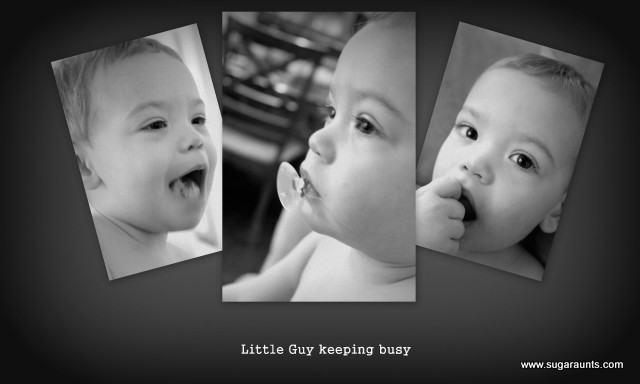
It is hard to believe January is coming to an end. It seems like time just goes by at lightening speed, especially when you have little preschoolers/toddlers to keep up with. Sometimes (most times) it is pure exhaustion, but we wouldn’t change it for the world. Here is a week in review of some of our craziness!!!
We had some dance parties, a fun day at the science center, tickle
time, a little basketball, a much needed sister night out, and a trip to the dentist!
You never know what next week will bring. Due to the cooold temps, we are currently working on some really fun indoor play posts.
AND…New for this week, We have created a Share It Saturday Pinterest Board.
All Share It Saturday Participants are welcome to pin to the board. Would you like to be a collaborator on this Group Board? Just let us know! Leave a message below or comment on one of the co-hosts pins on the Pinterest Board. So easy and you will gain so many great ideas from this board.
Here’s the link… Share It Saturday Group Pinterest Board
Stop by and join us!! Be sure to follow the board so you don’t miss a thing!
What a great group of link-ups that were posted last week. Thank you to everyone who took time to link-up and please do so again. We love seeing all of the creative ideas!
Here are some of our featured favorites from last week:
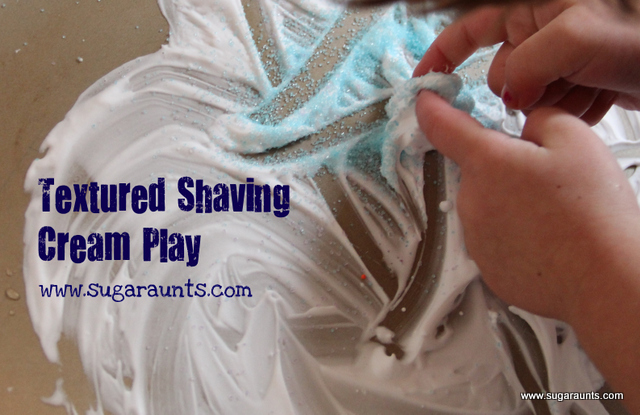
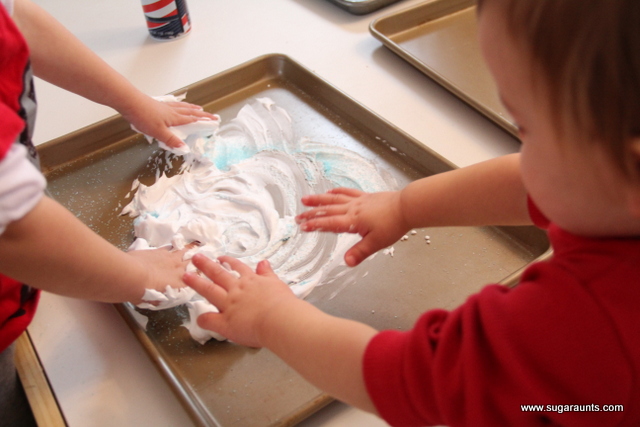
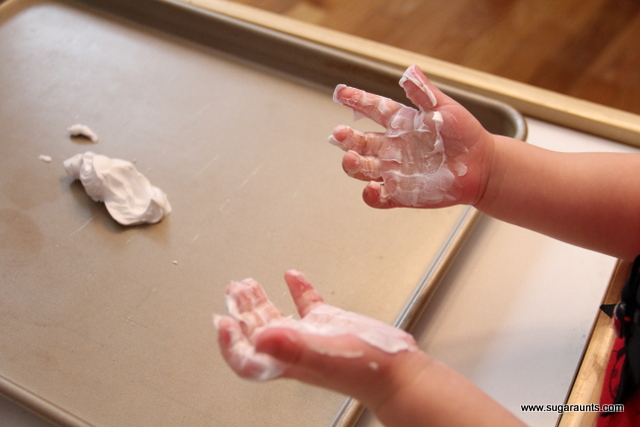
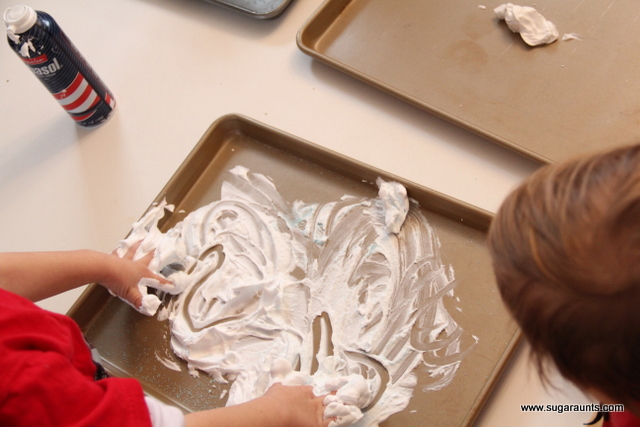
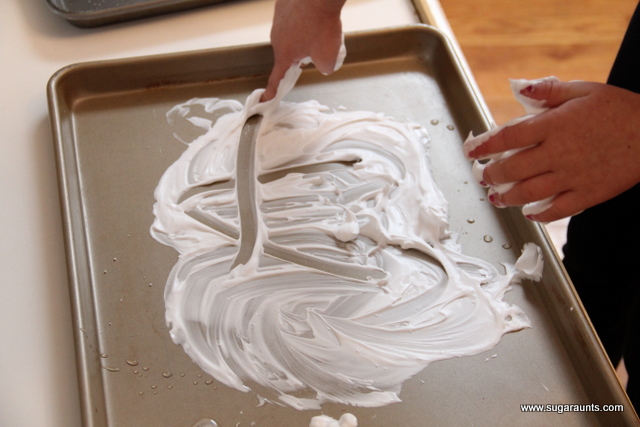
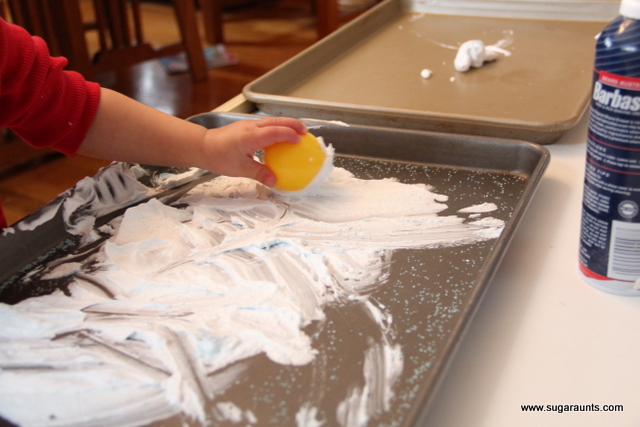
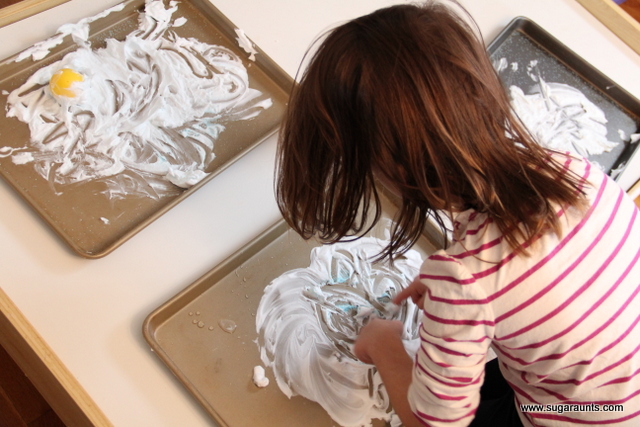
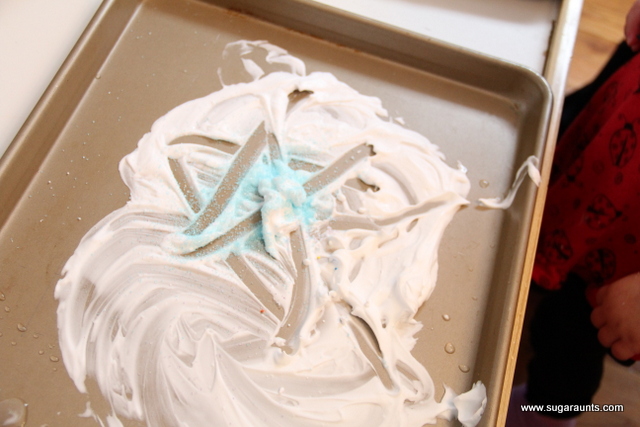
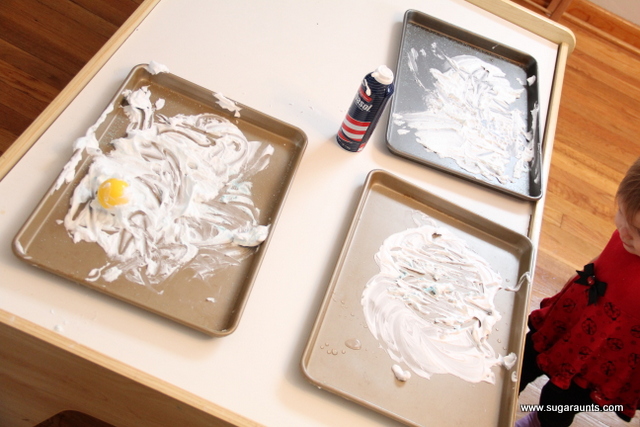
There is something about kids and a pile of shaving cream…They Looooove to play in it!
We added some old sprinkles from last Easter to give this Indoor Play Idea a different twist. They loved feeling the texture of the sprinkles on their hands while they played. It probably has a great exfoliating factor too 🙂
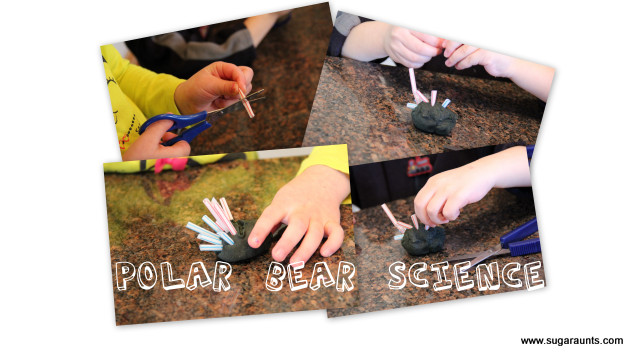
We had some fun with Science and Polar Bears today…
Did you know Polar Bears don’t have white skin? They actually have black skin and white, hollow fur. The hairs of their fur are hollow to absorb the sun’s light and keep the Polar Bear warm in those freezing arctic temps. When light from the sun hits the white hairs, it is reflected and gives the Polar Bear his white appearance we all think about when we think ‘Polar Bears’.
We were talking about these Polar Bear facts after Googl-ing around and looking for pictures of Polar Bears…Here are a couple of great links for Polar Bear facts for preschoolers…
So our project today was a little Polar Bear Science Experiment
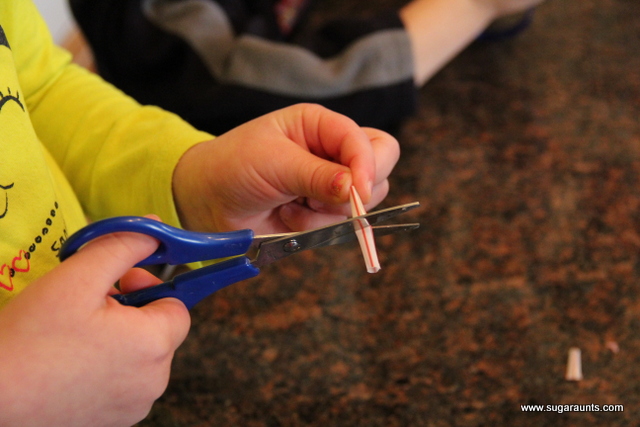
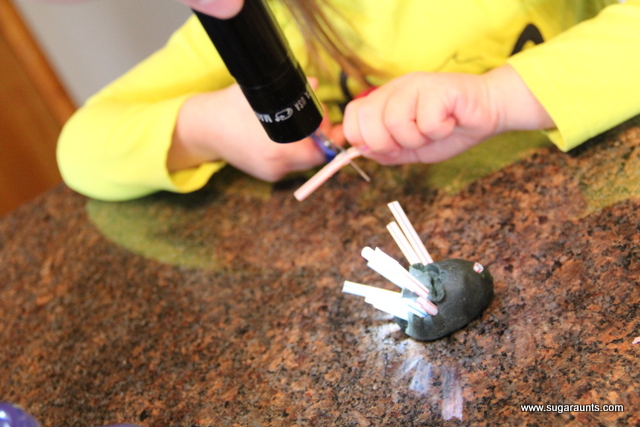
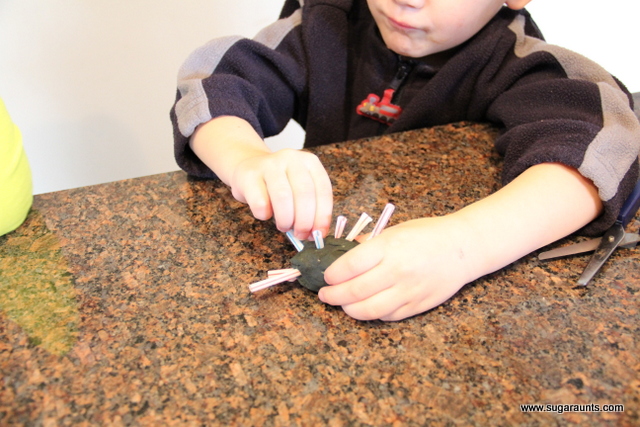
We started out by cutting straws into little bits. They loved this!!
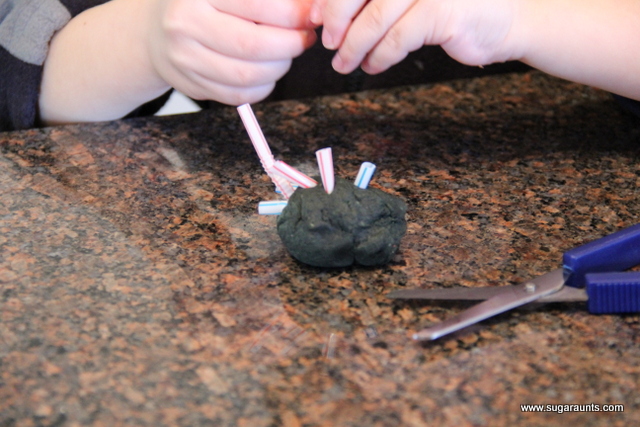
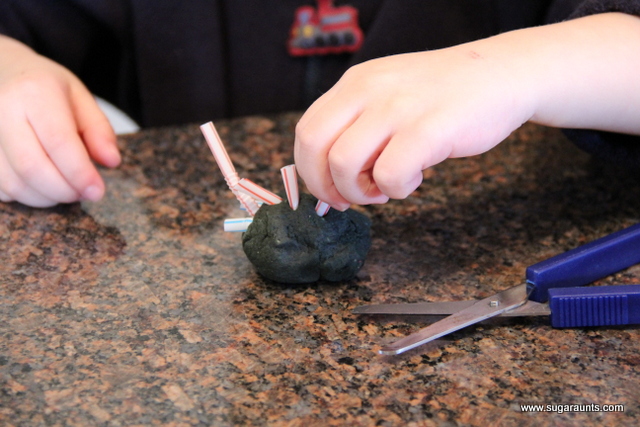
We used black play dough to be our Polar Bear’s skin and poked the straws into the lump of dough for polar bear “fur”.
(Tripod Grasp on those little straw pieces!)
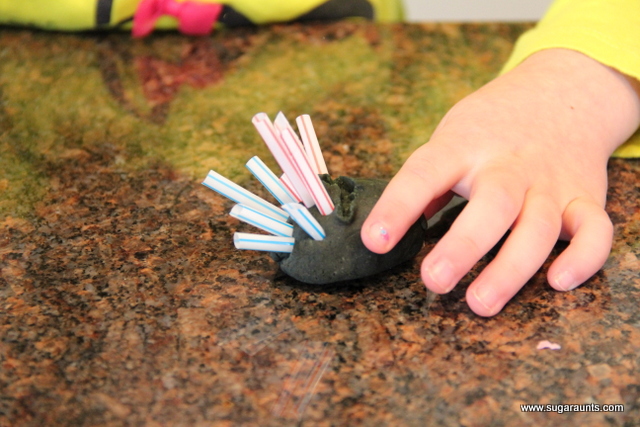
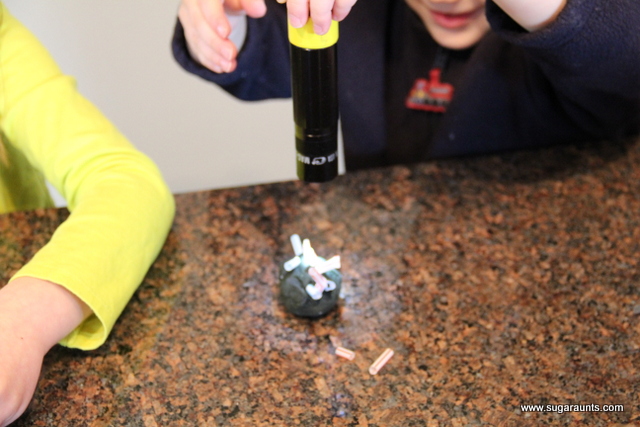
Once we had all of the “fur” on our little Polar Bear lumps, We pulled out the flash light to be our “sun”. Check out how the white straws reflect the light and really make the play dough Polar Bear look more white!
Cool, huh??
Little Guy thought this was so much fun!!
Then he made his Polar Bear into a shooter.
Of course.
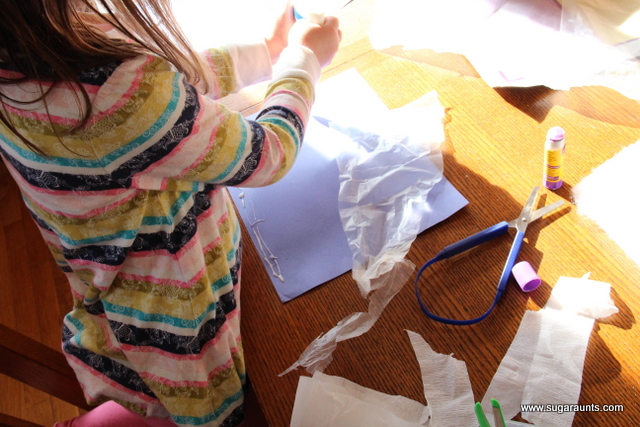
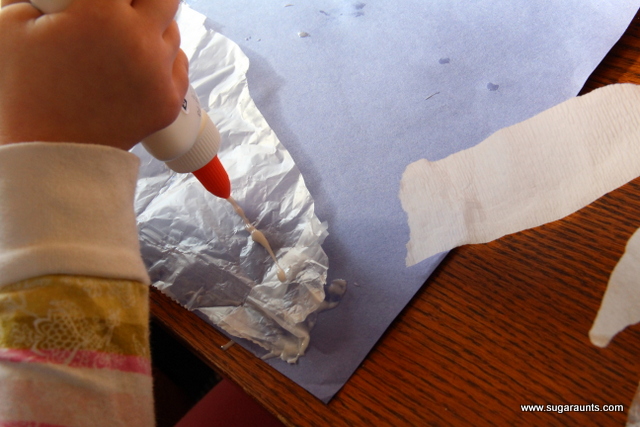
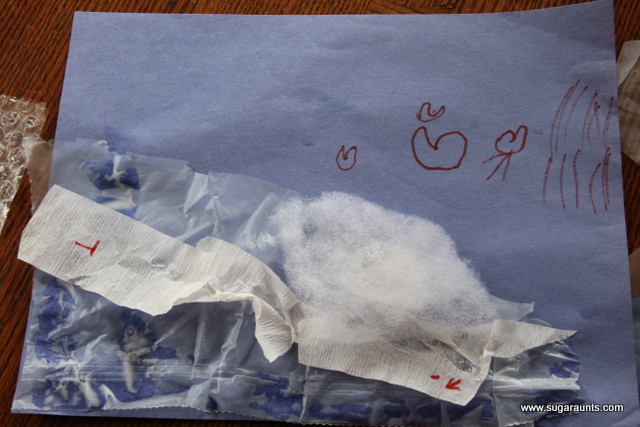
Our craft was a fun one…a little bit of this and that…
pulled together into an arctic/polar bear scene!
They did this Process Centered Art project…no specific goal in sight.
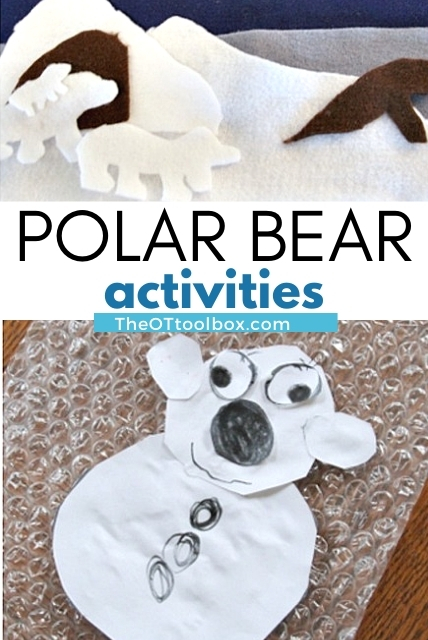
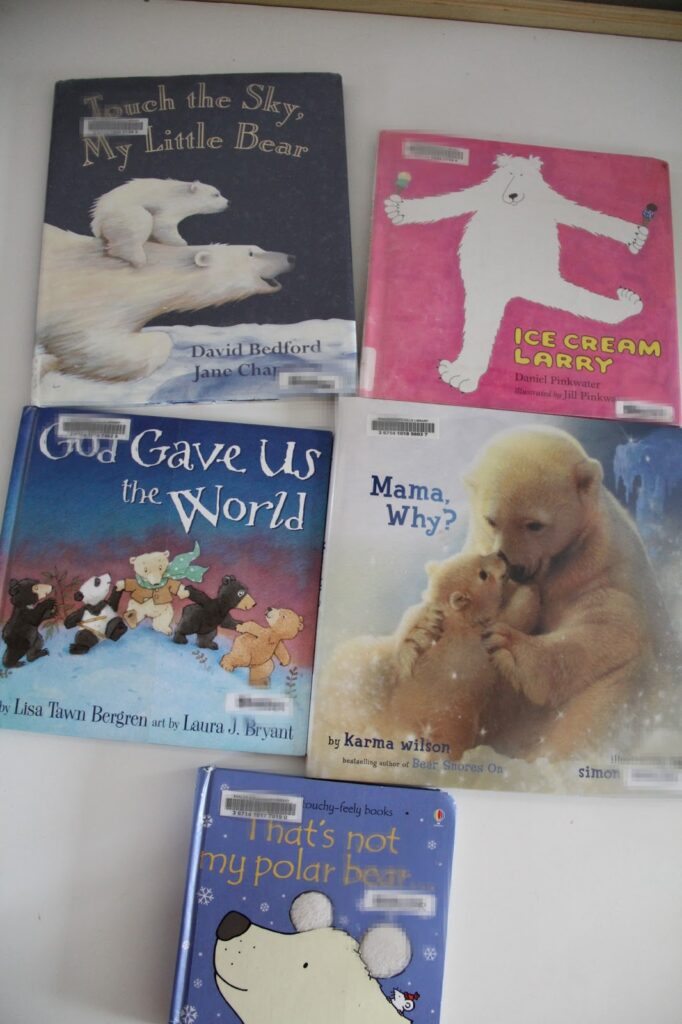
You may have noticed a polar bear theme here on the website in the past few days. Here, you’ll find all of these linked in one place so when you are creating a therapy theme, you have everything you need for polar bear crafts, polar bear sensory activities, polar bear gross motor ideas, and more. Add these ideas to an arctic animal theme, and have fun this winter!
Polar Bear Activities
This time of year, polar bear themes are common. There are many ways to incorporate this fuzzy arctic animal through play and learning while still building skills.
Here are some of the fun ideas we’ve shared:
Polar Bear Sensory Bin- A polar bear sensory bin goes well with the books and snack listed below. Make a day of polar bear learning and play for home activities or a therapy theme.
Polar Bear Self-Regulation Activity- Use this polar bear deep breathing printable to help kids with mindfulness and deep breathing as a coping strategy. It’s a free self-regulation tool you can use in a polar bear theme at home or at school.
Polar Bear Science- Kids can use play dough and cut straws to explore how a polar bear’s fur keeps him warm. It’s a great fine motor workout, too.
Polar Bear Worksheets- You’ll love all of the items in our Winter Fine Motor Kit. It’s loaded with coloring sheets, handwriting pages, puzzles, and crafts with a polar bear theme. There are sensory bin materials, polar bear finger puppets, lacing cards, modified handwriting pages, scissor skills activities, and so much more.
Polar Bear Books
{Note: This post contains affiliate links.} Head to the library with this list in hand. There are so many great polar bear books out there, and they make a great addition to sensory play, handwriting activities, and gross motor play. We’ve been reading these books all weekend, and they are SO much fun! The kids especially love Ice Cream Larry, which is such a silly, fun story! Some of our favorite Polar Bear Books for Kids:
I put together a bin with a bunch of craft supplies so we are ready to do all kinds of Polar Bear activities. We had a stay-at-home day today and did a few fun things while it was frigidly cold outside…
We checked out the areas where Polar Bears live and found the Arctic Ocean, Alaska, Canada, Denmark, Greenland, and Russia.
We talked about how the mama bear finds a big mound of snow and paws a shelter to protect her and her baby cubs during winter. Then the mama and baby come out in the spring.
Polar Bear Imagination Activities
This felt board was quick to snip up while the kids were eating breakfast this morning. So fun for imagination play! Big Sister pretended to be the mama bear and dug out the snow mound for a little home so the baby could stay inside.
We made this big snow mound using blankets over a table. All of the kids played in here for a long time! Little Guy kept saying “Humans are coming! Humans are coming!” and crawling in and out of the opening. Baby Girl LOOOOVED all of the action and just got really excited to be part of it 🙂
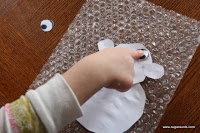
Polare Bear Craft
Big Sister did a cutting and gluing craft to make a Polar Bear. She thought Mr. Bear needed some buttons on his belly 🙂 You’ll need just a few items for this polar bear craft:
White paper
Bubble wrap
Black Marker
Scissors
Glue
To make the craft, draw circles in different sizes on the paper. You’ll need a big circle for the belly, a smaller circle for the head, two circles for the ears, two circles for the eyes, and a circle for the nose. You could also just draw on the eyes and nose.
Cutting circles is a great beginner scissor skills activity for kids. Curved lines is a more difficult progression in cutting with scissors because kids need to hold the paper with their assisting hand and turn the page in order to cut with smooth cuts.
To make this activity easier, use thicker paper or draw thicker lines.
Glue the circles onto the bubble wrap and add the face features.
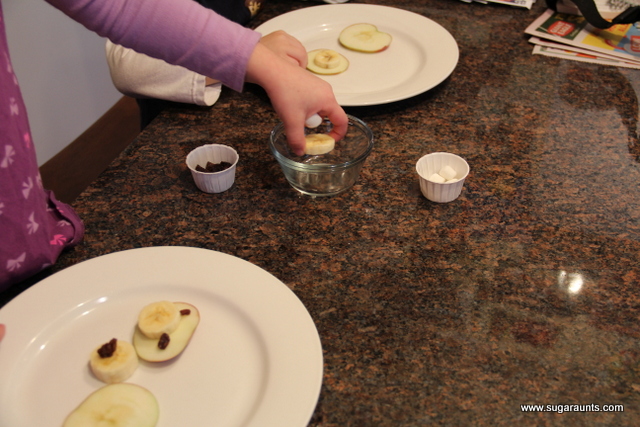
Polar Bear Snack Idea
We finished up with a little kiddie cooking activity for snack time. Raisins, bananas, apple slices, and marshmallows made some cute little Polar Bears.
I thought Little Guy’s Polar Bear snack was pretty cute 🙂
We have more ideas in store for the rest of the week, so be sure to stop back to see what we are up to! Have you done any cute Polar Bear themed activities? Link them up in the comments, I would love to check them out!!
You’ll also love all of the items in our Winter Fine Motor Kit. It’s loaded with coloring sheets, handwriting pages, puzzles, and crafts with a polar bear theme. There are sensory bin materials, polar bear finger puppets, lacing cards, and so much more.
Colleen Beck, OTR/L has been an occupational therapist since 2000, working in school-based, hand therapy, outpatient peds, EI, and SNF. Colleen created The OT Toolbox to inspire therapists, teachers, and parents with easy and fun tools to help children thrive. Read her story about going from an OT making $3/hour (after paying for kids’ childcare) to a full-time OT resource creator for millions of readers. Want to collaborate? Send an email to contact@theottoolbox.com.
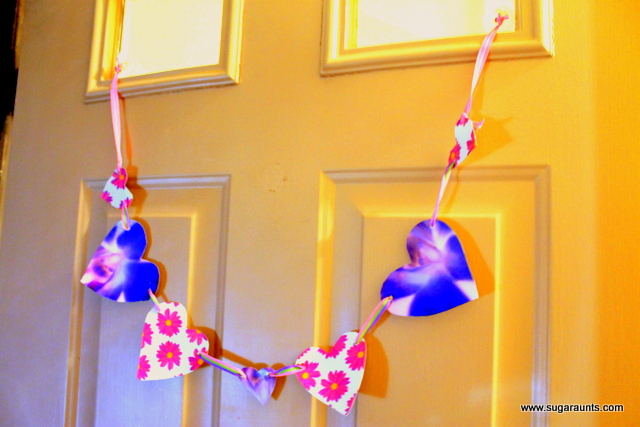
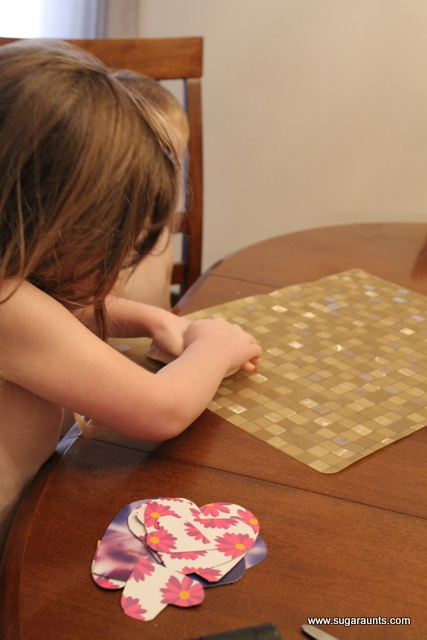
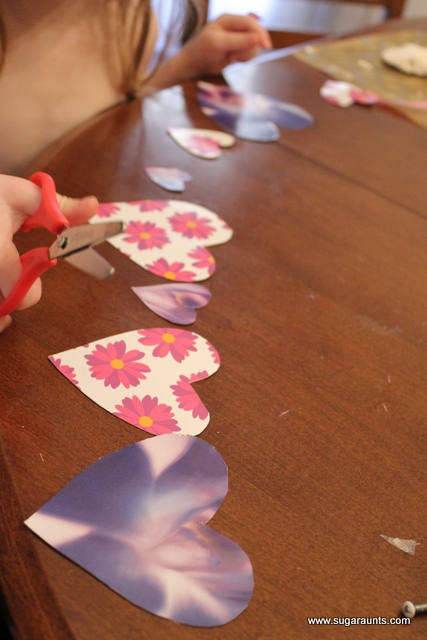
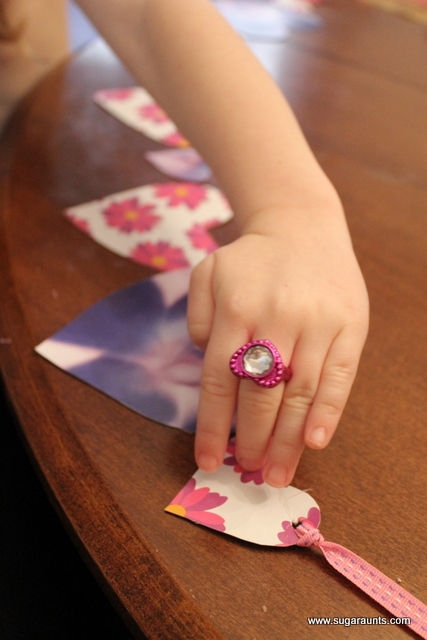
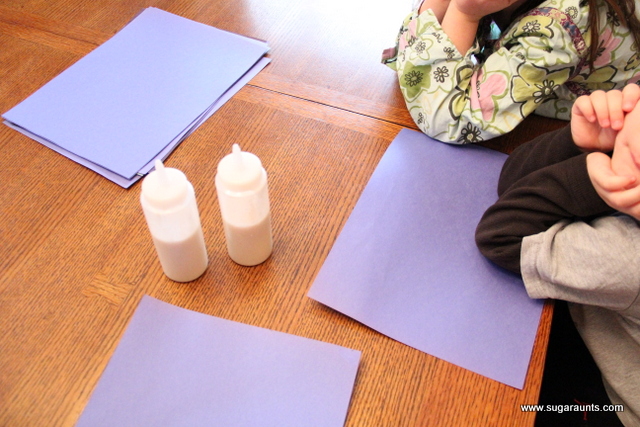
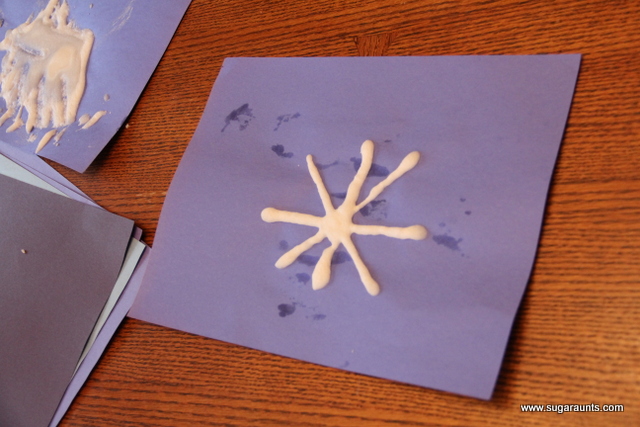
With Valentines Day approaching, we decided to make a cute little banner out of some empty tissue boxes. We had two pretty cute boxes that I thought would be perfect for a project like this.
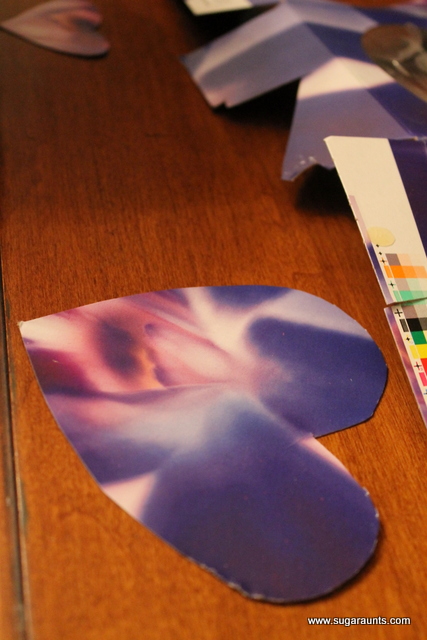
My daughter pulled the boxes apart and I helped her cut out hearts of different sizes. Cutting through the cardboard provided a different texture of cutting than just regular paper. I could really see my daughter concentrating on this one (and required a little help from mom).
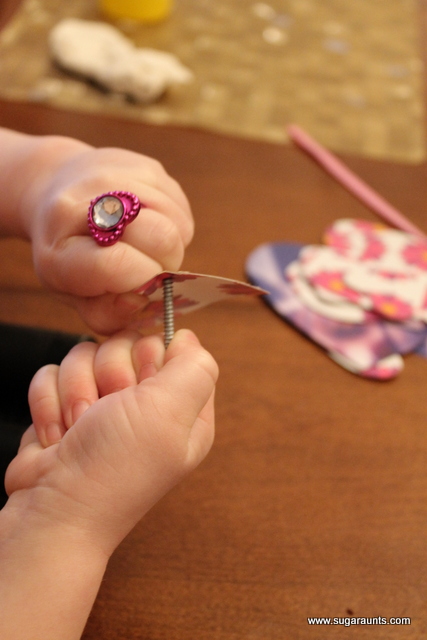
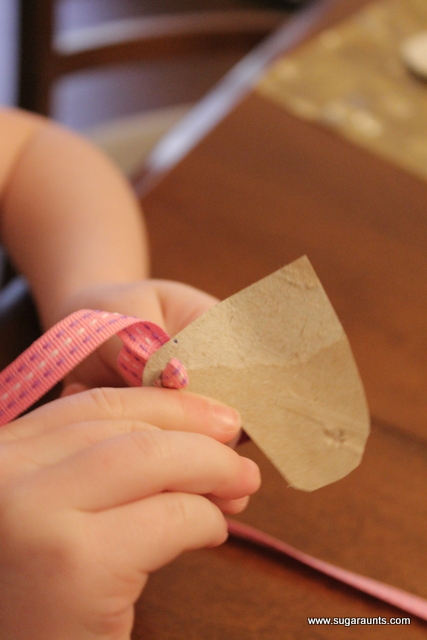
With some of the hearts being small, I looked around for something we could use to poke holes in them. I found a screw, this ended up being perfect. We assembled all the parts…the hearts, ribbon, a screw, and scissors.
We used the screw to poke holes in the hearts. This was a great activity, working the fine motor skills, stability, and bilateral hand coordination.
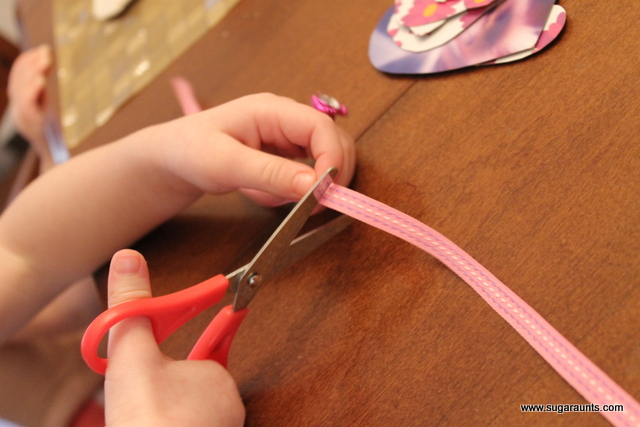
We cut some ribbon into little pieces and measured out just enough.
We arranged a pattern and strung the ribbon through the holes in the hearts.
The kiddos took a little break playing with playdough while I hung the banner on the door.
The sun was shining so bright! I think the door looks ready for Valentines Day:)
It’s Saturday again and we had so many great ideas submitted last week for the link up party. It’s tough to choose just a few of our favorites!
But first…
This week went by in such a flash, I wanted to share a few snapshots of our week gone by.
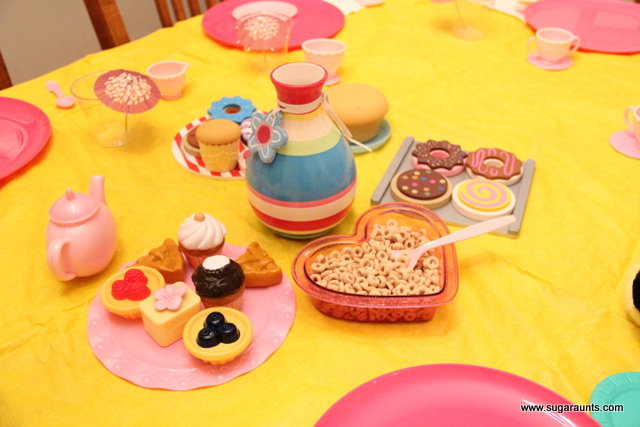
We had a Teddy Bear Tea Party on Friday and invited some of the cousins over to play…
We went to a fun bowling birthday party for a special nephew…
One day I attempted a Valentine’s Day photo shoot. Photographing one child is tough…I think I can write a post on how NOT to do a photo shoot with more than one kid. hmmmm…that actually may be coming soon to a Sugar Aunts blog near you;)
This is what it is like in our house most days. Now it’s just captured on camera 🙂
We borrowed a bunch of polar bear books from the library and had so much fun with them that we decided to start a week of Polar Bear themed play. I got this bin of supplies together so it’s all ready to go. Be sure to stop back to see what we are up to each day!
And now onto the SHARE IT SATURDAY!
Here are a few of our favorite play ideas from last week’s link up:
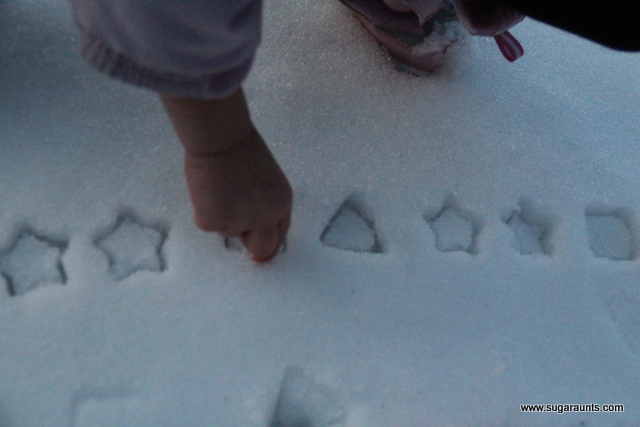
We have a shape sorter toddler toy that was perfect for making some shapes in the snow.
Working on patterns…
Push the shapes all the way down and you get some “snow brownies” 🙂
They are good enough to eat!
This would be fun with cookie cutters too…You could do any theme, colors, shapes, patterns, sorting…Maybe we’ll do those next time we get some snow on the ground!
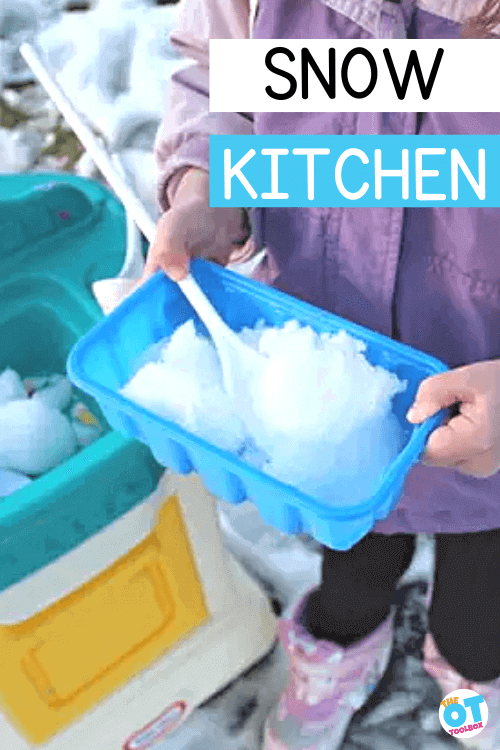
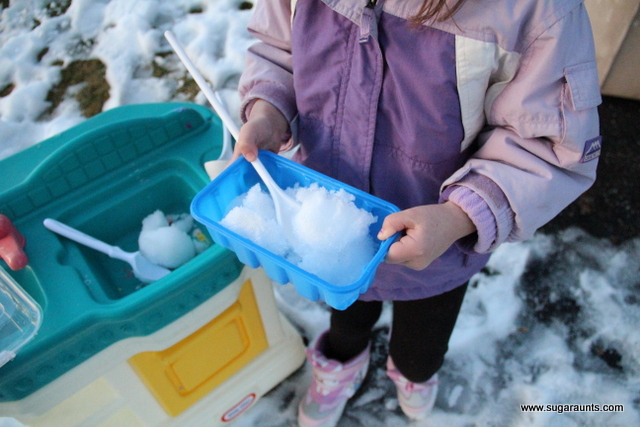
Did you ever make a snow kitchen when playing outside in the snow? We did just that one winter day! Making a snow kitchen is a great way to pretend while playing outside and kids develop many fine motor skills through scooping and pouring the snow into pretend food! This is a great winter fine motor activity for kids!
While we set up a snow kitchen in the outdoors, you could definitely bring this activity inside using a large bin or container to hold the snow. Add this idea to your list of Winter sensory bin ideas!
Snow Kitchen
When you think of a snow kitchen, you might think of a wintery ice restaurant in a cold climate where tourists eat inside a restaurant made of ice. However, in our situation, we simply headed outside one winter day to play in the new snow!
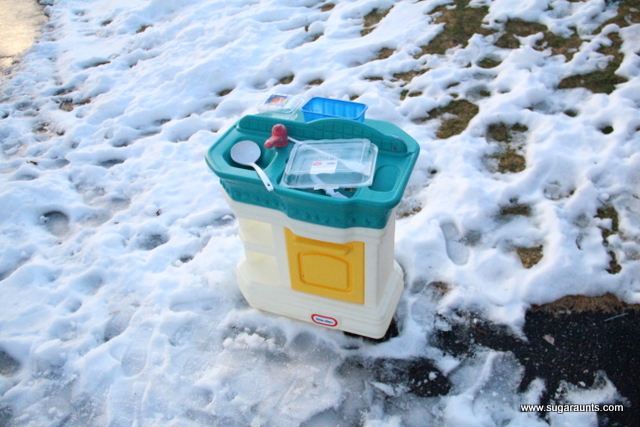
We had an old play kitchen set ready to go to a donation bin. However, before we sent the play kitchen set off, we used it to make a pretend snow kitchen!
You can make this pretend play even more fun with painted snow. Here’s how to paint snow to use in pretend snow food.
Use old containers to make an outdoor snow kitchen.
Just a few days ago, we had tons of snow in our yard…Today, it’s 60 degrees and all that’s left of our snowman is a pile of sticks, stones, and a carrot! The kids and I headed outside to play in the warm weather a few days ago as the warm spell was beginning to melt away the snow. I wanted to get the kids outside to enjoy the last of the snow before it was gone (for now…)
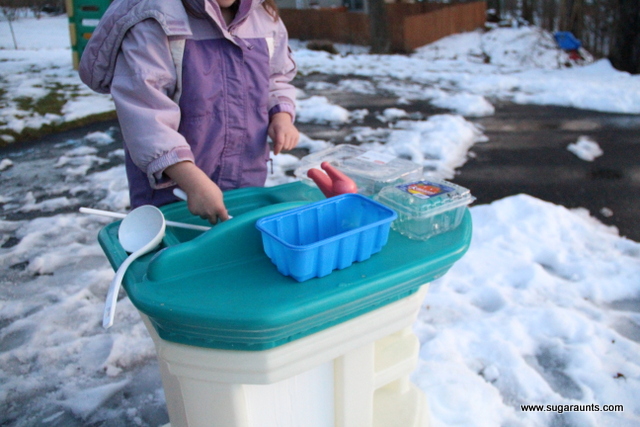
This is the invitation to play I set up…I pulled out our little kitchen set…with no battery operated parts or stickers on it to worry about getting wet.
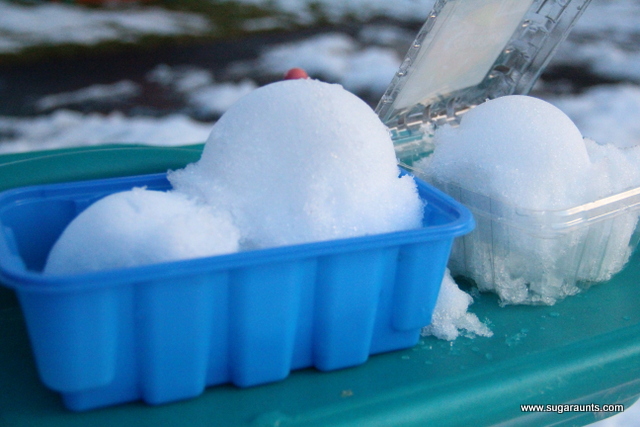
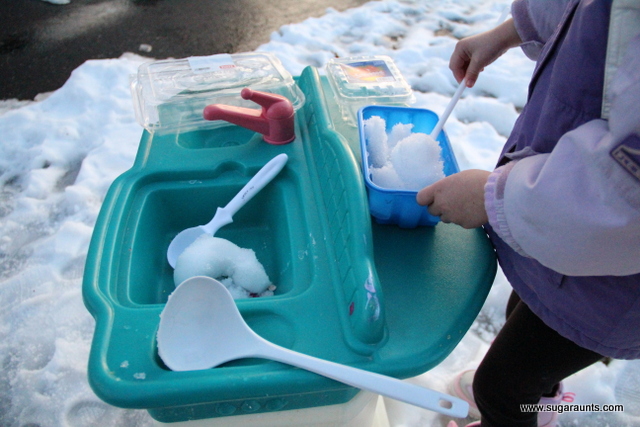
I brought out a couple of spoons, ladles, and the ice cream scoop from my kitchen, and added a few plastic containers from the recycle bin.
Perfect outdoor restaurant!
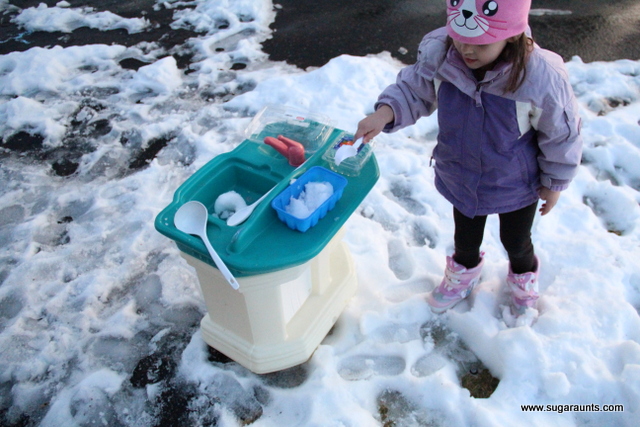
Big Sister had so much fun with this! She got busy being the “chef”.
How to make a snow kitchen
If you want to make a snow kitchen, you don’t need to use a pretend kitchen set outside. You can actually bring snow inside in a big bin or even just play outside with freshly fallen snow by taking your kitchen toys outside.
Gather a few items:
Scoops, spoons, ladles, bowls
Recycled containers
Bin of snow (if playing inside)
Or snow outside
Then get started cooking up some snow recipes!
Snow Food
Scoop snow into bowls and containers to make mounds of snow. Work on scooping and pouring as an eye-hand coordination task.
Mound snow into recycled containers and bowls.
You can even sprinkle toppings onto snow ice cream using sticks, rocks, and pieces of twigs.
If you work with freshly fallen snow, it would be fun to explore different sensory food textures by trying real snow food:
Maple Taffy- Squirt a drizzle of maple syrup on the snow. Let it harden in the cold temperature and then try the chewy maple taffy.
Sno Cones- Scoop some snow into a clean cup. Mix together a lemonade mixture (or other flavored liquid) and pour it over the snow to make real snow sno cones!
Snow Ice Cream- Place clean snow in a plastic baggie. Add sugar and vanilla flavoring. Add ice and salt to a larger baggie. Place the small snow baggie inside the ice bag. Make sure both bags are sealed tightly. Shake the bags to mix the ice cubes and salt. Keep shaking until the snow ice cream begins to solidify. Remove the small bag from the larger bag. Scoop the snow ice cream into a bowl and enjoy.
Sweet Snow- Scoop some clean snow into a bowl. Sprinkle sugar onto the snow. You could also use sprinkles, a cinnamon and sugar mixture, or ice cream toppings. Sugar on snow is a huge hit at a snow restaurant!
Order’s Up!
What if you had themed, NO-PREP activities designed to collect data and can help kids build essential fine motor skills?
Take back your time and start the year off with a bang with these done-for-you fine motor plans to help kids form stronger hands with our Winter Fine Motor Kit. This print-and-go winter fine motor kit includes no-prep fine motor activities to help kids develop functional grasp, dexterity, strength, and endurance. Use fun, winter-themed, fine motor activities so you can help children develop strong fine motor skills in a digital world.
The Winter Fine Motor Kit includes reproducible activity pages include: pencil control strips, scissor skills strips, simple and complex cutting shapes, lacing cards, toothpick precision art, crumble hand strengthening crafts, memory cards, coloring activities, and so much more.
Colleen Beck, OTR/L has been an occupational therapist since 2000, working in school-based, hand therapy, outpatient peds, EI, and SNF. Colleen created The OT Toolbox to inspire therapists, teachers, and parents with easy and fun tools to help children thrive. Read her story about going from an OT making $3/hour (after paying for kids’ childcare) to a full-time OT resource creator for millions of readers. Want to collaborate? Send an email to contact@theottoolbox.com.