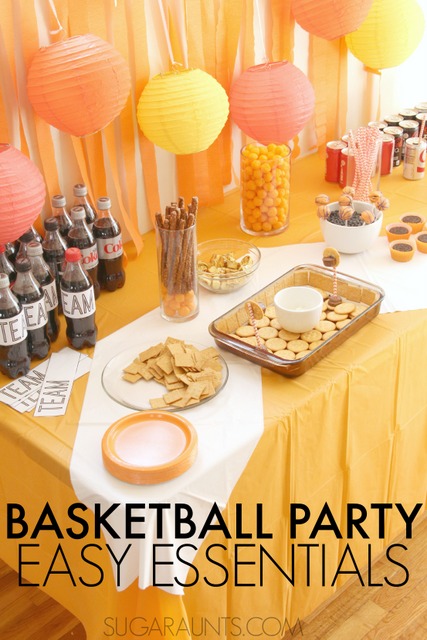
We love to host a fun party. From the decorations to the themed snacks, planning a party is a creative way to share a special day or event with friends and family. This time of year is the perfect time to host a basketball event party using a few easy party essentials. We’re sharing ideas for a basketball themed party for an upcoming Big Tournament celebration.
Basketball Party Ideas
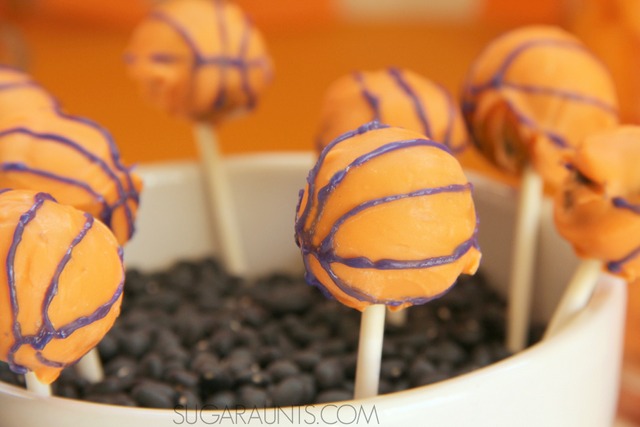
Any party needs snacks and when the theme is a basketball tournament party, cute treats are a must. I made these basketball lollipops using Oreo cookies. To make the cookie pops, crush one package of cookies into crumbs. Mix well in a mixer with a package of cream cheese. Roll the mixture into small balls and coat with orange chocolate melts. I found the easiest way to get the lollipop stick to stay in the cookie was to allow the chocolate coating to harden and then gently press the stick into the cookie ball. Add basketball details with icing.
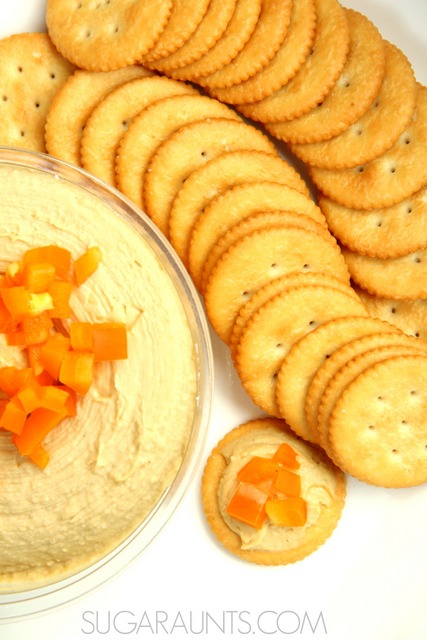
This Ritz cracker snack was a huge hit in our house! Top the crackers with hummus and chopped orange bell peppers. The orange peppers are perfect for the orange theme of our décor and add a little sweetness to the salty crunch of the crackers. Pulling a packaged container of hummus out before the party makes prep easy. And this busy mama needs quick and easy snacks!
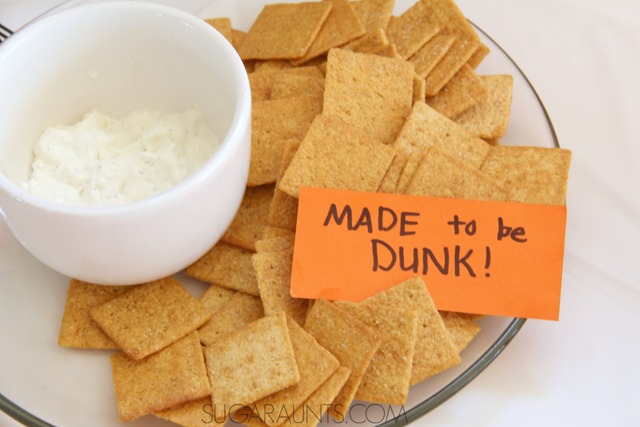
Add another low-prep snack to the table with Wheat Thins crackers and a bowl of dip. Spooning the dip into a bowl makes the party table a little prettier. I had to add a little sign for the dipping fans. These crackers are made to be “dunk” when they are at a basketball party!
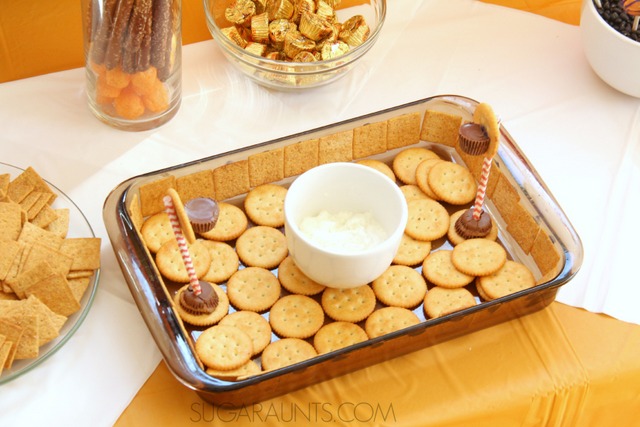
I put together a fun basketball court with the snacks we had: Ritz crackers were the court and Wheat Thins were the walls. Use a small dab of icing to make the square Wheat Thins stick to the sides of a casserole dish. To make the basketball hoops, I used more icing to get a cracker to stick to a paper straw. Add a Reese’s Mini Peanut Butter Cup to make the hoop with more icing. You will want to use a generous amount of icing and allow these to dry for several hours or overnight. To make the hoops stand, press the paper straw into a Reese’s Mini Peanut Butter Cup. I added a bowl of dip to our basketball court but you could add any cracker topping that takes the “main court”!
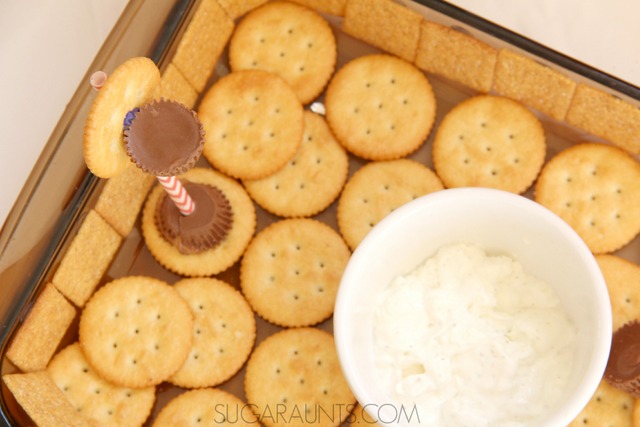
These hoops are sure to be the star of your basketball party!
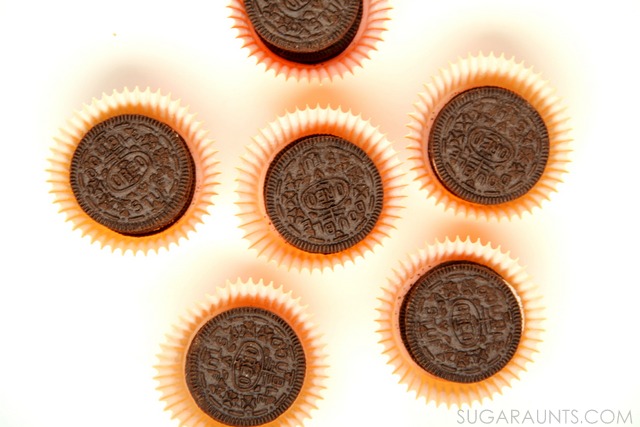
A few more easy treat ideas include popping Oreo cookies in a cupcake liner. I used orange cupcake liners to hold two Oreo cookies. This is simple and elegant dessert for your food table.
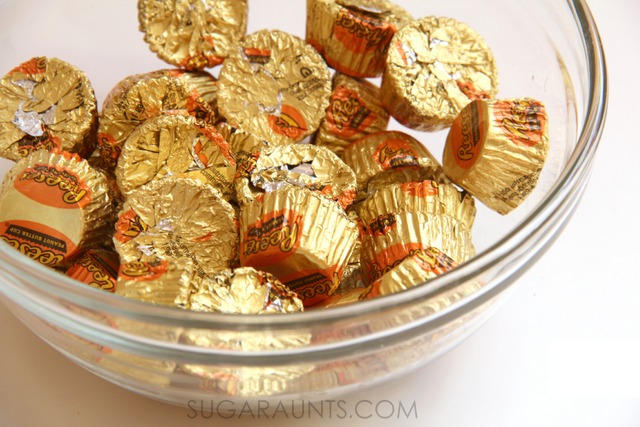
Of course, no one can resist snacking on a handful of Reese’s Mini Peanut Butter Cups during the big game. Pour them into a bowl and you’re done.

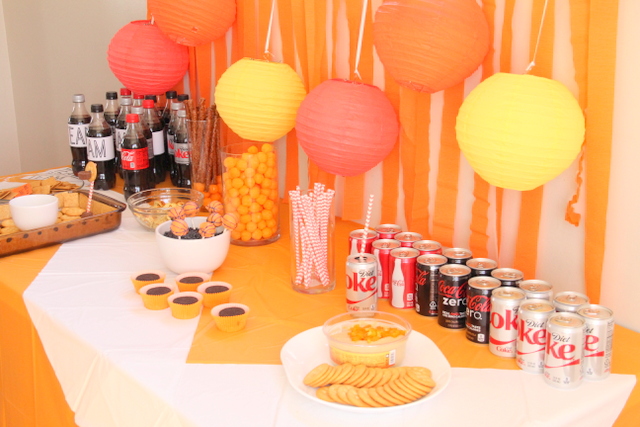
Other decor ideas include orange and white tablecloths and orange streamers to match the basketballs on the television screen. I loved adding the paper lanterns for a pop of color and to mirror a basketball.