10 Reasons Why Every Kid Needs to Play With Stickers

When you were a kid, did you have a sticker collection?   Maybe it was a Trapper Keeper binder with paper, or maybe it was a sticker book with themed pages.  Filling it’s pages were puffy stickers, scratch-and-sniff stickers, fuzzy stickers, and glossy glittery stickers.  


Thinking back to those sticker collection can bring back memories of sticker trades.  All you cared about back then was a complete collection of all the Care Bears or a page full of sticker-y rainbows.


But did you know that peeling all of those stickers has a bigger benefit that a full sticker book page? 


Playing with stickers can help kids with so many skill areas!  They can even be an Occupational Therapist’s secret weapon.  Pulling a fresh sheet of stickers from the OT’s treatment bag can bring on big smiles from kids of all ages.  And the best news is, that the children don’t even realize they are working on important developmental areas!


Use stickers in Occupational Therapy and development of so many skills with kids: fine motor, gross motor, visual perceptual, handedness, and more.


The Best Reasons to Play With Stickers

Affiliate links are included in this post.

When you see a sheet of stickers, what grabs your attention?  Maybe it’s the brightest sticker on the sheet, or maybe it’s a special character. Whatever it is that brings you sticker joy, they all are great for developmental areas.  
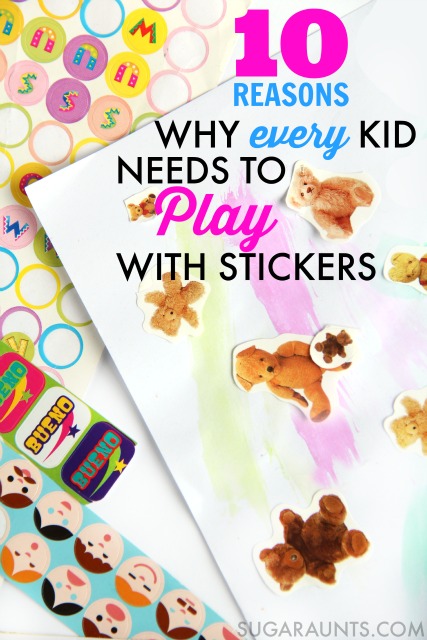
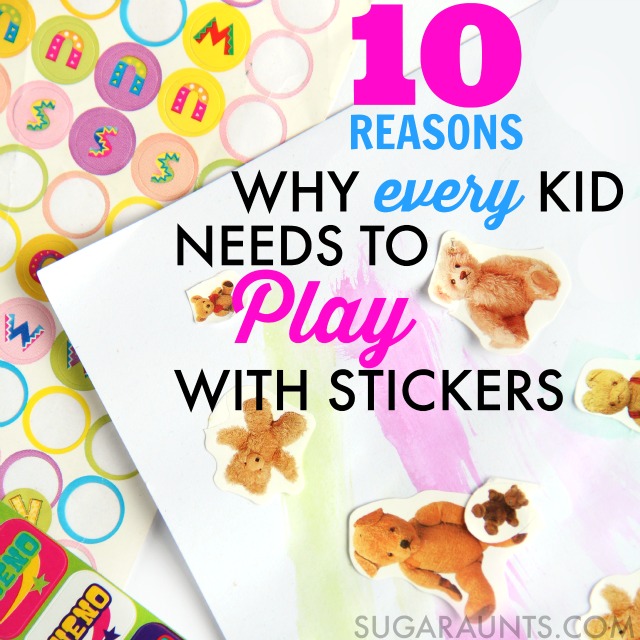
10 Reasons Why EVERY Kid Should Play With Stickers:
1. Neat Pincer Grasp. Stickers are a fine motor powerhouse.  Peeling the sticky little pictures requires a neat pincer grasp in order to pull up the edge of a sticker from a sticker sheet.  The very tips of the fingers are needed to grip such a small area.  For some kids, grasping just the edge of a single sheet of paper is quite difficult. Working with stickers is a great way to practice neat pincer grasp  for skills like picking up small beads, string, or a sewing needle.                                                                                                                                                        

Extend the skill:  Work on neat pincer grasp by peeling stickers of different sizes.  Smaller stickers will be more difficult to peel. Place stickers on strips of masking tape and other surfaces and and peel the stickers up. Then, work on grasp by placing the stickers down on different surfaces. Stick the stickers on paper taped to a wall to encourage an efficient wrist position.


RELATED ACTIVITY: STICKER SNOWMAN CRAFT

2. Bilateral Hand Coordination. It’s an essential skill for so many functional tasks.  Zippering a coat, cutting with scissors, and handwriting are all activities that require bilateral hand coordination.  Peeling stickers requires tow hands as you hold the sheet with one hand and peel with the dominant hand.  Both hands are involved in the work and doing different tasks.  

Extend the skill: Use stickers to work on bilateral hand coordination by using very large pieces of paper and very small sheets of paper.  
Show your child how to hold the sticker sheet in various positions. 

3. Visual Scanning. Visual scanning is required for skills like reading, writing, searching for an item in a crowded room, and visually scanning the environment.  Kids can scan a sticker sheet to peel off the sticker that they want.  

Extend the skill:  Position stickers all over a page.  Ask the child to look for a specific sticker that you describe.  
They can connect stickers with a crayon, or cut the paper along a line stickers.  
Position stickers all over a wall and work on visual scanning on a large scale as they look for specific stickers.  
Add in a flashlight and have the child scan for stickers with the light. 


4. Spatial Awareness. Difficulties with spatial awareness can make reading writing, and functioning in all daily tasks practically impossible.  Kids may write with sloppy handwriting or have trouble with organizing their body in space.  Use stickers as a visual cue for spatial awareness.  Kids can see the sticker’s bright color and can use it as a visual cue for where to start writing on a page, how big to form letters, where to stop in the hallway of lockers, where to place folders in a desk, where to place coats in the closet.  The use of stickers in this area are limitless!

Extend the activity:  Position stickers on the left margin of a paper for kids who need help with writing.  
Stickers can provide a cue for letter size, too. 
Use stickers in a large scale maze by sticking them on chairs, walls, and floors.  
Kids can hop or jump over stickers or go around, and touch stickers while working on spatial awareness.

5. Sensory Exploration. Explore scents with scratch and sniff stickers.  Discover textures of smooth, puffy, scratchy, and fuzzy stickers.  Kids are very motivated by stickers, too.  A sticker can be used as a reward for a child who touches a messy sensory bin or participates in difficult therapy treatment activities.


Extend the activity: Work on proprioception to the hands with stickers.
Use stickers in a mess-free sensory play activity.

Use stickers in Occupational Therapy and development of so many skills with kids: fine motor, gross motor, visual perceptual, handedness, and more.

6. Handedness. Kids often times have trouble learning which hand is which.  They will switch hands when writing and can put their shoes on the wrong feet.  Use stickers as a visual cue in learning left from right both on their body and off.  One sticker can be stuck to just one shoe to help a child learn to put their shoes on the correct feet.  You can put a sticker on the top of a child’s coat to teach them which way is up.

Extend the activity: When practicing scissor skills, place a sticker on the side of the paper the child should hold.  

7. Separation of the two sides of the hand.  Using the thumb side of the hand while bending the pinkie side of the hand in stability defines separation of the two sides of the hand.  This is needed for tripod grasp and in-hand manipulation as well as gross grasp and power grip strength.  Use stickers to work on this by placing a sticker in the child’s palm.  They can bend the pinkie, ring finger, and middle finger down to cover up the sticker while using the pointer finger and thumb in fine motor tasks.

Extend the activity:  Place a small object like a cotton ball in the hand while using the thumb and pointer finger to pick up stickers.  
Stack stickers in a pile by placing them on top of one another.
Use a sticker on the tip of a pencil to show kids where to pinch the pencil when sing a tripod grasp.

8. Hand Strength.  How can something as small as a sticker work on hand strength?  Children need strength in the small muscles of their hands in order to have endurance in coloring, using an open web space when holding a pencil, and when managing buttons and snaps on clothing.  Kids can use stickers to build the strength of the intrinsic hand muscles by peeling stickers from resistive surfaces. 

Extend the activity:  Place stickers on cloth like couches or carpeting and ask your child to unstick the stickers without ripping them.  They will need to use the intrinsic muscles and defined arches of the hand to pull them up.

9. Body Awareness. Toddlers can work on naming their body parts by sticking stickers on feet, and other parts.  Children with difficulty in sequencing might have trouble knowing if a sock or shoe goes on their feet first.  Use stickers to help with organizing and positioning on the body.

Extend the activity: Place stickers on feet, hands, arms, and back.  Ask your child to touch certain body parts in a specific order.  Work on getting faster.  
Toddlers can practice naming body parts by trying to peel off a sticker stuck to their wrist as you say “wrist”.

10. Gross Motor Development.  Crossing midline, jumping, hopping, skipping, and jumping jacks are gross motor tasks that can be difficult or some kids.  Use stickers as a visual cue or obstacle in practicing these areas.

Extend the activity: Place stickers on each knee.  Ask your child to touch the right knee’s sticker with their left hand and the left knee’s sticker with their right hand.  
Stick stickers high on walls as they try to jump up to touch them with outstretched hands.

MORE reasons to play with stickers:
Literacy, organization, sequencing, problem solving, self-confidence, language development, mathematics, creativity, sense of accomplishment, stress reduction, goal setting, and socializing.
What are your favorite ways to play with stickers?  

So, get your child involved with sticker collections to work on all of these developmental areas.  And, you’ll get to relive your childhood with the scratch-and-sniff, fuzzy, hologram, puffy stickers!

Best Sticker Gifts for Kids

Use stickers in Occupational Therapy and development of so many skills with kids: fine motor, gross motor, visual perceptual, handedness, and more.


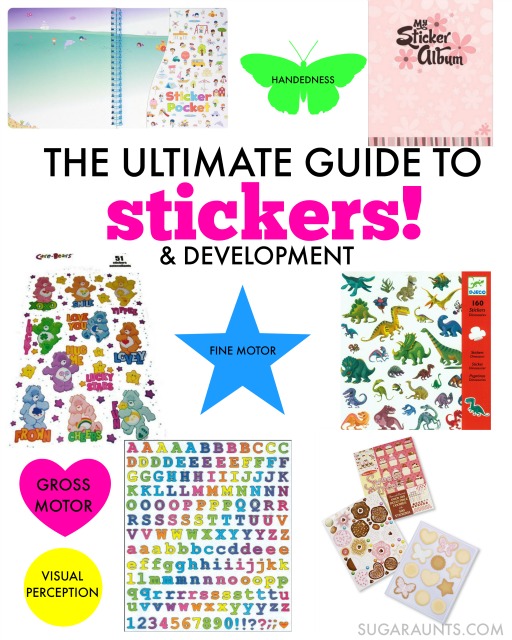
I found some very fun sticker activities out there that I wanted to share.  Play with your child using these sticker activities as you work on 10+ functional areas:

Every kid needs a sticker collection book! This My Sticker Album
has illustrated pages for sticker collections. 


Try this Re-Usable Sticker Book
to stick and re-stick stickers.


Need stickers to add to your collection book? The 1000 Stickers for Girls
and 1000 Stickers for Boys
should have you covered! (Although who says a truck sticker is just for boys? Nope! I would get both books for my kiddos!) 


There are stickers for every theme, character, or interest out there. From Dinosaur Stickers, to Cupcake Stickers
…there is something for everyone! 

(including the Care Bears
fans out there!) 


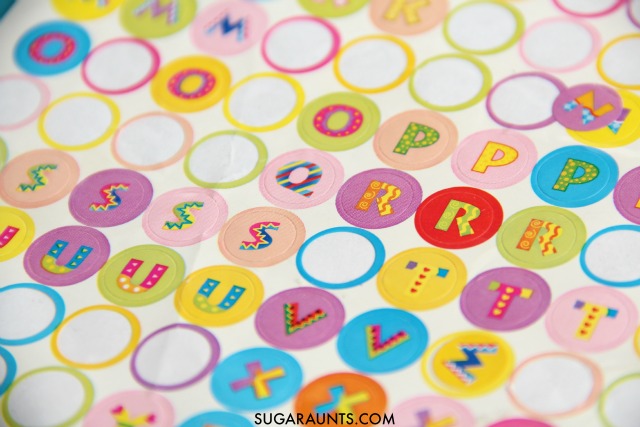
I love these Alphabet stickers
for name building, letter identification, and spelling word practice.


What stickers do you need in your sticker collection?

Use stickers in Occupational Therapy and development of so many skills with kids: fine motor, gross motor, visual perceptual, handedness, and more.

You will love our recent 31 Days of Occupational Therapy series where we shared free and almost free ways to work on Occupational Therapy goal areas.  This post is a great way to work on functional skills using free or inexpensive items.  Most of us have a couple of stickers around the house.  Some of my favorite activities from the series include: 
Want to see more?  Sign up to receive a newsletter with creative ways to develop skills in your little one.  Sign up here.

2nd Grade Mental Math Adding 10s and 100s with a Harvest Theme

Worksheets and kids are a tough mix.  My second grader plows through a long school day and then brings home a math wroksheet (among other homework items) almost every weekday.  We do the worksheet, but sometimes it’s hard to practice the math concepts when she needs to just practice new math ideas.  One of the strategies she’s learning in second grade is Mental Math. 


Mental Math is simply doing math in one’s head, mentally (makes sense, right?) It’s the way that we figure out answers to math problems quickly, and without pencil and paper.  So, in second grade, my daughter’s been learning how to add 10’s and 100’s to single and double digits using mental math as a strategy.


This Harvest themed Mental Math activity was a fun one to create and even more fun to use.  We made harvest-themed fruits and vegetables and a cornucopia craft to go along with the math practice.


Second grade mental math strategy to add 10s and 100s to digits with hands on learning in this creative Harvest-themed activity. I love the cornucopia craft!

Harvest Themed Mental Math Activity

You’ll need just a few materials to make this activity. (Affiliate links are included in this post.)
Brown cardstock

Recycled bottle caps
Glue
Label Sheets

Fingerpaints

White printer paper
Black permanent marker
Scissors


Second grade mental math strategy to add 10s and 100s to digits with hands on learning in this creative Harvest-themed activity. I love the cornucopia craft!


Make a cornucopia shape from the Brown cardstock.  On the printer paper, use the finger paints to make fingerprints in red, yellow, orange, green, and purple.  You can read all about the importance of creating fingerprint art over here.  It’s a great fine motor activity that really works on a child’s finger isolation skills and helps with tasks like handwriting, shoe tying, typing, and more.

Second grade mental math strategy to add 10s and 100s to digits with hands on learning in this creative Harvest-themed activity. I love the cornucopia craft!


Allow the fingerprints to dry and use the black marker
to turn them into fruits and veggies.  We made tomatoes, pumpkins, squash, grapes, and a pickle. 


Every cornucopia needs a pickle, right?


Cut out the harvest crop into small circles.  This was a great scissor skill activity for my preschooler.  We also cut circles from the Label Sheet
and stuck them onto the bottle caps.  Then, glue the fingerprint circles onto the bottle caps.  You could certainly skip the bottle cap step and just use the fingerprints, if you like.


Second Grade Math: Adding 10’s and 100’s

Second grade mental math strategy to add 10s and 100s to digits with hands on learning in this creative Harvest-themed activity. I love the cornucopia craft!


Adding digits while lining up the tens and hundreds column is a little tricky for some kids.  This activity was a way to help with that and make it a little fun with a harvest theme.


I made a code for my second grader to figure out.  Each fingerprint fruit or vegetable equaled either 10 or 100.  We then chose numbers to add to the pumpkins, tomatoes, grapes, squash, and pickles.


Adding tens and hundreds this way made it a little more fun to practice mental math!


NOTE: I wasn’t able to get any pictures of my second grader doing this activity because of the dark light we’ve got after 4:30 pm.  Fall means yummy harvest fruits and vegetables and gorgeous colored leaves…but it also means darkness at 5:00 pm!  Yuck!


Looking for more HARVEST themed activities for your second grader?   Try these from the 2nd Grade Blogger Team:

 
Harvest Vegetable Soup from Crafty Kids at Home


Saving Seeds Science from Rainy Day Mum
Scarecrow Glyphs Patterns from Still Playing School


We love creative math activities!  Here are some of our favorites: 


Kindergarten Sight Words Cloud Dough

We’ve done quite a few sight words activities on this site.  What’s cool is that the activities that we did with my now second grade daughter are still fun and working great with my kindergartner son this year.  Today, I’ve got a sensory sight word activity using Cloud Dough.


Adding a tactile (and sensory) approach to sight words may just help the memorization of words “stick”.   We made this cloud dough that was brightly colored and smelled great using a few materials we had in the house.

Sight word sensory bin with cloud dough made with baby oil and baby powder

 Cloud Dough Recipe for Sensory Exploration

To make the cloud dough, we used just a few ingredients (Affiliate links are included in this post):
3 cups Baby Powder
1/2 cup Baby Oil
2 sticks of Sidewalk Chalk
 
Mix the baby powder and baby oil with your fingers.  Use a Kitchen Mallet to crush the chalk into dust.  
This is an EXCELLENT proprioceptive activity that the kids really got into.  Smashing that chalk into smithereens requires a lot of muscle power and “wakes up” the muscles to the heavy work of pounding that hammer.  Try this pounding activity before a quiet and calming activity like writing.
 
Sprinkle the chalk dust into the cloud dough and mix by hand.  You can play with the cloud dough without the chalk dust, but we wanted a bright blue color.  
 
It took us a little bit of experimentation, (and blue hands), but we found out that mixing liquid food coloring into the cloud dough (even mixed into water or mixed into extra oil) will not give this sensory dough a bright color.  Instead, you’ll end up with dyed hands.
 
Now, start playing!


Cloud Dough Sight Word Activity

Cloud dough is very fun.  It’s moldable and a great sensory dough to explore.  We decided to add sight words to this sensory bin.  I used bright index cards to write out Kindergarten sight words.  We cut the words into smaller sizes and hid them in the cloud dough. 


To play sight word games with Cloud Dough:

Sight word sensory bin with cloud dough made with baby oil and baby powder
Write two sets of sight words.  Play different games.  Some of our favorite games to play with sight words can be done right in the cloud dough:
  • Play Memory with the sight words in the cloud dough.  Hide and turn the sight word cards in the dough.  Take turns looking for matches.
  • Scatter one set of sight words in the dough and the other set outside of the sensory bin.  Take turns quickly looking for matches of words.
  • Create small balls of cloud dough.  Push the cards into the dough and stand words up.  Ask your child to read the words and smash the cloud dough balls. This game is always a hit with the kids.
  • Play Hide and Seek for sight words in the cloud dough.
Sight word sensory bin with cloud dough made with baby oil and baby powder
 
We love creative sight words activities!  Here are some of our favorite ways to work on name practice in kindergarten through hands-on play.

                                    Sight Words Ping Pong Bounce Game
                                                   Sight Word Scooping 
 
Sight word sensory bin with cloud dough made with baby oil and baby powder

Love this idea? Share it on Facebook!

Homemade Udon Noodles and Shrimp Dinner Recipe

Have you been following along as we cook our way through the alphabet? We’ve been cooking a recipe for each letter and are up to U for Udon noodles. “U” is a pretty difficult letter to cook around.  Urchins, anyone?  The cooking with kids team decided to give Udon noodles a try.  


The kids and I headed off to the grocery store but weren’t able to find udon noodles.  Now, I’m sure they were available somewhere in the city.  But, I’m not about to drag four kids around on a Udon noodle search.  We decided to make our own!


Homemade Udon Noodle Recipe

Homemade Udon Noodles Recipe and shrimp dinner. This si so good and easy to make. The kids will love this Cooking with Kids recipe and will eat up this Japanese dinner recipe!

This post contains affiliate links.  
I had to look up a recipe for udon noodles and based ours on this one.  I changed the amounts around, and I’m not sure how authentic our recipe ended up being, but the noodles sure were good! 

Ingredients needed to make udon noodles:

1 teaspoon salt
2/3 cup water
1.5 cups flour

Homemade Udon Noodles Recipe and shrimp dinner. This si so good and easy to make. The kids will love this Cooking with Kids recipe and will eat up this Japanese dinner recipe!
First, stir the salt into the water until dissolved.  Pour the salt water into the flour.  Combine with your fingers until the flour pulls together.  Knead the dough on a floured surface until smooth.  This dough will be lumpy and tough to knead, but keep at it. 

Homemade Udon Noodles Recipe and shrimp dinner. This si so good and easy to make. The kids will love this Cooking with Kids recipe and will eat up this Japanese dinner recipe!
The recipe we referenced above used a foot method to knead the dough.  We skipped that, and just kneaded with our hands on the floured surface like our Baking Mat
 It took a lot of oomph, but we had a lot of little hands that wanted a turn kneading. 


Homemade Udon Noodles Recipe and shrimp dinner. This si so good and easy to make. The kids will love this Cooking with Kids recipe and will eat up this Japanese dinner recipe!
Use a Rolling Pin
to roll out a rectangle of dough.  Roll or fold the dough over.  Use a knife to cut narrow strips of dough from the roll.  Unroll the noodles and separate them on a floured surface.


Homemade Udon Noodles Recipe and shrimp dinner. This si so good and easy to make. The kids will love this Cooking with Kids recipe and will eat up this Japanese dinner recipe!
Bring water to a boil in a large pan.  Drop the noodles in one by one.  Stir after a minute to keep the noodles from sticking together.  Allow the water to return to a boil and cook the dough until the noodles float. 

Once cooked, drain the water and rinse the noodles.

We used our udon noodles in a shrimp dinner.  

Shrimp and Udon Dinner Recipe

To make dinner with our udon noodles, we made the following recipe:
1 cup carrots, chopped into ribbons
3-4 green onions, sliced
1/4 cup low sodium soy sauce
1 clove garlic, chopped
1 pound shrimp, cooked

Homemade Udon Noodles Recipe and shrimp dinner. This si so good and easy to make. The kids will love this Cooking with Kids recipe and will eat up this Japanese dinner recipe!
Saute the garlic in olive oil.  Add the ribboned carrots and sliced green onions, saving some green onions for garnish.  Allow these to cook for 5 minutes until softened. Add the soy sauce, cooked udon noodles, and cooked shrimp.  Stir and toss all ingredients for 2 minutes.  Add green onion garnish and serve immediately.

This dinner was a hit with all four kids.  While our noodles didn’t look perfect (in fact, they looked pretty bad!), the dish was delicious.  Our udon noodles were thick and chewy.  This is a dinner we’ll be making again.

Homemade Udon Noodles Recipe and shrimp dinner. This si so good and easy to make. The kids will love this Cooking with Kids recipe and will eat up this Japanese dinner recipe!
Stop back to see what the other bloggers on the Cooking With Kids team have made using udon noodles:

You’ll love these other recipes from our cooking with kids series:

Vegetable Quesadilla Recipe   Honey Nut Popcorn  Antipasto Skewers


M is for MushroomsVeggie Quesadilla Recipe | N is for NutsHoney Roasted Nuts Popcorn | O is for OlivesAntipasto Skewer Kabobs | P is for Peppers: Asian Chicken

Want to cook healthy foods for your family?  Grab Yum! Deliciously Healthy Meals for Kids, a cookbook for busy families that want healthy meal ideas. 


Healthy recipes for kids

Use Fall Leaves to Practice Scissor Skills and Line Awareness

I have a small obsession with helping kids learn how to use scissors.  It was one of my favorite areas to work on in the school-based Occupational Therapy setting.  (And I’ve got a few scissor skills activities to show for it!)  


Today’s activity is all about scissors, cutting on lines, and leaves.  This Fall, use those pretty leaves before they are covered with snow and practice cutting on lines.  

Practice scissor skills with Fall leaves to work on line awareness and scissor control.

This scissor skills activity is completely easy.  Go outside and gather some pretty fall leaves.  Like our leaf hole punch activity (also very good for working on scissor skills), you want leaves that are not crunchy and are freshly fallen.  You might want to gather leaves that are still on the tree for easier cutting of lines.  If you are working simply on the snipping of scissors, totally go for those crunchy leaves.  They provide a fun auditory feedback to the snipping of scissors and fun Fall confetti!


Cutting the leaves gets you whiffs of the leaves, too.  What a great way to incorporate the sense of smell into a scissor activity.


Practice scissor skills with Fall leaves to work on line awareness and scissor control.

Practice line awareness with scissors using Fall leaves

Use the leaf veins to practice line awareness.  I drew lines on the leaves for the kids to practice cutting along, but you can use just the lines of the leaves for older kids.  Holding the small leaf and snipping along the veins is a fantastic bilateral hand coordination activity for kids.  When cutting with scissors, bilateral hand coordination is essential for the assisting hand to move the paper accordingly as the dominant hand snips with scissors. 

Cutting along lines in simple and complex shapes is an issue when visual perceptual skills are difficult for a child.  They might demonstrate difficulties with cutting within a line.  Cutting choppy lines is apparent when a child has poor scissor control or visual motor skills with tools like scissors. 

Cutting leaves is a creative scissor activity (Find a ton more creative scissor activities here!) and will be a hit with your kids this Fall.  Save it for spring and cut those green leaves, too! 


Use this scented scissor skills activity to help kids learn graded scissor use in a fun way! 

Practice scissor skills with Fall leaves to work on line awareness and scissor control.
Try these scissor activities:

To-do Lists and Coffee

Sometimes the to-do list is overwhelming.  There’s preschool pick-up, after school dance class, grocery list, work duties, laundry, grocery shopping.  It can get overwhelming.  The oh, so very boring items on the list seem to always be there.  Whether you write out a list on sticky notes or keep an on-going checklist in your brain, it can get stressful!  Then there is the dishwasher that needs unloading. Again.  And that laundry basket that needs folding. Again.  


It seems like I’ve been in a flurry of rushing from list to list.  Because my lists seem to get lost before all of the to-dos are checked off.  And so then I write another one, but it is weirdly longer than the first one.


Life with four littles is busy.  Doing homework with the older two is an adventure.  I set up the second grader with her math worksheet while helping the Kindergartener with his new sight words.  They are learning so much. So fast!  And while I catch my breath that my 8 year old is adding three double digits with re-grouping, the 4 year old spills a cup of water and the 17 month old decorates the living room with baby wipes, finds and hides the van keys, colors on the wall with crayons, and slips in the water spill.


I wouldn’t change it at all.  The busyness of lists and the chaos of family life is a blessing.


There are the pretty pictures of fun stuff we do on Instagram and the cute crafts we share on Facebook.  But behind the pretty stuff is the busy, tired, always running, and happy mama.  I kind of think the snuggles overpower all of the mess and spills.  The cuteness of sleeping babies after 8:30 pm is also a secret re-charging time for overwhelmed moms. Ha!


I am definitely going strong on the coffee when it comes to waking up with a full to-do list.  Tackling the day and wrangling four little kids is not easy!  The kiddos are charged and ready to go with just a bowl of cereal, but I have to admit that it takes a bit more for this sleepy mom.  Recently I was sent Folgers Flavors and was super beyond excited to try them all.


Do you wake up to more to-do lists?

After the early (But why SO early??) morning snuggles from a certain 17 month old, there aren’t many things that trump my morning coffee.  I am a try-all-the-flavors of coffee creamer kind of girl, so the four flavors I was sent from Folgers Flavors was pretty awesome.  It was fun to try them all, and I felt like a kid in a caffeinated candy store.


So, what did I think of the flavored concentrates?


  • The squeezable bottle is conveniently small enough to fit in my over-full (but cleaning it is on my to-do list) cupboard.
  • I loved that I could stash a bottle of the concentrate in my bag for a weekend away and add flavor to my morning coffee.  The concentrates don’t need refrigerating, so it’s one less thing to worry about.  Bonus!
  • My favorite is the Mocha flavor (with both hot and cold coffee!) but the Vanilla, Hazelnut, and Caramel were really good, too.

Make Your Own Pick-Up Sticks and Work on Developmental Skills

Do you ever look around the house and think, “Why do we have so many toys??!!” 

If your house is like mine, your kids play with couch cushions, old cardboard boxes, and piles of paper, and cardboard tubes waaaay more than they play with toys.  Sometimes, it’s the simple things that are just more fun.

These DIY Pick-Up Sticks are one of those items.  It’s a homemade toy that is just so simple, it’s simply appealing.  Not only are these bright and colorful pick-up sticks fun, they are easy to make, and are used in so many play and functional skill areas. 


DIY pick up sticks for kids (and adults!) You can make these any color and using items you probably already have at home, while working on fine motor skills like open web space, pincer grasp, precision grasp and release, in-hand manipulation, and visual perceptual motor skills like eye-hand coordination, visual motor, visual scanning, and visual memory.


Making these colorful pick-up sticks is easy peasy.  Read how we made them here.  Do you know what we used to make them?  Lollipop sticks.  Yep!  A simple lollipop stick is the perfect accessory to play dough, the ultimate letter building tool, counting manipulative, fine motor workout, and a fabulous visual motor item.

Today, you’ll see how we use them to play pick-up sticks.

How do you play Pick-Up Sticks?

It is super easy to play pick-up sticks.  Dump the sticks out on a table.  Attempt to pick up a stick without moving any other stick.  You can slide, pull, tug, or wiggle a stick, but you can not move any other stick.  If another stick moves, your turn is over.  The player with the most sticks at the end of the game winds.  

Skills worked on when playing pick-up sticks:

Ohhh, this is an Occupational Therapist’s dream tool.  If you know an OT, he or she probably has a set of pick-up sticks in her treatement bag or clinic supply closet.  There are so many skill areas worked on while playing pick-up sticks!

  • Hand-Eye Coordination
  • Visual Scanning Visually scan the pile and each player can pick up only one or two certain colors to make the game harder.
  • Visual Motor
  • Pincer Grasp is encouraged by picking up the sticks.  Children need a pincer grasp for managing items like zippers, buttons, and snaps.
  • Color recognition
  • Precision grasp and release is a needed skill for fine motor tasks and manipulating small items.
  • Open Web Space Picking up the sticks encourages an open space between the thumb and pointer finger, needed for handwriting.
  • Figure Ground
  • Spatial Relations
  • Visual Discrimination

If your child loves playing Pick-Up sticks, try these modifications and ideas:

Affiliate links are included.

  1. Play with Pipe Cleaners.  The fuzzy, bendable sticks make dexterity more difficult.  Don’t move any other pipe cleaners!
  2. Play with Glow Sticks
    for a glow in the dark game of pick-up sticks.
  3. Try this set
    for a gift idea.
  4. This Melissa & Doug Suspend
    game builds sticks upward for a unique twist on the game of pick-up sticks. 
  5. Younger kids will love this Play Visions Pick Up Snakes
    with flexible snakes instead of sticks.
  6. Children that need a challenge will love this Playroom Entertainment Catch a Falling Star
    that is on a vertical plane. This game really works on the precision of grasp and release while encouraging an extended wrist. It’s an OT winner! 
  7. For more precision and fine motor fun, try Ker Plunk Game.
Make your own pick-up sticks with this DIY toy idea for kids.  There is so much leaning and developmental areas that you can work on with this simple idea: fine motor, dexterity, hand-eye coordination, open web space, precision of grasp and release, visual perceptual skills, and so many more ways!  Your Occupational Therapist will love this!


You will love to use your DIY Pick-Up Sticks like this: