DIY Desk Letter Strip Handwriting Hack

Sometimes all the little handwriting tricks can work wonders when kids are working hard on handwriting. But when the letter formation is functional and sentences are legible, the verbal cues and visual prompts are reduced. But there can be times that letter formation suffers when kids are writing on their own.  

Check out all of the handwriting tips in our Easy Tricks for Better Handwriting Help here.  

Be sure to join over 400 others in the Facebook group that I’ve created for handwriting help.  Jump in, ask questions, share your tips and tricks and join the fun:  Sweet Ideas for Handwriting Help

Writing prompts or independent writing tasks can revert to previous handwriting habits.  This DIY Desk Letter Strip is a simple handwriting hack that can help kids with letter formation when they are writing independently.  

Make a Desk Letter Strip from a ruler to help kids work on letter formation.

Letter strips are helpful for kids who are learning how to make letters, addressing letter reversal tendencies, and working on the motor plan to make letters functionally.

This DIY version of a letter strip is one that can be taken to any desk, tucked into binder pockets or file folders, or easily pulled out of a desk.  Kids will love that their ruler is quickly and discretely used as a letter strip that can help with letter formation or a quick check on the direction a letter should be aligned. 


Desk Letter Strip made from a ruler

Make a Desk Letter Strip from a ruler to help kids work on letter formation.
This post contains affiliate links.

To make our desk letter strip, we used wooden rulers.  These have a great back for writing letters on and are spacious enough for the upper case alphabet and lower case alphabet.  

Make a Desk Letter Strip from a ruler to help kids work on letter formation.
To make the letter strip, use another ruler to draw a quick line down the length of the ruler.  On that line, write the upper and lower case alphabet with a permanent marker. 

This portable letter strip would be great for cursive letters, too.  Upper case cursive letters are not easy for kids to remember as they are not used as frequently. A desktop example can be helpful during writing tasks.

Make a Desk Letter Strip from a ruler to help kids work on letter formation.

And that’s it!  

amzn_assoc_placement = “adunit0”;
amzn_assoc_search_bar = “true”;
amzn_assoc_tracking_id = “sugaun-20”;
amzn_assoc_ad_mode = “manual”;
amzn_assoc_ad_type = “smart”;
amzn_assoc_marketplace = “amazon”;
amzn_assoc_region = “US”;
amzn_assoc_title = “My Amazon Picks”;
amzn_assoc_linkid = “1d08c30cbb0d735fd69733253a60dc78”;
amzn_assoc_asins = “1891627228,B005GLHUFG,B002UZR754,189162721X”;


Show your student how they can use the letter strip to double check letter formation or to help with alphabetical order.

Looking for more ways to help kids address letter formation? Try these:


Did this quick tip work for you and your kiddo?  Let us know in the comments below or in the Sweet Ideas for Handwriting Facebook group!
p

amzn_assoc_placement = “adunit0”;
amzn_assoc_search_bar = “true”;
amzn_assoc_tracking_id = “sugaun-20”;
amzn_assoc_ad_mode = “manual”;
amzn_assoc_ad_type = “smart”;
amzn_assoc_marketplace = “amazon”;
amzn_assoc_region = “US”;
amzn_assoc_title = “My Amazon Picks”;
amzn_assoc_linkid = “f2fcbeb47c97ebe7b0678f953c600bfb”;
amzn_assoc_asins = “B003BMX65A,B0017YUE2C,B013CN0218,B000093KW1”;

Get 29 pages of modified paper with a Christmas Theme for legible and neat Letters to Santa, Christmas Wish Lists, Thank You Notes, Holiday Lists, and MORE! 

Sky Ground Writing Paper

A simple trick to teach kids how to write on the lines is
sometimes all that it takes to make hours of
handwriting practice
“click”. This modified paper technique is a common way that is used
among Occupational Therapists to address line awareness, letter size, and
letter formation needs in kids.  
 
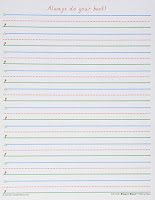
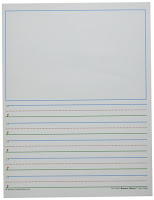
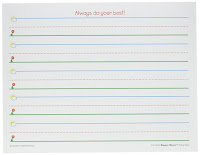
Try using commercial sky/ground paper or
these ideas for DIY versions of the paper for a visual cue that may 
help kids
learn to write on the lines, form letters with appropriate size, and make
letters 
accurately in a way that helps with legibility and overall neatness.
 
Use the sky ground technique of writing to help kids improve legibility through imporved line awareness, letter formation, and letter size.


Sky Ground Paper for Better Handwriting

This post contains affiliate links.
I am a huge advocate of using simple tricks to help kids improve
their 
handwriting.  This post is part of our 30 day series on simple ideas for better handwriting.  While I’m just a tad behind in my posting
schedule (don’t worry, I’ve got all 30 great ideas planned out for you!), I am
keeping the round up of easy handwriting tricks up to date. 
 
Check out all of the easy handwriting tips here.  
Be sure to join over 400 others in the Facebook group that I’ve
created for handwriting help.  Jump in, ask questions, share your tips and
tricks and join the fun:  Sweet Ideas for Handwriting Help
Now onto the paper!
Modified paper is a common way to address handwriting needs.
There are all kinds of adapted paper out there that can help kids improve
their legibility and neatness of written work.  Just a few examples
include bold lined paper, raised lined paper, colored lined paper, highlighted bottom space paper, and graphpaper.  Today’s topic addresses sky-ground paper
Sky ground paper is a modified version writing paper that is
designed to add a visual component to kids’ written work.  The color-coded
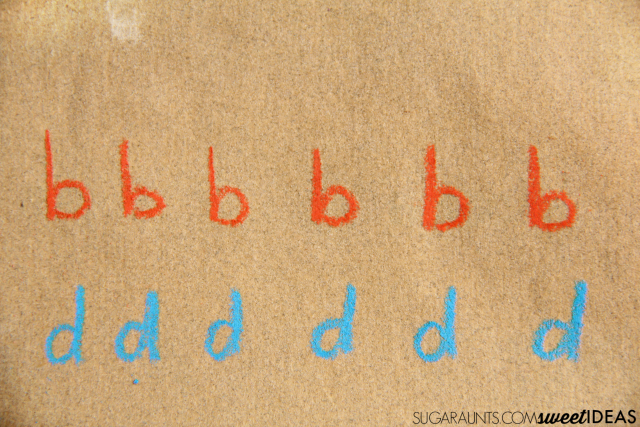
lines can help kids visualize the appropriate size of letters.  Consider
the “tall” letters: b, d, f, h, k, l, t, and all of the upper case
letters start at the top line.  However, occasionally, kids omit use of
that top line and either start the letter’s formation above the top line, or the
start the letter under the top line.  Their handwriting results in written
work that appears inconsistent in difficult to read.  
Taking the size awareness piece into consideration is an overall understanding of size both on paper and outside the body in the world around us. This tall and short worksheet has a fine motor and visual motor component that can be incorporated into whole-body movement activities to teach these concepts that carryover into handwriting.
 
Varying size of
letter height is a big component in overall legibility.  When letters are
formed too large for the available writing area, letters begin to grow in width
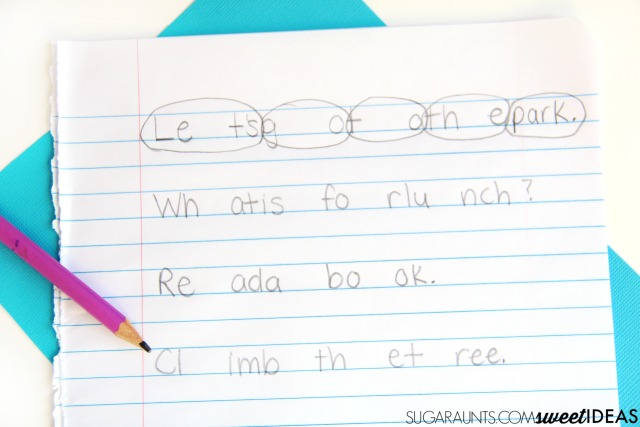
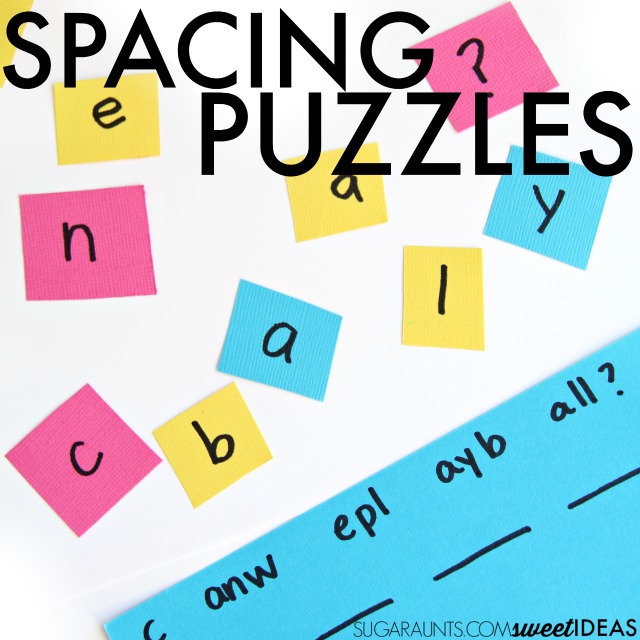
or are inconsistent in overall size.  Space between words suffers as a
result of the child attempting to squeeze their written response into the
available space. 
Likewise, letters that are supposed to meet the middle line or
have a “tail” that drops down below the baseline should be
appropriately placed on the line.  When a child seems to have visual
perceptual difficulties or difficulty with visual motor integration, letter
placement or pencil control may suffer.
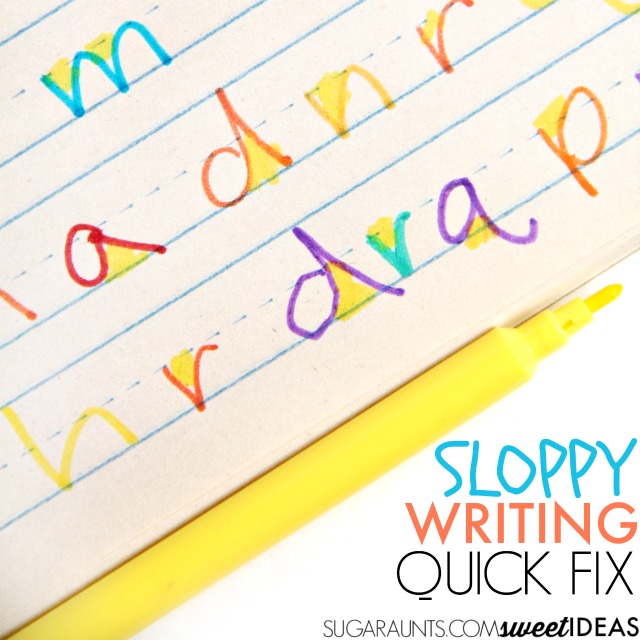
Beyond letter size, another indication for the need to add a
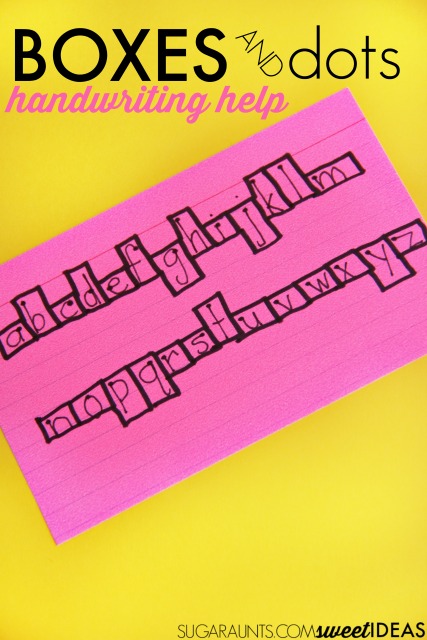
visual component to paper with the sky-ground paper is poor letter formation. Some children form letters in parts.  They make a “d” by
drawing a circle and a line.  Other times, kids form letters quickly and in
a flowing manner while writing.  For example, when writing the word
“car”, the child may make the letter “a” and then quickly
draw a curved candy cane shape for the letter “r” by starting at the
bottom line after forming the letter a with a downward line.  
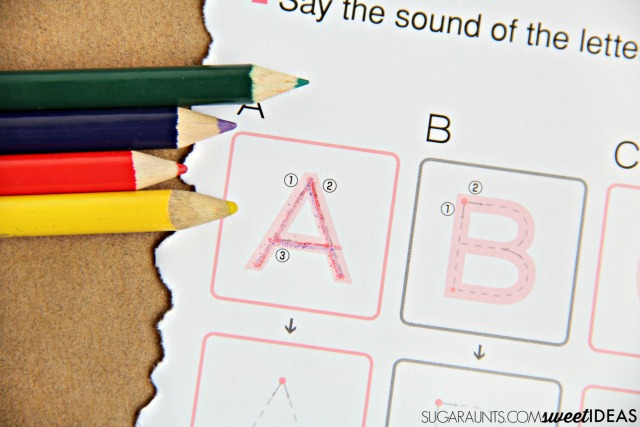
Using sky-ground paper can help kids to form letters
appropriately, with top-to-bottom formation.  Using visual and verbal cues
of the colored lines and even pictures on the lined paper can address these
needs.


Related Read: Try these handwriting accommodation strategies to address a variety of handwriting challenges. 

Visual perception Needs and Modified Paper

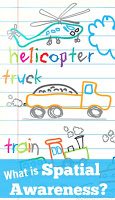
Visual perceptual needs in kids are often times visualized when a
child 
attempts to write.  You may see
difficulties with line awareness, spatial awareness, or size awareness.  This is because the visual perceptual skills are needed to place letters on the lines and play an important part of line awareness, size awareness, letter formation, and copying skills.

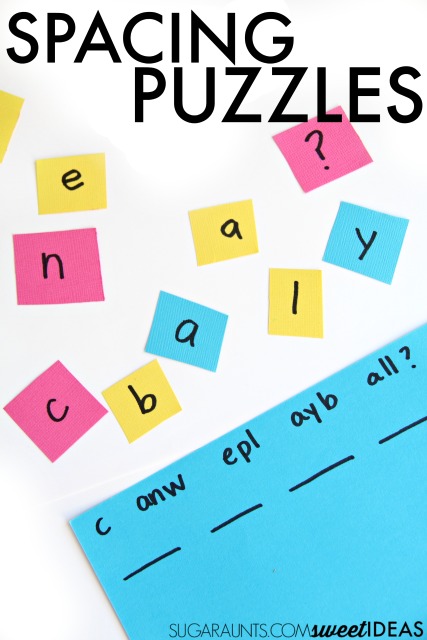
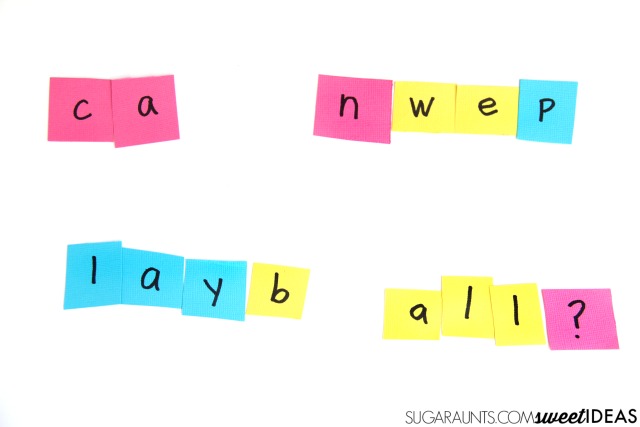
Visual motor integration skills and modified paper

When kids attempt to place letters on the lines, a difficulty with
eye-hand 
coordination may be observed.  Coordinated use of the pencil to place letters where they want them can
be difficult when they are lacking in visual motor 
integration abilities. 

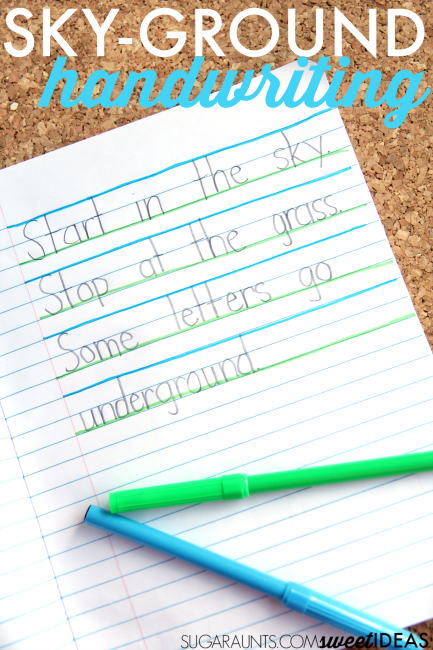
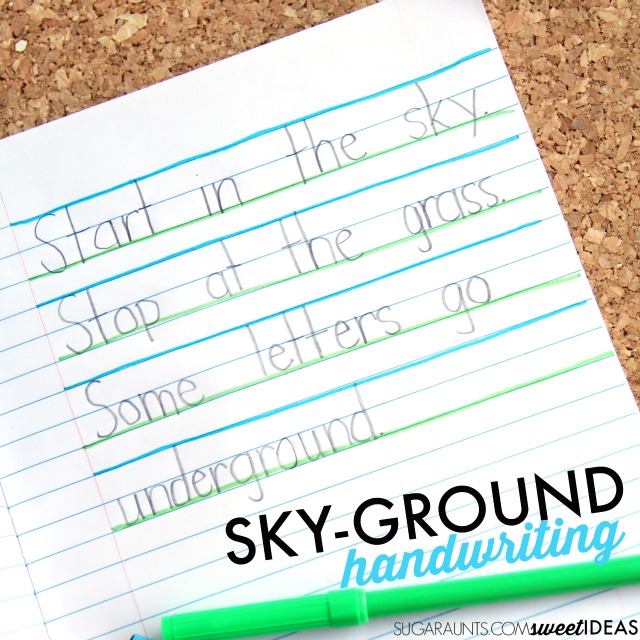
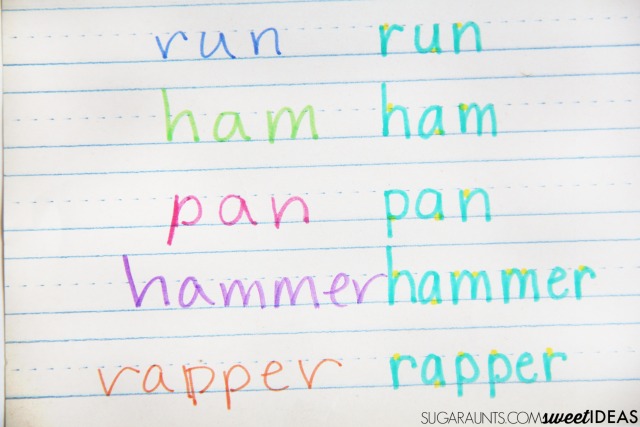
 Use Sky Ground Paper to Help with Handwriting

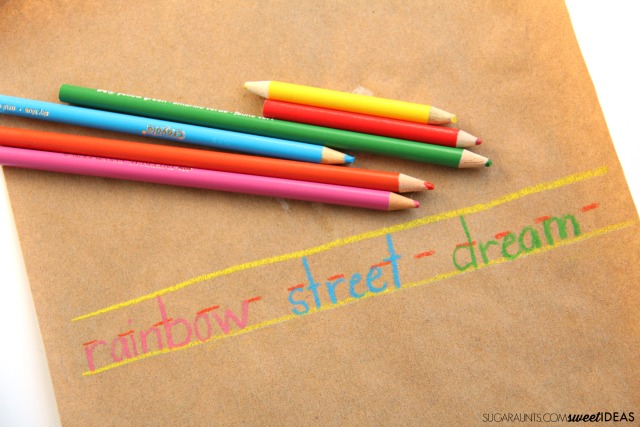
By seeing the blue line for the sky and the green line for the
ground, kids can see and understand the size differences in letters.  Tall letters that reach the top lines are the
ones that start at the sky or the blue line.
The small letters (a, c, o, r, etc) are letters that reach the middle
line but should not go up into the sky.
And tail letters (j, g, p, etc) have a tail that goes down under the
ground. 
What a visual for the child that can now “see” how letters should
be placed on lines!
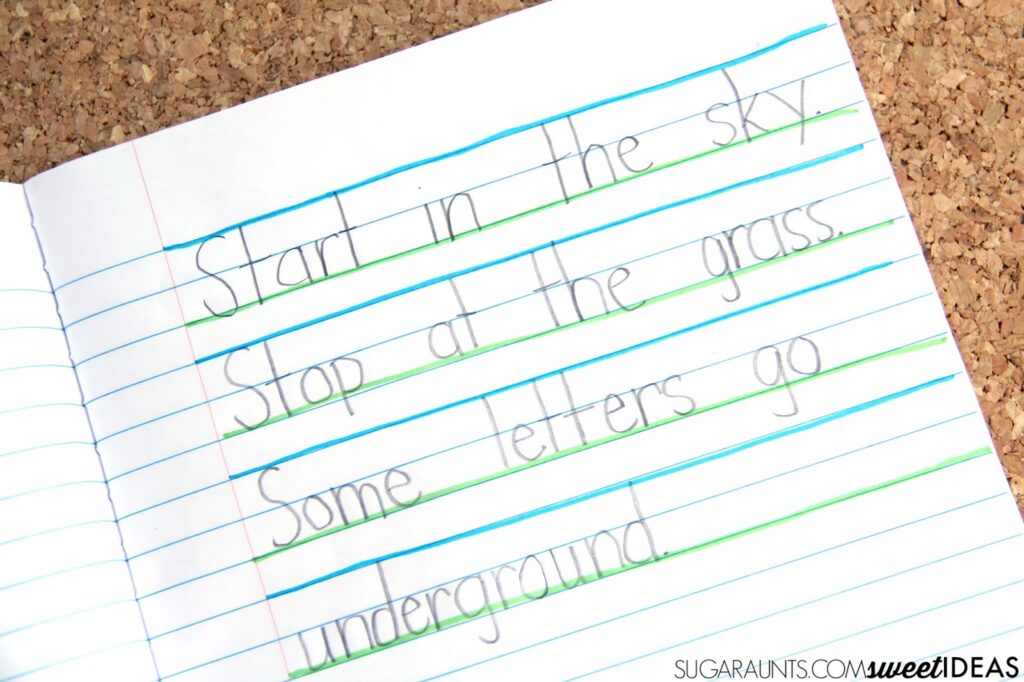
When helping kids use this paper, add verbal prompts such as:
“Start the tall letters in the sky.”
“Short letters start in the middle but they don’t go underground.”
“Make your “G” by starting in the sky and curving around to the
ground.  Add a line in the middle.”
“Tail letters hang down underground.”
“Make your “t” start in the sky and pull down to the ground.’
This technique is great for the visual learner!

 Use the sky ground technique of writing to help kids improve legibility through imporved line awareness, letter formation, and letter size.

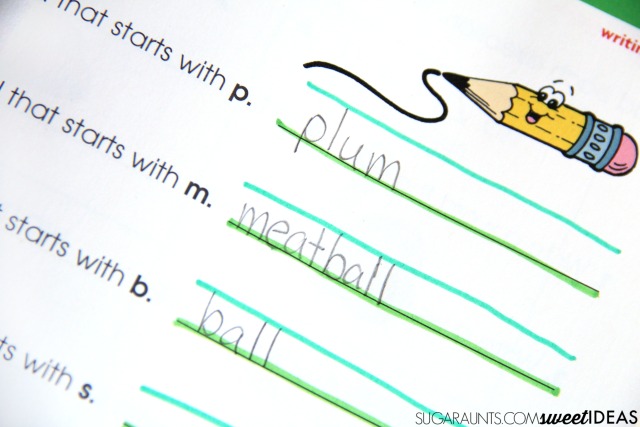
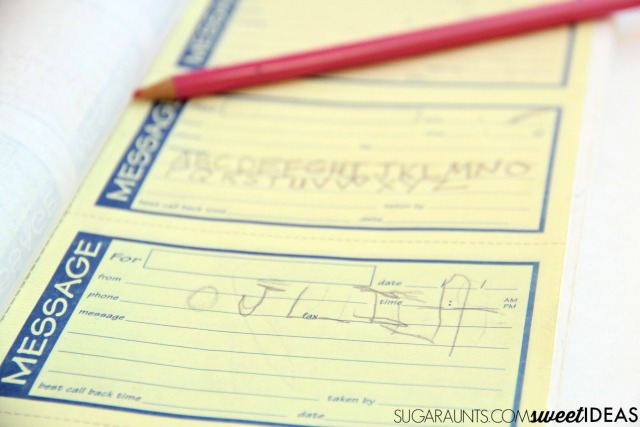
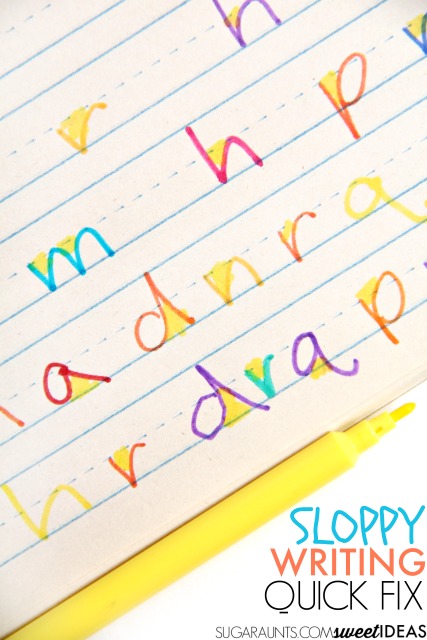
While there are several versions of this paper available online, you can easily make your own version for quick intervention.  Use a thin blue marker and thin green marker to quickly add lines to paper.

Use the sky ground technique of writing to help kids improve legibility through imporved line awareness, letter formation, and letter size.
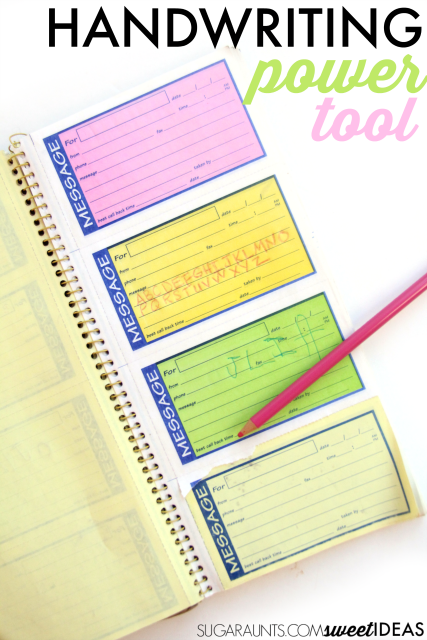
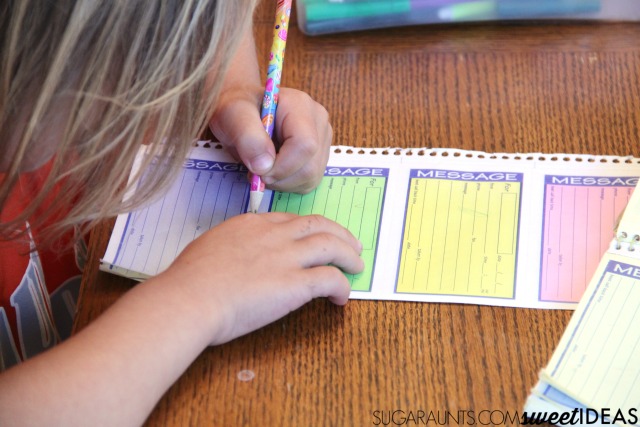
Add sky and ground lines to workbooks, too. This is a great way to use the modification for kids who are writing with a single rule size.
 Smart Start sky ground paper Smart Start paper


There are several versions of this paper available under the name Smart Start paper.  


House Handwriting Method 

Another trick that builds on this method is the concept of a
house.  For kids who are older or those
that don’t want marker lines or special paper to be used, try this house method
of writing. 

**Children can become very aware of how their paper looks
different that their desk neighbor.
Differences can be stressful for these kiddos that are already struggling
to write legibly due to underlying needs.
A lesser modification is great once they have shown success with adaptations
such as sky ground paper or DIY paper cues.

The House Method for spatial organization and letter formation
In this method of handwriting, draw a house shape on one margin of the paper.  The tall letters go into the attic, the small letters are in the first floor, and the tail letters go into the basement.  This is a very simple DIY to create by simply drawing one house on the left hand margin of the lined paper.
 
Line awareness and letter formation difficulties with older kids
Children who are beyond the age-appropriate level of double lined paper can still use both of these line awareness and letter formation techniques.  Just modify single lined paper with either the marker lines or a simple house shape. 
 
Looking for more letter formation handwriting ideas? 
 
Use the sky ground technique of writing to help kids improve legibility through imporved line awareness, letter formation, and letter size.
Did this quick tip work for you and your kiddo?  Let us know in the comments below or in the Sweet Ideas for Handwriting Facebook group!
Get 29 pages of modified paper with a Christmas Theme for legible and neat Letters to Santa, Christmas Wish Lists, Thank You Notes, Holiday Lists, and MORE!

Fall Leaf Auditory Processing Activities

These Fall Leaf Auditory Processing Activities are great for addressing listening skills in kids with or without auditory processing difficulties.  Try these creative ideas at home or in the school yard to easily strengthen auditory abilities for better learning. Perfect for children of all ages and developmental levels, it’s a Fall themed activity that will help kids learn to listen to details!

Fall Auditory Processing Activities


Listening isn’t easy for everyone.  For children with auditory processing disorders, learning is difficult. Imagine identifying and localizing sounds in a classroom that is filled with chattering children, scooting chair legs, pencils scratching on paper, and moving, sound-making children.  The process of localizing sounds, recognizing sound patterns, discriminating between different letter sounds, and interpreting auditory information can be less than optimal for the child with difficulty processing the sound information that is coming in. 


Try these listening activities using Fall’s leaves in a backyard auditory processing activity!

Try these activities to help kids who are auditory learners

Finally, be sure to check out this resource on auditory sensitivities that impact learning.

Fall Leaf themed auditory processing activities for sensory needs in kids.


Auditory Processing Activities Using Fall Leaves

This post contains affiliate links.

When there are auditory processing difficulties present, a child may tend to have the following problems that interfere with learning:


  • Poor direction following
  • Appear confused
  • Distractibility
  • Short attention spans
  • Sensitive to loud sounds
  • Inconsistently aware of sounds
  • Poor listeners


To build and strengthen auditory skills, try using leaves this Fall.  The crunchy, dry leaves that cover the ground are nature’s sensory tool when it comes to auditory processing needs.  


We first talked about the fall leaves that are covering our lawn and read through this month’s Virtual Book Club for Kids book, (affiliate link) Leaf Man by Lois Ehlert.  We talked about how the leaves of fall are all different colors, shapes, and sizes but have one thing in common: a great crunch when they are dry!


To do these sensory Fall Leaf Auditory Processing activity, you’ll need a bunch of leaves that have fallen from trees.  Dry leaves will work best, so if the leaves are newly fallen, you will want to gather leaves up in advance.  Let them dry indoors for several hours or overnight to get a great “crunch”.


Next, spread out the leaves in a big bin.  An under the bed storage bin works great for this activity.


Show your child how to squeeze and crumble the leaves using their hands.  Ask them to listen to the crunch of the leaves.  Notice how the leaves crumble and give off a satisfying noise as they are shifted around in the bin.  

Fall Leaf themed auditory processing activities for sensory needs in kids.


Use the dry leaves to address auditory sensory needs:


  1. Where is that leaf? Ask the child to sit in front of the bin (or if you are outside, sit in front of the adult.  Ask the child to close their eyes.  Using one hand to crunch leaves, ask the child to say or point to the side that the leaf crunch is coming from.  Add a high/low and front/back component by moving around to crumble the leaves, too.
  2. Leaf Pattern- Ask your child to gather a bunch of dry leaves.  Using a pile of leaves of your own, complete a crunching pattern as you crumble leaves at different speeds and in each hand.  The child can then repeat the pattern.
  3. Sound Stop- Crumble and crunch the leaves.  At intervals, stop crunching leaves and wait for a moment. Ask the child to say “Now!” when the leaves stop crumbling.
  4. Falling Leaf Sounds- With the child’s eyes closed, crumble leaves high and low above and below the child.  Ask the child to determine if the leaves are above them or below them as they determine the location of the sound.
  5. Lots of Sound Leaves- Add other sounds to the background noise: talking, music, rattle toys, birds chirping, etc.  Ask the child to determine when the sound of crunching leaves stop.  You can also add a localization dimension to this activity to work on auditory figure ground awareness.
Kids can complete these activities on a one-on-one basis or in a group setting.  For kids with sensory issues, or those that are sensitive to crumbling leaves, try using gardening gloves while crumbling.
 

How would you use Fall’s leaves in a sensory or auditory processing activity?

Fall Leaf themed auditory processing activities for sensory needs in kids.


Visit our auditory processing activities page for more creative ways to address auditory needs.

Address sensory needs while experiencing all that the Fall season has to offer! Grab your free copy of the Fall Sensory Experiences Booklet to create sensory diet activities that meet the needs of individuals in a Fall-themed way!

Get our Fall Sensory Activities Guide

    We respect your privacy. Unsubscribe at anytime.
    Powered By ConvertKit

    Teach Handwriting with Transfer Paper

    This handwriting trick is one that will get the kids excited about practicing their letter size, line awareness, letter formation, and pencil pressure when writing.  It’s a power tool that works on so many aspects or written work, making it a simple way to practice many components of handwriting at once.  What is this super handwriting tool?  Transfer paper!


    Follow along in the Sweet Ideas for Handwriting Facebook page, where over 300 readers and Facebook users are coming together to share and find handwriting tricks and tips.


    Use transfer paper to work on letter formation, size awareness, line awareness, and pencil pressure in handwriting with this easy writing trick that will help kids write with neater and legible handwriting.

    Use transfer paper to work on many handwriting skills


    This post contains affiliate links.

    There are so many ways you can build the skills needed for legibility in written work with a simple transfer paper notebook or transfer paper sheets.

    First, what is transfer paper?  It is that sheet of paper that creates a copy in memo notebooks.  It’s a sheet of paper that is used to create an instant copy by simply hand writing on paper.  It can be a fun surprise for kids that allow a moment’s focus and attention to writing practice that just doesn’t happen with regular paper and pencil.

    Use transfer paper to work on letter formation, size awareness, line awareness, and pencil pressure in handwriting with this easy writing trick that will help kids write with neater and legible handwriting.

    Build handwriting skills with transfer paper:


    Letter size and Line awareness- This messages book is perfect for helping kids work on letter size and line awareness.  It’s a great way to build the skills needed for keeping letters and words within writing spaces on worksheets and forms.  The act of writing on the given spaces with an awareness of how the letters will look on the copy is rewarding for kids.

    Letter formation– When kids are writing and flipping over the sheet to see how their writing looks, they slow down.  A slower speed can help kids work on letter formation.  Try verbal prompts for accurate letter formation with this slower speed.

    Pencil pressureTransfer paper is a great tool for building an awareness of pencil pressure and writing with a “just right” amount of pressure through the pencil.  Read more about proprioception and handwriting.

    Use transfer paper to work on letter formation, size awareness, line awareness, and pencil pressure in handwriting with this easy writing trick that will help kids write with neater and legible handwriting.
    Use transfer paper to work on letter formation, size awareness, line awareness, and pencil pressure in handwriting with this easy writing trick that will help kids write with neater and legible handwriting.
    This post is part of our Easy Quick Fixes to Better Handwriting series

    You’ll also want to join the Sweet Ideas for Handwriting Practice Facebook group for more handwriting tips and tools.

    MORE Creative Handwriting Tricks you will love:

    http://www.sugaraunts.com/2015/11/benefits-of-playing-with-stickers-occupational-therapy.html   


                                        Toys and Games for Reluctant Writers

    Get 29 pages of modified paper with a Christmas Theme for legible and neat Letters to Santa, Christmas Wish Lists, Thank You Notes, Holiday Lists, and MORE! 

    Sloppy Handwriting Quick Fix

    This handwriting trick is an easy one to teach to kids.  It’s a quick lesson in written work that may be just the thing that turns sloppy writing into neat and legible handwriting.  It’s a quick tip in our 30 day series (that is running just a tad behind schedule. Don’t fret though, all quick tips will be here as soon as they are up on the blog.) You can find all of the handwriting tricks here.  

    Follow along in the Sweet Ideas for Handwriting Facebook page, where over 300 readers and Facebook users are coming together to share and find handwriting tricks and tips.

    Soppy writing tips for better handwriting

    Sloppy Handwriting Quick Fix 

    You’ve probably seen it before.  Written work that is all over the page in terms of letter size and formation, letters that are big and some that are small, and little awareness to lines.  

    When a child writes quicly, sometimes letter formation suffers.  For other kids, they tend to write with poor letter formation all the time.  Letters have big gaps between parts of lines and there is very little re-trace.  

    When writing letters accurately, there should be a certain amount of re-trace.  Letters that are formed by the pencil tracing back over a line have re-trace.  Letters “a, d, h, m, n, r, and p” are just a few examples with re-trace.

    When a child omits that re-trace, they make letters that have a “kickstand”.  There is a big gap between parts of the letters and the size suffers.  Letters are formed haphazardly and illegibly.  It’s sloppy.

    To improve neatness in written work, try this easy trick:

    Grab a highlighter or yellow marker and go over your child’s written work.  You might use a list of spelling words or a response to a writing prompt.  Scan through the handwriting with your child and fill in the gaps with the yellow marker.  As you go through the letters, show your child how you can find all of those gaps and spaces that should be closed up tight.  

    Handwriting tricks for neater letter formation
    When letters are formed accurately and with nice re-trace, just a dot is all that is needed to fill in the gap.  Kids can even go through their written work and self-check for gaps in the letters.  Tell them to look for “kickstands” on their letters and to try to form the letters with just a small dot of space.

    RELATED READ: Learn more about re-trace in letter formation.

    Did this quick tip work for you and your kiddo?  Let us know in the comments below or in the Sweet Ideas for Handwriting Facebook group!

    Try this trick for neater letter formation and handwriting
    MORE Creative Handwriting activities that your child will love:

    http://www.sugaraunts.com/2015/10/visual-tracking-tips-and-tools-for.html 


    Handwriting Spacing Puzzles

    Kids who struggle with spacing in written work sometimes write withallthewordstogether.  That’s pretty tough to read, right? When kids struggle with spatial awareness may write words and letters with little regard to spacing. 

    A visual perception difficulty prevents kids from writing with adequate spacing on the page.  Other times, kids have trouble copying written work with appropriate spacing.  Still other kids might show difficulty with spatial awareness when writing at a fast speed or when writing in a journal or with free writing.  

    These spacing puzzles are a great hands-on activity for helping kids to recognize and become more aware of spacing between words.  It’s a hands on approach to addressing visual perception in handwriting.


    Spatial awareness puzzles for helping kids address visual perception skills needed for spacing between letters and words when writing.

    Spatial Awareness Puzzles for Helping Kids Space Between Words When Writing


    To practice spacing with a hands-on approach, try this spacing puzzle.  You’ll need just a couple of materials for the activity.

    Affiliate links are included in this post.

    Cardstock cut into squares.  
    Marker
    Cut the cardstock into squares.  Write letters on the cardstock squares.  Spread the letters out on the table.  You can use the letters in several different spatial awareness puzzles.

    Spatial awareness puzzles for helping kids address visual perception skills needed for spacing between letters and words when writing.
    Construct sentences with the letters, positioning the words in a jumbled manner regarding spacing.  A sentence such as “Can we play ball?” Might present as “Ca nwe playb all?” 

    In this puzzle, kids can re-arrange the letters to accurately space between the cardstock letters.  

    Use the jumbled sentences to practice spacing on paper by asking the child to copy the sentence with accurate spacing.  They can first re-arrange the letters on the table or just copy with accurate spatial awareness.

    Another activity might include writing a jumbled sentence on paper.  Kids can use the letter pieces to construct the sentence appropriately and then write it on paper. 

    Spatial awareness puzzles for helping kids address visual perception skills needed for spacing between letters and words when writing.
    A third activity involves writing jumbled sentences on paper and asking kids to circle the letters to form words.  They can then copy the sentences using appropriate spacing between letters and words. 

    All three of these spacing puzzles require the child to become aware of space between words.  When they slow down to position the words appropriately, they are likely to space between words when writing functionally. 

    Let me know if these puzzles work for your child who is working on spatial awareness!

    Spatial awareness puzzles for helping kids address visual perception skills needed for spacing between letters and words when writing.

    This post is part of our Easy Quick Fixes to Better Handwriting series

    You’ll also want to join the Sweet Ideas for Handwriting Practice Facebook group for more handwriting tips and tools.

    Looking for more activities to help kids work on spacing between words and letters?  Try these:


    Handwriting Spacing Tools


    Space Martial Spacing Tool


    Spatial Awareness in Handwriting

    Easy Trick for Tripod Grasp

    Kids love to have a secret.  

    Sometimes that secret is told to the next unsuspecting person they come into contact with, and other times that secret is held tight. 

    (Helllo, Who-Squeezed-the-Entire-Tube-of-Toothpaste-Into-the-Sink!) 

    This super easy handwriting trick will help kids work on their pencil grasp in order to promote a more functional grip on the pencil. It’s a handwriting trick that might not be obvious to the other student’s in the classroom or even the student at the next desk. 

    And whether your kiddo tells their pencil grasp secret or holds it tight to themselves, it will be a trick that helps them to write with better pencil control and letter formation.


    Pencil grasp trick that places a small item like an eraser in the palm of the hand.

    Hold an Item in the Palm When Writing to Help With Pencil Grasp


    This post contains affiliate links.  

    For this easy pencil grasp trick, you’ll need only one item:

    Show your child/ student/ OT client how to tuck the pencil eraser into the palm of their hand to help with pencil grasp.  While they are writing, they should hold the eraser in place using their pinkie and ring fingers. 

    Why does this pencil grasp trick work?


    When kids hold a small item like a a pencil cap eraser in the palm of their hand, they are using motoric separation of the two sides of the hand.  This encourages the thumb, pointer finger, and middle finger to manipulate the pencil with more control using the skilled side of the hand while the remaining fingers curl in to provide stability.  

    This is a trick that you won’t want to keep a secret.  Grab enough pencil cap erasers for the whole classroom.

    Love this handwriting trick?  Stop over to see all of the simple handwriting tricks for better handwriting in our 30 handwriting series. This post is part of our Easy Quick Fixes to Better Handwriting seriesBe sure to check out all of the easy handwriting tips in this month’s series and stop back often to see them all.  

    You’ll also want to join the Sweet Ideas for Handwriting Practice Facebook group for more handwriting tips and tools.
    Pencil grasp trick that places a small item like an eraser in the palm of the hand.
    What kid wouldn’t love to hold these secret erasers when they write?

    amzn_assoc_placement = “adunit0”;
    amzn_assoc_search_bar = “true”;
    amzn_assoc_tracking_id = “sugaun-20”;
    amzn_assoc_ad_mode = “manual”;
    amzn_assoc_ad_type = “smart”;
    amzn_assoc_marketplace = “amazon”;
    amzn_assoc_region = “US”;
    amzn_assoc_title = “My Amazon Picks”;
    amzn_assoc_linkid = “e6290d3b4dc5e6255905cd4d496ccb5a”;
    amzn_assoc_asins = “B00ANS2YCG,B008O81IN8,B0036VZWC6,B007K1D4JQ”;

    Box and Dot Handwriting Strategy

    This handwriting technique is a strategy that I’ve used many, many times in school-based Occupational Therapy.  It’s a handwriting strategy that uses boundaries of boxes and starting dots to help kids become more aware of letter size, letter formation, spatial organization, and use of lines.  


    The box and dot handwriting strategy is perfect for kiddos who are working on placing letters appropriately on the lines with awareness of tall letters (b, d, f, h, k, l, t) that should touch the top line, small letters that should reach half-way between the top and base stimuli lines (a, c, e, i, m, n, o, r, s, u, v, w, x, z), and tail letters that should drop down below the base line (g, j, p, q, y).


    Use a visual cue of boxes and starting dots to work on letter formation, line awareness, space awareness, and size awareness of letters when teaching kids to write.

    Box and Dot Handwriting Strategy for Better Letter Formation and Spatial Organization

    The dots in the boxes allow kids to practice letter formation by starting at the start point using the visual cue of a starting dot.  This is perfect for kids who are working on improving letter formation in a single stroke (r, m, n, etc) or letters that require the writer to pick up their pencil for portions of the letter formation (a, d, etc).  Sometimes, kids form the letters in “parts” as they build the letter instead of forming it accurately for speed and legibility.  The starting dot can help with pencil placement to address this part of letter formation. 


    The sized boxes of this handwriting strategy are great for allowing kids to form letters with appropriate spacing, giving kids a definite visual cue for spatial awareness between letters and words.


    Use a visual cue of boxes and starting dots to work on letter formation, line awareness, space awareness, and size awareness of letters when teaching kids to write.


    This handwriting technique can be used as an accommodation that allows students to learn letter size, placement, and formation.  This accommodation can be used on regular paper, graph paper, or worksheets.  When students start to demonstrate better understanding on letter characteristics, the boxes and/or dots can be faded out and eventually removed.  


    One strategy for grading down this tool is to first remove the dots from the boxes.  Other students may benefit from removing the boxes before the dots.  Simply adding a dot to writing spaces can provide the visual prompt needed for letter formation and placement. 


    Another technique for lessening the amount of visual cue is to transition students to a highlighter space for the bottom space or bottom half of lined paper. 


    Other times, using the boxes and dots on the words that are being copied are all that are needed for carryover of line awareness, letter formation, and spatial awareness. 


    Use a visual cue of boxes and starting dots to work on letter formation, line awareness, space awareness, and size awareness of letters when teaching kids to write.

    Love this handwriting trick?  Stop over to see all of the simple handwriting tricks for better handwriting in our 30 handwriting series. This post is part of our Easy Quick Fixes to Better Handwriting series. Be sure to check out all of the easy handwriting tips in this month’s series and stop back often to see them all.  


    You’ll also want to join the Sweet Ideas for Handwriting Practice Facebook group for more handwriting tips and tools.
    Get 29 pages of modified paper with a Christmas Theme for legible and neat Letters to Santa, Christmas Wish Lists, Thank You Notes, Holiday Lists, and MORE! 

    Sandpaper Letter Formation Trick

    This easy handwriting trick uses an item you probably have in the workshop or garage of your house. Sometimes, a creative technique is all it takes to help kids work on letter formation and line awareness in their handwriting.  We used sand paper to provide proprioceptive feedback through the pencil while working on handwriting skills that might be difficult for some kids on regular paper.


    This trick is a fun pencil control activity that is helpful for improving handwriting.


    Scroll to the bottom to watch this Sandpaper Handwriting Trick. 


    Use sandpaper as a strategy for helping kids to learn how to make letters, number formation, letter formation, spatial awareness, and line awareness in handwriting with a sensory, tactile, and proprioception activity.


    Sandpaper Writing Activity


    This post contains affiliate links.


    Sandpaper might be considered a super tool in the Occupational Therapist’s therapy bag.  It’s a great medium for working on handwriting in several areas:  Using sandpaper as a base sheet when writing provides a surface for feedback through the hand.  This is one easy way to help kids who need to work on pencil pressure.


    Read more about helping kids to write with appropriate pencil pressure.


    This is such an easy trick for helping kids to work on letter formation, number formation, letter reversals, and organizational issues such as line placement (aka writing on the lines and in the spaces on worksheets).


    All you need is a single sheet of sandpaper.  


    With kids, sometimes a small twist on what you’ve been doing is all that you need to get the hours of practice to finally “stick”.  You might have been working on letter or number formation over and over again in a bunch of different ways.  The chalkboard, the white board, the fun pencil, writing in the sand bin…but give the kiddo a piece of paper and the letters are choppy, poorly formed, and all over the lines.


    What is a mom/teacher/OT to do?  


    Some kids respond well to repetition.  Motor planning is a good thing when it comes to letter formation or number formation!  However, other kids work well with all of the tricks but just can’t carryover the skills they’ve learned once they are required to write quickly or write an open-ended response (aka think while writing).


    This sandpaper writing trick is one strategy that can help kids slow down, respond to tactile sensory input, and modify their pencil control given proprioceptive feedback.  


    Here’s how it works:
    Simply lay a piece of paper on top of a sheet of sandpaper.  And then write.


    The sandy grit of sandpaper provides feedback through the pencil and allows kids to slow down, write with better pencil pressure, and be more aware of how their pencil is moving in the space they have to write in. 


    Sandpaper provides a great proprioceptive strategy for handwriting. Different kids will respond to different grades of sandpaper.  This pack comes in an assortment of grades so that you can try more or less “sandiness” to the paper. A coarse grit will provide more feedback and a fine grit will provide less sensory input.  


    Watch the video to get a better understanding of how to complete this activity. Show it to the kiddos, too!


    Use sandpaper as a strategy for helping kids to learn how to make letters, number formation, letter formation, spatial awareness, and line awareness in handwriting with a sensory, tactile, and proprioception activity.

    This is a great trick to use with workbooks.  Use several colors of colored pencils to practice letter or number formation with rainbow writing.  Simply trace over the letters with different colors to practice letter formation.


    Using a sheet of sandpaper under a worksheet can allow for improved placement in a writing space by encouraging the child to slow down while writing. 


    Try writing right on the sandpaper with colored pencils to really add a tactile strategy to letter formation.  Try placing starting dots along with verbal or visual cues to form the letter correctly.  The tactile feedback will add a “memory” to forming the letter. 


    Use sandpaper as a strategy for helping kids to learn how to make letters, number formation, letter formation, spatial awareness, and line awareness in handwriting with a sensory, tactile, and proprioception activity.

    This is a great strategy for helping kids to address letter reversals.

    Use sandpaper as a strategy for helping kids to learn how to make letters, number formation, letter formation, spatial awareness, and line awareness in handwriting with a sensory, tactile, and proprioception activity.

    One last way to use sandpaper in handwriting is to draw lines on the sandpaper and ask the child to write on the lines with colored pencils.  While this is not a practical strategy for written work, it’s a great way to practice line awareness and spatial organization skills.  Once the sandpaper is filled up with writing, use it as a base for placing paper on top.  


    MORE ways to practice handwriting using sandpaper:

    Try using these Pencil Mazes over the sandpaper to work on pencil control.
    Work on pencil control and accuracy with Pencil Obstacle Courses

    Use sandpaper as a strategy for helping kids to learn how to make letters, number formation, letter formation, spatial awareness, and line awareness in handwriting with a sensory, tactile, and proprioception activity.


    Like this handwriting tip?  Try all of the strategies in our Easy Quick Fixes to Better Handwriting series. Be sure to check out all of the easy handwriting tips in this month’s series and stop back often to see them all.  


    Watch the video on this Sandpaper Handwriting Trick:


    You’ll also want to join the Sweet Ideas for Handwriting Practice Facebook group for more handwriting tips and tools.