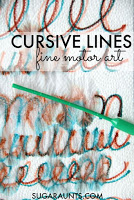
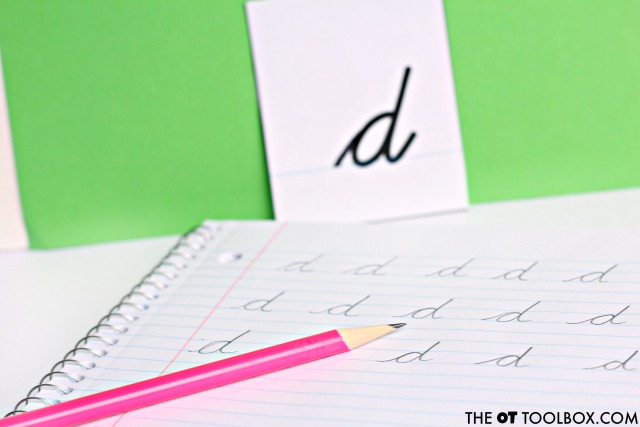
Adding movement and sensory input to teaching letters and handwriting is key for learning the motor plan, identifying letters, and carryover of learned skills.
This cursive slime activity is a fun way to encourage letter formation, letter identification, and letter matching using slime as a fine motor and sensory medium to make the activity fun and memorable.
This cursive slime activity adds a proprioceptive, tactile, and movement component to learning the parts of cursive letters. Kids can focus on the starting pencil lines that make up groups of letters known as cursive letter families.
Cursive Slime Activity
There is a lot more information on cursive letter families as well as more cursive writing strategies and tools here and in the How to Teach Cursive Writing series that we have on The OT Toolbox this month.
Grab more cursive writing tips and strategies for teaching cursive handwriting under the cursive writing tab up above.
For this cursive slime activity, you will first need a batch of slime. We love to make non-borax slime for safety reasons.
Our favorite recipe (and my YouTube loving kids are HUGE fans of trying all.the.recipes) is this contact solution and baking soda slime recipe. It’s a quick slime recipe that pulls together easily and one that older kids can make on their own.
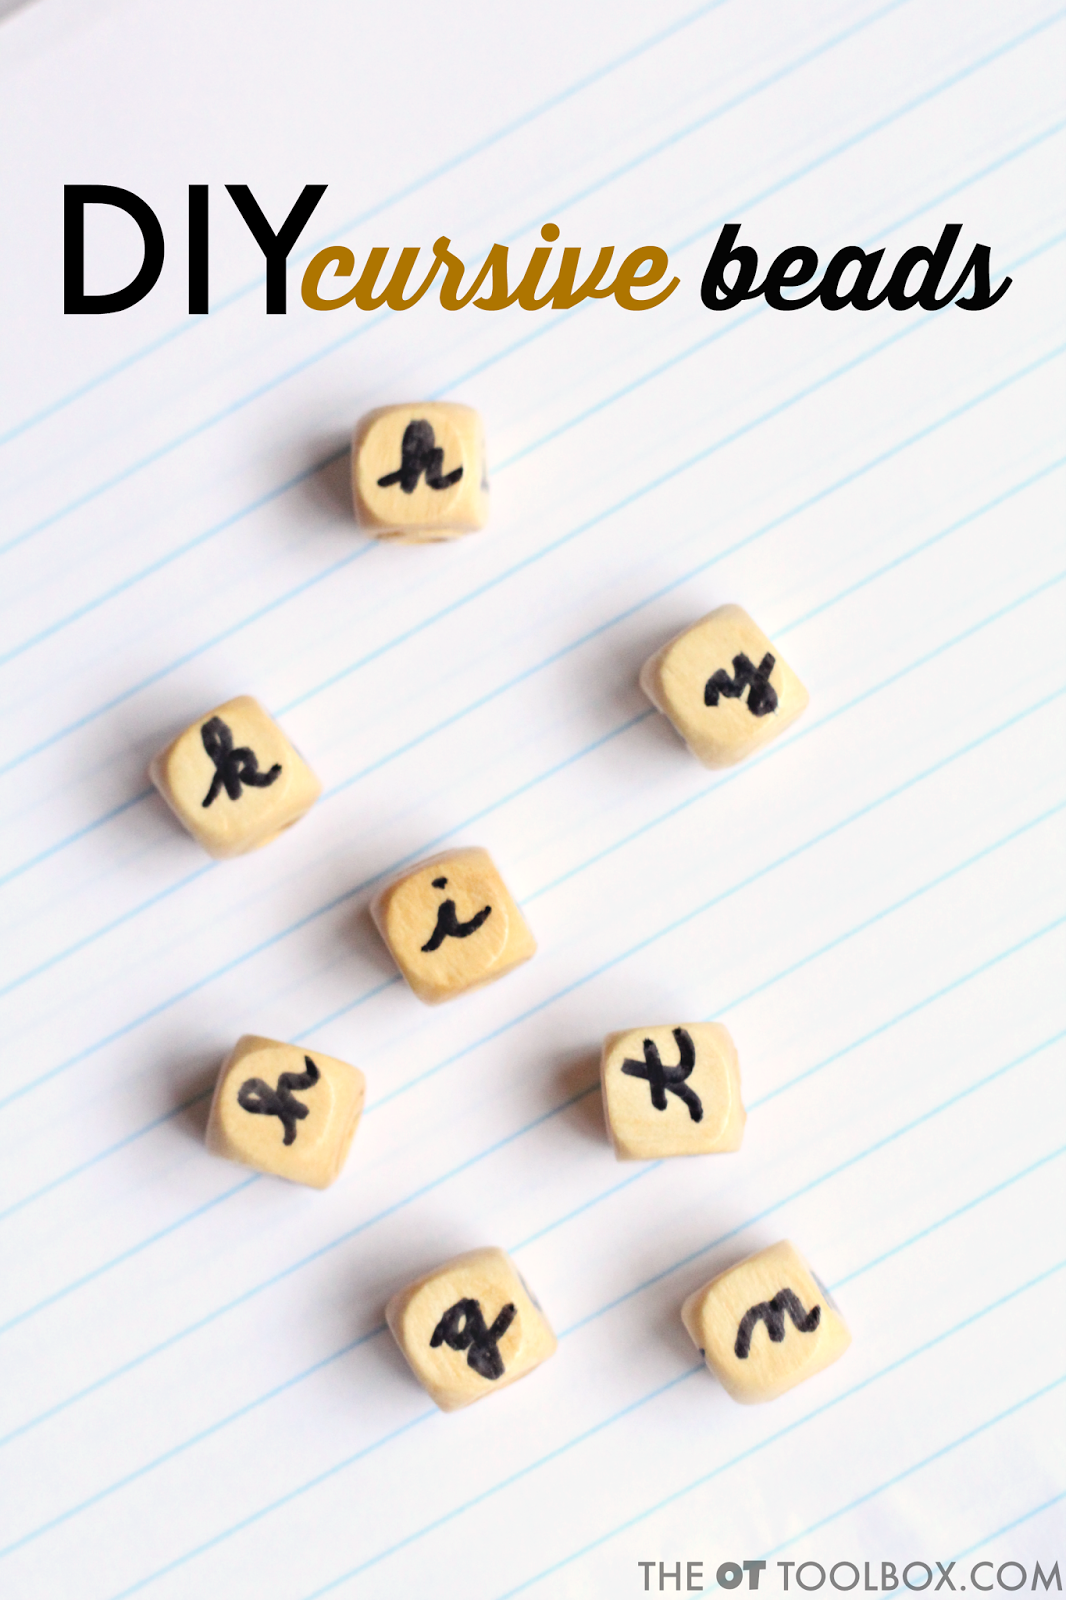
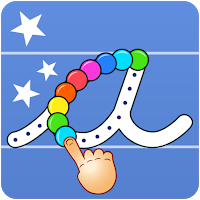
Coming up with creative activities that can help kids learn to identify and write cursive letters can be fun. This cursive activity uses beads as a tool for forming letters, copying cursive letters, and learning to identify cursive letters. The best thing about these cursive activity beads is that they can be used in a variety of ways to help kids learn and carryover cursive writing skills.
You can read more about cursive letter families below as well as more cursive writing strategies and tools here and in the How to Teach Cursive Writing series that we have on The OT Toolbox this month.
You can find all of the tips and strategies for teaching cursive handwriting under the cursive writing tab up above.
Cursive Activity Beads
Affiliate links are included in this post.
You’ll need just a few materials to make your own set of cursive activity beads:
Wooded Beads (Ours came from www.craftprojectideas.com)
It’s very easy to create these beads for using in cursive writing activities. Simply use the permanent marker and write letters on the sides of the beads. The flat side of the wooden beads makes it easy to write a small cursive letter. The surface “holds” the permanent marker’s ink nicely so it doesn’t smear.
We wrote the cursive letters on the beads according to cursive families. This way, cursive letters of the same cursive letter family were on the same bead. It’s a fun way to help kids learn parts of cursive letters and cursive letter families…to in the end help with carryover of cursive skills.
Cursive Letter Identification Activities
Use the cursive activity beads to help kids learn and practice cursive letters in many ways:
Use tweezers to pick up and identify cursive letters.
When it comes to handwriting, legibility is a big issue. Students can work on letter formation, speed, copying skills, pencil pressure, and other components of handwriting…but there is one focus that can make all the difference in cursive legibility: letter size! Letter size is a huge area to address if you are concerned with cursive legibility and functional handwriting.
For printed handwriting, size is a big concern and a helpful area to address to boost handwriting legibility but the biggest way to immediately make a difference in legibility to to address spacing between words. When it comes to cursive writing, that key area is letter size.
This post is part of our 31 day series on teaching cursive. You’ll want to check out the How to Teach Cursive Writing page where you can find all of the posts in this series. For more ways to address the underlying skills needed for handwriting, check out the handwriting drop-down tab at the top of this site.
Cursive Legibility and Handwriting Letter Size
With cursive handwriting, the natural spacing that occurs with cursive letter connectors help to group words together. Addressing size will help with consistency of letter formation and overall look of cursive writing.
A smaller letter size is essential for increased speed that is needed for functional use of cursive as a writing form.
When some tall letters are hitting the top line and others are hitting at the midline, overall legibility suffers. When some small letters hit the top line, the letters can look like a different letter (A cursive e that is formed so it hits the top line will look like a cursive l).
Handwriting Letter Size Activity
Try this easy activity to address consistency of handwriting letter size and cursive legibility.
You’ll need just a couple of materials for this letter size activity:
Cut each colored cardstock into small index card-sized pieces. Use these as starting and stopping guides for cursive handwriting.
The green cardstock can be the guide for a starting point for cursive letters. For some kids, knowing to start on the baseline is a big part of letter formation and cursive legibility.
For other kids, handwriting letter size is limited by the various sizes of cursive letters. For these kids, a visual guide of where to pause and re-trace or curve over to complete the cursive letter can really help with letter formation and cursive legibility.
Use the red cardstock to guide the top point of letters.
The visual guide can be used effectively when practicing a series of cursive letters such as a line of cursive letter b‘s. Simply hold the guide at the top line as a visual cue to stop at the top writing line.
The visual cue cards can be used as a visual self-check after writing a word.
Ruler Trick for Cursive Letter Size
Another trick to help with consistent cursive letter size is to use the ruler trick. Use a wooden ruler as a visual guide that can be kept in a desk or binder. Use a red marker to color the edge of a wooden ruler.
The ruler can then be used to guide or self-check letter height.
Looking for more ways to make cursive handwriting consistent and legible? Try these ideas:
Here on The OT Toolbox, we’ve been sharing lots of ideas on how to teach cursive writing. Today, you’ll find creative activities and tips for teaching cursive letter formation of tree letters. Cursive tree letters are those ones that start with a line up followed by a traced line back down. Lowercase cursive letters i, j, p, t, u, and w are tree letters. This cursive letter family is a group of cursive letters that are formed with similar pencil strokes.
Breaking letters down into cursive families can help students learn cursive letter formation. Below, you will find information on how to teach cursive letter formation of “tree letters”.
Check out how each letter of the alphabet is broken down into chunks of similar letters in this Facebook video.
Teach cursive letter formation “tree” letters
This post is part of our 31 day series on teaching cursive. You’ll want to check out the How to Teach Cursive Writing page where you can find all of the posts in this series. For more ways to address the underlying skills needed for handwriting, check out the handwriting drop-down tab at the top of this site.
Cursive Letter Formation of “Tree” Letters
When instructing students in forming these letters, start by outlining a cursive letter lesson plan of activities. You can read more about cursive letter lesson plans here.
Students can start out with learning The Tree Letters, start by practicing a series of upward curves across a line of paper. This can look like a string of cursive letter t‘s joined together. When practicing the curve of the cursive letter t motions in a strand across a page, don’t worry about the crossing of the t’s. Instead, set awareness on re-trace and the start/stop point of each curve.
Most important is the re-trace portion. Instruct students to draw the lines with proper re-trace as they trace back over the lines to create another line up and down.
When beginning with cursive instruction, students should concentrate on an upward curve from the base line to the middle line or top line of the paper. This is the “tree” of a tree trunk visual and is the re-occuring stroke in the letters i, j, p, t, u, and w.
Rainbow Writing Cursive Letter Tree Letters Activity
One activity that can practice the formation needed for tree letters is to practice drawing rainbows. Using a variety of colored pencils or markers, ask students to draw a small rainbow that starts at the baseline and peaks at the middle line. They can then trace back over that rainbow with other colors.
Then, ask students to create a series of rainbows across the line of paper using one color. They can then draw over that series of rainbow bumps with each colored pencil or marker.
As students trace over the previous color, ask them to keep their colored pencil or marker on the lines and to continue with re-trace back down to the baseline and back up again.
Activities for Teaching Cursive Letter Tree Letters
Use short phrases to instruct cursive formation. Phrases like “Pause”, “Stop”, “Trace back”, “Curve up”, “Curve Down”, and “Swing away to connect” can help.
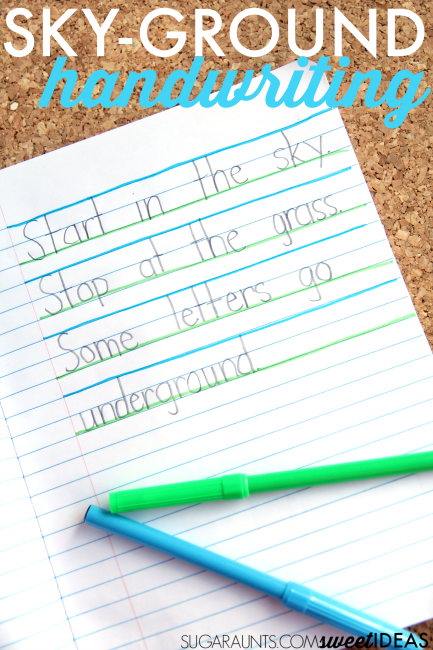
The verbal prompts should involve starting and stopping points such as “Start at the baseline”, “stop at the middle line”, or “Stop at the top line”. Line names should remain consistent with names used by the student in learning printed handwriting. Bottom Line, Middle Line, and Top Line are simple cues that typically work well.
Try this tree themed activity to teach cursive letter tree letters:
1.) Students learning the Tree Letters will benefit from a visual image of a a series of curved lines up and back down with a visual of a tree’s branches at the top. The tree’s trunk should trace back down over it’s first line to create a single trunk line. Use a green stamp to create a small leaf top on a letter t.
Try this with a series of letter t’s and the other Tree Letters. Be sure to ask students to copy only 2-3 letters at a time while working on formation so that poor habits are not established.
How to Teach Lowercase Cursive i
Use the following verbal prompts to teach lowercase cursive letter i:
Start at the baseline. Curve up to the middle line. Pause. Trace back down the tree trunk. Then swing away to connect. Go back and add the dot.
Instruct students to trace over the lines and create a small set of “roots” at the bottom of the tree trunk.
How to Teach Lowercase Cursive t
Use the following verbal prompts to teach lowercase cursive letter t:
Start at the baseline. Curve up to the top line. Pause. Trace back down the tree trunk. Then swing away to connect. Go back and add the crossline.
Instruct students to trace over the lines and create a small set of “roots” at the bottom of the tree trunk of the t.
Note about letter t- Older styles of cursive handwriting used a height of letter t that was taller than the middle line yet shorter than the top line. For ease and consistency with children, a height that reaches the top line can be most efficient.
The tree letters have different sizes which is important for legibility. A cursive t and a cursive i can take on similar appearances when the size awareness is take out. Teaching learners about letter size and the tall letters are tall while the short letters are short. Use this tall and short worksheet to put these concepts into play.
How to Teach Lowercase Cursive p
Use the following verbal prompts to teach lowercase cursive letter p:
Start at the baseline. Curve up to the middle line. Pause. Trace back down the tree trunk. Pass the baseline. Pause. Trace back up the tree trunk to the middle line. Curve around in a circle. Stop at the tree trunk near the baseline. Then swing away to connect.
Note about cursive letter p- This letter has a lot of re-trace. It also has a point where the pencil needs to stop without crossing over another line. This closure point can be a difficult precision point for some students. Work on re-trace and motor control for closure points in multi-sensory activities such as with sandpaper or in writing trays.
How to Teach Lowercase Cursive u
Use the following verbal prompts to teach lowercase cursive letter u:
Start at the baseline. Curve up to the middle line. Pause. Trace back down the tree trunk. Then swing away to create a second tree. Curve up to the middle line. Pause. Trace back down the tree trunk. Swing away to connect.
How to Teach Lowercase Cursive w
Use the following verbal prompts to teach lowercase cursive letter w:
Start at the baseline. Curve up to the middle line. Pause. Trace back down the tree trunk. Then swing away to create a second tree. Curve up to the middle line. Pause. Trace back down the tree trunk. Then swing away to create a third tree. Curve up to the middle line. Pause. Trace back down the tree trunk. Swing away to connect.
How to Teach Lowercase Cursive j
Use the following verbal prompts to teach lowercase cursive letter j:
Start at the baseline. Curve up to the middle line. Pause. Trace back down the tree trunk. pass the baseline and loop to the left. Swing up to the baseline and away to connect.
A few tips for teaching tree letters
It would be very difficult to teach cursive handwriting only by verbal instruction. Carryover and accuracy would suffer!
A visual component and slow teaching strategies are very important. Try these tips to help with learning cursive bump letters.
Try these cursive writing tools to help with forming letters:
Affiliate links are included.
Cursive Writing Wizard is a free app on Amazon that allows students to trace letters and words. The app has stickers and animations as well as games that promote learning of cursive letters and connecting lines.
Cursive Handwriting Workbook is a workbook for kids in elementary grades and focuses on formation of cursive letters (upper and lower case) as well as words.
Teachers can use a laser pointer in the classroom to help students see parts of cursive letters as they instruct each part of the formation. This is helpful when teaching letters in cursive letter families.
This fun handwriting activity is a fun way to practice cursive letter identification. Practicing cursive handwriting is one of the best strategies to helping kids carryover the skills that they’ve learned in cursive writing instruction. It makes sense, right? You practice more, you get better at it! But there is actually more to it.
The more practice that a child gets when using creative and unique activities, the more they are challenged in a variety of multisensory experiences. These various sensory and tactile experience broaden the fabric of a child’s learning experience.
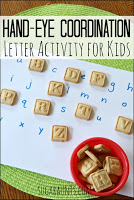
Cursive letter identification
This cursive letter activity is one that does just that; It is a creative tool to encourage cursive writing experiences that the child can draw on down the road. It allows eye-hand coordination and the perceptual skills of scanning, figure ground, form constancy and others as well as fine motor motions and dexterity.
You can read more about cursive letter families below as well as more cursive writing strategies and tools here and in the How to Teach Cursive Writing series that we have on The OT Toolbox this month.
You can find all of the tips and strategies for teaching cursive handwriting under the cursive writing tab up above.
Cursive Handwriting Activity
Use this handwriting activity to develop the ability to write, recall, and form cursive letters.
There has been much research demonstrating the use of our hands in manipulation of tools and materials as playing a valuable role in development of cognition and learning.
This fine motor activity is one that meets those criteria while working on cursive handwriting.
You’ll need just a few materials to create this cursive writing manipulative activity:
Pipe cleaner
Tape
Straw
Permanent marker
Scissors
To start this activity, cut the tape into small sections. Fold them over the straw as shown in the picture. Between each tape piece, cut the straw. You should now have “beads” of sorts.
Use the permanent marker to write cursive letters on one side of the tape. Flip the “bead” over and write the printed version of that letter on the other side. Ensure the letter is not written upside down.
Next, slide the cursive letter pieces onto the pipe cleaner.
Fold one end of the pipe cleaner into a ball to prevent the letters from sliding off.
Add the remaining cursive letters to the pipe cleaner.
Fold the other end of the pipe cleaner to stop the letters from sliding off.
Ask students to turn over the letters. They can copy the cursive letter or form the cursive letter from memory as they view the printed letter.
Use the letters as a model for writing the cursive letters in a sensory writing tray.
Scatter the letters on a table and ask students to sort letters or order them in alphabetical order. Students can then thread the letter “beads” onto the pipe cleaner.
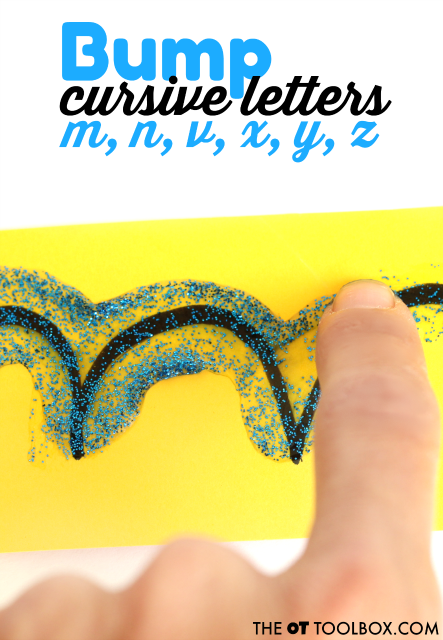
Try this creative activity for teaching cursive letter formation. By breaking letters down into cursive families, students can benefit from the parts that make up formation of cursive letters. Below, you will find information on how to teach cursive letter formation of “bump letters”.
Bump letters are those cursive letters that form with a bump to start off the pencil’s motion. Bump letters include m, n, v, x, y, and z.
Check out how each letter of the alphabet is broken down into chunks of similar letters in this Facebook video.
Teach cursive letter formation bump letters
This post is part of our 31 day series on teaching cursive. You’ll want to check out the How to Teach Cursive Writing page where you can find all of the posts in this series.
For more ways to address the underlying skills needed for handwriting, check out the handwriting drop-down tab at the top of this site.
Cursive Letter Formation of Wave Letters
When instructing students in forming these letters, start by outlining a cursive letter lesson plan of activities. You can read more about cursive letter lesson plans here.
When teaching the Bump Letters, start by asking students to practice a series of bumps across a line of paper. This can look like a string of cursive letter m‘s joined together. Children can draw the bump lines across a page.
Be sure to instruct students to draw the lines with proper re-trace as they trace back over the lines to create another bump.
When beginning with cursive instruction, students should concentrate on an upward curve from the base line to the middle line of the paper. This is the “bump” of a bump letter and the beginning pencil motion of letters m, n, v, x, y, and z.
Rainbow Writing Cursive Letter Bump Letters Activity
One activity that can practice the formation needed for bump letters is to practice drawing rainbows. Using a variety of colored pencils or markers, ask students to draw a small rainbow that starts at the baseline and peaks at the middle line. They can then trace back over that rainbow with other colors.
Then, ask students to create a series of rainbows across the line of paper using one color. They can then draw over that series of rainbow bumps with each colored pencil or marker.
As students trace over the previous color, ask them to keep their colored pencil or marker on the lines and to continue with re-trace back down to the baseline and back up again.
Use these activities and handwriting tips to help kids learn to write cursive letters. These are fun ways to teach cursive letter formation bump letters.
Activities for Teaching Cursive Letter Bump Letters
Use short phrases to instruct cursive formation. Phrases like “Pause”, “Stop”, “Trace back”, “Curve up”, “Curve Down”, and “Swing away to connect” can help.
The verbal prompts should involve starting and stopping points such as “Start at the baseline”, “stop at the middle line”, and “Stop at the top line”. Line names should remain consistent with names used by the student in learning printed handwriting. Bottom Line, Middle Line, and Top Line are simple cues that typically work well.
Here are two activities to teach cursive letter bump letters:
1.) Students learning the Bump Letters will benefit from a visual image of a rainbow. Students can visualize the starting point for the rainbow as the bottom line where a rainbow would begin. They can imagine the curve of the bump swinging up to the middle line like a rainbow. From there, the rainbow continues back to the baseline.
2.) Draw a line of bumps across a paper in a thick marker. Students can trace the bumps with a dob of glitter glue across the lines. Encourage students to trace on the lines and to focus on re-trace of the lines.
How to Teach Lowercase Cursive n
Use the following verbal prompts to teach lowercase cursive letter n:
Start at the baseline. Curve up to the middle line. Continue over the rainbow back to the baseline. Trace back up with a bump to the middle line. Continue the rainbow back to the baseline. Then swing away to connect.
Instruct students to trace over the lines between the first and second bump of the n.
How to Teach Lowercase Cursive m
Use the following verbal prompts to teach lowercase cursive letter m:
Start at the baseline. Curve up to the middle line. Continue over the rainbow back to the baseline. Trace back up with a bump to the middle line. Continue the rainbow back to the baseline. Trace back up with the bump to the middle line. Continue the rainbow back to the baseline. Then swing away to connect.
Instruct students to trace over the lines between the first, second, and third bump of the m.
How to Teach Lowercase Cursive x
Use the following verbal prompts to teach lowercase cursive letter x:
Start at the baseline. Curve up to the middle line. Continue over the rainbow back to the baseline. Swing away to connect. After the word is completed, add the cross line to the x.
Instruct students to remember to come back to the x to add the diagonal crossline.
How to Teach Lowercase Cursive y
Use the following verbal prompts to teach lowercase cursive letter y:
Start at the baseline. Curve up to the middle line. Continue over the rainbow back to the baseline. Curve along the baseline and bump up to the middle line. Pause at the middle line. Trace back down. Pass the baseline. Loop left. Swing away to connect.
How to Teach Lowercase Cursive z
Use the following verbal prompts to teach lowercase cursive letter z:
Start at the baseline. Curve up to the middle line. Continue over the rainbow back to the baseline. Pause and trace back up halfway to the middle line. Bump over back to the baseline. Pass the baseline. Loop left. Swing away to connect.
A few tips for teaching bump letters
Learning cursive only by verbal instruction would be detrimental to carryover and accuracy. A visual component and slow teaching strategies are very important. Try these tips to help with learning cursive bump letters.
Try these cursive writing tools to help with forming letters:
Affiliate links are included.
Cursive Writing Wizard is a free app on Amazon that allows students to trace letters and words. The app has stickers and animations as well as games that promote learning of cursive letters and connecting lines.
Cursive Handwriting Workbook is a workbook for kids in elementary grades and focuses on formation of cursive letters (upper and lower case) as well as words.
Teachers can use a laser pointer in the classroom to help students see parts of cursive letters as they instruct each part of the formation. This is helpful when teaching letters in cursive letter families.
Cursive writing requires a lot of practice. Adding multiple sensory strategies to handwriting is one way to make the motor plan of letters “stick” when it comes to learning cursive. Today, I’ve got a fun free freebie for you that can be used to help kids learn cursive letters in a variety of ways: Cursive letter flashcards! These letter formation PDF printable sheets are printable tools that can be used in many different ways.
These cursive flashcards can be used in so many ways to practice cursive writing:
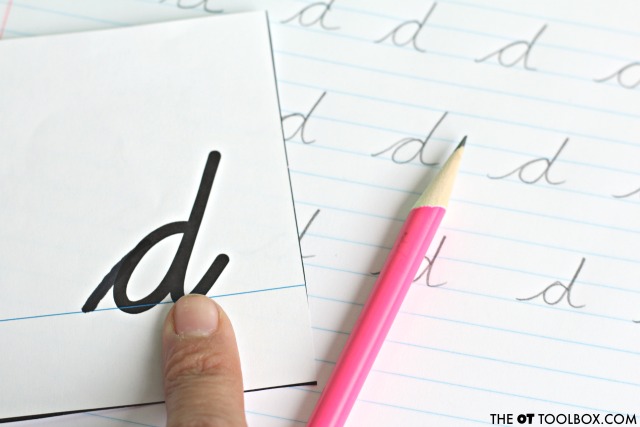
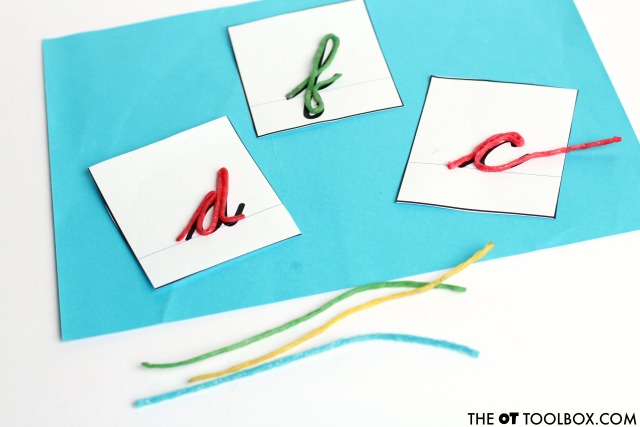
Cut them out and glue the printed side to the back of the printed side to use as flashcards.
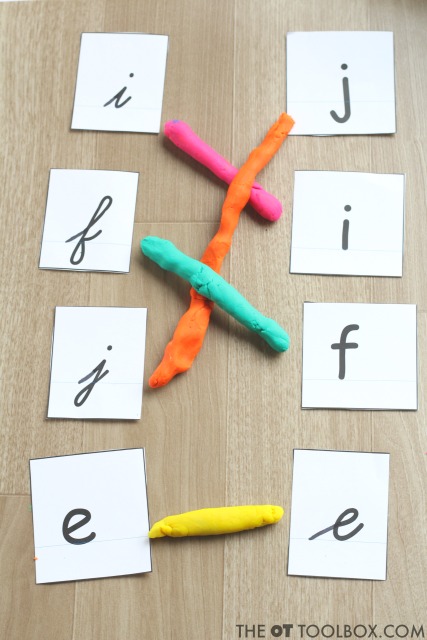
Cut them out but DON’T glue the printed and cursive sides together; Use them for matching games like this play dough match up. (Tip: using the play dough to create connecting lines boosts the fine motor skills.
Practice writing individual letters onto paper or worksheets. The cursive flashcards can be positioned on a desk for Near point copying so that students are not visually distracted as they copy the letters. This can help with pencil motions.
Imagine a child copying a cursive letter from a far point such as a smartboard or strip of cursive letters positioned in the front of the room. As they form parts of a letter, they need to shift their vision and may end up with jerky pencil strokes or a lift of the pencil. Copying a letter form from near point can help as kids learn cursive.
How would you use these cursive flash cards?
Need help with the underlying skills needed for handwriting? Start here on our Handwriting resources page.
The Handwriting Book is a huge resource when it comes to addressing handwriting concerns. It’s a book written by 10 occupational therapists and physical therapists and refers to every underlying skill related to written work. This is a tool for therapists, teachers, and parents.
More cursive writing resources (Click on the images to find out more):
Colleen Beck, OTR/L has been an occupational therapist since 2000, working in school-based, hand therapy, outpatient peds, EI, and SNF. Colleen created The OT Toolbox to inspire therapists, teachers, and parents with easy and fun tools to help children thrive. Read her story about going from an OT making $3/hour (after paying for kids’ childcare) to a full-time OT resource creator for millions of readers. Want to collaborate? Send an email to contact@theottoolbox.com.
Cursive handwriting is a new experience that many students are excited about. for most students, they have seen cursive handwriting before from teachers or parents and are very excited about the opportunity to learn cursive handwriting. below, you’ll find cursive writing tips to help harness that excitement in order to help students excel at learning to write in cursive.
Try the cursive handwriting tips below to encourage students to start to learn cursive handwriting and for ideas to practice writing upper and lowercase cursive letters.
The cursive writing tips below can develop the skills needed to use cursive handwriting in a functional manner.
Cursive handwriting tips
Encourage students to practice cursive writing with these tips.
1.) Provide a comfortable space to practice cursive writing. Students can learn and practice cursive handwriting in a place in my home or in the school where they are comfortable, the area is well lit, students are set up with appropriate seating and desk positioning. Use this these tips for desk positioning and positioning self-checks as needed.
2.) Encourage students to work at their own pace when learning cursive handwriting. Many children learn at different rates for variety of skills. Cursive handwriting is no different! Kids will learn cursive handwriting naturally and at their own pace. While students should learn cursive letters in a particular order for success, it is essential to practice the skills at the child’s own pace.
3.) Display children’s cursive handwriting work proudly! Students will be excited to see what they have learned and to show off their new cursive writing skills. Offer words of encouragement and praise for cursive handwriting efforts. A positive experience can encourage more effort and a proud awareness of what they are learning. Print off a certificate of completion when all of the cursive letters have been learned. You can print a certificate below.
4.) Offer words of encouragement when kids make mistakes in learning cursive handwriting. This is a new skill for many students. Some students may not have seen cursive handwriting or may struggle with the mechanics of handwriting in general. Celebrate the small successes.
5.) Provide students with a variety of sensory-based creative writing strategies to help with learning the motor plan for each cursive letter. It can go a long way in making learning cursive fun and memorable.
If you’ve ever taken a close look at cursive letters, you might recognize common starting pencil strokes that connect letters together into groups. We discussed this in a previous post here on The OT Toolbox on cursive letter families.
Today, we’re playing a fun cursive writing game that recognizes the common beginning starting points and starting lines that make up cursive letters.
Cursive Writing Starting Lines are the beginning pencil movements that create letters. Take a look at the images below and notice the starting movements that make up each group of letters. These starting lines create the cursive letter families.
To create this cursive letter game, we used four different colors of index cards. On each one, draw the beginning cursive lines below.
Letters are grouped into families, but each card should only have the first pencil motion that makes up each group: a bump, a portion of a loop, an upward slant, and a rolling curve up.
On the reverse side of each card, write the corresponding letters in that group.
Students can be shown how each letter has similarities in beginning lines.
To play the beginning lines cursive writing game, create small flash cards with each letter. You can match colors for beginner cursive writers. Use a common color to make the activity more difficult.
Next, ask students to match the cards to the beginning lines card.
Turn all of the small letter flashcards over and play a memory game. When the student flips the letter over, they can flip over the corresponding beginning line mark. This game works well with cards and letters that are all a single color.
How can you show students that the letters are grouped by a common beginning start line?
Need help with the underlying skills needed for handwriting? Start here on our Handwriting resources page.
The Handwriting Book is a huge resource when it comes to addressing handwriting concerns. It’s a book written by 10 occupational therapists and physical therapists and refers to every underlying skill related to written work. This is a tool for therapists, teachers, and parents.