How to Teach Carryover of a Functional Grasp With Coloring

Recently, I had the opportunity to try a set of adaptive grip crayons and I had to share this therapy tool. Below, you’ll find information on the adapted grip crayons created by Effortless Art and strategies to impact carry over of handwriting goals, or just specifically pencil grasp and crayon grasp when writing or coloring.

We also used these fun crayons for the 3 Crayon Challenge. Read below to see how to use a 3 crayon challenge to work on carryover of pencil grasp and a grasp activity that kids will love to do! You’ll want to check out our recommendations for the best crayons based on age, development, and fine motor skills, too.

You can use these coloring strategies on coloring activities like our President’s Day coloring pages (great for any US holiday!).

Teach Carryover of Pencil Grasp and Grasp When Coloring

Use adapted crayons to work on carryover of pencil grasp and grasp on a crayon when coloring by helping kids strengthen the fine motor skills they need for handwriting and a functional pencil grasp.

When it comes to teaching kids to maintain a functional pencil grasp on a pencil or grasp on a crayon, one of the absolutely BIGGEST challenges for therapists is figuring out how to get kids to carryover the skills they accomplish in therapy sessions. A child may write or color with a functional pencil grasp when they are working one on one with an occupational therapist, but as soon as they are on their own for a writing or coloring task, the pencil grasp or grasp on the crayon is out the window! They revert back to the comfortable or easiest grasp they are used to.

This lack of carryover with pencil grasp is especially apparent when kids are creating novel work. You may notice this lack of carryover when a student is required to free-write a journal page or complete a short essay paragraph without copying from a source.  The functional and efficient pencil grasp is the first to go!

The same situation occurs when a child is coloring. When a child colors, they may complain of fatigue after a few minutes. This is especially true for the child with hand weakness or fine motor deficits. They usually revert to their atypical grasp patterns that impact function and distal mobility when coloring.

Over in our Sweet Ideas for Handwriting Help group, the carryover and consistency issue comes up again and again. So often, therapists have told me their biggest challenge with working on a functional grasp is the lack of carryover.

Use adapted crayons to work on carryover of pencil grasp and grasp on a crayon when coloring by helping kids strengthen the fine motor skills they need for handwriting and a functional pencil grasp.

What is a functional grasp?

So, when it comes to helping kids maintain a functional grasp on a pencil or crayon, there are a few tricks of the trade that can help. Today, we’re going to talk about how to help kids maintain a functional grasp when coloring.

Below are tips and tricks that help kids carryover a grasp that promotes a safe and efficient grasp when coloring.

Related Read: Read more about the many benefits of coloring here.

First, let’s talk about what makes up a functional grasp when coloring.

For the child who reverts to an atypical grasp when coloring, there can be a few things going on (click on each link below to read more about these specific underlying areas related to crayon grasp):

Use adapted crayons to work on carryover of pencil grasp and grasp on a crayon when coloring by helping kids strengthen the fine motor skills they need for handwriting and a functional pencil grasp.

How to teach carryover of a functional grasp when coloring

Use these tips to teach kids to carryover the grasp skills they’ve learned in therapy or in on-on-one sessions when coloring:

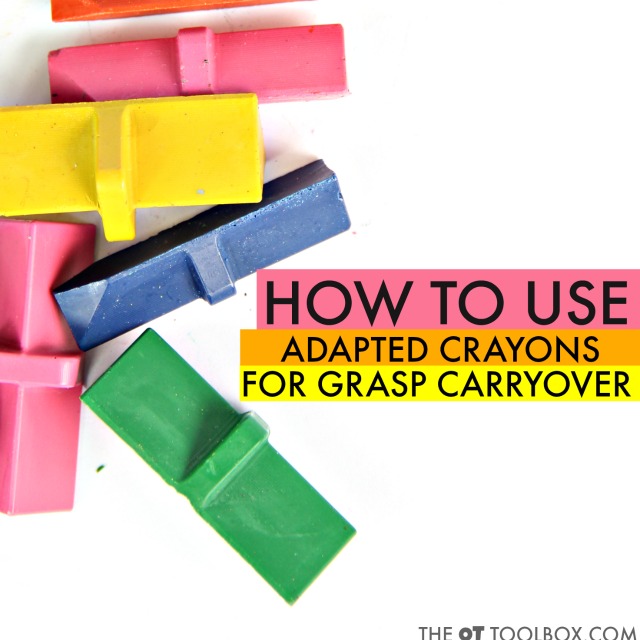
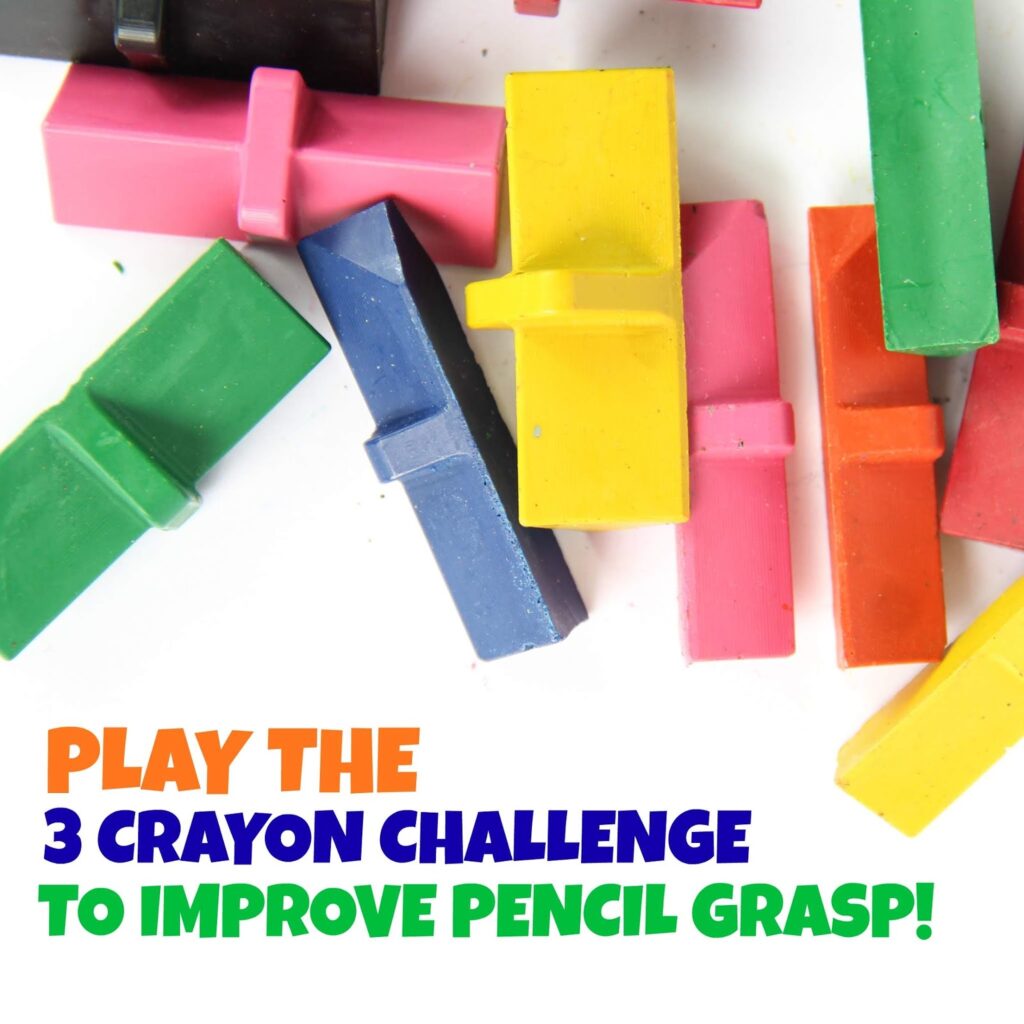
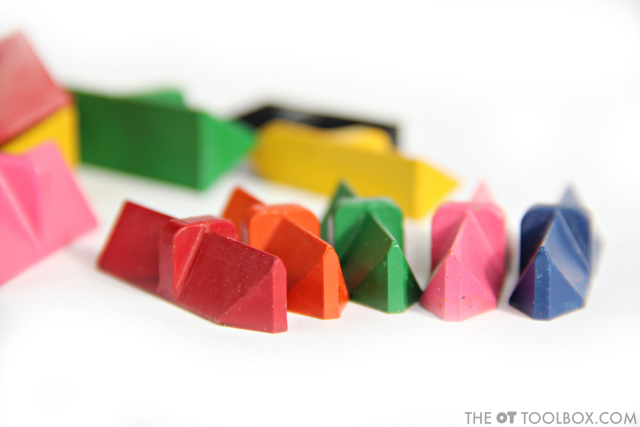
We used Effortless Art crayons, which are molded and adaptive grasp crayons to work on these skills. Amazon affiliate links are included below.

Effortless art crayons help kids maintain and carryover a pencil grasp to holding crayons when coloring.


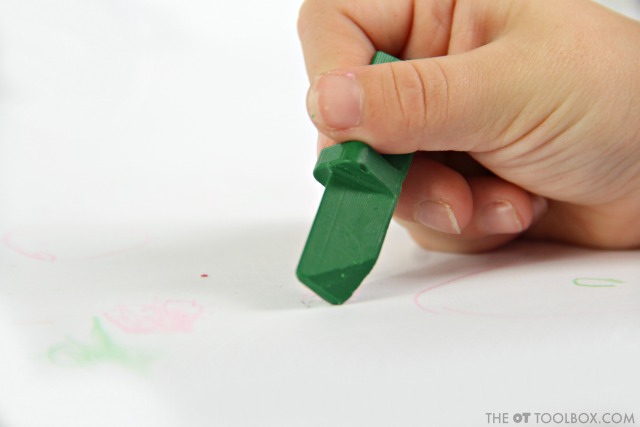
1. Use built-in adapted grip on molded crayons to use between color changes.
The built-in molding of Effortless Art crayons are perfect for helping kids easily switch between different colors while using the natural built-up grip on the shaft of the crayon. In fact, the Effortless Art crayons have a patent pending design which ensures that no matter how your child picks up a crayon, they’ll have proper grip and finger placement so they can effortlessly begin coloring right away.

Kids can strengthen te fine motor skills they need for carryover of a pencil grasp to coloring.

2. Promote distal mobility with a smaller coloring space to promote more precision and distal movement. The Level 2 Effortless Art crayons have a beveled edge that enables more refined precision for the advanced colorer! Asking kids to color in a smaller space encourages movement of the thumb and fingers to move the crayon as opposed to large movements that use the forearm or upper arm.

Play the 3 crayon challenge in occupational therapy activities to work on fine motor skills, pencil grasp, and hand strength.

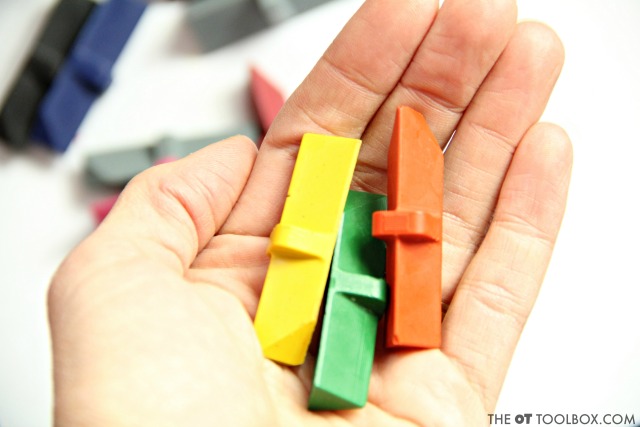
3. Use smaller crayons that fit in the thumb web space and promote opposition of the thumb to the pointer finger. One of the best tips to promote a functional grasp and separation of the sides of the hand is to use a smaller writing utensil. The shape and size of the Effortless Art crayons are small enough to fit in the hand while promoting opposition of the thumb to the pointer finger. Unlike larger molded crayons (like rock crayons or egg-shaped crayons) that are small but don’t allow for true opposition, the Effortless Art crayons have a molded shape that positions the precision side of the hand on the crayon every time. Now that is carryover and consistency!

Play the 3 crayon challenge on the wall to help kids strengthen their pencil grasp and grasp on crayons when coloring to improve fine motor skills and carryover, using adapted crayons like Effortless Art crayons.

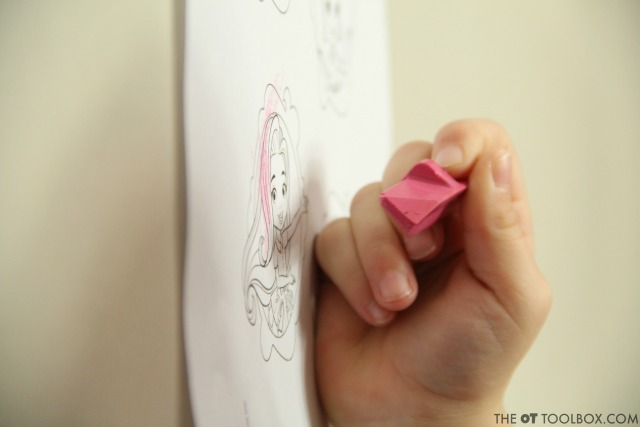
4. Elevate coloring pages on an easel or wall. An elevated position on a vertical surface puts the wrist into an extended position and pulls the thumb and pointer finger into a functional position. A DIY slant board works well too! In fact, ensuring consistency and carryover is easy if you use the DIY version to enhance wrist extension when coloring. If you hang a coloring page on a wall, tape a big sheet of paper under the coloring page first to prevent wall markings.

Play the 3 crayon challenge to improve hand strength and pencil grasp or grasp on crayons, using adapted crayons for better positioning and improvement of hand strength.

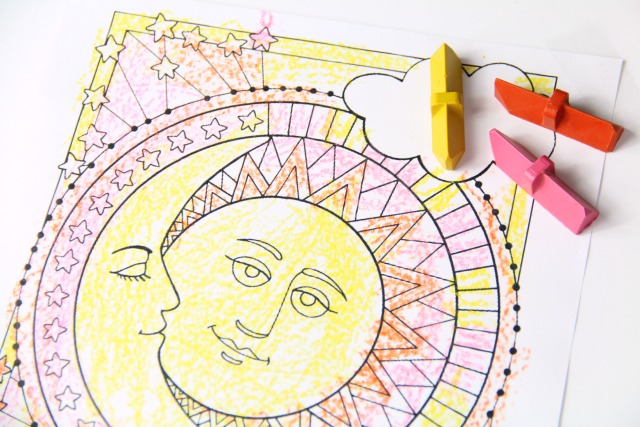
5. Make it fun! Like anyone, kids are intrinsically motivated by interests. I know my own kids are very into the three marker challenge that is taking over YouTube. So, why not make it a 3 crayon challenge and get the kids in on the challenge action? They will be motivated to do their best coloring, while switching colors and getting lots of crayon grasp practice in!

3 Crayon Challenge

Play the 3 crayon challenge to improve hand strength, pencil grasp or grasp on crayons and carryover of pencil grasp strategies for a more efficient grasp and improved hand strength.

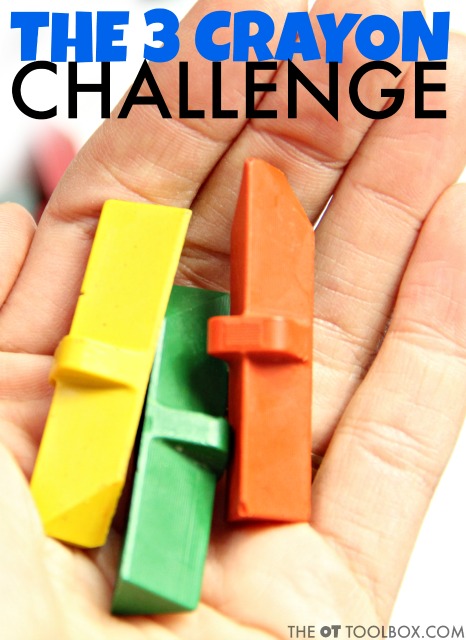
Play the 3 Crayon Challenge to sneak in the skills kids need to maintain consistency and carryover with grasp on the crayon. Here’s how to play (It’s pretty easy!):

1. Close your eyes.
2. Pick 3 crayons.
3. Color a whole page with the three crayons.

Check out this video we created:

The 3 Crayon Challenge to teach carryover of pencil grasp

Use adapted crayons to play the 3 crayon challenge to help kids work on hand strength and the fine motor skills they need for a better pencil grasp, using Effortless Art adapted grasp crayons in occupational therapy.

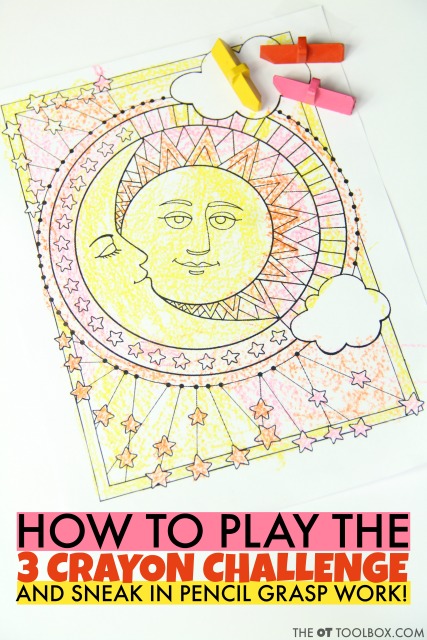
So, how does this fun challenge help kids carryover and use a functional grasp on crayons or pencils when writing? Well, coloring has so many benefits when it comes to strengthening the hands. Switching between the 3 crayon colors offers many opportunities to practice a functional grasp on the crayons. Additionally, kids can work on the visual motor skills needed for precision and line awareness when coloring.

We took the 3 crayon challenge up a notch and taped our picture to the wall. Coloring on a page on the wall really provides a therapeutic benefit to the task of coloring! Coloring on a vertical surface puts the arm, wrist, and hand into a position that promotes a functional pencil grasp. It encourages a tripod grasp, strengthens the arches of the hands, and separates the sides of the hand. What a powerhouse activity!

Using the Effortless Art molded crayons made this 3 Crayon Challenge an even better occupational therapy activity because there were so many opportunities to practice a functional grasp in a fun way!

3 Crayon challenge with adapted crayons to help kids strengthen their hands and fine motor skills for a better pencil grasp and carryover of pencil grasp.

More information about the Effortless Art crayon lines and the specific crayons:

Use adapted crayons to work on carryover of pencil grasp and grasp on a crayon when coloring by helping kids strengthen the fine motor skills they need for handwriting and a functional pencil grasp.

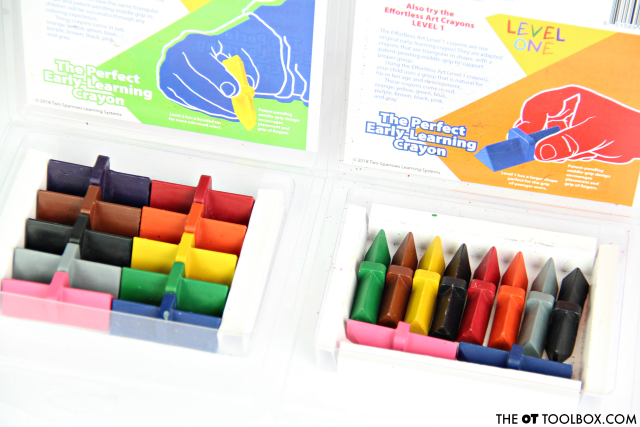
We had a blast trying out the Effortless Art crayon lines. The Level 1 version is great for beginners who are just beginning to progress through grasp development. The natural finger placement on the ridge or just below the ridge on the crayon allows for an open thumb web space, natural opposition of the thumb to the pointer finger, and placement of the middle finger as a support. This positioning pulls the precision side of the hand onto the crayon while allowing the power side of the hand to support the hand while coloring.

When this positioning is used on the crayon, the arches of the hand are developed, allowing for improved endurance when coloring.

Use adapted crayons to work on carryover of pencil grasp and grasp on a crayon when coloring by helping kids strengthen the fine motor skills they need for handwriting and a functional pencil grasp.

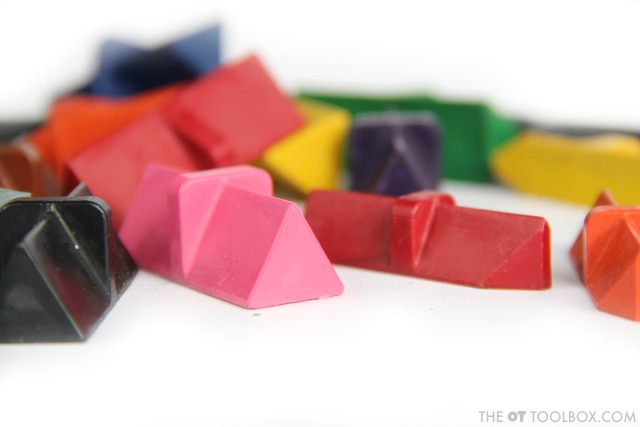
The second level of crayons is the Level 2 version, which has a smaller crayon shaft and shorter length. It’s also got a beveled edge which allows for coloring in smaller spaces and with more precision and distal mobility. These crayons can be purchased on the Effortless Art website, and should be available on Amazon soon.

Here are a few more features of the Effortless Art crayons and specific product features:

Effortless Art crayons are adapted grasp crayons to help kids learn to hold a crayon while improving the skills they need for pencil grasp and coloring..

How does increased attention span when coloring sound?  Recent studies have shown that children’s attention spans increase 20% to 60% when using Effortless Art Crayons compared to normal crayons.

Effortless Art Crayons are proud to donate to non-profit arts and early learning organizations and institutions are made from 100% recycled crayons.

You can find additional information on the crayons on the Effortless Art website. You’ll find that the crayons are available in packs of 5, 10, 60, 100, 120, and 200 on the website.

Have any questions? Direct customer questions about the Effortless Art crayons, interest in additional information on our products, or requests for additional information regarding the use of the crayons, to Effortless Art. The customer service team would be happy to review any questions.  Large orders made by schools or other interests may purchase from the website where volume pricing is available.

Need a large order? This bucket of 60 crayons would be perfect for the classroom!

Use adapted crayons to work on carryover of pencil grasp and grasp on a crayon when coloring by helping kids strengthen the fine motor skills they need for handwriting and a functional pencil grasp.

Eye-Hand Coordination Letter Match Activity

This hand-eye coordination activity is one that uses an item we had in the house (and you may too!) We love to use recycled and upcycled materials in occupational therapy activities and this eye hand coordination activity is no different! Working on the coordination skills needed for tasks like handwriting, self-dressing, managing clothing fasteners, and other skills. 
 
This hand-eye coordination activity doubles as a learning activity while matching letters and working on visual motor skills needed for tasks like handwriting, management of fasteners, coordination, and many functional tasks. Looking for more eye-hand coordination activities? 
 
For younger kids, this hand eye coordination activities for toddlers is a great resource,

Hand-Eye Coordination

This hand-eye-coordination activity is one that kids can use to work on the hand-eye coordination skills needed for motor planning, fine motor skills, and functional tasks like handwriting and other fine motor tasks.

 
First, let’s define hand-eye coordination. Coordination between the visual input our eyes perceive and process and the coordinated motor movements are an integration of the visual and motor systems. This is eye-hand coordination as it is used in functional tasks. Eye hand coordination is necessary for every functional skill. 

Hand-eye coordination activity

Amazon affiliate links are included below. 
 
This activity used a recycled cookie cake pan that we washed out and used in a bilateral coordination eye-hand coordination activity. Besides the cake pan (save that lid, too!), we used just two other items:
 
Small foam ball (A sports ball works great, but a ping pong ball would work for this activity too.)
 
Can’t find a pan like we used? A disposable container with a clear lid (like this one) would work too!
 
Related: Need some indoor bilateral coordination activities like this one? Try our list of Winter Bilateral Coordination Activities that kids will love!
Use a disposable cake pan to work on hand-eye coordination in occupational therapy activities to work on visual motor skills, bilateral coordination, visual skills and so many other areas of child development.

How to set up the hand-eye coordination activity:

1. Peel the stickers from the sticker sheet and randomly place them around the cake pan. 
 
2. Place the foam ball in the cake pan and pop the lid into place. 
 
That’s it! This is a super quick set-up and an activity that can be used by so many clients or students to work on a variety of areas.
Kids can use a recycled cake pan to work on hand-eye coordination and visual motor skills needed for reading, writing, and many other functional skills in occupational therapy activities.
Kids can use this eye-hand coordination activity to work on fine motor skills, visual motor skills, bilateral coordination and other areas in occupational therapy to work on tasks like handwriting, reading, writing, and so many other areas.

Hand-Eye Coordination Activity with Letters

Ask students to roll the ball from letter to letter as they look for specific letters. 
 
Roll the ball to letters in alphabetical order or ask he child to spell out spelling words. 
 
Older students can spell words in sentences. 
 
Call out random letters as students roll the ball as they visually can for each letter.
 
Roll the ball from one letter to another to match letters.
 
Incorporate handwriting by asking the child to roll the ball for 4 seconds. When a timer goes off, they child can write a list of words starting with that letter.
This ball and letter activity helps kids develop hand-eye coordination needed for tasks like handwriting, reading and other occupational therapy activities.


Hand-Eye Coordination Activity for Kids

This eye hand coordination activity addresses so many other areas as well:
Gross motor skills
Form constancy
Visual discrimination
 
Looking to work on the visual skills that play into motor output, motor planning, and eye-hand coordination activities? Our Visual Screening Tool may help.
A simple occupational therapy activity uses just a ball and letter activities to work on hand-eye coordination and the visual motor skills needed for reading, writing, math, functional skills and so many other areas.

More on eye-hand coordination skills:

For even MORE information on eye-hand coordination and the visual skills needed to complete visual motor and eye-hand coordination, or to better understand visual processing, you will want to join our free visual processing lab email series. It’s a 3-day series of emails that covers EVERYthing about visual processing. We take a closer look at visual skills and break things down, as well as covering the big picture of visual needs.

In the visual processing lab, you will discover how oculomotor skills like smooth pursuits make a big difference in higher level skills like learning and executive function. The best thing about this lab (besides all of the awesome info) is that it has a fun “lab” theme. I might have had too much fun with this one 🙂

Join us in visual processing Lab! Where you won’t need Bunsen burners or safety goggles!

Click here to learn more about Visual Processing Lab and to sign up.
Free visual processing email lab to learn about visual skills needed in learning and reading.
 
 
If you are unsure when to refer or having a hard time getting a parent on board, check out my ​OT Vision Screening Packet ​for more information. It contains a screener for therapists and useful handouts for parents on why addressing vision is important to their child’s success.

 
This is a digital file. Upon purchase, you will be able to access the 10 page file and print off to use over and over again in vision screenings and in educating therapists, teachers, parents, and other child advocates or caregivers.
 
Use a visual screening tool like this occupational therapy screening tool to address visual processing skills like visual convergence and to guide visual convergence activities in therapy.
A hand-eye coordination activity for kids that helps with visual skills like convergence, visual tracking, visual scanning, and motor components like bilateral coordination, precision, and motor planning needed for the eye-hand coordination that are worked on in occupational therapy activities.

Turn a $1 Pencil Box into a Therapy Power Tool

This pediatric occupational therapy activity box is a fun way to store and sort occupational therapy supplies for kids in schools, in home occupational therapy services, or for the school-based OT who travels from building to building. Pediatric occupational therapy activities and tools can be be used as an occupational therapy activity tool too! Read how to turn a dollar store pencil  box into an occupational therapy tool for kids.

Pediatric Occupational Therapy Activity Tool

These pediatric occupational therapy activities use a dollar pencil box and common materials to work on fine mototr skills, visual motor skills, coordination, crossing midline, bilateral coordination, and dexterity with kids.
How to turn a $1 pencil box into a therapy tool! 
A pencil box is a simple school supply.  It serves the purpose of storing a child’s pencils, pens, crayons, erasers, scissors, pencil sharpener, and more.  Therapists use a pencil box in occupational therapy to store similar materials with the addition of some OT gadgets such as adaptive scissors and pencils, fidget tools, pencil grips and more.  
Use a pencil box as a pediatric occupational therapy activity toolbox when filling it with fine motor items and other tools to improve fine motor skills.
Pencil boxes come in a variety of styles, colors, sizes, and designs and kids love going to the store right before school begins and picking out just the right one. But have you ever tried using one AS a therapy tool?  
Although storage is their purpose, you can turn a simple pencil box into a occupational therapy activity toolkit to address a variety of fine motor skills. It just takes a little imagination.
Below are 6 ways you can turn this Sterilite pencil box into many fun and unique occupational therapy activities to address fine motor hand skills. This pencil box was purchased at Target for a $1.

DIY Pediatric Occupational Therapy Activities

Amazon Affiliate Links are included in this post. You can purchase the items described below in this list or through the links below. 
Use a pencil box in pediatric occupational therapy activities to improve skills like strength and bilateral coordination in occupational therapy activity.
1.   Prior to giving the pencil box to the child, wrap the box with multiple rubber bands to work on hand strength, bilateral coordination, and upper extremity control. Have the child use two hands to remove the rubber bands in order to open the box.  When all activities are completed, have the child replace the rubber bands around the box.  The rubber bands will also ensure the lid doesn’t accidently pop open during transport spilling all of your therapy fun.
Use pony beads and a pencil box in pediatric occupational therapy activities for kids.
2. You can use the squares on the lid to work on pinch and precision skills with the use of pony beads.  Have the child pinch specific colored pony beads and directly place them into the indented squares on the pencil box with up to four pony beads each square.
3.  You can use the squares on the lid to work on tool grasp, distal control, prewriting and writing skills with the use of a dry erase tool. Have the child trace inside of the squares to draw a square or have the child color inside of the squares to work on coloring skills.  Letter writing is another option and it is a unique approach to practice!  Erase with a pom-pom to address pinch pattern and strength. 
This pediatric occupational therapy activity uses binder clips and a pencil box to improve bilateral coordination skills and fine motor skills in occupational therapy with kids.
4. You can use the edge of the pencil box to work on pinch, finger strength, bilateral coordination, and visual motor skills. Have child squeeze open binder clips and place them around the edges of the box either at random or in a color pattern.
This pediatric occupational therapy activity helps kids with fine motor skills, bilateral coordination, and eye-hand coordination in occupational therapy.
5.  After binder clips are assembled onto the edge of the box, push one side of the clips down and have child work on threading a lacing cord through the loops of the clips using a weaving or looping pattern. 
Work on skills like visual scanning, visual perceptual skills, letter identification, and fine motor skills in occupational therapy activities with kids.
6.  With the pencil box filled with an assortment of beads, write letters on the inside of the lid with a dry erase tool and then have child locate those targeted beads to string on a pipe cleaner.  Take turns and have the child write letters for you to find and string onto a pipe cleaner.

Think Out of the Box with Occupational Therapy Activities for Kids!

Although some of the occupational therapy activities are designed specifically for this type of pencil box, I hope you can now look at pencil boxes differently and begin thinking “out of the box” for activities you can do with kiddos during your therapy sessions.
Use a pencil box in pediatric occupational therapy activities.

The Cutest Little Pencil Grasp Trick

Over on Instagram this week, we shared our pencil grasp trick with a treasure chest theme. This pencil grasp trick is one that helps so many kids because there is a common reason for poor pencil grasp, that can be easily remedied. In fact, for kids struggling with pencil grasp and teachers or parents who are looking for how to teach pencil grasp or where to get started with teaching pencil grasp, this is a creative way to begin. 
Teaching pencil grasp begins with fine motor skills. If you are looking for fun ways to work on the fine motor skills needed for a functional pencil grasp, start on our fine motor page.

Pencil Grasp Trick

Use this pencil grasp trick to teach kids how to hold a pencil and how to write with a better pencil grasp.
In this pencil grasp activity, we are promoting separation of the sides of the hand. This skill is an area that can make a huge difference when it comes to encouraging a functional grasp when writing. 
Read more about separation of the sides of the hand and why this is an essential skill to master for pencil grasp. 
To encourage separation of the sides of the hand, we used a treasure chest themed activity and some gems that we received from www.craftprojectideas.com.

How to teach pencil grasp with a fun treasure chest pencil grasp trick:

This pencil grasp trick was easy to prep. You’ll need just a few materials:
(Amazon affiliate links are included below.)
Brown washable marker
To create this activity, simply draw a simple treasure chest on the ulnar side of the child’s palm with the washable marker. 
This act alone is often times one that sparks interest in a child who struggles with motivation and self-confidence in handwriting. 
Then, show the child that you are going to put some gems or “jewels” into their treasure chest. 
Ask them to keep the treasure safe and show them how you can fold their fingers down onto the treasure chest. They should cover the gems with just the ulnar digits, or the pinkie finger and ring finger. 

Separation of the sides of the hand

 Now ask them to pick up cgems with just their thumb and pointer finger while they keep the gems squirreled away in their palm. This is effectively separating the sides of the hand!
Next, ask the child to keep those gems hidden away in their palm while they write with a pencil. This separates the sides of the hand while holding the pencil and writing, allowing for a functional pencil grasp. 
Like this idea? Watch our Instagram page for more creative pencil grasp activities coming your way soon, all part of our #pencilgraspchallenge!
If you didn’t see this activity over on Instagram, then be sure to head on over to our IG page and follow along. We would love to connect with you over there! 

Saccades and Learning

Read below to learn about visual saccades and learning in kids, including how saccades affect learning, more about what are visual saccades, or visual scanning, and what saccadic movement looks like. You’ll also find information on saccades and smooth eye movements and the visual processing needs that impact learning. This information on vision can be helpful for the occupational therapist working with a child or student with vision related learning challenges as a result of visual saccades.

Visual Saccades and Learning


Saccades and saccadic eye movements have a huge impact on learning and reading.


For more information on saccades, check out this post on what exactly is visual scanning.

As therapists, we are often asked to provide consultation services to a child who cannot copy from the board, from one paper to another, frequently loses their place while reading, and has frequent errors in spelling and writing tasks, along with sloppy handwriting. These children are typically in first or second grade, maybe even third. They are good students who appear to be struggling for some unknown reason.  An underlying vision concern may be the culprit of these student’s difficulties, with the underlying concern being impaired saccades, or visual saccadic movements. 

What are visual saccades? Saccadic eye movement is so essential for reading and learning!


What are Saccades?

Saccades Definition: 

Saccadic movement, or more commonly known as saccades, is the ability of the eyes to move in synchrony from point A to point B rapidly WITHOUT deviating from the path. 


Typically, we look for these patterns to be established in left/right and top/bottom patterns as they are the easiest to identify. 


However, if the saccadic movement is not impaired, the eyes should be able to move in all directions in synchrony between two or more given points. 

Saccades and Pursuits


Before moving on, I want to clear up the difference between saccades and smooth pursuits. 


These two are often confused, but are really very difference. Saccades and smooth pursuits are the two parts of eye teaming. 


Smooth pursuits allow visual tracking of a moving item while saccades allow synchronized, rapid eye movement between two or more given points such as in visual scanning.

Impaired Saccades


Impaired saccadic movement is when the eyes do not move in synchrony in a designated pattern such as left/right and top/bottom. 


They may jump randomly or move in uncoordinated patterns that can lead to confusion of where the child was previously in reading and written work. 

What Do Problems with Saccades Look Like?

Below is a simple passage that we would expect a first grader to be able to read and what they might read with an impairment of saccadic eye movement.


The black cat sat next to the pumpkin. 
The black cat liked the pumpkin. 
The black cat meowed at the pumpkin.


This is what a child with impaired saccadic eye movement may have read:


The cat sat to pumpkin. 
The black cat liked pumpkin. 
The cat meowed the pumpkin.


This example is a demonstration of the “jumping” that may occur when reading or copying a sentence. While the child was reading, they may have stumbled and corrected themselves realizing they were not in the right spot and missing words along the way. 


Children who present with impaired saccades ofen times are shy when reading out loud to peers and adults because of this. 

Identifying Saccadic Impairments


Impaired saccadic movements are very difficult to see in screenings. The most common presentation of impaired saccadic movement is slight jerks, or jumps at the midline or outer edges of field of vision. They are so small, that they can be missed or mistaken for a twitch. Despite their small outward appearance, impaired saccadic movement can have significant impacts on the child’s learning.


In therapy or a classroom setting, having a child read the letters of a simple word search from left to right and top to bottom can provide an indication if they are unable to follow structured patterns with supports such as pointing with a finger, or covering up the lines under the one the child is looking at.


Here are some helpful strategies that can accommodate for visual problems in the classroom.

What Causes Saccadic Impairments?


It is unclear what causes saccadic movement impairments in children. It is clear however, that the child’s eyes have not learned to move in structured patterns between two points rapidly, which can significantly inhibit the learning process.  

Signs of Saccadic Movement Impairments in the Classroom


Like many underlying vision concerns, screenings alone cannot determine impairments. 


Some supporting signs that a child may have a saccadic movement impairment can be found below: 


• Difficulties copying work from the board to a paper without errors or omission of words
• Difficulties copying work between two papers without errors or omission of words
• Difficulties reading passages of work—specifically 2 or more lines of text
• Losing place when reading frequently
• Utilizing a finger to track when reading 
• Frequent errors when spelling
• Poor spacing and orientation to the line when writing 

Final Note on Impaired Saccadic Movements


Saccades plays a crucial part in eye teaming, reading and writing. When it is impaired, the child may experience high levels of frustration, embarrassment and difficulties with their daily reading and writing tasks.  Like many underlying vision deficits, impaired saccadic movements has many variations in presentation, and should be monitored closely by therapists and educators to ensure referrals to the developmental optometrist are made when necessary. 

More information on saccades:

For even MORE on visual saccades and the impact visual skills play in learning, you will want to join our free visual processing lab email series. It’s a 3-day series of emails that covers EVERYthing about visual processing. We take a closer look at visual skills and break things down, as well as covering the big picture of visual needs.

In the visual processing lab, you will discover how oculomotor skills like smooth pursuits make a big difference in higher level skills like learning and executive function. The best thing about this lab (besides all of the awesome info) is that it has a fun “lab” theme. I might have had too much fun with this one 🙂

Join us in visual processing Lab! Where you won’t need Bunsen burners or safety goggles!

Click here to learn more about Visual Processing Lab and to sign up.


Free visual processing email lab to learn about visual skills needed in learning and reading.


Looking for more information on vision? Check out my OT Vision Screening Packet for helpful handouts and a screening tool.

Occupational Therapy Vision Screening Tool

This visual screening tool was created by an occupational therapist and provides information on visual terms, frequently asked questions regarding visual problems, a variety of visual screening techniques, and other tools that therapists will find valuable in visual screenings. 

 
This is a digital file. Upon purchase, you will be able to access the 10 page file and print off to use over and over again in vision screenings and in educating therapists, teachers, parents, and other child advocates or caregivers.
Saccades and learning, read more to find out what are saccades, how to screen for visual saccades, and what saccadic impairments look like.
More Visual Processing Posts you will love: 


Following Direction Activities

These following direction activities are directionality activities that can help kids learn directions or spatial concepts such as left, right, up, down, and compass directions (north, south, east, and west) with a motor component. This hands-on learning activity really gets the kiddos moving and learning! 


We’ve shared directionality activities before that help kids navigate and use maps with movement. 

Following Direction Activity

These direction following activities can help kids learn directionality such as left/right awareness, laterality, and directions needed for navigating.

Teaching kids to follow the directions they need to physically move right, left, up, down requires development of spatial concepts such as spatial reasoning. This can be a real challenge for some kids! 


Following directions and understanding of spatial concepts is a foundation for understanding and utilizing compass directions or the cardinal directions of north, south, east, and west, and the use of maps. 

Left Right Confusion Direction Challenges

It can be a real challenge for some kids who struggle with the spatial understanding of following directions, or understanding their left from right in a subconscious manner. 


Have you come across the child who is told to raise their right and and they take a five second count to stop, think, and then raise their hand? They might hesitate when raising one hand or the other and still be uncertain whether or not they have held up the correct hand. Then, when the teacher, parent, or anyone else really, says the inevitable, “Your other right hand…”, the child feels a sense of discouragement and self-consciousness that doesn’t drive in the underlying need to really know the right from left! 


That’s where a directionality activity or following direction activity can come into play. Adding a physical component to learning directions and the difference between right, left, up, and down and what that looks like in relation to the child’s body can be such a helpful force in driving home this concept. 

Why work on directions with kids?

Working on the ability for kids to follow directions and spatial concepts is so important for kids. The direction/spatial relationship/preposition words that tell you where something is related to something else (beside, in front of, behind, over, under, around,  through, last, etc.) are very important when teaching math and handwriting concepts. Directionality and the ability for kids to follow physical directions is important for discovering where their bodies are in relationship to objects. This translates to following directions when getting from place to place by following a map or the cardinal directions.


When kids picture a scene in their mind’s eye and use that image to draw a map on paper, they are using higher thinking skills and spatial reasoning.

Directionality Activities

Amazon affiliate links are included below. 


The fun idea below comes from a new kids’ activity book that we’re devouring. It’s the new Playful Learning Lab for Kids, by the occupational therapist and physical therapist team at The Inspired Treehouse. It’s a book full of whole-body and sensory activities that enhance focus, engagement, and learning through movement and interaction.

Playful learning Lab activities for kids to learn through whole body movements


We used just a few materials to create this following directions activity:


Playful Learning Lab for Kids Book
Cardstock
Marker
Scissors

Use arrows to work on following directions and learning directions or directionality.


This is a simple activity (perfect for the classroom or homeschool when teaching directions!). First, draw and cut out large arrows from the cardstock. 


Next, place them along the floor in a path and start playing! 

Teach kids about directions and left right awareness or directionality through whole body movements with arrows!


There are so many ways to use these arrows to work on following directions and directionality:

1. Place the arrows on the floor for a fun brain break or sensory walk that uses directions as the kids work on following directions to stand in the direction the arrows are pointing. 

Direction following activities with arrows are a fun way to teach kids directionality and teach left and right with movement.


2. Name a cardinal direction or spatial direction and ask the child to point to the corresponding arrow. 


3. Place the arrows in a compass rose on the floor and ask kids to “step into a map” on the floor as they move north, south, east, and west.

Teach spatial concepts and spatial reasoning with arrows.

4. Stick the arrows to a wall using tape. Ask the students to write out a list of words that describe the directions the arrows are pointing (left, right, up, and down).


5. Hold up a sequence of arrows pointing in different directions. As the child to remember the pattern or order as they complete a series of side steps, front steps, or backward steps to follow the directions they see. 


6. Work on left/right directionality by holding up an arrow pointing in either the left or right directions. Kids should call out “Left!” or “Right!” when they see the direction the arrow is pointing. 

Teach kids directions and north, south, east, west using arrows and directionality concepts.


All of these following direction activities are ones that can be completed as on an individual basis or with a whole group. It’s a great mini brain break for the classroom and can be incorporated into the classroom curriculum by working on cardinal directions. 


Want to grab more movement-based learning ideas that you can start on today? You will love the bright pictures, sensory-based activities, and whole-body activities in Playful Learning Lab for Kids


It’s available now and is the perfect way to add movement to learning to improve attention, focus, brain function, remembering and learning!


This book will shift your entire mindset so you can begin to replace sedentary, one-dimensional lessons and worksheets with whole-body, multi-sensory activities that can instantly create a classroom or house full of active, engaged learners.


Playful Learning Lab for Kids is available on Amazon.

Ice Cream Play Dough Mat

free play dough mat with ice cream theme

This Ice Cream Play Dough Mat is a free printable playdough mat that helps kids build hand strength and fine motor skills, all with an ice cream theme. This is such a fun play dough activity for fine motor skills that kids will love!

When kids show weakness in their hands, it can be hard to know where to begin. Luckily, there are benefits to using play dough as a fun tool to support hand weakness. Typically the child is frustrated by the very activities or tasks that strengthen hands. There’s a reason why: it hurts! Their hand is fatigued and tasks like coloring are HARD! What if I told you a fun activity that involved an ice cream theme and play dough could take care of the fine motor struggles? When kids use this ice cream play dough mat, hand strengthening is sure to follow!

Use this ice cream play dough mat to help kids improve fine motor strength, specifically intrinsic hand strengthening with a fun play dough activity and a play dough mat activity.


Ice Cream Play Dough Mat

If you’ve been following The OT Toolbox over the past few weeks, you’ve probably seen a few play dough mats on the site. We’ve shared a couple of fun play dough mats that encourage intrinsic hand strength for a reason: Hand strengthening is SO important for our kids!


This free printable play dough mat is a fun one. Kids can create small balls of play dough that fit the various sizes on the ice cream images. all while working on the intrinsic hand strength and the fine motor skills that they need for tasks like pencil grasp, endurance in coloring or writing, accuracy with scissors, dexterity to manipulate very small items like coins, and coordination for tasks like buttoning or zippering.


Using a play dough mat like this one creates a fun opportunity for strengthening the intrinsic muscles of the hands.

You can use the play dough fine motor skills exercises we show in the video below along with the Ice Cream Play Dough Mat. It’s a great way to improve hand strength, using finger strength exercises, and grip strength exercises.


Intrinsic Hand Strength Activity

When kids use play dough in the tips of their fingers and thumb, they are really working the small muscles of the hand, or the intrinsic muscles. These are the ones that ensure arch development and contribute to separation of the sides of the hand, both which are SO important when it comes to fine motor skills and use in small motor tasks.   

Get the kiddos busy with this ice cream play dough mat to work on that intrinsic hand strength with this free printable playdough mat. You’ll want to cover it with a durable surface so you can print it off once and use it over and over again.    Remember to ask the child to use just one hand and only the tips of the fingers and the thumb to roll the play dough balls of various sizes to fit the circle forms on the ice cream playdough mat.   


Free Ice Cream PlayDough Mat:

Looking for more play dough mats or play dough activities? Be sure to grab your Astronaut Play Dough Mat and your free Outer Space Play Dough Mat.

Here are more free play dough mats that you can print off and use to work on hand strength endurance, and fine motor skills:

Free Bird Play Dough Mat

Free Toys Play Dough Mat

Free Astronaut Play Dough Mat

Free City Skyline Play Dough Mat

Grab your free printable ice cream theme play dough mat here and start working on that intrinsic hand strength! 

Grab this FREE printable Ice Cream themed play dough mat to help kids strengthen the intrinsic muscles of the hands!

    We won’t send you spam. Unsubscribe at any time.
     
     
    Print this free ice cream play dough mat and work on fine motor strength such as intrinsic hand strength and general hand strengthening needed for fine motor tasks such as handwriting and pencil grasp.


    Colleen Beck, OTR/L has been an occupational therapist since 2000, working in school-based, hand therapy, outpatient peds, EI, and SNF. Colleen created The OT Toolbox to inspire therapists, teachers, and parents with easy and fun tools to help children thrive. Read her story about going from an OT making $3/hour (after paying for kids’ childcare) to a full-time OT resource creator for millions of readers. Want to collaborate? Send an email to contact@theottoolbox.com.