Lowercase Letter Formation

lowercase letter formation activities

Teaching kids to write lowercase letters can be a tricky task. Kids are exposed to different techniques depending on if they went to preschool or not. Some children pick up on lowercase letter formation easily and others struggle with reversals, placement on lines, and accurate letter formation. Today, I’ve got some tips and tricks to teach kids how to write lowercase letters and a tool that kids will love.

Lowercase letter formation activities

Lowercase Letter Formation

Teaching lowercase letter formation can be fun! We’ve shared quite a few ways to use creative activities in teaching kids to write letters here on the website. One such activity is using a sensory means with baked cotton swabs.

Like we talked about in yesterday’s play-based learning post, we know that adding movement, play, and a creative component to learning allows kids to engage with learning in a way that allows children to truly benefit from the learning experience.

Ways to work on lowercase letter formation

Using play and movement in working on letter formation takes just a little out of the box thinking. Here are some ways to teach letter formation with movement and play.

Use a sensory writing tray to teach lowercase letters.

Add movement! Add motor components to teaching letter formation as kids learn how to form big lines down, curves, and slanted lines. Letters can be acted out with letter formation rhymes or with themes.

Use a color by letter worksheet to work on fine motor skills and the letter discrimination skills needed for connecting a lowercase letter to an uppercase letter.

Build lowercase letters with play dough, slime, wikki stix, yarn, or paper strips/paper curves.

Trace and then re-trace the letters on a dry erase board. Rainbow writing offers several chances to practice letter formation.

Trace letters with a finger. Then use finger paint, pudding, dish soap, lotion, or cooking oil.

Want an easy, on-the-go tool for working on lowercase letter formation in a fun and engaging way? I’ve got a fun way to help…

Lowercase Letter Formation Kit

Muscle Movers are a tools for working on letter formation with a focus on movement, motor planning, gross motor skills, and play.

Heavy duty laminate cards with letters on one side, unique animals and activities on the other – the educational opportunities are endless.

Use the cards for letter recognition and getting the wiggles out, add Wikki stix or PlayDoh to allow your Little Learner to use their fine motor skills to form the letters on the card and finally practice with the included dry erase pen.

I Can Build Letters! Magnets (with a magnetic dry erase board)– This set includes hands on letter building with colorful lines and curves used to work on letter formation. These colorful, super-strong magnets allow help improve problem solving and fine motor skills while visually supporting letter formation. These can be used on any magnetic surface.

I Can Build Letters guide– Use this guide as a companion to the I Can Build Letters! Magnets. Your child can start by building the letters on top of each guide on a regular surface, progress to a magnetic surface and then ultimately build letter puzzles with the color builder guide

I Can Write Letters! Workbook– Little Learners start writing using Fundanoodle’s zip, zoom, and buzz terminology. With our grid paper, they learn how to keep their letter a consistent size and we introduce the letters from easiest to hardest to write to develop confidence. And each book includes a series of practice pages and a reward sticker system

The Fundanoodle Letter Fun Kits come in a colorful zippered tote for learning on the go!

More lowercase letter writing activities

Some of the smartest and most creative folks I know are the readers of The OT Toolbox. I asked readers to tell me sensory strategies they personally love and use to address sensory modulation. Scroll through the comments…you might just find some new sensory strategies that will work for you! Hopefully we can learn from one another!

Also, check out these other soy suggestions based on therapeutic development through play.

  1. Fine Motor Toys 
  2. Gross Motor Toys 
  3. Pencil Grasp Toys 
  4. Toys for Reluctant Writers
  5. Toys for Spatial Awareness 
  6. Toys for Visual Tracking 
  7. Toys for Sensory Play 
  8. Bilateral Coordination Toys 
  9. Games for Executive Functioning Skills 
  10. Toys and Tools to Improve Visual Perception 
  11. Toys to Help with Scissors Skills
  12. Toys for Attention and Focus 

Sensory Friendly Clothing

Sensory friendly clothing is a must for kids with sensory processing needs. Heck, sometimes that itchy sweater or scratchy jeans get on my nerves, too! Today we are chatting all things sensory friendly clothing. Sensory issues with clothing are a common concern. Even winter sensory clothing issues are something to think about. You’ve probably noticed that itchy tag or a turtle neck sweater that just drives you nuts. But what about our kids with sensory issues?

Sensory friendly clothing

Before we get into the nuts and bolts of sensory friendly clothing, it’s helpful to have a few resources on hand. Read up on our articles on clothing sensitivity red flags, weighted vests and compression garments, as well as clothing fasteners because all of these supports can help.

Finding clothing for sensory issues can be a puzzle and an an adventure! Today we are talking about sensory friendly clothing and how something as simple as sensory friendly pajamas can make a world of difference in the child with sensory processing disorder or sensory needs.

Sensory friendly clothes and common sensory clothing issues that kids have.

Sensory Clothing

Many times, our kids with sensory processing needs struggle with tactile defensiveness or sensitivities when it comes to clothing. It’s nothing new to find that certain materials, seems, or clothing articles are itchy, scratchy, bumpy, rough, or even hurt our kids. Parents of children with sensory needs find that addressing sensory clothing issues is a real struggle. It’s just one more aspect of daily life that needs adjusted, modified, or adapted.

Meeting the needs of the child is essential for function and self-care. In fact, that independent functioning at the “just right” level is the foundation to daily life. Self-care is a priority of parents and allows children to become more self-reliant (Chiarello, 2015). It builds skills, develops self-awareness and self–esteem. Self care by identifying and understanding one’s particular preferences and using those day in and day out in self-care tasks brings us full circle in the way of functioning.

While there are ways to adapt clothing to make it less of a tactile issue, and addressing sensory sensitivities through sensory diets and sensory input is helpful, sometimes, meeting the child’s specific needs makes sense in the way of adaptive clothing that meets the needs of the child.

Sensory Clothes on the Market

Luckily, we are in an age of more awareness and inclusion. We have seen more and more sensory friendly clothes on the market and readily available in stores. We are able to use what is out there, and when the specific adaptive clothing is not available, we can sometimes adjust what we’ve got to make it meet the child’s needs.

You may have seen sensory clothing available in stores and online. The fact is that these items are more readily available. And, that is a wonderful thing to see! Prices, styles, and selection are improving. Costs are becoming more affordable. Our children with sensory needs can better thrive as a result.

Sensory Clothing Issues

There are certain aspects of clothing that are a common complaint for those with sensory processing issues impacted by clothing sensitivities. Some common complaints include:

  • Annoying Seams on clothing
  • Bumps or wrinkles in fabric
  • Tags that itch and scratch
  • Rough material
  • Clothing that bunches
  • Clothing that doesn’t “give” or stretch
  • Wide leg or arm openings that “flap” around the wrists or ankles
  • Clothing that is too tight or too loose
  • Pressure from shoes or footwear that doesn’t bend or give
  • Elastic waistbands
  • Padding or underwire in bras
  • Shoulder straps that are tight or too loose
  • Clothing that doesn’t breath or holds moisture from sweat
  • Clothing that never seems to fit “just right”

All of these concerns are sources for a daily battle when it comes to getting dressed and with the end result of independent self-care and self-dressing for kids. Getting out the door and onto the school bus can be a daily struggle that leads to a meltdown before the day even begins.

The same situation can occur at night when children with sensory processing disorder are asked to get dressed into their pajamas…those itchy pjs that bunch and pull…it’s a nightly battle that results in a pre-bedtime meltdown and hours of restlessness when what the kiddo and parents really need are rest and sleep.

Sleep and sensory needs

Occupational therapy practitioners often support and work with families of children with an autism spectrum disorder or another developmental disorder to address function as it relates to effective sleep. Sleep deprivation can impact the child, the family, and functional abilities on a day-to-day basis. When a child with sensory processing needs struggles to find rest as a result of clothing issues, meltdowns at bedtime, or frequent waking as a result of sensory avoiding or sensory seeking behaviors, sleep is impacted.

OT professionals aim to address a variety of needs impacting restful and adequate sleep. One such strategy for sensory needs is to suggest sensory friendly pajamas and clothing (Picard, 2017).

Want to try a pair of sensory friendly pajamas to address sensory issues like the one discussed today? Let’s take things up a notch by getting a sensory clothing into your hands.

One sensory clothing company that really addresses the sleep and sensory component is Lovey & Grink. These sensory friendly pajamas are fun and comfortable pajamas that they are excited to put on before bed. So often, kids complain that pjs are hot or scratchy. It can result in a nightly meltdown.

Take a look at many of the sensory pajamas out there on the market. When you look for super soft pajamas, you might notice that most of the softer pajama brands we saw were prone to shrink or really expensive. Lovey & Grink pajamas are kid tested and approved and best of all, reasonably priced. A bit more about these sensory pajamas”

  • Breathable (keeping your kids cool)
  • Durable (they’ll hold their shape and last after tons of washing)
  • And super soft (they’ll want to live in them!)

Parents know that anything that makes the bedtime routine a little smoother is a welcome help. These sensory friendly sleepwear is a tool that meets the child’s needs for better sleep.

Sensory Pajamas Giveaway

This giveaway has now ended.

Some of the smartest and most creative folks I know are the readers of The OT Toolbox. I asked readers to tell me sensory strategies they personally love and use to address sensory modulation. Scroll through the comments…you might just find some new sensory strategies that will work for you! Hopefully we can learn from one another!

Also, check out these other soy suggestions based on therapeutic development through play.

  1. Fine Motor Toys 
  2. Gross Motor Toys 
  3. Pencil Grasp Toys 
  4. Toys for Reluctant Writers
  5. Toys for Spatial Awareness 
  6. Toys for Visual Tracking 
  7. Toys for Sensory Play 
  8. Bilateral Coordination Toys 
  9. Games for Executive Functioning Skills 
  10. Toys and Tools to Improve Visual Perception 
  11. Toys to Help with Scissors Skills
  12. Toys for Attention and Focus 

References:

Lisa Chiarello and the Move and Play Study Team (2016) Children’s Participation in Self-Care and Ease of Care-giving for Parents. Movement and Participation in Life Activities of Young Children Information for Families and Service Providers. www.canchild.ca.

Picard, M. (2017). American Occupational Therapy Association Fact Sheet. Occupational Therapy’s Role in Sleep. Retrieved from https://www.aota.org/~/media/Corporate/Files/AboutOT/Professionals/WhatIsOT/HW/Facts/Sleep-fact-sheet.pdf

Play Based Learning Tool

Play based learning is a powerful tool! Today, we are discussing how and why a creative play that combines movement and visual processing skills impact learning and development. We’ll cover using learning and play with movement-based learning through play ideas using brain breaks. We’ll also share interactive learning opportunities that address motor, cognitive, social, emotional, sensory, and emotional needs.

This content is part of our week-long therapy giveaway event, where we are collaborating with brands to give you the opportunity to win various therapy items, toys, and games as a thank you for being here and a celebration of our profession and those we serve. This giveaway has now ended.

Play based learning ideas for kids

Play Based Learning

What is play-based learning, and why is learning through play important for kids? Why is it that children learn through play?

Play based learning offers many opportunities to advance on cognitive skills through the process of play. By using skills that the child is familiar with and confidence in, they can excel in learning concepts by simply playing.

While play offers the opportunity to build and advance on skills like motor development, executive functioning, problem solving, visual processing, and other areas. But play also offers situations to expand on self-regulation as well. By incorporating play into a learning experience, children get the chance to move. It’s a brain break built right into learning.

Learning through Play

Learning and thriving as a child, according to Kathryn Hirsh-Pasek, a well-known child development expert notes that children require the “six C’s” in order to succeed. These are six attributes that must exist in order for children to thrive. Through that success comes learning. These aspects build on one another and allow function and success for the child. The six attributes for successful thriving are as follows:

  • collaboration
  • communication
  • content
  • critical thinking
  • creative innovation
  • confidence

By building these areas as well as using these attributes in learning opportunities, we give our children the opportunity to succeed in learning. Don’t these attributes sound like aspects of play? Through play, kids collaborate with others. They interact in play situations in games and pretend play. They communicate with peers or through self-talk. They participate in real-life situations and carry those situations over into play as they “chew on” things that occur around them in the real world. They might pretend to go to the grocery store, drive a truck, take care of a baby, or be a teacher. They see the content and practice it by playing. Play is a chance to practice and expand on critical thinking. It’s a chance to expand on attention, problem solving, working memory and other essential skills. Creative innovation happens during the play process and as a result, creative innovation. All of these skills happen through play and are essential for learning as well. When the processes are combined by true engagement in play AND learning, real skills can be developed and built upon. Play is a powerful tool for learning!

Learning through play allows the learning situation to become active and not passive. It allows us to take a meaningful part in the learning process rather than sitting back and soaking in information. Play offers the freedom to participate in meaningful learning situations that are memorable.

By adding movement, games, or play situations into learning facts, the connections between physical education, movement, breaks, recess, energizing activities, and improved cognition strengthen. In fact, movement can be an effective cognitive strategy to (1) strengthen learning, (2) improve memory and retrieval, and (3) enhance learner motivation and morale.

Movement and Learning in Play

Brain breaks are a buzzword in the schools. But the facts are that kids are receiving less recess time, increased demands in the classroom, and have less outdoor play at home. When those factors align, it’s a recipe for disaster. The thing is that movement breaks in the classroom, or “brain breaks” offer kids the chance to reset. They can help to prepare the nervous system for learning. They can also be done in between learning activities or combined with learning situations to support self-regulation while children are engaged in an academic or learning task.

Movement, standing up, stretches, yoga breaks, and activity are powerful tools! As noted in Teaching with the Brain in Mind, by Eric Jensen:

“These actions can raise a child’s heart rate (and as a result, blood flow) by as much as 5 to 8 percent in just seconds (Krock & Hartung, 1992). And finally, here’s a powerful research finding: evidence from animal studies indicates that voluntary exercise influences gene expression to improve learning and memory (Tong, Shen, Perreau, Balazs, & Cotman, 2001). This improved pattern of gene expression enhances many factors that support the encoding and transfer of data, synaptic structure, and the activity and plasticity of neurons. All of these processes facilitate learning.”

Play Based Learning Activities

So knowing all of this, how can we combine play with learning in the classroom to build concepts, practice math facts, memorize vocabulary words, practice comprehension, and other essential learning tasks?

Adding opportunities to move during classroom times offers just the freedom for the facilitation of learning, all while offering the means to move and get the child in the “just right” state of regulation for absorbing information.

One tool for offering learning through play is by using an open-ended means of combining learning with games and movement activity.

Learning Through Play Activity

Adding movement to classroom learning by using games and gross motor actions offers a brain break opportunity. Some ideas include those that incorporate gross motor movement into math when repeating facts. These allow whole-body games such as Simon Says.

Students can perform specific motions when math facts are true, and perform other motor tasks when math facts are false. Try asking kids to jump or do jumping jacks for an up and down motion.

Bounce a beach ball in a game or at a target to encourage eye-hand coordination while practicing facts or stating true/false responses.

Add upside down motions in the classroom for a calming activity or one that “resets” sensory modulation. Students can sit in their seat and reach under one side to place an object at the far side of their chair, putting their head in an inverted position. Try placing index cards with facts, spelling words, or statements into piles on each side of the chair.

Toss balls at a target with answers.

Add movement games and songs into learning with tunes like “Head Shoulders Knees and Toes”.

Bend over at the knees and place cards, post-it notes, or items into a target. Add over or under movements with specific answers or true/false responses.

Sit on a target and spin around to each as far behind as the child can to add rotary movements. They can place balls into a target as the answer. Make it part of a relay or timed response with a team as they answer questions.

Use this PlaySet to build on learning in the classroom. The numbers can be assigned to answers or used in math activities. Add movement and play to learning by using the play set in gross motor activities, self-regulation and sensory modulation activities, motor planning, and emotional regulation activities, or other learning through play activities.

  • 1 PunkinPlaySpace
  • 3 Orange PunkinPitch Balls
  • 3 Blue PunkinPitch Balls
  • 1 Durable Vinyl Storage Pack

Play ANd Learn Play Space GIVEAWAY

This giveaway has now ended.

Play Based Learning Ideas

Some of the smartest and most creative folks I know are the readers of The OT Toolbox. I asked readers to tell me sensory strategies they personally love and use to address sensory modulation. Scroll through the comments…you might just find some new sensory strategies that will work for you! Hopefully we can learn from one another!

Also, check out these other soy suggestions based on therapeutic development through play.

  1. Fine Motor Toys 
  2. Gross Motor Toys 
  3. Pencil Grasp Toys 
  4. Toys for Reluctant Writers
  5. Toys for Spatial Awareness 
  6. Toys for Visual Tracking 
  7. Toys for Sensory Play 
  8. Bilateral Coordination Toys 
  9. Games for Executive Functioning Skills 
  10. Toys and Tools to Improve Visual Perception 
  11. Toys to Help with Scissors Skills
  12. Toys for Attention and Focus 

Then, scroll through the comments…you might just find some new learning through play activities that will work for you! Hopefully we can learn from one another!

Sensory Swing for Modulation

Sensory swings are a wonderful tool for improving sensory modulation in kids. We’ve covered different swings in the past, including specific types like a platform swing. Here, we will discuss how and why a sensory swing is used for modulation of sensory needs. Sensory swings are powerful sensory strategy when it comes individuals with sensory processing needs. Let’s discuss how sensory swings can help with sensory processing and modulation.

This content is part of our week-long therapy giveaway event, where we are collaborating with brands to give you the opportunity to win various therapy items, toys, and games as a thank you for being here and a celebration of our profession and those we serve.

Related, check out our blog post on affect modulation.

Use a sensory swing to help kids with sensory needs including sensory modulation

Sensory Swings for Modulation…

You’ve seen the issues in classrooms and in homes. There are kiddos struggling with self-regulation and management of sensory processing. We notice the child that gets overwhelmed or stuck on a direction to complete a worksheet. We see a child who breaks down and resolves into a pattern of hitting, biting, kicking, or damaging property. We notice the child that can’t sit upright in their seat to listen to their teacher. We can identify the child who bites on their pencil to the point of nibbling on eraser bits and chunks of wood. We see the actions and we see the results of a real need. Sometimes, we can even predict the events or situations that lead to these behaviors.

What we don’t see is the internal struggle.

We miss out on the feeling of overwhelming sensory input. We can’t feel the emptiness or the detached sensation. We miss out on what’s happening inside those beautiful, intelligent, and awesomely created brains and bodies.

While we can connect the dots from event to behavior, our biggest struggle as advocates, educators, and loved ones is to know the true internal path that connects those dots.

An occupational therapist analyzes the occupational domains that a child or individual pursues. They determine any difficulties in modulation, discrimination, praxis, motor skills, and other components that impact those occupations. In providing sensory-based interventions, therapists use tools to move their clients to optimal levels of arousal for functioning.

The sensory swing is one of those ways to help with sensory modulation.

What is Sensory Modulation

Sensory modulation information including what is sensory modulation and how to help.

As discussed in the book, The Sensory Lifestyle Handbook, sensory modulation is the organization and regulation of sensory input through the central nervous system to enable skills and abilities such as attention, activity levels. This skill is an efficient, automatic, and effortless occurrence in those with typically developing individuals.

Sensory modulation is defined by Dr. A Jean Ayres as “the neurological process that organizes sensation from one’s own body and from the environment and makes it possible to use the body effectively within the environment. The spatial and temporal aspects of inputs from different sensory modalities are interpreted, associated, and unified” (Ayres, p. 11, 1989).

Problems with sensory modulation result in difficulty responding to and regulating sensory input. A child with sensory modulation disorder might withdrawal as a result of their responses. They may become upset by noises or sounds. They may become overly distracted or obsessed with specific stimuli.

Sensory Modulation in a Nutshell

Essentially, sensory modulation is the ability to take in sensory input, sort it, and respond to that input. Modulation results in function, alertness, awareness of self, and awareness of the world around oneself.

When sensory modulation is stalled, moving slowly, or running on hyper speed, we see disorganized, over-responsive, or under-responsive individuals.

As a result, children struggle to complete functional tasks, follow directions, learn, manage emotions, interact socially, etc.

How to Help with Sensory Modulation

Sensory modulation issues can be improved to impact a child’s arousal state so they can be effective and function in daily living tasks, in school, emotionally, and socially. Some sensory strategies to help with modulation are listed below.

Use the expertise of an occupational therapist to identify and analyze modulation levels. Identifying strengths and weaknesses can play a part in helping to understand other underlying areas that need addressing and play into sensory modulation concerns. Functioning individuals may require specific levels and intensities of specific sensory input, which can vary across different environments or on a day-to-day basis.

  1. Use sensory activities to add proprioception, vestibular input, or touch input to help with arousal states, and calm or alert levels in order to function in tasks.
  2. Create a sensory diet that allows for sensory use across environments and sensory tools or strategies to address changes in modulation or arousal.
  3. Set up a sensory station to successfully integrate sensory activities into daily lives. Sensory stations can occur in the home, classroom, or on-the-go.

A sensory swing can be used to impact sensory modulation in all of these strategies.

Harkla sensory swing for therapy and sensory modulation

Use a sensory swing for Modulation

A sensory swing can be a calming place to regroup and cope. It can be a safe space for a child to gain calming vestibular input through slow and predictable motions.

A sensory swing can be a source of intense vestibular input as a means to challenge arousal levels.

A sensory swing can use a firm pillow base to provide proprioceptive feedback and heavy input while addressing tactile defensiveness.

A sensory swing can be a means for combining calming or alerting motions with coordinated movement strategies to impact praxis, postural control, and perception.

A sensory swing can be used with others as a tool for building social skills and emotional regulation.

A sensory swing can be used as an outlet for meltdowns before they turn into biting, kicking, hitting, or yelling.

A sensory swing can be a transition tool to provide calming vestibular input before physical actions and executive functioning concepts needed for tasks such as completing homework, or getting ready for bed.

Use a therapy swing to help kids with sensory processing

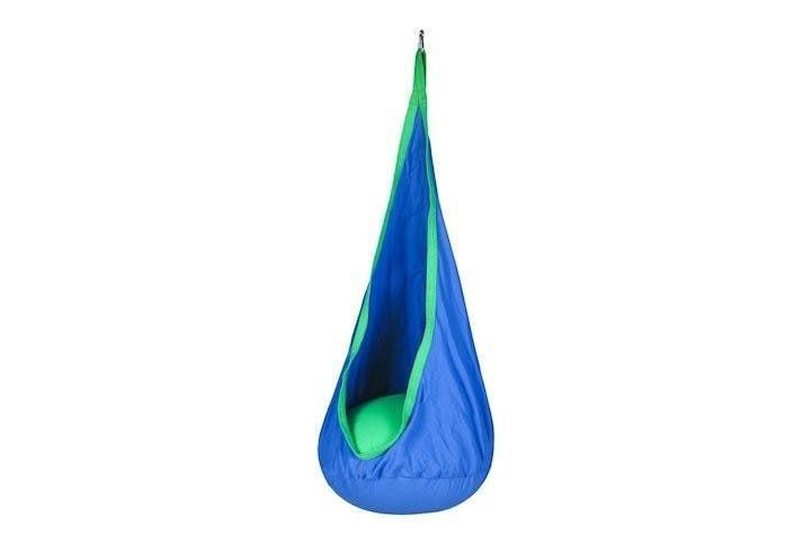
INDOOR Sensory Swing

Want to address modulation and impact sensory processing needs in the home, classroom, or therapy room? we’ve talked about how sensory swings impact sensory processing and the ability to regulate sensory input. Let’s take things up a notch by getting a therapy swing into your hands.

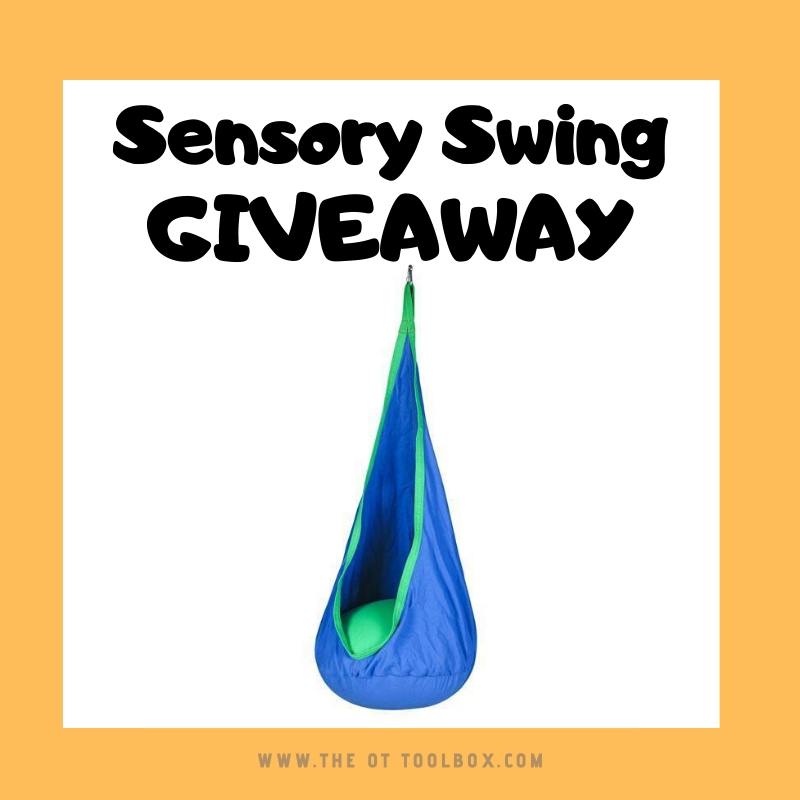
One sensory swing that I’ve got in my house is the Harkla sensory swing. We’ve used this exact swing as an outdoor sensory swing, but it’s a powerful tool when used as an indoor swing. Today, you have the chance to win one of your own. Using a Harkla swing as an indoor swing provides opportunities for modulation in various environments and as a tool to regulate emotions, behaviors.

Over or under inflate to provide more or less base of support and a challenge in postural control. Additionally, this swing holds up to 150 pounds, making it an option to address sensory modulation for adults.

Use the cocoon swing to create a relaxation space or sensory station right in the home or classroom. With the easy-to-install swing, a sensory diet space can come alive using the Harkla Therapy Swing!

Occupational therapists use pod swings to address sensory modulation, attention needs, regulation, or sensory processing disorder. The cocoon swing we’re giving away below provides a hug-like effect to address sensory needs or as a fun space to hang out in in the classroom or home. A few more details about this indoor swing option:

  • Comes with all the hardware for an easy setup, including a pump, adjustable strap, 4 bolts, carabiner, and a ceiling hook
  • Holds up to 150lbs for a safe place for your child
  • Includes an adjustable strap to make it easy to safely hang your sensory swings indoors from any height
  • Comes with easy-to-follow directions so anyone can hang it up
  • Free shipping & a lifetime guarantee

Harkla Sensory Swing Giveaway

This giveaway, sponsored by Harkla, has now ended.

TOns of Sensory Modulation Ideas

Some of the smartest and most creative folks I know are the readers of The OT Toolbox. I asked readers to tell me sensory strategies they personally love and use to address sensory modulation. Scroll through the comments…you might just find some new sensory strategies that will work for you! Hopefully we can learn from one another!

Also, check out these other soy suggestions based on therapeutic development through play.

  1. Fine Motor Toys 
  2. Gross Motor Toys 
  3. Pencil Grasp Toys 
  4. Toys for Reluctant Writers
  5. Toys for Spatial Awareness 
  6. Toys for Visual Tracking 
  7. Toys for Sensory Play 
  8. Bilateral Coordination Toys 
  9. Games for Executive Functioning Skills 
  10. Toys and Tools to Improve Visual Perception 
  11. Toys to Help with Scissors Skills
  12. Toys for Attention and Focus 

Ayres, A.J. (1 989). Sensory Integration and Praxis Tests. Los Angeles, Western Psychological Services.

Therapy Tools Giveaway

Hi there friends! For a while now, I’ve wanted to organize a massive therapy giveaway of some kind to just say thank you for your support over the years. This week, (plus a few extra days…) I’ve got some really awesome therapy tools to give away as part of a Holiday Therapy celebration! This giveaway celebrates you and all you do for others. The items are therapy tools and resources that you can use in your clinic, classroom, or home. NOTE: This giveaway has now ended. Stay tuned for next year’s Annual Therapy Tools Giveaway occuring in November 2020.

Therapy Tools Giveaway

These therapy giveaway items are perfect for occupational therapists and anyone working in pediatrics.

Stop back each day to enter the daily giveaway and catch up on the ones you may have missed. Each giveaway opens on the day specified and will remain open for the duration of the giveaway period. Share this page with others you think may benefit from the item or items.

Thankful for You

I am so grateful and incredibly proud of the readers of The OT Toolbox. You are professionals, advocates, and servants, defenders, and counselors. You are leaders, educators, and supporters of those looking for their ability to do and be. You are the manager of function and the chief of ability. By using your sincere empathy, insight, judgement, and expertise, you are the means for guiding those you serve towards capability. The profession is proud to have you. You are an instrument to build up others and the system to establish function.

You are the reason that so many flourish with their daily occupations. You are the roadmap to ability in the day to day skills that make up our classrooms, clinics, and communities. You deserve so much more than these items. These giveaways are just a simple way to express gratitude for you and all you do on a daily basis.

Therapy Tools Giveaway

So, to kick off the holiday season with gratitude and thanks, I’m excited to announce the first (hopefully annual) Therapy Giveaway!

Scroll down to find and enter the therapy tools being given away this week. You will find items for the classroom, sensory tools, fine motor tools, and therapy resources designed to promote function and ability in a variety of occupations. Enter each giveaway once per day! Each giveaway may have additional rules or stipulations, depending on the brand or company offering the therapy item. This giveaway is hosted on The OT Toolbox but may offer additional giveaway

THERAPY GIVEAWAYS

This is the place you will need to come back to each day over the course of the next 10 days. Each day, you will find a new therapy giveaway item “turned on”. If you missed entering any of the past giveaways, don’t worry! Just go back and enter those giveaways. All giveaways end on December 4th at 11:59 pm PST. Winners will be notified by email. Prizes will be fulfilled by the brand or company offering the giveaway. For some prizes, a full name and physical mailing address will need to be obtained via email so the prize can be mailed out.

Scroll through the images below and enter each one beginning on the day indicated. I’m excited to share each of the items below. In total, giveaway prizes add up to over $1,000! You’ll find therapy items that you can use in your practice, in the clinic, classroom, or home. There are sensory tools, handwriting products, massive therapy resource bundles, amazing therapeutic toys, and so much more. You are going to love each item!

Here we go!

Therapy Giveaway Item #1

Therapy giveaway Harkla sensory swing
Win a Harkla sensory swing for sensory input in the home or classroom! Valued at $80.00! Includes swing, all installation hardware, and cushion.

CLICK HERE to enter to win the Harkla Sensory Swing.

Therapy Giveaway Item #2

Lovevery blocks giveaway to win a set of blocks for kids
This 70 piece wooden block set from LOVEVERY is valued at $90 and includes over 20 block activities designed to promote skills, learning, and development.

Click HERE for a chance to win a LOVEVERY block set!

Therapy Giveaway Item #3

Free AOTA membership therapy giveaway
One occupational therapy professional will win a year-long membership to AOTA. Open to current and new (not currently a member) OTs, OTAs, OT students, and retired OT/OTAs.

Click HERE to enter to win a year-long membership to AOTA!

Therapy Giveaway Item #4

play and learn set giveaway for therapy giveaway
One PunkinFutz PlaySet, valued at $95.00. This multi-purpose therapeutic toy that offers endless learning and play activity opportunities and has a play-based curriculum available.

Click HERE to enter to win a PunkinFutz PlaySet!

Therapy Giveaway ITem #5

sensory friendly pajama set therapy giveaway
Win one pair of Lovey & Grink sensory friendly pajamas, valued at $42.00.

Click HERE to enter to win a pair of sensory friendly pajamas!

Therapy Giveaway Item #6

letter builder kit giveaway for therapy giveaway prize
Win one Lowercase Letter Builder Kit from Fundanoodle, valued at $74.99.

Click HERE to enter to win a Lowercase Letter Builder Fun Kit!

THerapy Giveaway #7

fine motor toy giveaway for week of therapy giveaways
Fine motor toy designed to promote fine motor strength, bilateral coordination, eye-hand coordination and more. Valued at $21.00

Click HERE to enter to win this fine motor toy!

Therapy Giveaway #8

therapy resources available online
Win a massive digital resource containing e-books, occupational therapy worksheets, activities, and therapy resources, valued at over $220!

Click HERE to enter to win a massive therapy resource bundle!

Therapy Giveaway #9

Win a Mightier Professional Kit, valued at $395 and includes a Mighty band & dedicated Mightier tablet, 1-on-1 onboarding and customized setup for your practice, Access to Professional Development Trainings and Mightier Certification Program, Unlimited player profiles, Monthly clinical consultation with a dedicated Mightier Certified OT

Click HERE to enter to win the Mightier Annual Professional Kit!

Therapy Giveaway Item #10

Pitchkit giveaway for therapy giveaway prize
Win a PunkinFutz Pitch Kit Set, to work on bilateral coordination, core strength, motor planning, eye-hand coordination, and more. Valued at $80.00

Click HERE to enter to win a PunkinFutz Pitch Kit Set!

Be sure to stop back each day to find out the details of each giveaway item!

Therapy tools giveaway items

Fine Motor Activities with Chalk

Kids struggle with fine motor skills. You may have seen it in a pencil grasp that needs work. You may see it in a child struggling to open a food container in the lunchroom. You may have seen it with weak or low endurance when coloring. All of those struggling areas are challenged by fine motor weakness and distal mobility problems that result in real struggles in the classroom or home.

Here are fine motor activities using chalk, an everyday item that you will find in many therapy rooms or classrooms. It’s all part of our fine motor activities with items like craft pom poms, playing cards, paper clips, and play dough.

Try these fine motor activities using chalk to improve the dexterity and mobility in pencil grasp, managing clothing fasteners, and other small motor tasks.

Fine Motor ACTIVITIES using Chalk

We’ve shared ways to use sidewalk chalk to build fine motor skills. This selection of activities are ideas for using small pieces of chalk that you might find in the classroom. Sidewalk chalk may only be on the shelves during summer months. Grab a pack of chalk from the dollar store and get ready to build precision and dexterity!

For information on what are fine motor skills and how these small motor skill areas impact function, check out the search bar on this website.

Use these fine motor activities using chalk to improve skills kids need.

Add these activities to the therapy lineup this week:

  1. Draw chalk on cardboard.
  2. Draw chalk on carpet squares.
  3. Copy pre-writing lines on construction paper.
  4. Wet chalk in water. Draw lines on a toilet paper tube.
  5. Draw big lines. Cover lines with rocks.
  6. Break chalk. Color small shapes.
  7. Use small pieces to color rocks.
  8. Draw with crayons and color on top with chalk.
  9. Drop chalk in water. Mix to create chalk paint.
  10. Break chalk with hammer.
  11. Draw on floor on sheets of paper.
  12. Carve into edges of sidewalk chalk with toothpick.
  13. Scoop up chalk dust and add drops of water. 
  14. Break chalk into small pieces and draw or copy shapes.
  15. Use chalk to rainbow write on sandpaper.
  16. Draw a line on paper and make a finger obstacle course.
  17. Write letters and shapes on paper and paint over them with water on a paintbrush.
  18. Tape paper to a wall or easel and write or copy forms with chalk.
  19. Break chalk into dust and add water. Use it to paint letters, shapes, and forms.
  20. Draw a chalk Twister board on cardboard. Use fingertips to play the game.
  21. Break chalk into dust. Add water and mix. Use the chalk paint to fingerpaint letters or numbers.
  22. Use the side of chalk to swipe a large line. Writing on a chalkboard, form extra large letters or numbers
  23. Use a toothpick to carve letters into the sides of chalk.
  24. Crush chalk into dust. Add a small bit of water and press the chalk into a mold (a chocolate mold or ice cube tray works well. Pop the mold into the freezer and use the molds to draw.
  25. Use chalk to color a coloring book page.
  26. Write letters or mystery words on construction paper with chalk. Use an eraser to swipe away the word. See if the word can be discovered by the left over letters or dust.
  27. Make a tic tac toe board with chalk. Use fingers to “hop” through the board.
  28. Crush chalk into dust. Sprinkle it onto paper. Use a spray bottle to spray water onto the dust.
  29. Use a scrap of material as a writing surface. Staple it to cardboard if it’s too hard to hold in place.
  30. Write mystery words n a piece of paper towel. Crumble up the paper towel and see if someone else can read the mystery word.

More fine motor activities with chalk

What would you add to this list? Leave your chalk ideas in the comments below!

Cursive Writing for Beginners

We have a lot of cursive writing posts here on The OT Toolbox. Check out the search bar and you’ll see tips for how to teach cursive writing, help with cursive writing speed, and even cursive letter order. There is a lot that goes into teaching cursive writing to kids. It doesn’t need to be complicated, though. Here, you will find a plan starting at the beginning when teaching cursive. This is everything you need to know about cursive writing for beginners.

Use these tips to teach cursive when working on cursive writing for beginners.

Cursive Writing- Start at the Beginning

Think about when kids start to learn cursive. They might be in second o third grade, or between 7 and 8 years old. Or, depending on the school and the cursive writing curriculum, there may or may not even be a plan in place to teach cursive writing.

Some teachers have to come up with cursive lesson plans on their own. Others follow a cursive curriculum such as Zabner-Browser, Handwriting without Tears, or D’Nealian. Sometimes, the school district allows a set number of weeks for cursive writing and if a child misses days during that time period, they miss the boat on learning a certain letter in cursive formation . In most cases, cursive is taught once and not covered again. Kids can write their spelling words in cursive or complete journals entries in cursive, but they are not required to do so. Usually, that is the only practice a student gets in fine tuning their cursive handwriting. Letter formation might get checked, but not graded for accuracy and the child doesn’t have the chance to go back and correct letter formation errors. They may not even notice a teacher’s marks on a letter formation mistake.

How to start teaching cursive

We’ve shared a lot of strategies to teach cursive here on The OT Toolbox. When getting started with cursive writing for beginners, try some of these first steps to cursive writing success:

Start with these pre-cursive activities. Start with pre-cursive lines and use the activities in this post to work on curves, lines, bumps, waves, and re-trace lines.

Grab these cursive flashcards to work on multisensory writing strategies when practicing cursive letter formation.

Use this gross motor warm-up before starting a cursive letter lesson. It’s a nice way to get the whole class geared up and ready to write.

Be sure to start with posture and paper positioning when beginning cursive lessons.

Use these tips to teach cursive s.

Try a cursive lines worksheet. Use the free worksheet below.

free cursive writing worksheet is great for teaching cursive to beginners.

Cursive Writing Worksheet

Use this free cursive lines worksheet to work on pencil control, cursive lines, and motor planning needed for connecting letters, re-tracing over cursive letters, and gaining motor control needed for smooth writing lines.

Enter your email below to access your free cursive writing worksheet.

Free Cursive Lines Worksheet

Enter your email and get weekly tools for kids in your inbox.

    We won’t send you spam. Unsubscribe at any time.
    Powered By ConvertKit

    Print off the cursive writing worksheet and trace the lines in a variety of ways to practice smooth lines, re-trace, bumps, and curves. Try some of these cursive worksheet ideas:

    • Try Rainbow writing with colored pencils.
    • Slide the cursive worksheet into a page protector. Use dry erase markers.
    • Color Mixing Writing– Use markers to mix colors while working on line formation and re-trace in cursive.
    • Tape the worksheet to a wall and get the gross motor action involved.
    • Pin the worksheet to a bulletin board. Trace the lines with a highlighter, pencil, pen, or marker to gain sensory feedback from the bulletin board.
    • Sandpaper Writing Trick– Place the cursive worksheet over a sheet of sandpaper. Trace the lines with a pencil to gain proprioceptive feedback when writing the cursive strokes. The sandpaper can be used with markers or a pen as well.

    What are Fine Motor Skills

    There are a lot of fine motor activities here on The OT Toolbox. On these fine motor skills examples all over the website, you’ll find a lot of descriptions of what the term actually means. I wanted to create a space that clearly breaks down the definition of fine motor skills and covers what are fine motor skills and how they all work together in functional tasks. These are the foundations of fine motor, broken down into specific skills.

    What are Fine Motor Skills?

    What are fine motor skills? This guide will explain the definition of fine motor, fine motor activities, and what fine motor skills mean in child development.
    What are fine motor skills? Read on for information on all of the pieces that make up “fine motor”…

    Scroll through Pinterest and you will see activity after activity that claims to improve fine motor skills or help with fine motor development…however, have you really found a resource that defines exactly how fine motor development occurs through play activities? This Fine motor list can be helpful in better understanding the activities we set up for kids so we can define fine motor skills and its meaning in play!

    Understand fine motor skills and how each motor skill impacts function.
    Understand fine motor skills and how each motor skill impacts function.

    Why are fine motor skills important?

    The OTs in the room know this process, of course. Read on to better understand the underlying fine motor skills play into activities such as holding a pencil, cutting with scissors, turning the page of a book, opening a snack baggie, zippering a coat, and every other task we complete throughout the day.

    Our hands are amazing tools. They help us get dressed, write down important information, open containers, hold utensils, and many other daily tasks. To support our success in completing these tasks, we must first develop the necessary fine motor skills. These skills can be broken down into in-hand manipulation skills, dexterity, web space and arches of the hands. Without these skills, our daily lives would be much more difficult.

    Fine Motor Skills and Examples

    In-hand manipulation is a fine motor skill needed for skills like manipulating coins, managing money, and holding a pencil.

    In-Hand Manipulation Skills- In-hand manipulation skills refer to the ability to move our fingers in a series of three dynamic patterns that include translation, shift, and rotation. A major component of in-hand manipulation skills is that they are completed with ONE hand. If the other hand is utilized for support, it is not longer an in-hand manipulation skill and the child may be experiencing a delayed skills. In-hand manipulation skills support our abilities to manipulate pencils, fasteners, tie our shoes and open packages with ease. Still other tasks include managing a fistful of small items such as sand, beads, dry beans, and play activities. Here is an in-hand manipulation activity, and here is another in-hand manipulation activity to work on these fine motor skills.

    Translation– Translation is the ability to move an item from the bottom of the palm, the top of palm and back. We use this pattern for giving out change, and “squirrelling” away multiple buttons, beads or other small items into our hand without dropping them. Translation supports fluid movement of the joints in the fingers, and separation of the two sides of the hand needed for dynamic finger patterns used in everyday activities. Translation includes two types of movement:

    • Finger-to-Palm Translation: Movement of an object from the fingers to the palm i.e. picking up a coin and moving it to the palm.
    • Palm-to-Finger Translation: Movement of an object from the palm to the finger tips.  (i.e. moving a coin from the palm to the fingertips to insert into a vending machine.)

    Translation is needed for tasks including manipulating coins or moving money within the hands.

    FIne motor skills includes shift in the hands to complete tasks like beading or threading.

    Shift- Shift allows us to move our fingers into position on the pencil to allow for optimal control of the eraser, or allow us to push a string through a bead. This movement pattern is often described as looking like your fingers are “walking” in a linear fashion from one end of the pencil to the other.

    Fine motor skills like rotation is needed for managing a pencil or moving items in the hand.

    Rotation– Spinning a pencil with one had to use the eraser, spinning a coin or flipping a card over to what’s on the other side. When describing the movement pattern of rotation is defined, it is defined as moving an item in a circular pattern on an axis. Rotation includes two types of movement needed for fine motor activities:

    • Simple Rotation: Turning or rolling an object 90 degrees or less with the fingers moving as a unit (i.e. unscrewing a toothpaste lid, or spinning a pencil to adjust when erasing or getting a pencil comfortable in the grip).
    • Complex Rotation: Turning an object more than 90 degrees using isolated finger and thumb movements (i.e. Turning a paper clip, or turning a pencil over to erase). Use these other games with paper clips to support various fine motor skills.
    Open thumb web space is a fine motor skill needed for tasks like buttoning and pencil grasp.

    Web Space– The area of the hand that is referred to as the web space is the distance between thumb and the index finger. When this area is not very large or is restricted due to malformations or tone, dexterity and dynamic finger movements are negatively impacted. Conversely, when the web space is an adequate width, dexterity and dynamic finger movement is positively impacted.

    The thumb web space is that space between your thumb and pointer finger that makes an “O” when you make the “OK” sign. In order to grasp small items with your thumb and index finger, you need to oppose the tip of your thumb to the tip of your pointer finger.  Not only do the tips of the fingers need to touch, but the thumb must rotate at the joint closest to your hand.  This opposition is needed to manipulate and grasp small items like a pencil when writing, shoe laces, buttons, and zippers.  Here are activities to work on an open thumb web space.

    While there is nothing that can be done to directly affect the web space as it is anatomically what it is, it is an important observation to make during a hand writing assessment due to its effect on other skills needed for writing.

    Arch development is a fine motor skill that kids need for endurance in coloring or writing.

    Arches of the hands- Like web space, the arches of the hands are an anatomical feature, but we can develop them through hand strengthening activities and exercises. There are three main arches of the hands–two that run from the hypothenar eminence (ulnar side) to the thenar eminence (radial side), and one that runs transversely up the middle of the palm. Of the two arches, one runs just below where the fingers meet the metacarpals, and the other on the bottom of the palm from the outside heel of the hand to just under the thumb.

    The main purpose of these arches is to allow for opposition of the thumb to the fingers, and for various power and precision grasp patterns. These arches are also what allow you to form a functional “C” shape with your hand.

    When the arches are underdeveloped, this functional position appears “flat”, thumb to finger opposition and dexterity skills decrease.

    The arches are needed for endurance in tasks like coloring, writing, and other fine motor activities. The curved palm is needed for tasks which require the palm to cup items such as small objects, coins, beads, water, or other things which can be held in the palm of a “cupped” hand. Here is an activity to improve arch development and intrinsic hand strength.

    Fine motor skills include distal mobility and dexterity.

    Dexterity- One of the most commonly known fine motor skills is dexterity. Dexterity is our ability to move our fingers in novel patterns of finger isolation and opposition to complete a variety of tasks throughout our day. Tasks like opening the toothpaste, eating cereal with a spoon, zipping a coat and many more. Without the good in-hand manipulation skills, web space and developed arches of the hands, dexterity skills are negatively impacted.

    Dexterity is one of the areas of fine motor skills that is most likely to noticed when its impaired due to its high level of need during daily activities.

    Sometimes we see kids who write using their whole arm or wrist. They move the pencil or crayon with the forearm and don’t move the fingers to color or write. Distal dexterity of the fingers and mobility of the hands is needed for precision. Here is an activity for dexterity.

    A Final Note on What Fine Motor SKills Are

    After reading through all of these details on what makes up fine motor skills, it can be overwhelming to think about where to begin. Don’t worry though! Our fine motor skill set is a complex and interactive skills that support many of our daily activities. When they are impaired or challenges are noted, identifying the area of skill break down is helpful when providing intervention and treatment. Take a look on this website for many fine motor activities that can be fun ways to work on specific skills.

    Place Value Scarecrow Craft

    Scarecrow craft to help with math skills

    Need a math craft idea that is perfect for this time of year? Look no further. This scarecrow craft can be used for any grade or age. Kids can be resistant to practicing extra math facts and practicing skills that they’ve learned in school or homeschool.  But often times, math skills like adding and composing numbers up to 1000 in this second grade math activity NEED additional practicing at home.  So how do you get that extra practice in without pulling teeth (or pulling out your own hair!)??  Playful Math activities make learning and practicing skills fun. We made this Math Scarecrow Craft to practice second grade math, including place value and composing numbers…but you can make it age-appropriate for preschool on up through elementary-aged kids.


    Make this Scarecrow craft this Fall and practice math facts and addition or subtraction.  This is perfect for second grade math or any preschool or elementary age student, and a fantastic scissor skill exercise for kids.


    Scarecrow Craft

     
    This post contains affiliate links.  
     
    To make this scarecrow craft, you’ll need a few materials:
    Ivory Cardstock
    scissors (THESE are my favorite brand and what I always recommended as a school-based OT!)
    glue
    Goldenrod cardstock
    orange cardstock
    Buttons, paper scraps, ribbons, etc.
    Brown Paper Bag
     
    Make this Scarecrow craft this Fall and practice math facts and addition or subtraction.  This is perfect for second grade math or any preschool or elementary age student, and a fantastic scissor skill exercise for kids.
     
    To make the scarecrow craft (and totally sneak math into this Fall craft):


    Scarecrow Craft for Kids

    First, snip the Goldenrod cardstock into long strips about 1/2 inch wide.  Cutting the cardstock in long cutting lines is an excellent exercise in scissor skills.  The cardstock provides a thicker resistance than construction or printer paper.  This added resistance provides feedback to kids who are working on line awareness and smooth cutting lines.  
     
    You can draw lines on the cardstock with a pencil/pen, or if the child needs more assistance with scissor skills, make the lines with a thick marker.  Cutting the long strips of cardstock require the child to open/shut the scissors with smooth cutting strokes as they cut along the lines.  Cutting all of the hair straw strands for the scarecrow craft is quite an exercise in scissor skills!
     
    Next, you’ll have the child cut a large circle from the Ivory Cardstock.  We used a bowl and traced a circle, but you could also have the child draw their own circle.  This will become the face of the scarecrow.  Cutting a circle with smooth cutting strokes is a more difficult task for children than cutting strait lines.  Kids may need verbal and physical prompts to cut along the curved line with accuracy.
     
    You can draw a hat-ish shape from the brown paper bag.  I say hat-ISH because a scarecrow often has a floppy and battered hat on his head, so a hat shape that looks mostly like a hat is just about perfect for this scarecrow craft!  
     
    Kids can cut the hat shape and may require more assistance with this part.  Cutting a material like a brown paper bag is more difficult than cutting regular printer paper, so the flimsy-ness of the paper requires more skill and accuracy with scissor control and line awareness.  
     
    Jagged lines make this scarecrow look authentic, though, so feel free to add more snips and cuts into the hat, too!
     
    Make this Scarecrow craft this Fall and practice math facts and addition or subtraction.  This is perfect for second grade math or any preschool or elementary age student, and a fantastic scissor skill exercise for kids.
     
    Next, you will crumble up the paper hat shape.  My daughter really got into this part. “Crumble up this paper?? Awwww Yeah!”
     
    Crumbling paper is a great fine motor strengthening exercise for children.  They really strengthen the intrinsic muscles of their hands with paper crumpling.  What a workout this scarecrow craft is!
     
    Glue the hat in place on the scarecrow’s head.


    Make this Scarecrow craft this Fall and practice math facts and addition or subtraction.  This is perfect for second grade math or any preschool or elementary age student, and a fantastic scissor skill exercise for kids.
     

    Scarecrow Math Craft

     
    To make the hair of the scarecrow, glue the goldenrod strips on the head and along the hat.  Cut a triangle from the orange cardstock for the scarecrow’s nose.  Use buttons, paper scraps, and ribbons to dress up your scarecrow, adding eyes, mouth, and any other decorations.  We received the buttons we used to make the eyes from our pals at www.craftprojectideas.com.  Add a smile and your scarecrow is ready to decorate walls and doorways this Fall!
     
    But wait!  Make this cute scarecrow into a Math activity that the kids will Fall in love with.  Yep, I went there.


    Place Value Craft

    To incorporate math into this scarecrow craft, use those paper strips.  We made this activity perfect for practicing second grade addition skills.  
     
    My second grader has been working on building numbers up to 1000.  On the strips, I wrote a three digit number on the end of many of the paper strips.  She then chose different ways to describe that number.  She wrote out the number in words on some strips.  
     
    On other strips, she built the three digit number using Common Core strategies.  For example, I wrote the number 421 on one strip.  She demonstrated how to “build” that number by writing “400 + 20 + 1”.  This technique helped her practice skills she’s learned at school while understanding what makes up a three digit number.  She was able to identify the hundreds, tens, and ones in a three digit number.  Work on and discuss place value and number order with this activity.
     

    The nice thing about this scarecrow craft is that you can adjust the math to fit any age…or just make the craft without the math facts for a super cute Fall Scarecrow!

     
    Make this Scarecrow craft this Fall and practice math facts and addition or subtraction.  This is perfect for second grade math or any preschool or elementary age student, and a fantastic scissor skill exercise for kids.
     

    Scarecrow Math Tips

    How can you make this Math Scarecrow Craft work for your child’s needs?  Try these ideas:
     
    • Adjust the activity slightly by working on math facts.  Write a number on the end of the strip and ask your child to write the addition or subtraction problem on the length of the hair.
    • Write the SAME number on the end of each strip.  Ask your child to write each strip with different math addition problems that make up different ways to reach the number.  For example, write the number 16 on each strip.  Your child can write 8+8 on one strip, and other strips with 10+6, 12+4, 20-4, etc.

    More Scarecrow Activities

    Looking for more scarecrow activities? Below are scarecrow activities for kids that cover a variety of areas: math, language arts, art, and more. 
     
    Stop by and see what our friends have come up with using this week’s Scarecrow theme:
     
    Scarecrow Syllables for Second Grade – Use a scarecrow activity to help with early literacy skills in this creative scarecrow activity from Look! We’re Learning! 
      
    Scarecrow Measures – Another scarecrow math activity, this one from Crafty Kids at Home is a fun addition to a Fall themed learning plan. 
     
    Scarecrow Silhouette Art Project – A Scarecrow craft that the kids will love is fun to add to your therapy plan. Use this idea from School Time Snippets. 
     
    Scarecrow Compound Word Match Game – Work on more literacy using this idea from Creative Family Fun.
     
    Scarecrow Craft with Landscape Another scarecrow craft the kids will love, use this one from Sallie Borrink Learning to work on scissor skills, too.


    More of our Creative Math ideas: