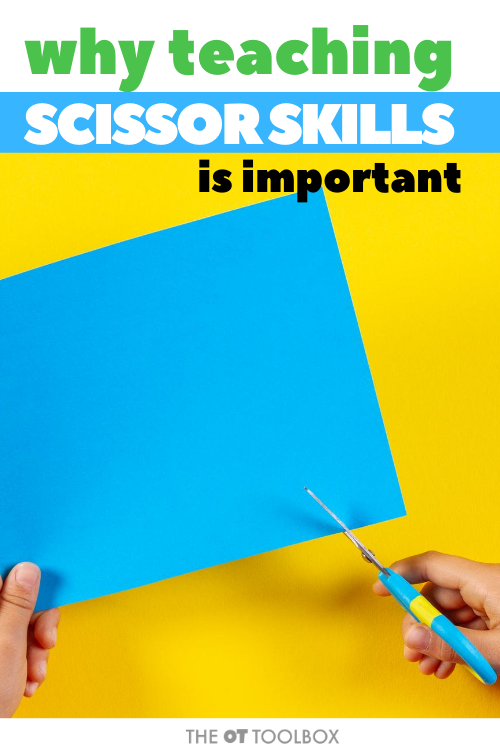
Teaching kids to cut with scissors depends a lot on the type of scissors that are used. Ask any pediatric occupational therapist, and you will find recommendations for kid-friendly scissors that actually allow kids to cut paper. You know…the training scissors to introduce kids to scissor skills…the ones that don’t just tear through paper.
Choosing the best scissors for kids
When it comes to finding the best scissors for kids, there is a lot more to it than you might think. Cutting scissors need to fit the child’s hand and feel comfortable. They need to be safe and allow the child to learn to manipulate the scissors while cutting paper (and nothing else). They need to have molded handles that are easy to hold in the correct position. And they need to grow with the child so they can progress from cutting snips to shapes and multi-angled forms.
Teaching kids to cut with scissors is a progress. There are tips that can help along the way and there are strategies that can help a child succeed.
Having scissors and a strategy can help!
Why is cutting with scissors important?
When we teach kids the correct way to hold scissors, kids find so much more success in cutting shapes. You probably have seen the child that holds scissors sideways on the paper. They open and close the scissor blades but nothing happens.
Maybe you’ve seen the child that pushes the scissors through the paper. They tear and rip the page instead of cutting along the lines.
You might recall the child that holds the scissors with their elbow out and up in the air so they are cutting in toward their body instead of out and along the lines.
All of these positioning tactics lead to poor scissor skills and a frustrated kiddo.
Importance of Scissor Skills
When we show kids how to properly hold scissors we set them up for success. When we hand scissors that properly fit the child, we are providing the tools for accuracy.
Teaching kids to hold the scissors correctly allows them to position correctly so they can cut along the lines and feel success as they cut shapes.
When kids open and close the scissor blades, they gain precision of fine motor skills. And, those same fine motor skills allow the child to gain accuracy in cutting more complex shapes and forms.
Cutting with scissors builds bilateral coordination skills so they can use both hands together in a coordinated manner.
Cutting along lines offers a way to gain accuracy and precision in eye-hand coordination skills.
Not only are kids gaining developmental motor skills, they are completing a functional task, too. Teaching kids the proper way to hold scissors allows them to open and close the blades to cut along the lines with accuracy. They can snip the paper rather than tear. They can progress in scissor skill development from showing an interest in cutting with scissors to cutting complex shapes.
So how to teach kids the right positioning for cutting with scissors?

Positioning for scissor skills
First in addressing positioning for scissor skills is sitting posture. Make sure the child is seated at a desk or table with their feet flat on the floor and arms at a functional position. Using a table that is too high puts the elbows and shoulders into too much flexion.
Tuck the elbows into the sides. Many times, we see new scissor users holding their elbows way out to the sides as they attempt to bring the scissor work closer to their face and body. Actually, having the child tuck their elbows into their side offers more support so they can work on refining those fine motor skills.
Make sure the scissors are positioned on the hand correctly. Kids often times, place their thumb in the small loop of the scissor handles and push all of their other fingers into the larger hole. If possible, ensure that the thumb is in the smaller loop and the middle finger is placed in the larger loop with the ring ginger and pinkie finger tucked into the palm for support.
If that positioning isn’t possible, allow the child to use their middle, ring, and pinkie fingers in the larger loop.
Be sure that the scissors are positioned perpendicular to the paper. When the scissors tilt sideways due to upper body positioning, the paper tends to tear rather than cut.
All of these tips, and much more are available in The Scissor Skills Book, created by an occupational therapist and physical therapist team that covers all things development and motor skills needed for cutting with scissors.
Scissor Skills Curriculum
So, if working on scissor skills, positioning, and building scissor accuracy is something you are working on with kids, then you are going to love this item!
This scissor book offers step by step strategies to support development of scissor skills. It’s a therapist’s look at scissor skills curriculum using a developmental approach to help with positioning the scissors so kids can cut along lin


")


318 thoughts on “Cutting with Scissors Program”
I start where the kid is. Sometimes they need to majorly backtrack to just ripping paper. But when they do get to cutting, I try to sit behind them and do hand over hand to help guide them.
I am currently working on scissor skills with a bunch of my kiddos! I have one kiddo that has been having a difficult time with scissor orientation and putting it on his hand correctly. With him, I have been having him frequently pick of the scissors while from a cup or off the table multiple times. Then he uses a visual cue off a picture of someone with a scissor correctly on his hand. He has been doing great and is at the point where he no longer needs the cue anymore!!
I also agree with starting where the kiddo currently is developmentally. I’m currently doing EI via Telehealth and had a mom set up the “toy rescue” activity using a muffin pan with a little one recently. They just have to snip the tape “x” to rescue the small toy inside. It was a hit!
I love using play dough and play dough scissors for the younger kiddos to explore cutting and learn the once or of scissors!
I think it is very important when working with a child to find out their interest. Once I find out their interest I do my best to have images for the child to color on, imitate, copy, and cut. I feel if the child is cutting out an image of their favorite character they enjoy cutting more and will focus on the task at hand. I also love to use scissors to cut play doh to give proprioceptive input!
I love having the student snip/cut straws and then it becomes a cutting and stringing activity!
I start with learning control with tongs, then ripping paper, making small snips, straight lines, curved lines, shapes, hand over hand if necessary to get that sensory input. The Noggins look like a great tool!
I use the verbal cue “thumbs up!” when teaching how to hold scissors and paper when cutting.
My son doesn’t like to use scissors bc “it’s hard”. I’ve struggled to encourage using them bc I don’t feel confident that I even know the right form. Having something to support the church form would be helpful to us.
Allowing the students to cut different types of textures such as play-dough, straws, shapes and lines on paper, and change up the thickness of paper choices. Using fun designs that spark the interest of the children. Hand over hand as they need to give the proper guidance. Thank you for sharing such amazing information on teaching cutting skills.
Hi! I agree I also assess and see where the child is at. I love working with scissors in a variety of mediums, including play dough, putty, kinetic sand and straws. I always try to incorporate something that is motivating to the child into our cutting activity. I love the joy you can see on a child’s face when they start to get it, and begin to enjoy cutting!
I like to work on scissor skills by incooperating play! Using straws, play doh, or theraputty to make something fun. I usually use a visual cue like a sticker for thumbs up positioning.
First I make a puppet out of a tennis ball by cutting a slit through the middle and adding facial features with a marker; a smaller cat toy tennis ball is great for smaller preschool hands. The puppet is a great motivator. Then I squeeze the sides of the ball which opens the mouth and tell the child it is hungry. Present colorful strips of paper to tear or cut into small pieces to feed the puppet. After the demonstration, I give the puppet ball to the child to manage. This will strengthen their fine motor coordination needed for cutting if they cannot manage scissors yet. If they are able to hold the scissors with or without assistance, they are ready to snip straight lines to cut ‘food’ for the puppet. FYI-The sample colored paint strips in stores are great because several colors are on a strip separated by the white paper line that is easier to hold and cut. The paint strip sample is heavier wight than copy paper.
As a pediatric OT, I like having the child start with snipping thin narrow strips of paper . I like grading it up or down with snipping construction paper, cardstock or foamsheets. Gentle tactile cues while standing behind the learner also helps–as well as keeping child’s elbow against their side..
I begin with activities that work on separation of the sides of the hand and wrist position such as using a squirt bottle. Then I have them use tongs and tweezers to pick up small items while maintaining proper hand positioning. I introduce basic scissors when they are ready . We work on just opening and closing scissors initially then I introduce different textures of paper from simple to most difficult to cut. We begin by snipping, cutting paper in half, then vertically and horizontally both hands are in same position with one holding paper and the other cutting . I use stickers and place them on their thumbs for reminders for “thumbs up” position. And if they are struggling with stabilization I have them put their elbows on the table. Once all of these are mastered, I introduce cutting out curves and angles using bilateral coordination with reciprocal movements. In the meantime, I am also working on shoulder stabilization, elbow flexion, upper body strength, postural control and hand /finger strength and dexterity!
Practice scissor grasp with bubble tongs!
Love this kit! Such a great idea. I like to work on the underlying skills starting with core strength. So we do a lot of prone activities before sitting at the table. But then I like to do fine motor strengthening while seated at the table, including cutting putty and thick paper.
I start with cutting plat-doh. If child holds elbows out I have put a piece of paper under their armpit that they have to hold in place while cutting and it really helps.
I also use hand over hand when they first begin to cut using open close.
My first go-to is “Scissor Salad” to determine where they are. I lay different colored strips of paper with different designs and have them snip and place is in the salad bowl. That way I can see where they are in terms of grasp and hand orientation. Kids love it!
When my daughter was first learning to use scissors, we gave her magazines to practice cutting She cut out everything and we had piles of pictures all over the house. Helped with sorting also!
I like to start with cutting play dough, then theraputty, then we can move onto lines & such. I will tape the paper to the wall to allow for the child to be able to fully visualize the line and be able to fully use both hands to hold the paper without stabilizing them move to a seated position at the table after working on skills!
I teach scissor skills in my PreK classroom. I love using the sand/water table filled with yarn, paper, pictures, etc for them to practice on!
I teach scissor skills so often with my caseload! I use a lot of visual cues such as stickers, goodly eyes and smiley faces on thumb to promote thumb up. I also sing a song “fingers on the bottom, thumb on top” to help them orient efficiently.
I usually see where they are and what they are able to do. Then I begin by using different types of scissors such as the self opening. And then I use hand over hand while seated behind them. I enjoy instructing this skill and also learning new ways to teach it.
I love having kids cut a variety of materials. My favorite is theraputty to work on hand strength
I love to cut with play dough scissors and play dough.
“Thumbs up, I’m ready to cut” is a quick and easy phrase to teach so a kiddo feels independent in their set up for hand positioning
I love partially freezing play dough or putty then cutting to increase have strength and give the kids more proprioceptive input while cutting.
I like to practice scissor skills by having kids cut different materials like play doh, straws, paper of varying thickness. Also working on hand separation using manipulatives, puppets, and other games
I like to start off by using bubble tongs in a sensory bin to pick up manipulatives. This really helps to gain muscle memory and motor planning prior to using actual scissors. Then I like to grade the material such as card stock, cardboard, construction paper – to more difficult materials such as regular paper and tissue. Making it fun always helps such as using a tp holder. You can make funny faces and then make strips of hair for the students to ‘trim’ off.
I like to use interesting and exciting projects for them to cut and put together. Before cutting with the scissors, have them use their first two fingers to “open and close” like the scissors will do. Then have them do the hand motion before putting the scissors in their hands. I’ve even drawn little faces or animals on their thumb knuckle so they know to keep their thumb up.
I like to remind the kids of the 3 T’s
– Towards the table
-Tuck the elbow
-Thumbs on top
I like to have my student hold something between his/her elbow and body to work on positioning (elbow down). We also cut a variety of things such as play doh, straws and different types of paper.
I like to use a sticker on scissors, so kids know which hole to put their thumb into! I will also use stickers as fun motivators to cut to on the paper. They also work as great visual cues when cutting out shapes!
Reminding about thumbs up is huge, both for the scissors and holding the paper. I also remind kids that a straight arm (not flexed wrist) let’s their strong arms help!
I like to teach kids how to use a thumbs up without the scissors first. We play games and answer questions with thumbs up, before using our scissors. This has made teaching scissor skills move more quickly.
I like to have the kids draw smiley faces on their thumbs to encourage a “thumbs up” position with both hands. We cut “hair” on paper faces.
I love teaching kids the skills of cutting! There are so many fun activities that incorporators the skill of cutting. I love using Play-Doh, putty, and other mediums for kids to cut on and to also build up hand strength. It is such a joy when I see kids cutting successfully!
I like to use play dough or therapy putty to help work on using scissors skills. I place a sticker on the thumb side so that the kids have visual cues to help them position scissors themselves.
In my class of 3 year olds turning four, we start to focus on scissor skills around January. By now they know the Mitten Song, from Carole Petersen’s HUM album. It helps get their thumbs in the right position. And we talk a lot about where do fingers, go which direction to the scissors belong, open slide shut and we do a lot of modeling and a lot of practicing.
I make sure to have left-handed scissors as well as right-handed available. I draw an X with Sharpie pen on the thumb hole for “X marks the spot for our thumb.” I like to use the easy-to-cut, cheap colored construction paper for practice. I take turns between letting the kids cut their own freeform shapes and having them practice cutting lines that were printed on the paper.
Lot of in hand manipulation activities, ripping on a line, then cutting on playdoh, cutting on hard paper, just getting more and more practice til we can cut that paper!
I like to see where the child is at, and choose crafts that are at their level and are motivating for them. For example, if a child has difficulty snipping, I will cut the strips of paper for them and then have them work on snipping the paper, and then gluing it onto a paper with an outline of their favorite character (or animal) printed on it. Then, I will start having them cut on the lines. Next, I will introduce crafts using circles, and then ultimately more complicated shapes as the child progresses. By targeting their interests and choosing tasks that they can be successful at, it makes it much more motivating for them to learn!
We work on activities to increase hand strength/intrinsic muscles as well as a multi-sensory approach for cutting tasks
One of my students who was working on cutting out basic shapes enjoyed a game that I made. Focus and attention to the cutting lines were difficult so we talked about how the scissors were a “shark” who was very hungry and I used a thicker line that had little fish that I drew along it frequently (which we can grade down as they progress). I also adapted the cutting lines so that we worked on corners and starting points for the shape by adding additional lines that went past the corners and in from the outside edge of the paper to the shape to support these skills. The student loved trying to have the shark “eat” all the fish and this game helped their aim and accuracy tremendously.
Cutting different textures! Lots of sensory feedback. Cutting on a line to their favorite character or food.
Depending On the age of the child I love to use play dough to learn scissor skills.
Thumbs on top. Cut straws and fringes first.
I start with cutting short wide lines and progress to longer and more narrow lines all while trying to make the cutting skill practice part of a larger overall activity such as a picture of something they like to do or a place that they have been to see/play.
with scoopers, tweezers and eye droppers to prepare for scissor skills, then cutting play doh
I like to work on cutting in a group. Each student gets a narrow strip with short, bold, straight lines to cut and after cutting they put the small tickets into the slot in the jar in the center of the table.
most of my caseload is older now, but when I worked with younger kids we often started with tongs to pick up objects and ‘feed’ different toy animals but releasing the object into their mouth. When introducing scissors, I put a sticker on the thumb to encourage correct forearm positions and orientation to the paper.
The starting point always depends on the foundational skills the child has but I love using scoop scissor tongs and loop scissors to initially teach the motor planning of opening and closing. I use stickers to help with orientation of scissors in the hands to provide visual cues. And I try to have kids hold paper or other objects under their arms to work on keeping elbows in and cutting out and away from the body.
Sniping and cutting strips to make “mosaic” creations fro animals to food to letters.
I use a top down approach to practice snipping, cutting straight and curved lines but also use a bottom up approach by doing a lot of bilateral coordination activities, specifically leading/supporting hand activities such as threading and lacing, a lot of work on core strength and hand and finger strength to develop control and a lot of eye hand coordination activities.
It’s been really hard to teach scissor skills remotely and I’ve found that it’s even hard to talk parents through the proper grasp for their kiddos. I’ve started explaining to the parent how the scissors should be positioned on the table (for a righty, the small thumb hole is pointing towards their belly and the scissors blade is pointing to the left) so that all the child has to do is reach in with their chomping fingers and pick up the scissors – and voila! It works like a charm and minimizes the stress and confusion of the parent and the child. Then we start with snipping play doh/putty to work on stabilizing with the other hand and slowly make our way to the edges of construction paper. Modeling scissor positioning on the table and then chomping fingers has totally helped work on basic scissor skills over teletherapy sessions!
I tell the child to keep thumbs up to begin with. Then we move to having a stuffed animal under the scissor arm. Finally, we go to large lines so they have that just right challenge!
We start with playdough. I also let kids stand or sit on the floor.
Block the scissors from closing all the way as they are learning to cut on a line. It helps reinforce the cut-slide motion and helps stay on the line vs having to reposition the scissors after each snip.
I like to start with play doh or putty to get hands ready and then have the child roll “snakes” and cut them into pieces.
I like to use tongs and clothes pins, I also like to trace lines with a car then pretend scissors are the car: “drive the car on the road”
Using scissors to cut anything: play doh, strings, straws, thick paper etc…anything that provides input and helps strengthen those hands. ?
Using scissors to cut anything: play doh, strings, straws, thick paper etc…anything that provides input and helps strengthen those hands. ?
I like starting with snipping activities. My kids love doing the toilet paper haircut activity. I have found that using visual cues to maintain a thumbs up approach is helpful. I even give some of my kids a little more cues by having them hold something between their trunk and cutting arm to prevent abduction.
My son found scissors quite tricky but with consistent practicing thumbs up strategy he got his confidence back. He now enjoys cutting through play dough 🙂
Basically, just lots of access and opportunities to use ✂️- along with glue or tape – the kids always want to cut! Using old magazines to cut pictures for collages is always fun.
I start by working on bilateral coordination and wrist and hand strength exercises. Then cut all sorts of different mediums. When going to paper, I use stickers to work on control with the scissors.
I like to use textured paper so the bumps can be felt along the way.
I like to make it fun with playdough, snipping of straws, or even cutting/making hair for creatures or creations!
I have the student sit on the floor cross cross with the table in front of them around head height. Then I tape paper to the edge of the table hanging down. They use both hands to cut along straight roads of various widths, to practice. This position perfectly sets them up to cut with wrist extension, and shoulder and trunk stability. It works well!!
I think it’s important to work on strengthening the hand to prepare for scissor skills so activities with spray bottles and animal ball popper toys are great to start with before actual cutting. Knowing the interests of the kids helps to guide planning for engaging cutting activities and crafts.
I try to work on the where the kid is at. Incorporate what they like to motivate them to keep trying
I like to start toddlers getting used to scissors by suggesting plastic PlayDoh scissors so that they can safely learn to hold scissors in one hand (compared to using 2 hands to operate and learn to open and close them over PlayDoh.
I try to use the scissors with my kid to cut chart paper or thick paper. Usually just cutting, no shapes, just randomly, it helps.
I like to put out scrap paper, scissors, glue, tape, and paper for the kids to create with. They make amazing art and get lots of fine motor practice.
Thumbs up with heavy weight paper or play dough!
I like to incorporate preferred topics and interests because scissors skills are often something kiddos default to wanting help with and not wanting to try! I also think it’s important to start out with prep activities and errorless things like skipping so accuracy isn’t as important to begin when they are getting the hang of it.
I like to put a folder in between the child’s torso and their dominant arm (used for scissors) to help them remember to keep their arm at their side, elbow in. If their elbow drifts away from the body, the folder drops to the floor!
I like to start with snipping and just getting used to opening and closing the scissors. Then I love to cut play doh!
Put cardboard under their armpit to keep the arm tucked in and not out like a wing.
I like to having a cutting box as one of the fine motor stations in the classroom. Then I just keep putting in different textures and mediums for the kids to practice cutting. The kids really enjoy the freedom to create pictures with the textures.
I like to have them cut a variety of textures and items. We also use a “cutting song” to help them with hand placement, sequence and safety.
Hello! I do lots of tong activities, verbal cues “thumb’s up Buttercup,” snipping/cutting in play doh or putty, then as they progress – I try to find fun cutting activities.
I use the happy thumb technique and have been known to draw a face on my thumbnail to help.
As I work with children aged 2 -5 there is a wide variety in development and ability when they become interested in scissors.
This sounds an excellent tool to help support the setting find the correct approach for each child.
Once a child is developmentally ready to start using scissors I like to start with non-paper items such as straws, Playdough, foil strips, etc to increase engagement.
I like to practice scissoring skills by cutting playdoh and other non paper materials.
We draw a smiley face on my son’s thumb so he remembers to keep his thumb facing up and can always see the face.
I use music to try and engage kids and make it fun!
I love using playdoh, straws, and other non-paper items for beginners to get a handle on cutting skills while working with an item that is easier to hold onto for snipping. Bubble tongs with water beads is a fun sensory play activity which is also great for getting used to the open and close motion needed for cutting. A fun idea which I saw featured on another blog once which is really motivating is to go on a nature hunt and find items such as dandelions and leaves and create a cutting box with those. 🙂
For my kids that hold their elbows up in the air, I stick a small toy (or bag of pom poms) under each arm so they have to hold their arms against their body. For my beginner cutters I might tape the paper to a vertical surface.
Once the child is able to hold the scissors correctly I will tape paper with cutting lines on a wall so they have to cut up while having them hold a folder that is opened up under their arms and not letting it drop as they cut.
I work with lots of non paper textures when students are in the early stages. We cut play-doh and slime, cut clouds of shaving cream. We also do a lot of projects involving snipped paper, or games to save their “trapped” toys.
When starting to teach cutting, I usually use play dough to begin teaching the skill. I love play dough since it provides proprioceptive feedback and the child has fun rolling the snake or worm that we are going to cut. As the child progresses, I tend to use cardstock since it will not tear as easily as regular paper. I like stickers as visual guides and talk about positioning using the alligator method. As long as you make it fun, the child has fun engaging in the task.
I will sometime draw a little face or put a small sticker on their thumb so that the child has a visual cue to make sure their thumb is up. If they can’t see the face or sticker they knew to correct. I also have had them hold a small toy or book or paper under their arm to make sure their elbow stays tucked in.
Holding and Positioning the scissor plays an important role in developing scissors skills. I would start with palmar grasp scissor( again depending on the child level) which will develop smooth motor control of shoulder, elbow and wrist while cutting different textures or line. Then will shift to two loops scissor. And before teaching them to cut different patterns line i will use different texture like playdough, straw, sand paper, foam sheets, cardboard paper etc through which child will receive the feedback and gain confidence over scissor skills.
I make my own diy scissor monster (using cardboard and googly eyes). Then I add food stickers on all different lines! Their scissors monster is super hungry! So they need to cut on the lines and eat the food they find. I’ve worked with special education students from kindergarten to second grade for 11 years and my own children the last 5, and they’ve all taken really well to this! A fun game to work on scissor skills! I do not have a website, but you can find me on Instagram under the username: @Mrs_abc123 or Facebook @Mrs.Abc123.
I have a fun pretend scissors toy that has scoops at the end. It helps facilitate motor control to place their hands in the scissors and do the open and closing motions. We use them to ‘feed’ a toy elephant and it is a favorite activity in my clinic!
Building the intrinsic muscles and motor control before giving scissors and paper
I like to start with using tongs that have the little bubble on the end to scoop up small items like Pom Pom balls. We also do a lot of snipping non paper items first: play dough, straws, between the beads of Marti-gras necklaces
I like using a variety of items like straws, putty, play doh, etc.
I like to use lots of visual cues including demonstration, stickers on thumbs for thumbs up positioning on cutting hand and helper hand, and numbering path to follow for helper hand on paper when cutting more complex shapes. Also love to use the folder under the arm trick to keep elbow down when cutting ?
I like to start with scoopers or tweezers as a warm up. Then snipping play doh and thicker paper. Using lots of visual cues.
I begin snipping small pieces of paper with mini loop scissors for most kids.
I like to draw a little smiley face, or glue googly eyes to the thumb loop of the scissors to promote proper hand positioning. The kids like finding the smiley face and making sure their scissors are “smiling” at them while they cut.
standing while cutting helps placement of arm.
I love to weave play into just cutting for cutting practice. I have had kids just clip paper pieces to make money for our toy cash register, straight cutting to make roads for cars, etc.
I like to start with them cutting 1/2 inch strips of paper for instant success than increase the size of the paper than add lines.
I use paint samples for cutting
To encourage snipping with scissors, I like to draw a face and hair on an empty paper towel tube roll. I cut strips on the hair and then have children snip the strips to “cut the hair” . They can also work up to cutting the main strips themselves. It is silly and fun 🙂
I would love to win this —looks so good!
Tong activities and cutting play dough before paper.
I use theraputty or playdoh to start a child snipping. I also use hand over hand and picture cues.
Start with scissor exploration with play dough, sand, etc with the child gripping them however comfortable (usually 2 hands). Then switch to snipping in a. thumbs up pattern, then only cutting lines, then shapes
To help kids with cutting I use stickers, fun worksheets, craft projects with shapes, or cutting pictures out of magazines.
snipping activities with paper plates to make a lion after coloring the plate
The folder under the arm trick!
Using stiffer paper at first and work on straight lines initially. Use a smiley sticker on thumb if needed to keep hand in correct position. Make it fun!
This cutting program is so cute! Kids will love this!
I sing songs that help them remember what they need to do. Open and shut And thumbs up when we cut. No idea what to know use probably just made it up. But the teachers come to me laughing and saying that the kids are singing while they’re cutting.
I have students cut holiday/birthday cards that I have saved. I draw lines and make strips for the students. As the student’s skills improve, I have them cut out the pictures on the cards.
Practice cutting through special projects that are holiday themed of involve the child’s interests.
I prefer to make it a fun activity rather than just cutting strips of paper. I like to utilize a lot of crafts and will assist with hand over hand if necessary so that they can complete the task and feel successful.
I’ve become a huge fan of adapted loop scissors (even for myself to use!). I will start off with these scissors a lot, especially for kiddos with decreased hand strength or difficulty with coordination. In my practice, my kiddos love to cut stickers. I have them place stickers on dots on a half sheet of computer paper. They either just snip the sticker or progress to cutting vertical lines to “eat” the sticker. For my older kiddos, cutting out masks (superheroes, Disney characters, etc…) has been a big blast. Even before we touch scissors though, I love doing games like ripping tissue paper or tape to make a piece of art to address bilateral coordination.
My favorite trick is having something small under the elbow of the “working arm” to promote bilateral hand use/turning the paper with the helper hand.
I often put a bus driver (eyes and a smiley face) on my students thumb and remind them that they need to be able to see the bus driver whenever they are cutting the paper.
I enjoy starting with something like playdoh, putty. Getting that open/close motion and some strengthening then progressing to snips of paper, along line, etc. Especially if the parent is present, playdoh scissors usually don’t cause much panic 🙂
I don’t actually know how to help!
Using playdough and playdough scissors is fun way to learn. I use adaptive scissors quite a bit as well.
Scissor tongs games and loop scissors
I like to start with snipping reinforced paper!
I like to incorporate cutting in creative ways to reduce frustration while learning cutting. I like to work with playdough and scissors, work on cutting packages while doing life skills baking, cutting various materials (string, paper, straws etc. ) during crafts and so forth! Thank you!
I love to use different materials for cutting while encouraging the kids to keep their thumbs up. We start with snipping and move on to cutting straight then curved lines, to irregular lines and shapes.
I like to start with snipping straws because they think it is fun and it only flies far if they are doing it correctly! My students think it is hilarious! Then we move to cutting playdough to help with strength and appropriate grasp.
I always start with positioning – thumbs up position, elbows in (no chicken arms!), cut the proper direction, close scissors part way and then open and advance.
My go to is to practice cutting play-doh! Most of my students will easily engage in the activity.
We use scissor skills activity boxes that have a variety of levels. They are out during I-play and after lunch free choice times. There are snip strips with variety of line types, longer cutting line pages, shapes, fringe cutting strips, stickers, chenille stems, sometimes we use play dough.
I will start by working side by side with student but still move behind them if need to provide hand over hand assistance while also giving verbal cues.
I work up from cutting Play-Doh to snipping paper to cutting the end piece of the project. The kiddos are able to progress gradually and will feel accomplished.
I like to help kids learn to cut with scissors by having them cut on the dotted lines from one object to another object and then they win a prize from my treasure box. I didn’t realize how much there is to teaching a child how to use scissors. Thank you for enlightening me. Love your work that you do!
Multi sensory! Using all different mediums to provide different sensory feedback (straws, play doh, different weights of paper etc) and coming up with rhymes Or saying to remember how to cut properly (ie. “Open and shut, this is how we cut,” “thumbs to the sky,” etc.)
I also tend to start with play doh. The kids always love seeing the play doh come out!
Definitely depends on the child’s skill level, but I do like having the kids cut PlayDoh or putty for some added hand strength. Playdoh is so versatile…we can work with bubble tongs to just pick up Playdoh, to snipping, straight lights, curved lines, shapes, etc. I also like to make silly people using toilet paper or paper towel tubes. The kids get a kick out of drawing the silly faces and then using scissors to cut “hair” at the top.
I made a video for parents on how their child should hold scissors correctly and other cutting tips for home practice. I got a lot of positive feedback and it helps reinforce what I am working on during therapy.
we make theraputty snakes and snip them into little pieces. A sticker on the thumb nail helps with scissor positioning. I have found it fun to punch small holes along a line to cut, to give a little sensory feedback while cutting.
I like to use play-doh first, then introduce the scissors. They struggle at first with the use, but that’s ok. Once I model, it becomes easier.
I work in front of the child so that I can see the line and orientation works from bottom up. I love using smaller scissors such as the Benbow scissors for web space development.
I use “thumbs up” for cutting to remind how to hold scissors.
I love to use stuffed animals under the arm to keep elbows tucked in. I try to always turn cutting activities into crafts so we will use whatever material we cut and glue it to make something the child is interested in.
I use nail polish to put a colored dot on the small hole where the thumb belongs on the edge that should be visible when used properly. I also have a bucket with straws that provides good sensory feedback as they begin to practice pressure and placement. Cut pieces are used for threading/recycling craft projects later.
I use playdough, putty when first starting scissors. Lots of fun games and activities to work on “open and shut” and maintaining a thumbs up position.
I like to have the student roll PlayDoh into a snake, then snip it with scissors, modeling first, then helping the initiation with hand-over-hand is necessary
We have the scissors club where children practice cutting all sorts of different materials and paper. They love it!
Once the kids are able to correctly hold the scissors I like to have them cut strips of paper or straws. My students love watching the pieces fall to the floor or with the straws fly up and then go to the floor. An added benefit is to have them pick up the pieces off the floor or table to work on pincer grasp with remaining fingers tucked in palm.
I like to use putty or playdough to have the kids snip it into little pieces.
I like to use playdoh, theraputty, and straws.
I love to start the kids off with play doh, then moving to strips of construction paper. I love the various self opening scissors to increase their independence and build hand strength but still provides feedback for opening and closing scissors.
Verbal cues of thumbs up, appropriate scissors, lots of cutting crafting projects!
I usually get them after they’ve had the preschool practice cutting playdough and straws so I use the verbal cues, ” Thumbs up and elbows down!” and always start with sturdy construction paper thats stiffer than photocopy paper.
I do mini trainings in all the K and first grades. I talk about positioning, cutting around corners etc. Teachers are very happy with the mini trainings.
Cutting different mediums such as straws, play-doh, and cardstock
I love to use craft activities to motivate kids for cutting skills. Then I can make adjustments and suggestions as they are cutting and having fun!.
Cutting Playdoh, but also making it functional (which tends to be motivating) like cutting open packages during snack time when a child cannot pull apart the packaging.
I have a picture laminated by my work area of a child holding scissors. I find this useful giving my students a visual to work off of. When teaching how to snip or when working on bilateral coordination, I have the child hold a straw and then snip the straw. The straw pieces go flying and the children love going to find them on the floor. thank you for all your helpful ideas, advice, information, and tools !
I am totally new to this, but two of my 3 kiddos (ages 5 and 3) receive OT services and have worked on scissor skills. My older son has sensory-processing issues and struggles with crossing the midline. His OT has me help him by tucking a washcloth between his elbow and torso to keep his elbow down. I also sometimes put a hand on his shoulder to keep it down.
My younger son has CP and is a lefty. He was just re-evaluated as he transitions from EIS to COME, and the OT evaluator recommended two things: using plastic scissors to cut play doh and getting him left-handed scissors!
I like using “tickets” to cut with scissors – I put items that they like inside a square, circle, triangle, etc. and they cut out the ticket in exchange for something else. I also like doing crafts where you cut out shapes and then paste them on a separate piece of paper to make a new picture, like a puzzle!
Scissor skills start with strengthening the hands. So lots of play-dough, picking up things with tongs and transferring to another container (build eye hand coordination). Then when they are ready for scissors, start them with springloaded ones and let them cut up paper with no specific line. Then slowly progress to cutting lines.
When working on scissor skills I like to use a bin filled with paper strips of different widths as well as using candy dots and glue to give visual and physical cues. I also do a lot of activities to encourage bilateral control and separation of the sides of the hand.
Cutting different types of line in a booklets
Different weight papers
I start with finger strengthening activities and bilateral motor tasks, such as tearing paper into pieces. Then move to holding scissors correctly and cutting small pieces of paper in half. I move to bigger pieces of paper then to lines.
I like to start working on having kiddos start to cut playdough and straws (these are fun since they will jump all over the place and kids find that so fun!). As kiddos improve their skills I really like to provide visual cues, such as a sticker on the thumb hole to cue them to keep their “thumbs up”, or stickers on paper for proper stabilizing hand placement.
I like to start with something fun like cutting play doh and move into cutting “hair” on construction paper people.
using therapy putty or play doh, find hidden beads , then roll it into a snake , then cut pieces, also I like having them cut small lines to stickers , positioning with stickers
Pediatric OTA! I love this! Always love the resources and information on this site and refer it to many clients!
Such a neat way to teach this skill
If the child is a beginner, I usually start with tongs to get them used to the opening/closing of the hand motion and make it fun. Then we cut playdoh before attempting real scissors and snippipng/cutting.
I put a smiley face sticker on the scissors and tell them that they have to hold the scissors so that smiley can watch them cut.
All fantastic ideas!! I encourage parents to have their child practice on old greeting cards in addition to all the other materials recommended!!
My littles, I start with tearing paper and using DYI tongs using craft sticks.
I like to start with play dough scissors, spring assisted scissors and lots of modeling. I also continue to provide many other hand strengthening activities.
I like to use colored carstock printed with a variety of lines to cut and remind kids thumbed up!
When working on finger and hand orientation, I like to draw a smiley face on the thumb nail (with washable marker), with instructions that “the smiley face will always be looking up at you when cutting”.
Snipping card stock or construction paper. When we start with straight lines or curved lines, give students a visual for start and stopping point. Sometimes I use a green dot showing where to start and red dot to stop. I also highlight the lines that need to be cut with a highlighter.
I love using theraputty or play dough to get started with cutting encouraging thumb up after making sure the child has grasped the scissors correctly.
I like to use a hole punch so the student can cut from hole to hole. This kits looks like so much fun. May have to order it if I don’t win!
To begin with cutting skills, I enjoy using play dough to snip/cut and I often draw pictures for the kids to cut (i.e., trees to cut down, fish to cut in half, etc.). I have some kids who will make a request of what they want me to draw so they can cut it up! I would love to have more resources to better engage them with cutting!
Cutting stuff that’s not just paper! Putty, straws, etc.
Pre-cutting activities, tape, dot cues, cut card stock
I like to have kids cut straws, play-doh and cut around a picture they drew or colored.
I start with cardstock rather than regular paper.
I usually work from ripping paper into confetti, cutting play-doh with safety scissors, and using an empty spray bottle with water for water play in order to strengthen those hands for using scissors.
I start with working on the open close motion using tongs or a squirt bottle then move up to using scissors. I use a small sticker in the thumb for a visual cue that the thumb looks up at the ceiling when cutting.
I love to have students cut play doh or putty as well as snip straws
I use tong and tweezer activities to build strength and in-hand manipulation skills. I incorporate visuals along with modeling when introducing scissors, I use “thumb up, elbow in” as verbal cue. I start the progression with materials such as dough, putty, straws, construction paper, etc.
I am loving this scissors kit. This would be so helpful in my preschool classroom.
I introduce with snips first so I can work on positioning using a neutral thumbs up position. I always encourage kids to check their position by singing, “my oh my are my thumbs to the sky!” Also on the stabilizing hand, to reinforce the stabilizers position. I then focus on how to open & close. I have students practice by cutting 1 inch snips that I’ve drawn all the way around a piece of paper. We work on lining up the scissor blade on the 1inch line. Then we move onto fun things to cut, play doh, straws, packing peanuts, Etc.
I’ve been finding that cutting away from the table has been really helpful to learn the correct shoulder and elbow positioning. Usually at the table, some kids bring their elbows all the way up to avoid the table, or they brace the paper against the table. Having them hold the paper up in the air helps them to practice the bilateral coordination aspect easily!
One of my favorite activities is to have them cut up straws. It usually produces lots of giggles!!
I like to use invisible duct tape to “tape” the child’s elbows to their bodies. Reminding the child not to break the duct tape.
I like to start out with encouraging lots of ripping with lots of different materials. Then introduce the scissors through play with playdough, natural materials, and then move to paper.
I like to start with construction paper or cardstock if the child is struggling with bilateral motor skills.
I love the expression younger students have on their face when I hand them a pair of scissors. But before I do that there’s a lot of prepping, such as strengthening core, shoulder stabilization, and separation of the hand. I like to work on fine motor strengthening, tearing paper of various thickness. We work on scissor safety and cutting different textures. It’s a great skill to teach kids and I always encourage parents to continue to work on them at home.
I work with playdoh and then transition to thick card stock for added feedback.
I use the ‘thumb up’ reminders when holding/using scissors and start with very small group of kiddos to cut straight lines then advance to zig zag, etc. Love the sticker idea!
One strategy I use to encourage a thumbs up position is to tape a piece of paper to the side of a table so it hangs down. The student sits on the floor and cuts up a line. If needed I make dots spaced apart for helper hand position and movement for the helper hand to encourage moving the helper hand upward as they cut.
Introduce play scissors to snip/cut playdoh.
I like starting with cutting things that can be done with one snip, like straws or making confetti from thing strips of paper, so there is an immediate cause and effect and sense of accomplishment!
I let them just hack away at a peice of paper to learn to move the scissors correctly
Practice cutting random lines in paper that is attached to the edge of a table. Make it fun.
It depends where the kiddo is at in terms of skill! If they are just learning and have good hand strength, I typically work on orientation of cutting by giving a “thumbs up”! Then I have a cut out circle and we will snip along the circle to create a “sun” (the rays of the sun are the snips) OR we will snip along a circle to create a lions mane and the kiddo loves it! It’s fun for them to put the mane on! We then pretend we’re lions and do some heavy work!
Wake up skill set by cutting resistive media first.
I use alot of the strategies mentioned above as well! especially stickers on thumbs for “two thumbs up”, strating with squeezing tongs, ripping paper, then snipping with playdoh, straws, etc. Finding whats motivating to the kid is the best!
I like to make fun shapes on different colored paper cut out or zigzag or different types of lines to cut on.
I begin with snipping and kids love snipping playdough (rolled into logs). I also prepare narrow strips of scrap paper for successful snipping and gradually increase the width of the strips until the child can cut several times consecutively. We glue our “snips” onto an art project or collage.
We tear paper first as necessary, then use looped scissors with hand over hand help as needed.
Use stickers as guides. I draw an eye and teeth on scissor and call it an alligator and remind them to open wide when taking bites.
Once they are ready for scissors, I use a ‘thumbs up’ cue, as well as ‘no chicken wings’ to keep their elbows tucked in; I like to bold the line to give them more success initially as well.
I like starting out with snipping activities (strips of paper, playdough, pipe cleaners, putty, etc). Then moving on to fun snipping pictures to practice precision.
I sometimes use a bottom up approach-like working on tong skills and bilateral hand use. I glue googly eyes on scissors and have students “eat” the line as they cut 🙂
My kids love scissors and therapy putty! I use scissors to cut through therapy putty. My kids also love stickers! I can also incorporate basic directional line tracing as well as pincer to peel off stickers. They love to cut through the stickers to follow lines.
I love using playdough and scissors. Like the playdough haircut factory where we can make playdough people and give haircuts. I also love to create sticker strips with lines and let the kids cut on the lines to get stickers. Around the holidays having kids cut out pictures of toys from catalogs and make collages is fun
Building on the child’s interests, developmental level, and learning style. Playing around with “non” scissors or tongs to build the skills without using typical looking scissors.
I like to first work on hand strength using various mediums then focus on bilateral coordination and positioning to increase skills , sometimes we need a vertical plane and different resistants to get proper input like using paper plates to help strength and understanding helper hand role in manipulation .
I like to make up strips of construction paper and put a sticker as a target. I try to find stickers of things the students like (I.e. trucks, Paw Patrol, Veggie Tales etc.) As they get better I add a line to the sticker.
Start with ripping paper and theraputty for hand strength and then move on to cutting play doh
I made up a little song for the younger students starting with ‘open and shut’ and progressing to ‘cutting around the outside when I cut’ .
So many great ideas! If the kiddo is brand new to cutting, I like to start with spray bottles, tearing paper, and play dough scissors. I love scissor scoops to “catch” toys and small items in order to practice without scissors and paper. I love the idea of scissor attachments- I use stickers, dots, thumbs up and other cues for orientation or scissors. for older kids I like to work on two handed tasks, hand and shoulder strengthening, and thickness or material cut (cardboard vs construction paper, etc).
I started with scissors that open up on their own once she cuts the paper. She only had to think about how she is holding the scissors this way. Now it is to move on from there. Muscle strength and coordination to move the scissors on her own. She has learned to enjoy the activity so far.
I started with scissors that open up on their own once she cuts the paper. She only had to think about how she is holding the scissors this way. Now it is to move on from there. Muscle strength and coordination to move the scissors on her own. She has learned to enjoy the activity so far.
There are so many strategies but you first have to see where they are functioning —
I have found that with the litle ones i sometimes use a rubberband around the smaller hole for the thumb to help provide some stability–
The kiddos also stay motivated when you use what motivates them and be creative such as cutting playdoh, cutting straws and stringing them. This set looks like it would be a great addition to my scissor cutting station.
I like to use play-doh for beginning cutters to cut. I also place the paper onto construction paper to help so the paper does not fold or bend while cutting.
I like to use play-doh for beginning cutters to cut. I also place the paper onto construction paper to help so the paper does not fold or bend while cutting.
Crafts! Simple, few steps, and something they can take home!
Crafts! Simple, few steps, and something they can take home!
I love teaching scissor skills! I start with ripping paper. When I assess that the child has good bilateral coordination, we move onto scissors placement, teaching them how to hold it properly. I put “googly” eyes on the thumb loop to cue for thumb placement. We work on cutting theraputty, straws, and maybe a thick magazine. I provide many different textured and thick items to cut first. I move onto more focused cutting with lines, then circles and other shapes. I like to sit behind them and cue. If they have low tone or have poor posture, they lay on their tummy or a wedge for optimal arm and hand placement.
To help my children I have them cut shapes, I would sit all 4, select the shape of the day, typically I have them do 10 however my younger ones don’t typically follow thru but they enjoy the activity.
I try to make cutting with scissors fun for kids by having them cut paper that has pictures with lines leading up to them. I cheer them on as if it’s a race to get to the flower or monkey or whatever is at the end of the line they’re cutting!
Cutting playdough is a fun and non-intentional way to introduce cutting skills
I like to put smiley faces on their thumb to help with keeping the thumb up during cutting.
I like to use a spring-opening scissors and opportunities to cut different types of materials.
Like!! Really appreciate you sharing this blog post.Really thank you! Keep writing.
Thanks so much for the blog post.
Hi there, after reading this amazing paragraph i am as well delighted to share my knowledge here with friends.
I like to put a visual mark to help remind them how to hold scissors and paper when cutting, personalize the craft activity to their interests, and work on other activities that support scissor cutting such as hand strength, posture, etc.
I like to start by having kids tear paper and use tweezers or tongs to pick up various objects. My favorite are the bug catcher tongs.
I like to have them start cutting soft objects like play dough while using a visual as needed for scissor grasp.
I usually start with tong/tweezer play activties, then move to snipping playdoh, straws, strips of paper to make mosaics, and then move to lines and shapes. I also try to start with heavier weight paper and encourage families to repurpose postcards, business cards, junkmail flyers, paint sample cards before moving to regular paper.
I like to start with play doh and play doh scissors for snipping.
My kiddos are little and very imulsive we def start with tearing and crumpling and then move into snipping playduigh and paper. They need a lot of HOH A
Sometimes, I use adaptive scissors (i.e. loop scissors) to help kids with cutting. I also thicken the line with a marker to improve cutting accuracy.
I like to help kids to learn how to use scissors by using scissor tongs first in sensory bins to pick up items! It helps to develop those muscles and get the opening/closing method.
I like to help kids to learn how to use scissors by using scissor tongs first in sensory bins to pick up items! It helps to develop those muscles and get the opening/closing method.
First, I make sure the child is holding the scissors correctly! Then depending on what their goal is (cutting on a line, cutting out a circle, etc. ), I like to find a picture that will be motivating for the child. For example, if the goal is to cut out a circle, I may have them “make a pizza” by cutting out a bigger circle for the pizza and cutting out smaller circles for the pepperonis!
Much like pencil pickups, I he scissors properly, put them down, and repeat to reinforce thumbs up.
Much like pencil pickups, I he scissors properly, put them down, and repeat to reinforce thumbs up.
I like to get students to roll out play dough snakes to warm up their hands and get them ready for cutting them get them to use their scissors to chop up the play dough snakes,
Sometimes we might pretend we are cooking using play dough mats or giving a hair cut,
I’ve been using hand over hand, not having any other ways to help. But this looks awesome for my guy who did everything wrong, and was so frustrated he didn’t want to continue what wood have been a fun activity.
I tape pieces of paper at eye level on the wall. Tape the paper at the top end and have the children begin at the bottom of each strip and cut upward. This can increase in difficulty with lines and or smaller strips of paper.
Use tweezers or tongs first to get the squeezing motion down pat, then advance to snipping with cardstock or playdough
Cutting playdough first and then using something to hold under their arm to stop them holding elbow out.
I am a new grad so I honestly haven’t had many chances to help kids with scissor skills, which is why this kit would be so useful for me! But as with any situation, take it slow, be patient, and find something they love as motivation!
I like to have students cut various materials…play dough, tinfoil, straws, thick paper, thin paper, yarn.
I like to have students cut various materials…play dough, tinfoil, straws, thick paper, thin paper, yarn.
Modeling and doing art projects together where scissors have to be utilized are fun, engaging, and also non threatening ways for modeling, instruction, and then practice of correct scissor use.
Lots of goofy textures that they normally wouldn’t be able to cut!
Cutting stickers in half is fun and gives a target. Or can use them for the four corners of a square!
Both my kids have started cutting straws to get the feel of how the scissors work and then progressed to card stock.
Both my kids have started cutting straws to get the feel of how the scissors work and then progressed to card stock.
Loop scissors and in the spring and summer we grow “grass man” and work on cutting his hair ).
All ages love that activity
Also for circles, draw a happy face and give them a name (i.e. Jack) and cut around the circle and make “Jack” dizzy!
Verbal/visual cues for helper hand etc
Loop scissors and in the spring and summer we grow “grass man” and work on cutting his hair ).
All ages love that activity
Also for circles, draw a happy face and give them a name (i.e. Jack) and cut around the circle and make “Jack” dizzy!
Verbal/visual cues for helper hand etc
I like to start with simple snipping skills for kids using colored 1-2 inch strips of paper. I slso like putting a sticker on kid’s thumbs to remind them to keep their thumb up.
Tong use and snipping straws/playdoh are favorites
Since I get to do animal assisted therapy with dogs in my clinic, we motivate children to cut up dog treats with scissors!
Since I get to do animal assisted therapy with dogs in my clinic, we motivate children to cut up dog treats with scissors!
I use pictures from old magazines for them to cut and then make collages of the theme of the week. I also give them various items to cut, such as string, yarn, various weights of paper, etc. to use for crafts. Many of my students have difficulty with cutting so I try to create opportunities for working on that skill.
I use pictures from old magazines for them to cut and then make collages of the theme of the week. I also give them various items to cut, such as string, yarn, various weights of paper, etc. to use for crafts. Many of my students have difficulty with cutting so I try to create opportunities for working on that skill.
I love starting out using play dough with kids to learn to snip and for thumbs up position.
I love starting out using play dough with kids to learn to snip and for thumbs up position.
Begin where the kid is at, start with ripping paper, progress to making snips and cutting on thick straight lines while providing hand over hand assist and adaptive scissors if needed. Gradually decrease assistance and increase difficult of shape
I love having my kiddos cut play dough or putty! Not only does it help save paper but it provides great feedback after each snip and helps strengthen those little hands!
Having them cut play dough, straws, and shapes for crafts. I also like to work w the tongs that have the semi circles on each end so when you close them it makes a dome shaped circle-to scoop and pick up items, close the tongs to hold the item, and have them transfer it to another area.
Having them cut play dough, straws, and shapes for crafts. I also like to work w the tongs that have the semi circles on each end so when you close them it makes a dome shaped circle-to scoop and pick up items, close the tongs to hold the item, and have them transfer it to another area.
When their ready to start cutting, I’ll wrap a rubber band above one of the loops to prevent the scissor from closing the whole way. This encourages consecutive cutting, not snipping.
Cutting is so challenging for most of my kids. I find it hard to get the teachers on board, even with just a simple adapted scissors, they either don’t cut much or don’t remember to use it. Would love to have this set!
Totally amazing list of things different therapists have used to work on this skills. The list itself is a huge gift/giveaway so thanks! I love the idea of a stuffed animal under the arm for stabilization at the elbow. The scissors as “eaters” is always fun as is a sticker face on the thumbs up thumb! I love the scissor salad activity and will definitely try that with kids!
We use hole punchers and playdoh scissors to cut playdoh, then we progress to cutting straws to make beads and follow the development progression of cutting including using the fronts of cereal boxes to make homemade puzzles
We use hole punchers and playdoh scissors to cut playdoh, then we progress to cutting straws to make beads and follow the development progression of cutting including using the fronts of cereal boxes to make homemade puzzles
I like using play dough or cardstock to begin cutting to build up some of the small muscles in the hand and provide the child more feedback. I also let the child explore with scissors (with supervision and safety precautions of course) cutting without lines but just a few guidelines or suggestions.
I like using play dough or cardstock to begin cutting to build up some of the small muscles in the hand and provide the child more feedback. I also let the child explore with scissors (with supervision and safety precautions of course) cutting without lines but just a few guidelines or suggestions.
I like to warm up with tong activities then move into cutting. I start kids on small loop scissors, then move to the spring opening, then child safety scissors.
I start with pre-scissor skill activities – lots of tong, tweezer, clothespin play to learn to “open/shut” We do lots of “feeding” the animals to work on this concept. Then I transition to loop scissors to cut fun objects (playdoh, straws, paper to make confetti, etc) I continue to progress them into traditional child safety scissors and work on cutting skills to have them make crafts and projects instead of simply cutting lines, circles, squares, etc.
Kids love cutting too thus, knowing how cutting activities helps them is another great opportunity to increase precision and so on!
I like to tape cutting lines to the edge of the table and have my students stand and cut the lines. My students also like to cut out shapes or letters that we are working on then play tic tac toe with the shapes.
By modeling, hand over hand, lots of opportunities!
Kids need the opportunity to practice! I like using printables (and sometimes even old magazines or junk mail ads) to let them color, cut, and paste. Practice cutting shapes to help them cut in straight lines and curves, gives them practice they need.
Kids need the opportunity to practice! I like using printables (and sometimes even old magazines or junk mail ads) to let them color, cut, and paste. Practice cutting shapes to help them cut in straight lines and curves, gives them practice they need.
I like to incorporate pictures, tracings and connect-the-dots cutting activities that result in their favorite image! The child is super motivated to cut away!
I love tucking something under the arm on the side they cut with, to help with keeping elbow at side (instead of “chicken winging” it!) Also cutting through various textures/thicknesses— playdoh, sandpaper, cardstock, construction paper— just to increase feedback as they’re learning. And cutting through stickers (that are arranged in straight or curvy lines) is fun, too. 🙂
I love tucking something under the arm on the side they cut with, to help with keeping elbow at side (instead of “chicken winging” it!) Also cutting through various textures/thicknesses— playdoh, sandpaper, cardstock, construction paper— just to increase feedback as they’re learning. And cutting through stickers (that are arranged in straight or curvy lines) is fun, too. 🙂
I teach younger students to begin snipping, then making snow flakes, snipping on pre-folded paper.
I like to teach students to cut on a highlighted line. I use a highlighter to encourage students to cut around an object rather than into it. Often students become discouraged because they cut off the black outline or cut off part of the picture, and their end product doesn’t look right. By cutting around the object, they can be successful as they learn to cut.
I also make sure left handed students have actual left handed scissors.
Cutting things that aren’t paper (putty, playdoh, straws, etc), and being silly to teach them that their thumbs need to be on top!
“Thumbs up” is always a go to for beginners. Using slightly heavier/sturdy paper, putting a smiley face on the thumb hole, and cutting strips into “confetti” to turn into an art project are super engaging for kids.
I work on scissor skills by practicing cutting play doh with toy scissors! Then we progress to work on holding and manipulating followed by snipping sheets!
Playdoh snipping!
playdough cutting, taping horizontal strips of paper to frame and cutting through all strips, having to move scissors forward
I´m an OT student, so im still learning how to do all of this, but i already loooove it!
I like to start with smaller pieces of heavier paper and basic lines then transition to more complex lines and shapes.
I like to use different media to mix it up. Like paint sample cards, or noodles, or yarn, etc. Making it fun always helps!
I like to start with using play doh scissors to cut play-doh. Once they have the motion, I move to card stock or toilet paper rolls and have them snip.
Start where they’re at! Make it fun and not frustrating- this means giving kids a good base of support in sitting, the right sized scissors and fun materials to cut.
I tell them, thumbs up when you cut- open and shut
I often start with loop scissors to make cuttibg easier. I use a variety of materials to cut including play dough, straws, cardboard., leaves etc
Lots of great ideas on this blog! Just started in the school district a couple months ago, so I love hearing all the different methods people use!
I love to start out by having kids cut play-doh
We work on hand strengthening activities and exercises. I like to give them pick up and transfer activities using various types of tongs and tweezers.
One trick I sometimes find helpful is holding the paper upright and giving the child verbal cues to cut “up” the page.
I incorporate various materials other than paper; straws, play-dough, yarn, etc.
I like to come up with crafts that will meet a child where they are at. I find the kids put more effort into cutting out a circle if its a dog’s head or part of a snowman than if it is just a circle!
Comments are closed.