In this blog post, we’re sharing a fun way to work on problem solving skills and overwhelm in kids. The kids we’ve worked with on executive functioning skills love The Size of the Problem Activity strategies for a few reasons. It helps them to understand just how big various daily problems actually are…so they can come up with a game plan to fix the issue at hand.
The size of the problem activity might sound like a quirky game, but it’s actually a combination of self-regulation, executive function, and metacognition that helps kids understand the magnitude of the problems they encounter and to cope with them….all while knowing that it’s ok to have problems, it’s ok to have big feelings, and it’s ok to not know what to do about them. After all, emotional regulation and executive functioning skills go hand in hand.
One way that I’ve done this in the past is with a few fun and engaging activity ideas. These activities can be used with different ages.
What Is “the Size of the Problem”?
Have you heard of a Size of the Problem concept? It’s a tool to help kids picture how bit their problems are.
Size of the Problem is a social-emotional learning concept that helps children recognize the actual size of the problem they are facing and match it with an appropriate response. The goal is to teach children that not every challenge requires the same level of emotion or reaction.
For example, dropping a crayon during art class may be a small problem that requires a quick solution and a calm response. On the other hand, a significant event such as a family emergency or a big change in a child’s life may be a large problem that requires additional support and coping skills.
Many children who struggle with emotional regulation may become very upset by small problems or have difficulty determining which situations require larger reactions. Teaching Size of the Problem helps children develop perspective-taking, self-awareness, and problem-solving skills.
The concept of “Size of the Problem” activity is often used in educational and therapeutic settings. It essentially helps the child to categorizing problems into different sizes based on their level of seriousness or impact.
The goal is to teach individuals, especially kids, to match their reactions to the size of the problem, promoting emotional regulation and effective problem-solving.
Helping kids to identify problems by size can help them with skills like:
- Self regulation
- Impulse control
- Working memory
- Emotional regulation
- Time management
- Planning and prioritization
- Social and emotional skills
- Self reflection
- Emotional Control
- Task Initiation
- Task Completion
- Working Memory
- Planning
- Mental Dexterity
- Prioritizing
- Processing Speed
- Organization
- Attention
- Self control
- Self-Monitoring
- Impulse Control
- Cognitive Flexibility
- Foresight
- Hindsight
- Self-Talk
- Problem Solving
- Persistence
- Shift
Remember that this can be a tricky skill to learn and then to use! Executive function develops over a long period of time and identifying problems, finding a regulation strategy, and then using it takes time, too!
How Does the size of the problem activity Work?
Now, let’s take a closer look at how this activity works:
- Identification: Kids are guided to recognize and express their feelings about a particular situation or issue. You can prompt them with questions like “How does this make you feel?” or “Why is this bothering you?”
- Categorization: Once the problem is identified, it is categorized based on its size:
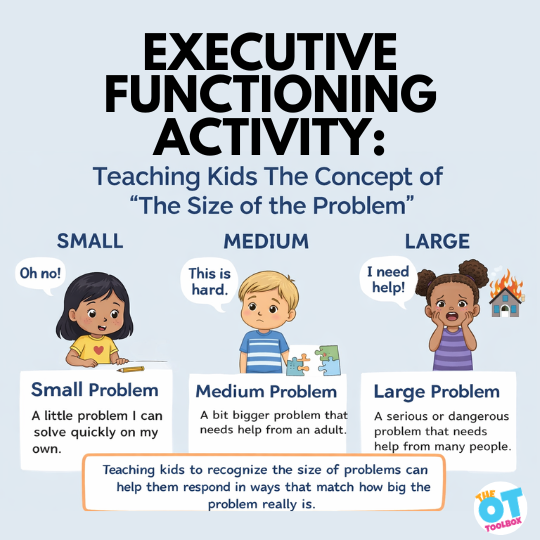
- Small problems: Minor issues that can be managed independently.
- Medium problems: Require more effort, support, or coping strategies to address.
- Big problems: Significantly impactful challenges that may necessitate assistance from adults or professionals.
- Understanding Impact: By assigning a size to the problem, kids can better understand how it relates to their overall well-being and differentiate between minor frustrations and more substantial issues.
- Applying Coping Strategies: Once the size of the problem is determined, appropriate coping strategies can be introduced. For instance, small problems may be addressed with simple self-soothing techniques, while bigger problems might require more complex problem-solving skills or external support.
How to Introduce the Size of the Problem to Kids?
Introducing the concept of the Size of the Problem to kids should be done in a simple manner. Here’s how you can make the introduction effective and relatable:
- Start with Simple Language: Begin by explaining the concept in language that suits the age group. Use examples they can relate to, like misplacing a favorite toy, having a disagreement with a friend, or not understanding a homework assignment.
- Use Visual Aids: Create a visual chart or use images to represent problems of varying sizes. This can be a spectrum ranging from small to large, helping kids visualize the different magnitudes of problems.
- Open Communication: Encourage conversation by asking them questions. For example, “Can you think of a time when something bothered you? Was it a small, medium, or big problem?” This prompts reflection and allows the child to connect the concept to their own experiences.
- Relate It to Emotions: Discuss how different-sized problems can make us feel various emotions. Connect emotions like frustration, sadness, or worry to specific examples. This helps children link the concept to their own emotional experiences.
- Model the Concept: Model the behavior by sharing your own experiences and categorizing problems based on their size. This helps children see real-life applications of the concept.
How to Teach Size of the Problem
Teaching Size of the Problem works best when children are given repeated opportunities to compare situations, discuss feelings, and practice matching responses to different scenarios.
Start by introducing categories such as:
Small Problems
Small problems are inconveniences that can usually be solved quickly and independently.
Examples:
- A pencil breaks
- A crayon rolls off the table
- Someone sits in your favorite chair
- You lose a turn in a game
These situations typically call for small reactions and simple problem-solving strategies.
Medium Problems
Medium problems are situations that may require help from an adult or a friend but are not emergencies.
Examples:
- An argument with a friend
- Forgetting homework at home
- Missing part of a special activity
- A disagreement during recess
These situations may cause someone to feel disappointed, frustrated, or upset, but they can often be resolved with support and communication.
Big Problems
Big problems involve safety concerns, emergencies, or significant life events.
Examples:
- A serious injury
- A natural disaster
- A family crisis
- A major big change in a child’s life
These situations may require adult assistance, emotional support, and more intensive coping strategies.
Using the Size of the Problem Activity in Different Settings
So, how does this play out in real life? Whether you’re at home, in school, or in a therapy session, the Size of the Problem activity is adaptable. It’s all part of emotional intelligence, but there are different problems that arise in different settings.
Let’s take a quick look at how it can be used in different settings:
Size of the Problem Scenarios At Home
So, you can help kids to understand that different problems come in different sizes by talking through the everyday problems that come up in the day to day at home.
We’ve all experienced issues that derail our plans, and this is true for sure, at home. For example, just this week in our house, we lost a bathing suit that is needed for swim class. A problem like this means that without her bathing suit, my daughter can’t swim in her swim class at school. She will have to either find her bathing suit in the laundry bins/stuffed in a bag/lost under the bed/etc. or she will sit out in swim class. She would then receive a zero for the day.
On the scale of small/medium/large problems, this one is pretty big because it means she would miss swim class each day until the bathing suit is found.
At home, parents play a huge role in the co-regulation that needs to occur as part of development. We can talk with our kids about mood and affect, emotions, and problem solving.
Other “size of the problem” scenarios that might happen at home include:
You need milk or another ingredient for making a meal. This problem is pretty small because there are easy options to solve the problem (ask a neighbor for a cup of milk, go to the store to get milk, make a different recipe that doesn’t require milk). However, if you need milk because a baby or toddler needs that as their primary source of nutrients, then the problem is bigger. It’s more of an immediate need. Some ways you could talk about this problem to support skill building might be:
- Make a family meal plan so you can see what ingredients are needed. This works on planning and working memory skills.
- Keep a checklist of ingredients that you need to pick up from the store. Getting kids involved with this (they can add items when they see the house has run out, too!). This can help kids with working memory, problem solving, and planning skills.
Everyone got up late and now you’re running late for the school bus. This is a larger problem because it has immediate, significant consequences like being marked tardy for school and then work for the adults. It requires a more urgent and structured response (driving to school). Strategies to address this problem could include:
- Teaching time management skills, such as setting alarms or creating a morning routine checklist.
- Problem-solving skills to identify what caused the delay and how to prevent it in the future.
- Emotional regulation skills to manage the stress or anxiety that might arise from running late.
You are unable to find the remote control. This is a smaller problem. It may cause frustration or inconvenience (especially when a favorite show is on tv) but lacks significant or long-lasting consequences. The approach to this issue is more about managing disappointment or frustration and finding creative solutions. This small problem is actually a great way to teach skills to our kids, that they can use for other problems.
- Encouraging the child to express their feelings in a constructive manner, and use self regulation strategies.
- Teaching organizational skills or systematic ways to look for lost items.
- Highlighting the difference in the scale of reactions appropriate for small problems versus big problems.
The list could go on and on (and on)! Problems are part of day to day life, because nothing is exactly like we might predict it to be. But, as parents, we can use these problems to help our kids develop real and essential skills.
Some ways to talk about and come up with tools to “go with the flow” when problems arise at home (and they will):
- Family Discussions: Gather the family and initiate casual discussions about daily experiences. Ask questions like, “What happened today that made you happy, and was there anything that bothered you?” Encourage kids to share and categorize problems based on their size.
- Visual Aids: Create a visible chart or poster at home depicting the Size of the Problem spectrum. Include pictures or symbols to represent different-sized problems. This serves as a daily reminder and facilitates ongoing conversations about emotions.
- Family Coping Strategies: Introduce and practice coping strategies as a family. Emphasize that everyone has different ways of dealing with problems, and it’s okay to seek support from one another. Make it a collaborative effort to build a positive and supportive home environment.
Size of the Problem Scenarios In School
You can probably see that identifying problem size and coping with that problem is actually a life skill. It makes sense that as parents we can help our kids develop these skill and that the home is a great place to work on them.
But, we all know that problems will arise at school too! You can even include some of these concepts and ideas in a calm down area in the school. For example, using an emotions check in activity or a feelings check in activities can help with this ability.
For example, some ways that size of the problem activities can be done at school include:
The student is missing a school assignment. This is a larger problem in the school context because it has direct consequences on the child’s grades. Things do come up, though so missing assignments are not always going to be a big issue, and it’s up to the teacher to decide on that. How big of a problem it is might depend on if the student consistently misses assignments, or other considerations.
This type of problem also provides an important learning opportunity about responsibility and time management.
Addressing this problem could involve:
- Helping the child understand the importance of deadlines and how missing them can impact their grades.
- Developing time management and organizational skills, such as using a planner or setting reminders.
- Working with the child to communicate with the teacher about the missed deadline and to understand the consequences and responsibility.
The student has a disagreement with a friend at recess. This is a smaller problem (in most cases), with less long-term consequences, but it’s an important opportunity to develop social skills.
Addressing this issue can involve:
- Teaching the child to express their feelings and listen to others’ perspectives, fostering empathy and communication skills.
- Encouraging problem-solving strategies to resolve disagreements, such as finding a compromise or seeking help from a teacher or peer mediator.
- Highlighting the importance of resilience and the ability to bounce back from minor social conflicts.
Some ways to help address various size of the problem scenarios at school include:
- Visual Aids in Classrooms: Teachers can display visual aids representing the Size of the Problem spectrum in the classroom.
- Role-Playing Exercises: Classroom activities can include role-playing exercises where students act out scenarios and categorize problems. This hands-on approach fosters a deeper understanding of the concept and encourages peer-to-peer discussions.
- Classroom Coping Strategies: Integrate coping strategies into the classroom routine. You can also incorporate self-regulation strategies. Teach students various coping mechanisms and encourage them to apply these strategies based on the size of the problem they encounter.
Teaching Size of the Problem Supports Social-Emotional Learning
Size of the Problem is an important social-emotional learning skill because it helps children understand how emotions, thoughts, and behaviors are connected.
Children learn:
- Perspective-taking
- Emotional regulation
- Flexible thinking
- Problem-solving
- Self-monitoring
- Communication skills
These skills support success in the classroom, at home, and in social situations.
Build Emotional Vocabulary Through Problem Solving
A strong emotional vocabulary helps children accurately describe their feelings and experiences.
Instead of simply saying they are mad, children can learn words such as:
- Frustrated
- Disappointed
- Worried
- Nervous
- Embarrassed
- Angry
- Overwhelmed
Expanding emotional vocabulary allows children to better communicate their needs and select appropriate coping strategies.
Size of the Problem activities
We covered some size of the problem strategies in the scenarios above, and these ideas can be applied to a bunch of different situations.
Now, let’s look at some strategies that align with the Size of the Problem activities. The idea is to match the intensity of the coping strategy with the size of the problem.
These can be great self regulation group activities for a small group in schools.
We do have a few printable resources that can be used:
- For small, medium, or large problems, you can also help students to use a goal ladder to help them identify steps they need to take to reach their goals when it comes to problems.
- Another tool is our resource to help kids break down goals.
- Another printable resource is our drawing mind map exercises. You can use them to help kids figure out different responses and what to do about problems.
The thing to remember is that problems mean responses. What seems like a small problem to one person might actually be a huge problem to the person actually experiencing it! And that’s totally ok! I like to think about it like the Zones of Regulation where it’s ok to not be in the green zone all of the time. It’s OK to feel emotions and have big feelings to things like losing the remote!
As therapy providers, and as parents and educators, it’s actually our job to not argue about how much a child should be responding to a problem, but to accept those feelings and then to offer solutions. Maybe some ideas for what to do next, or what to do next time can help!
One way to do this is with sorting problems, much like our measuring activities, only in this case, we’re helping kids to measure out the size of an issue they might be experiencing.
Small Problems
Small problems can use different tools that support small needs. A student can use these ideas to help.
- Breathing Exercises: Teach deep breathing exercises for small problems. A few mindful breaths can bring a sense of calm and perspective.
- Using a Stress Ball or Fidget Toy: Provide a small stress-relief tool. Squeezing a stress ball or using a fidget toy can be a quick and effective way to release tension.
- Taking a Short Break: Suggest a short break from the situation. Sometimes stepping away briefly can reset their emotions for small problems.
Medium Problems
- Journaling: Introduce journaling as a coping strategy. Writing about their feelings and thoughts can help kids process medium-sized challenges.
- Problem-Solving Techniques: Teach basic problem-solving skills. Guide them in breaking down the issue into smaller parts and brainstorming possible solutions.
- Positive Self-Talk: Encourage positive self-talk. Help children develop phrases like “I can handle this” or “It’s just a small bump in the road” for minor issues.
Large Problems
- Seek Adult Guidance: Encourage reaching out to trusted adults. For larger problems, seeking guidance from parents, teachers, or counselors is an appropriate and essential step.
- Create a Plan: Work together to create a plan. Break down the larger problem into manageable steps, helping kids feel more in control.
- Professional Support: Emphasize the importance of professional support. For significant challenges, seeking help from a therapist or counselor can provide the necessary tools and guidance.
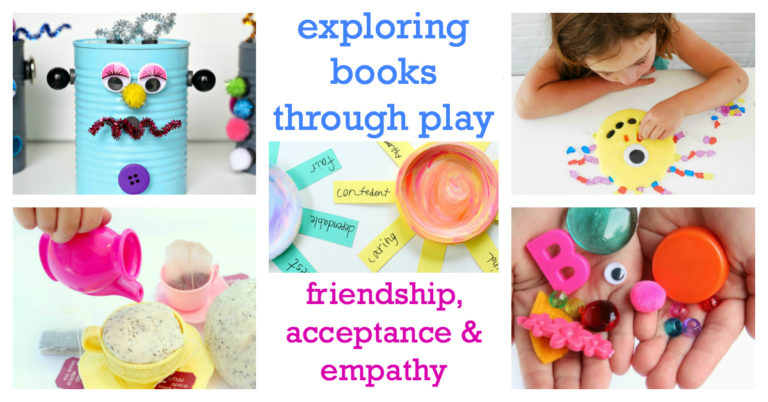
Size of the Problem Books
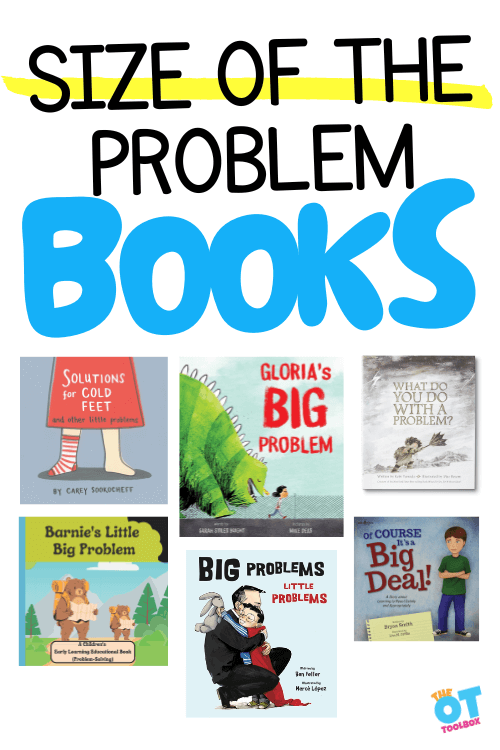
One way to help kids with problem solving and identifying what problems they are having…and then what to do about it…is with books. Some of the ones that I’ve used in the past (and love) include:
- The Problem with Problems
- Of COURSE It’s a Big Deal
- Gloria’s Big Problem
- Barnie’s Little Big Problem
- A Very Big Problem
- Big Problems Little Problems
- What Do You Do With a Problem?
- Solutions for Cold Feet and Other Little Problems
- My Day is Ruined!
- Don’t Squeal Unless it’s a Big Deal
When reading these books with kids, you can help them to pay attention to the problems and what the characters in the books did about them.
Different Strategies for Different Problems
Not every problem should be handled the same way. Teaching children to choose different strategies based on the situation helps build independence and resilience.
Possible strategies include:
- Taking a deep breath
- Asking for help
- Talking to a friend
- Taking a break
- Using positive self-talk
- Problem-solving independently
When children learn multiple coping tools, they are more likely to respond successfully to challenges as they experience life and encounter new situations.
How Can you help kids with size of the problem
Hopefully, these ideas gave you something to think about. The important thing to take from these ideas is that identifying the size of a problem isn’t meant to dismiss feelings we have about a problem. It’s actually normal to “feel” no matter what the problem’s size is. Helping kids to identify a problem by size is simply a tool that shapes the way kids understand and handle their emotions.
It helps them to use the regulation strategies that work for them. And it helps them work through those emotions.
I like that we can support kids, no matter what emotions they feel about a specific problem, and give them tools to meet those needs.
So, if you are a therapy provider working on social and emotional regulation skills with kids, know that the curriculum isn’t always cut and dry. That part comes with skilled therapy experience. We can equip our kiddos with the skills needed to assess, understand, and effectively manage challenges. This is part of function!
Teaching Size of the Problem as a Lesson
Teaching the size of the problem concept is an important lesson that helps children match the size of the reaction to the situation they are experiencing. This skill supports self-regulation, social participation, and problem-solving across school and home environments.
In this lesson, students learn to identify whether a problem is small, medium, or big, and then choose an appropriate reaction. Using a common language around problems and reactions helps children build consistency and confidence when navigating challenges.
This approach is especially helpful for younger students, children at the elementary level, and learners who benefit from explicit teaching, including ELL students and those receiving school-based counseling or occupational therapy support.
We made this size of the problem visual to support executive functioning skills. It can help to teach kids how to sort problems into small, medium, or large concepts. This is great for life skills and helping with safety awareness.
Size of the Problem Visual
To help kids learn about abstract concepts, you can use visuals to teach kids as well!
A strong size of the problem visual helps children understand abstract concepts in a concrete way. Visual supports often include categories such as small, medium, and big problems, along with matching reactions.
You might use:
- Different buckets labeled small, medium, and big
- A visual scale showing escalating problem sizes
- Icons or pictures that represent each level
Students can sort problem examples into the correct category and match them with an appropriate response. For example:
- A broken pencil might go in a small problem bucket
- Losing a turn at recess may be a medium problem
- A serious event like a tornado or thunderstorm would be considered a big problem
These visuals help children begin to recognize that not all problems require the same level of response.
Size of the Problem Scenarios
Using size of the problem scenarios allows students to practice applying the concept to real-life situations. Presenting different scenarios helps children learn to think through their reactions and build flexibility in their responses.
Examples of scenarios include:
- Someone cuts in line on the playground
- A best friend doesn’t want to play
- A game doesn’t go as expected
- A larger life event such as a family divorce
Students can discuss each students problem, determine its size, and decide on the size of the reaction that would be expected. This type of practice builds awareness and supports generalization across environments.
Using Task Cards and Hands-On Activities
Task cards are a great way to reinforce learning through structured practice. Each card can include a scenario, and students can sort it into the corresponding bucket or category.
Hands-on activities make this concept more engaging. Try:
- Sorting strips of paper with problem scenarios
- Tossing scenario cards into labeled bins in a basketball game
- Using visuals inspired by familiar themes like Incredibles characters
These types of activities encourage participation while reinforcing learning in a meaningful way.
Supporting Sized Reactions
A key goal of this lesson is helping children develop a sized reaction that matches the problem. Some children may demonstrate big reactions to small problems or have difficulty identifying when a situation requires a larger response.
Teaching strategies include:
- Modeling calm and appropriate responses
- Practicing matching problem size with reaction size
- Discussing alternative ways to respond
- Encouraging reflection on their own problems
This helps children move toward more flexible thinking and improved self-regulation.
Activities for Younger Students
For younger students, it can be helpful to simplify the concept using visuals, movement, and repetition. Use clear categories and provide frequent opportunities to practice.
Ideas include:
- Acting out scenarios with role play
- Sorting pictures into problem categories
- Using simple language like “small problem, small reaction”
- Practicing in real-life situations throughout the day
These strategies help build understanding over time and support carryover into daily routines.
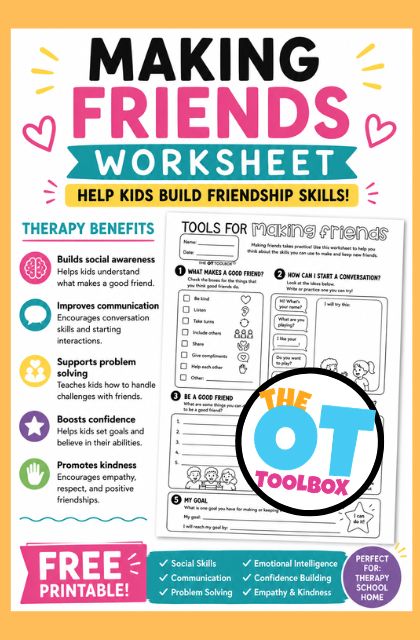
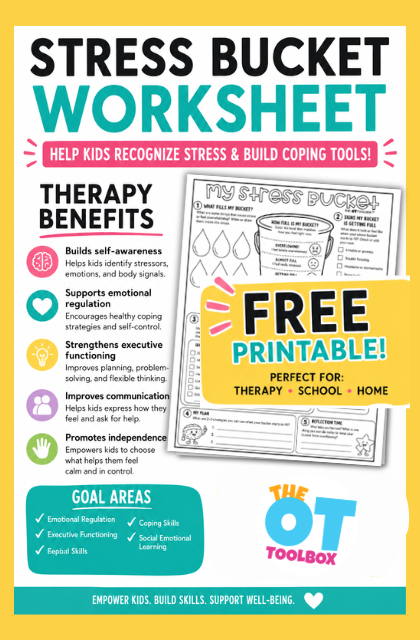
Size of the Problem Worksheets
Inside The OT Toolbox, we have Size of the Problem worksheets to help with this skill.
Occupational Therapy Perspective: Why Size of the Problem Matters
From an occupational therapy perspective, Size of the Problem is about more than behavior. It involves executive functioning, emotional regulation, perspective-taking, and self-monitoring skills. When children can accurately identify the size of a problem and choose an appropriate response, they are better able to participate in school, maintain friendships, manage frustration, and navigate daily challenges with confidence.
As children gain these skills, they become more flexible thinkers and more successful problem-solvers in all areas of life.

Colleen Beck, OTR/L has been an occupational therapist since 2000, working in school-based, hand therapy, outpatient peds, EI, and SNF. Colleen created The OT Toolbox to inspire therapists, teachers, and parents with easy and fun tools to help children thrive. Read her story about going from an OT making $3/hour (after paying for kids’ childcare) to a full-time OT resource creator for millions of readers. Want to collaborate? Send an email to contact@theottoolbox.com.