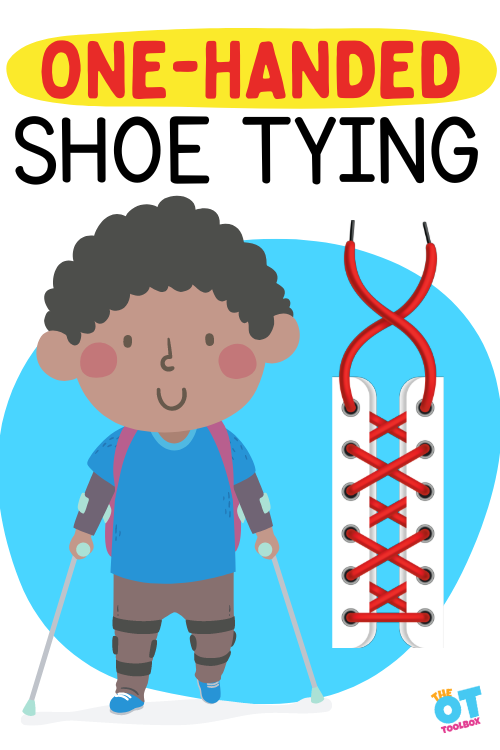
With the modern era of velcro, laceless, and stretchy lace shoes of every size and color, one might wonder why bother learning one handed shoe tying (or shoe tying at all). However, for some individuals, tying shoes with one hand is a necessary component of function. This post will not only teach you how to learn one handed shoe tying and teach it to others, but understand the why behind one (or two) handed shoe tying.

One Handed Shoe Tying
Let’s break down several things here…
- Why bother to learn one handed shoe tying methods
- Helpful tips for one handed shoe tying
- One handed shoe tying videos
- Step-by-step directions for one handed shoe tying with two bows
- Step-by-step directions for one handed shoe tying with one bow
The fact is that one handed shoe tying requires skills. While going with slip on shoes or loafer style of shoes might be ideal for some to don and doff shoes quickly and independently, sometimes a laced shoe is necessary. (See below.)
One handed shoe tying does require some skills:
- eye hand coordination
- problem solving
- following multi-step directions
- visual perception
- bilateral coordination (upper body/lower body)
- finger strength (Try these finger games and even finger and hand strength game boards to build skills)
- hand strength
- pinch strength
- finger dexterity, including precision grasp and release
- motor planning
To develop these skills, try some of these activities:
- Lacing toys
- Lacing shoe craft
- Or print off a shoe tying printable for directions to tie shoes.
- Use these shoe tying tips
Why Learn One Handed Shoe Tying?
There are times when one handed shoe tying comes in “handy”. Stroke patients, people with only one hand/arm, learners who only have one functioning hand, or a time when you only have one hand free to do the job.
There are tons of adaptations out there that are easier than struggling to learn one handed shoe tying. Alternate closure shoes are very popular and stylish, not to mention convenient and easy to use. Young children are not being taught shoe tying because it is easier to offer laceless shoes. Non lace-up shoes are easier for kids to be more independent, and easier for teachers who have to re-tie 20 pairs of laces a day.
If there are so many cool alternatives to lace up shoes, why learn?
There are several reasons to learn to tie laces
- Physical Disabilities or Injuries: People with certain physical disabilities, such as limb amputations, strokes, cerebral palsy, or conditions affecting their hand dexterity, may need to learn one-handed shoe tying in order to independently manage their footwear. Some of these individuals need to learn to tie their shoes with one hand from a very young age, while others learn this skill at an older age following a CVA or injury.
- AFO support- Individuals who require an ankle foot orthosis, brace, or more stability in the foot for other reasons will require shoes that hold these devices while offering stability.
- Temporary Hand Injuries: Other individuals recovering from hand injuries or surgeries may have limited use of one hand temporarily, making one-handed shoe tying a practical skill for maintaining their daily routines.
- Increased Independence: Being able to tie shoes with one hand can boost self-confidence and overall self-sufficiency.
- OT School- I still remember learning to tie my shoes in OT school many moons ago, as a strategy to have in my toolbox to teach individuals to tie their own shoes with just one hand! While there are always adaptations for things, it is better to know the basics when faced with something that is not adaptable (those darned velcro shoes)
- Types of shoes- There are velcro shoes but for many of our clients and patients, they are just not trendy enough! Have you ever seen velcro prom or tuxedo shoes? Nowadays they might make some more trendy versions of them, but the ones I found look like they belong on my grandfather. Try and get those on a teenager!
- There are more things that require tying than just shoes: boat ropes, string, balloons, a corset, ice skates, roller skates, work boots, wilderness survival skills, a bonnet, hair bows, arts and crafts, and so much more
- If you are working on skill building, learning to tie laces helps builds fine motor skills, balance, executive functioning skills, and independence with the ADL of self-dressing.
Before working on teaching one handed shoe tying, check out this blog post on the OT Toolbox for the basics of shoe tying, tips and strategies, benefits, and activities.
Helpful Tips for Teaching One-Handed Shoe Tying
When learning a new skill, there are helpful strategies to employ in order to have a better outcome when it comes to shoe tying skills in general:
- PRACTICE – every new skill takes practice. Take time to practice over and over again
- Timing – choose a time of day when people are not in a rush, or stressed out. On the way to the school bus is not the best time to start teaching
- Break it down – break any task down into steps to make it more manageable
- Backward chaining – do all of the steps for your learner except the last one. Have your learner finish the task, feeling that sense of accomplishment. Work backward from there
- Forward chaining – have your learner do the first step, then finish for them. Teach them one step at a time
- Model – wear tie shoes as much as possible and model this task
- Practice not on the foot first – it is helpful to start with a shoe tying board or a pair of shoes not on the learner. The added step of bending over, is just one more hurdle
- Use long laces that are easy to manage when practicing
- Work side by side tying shoes together one step at a time
- Environment – choose a quiet non distracting space for learning. Remove television and other media unless you are following along with a video tutorial
- Work on the underlying skills needed for shoe tying
- Make the task fun! Choose games related to tying, buy awesome fun shoes with laces, or have a competition
- Incentivize – it is not a bad idea to offer an incentive to a reluctant learner. New shoes when shoe tying is learned, a trip to the park to try out the new shoes, a call to grandma or a video message, or good old ice cream often helps.
One Handed Shoe Tying Videos
The following are steps to complete one handed shoe tying. Decide what the best method for teaching your particular learner is going to be (backward/ forward chaining, modeling, side by side training, video tutorial).
Here is a tutorial on one handed shoe tying with two bows:
This video has another strategy for tying shoes with one hand toward the end of the video:
Professor Shoelace has his own “Ian Knot” technique for teaching shoe tying. This strategy requires more finger dexterity, but has less steps:
This strategy is used by an individual born with cerebral palsy and uses high top shoes, which may be a required form of stability for some:
Step-By-Step One Handed Shoe Tying Directions (one bow)
For those learners, a method for traditional shoe tying will be described below
- Begin by anchoring one end near the toe then run straight across and into the opposite eyelet
- Snake the loose end through all of the eyelets, running straight across on the outside and straight up on the inside, until the end is fed into the last eyelet near the top of the shoe
- The loose end is now fed straight across and back out through the opposite eyelet. This second pass of shoelace through the eyelet keeps this knot nice and tight
- TIP: When loosening the lacing to remove the shoe, don’t pull this lace all the way out, as it’s difficult to feed through each time.
- Create a loop with the loose end sitting across the final straight section of shoelace. This is easy to do by holding the loose end between the right thumb and forefinger, then forming the loop around the right thumb.
- Feed a new loop of shoelace underneath the straight section (blue) and out through the previous loop. The lace is fed underneath with the right forefinger, meeting up with the thumb – which should still be inside the previous loop
- Grab the emerging loop and pull downwards and to the right. Take care not to pull the loose end all the way out!
- Continue pulling the loop until it sits snug and close to the eyelet.
One handed Shoe Tying with Two Bows
It is probably best to watch a few video tutorials or have someone demonstrate before trying to follow these directions.
- Hold one shoelace down with your opposite foot while crossing the other over and pulling it tight
- Make a loop while still holding the lace under your opposite shoe
- Bring the loop behind and under the straight lace
- While holding the loop with your thumb and first finger, release the other side from under your shoe
- Use your fingers to wrap the free lace around the first loop
- Use your thumb to push the lace through the newly formed loop
- Holding one loop in place with your free foot, pull the loops tight
One Handed Knot Shoe Tying Technique
Then there is this One handed knot with pictures of each step of one-handed shoe tying. This seems to be the most straight forward type of one handed shoe tying technique. Some learners do not like it because it looks “different” than traditional laces. Use these steps for a one handed knot:
- Tie a knot at one end of the shoelace.
- Thread the unknotted end into the one of the holes nearest to the toe of the shoe.
- Take the shoelace and lace it across the tongue of the shoe and then diagonally to the next hole. Lace up all of the holes using the single shoe lace.
- Continue to lace across the tongue of the shoe and up to the opposite side until you reach the top of the shoe.
- Circle the lace toward the toe of the shoe and under the lace that is the last straight part of the lace going across the tongue of the shoe.
- Circle around toward the top of the shoe. Pull the lace through the loop toward the ankle and out to the left side.
- Pull the loop tight.
One Handed Shoe Tying Adaptations
When the shoe tying techniques listed above don’t work, there are still alternatives! Even when using the adaptations listed below, one-handed shoe tying can be achieved, enabling functional independence.
Try these shoe tying tools and special laces: (Amazon affiliate links included. As an Amazon Influencer, I earn from qualifying purchases.
When Teaching One Handed Shoe Tying
Remember to practice, add incentives, and talk about the reasons for learning to tie shoes. I can’t tell you how many students I have asked if their mom is coming to prom to help them tie their shoes!

Victoria Wood, OTR/L is a contributor to The OT Toolbox and has been providing Occupational Therapy treatment in pediatrics for more than 25 years. She has practiced in hospital settings (inpatient, outpatient, NICU, PICU), school systems, and outpatient clinics in several states. She has treated hundreds of children with various sensory processing dysfunction in the areas of behavior, gross/fine motor skills, social skills and self-care. Ms. Wood has also been a featured speaker at seminars, webinars, and school staff development training. She is the author of Seeing your Home and Community with Sensory Eyes.


