Have you been working on cursive writing with a student? Are you concerned about how to teach cursive writing to students? Are you a therapist who is looking for strategies and creative ideas to help students improve cursive writing as a means of functional and legible handwriting? The handwriting ideas below are for you! Below, you’ll find ways to teach cursive writing by assessing and promoting proper posture in cursive writing.
This post and the posts you’ll see here over the next month are part of our 31 day series on teaching cursive. You’ll want to check out the How to Teach Cursive Writing page where you can find all of the posts in this series.
For more ways to address the underlying skills needed for handwriting, check out the handwriting drop-down tab at the top of this site.
For resources in handwriting, join us in the Sweet Ideas for Handwriting Help Facebook group.

Positioning During Cursive Writing
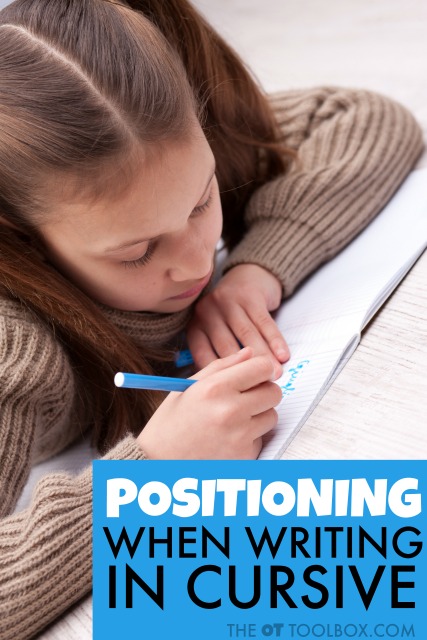
When we write in cursive it’s really no different than sitting at a desk to write and print it work.
Proper positioning can make a big difference however, between sloppy cursive writing and legible cursive writing. Here are a few a few key points to remember when positioning a child for cursive writing success.
Positioning at a desk when during cursive handwriting
The child must be seated seated comfortably and upright. They should be well-balanced and straight at the midline with 90° flexion posture at the knees, feet, and hips.
A proper sized desk and chair is essential for cursive handwriting as well as printed writing. The writing arm should be slightly abducted at the shoulder with the elbow flexed. The elbows should be even with the desk surface.
It’s essential that a child is not sitting at a desk that is too tall for the child. This is a common factor when it comes to positioning for any student in the classroom.

Environmental positioning issues when writing
When a child is learning to write in cursive or is practicing handwriting there should be sufficient light.
Especially when writing in cursive, a hand can get in the way so that little kids cannot see how they are forming letters. If their shadows reflecting onto the written work, it can interfere with self assessment of formation.
A sloped writing surface such as an easel or a three ring binder can help with extended wrist and with copying letters from a source like an overhead board or a SmartBoard.
Paper positioning for cursive handwriting
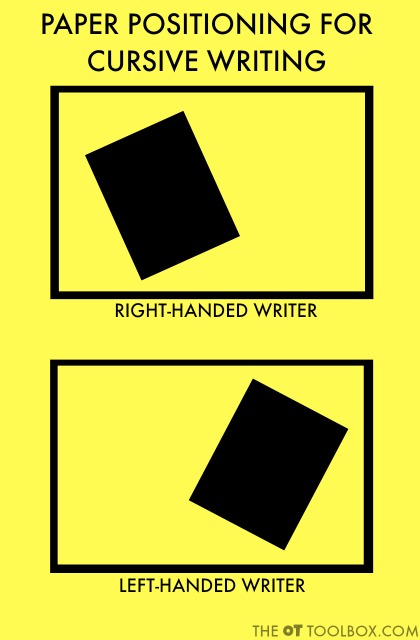
When a child is writing they should be able to move their hand and arm freely to position the paper. When writing in cursive, right-handed children should position the paper slightly to left side of the desk.
Left-handed children should position the paper slightly to the right side of the desk. This is especially true for the left-handed writer whose arm crosses over their body in front of them on the desk.
They can’t see what the letters have been formed and the amount of writing space that is available as they head towards the right margin of the page. The top of the paper should be parallel with the child’s dominant hand and at a 45 degree angle on the desk.
The tilt of the paper can help with slant of cursive letters. Left-handed writers will want to slant the paper about 20% to the right. The right lower corner of the paper should be pointing toward the child’s right armpit.
Right-handed writers will want to slant the paper about 20% toward the left. The left lower corner of the paper should point to the child’s left armpit.
Poorly positioned paper on the desk can result in cramped motions of letter formation and specifically reduced dexterity in the distal fingers.
Providing enough room and space on the desk and placement of the paper can allow for flow in rhythm in cursive writing. Here, you will read more about paper positioning when writing and find an easy desk modification that can be used in the classroom.
Posture and positioning make a big difference in legibility of cursive handwriting. Be sure to start each cursive writing practice session with a quick posture check and environmental check.
Stop back tomorrow for another cursive writing strategy or check them all out on our How to Teach Cursive Writing master page.


1 thought on “Positioning When Writing in Cursive”
Hi! Do you have the 31 Days of Cursive in a PDF? I would like to print it and make a notebook for the month of September.
Comments are closed.