This evaporation experiment uses recycled materials to explore evaporation. Kids can use the recycled materials projects as a science science experiment to explore how evaporation works with different sized containers.
Evaporation Experiment
This was SUCH a fun way to explore science with my kids. We talked about water evaporation while engineering a few different water containers and working in a bit of math, too. Getting outside to play is something we do everyday, so this outdoor STEM activity was a perfect way to bring a little bit of learning outdoors on a sunny day.

Evaporation Experiment with Recycled Materials

To complete this science experiment, we used all items from our recycle bin. You’ll need a few items to do this evaporation experiment at home:
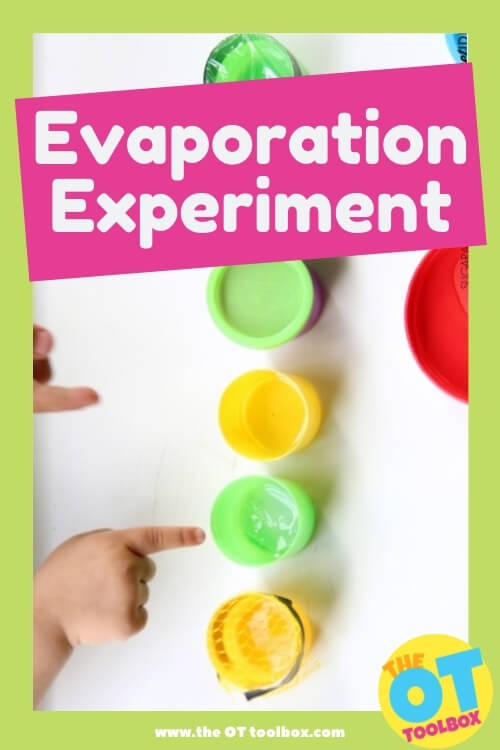
- Lids from various containers. (We used lids of various sizes to explore how fast water would based on container size. Some lids you’ll want are deep lids, bottle caps, and low lids like one from a play dough canister.) If you have a recycled materials craft bin started, just pull from there.
- Other recycled materials to see if we could adjust the lids that were alike.
- Tape (This was the only non-recycled material that we used in this science experiment.)
- Eye-dropper, small spoon, or a straw to drop water into the cups and containers.

Evaporation Activity for Kids
To set up this evaporation experiment, we worked on a bit of fine motor skills and visual perceptual skills. First we expored each container, lid, and cup to determine which was biggest, smallest, and which we thought would hold more water.
This is a great evaporation activity for preschoolers!
Determining the containers by size allows preschoolers to explore visual perceptual skills and size concepts.
Next, you’ll need to add the same amount of water to each cup or container. There are several ways you can do this: by using an eye dropper, small spoon (like a teaspoon), or the end of a straw. We used a dropper to fill each lid with the same amount of water. Each lid had 10 ml of water.
You can use the end of a straw to drop water drops into the cups. When you use the straw, kids are working on so many fine motor skills. We talked about how to do this (and why using a straw to drop water into the cups) is such an awesome way to build precision and dexterity in this butterfly painting craft.
My preschooler had fun scooping water into the lids and counted the measurements.
We then noticed how we had four containers that were all the same size. The other lids were various sizes.
To the four lids of the same size, we modified the containers slightly to see how the top would affect rate of evaporation. We covered one with foil. Another was covered with plastic wrap and poked with small holes. The third was covered with mesh. The fourth container was left open to the air.
Related: You could take this evaporation experiment further and use ice cubes that then melt and evaporate. Here is information on the motor benefits of scooping ice. The ice cubes would then have to melt to a liquid and then go through the process of evaporating to a gas state.
Evaporation Experiment Predictions
I asked my kids from which lid they thought water would evaporate more quickly.
My preschooler said she thought the smallest lid (the bottle cap) would evaporate first because it was the smallest lid. She thought the play dough lid’s water would evaporate slowest because it was the biggest lid. She hypothesized that of the four containers that were the same size, the open container would evaporate first and the covered container would evaporate last.
I thought her answers were interesting and clearly following Piaget’s conservation theory. In this case, she thought the bottle cap appeared to have more water because it was filled to the brim, where the large and low play dough lid was only slightly covered with water.

My older kiddos had different answers: They thought the play dough lid would evaporate first because it had less “deepness” (or depth). We decided that the sun would shine and evaporate this lid’s water first.
They agreed with my preschooler when they said they thought the uncovered lid would evaporate before the covered lid.

While we made good hypotheses with this experiment, we ran into a bit of bad weather luck following our outdoor science. Our sunny day turned into several days of rain and gloomy skies. We’re still waiting for our water to evaporate and will update this post when we have some results!
This post is part of the 31 Days of Outdoor STEM Activities series. Stop by and see all of the ideas shared.

You will love these STEM activities that we’ve shared:
Recycled materials Fulcrum and Lever
Lemon STEM science experiment ideas
Tinker Toys STEM Pulley

Colleen Beck, OTR/L has been an occupational therapist since 2000, working in school-based, hand therapy, outpatient peds, EI, and SNF. Colleen created The OT Toolbox to inspire therapists, teachers, and parents with easy and fun tools to help children thrive. Read her story about going from an OT making $3/hour (after paying for kids’ childcare) to a full-time OT resource creator for millions of readers. Want to collaborate? Send an email to contact@theottoolbox.com.


