Today’s post on creating a sensory room on a budget is part of a series focusing on sensory rooms in schools. A sensory room is a controlled and intentionally created space that provides multi-sensory resources to support a student’s sensory needs, to enable them to engage in learning. The sensory room is a calming strategy for school, but the price tag can be hefty when you get into specific sensory strategies. That’s where planning a sensory space on a budget comes into play.
Why make a sensory room on a budget
Creating a sensory room on a budget can be a game-changer for individuals of all ages who benefit from sensory support. As an occupational therapist in the school setting, I’ve seen the power of supporting student needs with movement and sensory breaks. The dysregulation that impacts learning and social interactions can be supported with tools used in the sensory room.
We wanted to put together a resource on how to set up a budget-friendly space for the school environment. A sensory space is a resource for the student and can be used by educators, teaching assistants, occupational therapy providers, school counselors, or other type of professionals working with children.
In the schools, I’ve helped to design a low-cost sensory space designed to support numerous sensory needs. By incorporating DIY sensory room ideas and utilizing affordable sensory room equipment, you can create a space that supports sensory needs without breaking the bank.
Sensory Needs- One of the main benefits of a low-cost sensory space is the ability to support student sensory needs effectively. This may include movement activities that are both calming and organizing through proprioceptive, vestibular, auditory, visual, and tactile senses. For other kids, an OT might recommend a sensory room’s alerting sensory input tools for those who need to “wake up” the senses for optimal learning and functional participation.
Occupational therapy providers may work right in the sensory room, depending on the needs of their students. One sensory room space that I used in the past with students was tucked away in a large closet. Another was in a space above the stage area of a school. The point is that a sensory space can be as frugal and minimal as needed in the given space available in a school.
Sensory Diets- The main goal of a sensory room, from the perspective of an occupational therapist, is to provide a safe and controlled environment where students can engage in sensory activities that help regulate their sensory systems. We as OTs tend to be involve in creating and implementing sensory diets. The sensory room is a great place to incorporate sensory strategies within the space, while meeting the goals of a sensory diet.
Emotional Regulation Needs- Another goal of a sensory room is to addressing emotional regulation needs. For students who struggle with regulating their emotions, having access to sensory tools and activities can provide a healthy outlet that allows them to learn and function.
It’s simple things like squeezing a stress ball, swinging in a hammock, or engaging in deep pressure activities that can be used in a budget-friendly sensory room. There are many coping strategies that can be used on a budget.
Brain Breaks- In addition to supporting sensory and emotional needs, a low-cost sensory space also offers movement breaks and brain breaks, which is very needed in learning environments. When there is a sensory room available in the school setting, students are able to use these regulating movement strategies when they need them the most, all while taking a multisensory approach to academics.
Movement Breaks- We know the benefit of movement and learning. I’ve seen many students that have gone to a sensory room for a movement break and various exercises in the school sensory room and then returned to learn and participate in lessons. That break allowed them to re-energize and refocus their attention. This can be particularly beneficial in educational settings, where students may experience fatigue or difficulty staying engaged for extended periods.
The ultimate goal from a frugal version of a sensory room is to create a supportive learning environment that accommodates diverse sensory and learning needs, at a low cost. The space is a great way to incorporate classroom sensory diet strategies, based on the needs of the individual student.
If the costs are kept low, you can even use these ideas as a sensory room ideas for home or other spaces like church, preschool, daycare, etc.
How to make a sensory boom on a budget
Creating a sensory room does not have to break the bank. Coming up with therapy tools and strategies in a low-cost sensory room is key, especially when so many aspects of sensory needs cost a lot of money.
Other posts in the sensory room series highlight benefits, why have one, things to consider, cleaning materials, supervision, use by teachers and aides, sensory room rules and protocols, and things to include when designing a sensory room.
Another important consideration is that you can use a sensory room with students from the whole school. So, when you look at it as a school-wide support, this can drop the overall “cost” per student. However, most occupational therapists and OTAs will tell you that there is a risk with just taking a student into the sensory room to “play” or blow off steam.
That being said, we’ve used a sensory room with a small group or a regulation station type of event. The space has even been used as a self regulation group activity for several students and their aides at one point or another.
Below, we share several OT-approved tips for setting up a sensory room on a budget.
Creating a sensory room does not have to break the bank.
When you are considering how to set up and create a low cost sensory space, some things to think about include the considerations below. Affordable sensory room setup starts small and will include a plan for using what you have on hand in the way of sensory supports.
- Start small: You do not need to create an entire room right away. You can start with a small corner of your classroom, a designated closet, or storage area.
- Utilize what you already have: Look around your classroom and see what you can repurpose for use in the sensory room. For example, you might use an old beanbag chair or a stack of blankets for a cozy reading nook.
- Shop around: Look for deals and discounts on sensory equipment. You might be able to find items at a discounted price at secondhand stores, garage sales, or online marketplaces.
- Donations: Reach out to your community and see if anyone is willing to donate sensory equipment. You might be surprised by the generosity of others!
- Fundraising: Consider fundraising to raise money for sensory room equipment. You might hold a bake sale, car wash, or other community events to raise funds.
What are the caveats to these cost saving measures?
Some of the suggestions above will depend largely on the rules at your school.
- Many school districts frown on home made items, even though they are more likely better made than mass produced products. These rules have something to do with insurance and liability.
- Ask if there are constraints about where you can order items from. When I searched, I found the coolest things online, only to find out we cannot order from large vendors such as Amazon, Target, Walmart, or tiny mom and pop shops. This is very limiting and time consuming to spend more money shopping for sensory items at a preferred vendor, or sacrifice buying what you really want. *If you are using your own money, or donated items, you may have more freedom in where to order or get items from.
- The same districts that warn against home made items, are likely to refuse second hand items as well.
- Always consider safety and rules of the sensory room. We cover this in another blog post.
Planning an inexpensive Sensory Room
Once you have trudged through the rules and do’s don’ts in your school, you can get started creating your list. Try and think of all the things you would love if you did not have a budget. This will help guide you in determining where your money goes.
When your plan has been hatched, you can prioritize what is most important, and what can wait. You can also see which of these items can be donated, made, bought second hand, or replaced with a less expensive version.
A sensory room does not have to be full of expensive equipment to be effective. Sometimes a clear space with very limited sensory input is just as effective as a buy sensory room.
One key aspect is to include some type of Visual schedule of sensory strategies that can be used by sensory room participants.
You’ll also want to incorporate some type of feelings check in or an emotions check in system to use when entering the calm down area and to help them identify how they are feeling and then use strategies to support those needs.
Frugal Sensory Room Items
Sensory room equipment on a budget can include using sensory supports that are free or are already in place in a space like the school or home. Here are some budget-friendly sensory room supplies:
- Crash pad – Here is where your home-made ideas can come in handy. You can buy large foam pieces and stuff them into a duvet cover for a fun (washable) crash pad. A crash pad is a great soft-landing spot for kids who either need a calm down corner, some heavy work, or a safe place to get some frustration out. I have heard there are local mattress factories that have mattresses and foam pieces they can donate.
- Stuffed animals – fill your space or crash pads with stuffed animals. Filling a zippered mattress cover with stuffed animals to make a crash pad, will be easier to keep cleaner than washing 100 plushies.
- Pickle Balls – Pickle Ball has become an increasingly popular sport lately. I bet there are places that have tons of worn-out pickle balls that can fill your ball pit pool.
- Kiddie pool – buy a child size pool (baby pool) to fill with balls, stuffed animals, shredded paper, packing peanuts, sand, or birdseed. Here are some of our favorite ball pit activities.
- Fabric scraps – there are tons of crafters out there with bags of fabric scraps. Gather some of these to make blankets, pillows, tents, or soft-landing spots
- Sensory bin – we all know the tactile benefits of the sensory bin. The OT Toolbox has multiple posts on sensory bin ideas. In a large sensory room you may have space for a sensory bin made of a child’s plastic pool, or a sand and water table.
- Swivel chairs or other flexible seating options (couch, soft chair, floor mats, large pillows, Bean bag chair )
- Sit and spin toy
- Deflated beach ball seat as a wobble cushion for the floor
- Free printable emotions Playdough mats
- Brain breaks
- Heavy work activities based on animals or themes
- A book center with Zones of Regulation books that talk about different feelings and support regulation and processing through feelings
- Jumping mat or small trampoline- When children jump, they put pressure on their joints
- Weighted blanket– Weighted blankets provide deep pressure over the entire body, making this activity one of the an effective whole-body proprioceptive strategies to help children calm down
- Watering plants- Lifting a watering can, can impact joints all over the body. As children stoop down to pick up the watering can, moving it over plants of different heights, they are getting great input
- Weighted ball- Lifting and rolling over a weighted ball increases proprioceptive input in the hands, arms, shoulders, and core.
- Play Dough- Squishing, squeezing and pulling apart playdough or clay, increases proprioceptive input in hands and small joints. You can add a desk or writing surface for table top sensory play and then add a foot fidget to the chair.
- Printable sensory paths- We have many free deep breathing exercises on the website, including:
More elaborate equipment for your sensory room
Parts of your room might call for more elaborate equipment than a few stuffed animals and scraps of fabric. While some sensory equipment can be very expensive, if you think through the needs and design of the space, a budget sensory room design can incorporate just one or two of the more expensive items and use other budget-friendly options.
Here are smore more expensive items that can be used as a center point and then more inexpensive items can be added around these therapy tools.
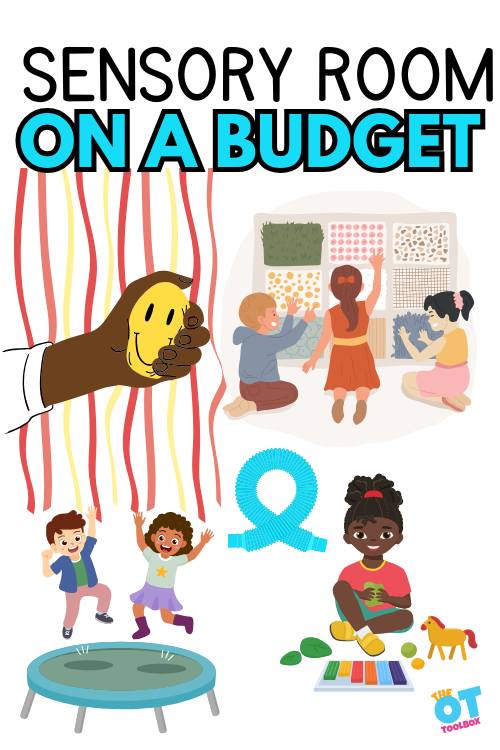
- Sensory wall– A sensory wall can be made of carpet pieces, odds and ends, fabric, sponges, Legos, or whatever textures you can find.
- Fiber Optic lights– a commercial light wall costs over $1,000. This one on Amazon can serve the same purpose for under $100.
- Bubble tube– A traditional bubble tube is very expensive. There are less expensive versions on Amazon available. Add a mirror behind the tube to create the illusion there is more than one tube. Make sure to secure it to the wall.
- Sensory swings- A sensory swing is a high priority in my opinion. There are several different swing options out there, including many that can be do it yourself options. Use fabric to create a hammock swing, or wood and rope for a great platform. Check out our posts on hammock, Lycra, and platform swings. A Sensory Swing used for sensory modulation is an amazing way to provide an option to swing in a home or preschool setting
resources out there for building a sensory room on a budget
When building your sensory room, you will be limited by the constraints at your school, but if there are no rules, the sky is the limit!
- This Pinterest post has hundreds of ideas for creating a sensory room on a budget
- There are multiple different ideas out there to create rooms of all types
- Here is another post on one woman’s journey to create her own sensory room on a budget
Remember, you can start small and build a little more each year.

Victoria Wood, OTR/L is a contributor to The OT Toolbox and has been providing Occupational Therapy treatment in pediatrics for more than 25 years. She has practiced in hospital settings (inpatient, outpatient, NICU, PICU), school systems, and outpatient clinics in several states. She has treated hundreds of children with various sensory processing dysfunction in the areas of behavior, gross/fine motor skills, social skills and self-care. Ms. Wood has also been a featured speaker at seminars, webinars, and school staff development training. She is the author of Seeing your Home and Community with Sensory Eyes.


