Cursive handwriting can be an incentive for kids to sit down and write. Many times, kids see older children or adults writing in cursive handwriting, or see a card that comes in the mail with cursive writing. They want to be able to read the writing and learn to write in cursive themselves.
My daughter asked to learn how to write in cursive, so I was happy to get started with her. I loved assisting my occupational therapy students in fine motor tasks like cursive handwriting and was so excited to share tips and hints with my daughter as she learned cursive letter formation.
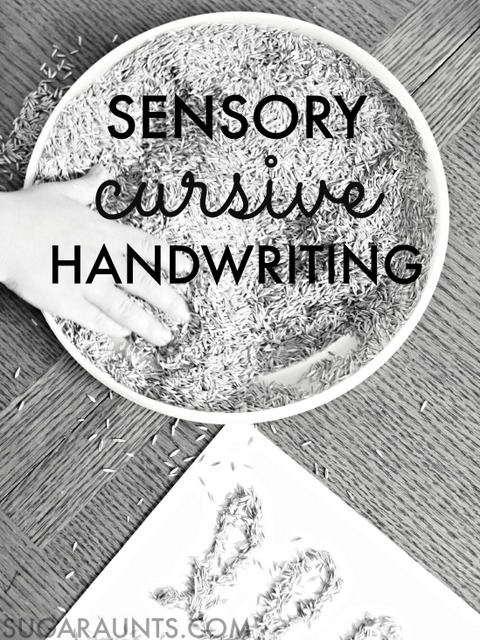
We’ve been doing a lot of practice and fun pre-cursive activities to learn the basics. Today’s sensory cursive activity is another way to introduce cursive letter lines and beginning pencil strokes.

How to teach cursive handwriting from the beginning: Where to start with teaching cursive
This post contains affiliate links.
When you start to teach a child how to write in cursive, do not teach letters alphabetically. When a child learns printed letters, they do not learn how to write in alphabetical order. Instead, you’ll teach letters based on formation. Lower case cursive letters share similar pencil strokes and make teaching certain groupings together. We talked about the c letter series a little bit with our fizzy dough cursive sensory activity. Letters c, a, d, g, and q start with the cursive letter c and are typically the first letters taught.
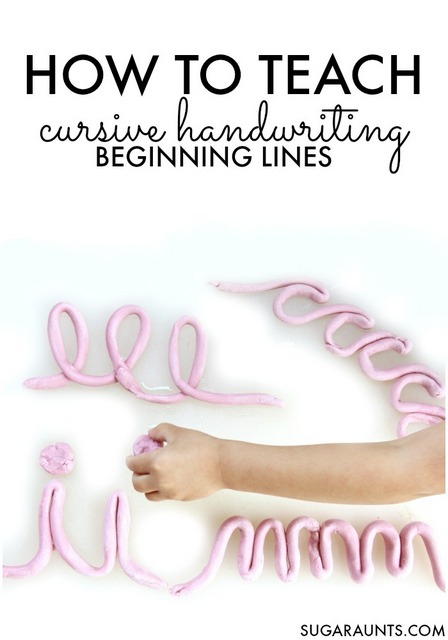
Today we practiced the l series of letters. The lower case cursive letters l, e, b, f, h, and k begin with the letter l’s loop. I had my daughters use
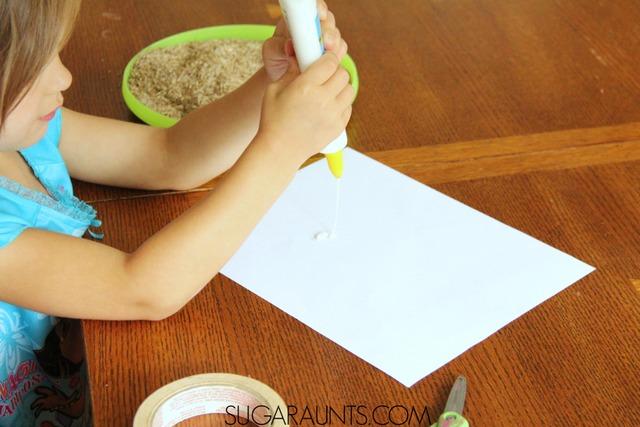
a bottle of glue
(we go through a LOT of glue in our house!) to draw the loops of l across a page. At this point, do not worry about size. We are focusing on the formation of the “l”‘s loops and connecting the “l”‘s together. You’ll want to encourage your child to form skinny and tall “l”s and not wide loops formed haphazardly. Using the glue bottle really provides a proprioceptive feedback to your child as they squeezed the bottle and form the letter’s loops. You can read more about proprioception in handwriting here.
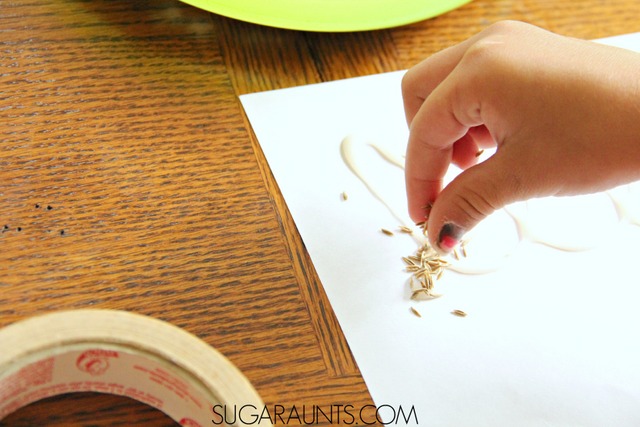
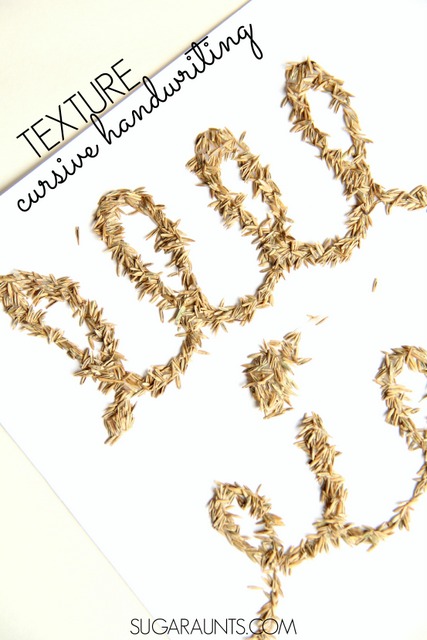
Next, we used a tray of grass seed for a sensory and textured way to write our cursive letter loops. Using grass seed over the glue is a great sensory addition to handwriting practice for it’s texture. Little hands love to examine and explore the soft, yet pokey seed. It’s small enough that the seeds stick well to the glue and the letters are still very legible. A larger seed such as dyed pumpkin seeds (although equally as FUN!) makes the glue letters more difficult to distinguish, especially if a child writes the letters on the smaller side.
The small size of grass seed requires a wonderful pad to pad grasp (the pads of the thumb and index finger touching together, pincer (or pad-to-pad) grasp, and neat pincer grasp where the tips of the thumb and index finger are manipulating very small items, and rotation of the grass seed between the pads of the thumb and index finger. Rotation of items is important as a child rolls items, such as a pencil between the pads of the thumb and index finger. Rotation of the grass seed happens as they pick up the seeds and manipulate them onto the glue letters.
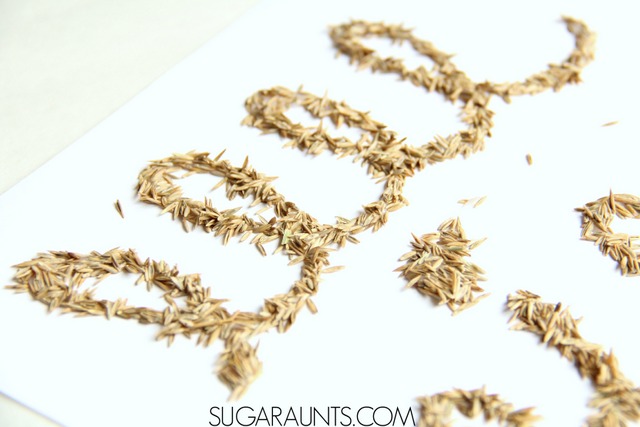
Form all of the basic beginning lines of cursive. Practice the loops of “l”s, the curves of “c”s, and the re-tracing of “i”s. Practice writing the glue and grass lines in connected letters and individual letters.
Love it? Pin it!
More cursive handwriting activities you will Love:
This post is part of our month-long Learning with Free Materials series, part of the 31 Days of Homeschooling Tips as we blog along with other bloggers with learning at home tips and tools.
Looking for more ideas to teach cursive? You’ll love our 31 day series on how to teach cursive handwriting:


2 thoughts on “How to teach cursive writing with sensory textures”
This is such a fun idea. Thanks for sharing! I'm pinning it so I don't forget about it.
Thanks! It was a big hit in our house 🙂
Comments are closed.