This blog post sharing how we made a scrapbook with recycled materials is an old one on the site, but we still love looking back at our kid-made scrapbook! The best thing about a scrapbook using recycled materials is that you can use what you have on hand…even incorporating recycled art or other items. This is a kids craft that you’ll love to hold onto forever! Let’s get started with a recycling bin project that kids will love.
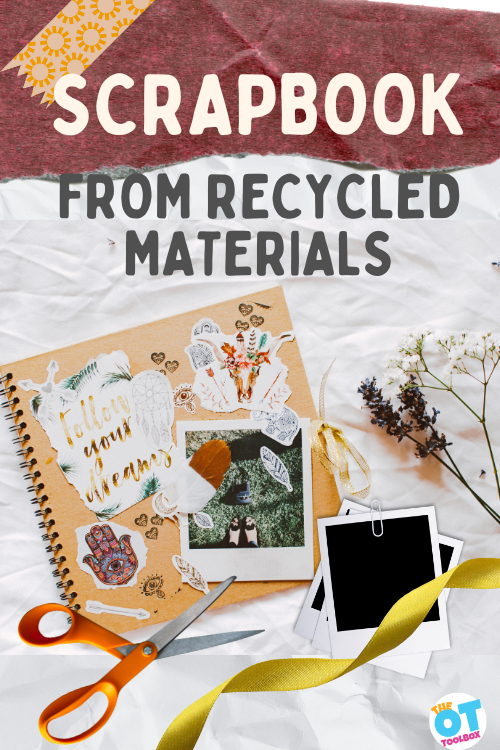
DIY Scrapbook for Kids
A DIY scrapbook made with recycled materials is a fun and creative way for kids to turn everyday items into meaningful keepsakes. Instead of throwing away paper scraps, cardboard packaging, or old magazines, children can repurpose these materials into colorful scrapbook pages filled with memories, drawings, and photos. Recycled crafts like this help children see that ordinary materials can become something new and useful.
Creating a scrapbook also encourages creativity and problem-solving. Kids can experiment with textures, colors, and shapes as they arrange recycled materials onto each page. Using items like ticket stubs, greeting cards, or magazine pictures allows children to personalize their scrapbook and tell their own story. It’s also a simple way to introduce kids to sustainable crafting and environmental awareness.
Scrapbook Using Recycled Materials
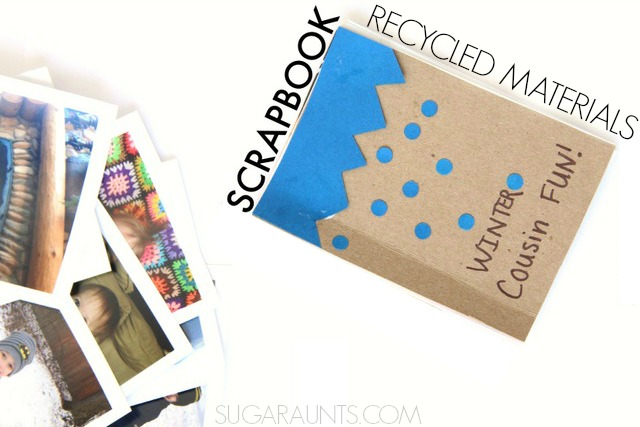
We love using recycled materials in crafts and activities. There’s nothing like grabbing craft supplies from the recycle bin and creating, learning, and playing! We made our own phone picture scrapbook together with the kids using recycled materials and now have a great keepsake of a season of fun with cousins!
The best news is that these are pictures from my phone that I never would have printed off let alone scrap booked into a memory keeper.
There are so many items in your recycle bin (or heading for the trash) that can be used as embellishments in a recycled scrapbook design. Look around the house and see what you can come up with!
Here are some ideas for decorating a scrapbook with recycled items:
- Scrap paper
- Kids art
- Old papers from school
- Old school folders
- Fabric from clothing that no longer fits
- Strips of colored paper- try junk mail!
- Paper bags
- Old magazines
- Envelopes that come in the mail
- Refrigerator magnets
- Stickers
- Old jewelry
- Decorative paper from greeting cards
- Various types of paper texture: cardboard, egg cartons, fabrics, etc.
- Old magazines and catalogs
- Junk mail envelopes
- Greeting cards
- Cereal boxes or food packaging cardboard
- Scrap paper from school projects
- Newspaper pages
- Paper bags
- Wrapping paper scraps
- Ticket stubs or event programs
- Fabric scraps or ribbon pieces
These items can be used as a photo mat for holding photos on the scrapbook page, or you can use the items as accents on the page. The sky is the limit!
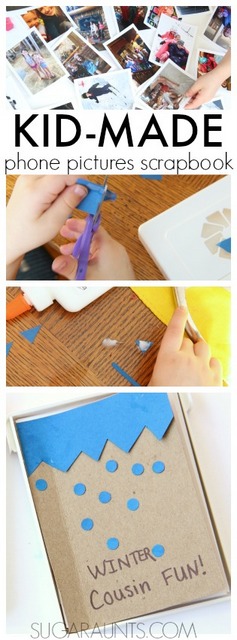
Children can cut pictures, letters, and patterns from these materials to decorate scrapbook pages. Even small pieces of cardboard or packaging can become borders, frames, or pockets within the scrapbook. I like using old wrapping paper for background layers of the scrapbook because they hold memories and it’s a great medium for kids to cut. Read about cutting wrapping paper as a developmental tool for kids.
Add a few scrapbooking tools to work with the materials and you are good to go:
- Scissors
- Glue
- Brads
- Pens
- Markers
- Staples
- Hole punches to punch holes in paper and use the paper holes as accents
These lists should give you some inspiration to get started!
How to make scrapbook using recycled materials
If you are like me, you always have your phone in your back pocket. A mom has got to capture those cutie pie moments and lugging a big camera around just isn’t an option sometimes. I love having a phone camera always on me a the slightest indication of a gummy baby smile.
How to Make a DIY Scrapbook
Making a recycled scrapbook can be simple and flexible depending on the materials you have available.
Start by creating the base of the scrapbook. Pages can be made from cardboard cut from cereal boxes, construction paper, or thick paper bag material. Punch holes along one side and tie the pages together using yarn, ribbon, or string. Another option is to staple the pages together or glue them inside a folded cardboard cover.
Next, let kids decorate each page using recycled materials. They can glue magazine pictures, add drawings, or attach photos. Small envelopes or folded paper pieces can be glued onto pages to create pockets for storing notes or small keepsakes.
Encourage kids to add titles, captions, or short sentences that describe the memories on each page.
One of the best ways to do this is to just grab some paper shopping bags and staple them together to make pages. Then start laying on the creative scrapbook add-ons.

With such access to capturing images, most of us have hundreds or thousands of pictures stored on our phones. Those images usually never get printed! All of those real-life, caught in the moment pictures that tell the story of our lives just get stored away and never to be printed or scrap booked.
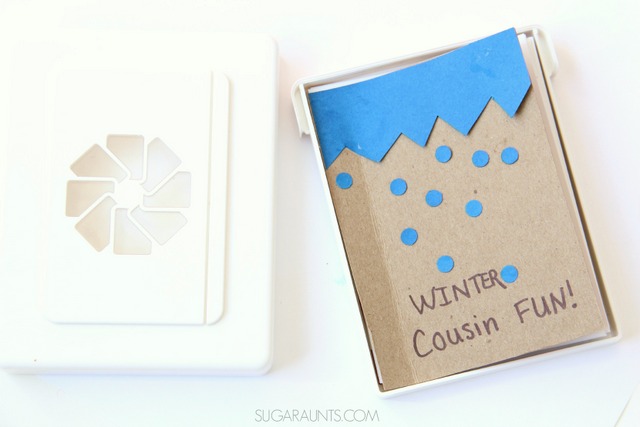
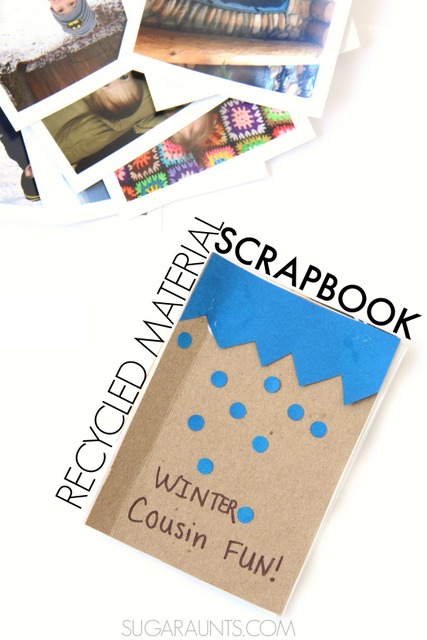
When they arrived in the mail, my kids loved looking at the “story” of our winter. And, these pictures were clear and bright! We decided to make a scrapbook with our high quality pictures using recycled materials.
Here are the directions to make a scrapbook from recycled items:
- Cut out 2 pieces of cardboard to create a front cover and back cover. Cut the cardboard to the size of the book you want to create. We used a cardboard box to create a front and back cover for our scrapbook. A thin cardboard like a cracker box or cereal box will work best.
- Cut paper the same size as the cardboard. This will be pages in your recycled scrapbook. Thicker paper like cardstock or an old folder works best for the pages.
- Cut paper, fabric, or cardboard larger than the size of the images. This will be photo mat for each image.
- Use double sided tape to attach images to the photo mats.
- Add accents or embellishments onto each page: pieces of fabric, old stickers, layering various textured paper, adding strips of cardboard, etc.
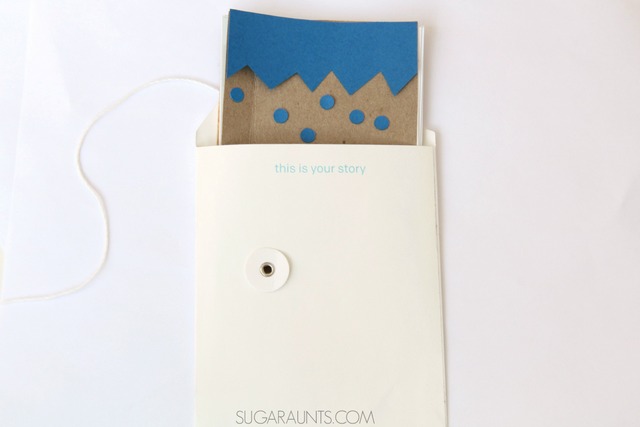
- Use a hole punch to punch holes in each photo page and in the front cover and back cover.
- Thread the book together using a strip of recycled fabric, a piece of string, or twine. Tie each hole with the material.
- Use recycled paper, ribbon, or scraps from magazines to decorate the front cover. We used scraps of paper to make a top border and falling dots on our scrapbook. You can add decorations to the back side of images as well, even adding written descriptions for each picture in the scrapbook.
Fine Motor Benefits of Scrapbook Making
Creating a scrapbook supports many important fine motor skills that children need for school tasks like writing and cutting. Cutting pictures from magazines helps strengthen the small muscles in the hands while also improving scissor skills.
Tearing paper, gluing small pieces, and placing decorations onto pages all encourage finger coordination and hand control.
Children also practice bilateral coordination when they hold paper with one hand while cutting with the other. When kids write captions or labels for their scrapbook pages, they are practicing handwriting and visual motor skills in a meaningful and motivating way.
Because scrapbook projects combine art, writing, and organization, they provide a rich opportunity to build multiple developmental skills through creative play.
Fun Scrapbook Theme Ideas
Scrapbooks can be created around almost any theme. Giving kids a topic often helps them stay engaged and excited about the project.
Some fun scrapbook themes include:
- My Favorite Things
- Family Memories
- Vacation or Travel Scrapbook
- Nature Walk Discoveries
- School Year Memories
- Favorite Books or Characters
- Seasonal Scrapbooks (Fall, Winter, Summer)
Kids can collect pictures, drawings, and small items related to their theme and arrange them creatively across the pages.
Scrapbook Prompts for Kids
Sometimes children need a little inspiration for what to include in their scrapbook. Simple prompts can help guide their ideas.
Try prompts like:
- My favorite food is…
- My best memory this week…
- My favorite place to visit…
- Something that makes me happy…
- My favorite animal…
- My favorite game to play…
Kids can draw pictures, glue images, or write short sentences in response to these prompts.

Colleen Beck, OTR/L has been an occupational therapist since 2000, working in school-based, hand therapy, outpatient peds, EI, and SNF. Colleen created The OT Toolbox to inspire therapists, teachers, and parents with easy and fun tools to help children thrive. Read her story about going from an OT making $3/hour (after paying for kids’ childcare) to a full-time OT resource creator for millions of readers. Want to collaborate? Send an email to contact@theottoolbox.com.


")
")
