In this blog post, we’re covering Handwriting Without Tears letter order, or the specific order to teach letter formation based on the handwriting curriculum, Handwriting Without Tears (Learning Without Tears). We’ve previously covered the cursive HWT order so this is a nice resource to have on hand.
Have you noticed most teachers teach letters in alphabetical order? The first thing they teach is name writing, then writing the alphabet. This seems like a logical progression, but is not the most effective or efficient method. There are several different handwriting programs out there to address this important skill. Many of them do not teach letters in order.
One program specifically is; Handwriting without Tears (now called Learning without Tears). The Handwriting without Tears letter order is vastly different than writing letters in sequential order.
handwriting without tears letter order
The Handwriting without Tears program is popular among therapists for good reasons:
- It’s a research-backed curriculum
- The program is designed to be easy to teach and easy to learn
- Developmentally appropriate sequence
- It uses explicit instruction combined with guided practice
- Promotes handwriting automaticity
- Multisensory learning to support a variety of learning styles, including kinesthetic learners, visual learners, and auditory learners
- Uses hands-on tools and activities in handwriting lessons
- Uses intuitive lesson booklets to promote learning
According to the folks at Learning without Tears, “Pre-K–5 students move through a developmentally appropriate teaching order from capital, to lowercase, and cursive letters. This design helps children master handwriting skills in the easiest, most efficient way. Instead of teaching 52 letter symbols with a mishmash of different sizes, positions, and confusing starting places, we divide and conquer.”
what is handwriting without tears letter order?
If you have used the HWT program, you may have noticed the letters are not in sequential order. In other words, the Handwriting Without Tears program does not teach letter formation in order from A-Z.
This sounds counter intuitive, as students are generally taught letters in order. Child development skills, as found in the Peabody Developmental Motor Scales, demonstrates the visual motor progression of fine motor skills. We cover some of this in our post on drawing milestones.
When developing writing skills, pre-writing lines emerge. This begins when the stages start at scribbling, vertical and horizontal lines, then circular forms. After these are mastered, more difficult designs such as a cross, square, and triangle are developed.
Learners who are still mastering the basics of writing lines, do not have the necessary skills to form more complex designs such as the letter A which relies on diagonal lines, or B which requires semicircles. Students often get stuck at this stage if they are unable to form these letters.
The Handwriting without Tears letter order promotes success, focusing on letters that use the preliminary pre-writing strokes. This is why letters with straight lines are taught first and in a group, known as letter families.
HWT Letter Order Groups
The Handwriting Without Tears letter order progresses like this:
- L, F, E, H, T, I
- U, C, O, Q, G, S, J, D, P, B, R
- K, A, N, M, V, W, X, Y, Z
Handwriting Without Tears Straight Line Letters
The first letters are L, F, E, H, T, I. Notice all of these letters require only vertical and horizontal lines.
This is the first developmental skill mastered. Imagine the success of learning six letters right away, rather than struggling on A and B!
handwriting without tears Circular Letters
The second set of letters are circular: U, C, O, Q, G, S, J, D, P, B, R. The letters within each section progress in level of difficulty from U to R.
Notice that letter B is 16th on the list! This is vastly different than the traditional method of teaching it as letter number two.
While R, is a circular letter, it also contains a diagonal, which segues into the third uppercase letter formation group.
Grab our Letter B Worksheet for sensory motor practice to form the semicircles that make up this circular letter.
We also have a Letter C Worksheet for improving the circular motion of the pencil which carries over to other letters (Also known as magic c and is helpful for forming the lowercase letter counterparts).
Further down the list is letter D, and you can use our Letter D Worksheet to work on the straight line followed by a rotated semicircular motion that then carries over to the remaining letters with the same motor pattern: P, B, and R.
handwriting without tears Diagonal Letters
The third and final set of letters are the diagonals. Copying a triangle is one of the last basic shapes to learn as a developmental progression.
Forming diagonals is tricky. Not only are students crossing midline, they are doing so in a top to bottom fashion.
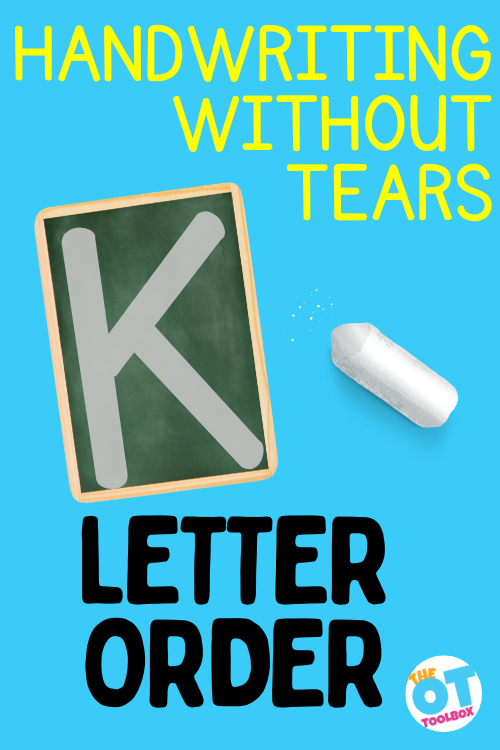
The letters in this series are: K, A, N, M, V, W, X, Y, Z. A is number 18 on the list. Now you can see why students struggle to learn the very first letters of the alphabet. They are not developmentally ready for this skill at the time we are insisting on teaching it.
Try using our Letter A Worksheet for sensory motor practice to form the diagonals and starting the letter in the middle.
Starting Position for handwriting without tears letters
An additional method HWT uses to group uppercase letters is their starting position. This is not my personal method of teaching, as I prefer the developmental sequence.
When focusing on the starting point for letters, Handwriting Without Tears groups the upper case letters into three catagories, depending on where the pencil starts:
- Frog Jump Capital Letters – F, E, D, P, B, R, N, M
- Corner Starting Capital Letters – H, K, L, U, V, W, X, Y, Z
- Center Starting Capital Letters – C, O, Q, G, S, A, I, T, J
Take a look at the Frog Jump Capitals that start at the left corner (F, E, D, P, B, R, N, M). Notice several of these letters are more complex with diagonal lines. This can be a challenge for some students that struggle with the pre-writing lines, specifically diagonals. Additionally, this grouping of letters includes several different pencil stroke patterns, which can also be a challenge for some students.
Their second grouping is the starting corner capitals (H, K, L, U, V, W, X, Y, Z). This grouping of letters also includes a mix of straight line letters, diagonals, and curves.
Lastly, the center starters (C, O, Q, G, S, A, I, T, J) are addressed. Again, this group of letters includes more curved lines, but again, a mix of straight lines, curved lines, and diagonals. Notice how many of the last letters are commonly used letters. This is another reason why this particular HWT letter order might be a challenge for some.
uppercase or lowercase letter order first?
There has been some discussion on whether it is better to teach upper or lowercase letter formation first. We cover the developmental reasons in our linked blog post.
The research has been inconclusive, as there are benefits to both.
- While lowercase letters are everywhere, capital letters are the first introduced in toddler books and puzzles.
- Lowercase letters will be used much more than capital, but uppercase letters are much easier to form due to the simple straight lines.
- There is no retracing or letters that sit below the line in uppercase letters
- B/D are not as confusing as lowercase b and d when writing capital letters
- When reading, many agree that teaching letter sounds is more important than their names, therefore teaching lowercase letter sounds first, may be more beneficial than teaching the letter names
- Consider the age of your learners – preschooler should write uppercase first, as that is their developmental progression stage. Kindergarten and later students may be able to start in alphabetical order, however for delayed students, this can cause frustration
handwriting without tears lowercase letter order
For the same reason we teach uppercase letters in a progressive order, Handwriting without Tears lowercase letter order is important also. These letters are formed in developmental progression as with the uppercase.
- Just like their capital letters – c, o, s, v, w, t (just like uppercase only lower cross)
- Magic C – these high frequency letters (a, g, d) start with a magic “c”. This helps differentiate between b and d. While “q” is a “magic c” letter, it is taught later to avoid confusion with g
- The rest of the vowels – u, i, e
- Familiar from capitals – l, k, y, j
- Diving letters – these letters dive down (p, r, n, m, h, b)
- Tricky leftovers – f has a tricky start, letter q is taught here to avoid confusion with g, x and z are familiar but infrequently used
- Once these are learned, I add another group: the drop down letters. These are the most difficult to write correctly as all of the other letters sit on the line. When I am teaching correct letter formation, j, g, p, q, y are stressed as their own group, after the others have been learned
cursive handwriting letter order
As with upper and lowercase letter formation, cursive letters are formed in groups. While HWT has their way of presenting the cursive letters, I prefer (Amazon affiliate link) “Loops and other Groups“.
This system groups the letters into the way they are formed. There are the clock climbers, kite strings, loop groups, then hills and valleys. Capital letters are taught last, as they are tricky and not used as frequently.
Here is an interesting post from the OT Toolbox about teaching cursive writing.
How to Teach Cursive Writing is another great resource.
Handwriting Without Tears Letter Order: Why It Matters for Young Writers
When teaching young children how to write, the Handwriting Without Tears letter order offers a thoughtful, developmental teaching order that sets students up for success. Instead of following the traditional A-Z sequence, this method begins with letters that are easiest to form (like L, F, E, H), and builds confidence with correct formation from the very beginning. This intentional capital teaching order is backed by research and clinical observation, helping kids avoid common challenges like reversals and handwriting fatigue.
As an occupational therapist, I’ve seen how this method supports literacy skills and improves alphabet knowledge in a way that’s functional and developmentally appropriate. The progression of letters aligns with how children gain motor control and visual-motor integration skills. This gives kids a way to learn with success and confidence.
Why the Handwriting Without Tears Letter Order Works
The beauty of this approach is that it focuses on multi-sensory writing experiences using hands-on materials like wood pieces, chalkboards, and the ever-popular mat. These tools offer multisensory activities that integrate touch, sight, and movement. This helps with creating a motor plan for developing both muscle memory and motor planning. By breaking letters into meaningful categories (such as “Frog Jump Capitals” or “Starting Corner Capitals”), the method helps children internalize consistent patterns of movement.
The result? Better posture, improved pencil grasp, and fewer instances of letter formation confusion or reversals. Kids develop strong muscle memory for correct formation, which leads to more automatic writing and fluent sentence construction down the road.
Letter Formation Strategies that Support Real Learning
Handwriting Without Tears activities also include rich vocabulary support, songs, and movement-based games. These reinforce learning while making it fun and meaningful. Using visual cues, auditory repetition, and tactile feedback all at once gives young writers multiple ways to engage with each letter. These letter formation strategies aren’t just good for OT sessions—they’re practical for classroom teachers, homeschoolers, and parents too.
The curriculum’s commitment to hands-on materials like magnetic boards, wooden letter pieces, and roll-a-dough letters ensures that instruction is rooted in movement and exploration, not just pencil-and-paper tasks. When we combine these tools with consistent routines, movement breaks, and guided support, we empower young writers to feel successful and build foundational literacy skills that last.
Frequently Asked Questions about Handwriting Without Tears
Why Handwriting Without Tears?
Handwriting Without Tears is a developmentally appropriate approach that breaks down handwriting into manageable, multisensory steps. It supports young children with letter formation strategies that are backed by research in motor development and learning. This program uses a developmental teaching order, hands-on materials, and movement-based learning to reduce frustration, avoid reversals, and build strong alphabet knowledge and literacy skills from the start.
What are corner starter letters?
Corner starter letters are capital letters that begin at the top left corner of the writing space or chalkboard. Examples include F, E, D, P, and B. These letters follow a consistent movement pattern, helping children learn correct formation with fewer motor planning challenges. Teaching these letters first reinforces a top-to-bottom, left-to-right writing habit, which is essential for fluent writing.
What are center starter letters?
Center starter letters begin in the middle of the top line or writing space. Examples include C, O, Q, and G. These letters often involve curves and circular movements, making them slightly more complex. Teaching these after corner starters allows children to develop the control and coordination needed for more advanced motor tasks.
Why teach letters in groups?
Teaching letters in developmentally appropriate groups (instead of alphabetical order) allows children to master foundational strokes and patterns before moving on to more complex shapes. We call these letter families. This strategy promotes correct formation, reinforces muscle memory, and supports multi-sensory writing by allowing for repetition and confidence-building. Grouped teaching also reduces the likelihood of reversals and helps build smoother transitions into writing words and sentences.
resources to support handwriting without tears letter order
- Learning Without Tears letter strategies uses a multisensory approach to learning letters, which includes creating letters out of clay or wooden blocks, singing songs about letters, to drawing on tiny chalkboards.
- Cursive writing letter order teaches more specifics about writing in letter groups
Everyone is different, as are their learning styles. Ultimately the goal is success. Whether that means using the Handwriting Without Tears Letter Order, or another teaching method, whatever helps and motivates your student is the correct choice. Nothing we teach is one size fits all. That is what makes our job so exciting and dynamic!

Victoria Wood, OTR/L is a contributor to The OT Toolbox and has been providing Occupational Therapy treatment in pediatrics for more than 25 years. She has practiced in hospital settings (inpatient, outpatient, NICU, PICU), school systems, and outpatient clinics in several states. She has treated hundreds of children with various sensory processing dysfunction in the areas of behavior, gross/fine motor skills, social skills and self-care. Ms. Wood has also been a featured speaker at seminars, webinars, and school staff development training. She is the author of Seeing your Home and Community with Sensory Eyes.
The Letters Fine Motor Kit is a supplement to any handwriting curriculum and uses hands-on, multisensory strategies to support letter formation.
Want printable handwriting and sensory motor activities to target the visual motor skills needed for letter writing? Grab a copy of our Letters! Fine Motor Kit. The printable PDF contains 100 pages of hands-on letter writing practice for multisensory handwriting!

Inside the Letters Fine Motor Kit, you’ll find:
- A-Z Multisensory Writing Pages: Roll a ball of dough letters, ASL sign language letters, gross motor movement, small-scale letter box writing task, finger isolation letter trace, and writing practice area
- Alphabet Fine Motor Clip Cards– Clip clothespins or paper clips to match letters with various fonts to strengthen the hands and focusing on eye-hand coordination, bilateral coordination, visual processing skills, and more.
- Cut and place Fine Motor Mazes– Cut out the letter pieces and trace the maze with a finger to work on eye-hand coordination and finger isolation. Place a small letter on the letter spots to address in-hand manipulation and dexterity skills.
- A-Z Cotton Swab Cards– Includes upper case and lower case letters. Dot the cards using a cotton swab or laminate the cards and use them over and over again.
- A-Z Pattern Block Cards– These cards include a section for tracing with a finger tip for separation of the sides of the hand, eye-hand coordination, and finger isolation during letter formation. There is also a space to “finger write” the letter using the fingertip. This multisensory letter formation activity can be a great brain break during handwriting or literacy tasks. Learners can then form the letter using parquetry blocks.
- Fine Motor Letter Geo-Cards– These geo board cards include A-Z in upper case forms. Users can copy the letter forms in a variety of multi-sensory strategies.
- A-Z Color and Cut Letter Memory Cards– These upper case and lower case letter cards can be used to color for letter formation. Then use them in fine motor matching tasks or in sensory bins.
- Color By Size Sheets– Help learners discriminate between tall letters, small letters, and tail letters. This visual perception activity invites learners to color small areas, using hand muscles for strengthening and handwriting endurance.
- A-Z Building Block Cards– These LEGO block cards invite users to copy the cards to form letters using small building blocks. Users can place the blocks on the cards or copy the letter to address visual shift and visual memory. This activity set comes in upper case and lowercase letter forms.
- A-Z Play Dough Letter Formation Cards– Print off these cards and laminate them to create play dough mats. Learners can form the letters using the arrows to correctly form letters with play dough while strengthening their hands and visual motor skills. Each card includes a space for practicing the letter formation, using a dry erase marker if the cards are laminated.
- Graded Lines Box Writing Sheets– Users can trace and form letters in boxes to work on formation of letters, line awareness, starting points, and letter size.
- Alphabet Roll and Write Sheets– Roll a dice and form the letter associated with the number of dots on the dice. This is a great way to work on letter formation skills using motivation. Which letter will reach the top first? This activity is easily integrated with a rainbow writing task to increase number or repetitions for letter practice.
- Pencil Control Letter Scan– Use the letter bubble tracks to scan for letters. Users can fill in the letters of the alphabet to work on pencil control skills.
- Color and Cut Puzzles– Color the pictures to work on hand strength and letter formation skills. Then cut out the puzzles and build visual perceptual skills.
Get your copy of the Letters Fine Motor Kit today!


