Did you know there is a specific order to teach cursive letters to promote cursive writing legibility and carryover of cursive handwriting? Occupational therapy providers work with the occupation of handwriting and cursive letters are part of that process. In this post, you’ll learn about cursive writing order to teach letters of the alphabet, including the Handwriting Without Tears letter order for teaching cursive. The order that kids should learn the cursive alphabet, including print letter patterns that are directly transferable to cursive alphabet letters.
Using a developmental approach to teaching cursive letters supports children and sets them up for success.
order to teach cursive letters
The order that cursive letters are taught is based on development of skills. Just like the order to teach printed letter formation is based on development of pencil control skills, visual motor skills, cursive letter order is also taught developmentally.
This means that letters are grouped into similar pencil strokes, or letter families.
Learning to write the alphabet in cursive, writing one’s name in cursive, and writing words in cursive is something that many kids want to do around the second grade.
It’s around second grade, or 7-8 years of age that fine motor skills develop in such a way that pencil control and graded precision are developed to enable greater in-hand manipulation, and movement through the range of mobility in the thumb and intrinsic muscles within the hand.
This enables pencil movements to become more mobile and fluid, which are pre-requisites for cursive writing skills.
Prior to this skill achievement, handwriting is taught based on pencil strokes, including uppercase letters before lowercase letters because of the developmental aspect of learning letter formations.
Cursive seems like a “grown up” style of communication that kids see adults or older students using and they try to make swoopy writing on their own.
Some children can be very motivated to learn to write the alphabet in cursive and use it in their written work.
However, one tip for teaching children to write in cursive is to go through the letters in an order that makes sense according to the pencil movements needed to create the letters.
Writing cursive letters in a group of similar pencil strokes is helpful for carryover of pencil control practice and letter formation. Here is more information on teaching groups of similar cursive letters together in a chunk, or cursive letter families.
Once kids have a start on cursive letter formation, they can practice in creative ways like on the window.
Other children who may not be exposed to cursive written work might have their first exposure to cursive in the classroom. Still other students might be in a public or private classroom where cursive handwriting has been dropped from the curriculum. These kids may need extra practice at home or might need to learn cursive handwriting from the very beginning.
But where to start when teaching kids (or adults!) the cursive writing alphabet and how to form words in cursive? Read on for tips and strategies to get started on learning cursive letters.
Cursive Letters Order
We’ve touched on cursive handwriting in previous posts, include a small piece about starting to teach cursive letters. This strategy will outline the alphabet and the letter order to make learning cursive more easy, based on learning letters in a developmental and progressive order.
RELATED READ: Practice letters in a Cursive Writing Journal.
There are print letter patterns that are directly transferable to cursive letters.
These are cursive letters that are formed similarly to their printed letter counterparts. The muscle movements of the hands that are used to form some printed letters are directly related to the same letters. For this reason, it’s a good idea to start with these letters when learning the cursive writing alphabet.
The printed letter patterns that make up some letters will transfer directly to cursive, and when formed with a few subskills, cursive letter formation will easily follow (in most cases):
- Left-to-right strokes
- Good starting points
- Direction of movement
- Consistent stopping points
- Control of downstrokes
- Smooth rhythm
Given the subskills noted above, cursive letter formation will lend to more legible letter formation. Often times, learning correct letter formation and motor practice will help with legibility and ease of cursive writing into a viable form of written communication.
Cursive Letter Order Patterns
If you take a look at cursive letters, you might see a pattern that is similar among the letters. This is part of why we use a cursive pre-writing lines approach when teaching cursive for the first time.
You’ll see pencil and paper activities that support this pencil movement with different pencil strokes:
- Upswing (the line to start a cursive i or t)
- Downswing (the line to start a cursive c or a)
Both of these movements can transfer to different starting lines for the other letters. The muscles used to make these lines can then transfer to the other starting movements. Check out our blog post on cursive beginning lines for more information on this concept.
Heling kids to start off with confidence in pencil control to make these beginning strokes supports confidence when learning cursive letters from the start!
When teaching the cursive alphabet, where to begin?
These letters have print patterns that are directly transferable to their cursive letters. This is related to the pencil strokes that are used to form the cursive letters. For this reason, there is a different order to teach cursive lowercase letters compared to their uppercase letter counterpart.
When we consider printed letters, we can directly translate the pencil strokes to some of the cursive letter counterparts. This means that learning the cursive letter form of the letter should be easier based on knowledge of the printed letter’s form.
Having letter recognition skills for printed letters supports the ability to learn cursive letters. For example, there are printed letters which directly translate to the pencil strokes in cursive:
- t, i, and u and w transfer to their cursive letter counterparts.
- e and l transfer to their cursive letter counterparts.
- n, m, p, and h transfer to their cursive letter counterparts.
- a, c, d, q, and o transfer to their cursive letter counterparts.
- j and g transfer to their cursive letter counterparts.
This means that the remaining letters are the only ones that need to be taught as a new handwriting motor plan in mind. Those letters include:
- b, f, k, r, s, v, x, y, and z
We can help learners with this group by calling them cousins or relatives to their printed letter counterpart because they are similar, but different.
Lowercase Cursive Letters
The following letters transfer directly to their cursive letter forms: c, a, d, g, o, q, i, t, u, j, e, l, f, h, p, n, and m.
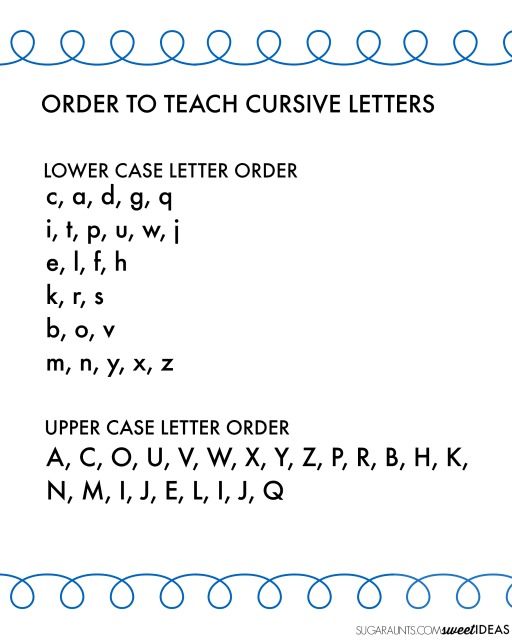
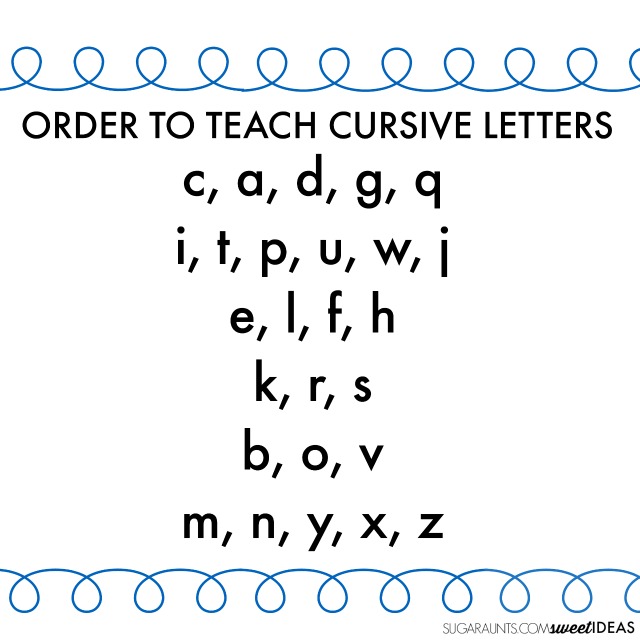
Knowing that there are letters that use similar motor plans as a starting point, it is recommended to follow an order when teaching lowercase cursive letters:
- c, a, d, g, q – These letters can be considered “wave letters” because of the beginning stroke.
- i, t, p, u, w, j – These letters can be considered the “tree letters” because of the beginning line to swing up.
e, l, f, h – These letters can be considered the “loop letters” because of the loop that the pencil makes. - k, r, s
- b, o, v – These letters can be considered the “tow truck letters” because of the ending connection.
- m, n, y, x, z – These letters can be considered the “bump letters” because of the beginning pencil stroke.
Uppercase cursive letters
Upper case cursive letters should be presented in a specific order as well:
A, C, O, U, V, W, X, Y, Z, P, R, B, H, K, N, M, I, J, E, L, I, J, Q
This letter order uses a combination of research-based strategies and focuses on movement based patterns as well as common letter formations, i.e. the way the letters connect to form words. Read about how to connect cursive letters for specifics.
In general, it’s considered that the baseline connecting letters are taught prior to the middle line connecting letters. This isn’t accurate for the Learning Without Tears program (Handwriting Without Tears cursive letter order) when it comes to letter w which is taught near the beginning, due to it’s direct translation from the printed version of letter w.
This upper case cursive letter order (or cursive capital letters) order teaches upper case letters that are similar to lower case letters first. Always teach lower case cursive letters before upper case letters.
Print out the Free printable version for the classroom or home.
Affiliate links are included below.
WOrk on Cursive Letter Order with these Ideas:
Here, you’ll find More creative ways to work on learning cursive writing:
- Fizzy Dough Pre-Cursive lines
- How to teach cursive writing with sensory textures
- Creative Cursive Handwriting Journal
- Napkin Letter Formation Art
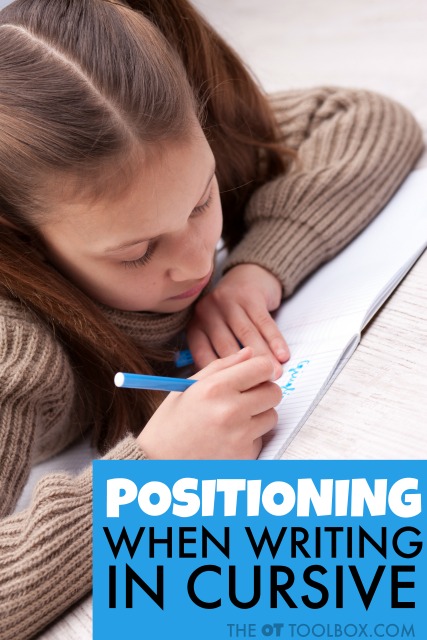
- Positioning When Writing in Cursive
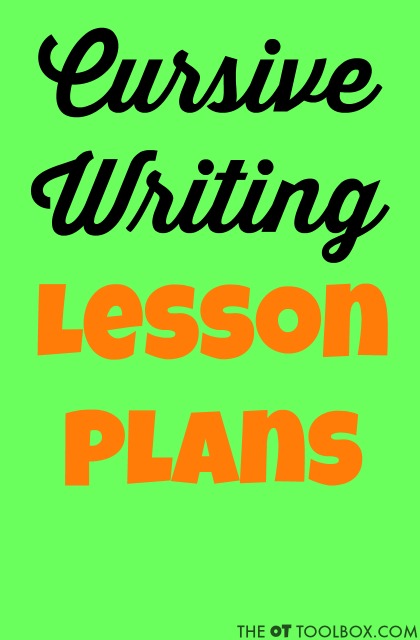
- Cursive Writing Lesson Plan
Cursive Writing Order
Looking for more information on how to teach cursive writing? You’ll love our 31 day series on How to Teach Cursive Writing.
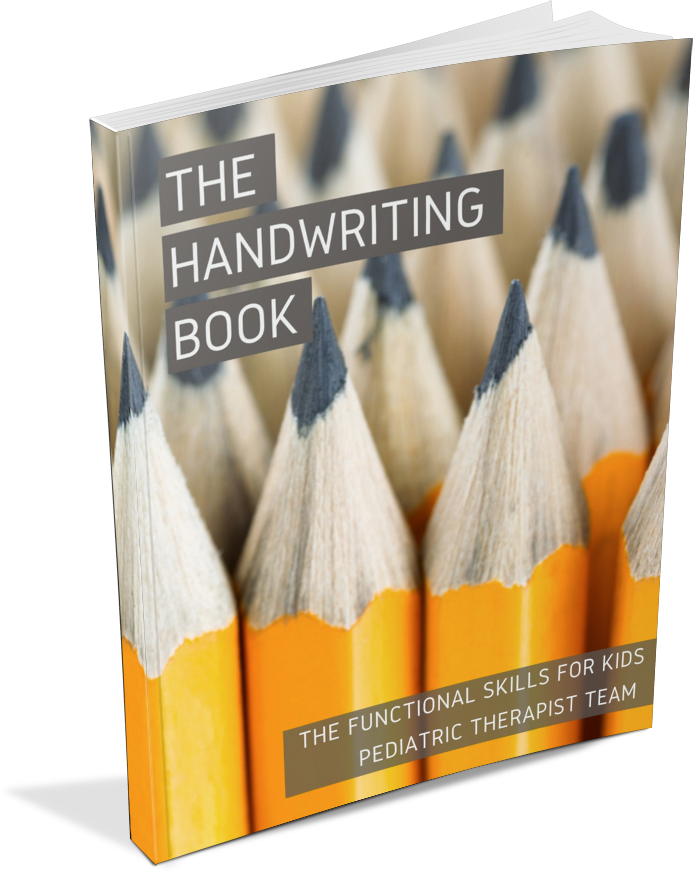
The Handwriting Book breaks down the functional skill of handwriting into developmental areas. These include developmental progression of pre-writing strokes, fine motor skills, gross motor development, sensory considerations, and visual perceptual skills. Each section includes strategies and tips to improve these underlying areas.
- Strategies to address letter and number formation and reversals
- Ideas for combining handwriting and play
- Activities to practice handwriting skills at home
- Tips and strategies for the reluctant writer
- Tips to improve pencil grip
- Tips for sizing, spacing, and alignment with overall improved legibility
A final note on teaching cursive letters
Sometimes, cursive letters are taught as a writing format for children that struggle with the motor plan to form and use legible printed handwriting. This might be the case for several reasons:
- The motor plan to form printed letters is choppy and difficult to recall the different pencil strokes for each letter.
- Cursive letters use a smoother flow to form letters. The continuous hand movements can be easier for some students because it involves fewer stops and starts compared to print writing.
- The challenge of letter reversals and letter confusion that occurs with dysgraphia can mean that cursive writing may be easier to learn and use than printed handwriting. This is because cursive letters connect with continuous pencil strokes, leading to less letter reversals and other common writing errors associated with dysgraphia.
Just like printed handwriting, cursive letters are one form of written expression however, there are differences when it comes to legibility. Perfect formation and pencil strokes are not always necessary!
Cursive Letters Tips
We have many blog posts here on The OT Toolbox that support cursive letter writing. Explore these activities and tools to teach the cursive alphabet.

Colleen Beck, OTR/L has been an occupational therapist since 2000, working in school-based, hand therapy, outpatient peds, EI, and SNF. Colleen created The OT Toolbox to inspire therapists, teachers, and parents with easy and fun tools to help children thrive. Read her story about going from an OT making $3/hour (after paying for kids’ childcare) to a full-time OT resource creator for millions of readers. Want to collaborate? Send an email to contact@theottoolbox.com.


