Part of teaching scissor skills is knowing how to hold scissors. Holding scissors correctly is a skill that some children struggle with achieving. You can walk into any classroom and see multiple ways children grasp scissors. This impacts the way they are able to cut with good hand and finger control. If bad habits are learned early, these can be difficult to correct, but not impossible. Check out the Steps of Scissor Development for a more detailed development of how to hold scissors, and learning scissor skills.
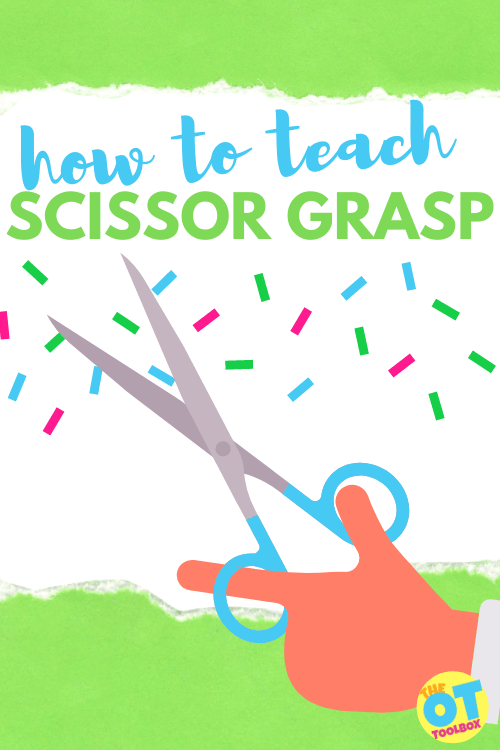
How to Hold Scissors
For the purpose of this post, we are focusing on the proper and effective grasp of scissors and how this can be achieved. Think of it as a basic pyramid or hierarchy of skill building that begins with pre-scissor skills and advances to scissor skills. You could consider this the hierarchy of holding scissors.
This post will address each step in learning to hold scissors, and provide information/activities to help at whatever stage your learner is stuck.
Take a look at each level related to holding scissors correctly:
a. Pinch and release finger movements
b. Scissor grasp
c. Open and close hand and finger movements while snipping paper
d. Repetitive open and close hand and finger movements while cutting
When teaching how to hold scissors correctly, first observe their current skill level. If they have learned some bad habits or techniques, back track to an earlier stage of scissor skill development, moving forward from there.
It is best to catch a child while they are first learning a skill, but we all know that may not be possible.
The OT Toolbox has a great Cutting with Scissors Program. You’ll find some fun ideas and strategies for every stage of scissor skill learning. There is a great Scissor Skills Book in the shop section of the website.
how to hold scissors: Pre-scissor skills Pinch and release
Before scissor skills can be mastered, young children need to establish the pre-scissor skills of pinch and release. These are preschool scissor skills that are established through play. Similar to the preschool pre-writing skills established in the preschool years, learning to hold scissors starts with grasp and release of small objects in play.
Step one focuses on pre-scissor skills with the use of fun, inexpensive tools that are wonderful for hand strengthening. These teach the hand/finger actions of pinch, squeeze, and release to help learners get ready for being successful holding scissors.
Tearing or ripping materials is a great way to work on pinch and release. Be sure your learner is not using a gross grasp to twist and rip. Have them work on pinching and tearing with use of the tips of the fingers. If this is too difficult, give a little help by making a slight tear to start with, then encourage them to finish.
Tearing teaches children how to use two hands together in a coordinated manner. Try these activities:
- tear small squares and other shapes from strips of paper to create a paper salad or pizza
- tear small pieces of tape from a roll and stick on an outline
- tear tissue paper or crepe paper into small squares and pinch up into small balls to make a picture craft
- tear small pieces from leaves as part of a nature tray
- rip cotton balls into smaller pieces to create an art piece or stuff a baggie
- pull apart strips of Velcro to separate the hook side from the loop side
You’ll want to check out this blog post to discover how to tear paper with specific activities that are developed and activities to work on this fine motor skill using just paper and the hands.
Pinching and squeezing can build hand and finger strength, while releasing objects with precision (in hand manipulation) works on the beginning stages of open and close hand actions.
- pinch and release small play dough balls into flat pieces called ‘mini-pies’
- pinch along a play dough log from left to right to make small indentations
- pinch clothes pins (this blog post shares several pinch exercises and activities using clothes pins)
- pinch bubble wrap bubbles to make them pop
- pinch and squeeze small sponge squares to wring out water
- pinch the end of a craft stick and play tug-o-war with a partner
- pinch and release coins into a bank, change it up and alternate with coins, buttons, and game chips
- pinch and stack blocks or mini-erasers
- blow bubbles and attempt to pinch and pop small bubbles in the air
Also check out this blog post on pincer grasp activities for precision of pinching activities.
This resource on hand strengthening activities covers additional scissor skills for preschoolers to develop for holding scissors correctly.
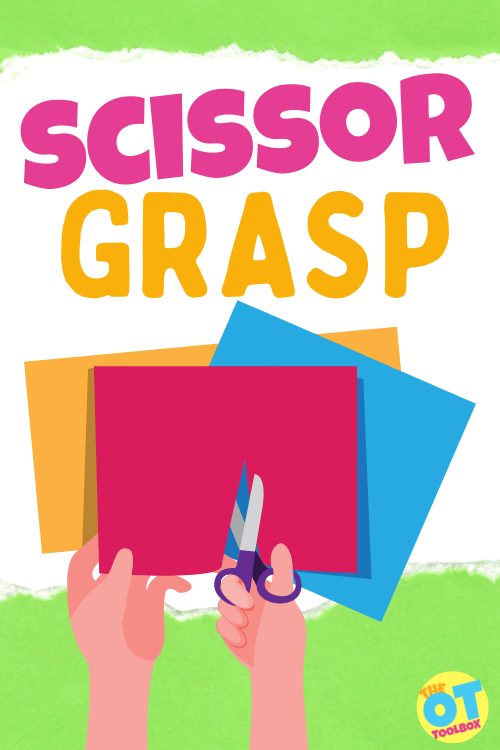
Scissor Grasp
Teaching kids how to hold scissors can be difficult. Placing scissors in the loops can be a test of visual perceptual skills and fine motor skills. To help with holding scissors, you can break the process down into several areas: thumb positioning, placement of the other fingers in the loops, and wrist positioning.
When it comes to scissor grasp, you can use additional supports to ensure proper, or functional, finger placement on the scissors.
First, let’s go over a point about functional scissor grasp.
Functional Scissor Grasp
Much like a functional pencil grasp, scissor grasp should be functional as well. What is meant by this is that not all scissor grasps may look the same. One child may hold the scissors with the pointer finger, or index finger through the guiding loop and others may place both the index finger and the middle finger through the guiding loop of the scissors. What is most important is that the child is able to cut age-appropriate shapes, materials in an effective, efficient, and safe manner.
A functional scissor grasp might look differently for each individual. But if a middle school student is able to cut worksheet items, coupons on the lines, cut gift wrap, or other materials in order to learn, function at an age-appropriate level, with safe use of the scissors, then you have functional scissor grasp. Focusing on precise placement of the fingers on the scissors isn’t necessarily an important area of focus.
However, when teaching scissor grasp, there are important things to keep in mind.
How to Teach a Thumbs Up Scissor Grasp
When it comes to grasping the scissors, your learner should use a thumbs-up approach to grasp scissors or the paper being cut.
There are several strategies for teaching kids to hold scissors with “thumbs up”:
- You can simply just use a verbal cue.
- Place a sticker or draw a smiley face on the thumbnail to provide a visual cue.
- Place a sticker or tape on the scissors to visually remind learners of proper scissor placement in the hands.
- Add a “shark fin” to the thumb scissor loop. The fin should be up when cutting.
- Playing thumbs-up games, like thumb wars, can help to encourage use of this position with more automaticity.
- Try these open thumb web space activities to strengthen and mobilize the thumb.
Finger Placement for Scissor Grasp
Let’s look at the other fingers needed for correct scissor grip.
The skill fingers of the hand need to be used to open and close tools, and are essential when working on scissor skill development. Skill fingers are the thumb, index, and middle fingers and they are responsible for grasping, and manipulation of tools.
We covered the thumb positioning on the scissors above, but the placement of the other fingers can be where holding scissors correctly gets a little sticky.
Pointer Finger Placement- Most often the first finger stays out of the scissors’ loops. It is used to “point the way.” When the pointer finger is positioned around the bottom loop rather than inside the loop, it helps to guide the scissors. This opens up the arches of the hand, especially for your learners with small hands. This may feel awkward at first, but will soon become a habit.
Middle, Ring, and Pinky Finger Placement- Placement of the remaining fingers depends on the type of scissors used. Some scissors have a small circle loop that require only the middle finger to go through the loop while the ring and pinky finger are tucked into the palm. Other scissors have a larger bottom loop that allow the middle, ring, and pinky fingers to all fit in the loop.
The main job of the ring and pinky fingers are to stabilize the scissors. They curl into the hand to help stabilize, supporting the arch of the hand, much like in a pencil grasp. This is where motoric separation of the sides of the hand is important, much like in holding a pencil or crayon. To encourage your learner to keep the stability fingers curled into the palm, give the child a small pom-pom ball to hold in their palm with the ring and pinky fingers while the skill fingers work.
When teaching young children to hold scissors, it is best to use a pair of scissors and stick to that scissor type to reduce confusion between holding patterns.
Wrist Position when Holding Scissors- A stable wrist is needed to ensure a functional grasp on the scissors. If the wrist is bent, the scissor blades will not be able to open/close effectively and line accuracy will suffer. The wrist should be positioned in a neutral position, and not flexed (bent forward) or extended (bent backward). This blog post on wrist stability covers activities to address this motor skill.
Elbow and Forearm Position- Always check the child’s elbow position when using scissors to cut. Their elbows should be by their sides and not winging outward. You can use a hack trick by having the child hold a piece of paper under their cutting arm while cutting. Tell the child to be careful and not let the paper fall!
Activities for holding scissors: addressing open-close
Next, we’ll look at the scissor skill for the open and close hand movements necessary for correct scissor grip. There are various tools that can be used to promote open and close hand and finger movements while maintaining a grasp and positioning of the scissors.
Tongs or clothespins – Learners can use a variety of tongs to help learn open-close actions. These can be simple kitchen tongs, toaster tongs, (Amazon affiliate link) strawberry huller, clothespins, or something as fun as scissor tongs or bubble tongs.
Show learners how to open and then close tongs to pick up and place small objects such as cotton balls, marshmallows, or pom-poms. Play a game to race and fill a small container. Learners can use clothespins to hang up socks or washcloths on a clothesline. These activities will help them understand and learn the concept of open and close before transitioning to actual scissors.
Pickle Picker– A (Amazon affiliate link) pickle picker is a therapist favorite when it comes to building strength and stability in the thumb and arches of the hand. To use a pickle picker as a therapy tool, one needs to maintain a stable wrist, isolate the thumb to slowly press down on the plunger of the tool. To lower the claws of the pickle picker, you need to add force through the thumb with a stable hand in order to grab a small object. Then, to grasp the item, you need to slowly release force through the thumb allowing for graded release. We use pickle pickers to grab and sort craft pom poms, mini erasers, and other small objects (not just pickles!) Pickle pickers are a great eye-hand coordination and strengthening tool to use with our craft pom pom activity sets.
Hole punch – Children can use a hand-held hole punch to punch holes in paper. You can use a regular hole punch or you can use festive hole punchers that have different shapes like hearts, stars, and raindrops. Use the hole shapes to paste on paper and create fun bugs, snow scenes, or fireworks. This activity will help build hand strength and work on the open-close hand action.
Water squirters/Spray Bottles– Practice grasping and releasing the trigger on water squirters using the skill fingers to pull the trigger. Show them how to make the water come out to spray on objects such as dirty toys, chalkboards, pavement, and sidewalks. This helps to strengthen the fingers and hand and teach grading their movement patterns. Be mindful how parents feel about squirters that resemble weapons. Choose animal shaped squirters or spray bottles instead.
Mini staplers – Use mini-staplers to work on similar movements needed with scissor use – grasp, squeeze, and release. Color the staples with a permanent marker or buy the staples in different colors to make the activity more fun! This works on hand and finger strength as well as open and close.
Eyedroppers – Play with eyedroppers to squeeze water drops onto coins, or colored water onto coffee filters or paper towels. This works on finger strength, grading their movement through proprioception, and finger movements.
Wind-up toys – Try wind-up toys to work on bilateral hand use with one hand holding the toy while the other hand twists the crank. Bilateral hand use is needed for cutting with scissors.
Finger game songs – Play finger game songs to work on separation of the two sides of then hand. Try The Itsy-Bitsy Spider, Two Little Blackbirds, Where is Thumbkin, and Open Shut Them. Want other finger rhyme ideas? Grab the free Favorite Finger Play Rhymes and Songs at Your Kids OT website. These work on finger and hand movements needed for holding scissors.
holding scissors with open-close for snipping
Next, let’s look at holding scissors and working on open-close motion with snipping movements. This is a good how to hold scissors preschool activity to use when teaching young children to cut and maintain a functional hold on the scissors. At the preschool and Pre-K age, snipping with scissors is age appropriate.
You can first approach snipping by performing some fun warm-ups using the correct hand position and motion without scissors in hand. Then move to doing these same movements while holding the scissors, without cutting anything yet. Focus on having them learn to hold scissors correctly.
When first introducing the scissors to your learners, start with correct finger placement and orientation of the scissors. A mature way to hold scissors looks like this:
- The thumb goes inside the top loop of the scissors.
- The middle finger goes into the bottom loop of the scissors.
- The index finger goes on the outside of the bottom loop to stabilize and provide directional control of the scissors. (As a visual cue, you can place a sticker or dot on the exterior of the bottom loop for where the index finger holds the loop.)
- The ring and pinky fingers go curled into the palm.
- The wrist is slightly rotated inward as the thumb is up.
- The assisting hand holds and manipulates the paper.
If the learner is a beginner cutter, the index and middle finger can go into the bottom loop at the same time, until their grasp becomes more mature and the index finger can shift to the exterior of the bottom loop.
Keep in mind leaving the first finger out of the loop will open up the hand arches for easier cutting. A tip for the placement of the middle finger in the bottom hole: rest the scissor handles on the middle knuckle of the middle finger (the one closest to the fingertip).
Prevent the child from shoving their fingers into the loops all the way down to bottom knuckle as this makes it very difficult for the child to open and close the scissors skillfully.
Poem to Teach Scissor Grasp
Here’s a fun poem to help a child remember where their fingers go in the scissor loops:
Thumb on top,
two below,
two get curled,
and away you go!
- Don’t forget that a visual cue with use of a sticker or smiley face drawn on the thumbnail, along with a pom-pom ball curled into the palm with the ring and pinky fingers, can be used to assist with correct scissor grasp.
Here are some fun activities for holding scissors:
- Pretend their fingers or scissors are: a train using “choo-choo” as open and close verbal cues.
- How about a car using “beep, beep” as open and close verbal cues (you can draw headlights on the tips of the scissor blades and play an open-close game).
- Or a crocodile and use “chomp, chomp” as open and close verbal cues (you can draw teeth and an eye on a pair of scissors and play an open-close game)
- Exercise those scissor holding fingers by doing open and close movements like the ASL (American Sign Language) hand sign for scissors
Snipping activities for learning to cut with scissors
This involves the use of scissors and singular snipping of objects to work on initial development. Snipping movements begin as random snips with simple open and close of the blades, and as skill improves advancing to snipping with more control.
Snipping Activities:
- Pretend the scissors are a crocodile, train, or car and work on random snipping
- Snip play dough that is rolled into a log or snake form, Playdoh barbershop is a great tool for snipping!
- Cut straws, yarn, tape, packing peanuts, small strips of paper into pieces, small bands of paper can be snipped to rescue an item in a box
- Go outside and trim the grass by snipping it with the scissors
- Paper or yarn can be cut, that is part of a fun craft such as haircut, pizza, snowman, critter rescue
- Try thicker paper (cardstock, construction) or thinner copy paper around the edge to create fringe while working on the helper hand holding and manipulating the paper. This resource covers the progression of paper grades to support cutting skills.
- Snip on lines drawn around the edge of a paper plate or on small strips of paper to begin snipping with more control and precision of the scissors
- Place stickers along the edge of paper or index cards and have the child chomp through the stickers with snipping action
If you are look for even more cutting ideas, activities, and strategies, explore these other blog posts here at The OT Toolbox: Scissor Skills, Creative & Fun Ways to Help Kids Cut with Scissors, and The Ultimate Guide to Scissors Skills.
how to hold scissors with repetitive open-close for cutting
The final skill is the repetitive open and close hand and finger movements, moving forward with the scissors to cut with control and precision on cutting lines.
This begins with straight lines, advancing to curved lines, circle shapes, to angled lines and shapes with corners. All of these require good bilateral hand use with the assisting hand to advance and turn the paper.
Thicker lines are the easiest for early scissor learners to manage, while thinner lines are for more advanced learners, who have developed more control and precision with scissor use.
The OT Toolbox has you covered with a Printable Pack for Practicing Scissor Skills!
- Consider the paper and materials used while teaching scissor skills as thicker paper such as cardstock and construction paper may have more stability, while copy and tissue paper is flimsier making it harder for a younger kiddo to manage.
Below is a progressive list of lines and shapes to work on cutting. They are ordered easiest to most difficult, as the child gains more skill.
- Short straight lines
- Long straight lines
- Short curved lines
- Long curved lines
- Short angled lines
- Long angled lines
- Simple shapes
- Complex shapes
Modifications to help correct scissor grip
Modifications and adaptations sometimes cannot be avoided, often becoming necessary to achieve a consistent and functional grasp.
There are many modifications that can be made to help learners be successful with finger placement, keeping bad habits from forming. Try these before jumping into adaptive scissors:
- Draw a smiley face on the thumbnail or the thumb to provide a visual cue for thumbs-up.
- Glue googly eyes, draw a face, place a sticker, or wrap a piece of tape on the exterior of the thumb hole to cue the child to orient the scissors properly and for correct thumb placement.
- Use permanent marker to draw a line on the exterior of the scissor blade that needs to be on top, which is the thumb hole side. They should see this line while cutting.
- If the bottom loop is too large and encourages the child to place many fingers in the loop, you can tape up part of the loop providing a blocker for the other fingers.
- Wrap a rubber band around the base of the blades to prevent the child from ‘chomping’ the paper and instead promote a snipping movement as the band prevents full opening of the scissor blades.
- With the same idea as above, you can wrap just the bottom handle with a rubber band and this prevents complete closure of the blades to also work on snipping.
- Create a sock glove that has holes in it for the thumb, index and middle fingers while the ring and pinky fingers must stay curled inside the sock.
One last thing, PLEASE use left-handed scissors with left-handed kiddos. Do not force these children to cut with right-handed scissors. It is easy to purchase left-handed scissors for kids. Yes, it matters! So, get some for your clinic or your classroom and please use them!!
*Editors note: Left handed children can and will learn to adapt to right handed scissors. Unfortunately it is a right handed world, and lefty scissors are not always available. Unless they are going to carry lefty scissors around with them forever, it is easier to learn with something more mainstream.

Regina Parsons-Allen is a school-based certified occupational therapy assistant. She has a pediatrics practice area of emphasis from the NBCOT. She graduated from the OTA program at Caldwell Community College and Technical Institute in Hudson, North Carolina with an A.A.S degree in occupational therapy assistant. She has been practicing occupational therapy in the same school district for 20 years. She loves her children, husband, OT, working with children and teaching Sunday school. She is passionate about engaging, empowering, and enabling children to reach their maximum potential in ALL of their occupations as well assuring them that God loves them!
*The term, “learner” is used throughout this post for readability, however this information is relevant for students, patients, clients, children of all ages and stages or whomever could benefit from these resources. The term “they” is used instead of he/she to be inclusive.
Looking for tips and tools from pediatric occupational therapists and physical therapists to help with all things scissor skills? The Scissor Skills Book is a comprehensive resource that covers all aspects of development related to cutting with scissors.
If you’re a parent who is reluctant to let your child cut with scissors…
If you’re a teacher who is tired of watching students snip their crafts and worksheets into tiny pieces…
If you’re a therapist looking for creative ways to promote scissor skills in your treatment sessions…
This book is for you!
Written by a team of 10 pediatric physical and occupational therapists with years of experience in the field, The Scissor Skills Book is the ultimate resource for tips, strategies, suggestions, and information to support scissor use by kids.
Click here for your copy of The Scissor Skills Book!


