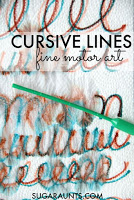
Try this creative activity for teaching cursive letter formation. By breaking letters down into cursive families, students can benefit from the parts that make up formation of cursive letters. Below, you will find information on how to teach cursive letter formation of “bump letters”.
Bump letters are those cursive letters that form with a bump to start off the pencil’s motion. Bump letters include m, n, v, x, y, and z.
Check out how each letter of the alphabet is broken down into chunks of similar letters in this Facebook video.
Teach cursive letter formation bump letters
This post is part of our 31 day series on teaching cursive. You’ll want to check out the How to Teach Cursive Writing page where you can find all of the posts in this series.
For more ways to address the underlying skills needed for handwriting, check out the handwriting drop-down tab at the top of this site.
Cursive Letter Formation of Wave Letters
When instructing students in forming these letters, start by outlining a cursive letter lesson plan of activities. You can read more about cursive letter lesson plans here.
When teaching the Bump Letters, start by asking students to practice a series of bumps across a line of paper. This can look like a string of cursive letter m‘s joined together. Children can draw the bump lines across a page.
Be sure to instruct students to draw the lines with proper re-trace as they trace back over the lines to create another bump.
When beginning with cursive instruction, students should concentrate on an upward curve from the base line to the middle line of the paper. This is the “bump” of a bump letter and the beginning pencil motion of letters m, n, v, x, y, and z.
Rainbow Writing Cursive Letter Bump Letters Activity
One activity that can practice the formation needed for bump letters is to practice drawing rainbows. Using a variety of colored pencils or markers, ask students to draw a small rainbow that starts at the baseline and peaks at the middle line. They can then trace back over that rainbow with other colors.
Then, ask students to create a series of rainbows across the line of paper using one color. They can then draw over that series of rainbow bumps with each colored pencil or marker.
As students trace over the previous color, ask them to keep their colored pencil or marker on the lines and to continue with re-trace back down to the baseline and back up again.
Use these activities and handwriting tips to help kids learn to write cursive letters. These are fun ways to teach cursive letter formation bump letters.
Activities for Teaching Cursive Letter Bump Letters
Use short phrases to instruct cursive formation. Phrases like “Pause”, “Stop”, “Trace back”, “Curve up”, “Curve Down”, and “Swing away to connect” can help.
The verbal prompts should involve starting and stopping points such as “Start at the baseline”, “stop at the middle line”, and “Stop at the top line”. Line names should remain consistent with names used by the student in learning printed handwriting. Bottom Line, Middle Line, and Top Line are simple cues that typically work well.
Here are two activities to teach cursive letter bump letters:
1.) Students learning the Bump Letters will benefit from a visual image of a rainbow. Students can visualize the starting point for the rainbow as the bottom line where a rainbow would begin. They can imagine the curve of the bump swinging up to the middle line like a rainbow. From there, the rainbow continues back to the baseline.
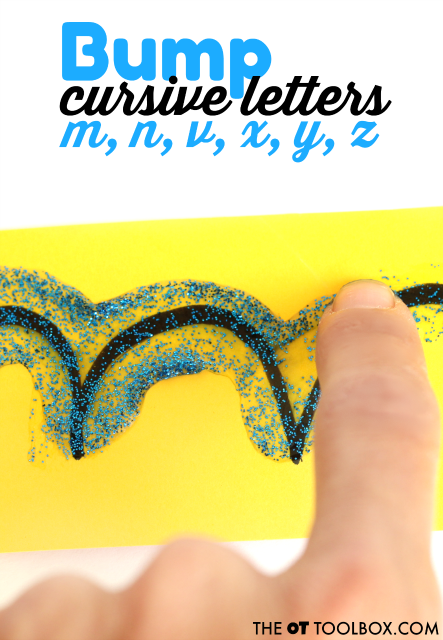
2.) Draw a line of bumps across a paper in a thick marker. Students can trace the bumps with a dob of glitter glue across the lines. Encourage students to trace on the lines and to focus on re-trace of the lines.
How to Teach Lowercase Cursive n
Use the following verbal prompts to teach lowercase cursive letter n:
Start at the baseline. Curve up to the middle line. Continue over the rainbow back to the baseline. Trace back up with a bump to the middle line. Continue the rainbow back to the baseline. Then swing away to connect.
Instruct students to trace over the lines between the first and second bump of the n.
How to Teach Lowercase Cursive m
Use the following verbal prompts to teach lowercase cursive letter m:
Start at the baseline. Curve up to the middle line. Continue over the rainbow back to the baseline. Trace back up with a bump to the middle line. Continue the rainbow back to the baseline. Trace back up with the bump to the middle line. Continue the rainbow back to the baseline. Then swing away to connect.
Instruct students to trace over the lines between the first, second, and third bump of the m.
How to Teach Lowercase Cursive x
Use the following verbal prompts to teach lowercase cursive letter x:
Start at the baseline. Curve up to the middle line. Continue over the rainbow back to the baseline. Swing away to connect. After the word is completed, add the cross line to the x.
Instruct students to remember to come back to the x to add the diagonal crossline.
How to Teach Lowercase Cursive y
Use the following verbal prompts to teach lowercase cursive letter y:
Start at the baseline. Curve up to the middle line. Continue over the rainbow back to the baseline. Curve along the baseline and bump up to the middle line. Pause at the middle line. Trace back down. Pass the baseline. Loop left. Swing away to connect.
How to Teach Lowercase Cursive z
Use the following verbal prompts to teach lowercase cursive letter z:
Start at the baseline. Curve up to the middle line. Continue over the rainbow back to the baseline. Pause and trace back up halfway to the middle line. Bump over back to the baseline. Pass the baseline. Loop left. Swing away to connect.
A few tips for teaching bump letters
Learning cursive only by verbal instruction would be detrimental to carryover and accuracy. A visual component and slow teaching strategies are very important. Try these tips to help with learning cursive bump letters.
Teach each letter individually and for short periods of time each day.
Practice cursive letters in multiple sensory experiences, including shaving cream on desks, writing trays, in goop, with play dough or slime, etc.
Practice each letter in a group focusing on one letter at a time. When a new letter is introduced, continue with previously learned letters.
More Cursive Handwriting Tools and Resources:
Try these cursive writing tools to help with forming letters:
Affiliate links are included.
Cursive Writing Wizard is a free app on Amazon that allows students to trace letters and words. The app has stickers and animations as well as games that promote learning of cursive letters and connecting lines.
Cursive Handwriting Workbook is a workbook for kids in elementary grades and focuses on
formation of cursive letters (upper and lower case) as well as words.
Teachers can use a laser pointer in the classroom to help students see parts of cursive letters as they instruct each part of the formation. This is helpful when teaching letters in cursive letter families.