This blog post on creative cursive practice was originally written August 27, 2015. It was updated with more creative cursive writing solutions as of February 27, 2024.
One thing I wanted to share as a school-based occupational therapist is the use of creative cursive strategies to support cursive writing. So often, OT practitioners hear from parents and teachers that a student can’t write their name in cursive, when this is the only functional form of cursive writing they’ve had to retain. I’ve seen time and time again, where students are taught cursive letter formation one time, and then they are expected to use and retain that formation. One summer break (or even a weekend) and the formation pattern for the cursive letter is lost. Or, a student struggles with handwriting in general and cursive is a back up plan used as a handwriting accommodation. While this is completely appropriate for some students, if you don’t use it and practice it, you definitely lose it.
Using creative writing strategies to support letter learning is key to letter formation. This creative cursive journal fits the bill for practicing cursive in different and fun ways. These strategies are just some of the cursive writing tips we have on the site.
Creative Cursive
If you are starting to consider how to teach cursive writing, then having a toolbox of strategies in your mind is helpful. Creative cursive activities supports the motor plan needed to form cursive letters in handwriting automatically.
Learn to write cursive letters and words with this free cursive writing journal and creative cursive handwriting activities.
My daughter has made herself a goal for her second grade school year.
She wants to learn how to learn to write in cursive. Teaching cursive letters is a challenge, because you can learn it once, but if you don’t practice, it’s a skill that’s lost.
We’ve done a few cursive handwriting activities this summer, but have a long way to go as she learns to write letters in cursive, connect cursive lines, and write upper case letters.
Then there is reading cursive handwriting which can be a difficult processing task for some kids. Forming letters on lines with smooth pencil strokes and re-trace of lines requires practice.
I’ve got some fun and creative ways to learn and practice cursive handwriting to share with you.
Today’s Cursive Handwriting Daily Journal is a creative way to practice letter formation and use learned letters in daily journaling.
Learn to Write Cursive with a Cursive Writing Journal
We made this Cursive Handwriting Journal to practice cursive letter formation on a daily basis. Using creative handwriting ideas are a fun way to practice letter formation.
These worksheets are great for practicing cursive letter formation in a variety of ways. (Try a new creative cursive technique each day!) They also have an area to use what your child has learned in a daily journal entry. You can print off the journal along with a tips and tools sheet for creative cursive handwriting.
We used our journal worksheets to form a few new letters with pipe cleaners. Write the letter in the large space at the top of the page. Use a pipe cleaner to form the letter.
Encourage your child to use the written letter as a guide to correctly form the pipe cleaner letter.
You can create a permanently formed fuzzy letter by adding a dab of glue at the connecting parts of the pipe cleaner letters.
Then, trace the pipe cleaner with your finger to further practice cursive letter formation.
This is a hands-on way to practice and learn to write cursive letters.
4. Next, practice writing the letter on the lines below. Encourage your child to write a few words using the letter and letters they’ve already learned. You can write a model word for them to copy.
You can then use the journal sheets to write sentences using the words that they’ve practiced and learned in cursive.
Creative Cursive Tips and Tools for Learning Cursive Handwriting
When I worked in a variety of upper elementary and middle school settings, cursive writing came up a lot. Some practice activities work well for some students and others work for other students. Having a variety of tools in mind is nice because I’ve found that you can try things once that don’t work for learning cursive takes a lot of work…and practice.
1. Cursive Writing Apps- Use tablets or touchscreen devices equipped with stylus pens for interactive cursive practice apps. These apps often provide engaging activities and games to make learning cursive more enjoyable for children. An example is “Cursive Writing Wizard” available on both iOS and Android platforms. Here is my list of favorite occupational therapy apps, which includes handwriting apps.
2. Cursive Art – Combine cursive practice with art by incorporating calligraphy techniques. Encourage learners to create artistic pieces using cursive writing, such as writing quotes or poems in cursive and decorating them with illustrations or borders. I love this handwriting art activity, and kids do too.
3. Multi-Sensory Cursive- Engage multiple senses by practicing cursive writing in different mediums, such as sand trays, shaving cream, or finger paint. This tactile experience can enhance muscle memory and retention. These multisensory letter mats are printed version, but a similar activity could be done with cursive.
4. Outdoor Writing Activities- Take cursive practice outdoors by using sidewalk chalk to write letters and words on pavement or by tracing letters in the sand at the beach or in a sandbox. This change of environment can make the learning experience more enjoyable and memorable.
5. Music and Movement– Integrate music and movement into cursive practice by playing instrumental music in the background and encouraging learners to write cursive letters in rhythm with the music. You can also incorporate gross motor movements, such as writing large cursive letters with arm movements in the air.
6. Cursive Handwriting Games– Create games that involve cursive writing, such as scavenger hunts where participants search for objects with cursive words written on them or relay races where teams write cursive letters or words on a whiteboard or chalkboard. I also love to use handwriting games to practice specific letter formations.
7. Letter Building– Provide materials like wooden blocks or clay and challenge learners to build cursive letters with them. The Handwriting Without Tears program offers This hands-on activity helps reinforce letter shapes and spatial awareness.
8. Storytelling– Kids love fun stories! If you do a writing prompt where students build on one another’s ideas. We love using this strategy for working on cursive because they can read their peer’s cursive. This not only provides practice and letter recognition skills with cursive writing. It also fosters creativity and narrative skills when writing in cursive.
9. Pen Pal Program– Pair learners with pen pals who communicate through handwritten letters in cursive. This real-world application of cursive writing can motivate learners to practice and improve their skills.
10. Collaborative Projects– Initiate collaborative cursive writing projects, such as creating a class mural or poster where each student contributes a cursive letter or word. This fosters teamwork and a sense of accomplishment. Our middle school journal prompts are a good place to start.
These out-of-the-box cursive practice ideas aim to make learning engaging, enjoyable, and effective for learners of all ages.
When kids are learning to write cursive letters, they need to also learn about connecting cursive letters together appropriately right from the start. In this blog post on on how to connect cursive letters, we’ll explore the tips for seamlessly joining cursive letters within a word to ensure fluid and proficient cursive handwriting. Teaching correct connectors between letters is essential for cursive accuracy and legibility. Let’s break down cursive connectors…
Connecting some cursive letters is an obvious flow into the next letter, but others are more difficult. Then, there is the pencil flow, the motor planning, and baseline control…there is a lot to consider for the student learning to write in cursive!
Connecting Cursive Letters
If cursive letters don’t connect properly, one letter can look like different letter. Connecting the letters together requires practice and instruction. The more a child succeeds in proper cursive connectors, the more legible handwriting will be.
If the letters don’t connect correctly and it can be hard to read handwriting. This is especially true as we get older and practice the incorrect forms. Your hand will become accustomed to producing the incorrect forms.
Connecting cursive letters is especially important with some of the letters that have a tow rope connectors between the letters. We call these letters tow rope letters.
Cursive b is one of these letters.
Cursive v and cursive o are other tow rope letters, meaning that the connecting lines between these letters and the letter next to them is at the middle line and changes the motor plan to the letter following the tow rope letter.
This resource on teaching cursive b has more information on this difference in motor planning in the letter formation.
How to Connect Cursive Letters
When forming specific letters, it can be easy to merge letters or for a cursive writer to form commonly connected letters in an alternative manner. You may find this is true when you write a letter e and e connected together. One cursive writer may make this letter combination completely different than another person who connects letters in a different way.
Timed writing samples show that cursive writing is more efficient and quicker than the fastest printed writing. Joining letters with connectors is what makes in writing happen more quickly and efficiently.
Connecting cursive lines in handwriting should occur fluidly and with a gliding motion of the pencil on the paper. If this doesn’t occur, or the writing looks choppy or jumpy with letters being jumbled as a result of connection issues, it can be helpful to take breaks in between writing strokes.
There are several factors that impact fluid writing in connecting cursive letters in a word. Checking for these items is the first step when you see difficulties with letter connections, or choppy handwriting:
Fluidity of writing
Writing speed
Writing rhythm
Paper position
Experience with cursive writing (practice)
Fluidity of writing- The handwriting motor plan that you have in your mind for forming two letters together may remain the same with practice.
Writing Speed and Rhythm- Letter writing speed and rhythm has a lot to do with unique formations and connections of cursive letters.
Paper positioning- Cursive letter formation and connectors can also have a lot to do with the angle of handwriting, or the paper positioning when writing in cursive. Paper slanted and positioned to the left will affect the way cursive g connects to the letter next to it.
Experience- More practice of letter connectors will help with speed and rhythm in cursive writing. When children just start out with learning cursive, they are working on the overall letter form. The connectors are a “pause” moment for them as they finish one letter and then move onto the next. For new cursive writers, you’ll see a drawn out connection. You might even see the pencil lift up from the paper. This is a sort of mental break. With experience, forming the cursive letters becomes more natural and the connection between the cursive letters becomes more fluid.
The connections between letters will come naturally according to the individual’s personal writing style.
Variations in Connecting Cursive Letters
The thing about cursive writing is that it is very personalized. While the letter form is the same for most, there can be variations in the letters that becomes part of that person’s handwriting style.
Think about an adult hand writing or your own handwriting. The cursive letters are probably fluid and not exact as you might have learned in a cursive handwriting guide book or in second grade cursive writing instruction. This is because you have develop your own style of cursive. This has happened over time and with practice.
Look at your own cursive handwriting. You may notice that some letters are not formed or connect exactly as you were taught in grade school. Adaptations to cursive result in personal cursive writing styles and can be completely legible.
The motor plan is established. Kids can create their own cursive style too. When that happens, handwriting will be legible and comfortable. For kids that are learning cursive letter connections, or kids that don’t have the fluid motions quite yet, flow exercises can be a big help.
Cursive Line COnnecting Exercises
Cursive lines can be practiced with specific activities to support the development of this skill.
Flow exercises are very important and useful in helping kids to develop fluid fluid motions and establishing a comfortable style of handwriting. Exercises designed to improve cursive letter connectors are made up of simple bends and arches, joined together from the base.
Cursive letter connector exercises connect common letters together and start at the base. This might be a series of “cursive i“s connected with ease. Another connector exercise might be a string of cursive letter “l”s connected. You can also mix other letters such as cursive u and cursive n, working on the flow between two different letters.
Tips for Fluid Cursive Lines between letters
A few tips for teaching cursive letter connections include:
Mix it up. Try to incorporate different letter directions and sizes of joining strokes when working on the flow of connections.
Connect just a few letters together at first. Flow exercise typically occur with 2 to 3 letters in groups. This helps to form a motor plan for letter formation.
Start letters at the correct starting point. Another important point about connecting letters is formation. It’s important to start certain letters at a specific point such as cursive o. It always needs to start at the top and curve around in a counterclockwise motion. In this way the letter can connect easily two other letters.
How to Connect Cursive Letters
There are several strategies to use, and because of the different letter strokes, it’s a good idea to work through these.
Pause and connect- One strategy to work on letter connections is to practice forming the letter and then when the letter is completed, pause and then connect to make the next letter. This then progresses to the next step in teaching cursive connections.
Baseline control- Most of the letters connect at the baseline. They rock or slide into the next letter. The pencil moves along the baseline as it ramps up to connect to the next cursive letter.
Work on this baseline control by using muscle groups to control the pencil. This can be achieved by hand strengthening and fine motor skill work, but also practice with pencil control exercises. Specifically, pencil control worksheets like tracing along the lines of graph paper can support this skill.
Right handed writers will push the pencil along the baselines and then use pulling motions of the hand to pull slanted pencil strokes back into the palm of the hand. Work on this motion with pencil control and with fine motor work to pull items into the hand.
Left handed writers will pull rocker letters and rainbow motions of the pencil to the right by pulling the pencil into the palm. They will connect letters along the baseline with a pushing motion of the pencil moving away from the palm. Work on this motion with pencil control and with fine motor work to push items away from the hand. Here is more information on left-handed cursive.
Backward chain letter formation- Another way to teaching students how to connect cursive letters is through the technique of backward chaining.
Backward chaining is a common strategy for tasks such as teaching kids to tie their own shoes or to fasten zippers. It can be used for learning cursive handwriting connectors, too!
With backward chaining in cursive writing, it’s important that this strategy is only used with letters that are very well established. Try this trick only when a child is very fluent with cursive letter b, for example. Then: students can start out with a cursive b.
Add in multisensory strategies- In addition to the backward chaining technique, you can add multisensory strategies to add more learning styles.
We shared a color mixing rainbow writing activity before that explains this activity. They can write in a black magic marker or trace over a worksheet. Students can use a highlighter marker to trace over just the connector of the b. They can do this several times across a sheet of paper, tracing over only the connector line of the b as it travels to the next letter. Students can even trace that connector over to connect to other letters such as cursive e, cursive a, cursive i, etc.
Then, ask students to complete the whole letter b, connecting it to the same letters that were practiced above.
Air writing- Still another tactic to teach cursive connections is through gross motor air writing. Practice backward chaining with cursive letters by forming big motions of the cursive letters. For example, don’t as students to start at mid loop of the b.
Direction change in cursive letter connections
One aspect of connecting letters is the direction change that happens when some letters connect with others. The pencil changes direction and uses a different muscle set mid-letter or mid-connection.
Joining two letters that change directions can be confusing for kids who are just learning to write in cursive and connect letters correctly. Some letters require a change pencil direction when connecting.
Some examples of this include:
cursive b connected to other cursive letters
cursive w connected to other cursive letters
cursive v connected to other cursive letters.
cursive o connected to to other cursive letters
When two letters connect that require the pencil to go in one direction, and then stop and reverse to go in the opposite direction to connect the letter, it can be quite difficult for a child who is just learning to write in the continual pencil motions that cursive writing requires.
These letters require precision and pencil control for legibility. Cursive writers need to have a relaxed style otherwise the retrace required in these letters can make the retrace wide.
Re-Trace in Connective cursive letters
Re-trace is when the pencil traces back over the line it already made. Cursive letters with re-trace include:
a, c, d, g, h, i, j, m, n, o, p, q, s, t, u, w
Some of these letters have a re-trace because of the swing up to create the letter. This is the initial connection to start the letter. This includes the letters:
a, c, d, g, o, q
Other of these re-trace letters have a re-trace formed by the bumps of the letter. This might be the starting connector or it might be inside the letter. This includes:
h, m, n, u, w
Other of these letters have re-trace formed within in the letter:
i, t, j, s, p
It’s important for kids to learn to correctly re-trace and connect letters when they are just learning. As they grow and develop their own personal writing style lifting the pencil for these letters is fine.
Cursive letter s has re-trace as well as directional changes that use different pencil control and motor plans.
Connections between letters can vary from person to person as an individual ages and develops. As long as legibility and functional speed are appropriate, this is fine!
Some top handwriting programs for addressing skills like letter formation and cursive connectors:
Need help with the underlying skills needed for handwriting? Start here on our Handwriting resources page.
The Handwriting Book is a huge resource when it comes to addressing handwriting concerns. It’s a book written by 10 occupational therapists and physical therapists and refers to every underlying skill related to written work. This is a tool for therapists, teachers, and parents.
The Handwriting Book is a comprehensive resource created by experienced pediatric OTs and PTs.
The Handwriting Book covers everything you need to know about handwriting, guided by development and focused on function. This digital resource is is the ultimate resource for tips, strategies, suggestions, and information to support handwriting development in kids.
The Handwriting Book breaks down the functional skill of handwriting into developmental areas. These include developmental progression of pre-writing strokes, fine motor skills, gross motor development, sensory considerations, and visual perceptual skills. Each section includes strategies and tips to improve these underlying areas.
Strategies to address letter and number formation and reversals
Ideas for combining handwriting and play
Activities to practice handwriting skills at home
Tips and strategies for the reluctant writer
Tips to improve pencil grip
Tips for sizing, spacing, and alignment with overall improved legibility
Colleen Beck, OTR/L has been an occupational therapist since 2000, working in school-based, hand therapy, outpatient peds, EI, and SNF. Colleen created The OT Toolbox to inspire therapists, teachers, and parents with easy and fun tools to help children thrive. Read her story about going from an OT making $3/hour (after paying for kids’ childcare) to a full-time OT resource creator for millions of readers. Want to collaborate? Send an email to contact@theottoolbox.com.
Supporting kids by teaching cursive handwriting can be a challenge when there are problems in cursive writing. We’ve covered many issues that contribute to handwriting problems, but when you look at cursive in particular, there are differences to consider. One tool to support an educator or occupational therapy practitioner is a cursive writing screening tool. Below, you’ll find a cursive handwriting checklist to support and overcome problems in cursive writing. Also be sure to check out tips and specific strategies to teach cursive.
Get your copy of the cursive screening tool at the bottom of this blog post.
Problems in Cursive?
Cursive handwriting can be a challenge to learn. When kids do learn the letters, many times cursive writing takes on a personal style of letter formation. To assess cursive handwriting in the child who is already writing, it takes assessment of the individual parts of cursive writing such as letter formation, speed, rhythm, and legibility.
To diagnose cursive handwriting struggles, it’s important to look at the overall piece of written work. The cursive writing assessment checklist below will help to assess cursive handwriting and work on cursive writing progression.
Is the writing sample legible?
Can the individual read it after a period of hours or days?
Are specific letters identifiable?
Are letters formed properly, and are they connected correctly?
Do the letters flow and can join together accurately?
Are the strokes leaning in a consistent direction?
Are there added pencil strokes or portions of letters missing?
Is there consistent use of line and size awareness?
There is a lot to consider when it comes to supporting cursive writing needs!
Looking at all of the parts that make up cursive handwriting can be beneficial to pinpoint areas that need more work in order to promote functional cursive handwriting.
These are all things to look at when assessing cursive handwriting.
Once the specific needs of the student are identified, these strategies can be taught and practiced. Then, a cursive self-assessment of cursive writing can be used by the student for handwriting carryover.
How to Diagnose Cursive Writing Problems
Look at the items below to diagnose cursive handwriting issues and figure out how to work on these areas to improve overall legibility.
is the writing correct but layout and spacing poor?
Another area to consider when assessing cursive writing is to look at desk and paper positioning.
cursive writing lines
The lines that make up cursive letters support legibility but there is more to it as well. We cover these areas in the cursive writing problems screener.
Children may encounter various challenges when it comes to writing cursive letters on lines:
Letter Size and Spacing: Maintaining consistent letter size and appropriate spacing between words and letters can be difficult. Some children may write letters that are too large, too small, or unevenly spaced.
Letter Formation: Cursive letter formation involves specific strokes and connections between letters. Kids may struggle with remembering the correct sequence of strokes or the direction of loops and curves.
Letter Slant: Cursive writing typically has a specific slant or angle to the letters. Children may find it challenging to maintain a consistent slant throughout their writing.
Staying on the Lines: Writing within the lines requires fine motor control and coordination. Children might have difficulty staying within the designated lines, resulting in letters that float above or dip below the lines.
Legibility: Poorly formed cursive letters or inconsistent sizing and spacing can lead to illegible handwriting, making it challenging for others to read.
Fatigue: Cursive writing can be more physically
Included in the form are areas for notes on handwriting, along with the above questions divided into sections:
Cursive Letter Formation
Cursive Letter Connections
Cursive Letter Size
Overall Cursive Letter Legibility
This Cursive Handwriting Assessment Checklist is a great way to assess and monitor cursive handwriting progression.
Use this Cursive Handwriting Assessment Checklist to diagnose and identify specific problems in cursive handwriting samples.
Once specific issues are determined, it can be easy to work on those specific skills.
Each child will be different in the way that their writing appears on paper. Even children who are instructed in a group will end up with writing that looks completely different, especially once a personal style is incorporated into cursive writing.
If you’re seeing problems with cursive handwriting skills and would like to assess where the breakdown is happening, you’ll want to grab our cursive screening tool. Use it to assess cursive handwriting using a checklist of cursive writing skills.
To get this printable, enter your email address into the form below. The printable will arrive via email so you can print it from any device and from any location.
This cursive screener is also found inside our membership club. Members can log in and then head to our cursive resources.
Colleen Beck, OTR/L has been an occupational therapist since 2000, working in school-based, hand therapy, outpatient peds, EI, and SNF. Colleen created The OT Toolbox to inspire therapists, teachers, and parents with easy and fun tools to help children thrive. Read her story about going from an OT making $3/hour (after paying for kids’ childcare) to a full-time OT resource creator for millions of readers. Want to collaborate? Send an email to contact@theottoolbox.com.
Did you know there is a specific order to teach cursive letters to promote cursive writing legibility and carryover of cursive handwriting? Occupational therapy providers work with the occupation of handwriting and cursive letters are part of that process. In this post, you’ll learn about cursive writing order to teach letters of the alphabet, including the Handwriting Without Tears letter order for teaching cursive. The order that kids should learn the cursive alphabet, including print letter patterns that are directly transferable to cursive alphabet letters.
Using a developmental approach to teaching cursive letters supports children and sets them up for success.
order to teach cursive letters
The order that cursive letters are taught is based on development of skills. Just like the order to teach printed letter formation is based on development of pencil control skills, visual motor skills, cursive letter order is also taught developmentally.
This means that letters are grouped into similar pencil strokes, or letter families.
Learning to write the alphabet in cursive, writing one’s name in cursive, and writing words in cursive is something that many kids want to do around the second grade.
It’s around second grade, or 7-8 years of age that fine motor skills develop in such a way that pencil control and graded precision are developed to enable greater in-hand manipulation, and movement through the range of mobility in the thumb and intrinsic muscles within the hand.
This enables pencil movements to become more mobile and fluid, which are pre-requisites for cursive writing skills.
Prior to this skill achievement, handwriting is taught based on pencil strokes, including uppercase letters before lowercase letters because of the developmental aspect of learning letter formations.
Cursive seems like a “grown up” style of communication that kids see adults or older students using and they try to make swoopy writing on their own.
Some children can be very motivated to learn to write the alphabet in cursive and use it in their written work.
However, one tip for teaching children to write in cursive is to go through the letters in an order that makes sense according to the pencil movements needed to create the letters.
Writing cursive letters in a group of similar pencil strokes is helpful for carryover of pencil control practice and letter formation. Here is more information on teaching groups of similar cursive letters together in a chunk, or cursive letter families.
Once kids have a start on cursive letter formation, they can practice in creative ways like on the window.
Other children who may not be exposed to cursive written work might have their first exposure to cursive in the classroom. Still other students might be in a public or private classroom where cursive handwriting has been dropped from the curriculum. These kids may need extra practice at home or might need to learn cursive handwriting from the very beginning.
But where to start when teaching kids (or adults!) the cursive writing alphabet and how to form words in cursive? Read on for tips and strategies to get started on learning cursive letters.
Cursive Letters Order
We’ve touched on cursive handwriting in previous posts, include a small piece about starting to teach cursive letters. This strategy will outline the alphabet and the letter order to make learning cursive more easy, based on learning letters in a developmental and progressive order.
There are print letter patterns that are directly transferable to cursive letters.
These are cursive letters that are formed similarly to their printed letter counterparts. The muscle movements of the hands that are used to form some printed letters are directly related to the same letters. For this reason, it’s a good idea to start with these letters when learning the cursive writing alphabet.
The printed letter patterns that make up some letters will transfer directly to cursive, and when formed with a few subskills, cursive letter formation will easily follow (in most cases):
Left-to-right strokes
Good starting points
Direction of movement
Consistent stopping points
Control of downstrokes
Smooth rhythm
Given the subskills noted above, cursive letter formation will lend to more legible letter formation. Often times, learning correct letter formation and motor practice will help with legibility and ease of cursive writing into a viable form of written communication.
Cursive Letter Order Patterns
If you take a look at cursive letters, you might see a pattern that is similar among the letters. This is part of why we use a cursive pre-writing lines approach when teaching cursive for the first time.
You’ll see pencil and paper activities that support this pencil movement with different pencil strokes:
Upswing (the line to start a cursive i or t)
Downswing (the line to start a cursive c or a)
Both of these movements can transfer to different starting lines for the other letters. The muscles used to make these lines can then transfer to the other starting movements. Check out our blog post on cursive beginning lines for more information on this concept.
Heling kids to start off with confidence in pencil control to make these beginning strokes supports confidence when learning cursive letters from the start!
When teaching the cursive alphabet, where to begin?
These letters have print patterns that are directly transferable to their cursive letters. This is related to the pencil strokes that are used to form the cursive letters. For this reason, there is a different order to teach cursive lowercase letters compared to their uppercase letter counterpart.
When we consider printed letters, we can directly translate the pencil strokes to some of the cursive letter counterparts. This means that learning the cursive letter form of the letter should be easier based on knowledge of the printed letter’s form.
Having letter recognition skills for printed letters supports the ability to learn cursive letters. For example, there are printed letters which directly translate to the pencil strokes in cursive:
t, i, and u and w transfer to their cursive letter counterparts.
e and l transfer to their cursive letter counterparts.
n, m, p, and h transfer to their cursive letter counterparts.
a, c, d, q, and o transfer to their cursive letter counterparts.
j and g transfer to their cursive letter counterparts.
This means that the remaining letters are the only ones that need to be taught as a new handwriting motor plan in mind. Those letters include:
b, f, k, r, s, v, x, y, and z
We can help learners with this group by calling them cousins or relatives to their printed letter counterpart because they are similar, but different.
Lowercase Cursive Letters
The following letters transfer directly to their cursive letter forms: c, a, d, g, o, q, i, t, u, j, e, l, f, h, p, n, and m.
Knowing that there are letters that use similar motor plans as a starting point, it is recommended to follow an order when teaching lowercase cursive letters:
c, a, d, g, q – These letters can be considered “wave letters” because of the beginning stroke.
i, t, p, u, w, j – These letters can be considered the “tree letters” because of the beginning line to swing up. e, l, f, h – These letters can be considered the “loop letters” because of the loop that the pencil makes.
k, r, s
b, o, v – These letters can be considered the “tow truck letters” because of the ending connection.
m, n, y, x, z – These letters can be considered the “bump letters” because of the beginning pencil stroke.
Uppercase cursive letters
Upper case cursive letters should be presented in a specific order as well:
A, C, O, U, V, W, X, Y, Z, P, R, B, H, K, N, M, I, J, E, L, I, J, Q
This letter order uses a combination of research-based strategies and focuses on movement based patterns as well as common letter formations, i.e. the way the letters connect to form words. Read about how to connect cursive letters for specifics.
In general, it’s considered that the baseline connecting letters are taught prior to the middle line connecting letters. This isn’t accurate for the Learning Without Tears program (Handwriting Without Tears cursive letter order) when it comes to letter w which is taught near the beginning, due to it’s direct translation from the printed version of letter w.
This upper case cursive letter order (or cursive capital letters) order teaches upper case letters that are similar to lower case letters first. Always teach lower case cursive letters before upper case letters.
The Handwriting Book breaks down the functional skill of handwriting into developmental areas. These include developmental progression of pre-writing strokes, fine motor skills, gross motor development, sensory considerations, and visual perceptual skills. Each section includes strategies and tips to improve these underlying areas.
Strategies to address letter and number formation and reversals
Ideas for combining handwriting and play
Activities to practice handwriting skills at home
Tips and strategies for the reluctant writer
Tips to improve pencil grip
Tips for sizing, spacing, and alignment with overall improved legibility
A final note on teaching cursive letters
Sometimes, cursive letters are taught as a writing format for children that struggle with the motor plan to form and use legible printed handwriting. This might be the case for several reasons:
The motor plan to form printed letters is choppy and difficult to recall the different pencil strokes for each letter.
Cursive letters use a smoother flow to form letters. The continuous hand movements can be easier for some students because it involves fewer stops and starts compared to print writing.
The challenge of letter reversals and letter confusion that occurs with dysgraphia can mean that cursive writing may be easier to learn and use than printed handwriting. This is because cursive letters connect with continuous pencil strokes, leading to less letter reversals and other common writing errors associated with dysgraphia.
Just like printed handwriting, cursive letters are one form of written expression however, there are differences when it comes to legibility. Perfect formation and pencil strokes are not always necessary!
Cursive Letters Tips
We have many blog posts here on The OT Toolbox that support cursive letter writing. Explore these activities and tools to teach the cursive alphabet.
Colleen Beck, OTR/L has been an occupational therapist since 2000, working in school-based, hand therapy, outpatient peds, EI, and SNF. Colleen created The OT Toolbox to inspire therapists, teachers, and parents with easy and fun tools to help children thrive. Read her story about going from an OT making $3/hour (after paying for kids’ childcare) to a full-time OT resource creator for millions of readers. Want to collaborate? Send an email to contact@theottoolbox.com.
we’ve covered many cursive letter resources here on the site, and this blog on how to write c in cursive is one of the top! There’s a reason why: Cursive c is a building block for forming other cursive letters. After learning how to make cursive c, students can then easily transition to several other cursive letters! Let’s get started with how to teach cursive, starting with the lowercase letter c.
Amazon affiliate links are included in this blog post. As an Amazon Influencer, I earn from qualifying purchases.
How to Write C in Cursive
Cursive handwriting can be a difficult thing to teach kids. Today, I’m starting a new series on how to teach cursive letters in fun and creative ways.
In this series, we’re starting with how to write cursive c first.
Letter “c” is one of the first letters that kids are taught when learning cursive. The letter is directly related to it’s printed counterpart. The curve of the letter is one of the most basic pre-cursive strokes that are made and helps to build several other cursive letters (a, d, g, q, and o).
In the Loops and Other Groups cursive writing program, these letters are called Clock Climbers. They are the letters a, d, g, q, o which start with the cursive c formation. The lines “climb a clock” around a curve.
The fact is that fluent cursive writing predicts high level spelling and composing skills, more so than manuscript or typing. And, in fact, studies show that test completed in cursive receive higher scores than those completed in manuscript.
First up is how to make letter c in cursive. This series will most definitely not be in alphabetical order for many reasons, mainly because the cursive writing alphabet is typically not taught in alphabetical order. Rather, the letters are taught in groups of related pencil lines. This supports the motor plan of forming each individual letter and helps with carryover skills. Read more about this concept in our post on cursive letter families.
Let’s start with addressing cursive letter c!
In this blog post, images show use of raised line paper. While this type of adapted paper isn’t a must, the raised lines support development of line awareness when teaching this lowercase cursive letter formation.
How to Teach c in Cursive:
This post contains affiliate links.
Beginning Upstroke
The beginning upstroke of the beginning lines in cursive “c” can be practiced in creative ways in order to help with re-trace when forming the curve of the letter.
There is research that shows teaching the cursive letter c like a cursive “i” with a hooked top, the carryover of legibility is better.
Re-trace-
After forming the up-stroke of the letter, the curved top, and the re-trace back to the bottom of the letter, it is helpful to work on sliding the pencil along the baseline of the paper to develop letter connectors and to improve legibility. Read about tips to teach cursive letter connectors. The letter c has a re-trace at the beginning of the letter and traces back over the initial letter connection from the start of the letter.
Practice-
The final step of writing cursive c is to practice, practice, practice! When it comes to writing c in cursive, there are many tips that you can use. Try the activities listed below as well as these practice tips:
Write Cursive C with Gross motor practice- Use whole body movements to practice formation. This can occur on the ground with chalk, on a dry erase board at the vertical, in the air with air writing, or using the ideas listed below.
Rainbow writing- The child writes the letter in one color and then trace over it with another color. Continue to trace over the letter with each color of the rainbow. This can be done on a large scale with chalk, markers, etc.
Tips for helping kids stop at the baseline when writing the letter “c”:
Use a verbal prompt to bump the bottom line. Trace the baseline with a highlighter for a visual prompt. Try some of these tricks for writing on the lines.
Establish a motor plan to make cursive c consistently
After cursive letter c has been taught, the next step is multisensory exposure to the motor plan to complete the letter consistently. This establishes the kinesthetic input and practice trials. We cover this in more detail in a blog post on motor planning and handwriting.
With different tactile and sensory-based movements of handwriting, repetitions allow information to be embedded in the brain.
Here are some activities to work on cursive c:
The Handwriting Without Tears program (affiliate link) promotes forming letter c without the starting stroke, making formation easier for most kids.
Use sensory textures to teach letter c and the strokes needed to make the letter.
Try practicing cursive handwriting and more cursive letter c practice with these creative cursive handwriting ideas like Textured Cursive Lines
The Handwriting Book is a comprehensive resource created by experienced pediatric OTs and PTs.
The Handwriting Book covers everything you need to know about handwriting, guided by development and focused on function. This digital resource is is the ultimate resource for tips, strategies, suggestions, and information to support handwriting development in kids.
The Handwriting Book breaks down the functional skill of handwriting into developmental areas. These include developmental progression of pre-writing strokes, fine motor skills, gross motor development, sensory considerations, and visual perceptual skills. Each section includes strategies and tips to improve these underlying areas.
Strategies to address letter and number formation and reversals
Ideas for combining handwriting and play
Activities to practice handwriting skills at home
Tips and strategies for the reluctant writer
Tips to improve pencil grip
Tips for sizing, spacing, and alignment with overall improved legibility
Colleen Beck, OTR/L has been an occupational therapist since 2000, working in school-based, hand therapy, outpatient peds, EI, and SNF. Colleen created The OT Toolbox to inspire therapists, teachers, and parents with easy and fun tools to help children thrive. Read her story about going from an OT making $3/hour (after paying for kids’ childcare) to a full-time OT resource creator for millions of readers. Want to collaborate? Send an email to contact@theottoolbox.com.
A final note on Cursive C
Learning cursive c is a common starting point for other cursive letters due to the beginning formations of the pencil strokes. Once a learner has cursive c down pat, you can add a single stroke or combination of pencil strokes to form cursive d, g, o, and q.
Use the strategies shared above to work on the visual motor, sensory motor, and muscle memory to create cursive letters with fluency and efficiency.
This bat template is a fine motor activity, perfect for building motor skills with a Halloween twist. Use the bat printable as a stencil to cut out, trace, and then use in fine motor work. Add this to your Halloween occupational therapy activities!
Bat Template
Fall is here and that means it’s time to pull out the Halloween crafts! This bat Halloween craft is a favorite in our house, and it’s actually a fun way to celebrate Halloween with kids without spooky decorations.
We also used this bat template in a Stellaluna activity that also challenged visual processing skills. Be sure to check that activity out for another way to use this printable bat stencil.
The nice thing about using our bat template is that it becomes an open-ended Halloween craft idea is one that doesn’t need a lot of materials. In fact, it’s a simple craft idea that is big on the fine motor skill development! When kids make this bat craft, they will be boosting skills such as fine motor strength and dexterity in a big way.
For more Halloween craft ideas, check out some of the ideas at the bottom of this post…it’s the perfect addition if you’re looking for Halloween crafts for toddlers or Halloween crafts for preschool parties.
Related, check out these spider activities for more spooky but fun ideas.
Bat Template Craft
We made this bat craft with a fun sensory twist. And, since we have a certain second grader that is cursive handwriting obsessed, we decided to add a cursive handwriting twist to this activity. This activity could work to help kids with letter formation of upper case letters, lowercase letters, or numbers too. The possibilities are endless.
We arranged the bat template so you can print out one bat printable page and then get 3 bats from the one page.
Or, if you are using the bat templates with a group of kids like in a classroom Halloween party activity, you can easily cut the bat template page into three sections with one bat stencil for each child.
This post contains affiliate links.
Bat Printable
To make your bat craft, you’ll need just a few materials.
Scissors (THIS is my favorite brand and the ones that I always recommended as an Occupational Therapist!)
Pencil or marker
This is a great Halloween craft for preschoolers because it’s a fantastic way to work on scissor skills with a Halloween activity.
Make the Bat Template
First print out the Pat printable onto printer paper.
Cut out the bat templates on the page. Each template has three bats. Students can cut out the bat printable or the adult can do this as preparation work.
Trace the bat template onto cardstock or black construction paper. This is another good task for students to do as tracing the bat template supports development of bilateral coordination skills, eye-hand coordination, crossing midline, and pencil control skills.
Cut out the bat template.
Kids can cut out the shape using their Scissors for great scissor skill work. The bat shape is a complex cutting shape and can be done by Elementary aged students.
Cutting the angled wings and curves can be difficult, but by using the cardstock, kids will get a bit fore proprioceptive feedback from the thicker resistance of the paper material.
To make the task easier, cut wings without the jagged lines or use thicker cutting lines when you draw the bat shape.
Decorate the Bat Cutout
Once you have the bat, you’ll need to cut pieces of the black yarn. Have your child cut long or short pieces, it doesn’t really matter what length they wish to cut for their bat’s texture.
Cut black yarn for the bat cutout.
Cutting the yarn is a great material to practice appropriate scissor positioning and bilateral hand coordination.
If a child is holding the scissors on an angle, cutting the yarn will be more difficult. (You may see them trying to “saw” at the yarn!) Encourage them to hold the scissors straight up and down and the blades of the scissors at a 90 degree angle to the yarn. You can find more of our Scissor Skills activities.
2. Next, pour some glue into a shallow dish or plate. Show your child how to drag the yarn through the glue and get it nice and saturated with the glue. Use both hands to pinch and “scrape” off excess glue from the piece of yarn.
3. Next, drape the black yarn on the bat shape. You can let your child get as creative as they wish with this part. Some might like to outline the bat shape and others, just pile it up on the bat.
4. Let the glue and yarn harden and you’ll have a textured bat craft to use in Halloween decorations this Fall. You will have to wait for the glue to dry, probably overnight.
Use the Bat Printable in Handwriting Practice
Occupational therapy practitioners know the value of using a single activity or material to develop a variety of skill areas. That is the case with this bat printable…use it to work on handwriting skills too!
We used those saturated yarn pieces to build cursive letters, but you could build printed letters as well, using our letter construction method.
Use this Bat Craft for kids to work on letter formation of any kind. It’s a creative writing activity that they will be sure to remember. Work on forming individual letters, spelling sight words, or making Halloween words.
Use the Bat Printable in Learning
This would work as a very fun…and very sensory…classroom Halloween party idea or learning activity for this time of year, while working on team work skills, and learning components.
Split kids up into teams. Give each team a collection of cut black yarn and a bowl of glue.
Write a spelling word, or a Halloween word on the board or hold up a sign with a Halloween word.
Each team has to work together to use the cut yarn and glue to spell the Halloween word on a piece of paper or cardboard.
Once a team has completed the word, they have to hold up their paper or cardboard. The first team to spell the word with the letters sticking wins! (Too much glue or not enough glue will make this a fun race for Halloween parties for kids of all ages.)
Build printed letters with the glue yarn, too. We had a lot of fun with this Halloween craft and it was a hit with all of my kids…from preschool on up to grade school.
Check out some of these other Halloween activities and crafts:
Make a Spider Craft using potato stamps. Fun for parties or just Halloween fun with the kids!
Use cookie cutters and chalk to make Halloween Chalk Art. It’s a messy and sensory Halloween activity that the whole family can get involved in.
Want a copy of this free bat template printable? Enter your email address into the form below to get a copy of this Halloween printable. This activity is also available inside The OT Toolbox Member’s Club under our Bat Therapy Theme. Members can log in and get the bat template there without entering an email address. Not a member yet? Join us today.
Colleen Beck, OTR/L has been an occupational therapist since 2000, working in school-based, hand therapy, outpatient peds, EI, and SNF. Colleen created The OT Toolbox to inspire therapists, teachers, and parents with easy and fun tools to help children thrive. Read her story about going from an OT making $3/hour (after paying for kids’ childcare) to a full-time OT resource creator for millions of readers. Want to collaborate? Send an email to contact@theottoolbox.com.
Teaching kids to write uppercase cursive can be quite tricky. Upper case cursive letters are part of handwriting and everyday written expression, but when it comes learning the motor plan for forming uppercase letters in cursive writing, establishing fluent writing is needed for accuracy. Below you’ll find tricks for teaching uppercase cursive letters and uppercase cursive letter formation.
Upper Case Cursive
In this blog post, we refer to the terms “upper case cursive letters” and “uppercase cursive”. The semantics of describing capital letters in cursive is simply for understanding the material, and meeting the needs of all individuals seeking resources on teaching upper case letters in cursive formation.
Let’s get started with the uppercase cursive writing resources and tips.
Some uppercase cursive letters are not used as often as their lowercase counterpart.
When kids learn to write their name in cursive and become proficient at their cursive signature the uppercase letter is just part of the writing motor plan becomes natural and a personal part of a personal style.
There are many uppercase cursive letters that can easily be forgotten simply because they are not used very often!
This post is part of our 31 day series on teaching cursive. You’ll want to check out the How to Teach Cursive Writing page where you can find all of the posts in this series.
For more ways to address the underlying skills needed for handwriting, check out the handwriting drop-down tab at the top of this site.
Uppercase Cursive LetterS
Some students develop a natural speed and personal writing style and will prefer to write in cursive. Other students will write only their signature in cursive. Still other students develop a natural speed and personal style and may mix upper and lower case cursive letters.
If you look at the average adult handwriting you may notice that there is a mixture of printed and cursive letters. The goal being functional written work, this is fine for adults and individuals who are writing for speed such as high school students.
However, consistent and accurate formation is needed for formal written work in cursive.
Like the cursive letter families for lowercase, the uppercase letters are divided up into groups of families based on pencil strokes.
Teaching kids to write cursive upper case letters is broken down by formation and pencil strokes. We’ve listed the letters out in groups below to support letter formation and motor planning skills.
The descriptions are designed to promote the easiest formation style of cursive letters, eliminating extra lines such as the beginning loop of uppercase cursive letter C.
The letters that are exact replicas of their printed counterparts are designed to ease transition for letters that are not commonly used in written work. This is a tactic of the Handwriting Without Tears letter order strategy.
Uppercase Cursive Letters D, F, T
Cursive D, F, and T are Uppercase Cursive letters with a downward start.
These letters include D, F, and T. These letters all start with a downward stroke of the pencil. Let’s break these letters down by formation and pencil strokes.
Uppercase cursive D begins down followed by a loop to the left upwards with a curved back to the baseline and a big round curve to finish off the top.
Uppercase cursive F starts in the middle of the letter with a downward stroke followed by a curve to the left and a crossline. Then on top is a crossline topper.
Uppercase cursive T starts with a middle down work stroke in the middle of the letter followed by a curve to the left and no crossline. Then on top is a crossline topper.
Uppercase Cursive A, C, E, O, and Q
Upper case cursive A, C, E, O, and Q are considered “Right curve start uppercase letters” because the pencil stroke starts in the right upper corner. This group includes uppercase letters that start on the right side and curve left. Consider the formation of these letters much like the formation of a printed c.
Uppercase cursive A starts at the right top line and curves to the left with a big C motion to the baseline. The pencil then curves up to close a letter causes at the top line. Retrace back down in loops a way to connect.
Uppercase cursive C starts with a right curve start at the top uppercase C
Uppercase cursive E starts with a right curve start at the top line. It includes two small curves pausing at the middle line before curbing again to the left to the baseline.
Uppercase cursive O is a right curve start beginning at the top line and curving in a big city motion to the baseline. It continues around to close the lot start has a small loop at the top.
Uppercase cursive Q is a right curve start letter beginning at the top line and curving in a big motion to the baseline. Q continues around to close the top of the letter and has a small loop at the end. It then has a kickstand line to complete the letter.
Uppercase Cursive B, P, R, L
These letters are considered “Rocker start uppercase letters“. Uppercase B, P, R, and L begin with a small curving motion to begin the letter at the top line.
Uppercase cursive B starts with a rocker start followed by a straight line down to the baseline. It retraces up to the top line and curve around right to the middle line. Pause and curve around right to the baseline.
Upper case cursive P is a rocker start cursive letter. The letter starts with a rocker line to the top. Straight line down to the baseline. Retrace up to the top line. Curve around with a small curve to the middle line.
Upper case cursive R is a rocker start cursive letter. The letter starts with a rocker line to the top. Straight line down to the baseline. Retrace up to the top line. Curve around with a small curve to the middle line. Kick out to the baseline with a slant.
Upper case cursive L is a rocker start letter that continues with a small loop down to the baseline. The line continues with a small group and diagonal line to connect as it swings away to the baseline.
Upper Case Cursive I and J
Next up in teaching cursive capital letters are the “Left curve start letters“. These letters switch pencil stroke directions and have a starting point on the opposite side of the other letters previously covered. There are just two letters start with a left. These include uppercase letter I and J. Both letters start with the pencil moving in a left line direction.
Uppercase letter I is a left curve start letter. The letter starts at the baseline and swings in a loop to the left and turns at the top line. It continues the tall loop back to the baseline, but continues the motion until reaching the middle line. The pencil pauses and pulls in toward the loop at the midline.
Uppercase letter J is a left curve start letter. The letter starts at the baseline and curves left and then up to the top line. It swings straight back down to the baseline and pass the baseline with a table. The line then swings left and then curves up and away to connect.
Upper Case Cursive H, K, M, N, X, W
Next up are the “Top loop start letters“. Several letter start with a top-starting loop that continues down. These letters include capital H, K, M, N, X, and W.
Uppercase cursive H begins with a top loop that continues down to the baseline. The pencil picks up and starts again at the top line. The pencil stroke goes straight down to the baseline and then swings away to touch the initial pencil line. It swings in a loop and then connects over to the second line.
Upper case cursive H is one of a few letters with two pencil strokes where the pencil picks up to continue a letter. Most cursive letters and all other cursive letters use only a single pencil stroke.
Uppercase cursive K is a loop start letter. It begins at the top with a link to the right on the lease straight line down to the baseline. This is much like the uppercase letter H. However with the K, the second line starts at the top line and continues in to cross the first line with a small loop and then continues out again to the baseline.
Upper case cursive M is a loop start letter that begins at the top line with a loop. The line continue straight down to the baseline and stops. It retraces up over the climb to the top with a bump and continues down to the baseline again. The pencil strip retraces back up that one to the top line and bumps over to the baseline
Upper case cursive N is a loop start letter that begins at the top line with a loop. The line continue straight down to the baseline and pauses. It re-traces back up and curbs away with a bump at the top line. The line continue straight down to the baseline and stops.
Uppercase cursive X is a loop start letter that begins with the loop at the top line followed by a diagonal line down to the baseline. The pencil is picked up and continued at the top line and has a diagonal in the opposite direction to cross at the middle of the X.
Upper case cursive W is a loop start letter that begins at the top line with a loop. The line continues down with a bottom bump inverted bump at the baseline that continues up to the middle line and beyond to the top line. The line is retraced back down with an inverted pump at the baseline. The line continues back up to the top line.
Upper case cursive U, V, W, Y, Z
The last remaining uppercase cursive letters are ones that are very similar information to their lowercase counterparts. They are quite similar in most cases to their printed letter.
These letters include U, V, W, Y, Z
Uppercase cursive U is an exact replica of its printed counterpart.
Uppercase cursive letter V is an exact count a part of its printed counterpart.
Uppercase cursive W is an exact replica of its printed counterpart.
Uppercase cursive Y is an exact replica of it’s lowercase cursive counterpart.
Uppercase cursive Z is an exact replica of the lowercase Z form.
Uppercase Cursive letter practice
Now that you have the specific letter formation directions down and the order to teach uppercase cursive letters, the next step is practice!
Creating a motor plan for automatically creating letters supports handwriting speed, autonomy, and legibility. Practice makes perfect, after all!
But how do you help kids (or adults) create that motor plan for uppercase letters?
Adding sensory motor handwriting strategies! Use the ideas below as a practice component for practicing uppercase cursive writing.
Bold Lines Handwriting Trick– Work on forming uppercase cursive letters on the lines using this bold lines trick.
DIY Desk Letter Strip– Make an uppercase cursive letter strip to using forming letters correctly and grouping uppercase cursive letters into families based on the way the pencil strokes go.
Need more uppercase cursive tips? Try the Handwriting Book:
The Handwriting Book is a comprehensive resource created by experienced pediatric OTs and PTs.
The Handwriting Book covers everything you need to know about handwriting, guided by development and focused on function. This digital resource is is the ultimate resource for tips, strategies, suggestions, and information to support handwriting development in kids.
The Handwriting Book breaks down the functional skill of handwriting into developmental areas. These include developmental progression of pre-writing strokes, fine motor skills, gross motor development, sensory considerations, and visual perceptual skills. Each section includes strategies and tips to improve these underlying areas.
Strategies to address letter and number formation and reversals
Ideas for combining handwriting and play
Activities to practice handwriting skills at home
Tips and strategies for the reluctant writer
Tips to improve pencil grip
Tips for sizing, spacing, and alignment with overall improved legibility
There are many reasons why writing uppercase cursive letters are so difficult for many students. While cursive is a fluent progression from printed handwriting and an easier form for many students, there can be some issues that impact legibility and fluency with forming the uppercase version of these cursive letters.
Cursive letters are not used as often as the lowercase counterparts. Because of this, it can be challenging for kids to consistently remember how to form uppercase letters in cursive.
Practicing letters to create the muscle memory is the way to get there. Practice those upper case cursive letters and they will become fluent and legible!
Colleen Beck, OTR/L has been an occupational therapist since 2000, working in school-based, hand therapy, outpatient peds, EI, and SNF. Colleen created The OT Toolbox to inspire therapists, teachers, and parents with easy and fun tools to help children thrive. Read her story about going from an OT making $3/hour (after paying for kids’ childcare) to a full-time OT resource creator for millions of readers. Want to collaborate? Send an email to contact@theottoolbox.com.
Here we are covering how to teach cursive b, cursive e, cursive f, cursive h, cursive k, and cursive l. These loop letters are all connected because of their similar pencil movements that make the letter. You can add these tips and strategies to teach cursive letter writing. Today, you’ll find creative activities and tips for teaching formation of cursive loop letters. Cursive loop letters are those ones that start with a loop line up. Lowercase cursive letters b, e, f, h, k, and l are loop letters.
Writing cursive letters in order with a specific strategy is very helpful in teaching proper letter formation in a way that is logical.
Loop letters are a set of cursive letters that all have a loop in the initial formation of the letter. These loop letters include:
cursive b
cursive e
cursive f
cursive h
cursive k
After the initial loop, or upswing of the pencil, the pencil moves back down toward the baseline and moves into another pattern to form the rest of the letter.
This cursive letter family is a group of cursive letters that are formed with similar pencil strokes.
Breaking letters down into cursive families can help students learn cursive letter formation. Below, you will find information on how to teach cursive letter formation of “tree letters”.
This post is part of our 31 day series on teaching cursive. You’ll want to check out the How to Teach Cursive Writing page where you can find all of the posts in this series.
For more ways to address the underlying skills needed for handwriting, check out the handwriting drop-down tab at the top of this site.
Motor Plan for Formation of “Loop” Letters
When instructing students in forming these loopy cursive letters, start by outlining a cursive letter lesson plan of activities. You can read more about cursive letter lesson plans here. Students can start out with learning the cursive letters that make up the Loop Family.
Start by practicing a series of upward curves across a line of paper. This can look like a string of cursive letter loopy l‘s joined together. When practicing the curve of the cursive letter l motions in a strand across a page, set the child’s awareness on height and the start/stop point of each curve.
Most important is the width of the loop. Instruct students to draw the lines with proper width of the loop. A wide loop will make the letter inefficient and difficult to connect to other letters.
When beginning with cursive instruction, students should concentrate on an upward curve from the base line to the middle line or top line of the paper.
This loop occurs in the Loop Family letters: b, e, f, h, k, and l.
Fine Motor Activity for Practicing Cursive Loop Letters
Try this activity to practice the loops of the loopy letters. Use washable markers to draw loops on a paper towel. (Adding pencil lines for writing spaces before starting can be a big help for addressing loop and letter size!)
To the loops, add drops of water and watch the colors expand.
Be sure to talk to the child about loop height and width as these aspects to cursive writing will carry the most weight when it comes to legibility.
For a colorful work of art, trace over the marker loops with additional colored markers. Read more about this cursive handwriting activity and others here on The OT Toolbox.
Activities for Teaching Cursive Loop Letters
Use short phrases to instruct cursive formation. Phrases like “Loop up to the top line” or “Loop up to the middle line” can help.
Try these sensory activities to teach cursive handwriting loop letters: Affiliate links are included below.
Write with glitter or colored glue on lined paper. Allow the glue to dry. Students can feel the raised lines of the loops.
Draw with wet chalk on a chalkboard or sidewalk. Be sure to add guide lines first to address loop height.
Create different sized loops using wikki stix. (affiliate link) Wikki Stix activities are a great tool for getting the hands in on the fine motor action with a tactile experience that promotes motor planning and kinesthetic learning.
How to Teach Cursive b
Use the following verbal prompts to teach lowercase cursive letter b:
Start at the baseline.
Loop up to the top line and back to the baseline.
Swing up to the middle line.
Tow rope away to connect.
Lowercase cursive letter b is a tow rope letter. These are letters that connect at the middle line. They change the beginning of the letter they connect to.
It can be helpful to practice letters that are commonly connected to letter b such as ba, be, bi, bl, bo, br, bu, and by.
How to Teach Cursive e
Use the following verbal prompts to teach lowercase cursive e:
Start at the baseline.
Loop up to the middle line and back to the baseline.
Loop away to connect.
Instruct students to stop at the middle line.
How to Teach Cursive f
Use the following verbal prompts to teach lowercase cursive letter f:
Start at the baseline.
Loop up to the top line and back to the baseline.
Continue straight down past the baseline.
Curve right and up to the baseline, connecting at the strait part of the tail.
Swing away to connect.
Note about cursive letter f– This letter requires the pencil lines to close the tail into a “bunny ear” type of loop. Think about drawing a tall bunny ear. The lines create a long, loop type of shape that does not cross like a the loop on the top part of the f.
Rather, the curved motion has a potential for an opening. It’s important for students to close the tail of the f. Likewise, it’s important to keep the closure point at the baseline. If the closure point creeps up above the baseline or has an opening, the letter can potentially look like a cursive b.
Work on loop formation and motor control for closure points in multi-sensory activities such as with sandpaper or in writing trays. b, e, f, h, k, and l.
When it comes to specific letters, an understanding of tall, short, and tail letters is needed for carryover of accuracy related to line use and size awareness.
Taking the size awareness piece into consideration is an overall understanding of size both on paper and outside the body in the world around us. This tall and short worksheet has a fine motor and visual motor component that can be incorporated into whole-body movement activities to teach these concepts that carryover into handwriting.
How to Teach Cursive h
Use the following verbal prompts to teach lowercase cursive letter h:
Start at the baseline.
Loop up to the top line and back to the baseline.
Pause.
Re-trace back up to bump to the middle line.
Continue over the bump to the baseline.
Swing away to connect.
How to Teach Lowercase Cursive k
Use the following verbal prompts to teach lowercase cursive letter k:
Start at the baseline.
Loop up to the top line and back to the baseline.
Pause.
Re-trace back up to bump to the middle line.
Continue over the bump and pull back into the loop.
Add a kickstand to the baseline.
Swing away to connect.
Use these sensory activities to practice cursive letter k:
Note about cursive letter k– This letter requires the pencil lines to close the bump at the loop. It’s important for students to pull the pencil lines in and to close the bump.
If the closure point doesn’t close at the loop, the letter can potentially look like a cursive h.
Work on loop formation and motor control for closure points in multi-sensory activities such as with sandpaper or in writing trays.
How to Teach Cursive l
Use the following verbal prompts to teach lowercase cursive letter l:
Start at the baseline.
Loop up to the top line and back to the baseline.
Loop away to connect.
A few tips for teaching cursive loop letters
It would be very difficult to teach cursive handwriting only by verbal instruction. Carryover and accuracy would suffer!
A visual component and slow teaching strategies are very important. Try these tips to help with learning cursive loop letters.
Amazon Affiliate links are included in the links below.
Try these cursive writing tools to help with forming letters: Affiliate links are included.
Cursive Writing Wizard is a free app on Amazon that allows students to trace letters and words. The app has stickers and animations as well as handwriting games that promote learning of cursive letters and connecting lines.
Cursive Handwriting Workbook is a workbook for kids in elementary grades and focuses on formation of cursive letters (upper and lower case) as well as words.
Teachers can use a laser pointer in the classroom to help students see parts of cursive letters as they instruct each part of the formation. This is helpful when teaching letters in cursive letter families.
The Handwriting Book is a comprehensive resource created by experienced pediatric OTs and PTs.
The Handwriting Book covers everything you need to know about handwriting, guided by development and focused on function. This digital resource is is the ultimate resource for tips, strategies, suggestions, and information to support handwriting development in kids.
The Handwriting Book breaks down the functional skill of handwriting into developmental areas. These include developmental progression of pre-writing strokes, fine motor skills, gross motor development, sensory considerations, and visual perceptual skills. Each section includes strategies and tips to improve these underlying areas.
Strategies to address letter and number formation and reversals
Ideas for combining handwriting and play
Activities to practice handwriting skills at home
Tips and strategies for the reluctant writer
Tips to improve pencil grip
Tips for sizing, spacing, and alignment with overall improved legibility
Colleen Beck, OTR/L has been an occupational therapist since 2000, working in school-based, hand therapy, outpatient peds, EI, and SNF. Colleen created The OT Toolbox to inspire therapists, teachers, and parents with easy and fun tools to help children thrive. Read her story about going from an OT making $3/hour (after paying for kids’ childcare) to a full-time OT resource creator for millions of readers. Want to collaborate? Send an email to contact@theottoolbox.com.
If you are teaching kids to write in cursive handwriting, these tips on how to write cursive a will help with a starter letter that supports the development of cursive writing skills. Writing letter a in cursive might seem like a good place to start when teaching cursive writing (after all, it’s the beginning of the alphabet!), but actually, you’ll want to start developmentally by teaching cursive letters in a sequential order.
How to Write Cursive a
Teaching cursive handwriting is a challenge for many parents and teachers. Taking it step-by-step is key. Here, you will find strategies for how to write cursive letter a. Many times, there is not a specific curriculum that schools use and teachers need to scramble for resources and THEN fit handwriting time into an already jam packed day.
That’s why here at The OT Toolbox, you will find cursive writing tools that can be easily added into a school day. So, if you are wondering how to teach cursive writing, then you are in luck, because we have specific tips and tricks to teach cursive letters a-z.
Here you will find tricks and tips to write cursive a…in fun ways!
Lowercase cursive letter a is one of the wave letters. The letters c, a, d, g, q, and o make up these letters that contain similar letter strokes. That’s why when children are taught to write in cursive, these letters are typically grouped together. We talked about how cursive letters are related and grouped into cursive letter families.
Teaching cursive letters in groups helps with letter formation, including the motor plan to form similar letters. When kids can practice cursive with a sensory approach to writing letters, they engage multiple senses along with the motor movements to form each letter. Grouping them into like letters makes the learning easier.
a in Cursive…where to start?
Start by reviewing how to form cursive c.
Start by reviewing and practicing cursive letter c. Cursive letter c (and cursive a) is a wave letter. Starting with some pencil strokes and multi-sensory practice of the wave formation is a good place to begin. Try some multi-sensory approaches to build motor planning for forming cursive a.
Hold a small crafting pom pom or cotton ball in the thumb, pointer finger, and middle finger. This positions the hand into a tripod grasp and “wakes up” the muscles for writing.
Holding the cotton ball, students can use whole arm motions to “draw” an imaginary wave in the air. Encourage them to be sure to re-trace the wave so it has a big curved portion at the top or crest of the wave. Here is more information on teaching wave letters.
By re-tracing that wave back down to the bottom, they can see the letter “c” or the beginning part of a letter a forming.
One tip to get that line really formed with re-trace is to tell kids that they want the wave to be great for surfing under. If the wave is fat at the bottom, it’s not a surfing wave. We want to see a wave that is ready to fall over and crash so a surfer can surf right along the inside of the wave.
Making a string of cursive c’s or a wave with several waves together is a good exercise.
Next, turn cursive c into a cursive a.
Once that curved c is reviewed, and the students are tracing back over their wave lines so the curve looks like a single line, it’s time to turn lowercase c into lowercase a.
Teach cursive a by telling students to form a cursive c that looks like a wave ready to crash over.
Their pencil should trace back over the wave line and move along the baseline. The pencil should move straight up to the top of the wave and pause where the wave is just about to tip over.
Next, the pencil should trace strait back down to the bottom line of the paper. Then, the pencil can move along the baseline to connect to the next letter. Here are tips to teach cursive letter connections.
Here are those cursive writing directions listed out:
Write a cursive c with the top of the wave ready to crash.
Move the pencil along the baseline and up to touch the tip of the wave.
Pull the pencil strait down to the baseline.
Curve away to connect.
Poor Formation of cursive a?
What happens when the cursive a (or other writing in cursive) falls flat? There can be some troubleshooting to do when it comes to writing in cursive. Here are some problems you might see whth letter a.
The lines curving up to the top of the lowercase a aren’t touching- Remind the student to trace back over the curve of their magic c. Review how to make the curve of a letter c.
The “wave” looks to wide- A gaping wave can make the letter a look sloppy. Teach students to trace back over the curve of the along the same line. Try using rainbow writing for this method.
The up line to touch the top of the a is slanted. The a looks
The Handwriting Book is a comprehensive resource created by experienced pediatric OTs and PTs.
The Handwriting Book covers everything you need to know about handwriting, guided by development and focused on function. This digital resource is is the ultimate resource for tips, strategies, suggestions, and information to support handwriting development in kids.
The Handwriting Book breaks down the functional skill of handwriting into developmental areas. These include developmental progression of pre-writing strokes, fine motor skills, gross motor development, sensory considerations, and visual perceptual skills. Each section includes strategies and tips to improve these underlying areas.
Strategies to address letter and number formation and reversals
Ideas for combining handwriting and play
Activities to practice handwriting skills at home
Tips and strategies for the reluctant writer
Tips to improve pencil grip
Tips for sizing, spacing, and alignment with overall improved legibility
Colleen Beck, OTR/L has been an occupational therapist since 2000, working in school-based, hand therapy, outpatient peds, EI, and SNF. Colleen created The OT Toolbox to inspire therapists, teachers, and parents with easy and fun tools to help children thrive. Read her story about going from an OT making $3/hour (after paying for kids’ childcare) to a full-time OT resource creator for millions of readers. Want to collaborate? Send an email to contact@theottoolbox.com.
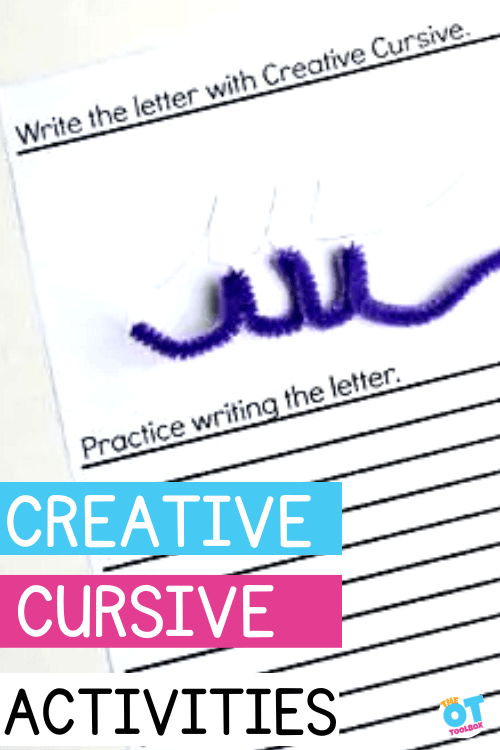


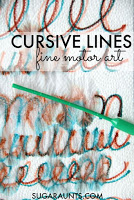

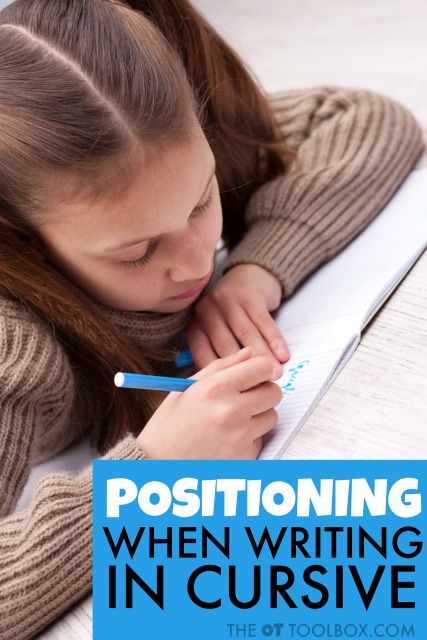
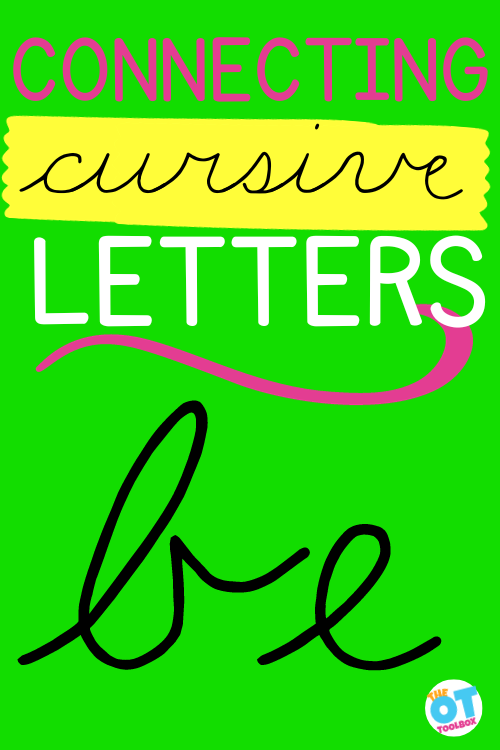


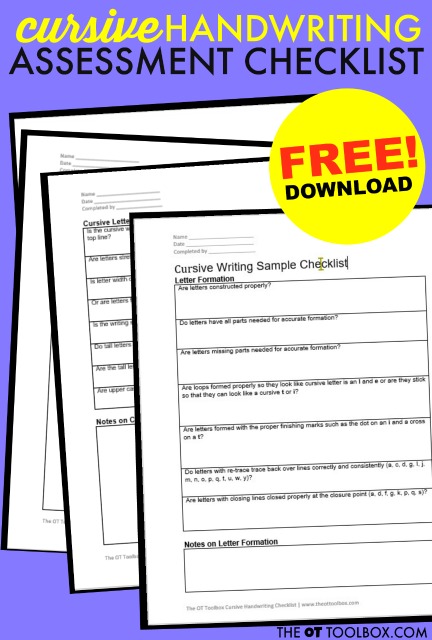


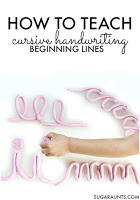
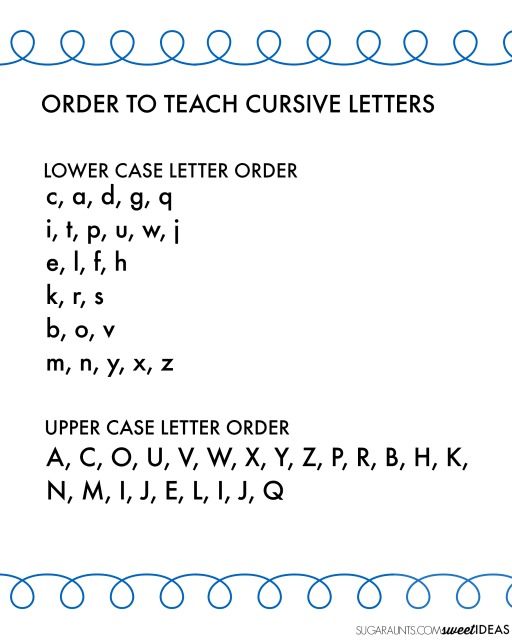
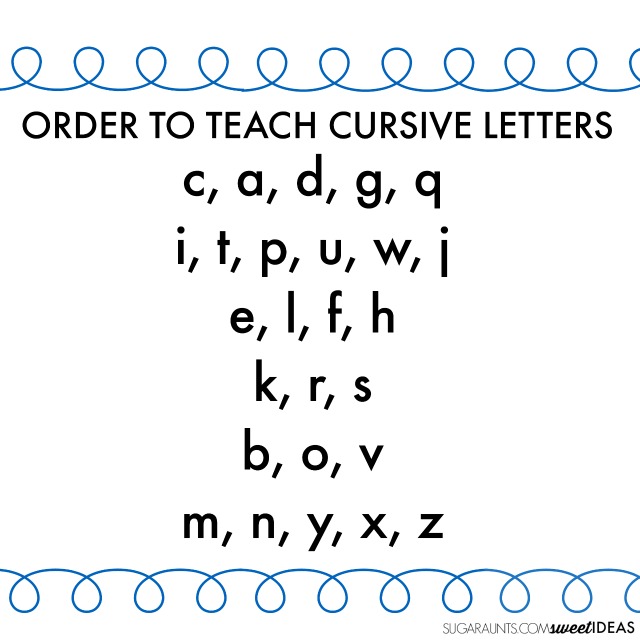


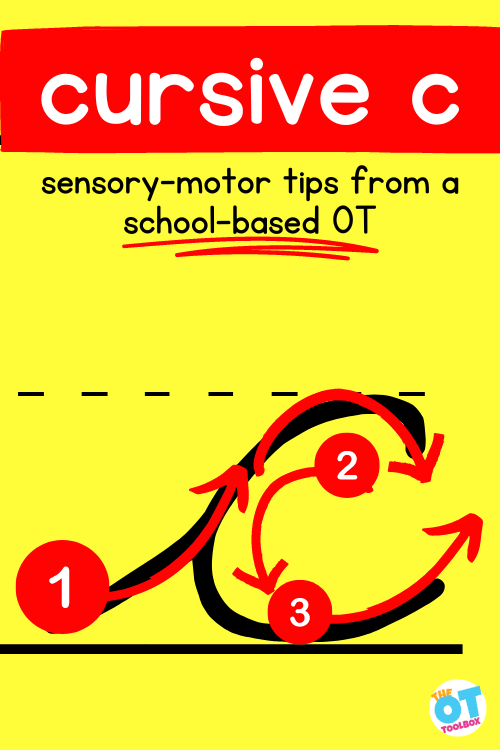
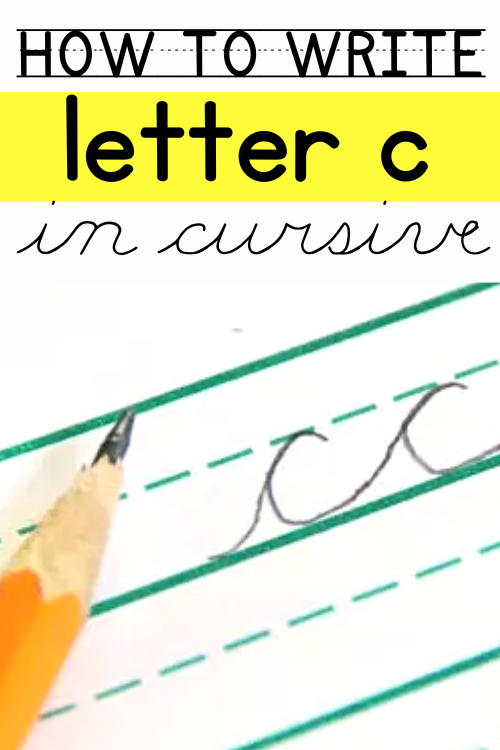
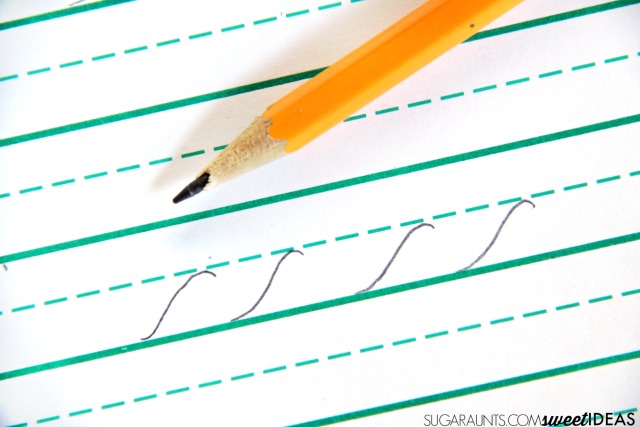
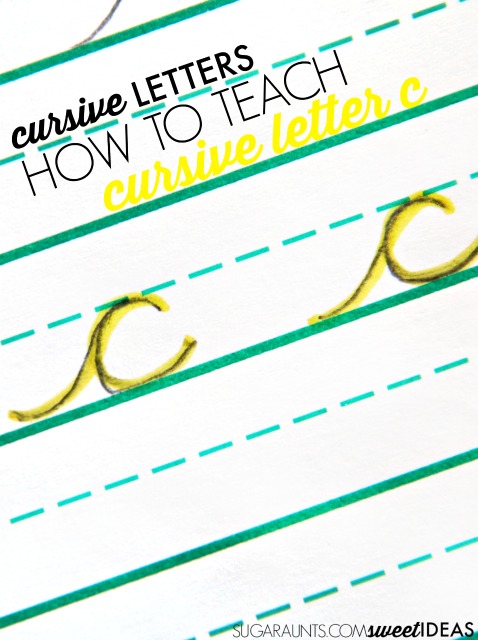
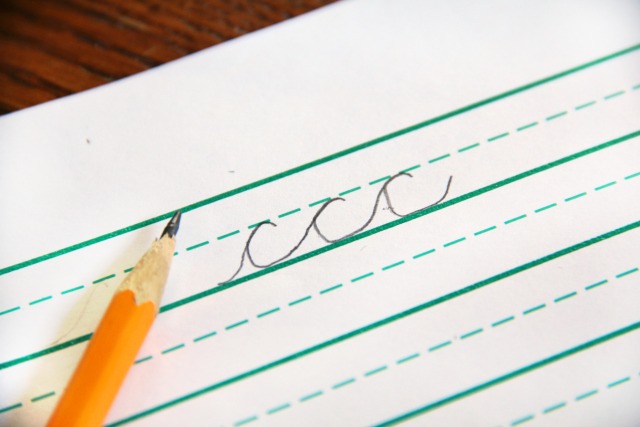


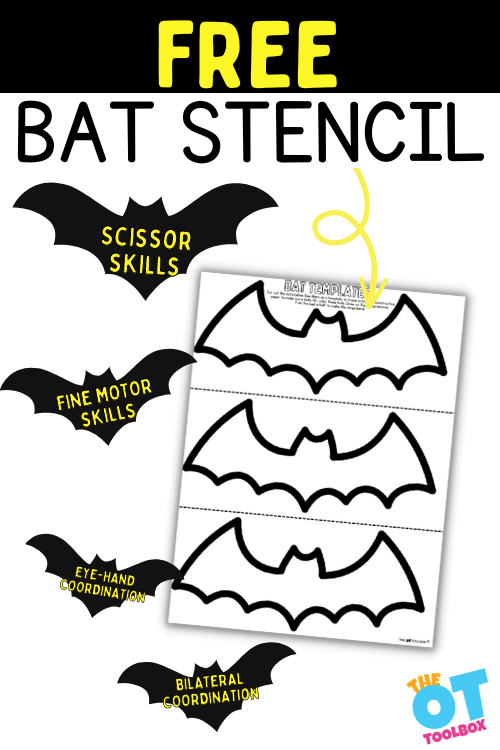


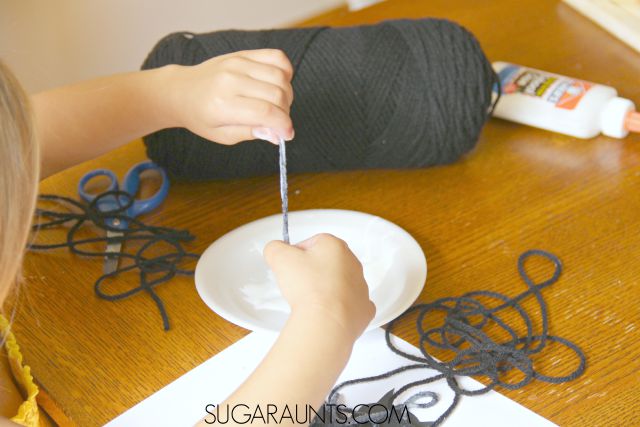
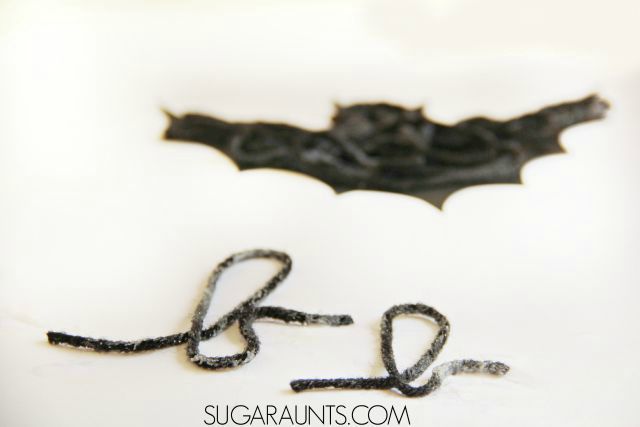
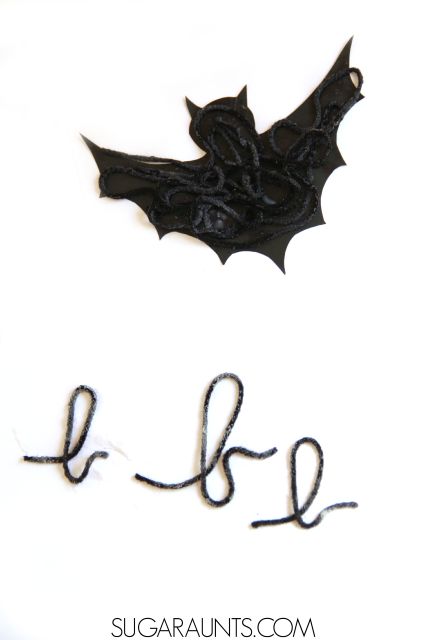
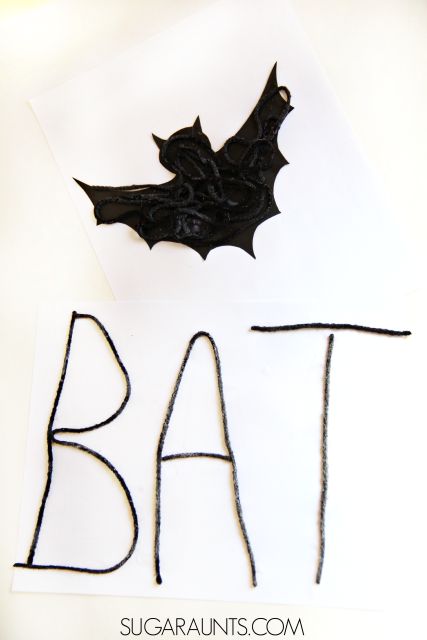

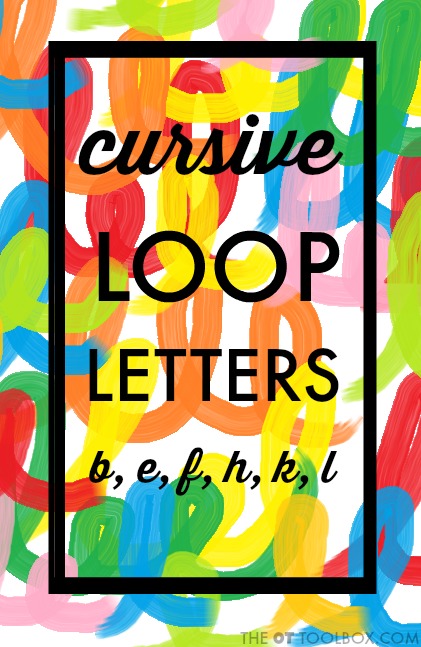
")