Here we are covering how to teach cursive b, cursive e, cursive f, cursive h, cursive k, and cursive l. These loop letters are all connected because of their similar pencil movements that make the letter. You can add these tips and strategies to teach cursive letter writing. Today, you’ll find creative activities and tips for teaching formation of cursive loop letters. Cursive loop letters are those ones that start with a loop line up. Lowercase cursive letters b, e, f, h, k, and l are loop letters.
Writing cursive letters in order with a specific strategy is very helpful in teaching proper letter formation in a way that is logical.
Our resource on bad handwriting is a great place to start.
What are loop letters?
Loop letters are a set of cursive letters that all have a loop in the initial formation of the letter. These loop letters include:
- cursive b
- cursive e
- cursive f
- cursive h
- cursive k
After the initial loop, or upswing of the pencil, the pencil moves back down toward the baseline and moves into another pattern to form the rest of the letter.
This cursive letter family is a group of cursive letters that are formed with similar pencil strokes.
Breaking letters down into cursive families can help students learn cursive letter formation. Below, you will find information on how to teach cursive letter formation of “tree letters”.
")
This post is part of our 31 day series on teaching cursive. You’ll want to check out the How to Teach Cursive Writing page where you can find all of the posts in this series.
For more ways to address the underlying skills needed for handwriting, check out the handwriting drop-down tab at the top of this site.
Motor Plan for Formation of “Loop” Letters
When instructing students in forming these loopy cursive letters, start by outlining a cursive letter lesson plan of activities. You can read more about cursive letter lesson plans here. Students can start out with learning the cursive letters that make up the Loop Family.
Start by practicing a series of upward curves across a line of paper. This can look like a string of cursive letter loopy l‘s joined together. When practicing the curve of the cursive letter l motions in a strand across a page, set the child’s awareness on height and the start/stop point of each curve.
Most important is the width of the loop. Instruct students to draw the lines with proper width of the loop. A wide loop will make the letter inefficient and difficult to connect to other letters.
When beginning with cursive instruction, students should concentrate on an upward curve from the base line to the middle line or top line of the paper.
This loop occurs in the Loop Family letters: b, e, f, h, k, and l.
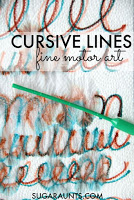
Fine Motor Activity for Practicing Cursive Loop Letters
Try this activity to practice the loops of the loopy letters. Use washable markers to draw loops on a paper towel. (Adding pencil lines for writing spaces before starting can be a big help for addressing loop and letter size!)
To the loops, add drops of water and watch the colors expand.
Be sure to talk to the child about loop height and width as these aspects to cursive writing will carry the most weight when it comes to legibility.
For a colorful work of art, trace over the marker loops with additional colored markers.
Read more about this cursive handwriting activity and others here on The OT Toolbox.
Activities for Teaching Cursive Loop Letters
Use short phrases to instruct cursive formation. Phrases like “Loop up to the top line” or “Loop up to the middle line” can help.
Try these sensory activities to teach cursive handwriting loop letters: Affiliate links are included below.
Write with glitter or colored glue on lined paper. Allow the glue to dry. Students can feel the raised lines of the loops.
Draw with wet chalk on a chalkboard or sidewalk. Be sure to add guide lines first to address loop height.
Create different sized loops using wikki stix. (affiliate link) Wikki Stix activities are a great tool for getting the hands in on the fine motor action with a tactile experience that promotes motor planning and kinesthetic learning.
How to Teach Cursive b
Use the following verbal prompts to teach lowercase cursive letter b:
- Start at the baseline.
- Loop up to the top line and back to the baseline.
- Swing up to the middle line.
- Tow rope away to connect.
Lowercase cursive letter b is a tow rope letter. These are letters that connect at the middle line. They change the beginning of the letter they connect to.
It can be helpful to practice letters that are commonly connected to letter b such as ba, be, bi, bl, bo, br, bu, and by.
How to Teach Cursive e
Use the following verbal prompts to teach lowercase cursive e:
- Start at the baseline.
- Loop up to the middle line and back to the baseline.
- Loop away to connect.
- Instruct students to stop at the middle line.
How to Teach Cursive f
Use the following verbal prompts to teach lowercase cursive letter f:
- Start at the baseline.
- Loop up to the top line and back to the baseline.
- Continue straight down past the baseline.
- Curve right and up to the baseline, connecting at the strait part of the tail.
- Swing away to connect.
Note about cursive letter f– This letter requires the pencil lines to close the tail into a “bunny ear” type of loop. Think about drawing a tall bunny ear. The lines create a long, loop type of shape that does not cross like a the loop on the top part of the f.
Rather, the curved motion has a potential for an opening. It’s important for students to close the tail of the f. Likewise, it’s important to keep the closure point at the baseline. If the closure point creeps up above the baseline or has an opening, the letter can potentially look like a cursive b.
Work on loop formation and motor control for closure points in multi-sensory activities such as with sandpaper or in writing trays. b, e, f, h, k, and l.
When it comes to specific letters, an understanding of tall, short, and tail letters is needed for carryover of accuracy related to line use and size awareness.
Taking the size awareness piece into consideration is an overall understanding of size both on paper and outside the body in the world around us. This tall and short worksheet has a fine motor and visual motor component that can be incorporated into whole-body movement activities to teach these concepts that carryover into handwriting.
How to Teach Cursive h
Use the following verbal prompts to teach lowercase cursive letter h:
- Start at the baseline.
- Loop up to the top line and back to the baseline.
- Pause.
- Re-trace back up to bump to the middle line.
- Continue over the bump to the baseline.
- Swing away to connect.
How to Teach Lowercase Cursive k
Use the following verbal prompts to teach lowercase cursive letter k:
- Start at the baseline.
- Loop up to the top line and back to the baseline.
- Pause.
- Re-trace back up to bump to the middle line.
- Continue over the bump and pull back into the loop.
- Add a kickstand to the baseline.
- Swing away to connect.
Use these sensory activities to practice cursive letter k:
Note about cursive letter k– This letter requires the pencil lines to close the bump at the loop. It’s important for students to pull the pencil lines in and to close the bump.
If the closure point doesn’t close at the loop, the letter can potentially look like a cursive h.
Work on loop formation and motor control for closure points in multi-sensory activities such as with sandpaper or in writing trays.
How to Teach Cursive l
Use the following verbal prompts to teach lowercase cursive letter l:
- Start at the baseline.
- Loop up to the top line and back to the baseline.
- Loop away to connect.
A few tips for teaching cursive loop letters
It would be very difficult to teach cursive handwriting only by verbal instruction. Carryover and accuracy would suffer!
A visual component and slow teaching strategies are very important. Try these tips to help with learning cursive loop letters.
- Use large motor movements when starting out with cursive instruction.
- Teach each letter individually and for short periods of time each day.
- Practice cursive letters in multiple sensory experiences, including shaving cream on desks, writing trays, in goop, with play dough or slime, etc.
- Practice near copy work using a visual cue like these free cursive letter flashcards.
- Practice each letter in a group focusing on one letter at a time. When a new letter is introduced, continue with previously learned letters.
Want to teach other cursive letter families?
Here is information on how to teach wave letters (c, a, d, g, q).
Try these ideas to teach bump letters (m, n, v, x, y, z).
Try these ideas to teach tree letters (i, j, p, t, u, and w).
")
Cursive Handwriting Apps
Amazon Affiliate links are included in the links below.
Try these cursive writing tools to help with forming letters: Affiliate links are included.
Cursive Writing Wizard is a free app on Amazon that allows students to trace letters and words. The app has stickers and animations as well as handwriting games that promote learning of cursive letters and connecting lines.
Cursive Handwriting Workbook is a workbook for kids in elementary grades and focuses on formation of cursive letters (upper and lower case) as well as words.

Teachers can use a laser pointer in the classroom to help students see parts of cursive letters as they instruct each part of the formation. This is helpful when teaching letters in cursive letter families.
The Handwriting Book covers everything you need to know about handwriting, guided by development and focused on function. This digital resource is is the ultimate resource for tips, strategies, suggestions, and information to support handwriting development in kids.
The Handwriting Book breaks down the functional skill of handwriting into developmental areas. These include developmental progression of pre-writing strokes, fine motor skills, gross motor development, sensory considerations, and visual perceptual skills. Each section includes strategies and tips to improve these underlying areas.
- Strategies to address letter and number formation and reversals
- Ideas for combining handwriting and play
- Activities to practice handwriting skills at home
- Tips and strategies for the reluctant writer
- Tips to improve pencil grip
- Tips for sizing, spacing, and alignment with overall improved legibility
Click here to grab your copy of The Handwriting Book today.

Colleen Beck, OTR/L has been an occupational therapist since 2000, working in school-based, hand therapy, outpatient peds, EI, and SNF. Colleen created The OT Toolbox to inspire therapists, teachers, and parents with easy and fun tools to help children thrive. Read her story about going from an OT making $3/hour (after paying for kids’ childcare) to a full-time OT resource creator for millions of readers. Want to collaborate? Send an email to contact@theottoolbox.com.
