When kids are learning to write cursive letters, they need to also learn about connecting cursive letters together appropriately right from the start. In this blog post on on how to connect cursive letters, we’ll explore the tips for seamlessly joining cursive letters within a word to ensure fluid and proficient cursive handwriting. Teaching correct connectors between letters is essential for cursive accuracy and legibility. Let’s break down cursive connectors…
Connecting some cursive letters is an obvious flow into the next letter, but others are more difficult. Then, there is the pencil flow, the motor planning, and baseline control…there is a lot to consider for the student learning to write in cursive!
Connecting Cursive Letters
If cursive letters don’t connect properly, one letter can look like different letter. Connecting the letters together requires practice and instruction. The more a child succeeds in proper cursive connectors, the more legible handwriting will be.
If the letters don’t connect correctly and it can be hard to read handwriting. This is especially true as we get older and practice the incorrect forms. Your hand will become accustomed to producing the incorrect forms.
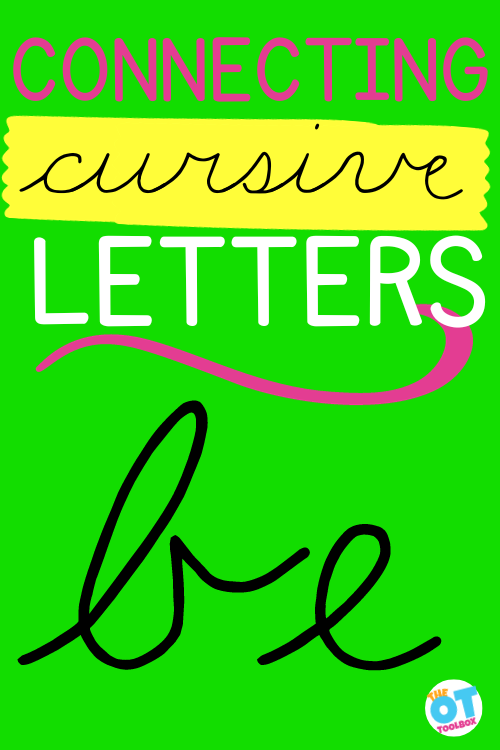
Connecting cursive letters is especially important with some of the letters that have a tow rope connectors between the letters. We call these letters tow rope letters.
Cursive b is one of these letters.
Cursive v and cursive o are other tow rope letters, meaning that the connecting lines between these letters and the letter next to them is at the middle line and changes the motor plan to the letter following the tow rope letter.
This resource on teaching cursive b has more information on this difference in motor planning in the letter formation.
How to Connect Cursive Letters
When forming specific letters, it can be easy to merge letters or for a cursive writer to form commonly connected letters in an alternative manner. You may find this is true when you write a letter e and e connected together. One cursive writer may make this letter combination completely different than another person who connects letters in a different way.
Timed writing samples show that cursive writing is more efficient and quicker than the fastest printed writing. Joining letters with connectors is what makes in writing happen more quickly and efficiently.
Connecting cursive lines in handwriting should occur fluidly and with a gliding motion of the pencil on the paper. If this doesn’t occur, or the writing looks choppy or jumpy with letters being jumbled as a result of connection issues, it can be helpful to take breaks in between writing strokes.
There are several factors that impact fluid writing in connecting cursive letters in a word. Checking for these items is the first step when you see difficulties with letter connections, or choppy handwriting:
- Fluidity of writing
- Writing speed
- Writing rhythm
- Paper position
- Experience with cursive writing (practice)
Fluidity of writing- The handwriting motor plan that you have in your mind for forming two letters together may remain the same with practice.
Writing Speed and Rhythm- Letter writing speed and rhythm has a lot to do with unique formations and connections of cursive letters.
Paper positioning- Cursive letter formation and connectors can also have a lot to do with the angle of handwriting, or the paper positioning when writing in cursive. Paper slanted and positioned to the left will affect the way cursive g connects to the letter next to it.
Experience- More practice of letter connectors will help with speed and rhythm in cursive writing. When children just start out with learning cursive, they are working on the overall letter form. The connectors are a “pause” moment for them as they finish one letter and then move onto the next. For new cursive writers, you’ll see a drawn out connection. You might even see the pencil lift up from the paper. This is a sort of mental break. With experience, forming the cursive letters becomes more natural and the connection between the cursive letters becomes more fluid.
The connections between letters will come naturally according to the individual’s personal writing style.
Variations in Connecting Cursive Letters
The thing about cursive writing is that it is very personalized. While the letter form is the same for most, there can be variations in the letters that becomes part of that person’s handwriting style.
Think about an adult hand writing or your own handwriting. The cursive letters are probably fluid and not exact as you might have learned in a cursive handwriting guide book or in second grade cursive writing instruction. This is because you have develop your own style of cursive. This has happened over time and with practice.
Look at your own cursive handwriting. You may notice that some letters are not formed or connect exactly as you were taught in grade school. Adaptations to cursive result in personal cursive writing styles and can be completely legible.
The motor plan is established. Kids can create their own cursive style too. When that happens, handwriting will be legible and comfortable. For kids that are learning cursive letter connections, or kids that don’t have the fluid motions quite yet, flow exercises can be a big help.
Cursive Line COnnecting Exercises
Cursive lines can be practiced with specific activities to support the development of this skill.
Flow exercises are very important and useful in helping kids to develop fluid fluid motions and establishing a comfortable style of handwriting. Exercises designed to improve cursive letter connectors are made up of simple bends and arches, joined together from the base.
Cursive letter connector exercises connect common letters together and start at the base. This might be a series of “cursive i“s connected with ease. Another connector exercise might be a string of cursive letter “l”s connected. You can also mix other letters such as cursive u and cursive n, working on the flow between two different letters.
Tips for Fluid Cursive Lines between letters
A few tips for teaching cursive letter connections include:
- Mix it up. Try to incorporate different letter directions and sizes of joining strokes when working on the flow of connections.
- Connect just a few letters together at first. Flow exercise typically occur with 2 to 3 letters in groups. This helps to form a motor plan for letter formation.
- Start letters at the correct starting point. Another important point about connecting letters is formation. It’s important to start certain letters at a specific point such as cursive o. It always needs to start at the top and curve around in a counterclockwise motion. In this way the letter can connect easily two other letters.
How to Connect Cursive Letters
There are several strategies to use, and because of the different letter strokes, it’s a good idea to work through these.
Pause and connect- One strategy to work on letter connections is to practice forming the letter and then when the letter is completed, pause and then connect to make the next letter. This then progresses to the next step in teaching cursive connections.
Baseline control- Most of the letters connect at the baseline. They rock or slide into the next letter. The pencil moves along the baseline as it ramps up to connect to the next cursive letter.
Work on this baseline control by using muscle groups to control the pencil. This can be achieved by hand strengthening and fine motor skill work, but also practice with pencil control exercises. Specifically, pencil control worksheets like tracing along the lines of graph paper can support this skill.
- Right handed writers will push the pencil along the baselines and then use pulling motions of the hand to pull slanted pencil strokes back into the palm of the hand. Work on this motion with pencil control and with fine motor work to pull items into the hand.
- Left handed writers will pull rocker letters and rainbow motions of the pencil to the right by pulling the pencil into the palm. They will connect letters along the baseline with a pushing motion of the pencil moving away from the palm. Work on this motion with pencil control and with fine motor work to push items away from the hand. Here is more information on left-handed cursive.
Backward chain letter formation- Another way to teaching students how to connect cursive letters is through the technique of backward chaining.
Backward chaining is a common strategy for tasks such as teaching kids to tie their own shoes or to fasten zippers. It can be used for learning cursive handwriting connectors, too!
With backward chaining in cursive writing, it’s important that this strategy is only used with letters that are very well established. Try this trick only when a child is very fluent with cursive letter b, for example. Then: students can start out with a cursive b.
Add in multisensory strategies- In addition to the backward chaining technique, you can add multisensory strategies to add more learning styles.
We shared a color mixing rainbow writing activity before that explains this activity. They can write in a black magic marker or trace over a worksheet. Students can use a highlighter marker to trace over just the connector of the b. They can do this several times across a sheet of paper, tracing over only the connector line of the b as it travels to the next letter. Students can even trace that connector over to connect to other letters such as cursive e, cursive a, cursive i, etc.
Then, ask students to complete the whole letter b, connecting it to the same letters that were practiced above.
Air writing- Still another tactic to teach cursive connections is through gross motor air writing. Practice backward chaining with cursive letters by forming big motions of the cursive letters. For example, don’t as students to start at mid loop of the b.
Direction change in cursive letter connections
One aspect of connecting letters is the direction change that happens when some letters connect with others. The pencil changes direction and uses a different muscle set mid-letter or mid-connection.
Joining two letters that change directions can be confusing for kids who are just learning to write in cursive and connect letters correctly. Some letters require a change pencil direction when connecting.
Some examples of this include:
- cursive b connected to other cursive letters
- cursive w connected to other cursive letters
- cursive v connected to other cursive letters.
- cursive o connected to to other cursive letters
When two letters connect that require the pencil to go in one direction, and then stop and reverse to go in the opposite direction to connect the letter, it can be quite difficult for a child who is just learning to write in the continual pencil motions that cursive writing requires.
These letters require precision and pencil control for legibility. Cursive writers need to have a relaxed style otherwise the retrace required in these letters can make the retrace wide.
Re-Trace in Connective cursive letters
Re-trace is when the pencil traces back over the line it already made. Cursive letters with re-trace include:
- a, c, d, g, h, i, j, m, n, o, p, q, s, t, u, w
Some of these letters have a re-trace because of the swing up to create the letter. This is the initial connection to start the letter. This includes the letters:
- a, c, d, g, o, q
Other of these re-trace letters have a re-trace formed by the bumps of the letter. This might be the starting connector or it might be inside the letter. This includes:
- h, m, n, u, w
Other of these letters have re-trace formed within in the letter:
- i, t, j, s, p
It’s important for kids to learn to correctly re-trace and connect letters when they are just learning. As they grow and develop their own personal writing style lifting the pencil for these letters is fine.
Cursive letter s has re-trace as well as directional changes that use different pencil control and motor plans.
Connections between letters can vary from person to person as an individual ages and develops. As long as legibility and functional speed are appropriate, this is fine!
Looking for more ways to work on cursive letter connectors? Try any of these creative cursive writing strategies or these handwriting activities.
Tip: Use these strategies to teach cursive letters with a tow rope connection.


Some top handwriting programs for addressing skills like letter formation and cursive connectors:
The Handwriting Book covers everything you need to know about handwriting, guided by development and focused on function. This digital resource is is the ultimate resource for tips, strategies, suggestions, and information to support handwriting development in kids.
The Handwriting Book breaks down the functional skill of handwriting into developmental areas. These include developmental progression of pre-writing strokes, fine motor skills, gross motor development, sensory considerations, and visual perceptual skills. Each section includes strategies and tips to improve these underlying areas.
- Strategies to address letter and number formation and reversals
- Ideas for combining handwriting and play
- Activities to practice handwriting skills at home
- Tips and strategies for the reluctant writer
- Tips to improve pencil grip
- Tips for sizing, spacing, and alignment with overall improved legibility
Click here to grab your copy of The Handwriting Book today.

Colleen Beck, OTR/L has been an occupational therapist since 2000, working in school-based, hand therapy, outpatient peds, EI, and SNF. Colleen created The OT Toolbox to inspire therapists, teachers, and parents with easy and fun tools to help children thrive. Read her story about going from an OT making $3/hour (after paying for kids’ childcare) to a full-time OT resource creator for millions of readers. Want to collaborate? Send an email to contact@theottoolbox.com.