Whether you’re a parent looking to engage your little ones or a therapy professional wanting to host a messy play date at a Mommy and Me therapy clinic, we have you covered with this blog post. We’re talking all things messy play dates and how to set up a messy play day as a therapy tool for supporting child development through sensory play experiences.
The fact is that kids need messy play!
Messy play isn’t just about the joyous chaos it brings; it’s a purposeful and therapeutic approach that can enhance a child’s cognitive, motor, and social skills.
For those new to the world of occupational therapy, messy play is more than just an excuse to get messy – it’s a powerful tool to stimulate the senses, encourage fine and gross motor skills, and support various aspects of child development. Throughout this post, we’ll provide explanations and suggestions in a way that’s accessible to everyone, whether you’re a seasoned professional or a parent navigating the vast landscape of child development.
How to Set up a Messy Play Date
If you’ve been thinking about hosting a messy play date, there are a few things to consider.
Most of the ideas here are great for outdoor sensory play experiences, but you could definitely set these up indoors as well.
Below are items to have on hand, depending on the types of activities you’re planning for the messy play date.
Items to control the mess:
- Drop cloth
- Plastic table cloth
- Garbage bag cut into a flat sheet
- Sheet
- Vinyl or cloth shower curtain on the floor
- Large bins and containers for sensory bins
- Baby pool
- Smock or Apron: To protect clothing from stains and mess.
Fine motor items:
- Containers
- Scoops and spoons for scooping and pouring and all of the fine motor benefits.
- Tongs or tweezers
- Brushes, Sponges, or Rollers: Various tools for applying paint to different surfaces.
- Plastic spoons
- Funnels
Sensory Bin items:
- Shallow bins or trays
- Bowls and Cups: Suitable for mixing and holding various sensory substances.
Ingredients for Sensory Activities:
- Water
- Ice cubes
- Paint
- Corn starch
- Food coloring
- Ivory soap
- Baby oil
- Dish soap
- Dryer lint
- Cornstarch, Flour, or Oatmeal: Can be used to create textures in sensory bins
- Shaving Cream
- Sand or Kinetic Sand
- Cooked Pasta
- Gelatin or Jell-O
- Painting Supplies
- Bubble wrap
- Large Sheets of Paper
- Plastic sandwich baggies
Sensory Toys and Objects:
- Feathers, Beads, or Pom-Poms
- Beads
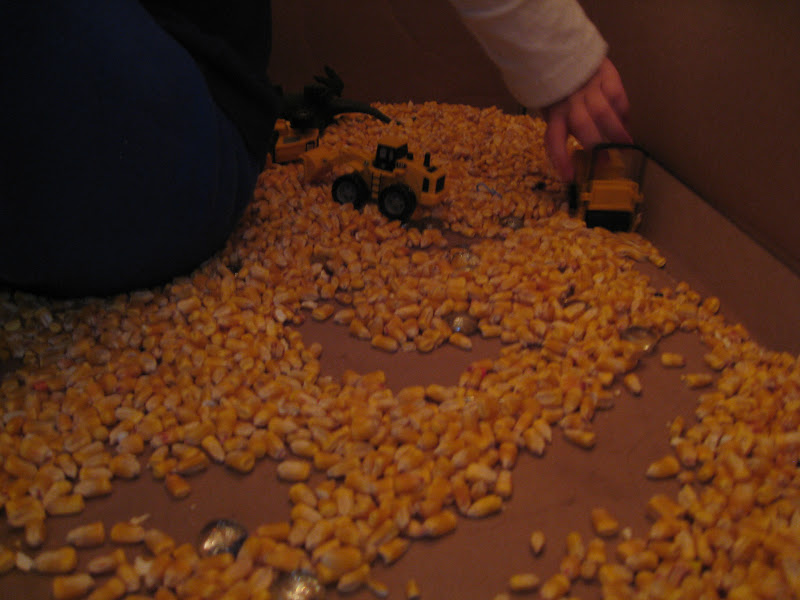
- Plastic Figures or Toys
Clean-Up Supplies:
- Wet Wipes or Damp Towels
- Trash Bags
- Soap and Water
- Hose (outdoor play)
- Clean water bin
Messy Play Date Extras:
- Essential Oils or Extracts: Add scents to sensory materials for olfactory stimulation.
- Ice Cube Trays or Molds: Great for freezing colored water or other sensory mixtures.
- Bubble Machines: Introduce additional sensory experiences.
Safety items:
- Disposable Gloves: Especially useful for activities involving substances that may irritate the skin.
- Paper towels
- Water
Mommy and Me Class
The occupational therapy practitioners here might be thinking about using these ideas for a Summer program with a messy play date theme.
You’ll want to decide if this is a play date for friends or a session that might be used with a therapy clinic or program. Often times, school based therapy providers are looking for ways to support needs of kids over the summer, but also are looking for a way to earn extra income over the summer months. A Mommy and Me messy sensory play day is a great idea.
There are so many ways to support sensory needs and sensory motor development with a sensory play date. This is a great cash-based clinic that you can host at an occupational therapy clinic. We love coming up with summer programming in a summer
- Here is information on setting up a summer sensory camp, and doing a messy play date theme is perfect for this.
Messy Play Dates
If you’ve been to a play date with little ones, you might not be expecting a giant sensory mess. However, a play date designed as a sensory experience can be so beneficial for kids.
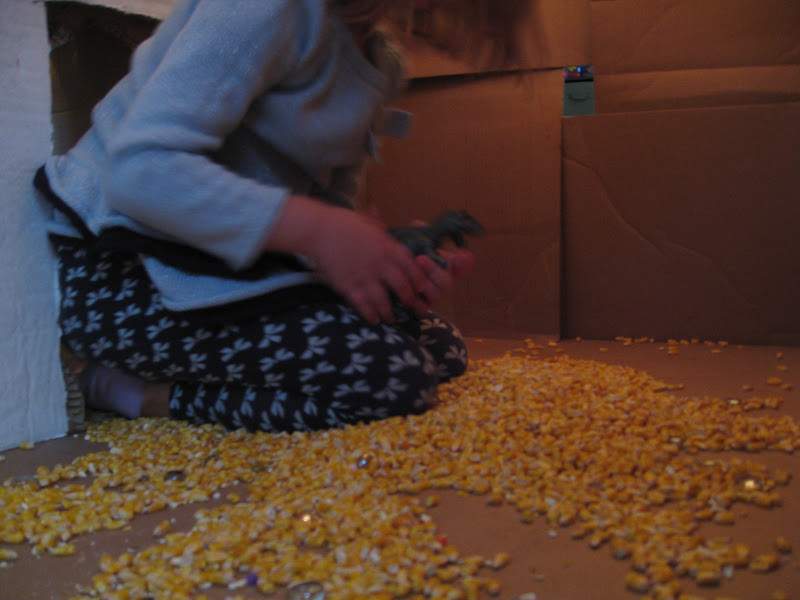
We had a messy play day party here at our house this summer. I only wish I had more pictures from the day…I guess my hands were either covered in yuk, or holding the baby (or both) and didn’t have the camera nearby…There were so many FUN moments!
The benefit is that through sensory touch, messy play activities support development in several areas: tactile sensory exploration, tactile challenges, problem solving, communication and language development, fine motor skills, self-care skills (washing hands and putting on a cover-up, etc.) We love messy play!
As an OT, I see SO many benefits of doing messy play with kids. They have NO IDEA they are working on their creativity and fine motor skills, enhancing the learning process, promoting language, and fostering social development! All they think is “WOW, I have a cool Mom!” 😉
I thought I would put the recipes and tips for a messy playdate all in one place. Here!!
We made Goop, Clean Mud, Driveway paints, Dryer Lint Paper Mache, Moon Dough, & Green Spaghetti. I also had Shaving Cream, Bubbles in a baby pool, and Jello to play with.
Goop Recipe
GOOP is the coolest stuff to play with! It’s solid…it’s liquid…it’s messy! Here’s how you make it:
1/4 cup water
Mix cornstarch and water and
color. (You can make a whole water table
full keeping the ratio of cornstarch to water 2:1).
Pour into a bin with a lid. Observe and explore. There will be no finished product — just
exploration and fun. It can be reused, just store in an airtight
container….add spatula, slotted spoon, scoops for added fun.
Tip: cornstarch can be found at Bottom Dollar for 99cents/box!
OoBleck Messy Play
Mix cornstarch and water to create Oobleck, a non-Newtonian fluid with unique properties. Children can squish, squeeze, and explore its texture, promoting sensory integration and fine motor coordination.
We have a recipe and oobleck activities that are great for more messy play day ideas.
Clean Mud Recipe
CLEAN MUD is so fun. The process to make it is easy and cool for the kids, too. Even Baby Girl got into the toilet paper shredding action!
- Shred 2 rolls toilet paper into
Rubbermaid bin…(it doesn’t have to be shredded real small, I would pull maybe 10 layers away from the roll and then tear into 2-3 square chunks).
- Remove the wrapper from a bar of Ivory
Soap, put in glass dish. microwave for 2 min…it will blow up like a cloud.
- Add soap and warm water to the toilet paper. Mix to a consistency like mud. You may have to add more hot water as needed.
We played with this at the toy kitchen set in the driveway (there were no battery operated parts on this kitchen…important when hosing down to clean up)…You could just play with it in the bin, but we added containers from our recycle bin, glitter, and spatulas, and scoops for “cooking fun”.
Tip: Use single ply toilet paper. Double ply will change the consistency and you will need more soap/water. Look for Ivory soap coupons that are out there. I was able to buy the soap for 35cents for a 3 pack!
DriveWay Paint Recipe
DRIVEWAY PAINTS We did this last year too, and my kids LOVE it! They drew all sorts of pictures & words all over our driveway. This is super easy to make.
- Mix flour and water to a paint-able consistency.
- Add food coloring. We used paint brushes that we had in the garage. Big Sister loved helping me mix these paints up.
Tip: If you use too much flour, it will be harder to wash away the paints from your driveway. The rain will eventually take it away, but you may have a little reminder of your fun for a while. This year, my paints were more watered down and they washed away with just a little squirt from the hose.
Dryer Lint Paper Mache
DRYER LINT PAPER MACHE is the weirdest consistency! Still fun to play with, but…interesting!
Here’s what you need to make dryer lint paper mache:
- 3 cups of dryer lint
- 2 cups of Warm Water
- 2/3 Cup of Flour
- Put the dryer lint in a large pot. Slowly add the warm water, so all the lint gets wet. Add the flour slowly and stirring well.
- Cook this mixture, stirring constantly until it forms peaks and holds together. Pour the mache onto a surface ( I used a large throw-away casserole tin) and let cool.
- After it cooled, we used it to cover balloons, but there really was so much going on at the party that this station was forgotten about for the “cooler” areas. This might be neat to try covering a balloon like traditional paper mache.
Moon Dough Recipe
MOON DOUGH…Most of the recipes you find online will use baby oil. I used vegetable oil since I had a ton here. It worked pretty well and I would make it this way again.
The ratio is 1 cup of oil to 2 cups of flour. We played with this in a big Rubbermaid bin, adding sand molds and spoons.
Tip: Store this in a covered container and it will keep. Pull it out when the kids need an activity!
Spaghetti Sensory Play
GREEN SPAGHETTI was a HIT with Baby Girl and the other babies! I had been given 4 boxes of spaghetti.
To color cooked pasta:
- Cook it in boiling water, Strain, and run cool water over the noodles to keep it from sticking.
- Pour the cooked spaghetti in a big bin and add more water so the noodles don’t dry out…eyeball this. You don’t want spaghetti soup!
- Add food coloring and stir. I used green coloring and then poured the whole thing into a blow up baby pool right before the party. We added little plastic dinosaurs to the whole mix for added fun.
Tip: Put the baby pool on a tarp for babies who love crawling in and out of baby pools! You will find green spaghetti noodles all over your yard…
messy play shaving foam
Another easy messy play date activity is using messy play shaving foam, or non-scented shaving cream. You can play in a sensory bin or just go full messy by playing out in the driveway.
If you are setting up a shaving cream sensory bin, it’s a pretty easy set up.
- Fill shallow bins with shaving cream.
- Hide small toys or objects inside.
Kids can dive in, searching for treasures while experiencing the unique texture of the shaving cream. This activity enhances tactile sensitivity and hand-eye coordination.
SHAVING CREAM was a fan favorite. I had some Moms bring a can with them, but was able to find unscented shaving cream at the Dollar Tree. This was the biggest chunk of money spent on this party…$6 on 6 cans of shaving cream…not too bad!
We pulled the plastic Little Tykes picnic table onto the driveway and let the kids spray the shaving cream all over the table to draw, write, mix, etc. Most kids (and the poor nearby tree) ended up with shaving cream ALLLL over them…and had a BLAST!
Tip: Buy UNSCENTED shaving cream. Or your children will smell like old men 🙂
bubble foam sensory play
Next, you can make some bubble foam sensory play using a large bin or a baby pool.
BUBBLES IN THE BABY POOL is so simple and so much fun! I had a free sample of Dawn dish detergent (maybe a 4 oz bottle?) that I squirted all over the bottom of a baby pool.
Add an inch of water from the hose, putting the nozzle at full blast. The bubbles will mound up. You may have to use your hand to get more bubbles.
Tip: Cut a funnel out of the top of a 2 gallon milk jug, keeping the handle on, for extra bubble fun.
jello sensory bin
You can also create a Jello sensory bin using toys like alphabet magnets or mini dinosaurs that are molded into the Jello.
JELLO is so easy and fun if you add unexpected items. We had a ton of ABC fridge magnets and added these to green jello before it set. You can find Jello at great prices if you use a generic brand.
Tip: Jello is a great consistency for sensory play, but ants will love it too! Put the bin on a tarp for easier clean up.
The party finished with a great mixture of clean mud, green spaghetti, moon dough, and shaving cream in the play kitchen. What fun and awesome memories!!
Messy Finger Painting
Another fun messy play date activity is messy finger painting.
- Set up a designated area with large sheets of paper and non-toxic finger paints.
- Encourage children to explore the texture of the paint with their fingers, promoting fine motor skills and sensory exploration.
Edible Play Dough
One messy play date idea that is great for all ages is making edible play dough. You could even get the kids involved with making the edible play dough recipe. We love this marshmallow play dough recipe because it offers so much heavy work and proprioceptive input to calm and organize the body.
If you don’t want to make edible play dough, you can use any play dough recipe. There are so many benefits to playing with play dough that kids get all of the sensory benefits even when a recipe is not edible.
Here are all of our best dough recipes which have many different sensory benefits depending on the play dough ingredients.
Make edible playdough using ingredients like flour, salt, water, and food coloring. Kids can mold shapes, fostering creativity, and engage in tactile exploration.
water balloon splatter painting
Water Balloon Splatter Painting is a fun and messy activity for all ages.
Fill water balloons with washable paint, and let the kids toss them onto large sheets of paper.
The burst of colors creates a beautiful masterpiece, while the physical act of throwing promotes gross motor skills.
Ice Painting
Ice painting is a fun and sensory messy play date activity and you can do this several different ways:
- Freeze paints mixed with water into ice cube trays. Add a popsicle stick and use the frozen ice cubes to paint on paper as they melt
- Freeze paints mixed with water into ice cube trays. Then smash the ice cubes onto paper using hammers. We smashed ice cubes with hammers and the end result was gorgeous. You can also have kids jump on the ice cubes.
- Dip frozen ice cubes into paint and paint with the ice onto paper. The paint and water will mix to swirl the colors as the ice melts.
- Stamp ice cubes frozen into different shapes onto paint and then onto paper. Stamping with ice cubes encourages hand-eye coordination and introduces children to the concept of making impressions with different objects.
painting on bubble wrap
One messy play date idea that kids seem to really love is painting on bubble wrap.
This mess-free bubble wrap painting is good to have on hand incase you have a child experiencing a little tactile defensiveness.
Another way to incorporate messy sensory tactile input is by stomping on bubble wrap.
1. Lay out a sheet of bubble wrap on the floor.
2. Secure it with tape.
Allow the kids to stomp, jump, and dance on the bubble wrap. This activity enhances proprioception, the sense of body awareness, and provides a sensory-rich experience.
mud sensory play
Mud Pie Making is an easy and messy sensory activity.
Set up a “mud kitchen” with pots, pans, and bowls filled with a mixture of soil and water. Kids can engage in imaginative play, promoting social interaction, and work on their fine motor skills while creating mud pies. You could also create a snow kitchen if the weather is cold.
We have other sensory play date ideas in our book, Exploring Books Through Play.