S’more Bites

These lil cuties were something I threw together for my nephew’s 1st birthday.  I was in charge of making a bite sized s’more to fit a Cowboy Birthday Party theme.  These were really quick and easy to put together.  I experimented with the ingredients and baking time, and want to share with you just how simple it is to have mini s’mores any old time (now that could be dangerous)! 
Seriously, they are so tiny and cute, how can they be bad for you???!!! 😉

Start out with the basics for S’mores.  These Honey Maid Lil’ Squares are so cute! Baby Girl loves them (and so does Big Sister and Little Guy).  They are really little…one inch squares. Perfect for little one’s snack time too!
Chop the chocolate bars into little squares. I broke each bar up along the lines then cut those into thirds.
Spread out the mini-grahams on your cookie sheet.  I put a layer of aluminum foil down first because I was experimenting and wasn’t sure if the chocolate would spread over the graham.  It didn’t. No need to use the foil.
Bake the grahams and chocolate in oven at 350 for 2-3 min…Keep a close eye on this and pull them out when the chocolate starts to get shiny.  I tried another batch for a halloween party this weekend and totally baked them too long. the chocolate burned and the whole batch went into the garbage 🙁

Press a mini marshmallow into each chocolate square.

Pop the cookie sheet back into the oven for a minute or two.  Keep an eye on them, again…You want the marshmallow to puff up a bit.

Pull them out of the oven and turn on the broiler. When the oven has heated up, stick them back into the oven for just a minute.  Watch closely…You can keep the oven door slightly opened to make sure they don’t burn.  Out comes perfect mini-s’more bites!
(This picture is terrible, I know)
These were so good and I got so many compliments on them!  Even a request to make these every time we have a pot luck dinner!  That says something!!
~Colleen

Star Shaped Food Ideas

We were seeing stars at this party! This is just a quick post overflowing with star shaped party food pics! Many years ago, we had a Twinkle Twinkle Little Star party for my daughter’s first birthday. The star shaped food was a hit! Here are some things we had at the party…also had stuffed shells & salad (completely NOT star-shaped, but…yummmmm…)!

Star Shaped Food

We made a few different star shaped foods and star shaped snacks to serve. The best thing is that they were all fairly easy to pull together. The star shaped food ideas you’ll find below include:

  • Star pretzel rods (homemade icing candy stars)
  • Star cookies
  • Star shaped tortillas (so easy to make!)
  • Star cherry pie
  • Star shaped brownies

Other items that we used to create a star theme for the party food were star toothpicks, star garland, and sugar sprinkles to top chocolate covered Oreo cookies.

Star Shaped Icing Candy- To make this star treat, I used royal icing in a piping bag. I spread out a piece of wax paper and drew small stars on the wax paper, in rows. After the icing dried, I simply peeled away the wax paper. You can read the full instructions and see pictures of the candy making process on our blog post about the star candy recipe.

The star candies would be fine on their own, or use them to decorate chocolate dipped pretzel rods like we did.

My star sugar cookies
Pretzel rods dipped in pink chocolate melts with my icing candy stars
Aldi’s Sassy Apple Salsa (Go out now and buy this! It is SO good!)
with…
Star Tortilla Chips- Star shaped dippers! These were so simple to make and you could use any shape really to make your own fun tortilla chips.
  1. Use a cookie cutter to cut store-bought tortillas.
  2. Toss them on a cookie sheet with a little olive oil.
  3. Bake at 350 for 20 min.
  4. Stir them up every once in a while with the spatula. Think of the shaped possibilities using cookie cutters…
Star food toppers- This was another fun and easy way to decorate food for a star themed party. Simply cut out stars or use a star shaped hole punch. Glue two to the top of a toothpick and poke into any snack or appetizer.
Cherry Pie using this recipe.  I love the star top!
Star shaped brownies- Use a mix, pour into a jelly roll pan to bake. They are so thin and perfect for cutting with a cookie cutter.  Sprinkle with confectioners sugar once you pull them out of the oven.  Eat all of the brownie scraps before the party 🙂
((Not food!  But a shot of my star garland.  Stars were were taped to thread.))
Buffalo Chicken Dip Cups and Barbecue Chicken Dip Cups, posted about here.
Not star shaped, these chocolate covered Oreos were sprinkled with silver sugar…from the baking aisle at the grocery store.  So good!  They were actually Aldi brand Oreos and had chocolate filling. Very yummy!
Maybe some of these star shaped foods could go along with a 4th of July Party??
~Colleen

Buffalo Chicken Dip & Barbecue Chicken Dip Cups

These apps are SO good and SO easy!
This is a basic recipe split into two bowls with only one different ingredient added to make an entirely different and delicious appetizer.  So easy!  

I don’t usually measure when making buffalo chicken dip, but I know lots of people like to see the measurements of ingredients when they cook, so I did my best to get the amounts in here for ya. 
Start like you are making your typical buffalo chicken dip…1/2 cup of ranch, 1 (8 oz) block of cream cheese, 3/4 cup of shredded cheddar cheese, 2 chicken breasts shredded.  (you could use canned chicken if you want to go reeeeally simple, but I had some frozen shredded chicken breasts in the freezer, so it was pretty quick to just thaw…and much better than canned, in my opinion).
I added one small diced green pepper to this.
At this point, split the mixture into two bowls.  In one bowl, add 1/2 cup of hot sauce.  In the other bowl, add 1/2 cup of barbecue sauce.
How easy is that!!??

Mix your two bowls well and let them sit for a little bit while you do this next part.  It lets all of the flavors get acquainted 🙂

This next part is so easy and your guests will think you’re all fancy.  Really, who doesn’t love an appetizer in a pretty little cup??
You can find the potsticker wrappers in the frozen section of the grocery store.  BTW, the recipe on the back of the potsticker package is GOOOOD! Try it. You will love it.

You have to let the wrappers sit out for a bit so you can easily separate them.

Place into a mini muffin tin. No need to bake them first.  Baking them with the filling in them makes for a soft bottom and crunchy tops.  Perfect combo!

Fill half of the cups with the buffalo mixture and half with the barbecue mixture.  Bake at 350 for 10 min.  Check on them…You want the edges to be crispy brown and the filling to be bubbly.  You can make these ahead of time and re-heat on a cookie sheet.  They are just as awesome the next day.  I know this for a fact 😉

Enjoy!
~Colleen

Linked Up:

Crock Pot Mac and Cheese With Broccoli

We love how easy this crock pot mac and cheese with broccoli recipe is. Kids love it, too. The steps are easy, and using a crock pot to make the mac and cheese recipe means that it’s a good starter recipe for cooking with kids. Let’s get cookin’!

Crock Pot Mac and Cheese with Broccoli

My kids love Mac n’ Cheese.  I love the fresh baked, hot out of the oven, home made kind.  I was trying to find a recipe for Mac n’ Cheese in the Crock Pot and decided to try this one…

Crock Pot Mac n’ Cheese with Broccoli


Ingredients to make crock pot mac and cheese with broccoli:
 
  • Cooking spray
  • 24oz Uncooked Macaroni
  • 2 tablespoons Vegetable Oil
  • 4 cups Shredded Cheddar Cheese
  • 2 cups Shredded Mexican Cheese Mix
  • 12 oz can of Evaporated Milk
  • 1 can of  Cheddar Cheese Soup
  • 14 oz Frozen Chopped Broccoli
  • 3 cups Milk
  • 1 tsp Paprika
  • 1 tsp Onion Powder
  • 1/2 tsp Garlic Powder
  • Salt and Pepper to taste
 
To make the crock pot mac and cheese, follow these steps:
  1. Spray the inside of the crock pot with cooking spray. 
  2. Pour the uncooked macaroni and oil into the crock pot and stir until the pasta is covered. 
  3. Add the remaining ingredients and stir until well mixed.
  4. Turn the Crock Pot on low heat and let cook for 3 hrs. 
 
I would recommend stirring every now and then.  It looks really runny at first but after awhile it will start to thicken.  I used 3 cups of milk but I think I would try a little more next time.  Mine was on low heat for several hours after the first 3 and got really soft.  The babies loved it!


It ended up being pretty tasty!  I would recommend using a thicker noodle, maybe a spiral noodle or something with a little more texture (the elbow macaroni got soft fast). 
Hope you enjoy!


National Cookie Month!

Anyone who knows me, knows that I love cookies. I love to bake them. I love to make them for people I love. I love love love to eat them!
My husband laughs at me because one of the highlights for me at any wedding, is the cookie table 🙂
So, when I found out that October is National Cookie Month, I knew I needed to celebrate in the ways that I love the best! I thought I would share what I have been baking up in the kitchen over the last year or so. Some of these have been for my own kids birthdays, some have been for nieces and nephews birthdays, and some have been actual cookie orders!
I love taking new orders and working on custom ideas, so if you see something that you like, or have a party theme you would love cookies to coordinate with, just message Colleen at sugaraunts.gmail.com
Check out this cookie picture overload….
Circus theme party, I wrote about here
Snowman cookies
Snowman snow globe cookies
Manger scene and stars cookies
Cars Party cookies
Baby Girl Baptism cookies
Baby Boy Baptism cookies
Fish party cookies
Minnie Mouse party cookies
Sesame Street Party cookies
Cars and Candyland Party cookies, see it all here
Butterfly party cookies
Sports and Dress-Up party cookies
We had a busy day with TWO birthday parties (a certain superhero-obsessed nephew turned 3, and a sweet little friend of ours turned 4) but I’ve had an original cookie recipe on my mind I am hoping to try out (and share if it tastes ok…) in the next few days. Think: pudding/cream cheese/fudge cakeballs with a surprise coating….I’ll let ya know how it goes!
~Colleen

Lemon-Raspberry Cupcakes

Lemon-Raspberry Cupcakes

With summer coming to an end, I decided to bake something to remind me of the hot days- what could be more summery than raspberry lemonade? These little minis were such a hit at my work bake-sale. People bought them two for a dollar!

I went the easy way and bought a lemon cake mix- whipped these up and baked them according to to the box.  I watched them a little closer making sure not to over bake since they are minis.
I found some cute cupcake liners with little lemons on the bottom of them.  They were on sale which made them even better!

 Voila!

The icing recipe was a buttercream that I added a few drops of red food coloring and a teaspoon of Raspberry Extract instead of vanilla.

 I didn’t have a pastry bag so I used a Ziploc and cut off a corner…this made a big mess.  This works in a pinch, but next time I will make sure I have a pastry bag handy. 

These little yummies were so fun to decorate.
Aren’t they so cute?

 Here they are all dressed up!
   The fresh raspberry on top really added a nice pop of flavor.
Delicious!

~Leanne

Healthy Double Chocolate Chip Muffins

double chocolate chip muffins on a cooling rack

These healthy double chocolate chip muffins are a delicious recipe that kids can help to make. Getting kids active in the kitchen in cooking with kids recipes supports development of skills, and this muffin recipe does the job! Here’s how you make this healthy treat.

Healthy Double Chocolate Chip Muffins

If you like chocolate, this double chocolate muffin is for you.

 
This recipe is one I have made so many times for my kids. They LOVE banana muffins, especially when they are mini versions. The original recipe is from here. I have made this so many times and modified it to what I think is the best banana muffins. It can’t get much healthier than this.
 
There is so much protein in these little buggers, you won’t feel bad about grabbing two (or four). My kids love them with breakfast, lunch, or as a snack. I make a double batch and freeze most of them, pulling out a dozen or so when we need them. Baby Girl even loves them frozen (feels great on teething gums). 
 
We had a rainy day on Friday and certain wild children needed to do something (besides jump off of couches). We decided to make some of these banana muffins, with a few extras added in. They LOVE to help me in the kitchen.  
 
They love to scoop, stir, spill… 
 
The benefits of scooping and pouring is that you can use kitchen tasks like helping to make these muffins as a fine motor and visual motor activity.


I added flax seed, wheat germ, and a scoop of protein powder to make these double chocolate muffins. We were out of chocolate chips but I found some Hershey kisses and chopped them up into big chunks.


I usually use apple sauce instead of oil, but was out of apple sauce. I looked through the fridge and found yogurt. That works! Plain Greek yogurt would be even better.  What else do these muffins need?

Peanut Butter!


Healthy Double Chocolate Chip Muffins Recipe

Our recipe includes bananas to help hold the ingredients together.

 
4 Ripe bananas
1 cup whole wheat flour
1 cup oats
1/2 cup peanut butter
1/2 cup ground flax seed
1/2 cup wheat germ
1 scoop chocolate protein powder
1/2 cup brown sugar
1/2 cup apple sauce (or plain Greek yogurt)
2 Tbsp light butter
1 tsp vanilla extract
1 tsp baking soda
1/2 tsp baking powder
1 egg
1/4 tsp salt
12 chopped Hershey kisses
 
Directions:
  1. Preheat oven to 350 degrees.
  2. Cream butter with sugar and peanut better.
  3. Add egg and beat lightly. Add mashed bananas, vanilla, and yogurt.
  4. Then add all dry ingredients and mix well.
  5. Spoon into lined mini muffin tins.
  6. Bake 10 minutes. Enjoy!


Colleen Beck, OTR/L has been an occupational therapist since 2000, working in school-based, hand therapy, outpatient peds, EI, and SNF. Colleen created The OT Toolbox to inspire therapists, teachers, and parents with easy and fun tools to help children thrive. Read her story about going from an OT making $3/hour (after paying for kids’ childcare) to a full-time OT resource creator for millions of readers. Want to collaborate? Send an email to contact@theottoolbox.com.

Mint Chocolate Chip Cupcakes

Mint Chocolate Chip Cupcakes
 If you like mint chocolate chip ice cream, you need to try these! 
I signed up to bake something at a bake sale at work and I wanted to try something different.  I usually make chocolate chip cookies but others had already signed up to make those. I had an idea…what about mint chocolate chip cupcake?  I used a box mix for the chocolate cake and added some chocolate chips to them before baking.  The icing was super simple…mint flavored butter cream icing with chopped up chocolate chips. 
I made the cake according to the directions on the box.  I usually like to make chocolate cake from scratch with the recipe on the back of Hershey’s Cocoa power (sooo good and so easy) but I just used the box to make it easier.
I sprinkled chocolate chips on top.
Once these were cool, I worked on the icing.  I found a package of mint flavor that you just mix into any frosting you want to make (I made a butter cream). 
This tasted good, but I wanted to add a little something…chopped up chocolate chips (YUM)!

I piped the icing onto the cooled cupcake.  I didn’t have a pastry bag so I scooped the icing into a Ziploc bag and cut off a corner.  Once they were decorated with the icing, I added a few chocolate chips on the top just to make them look pretty!
Here is the butter cream icing I made.  So simple yet so good.
Buttercream Icing:
1/2 cup shortening
1/2 cup butter, softened
1 teaspoon vanilla extract
4 cups confectioners’ sugar
2 tablespoons milk
In a large bowl, cream together the butter, shortening, and vanilla. Blend in the sugar, one cup at a time, beating well after each addition. Beat in the milk, and continue mixing until light and fluffy. Keep icing covered until ready to decorate.               
Now onto my next creation….Lemon Raspberry Mini Cupcakes!
~Posted by Leanne

Our Favorite Homemade Haluski Noodles Recipe

One of our favorite recipes to make with kids is homemade Haluski Noodles. I love that this traditional comfort food of our heritage is a favorite among my kids, and they are gaining more benefits, too: of family and tradition, combined with the learning and development that happens in the kitchen when cooking with kids!

Homemade Haluski Noodles

Close your eyes and breathe in the enticing aroma of butter sizzling in a skillet, perfectly caramelized onions, and the harmonious blend of tender, homemade haluski noodles and cabbage. These are the flavors that bring warmth and nostalgia to the table, courtesy of the beloved dish known as haluski.

In this blog post, we’re sharing the art of crafting haluski noodles from scratch—a tradition that celebrates simplicity, flavor, and the joy of homemade comfort food.

Creating haluski noodles from scratch is a labor of love, one that involves kneading dough with care and transforming it into delicate, pillowy noodles. (Great for functional heavy work for kids!)

Whether you’re a seasoned cook or a novice in the kitchen, you can easily make homemade noodles right on the counter top or you can turn the homemade dough through a haluski noodle maker…it’s an easy recipe that is worth the extra effort!

How to make homemade Haluski Noodles

I needed a yummy recipe.  Something that would be easy for her to reheat – something in one pot would be great.  Haluski and Sausage hit the mark, and I knew just what to do to make it extra delish – make the noodles from scratch!
 
Noodle Ingredients: (This will make more than enough noodles for your dish. If you’d like, you can save some and use them in soups or other pasta dishes for the week.)
  • 2 cups flour (and some extra for rolling out the dough)
  • 1 teaspoon salt
  • 4 eggs
  • 1 tablespoon oil
  • 1 tablespoon warm water
Haluski Ingredients:
  • One large onion
  • One head cabbage
  • One stick butter (more/less depending on how buttery you like your haluski)
  • Sausage or Kielbasa (I used Turkey Sausage)
 

Directions for Haluski Noodles:

 
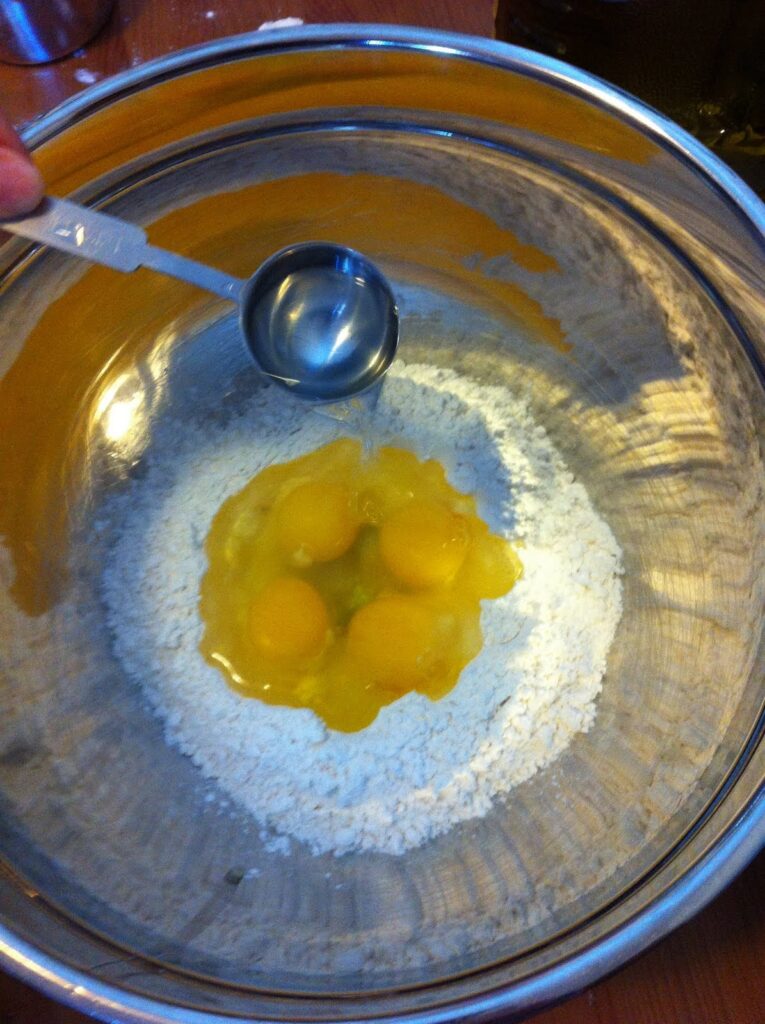
  1. First put the dry ingredients in a large bowl and mix together.  
  2. Create a well in the center of the flour.  
  3. Crack the eggs into the well.
  4. Add the oil and water to the well.
 
add eggs to a well made in flour to prepare the homemade haluski noodles
 
5. Break each egg, and gently mix the wet ingredients together.  
6. Slowly mix the dry ingredients into the wet.  
7. Mix until well incorporated.  If your dough is sticking to the bowl, add more flour until it can form a ball.  
 
Let homemade dough rise
 
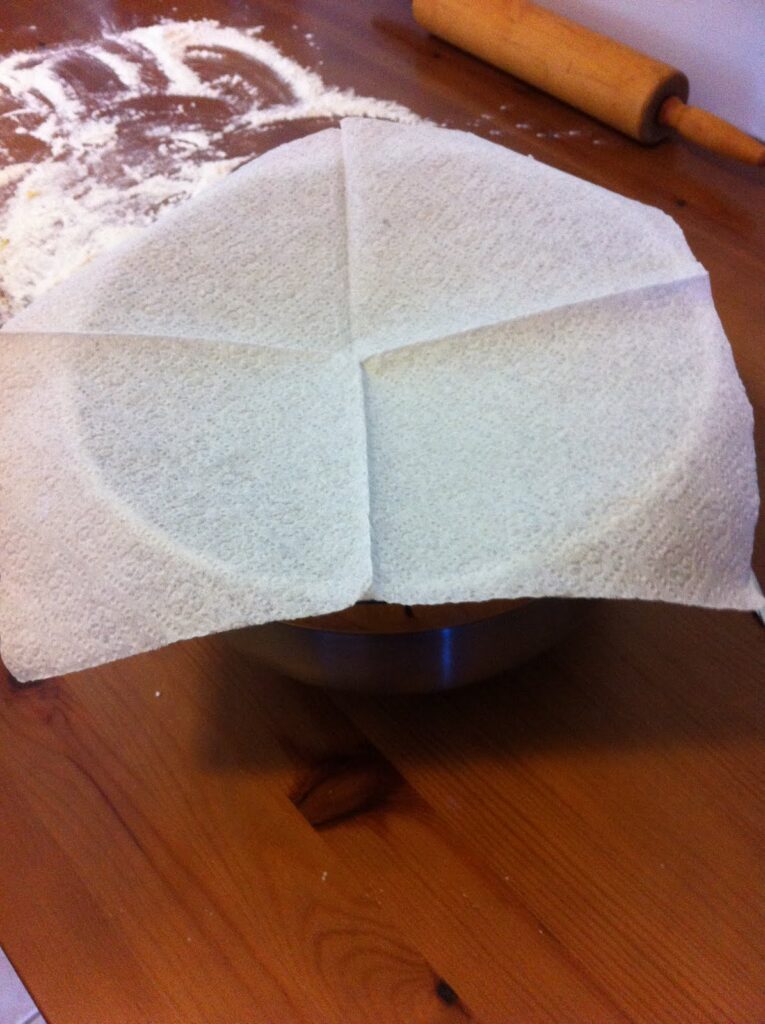
8. Let your dough sit in the bowl, covered with a paper towel, for 10 minutes.
 
spread flour on the table to roll out haluski noodles
 
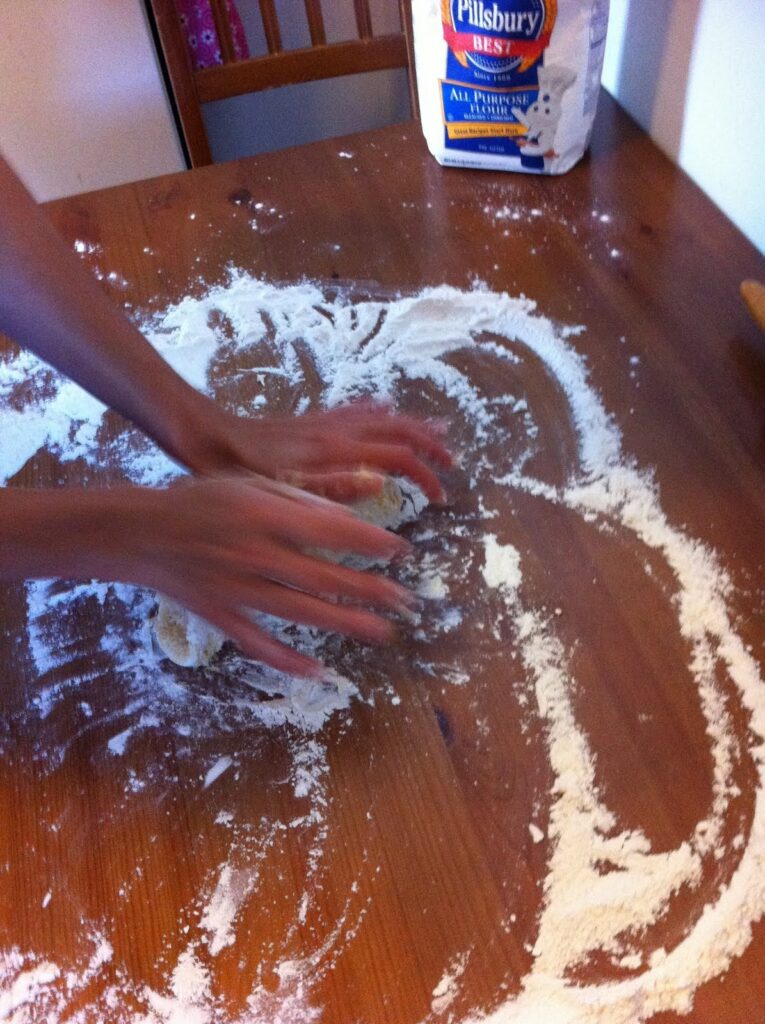
9. Generously flour the table. Dust the dough with flour also.  
10. Kneed the dough until it is still soft but no longer sticks to the table.  (You can add more flour during this process if it’s too sticky.)
 
 
11. Flour the table and dough again so that it doesn’t stick while rolling it out.  
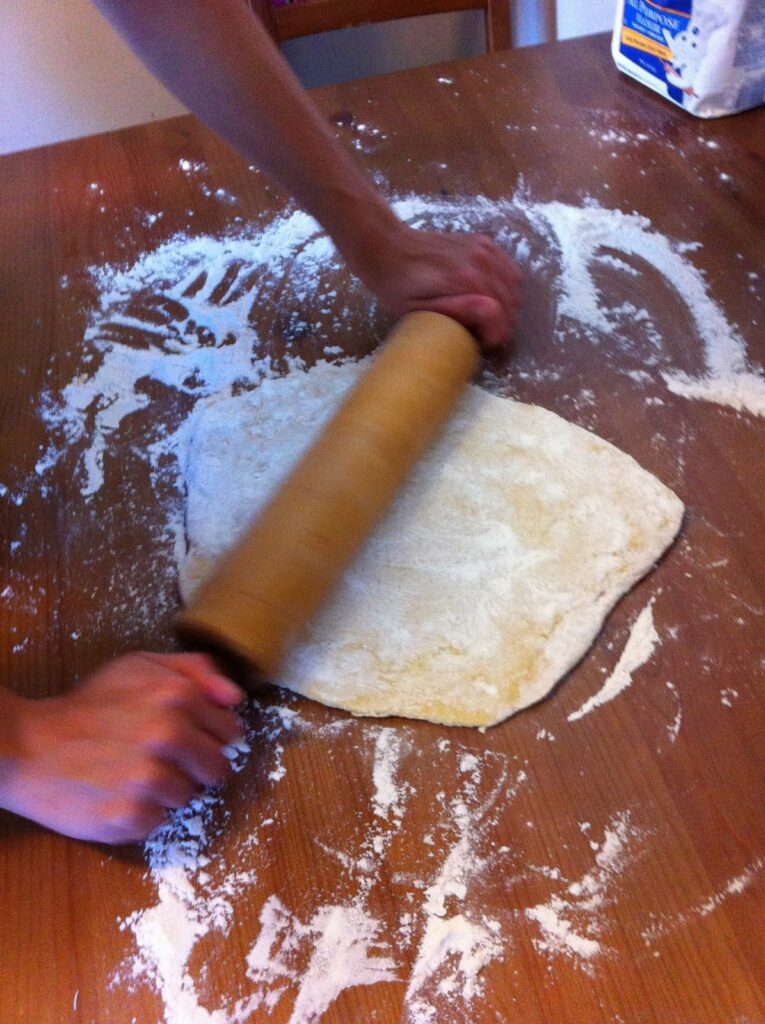
12. Roll the dough to your desired thickness.  These noodles plump up a little when you boil them, so roll it a bit thinner than desired.


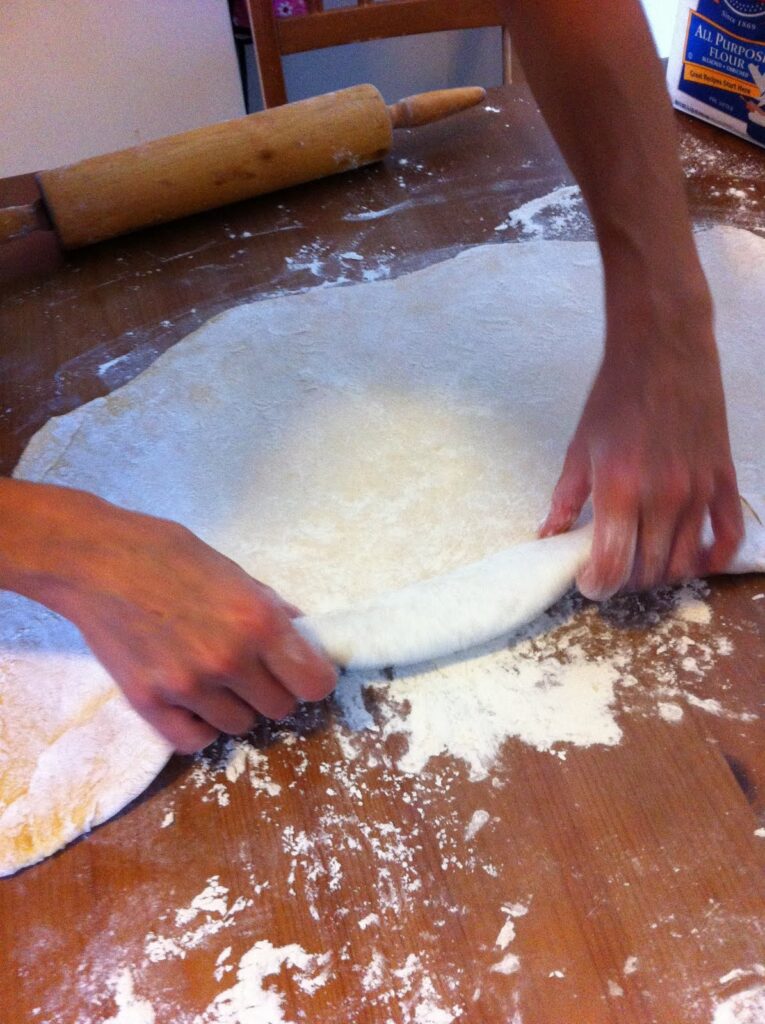
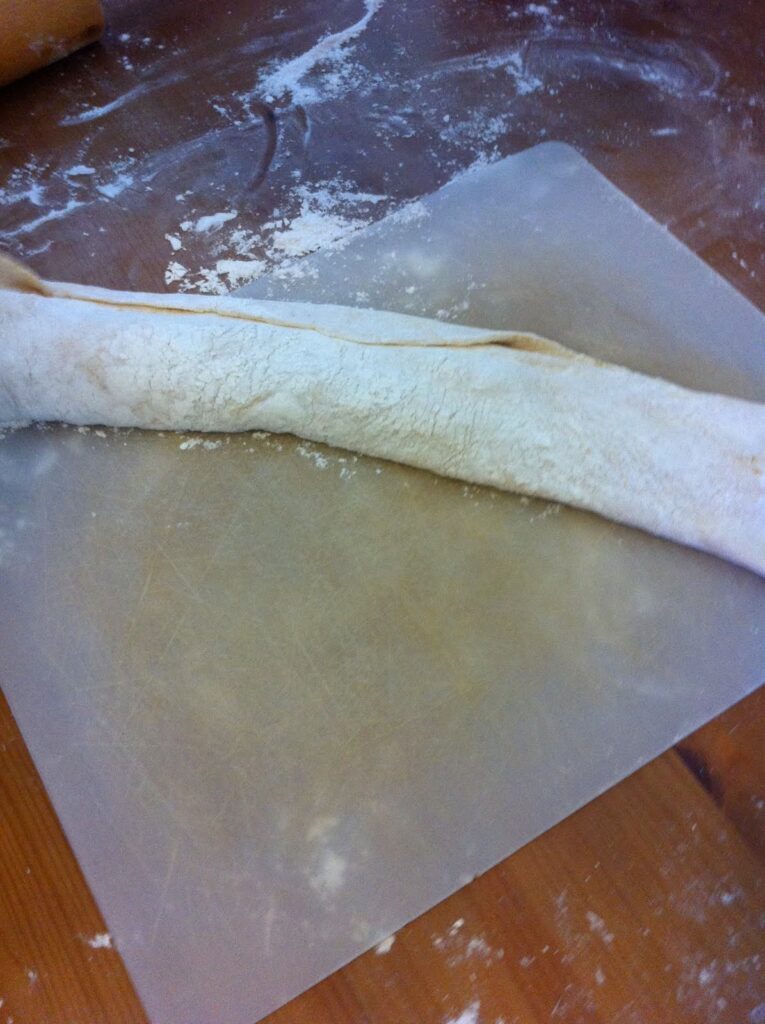
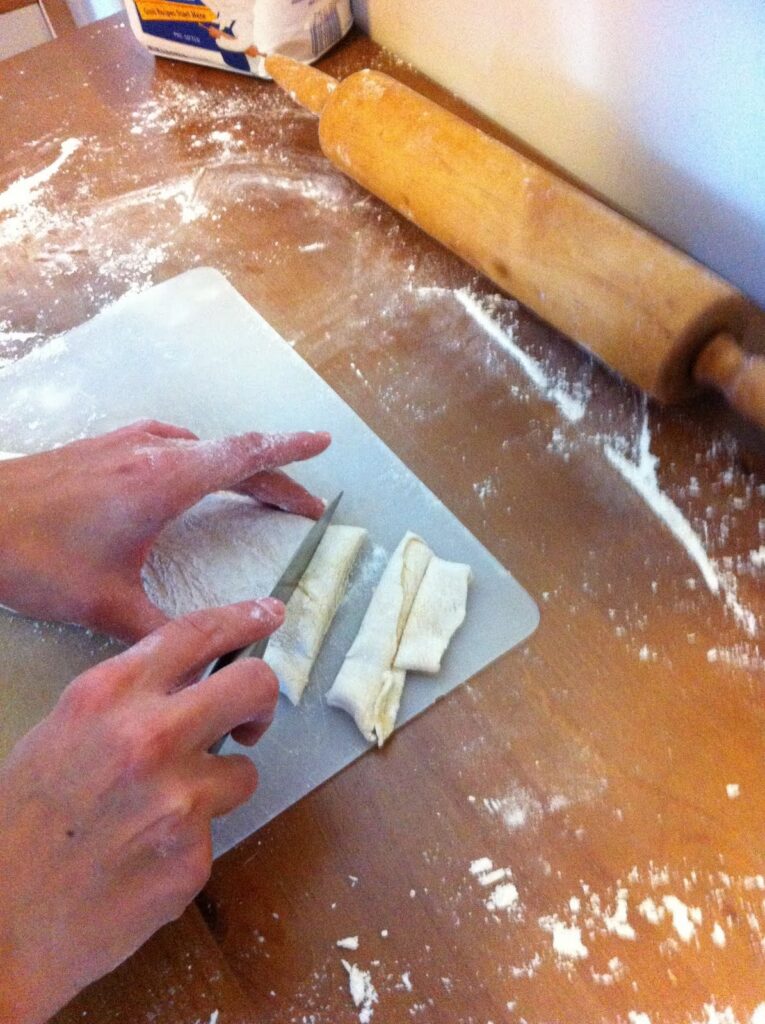
13. Roll the dough, jelly-roll style.  Make sure you do not roll it too tightly – you don’t want it to stick together.


14. Cut the rolled dough into 1/4 pieces.  
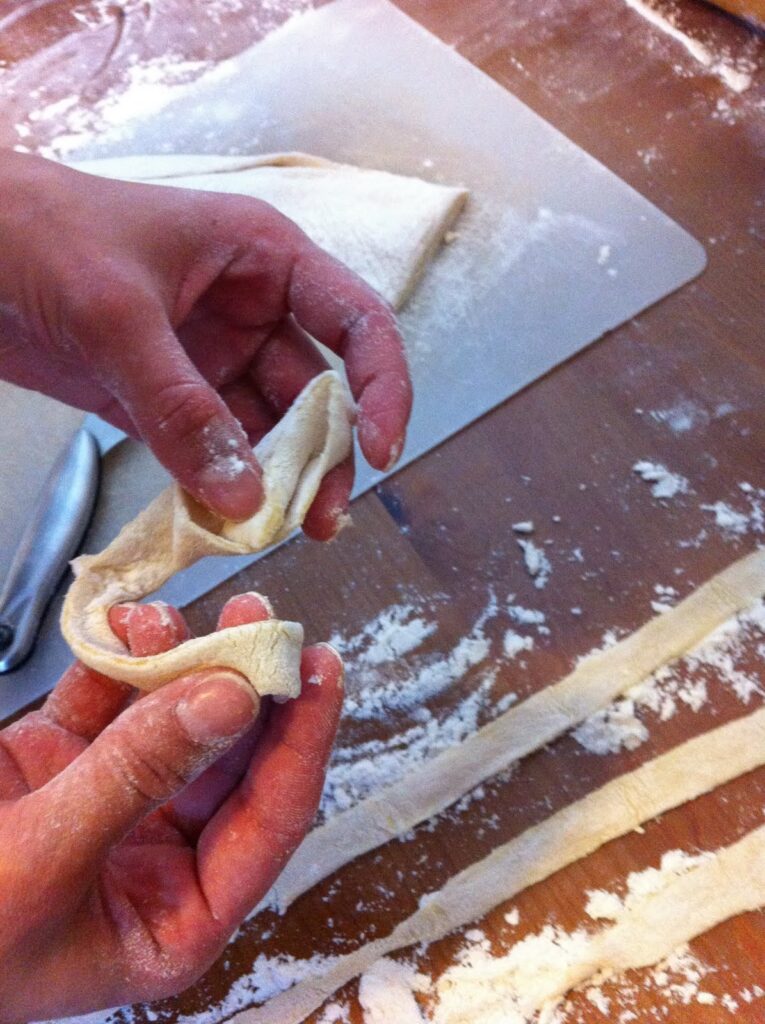
15. Unwrap the noodles as you go so that the dough doesn’t stick to itself.  
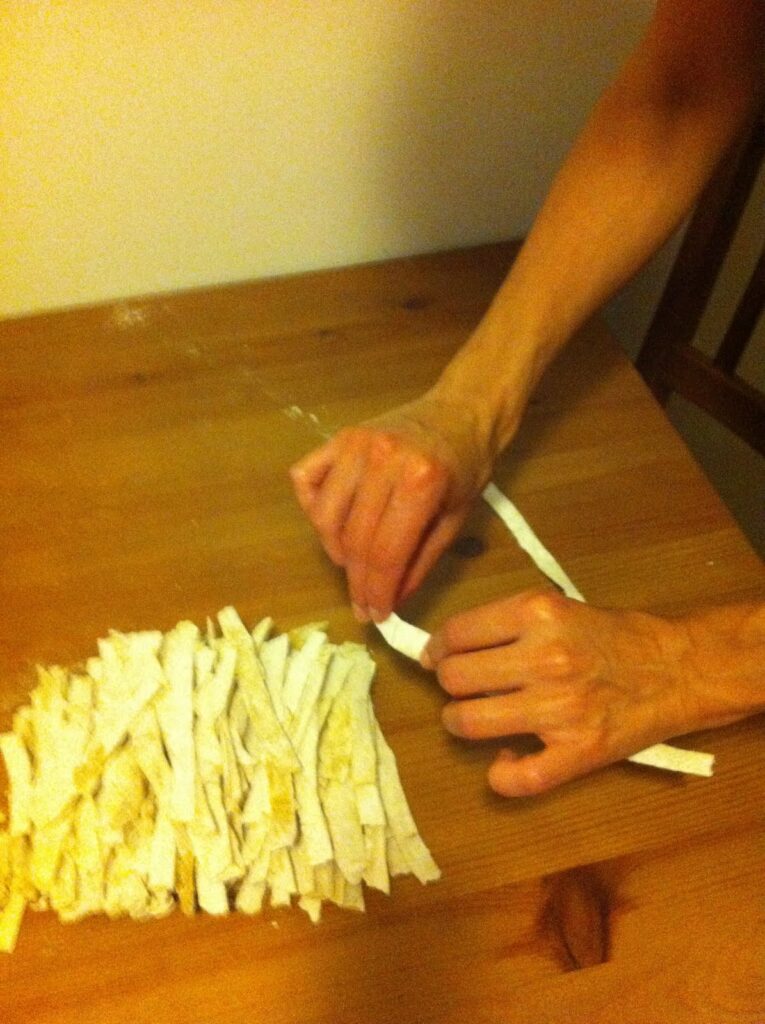
16. Lay the noodles out on your floured table.
 
 
You can cook your noodles right away, or you can let them sit until dried.  Cut your noodles to desired length before cooking.  If you dried them, you can break them by hand.
 
Cook them in boiling water, just like you would egg noodles.  You know they are done when they start floating to the top of the water.
 
Use a Noodle Maker to make the Haluski noodles– You can also create a thinner noodle if you would prefer thin Haluski Noodles. Once you have your dough made, cut it into small pieces. Then use the noodle maker: 
  1. Set up the noodle maker on the edge of a table. Attach the desired  fettuccine noodle attachment.

  2. Divide the dough: Cut the dough into smaller portions, as this will make it easier to work with. Dust each portion with flour to prevent sticking.

  3. Adjust the noodle maker settings: Most noodle makers have adjustable settings that control the thickness of the noodles. Set the desired thickness according to your preference.

  4. Begin the rolling process: Feed one portion of the dough through the noodle maker, starting at the widest setting. Crank the handle or turn on the machine, depending on the type of noodle maker you have, to roll the dough through the machine. As you roll the dough, gradually decrease the thickness settings to achieve the desired thickness for your noodles. This is a GREAT activity to involve kids in. It’s a bilateral coordination task that they will love!

  5. Cut the noodles: Once you have rolled out the dough, switch to the cutting attachment for the specific type of noodles you want. Pass the rolled dough through the cutting attachment, and the noodles will be formed as you turn the handle or operate the machine.

  6. Dust and separate the noodles: As the noodles come out of the machine, lightly dust them with flour to prevent sticking. Use your hands or a wooden dowel to gently separate and arrange the noodles. You can create nests of noodles or lay them flat on a baking sheet lined with parchment paper.

  7. Repeat the process: Continue the process with the remaining portions of dough until all the noodles are formed.

  8. Cook and enjoy: Bring a pot of salted water to a boil and cook the homemade noodles for a few minutes until they reach the desired tenderness. Drain the noodles and incorporate them into your favorite pasta dishes or sauces.


Directions for Haluski:

Use the haluski ingredients listed above and follow the directions below:


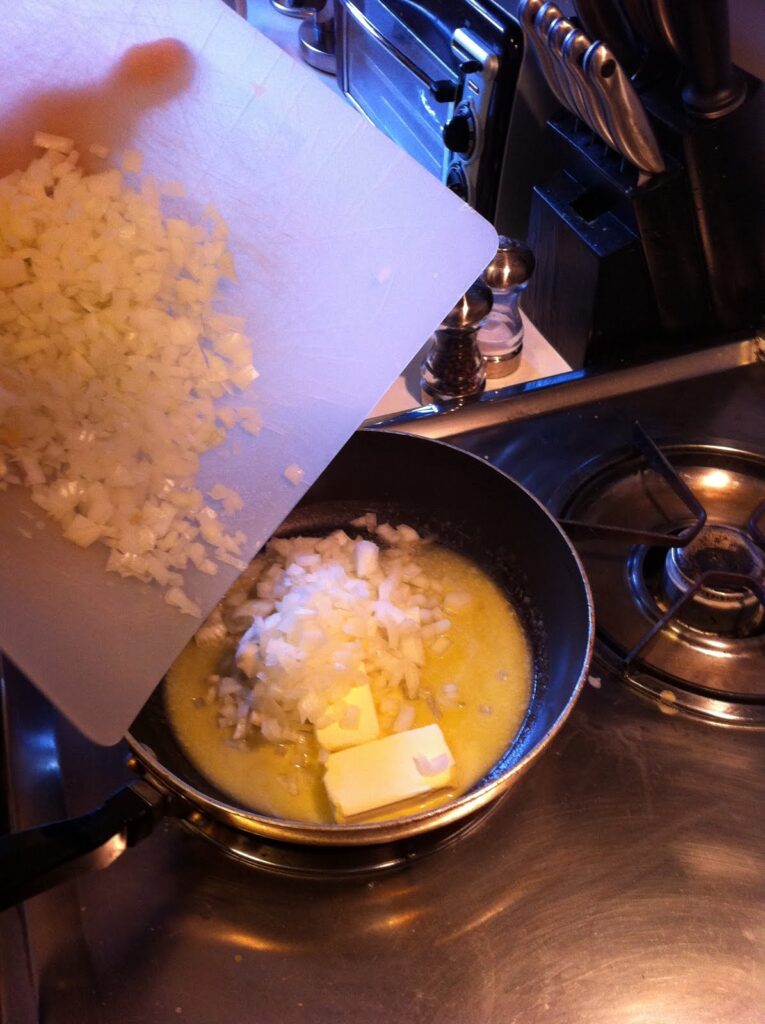
  1. While the noodles were boiling, I chopped the onion and melted the butter.  
  2. Sauté the onions in the butter until they are tender.
 
 
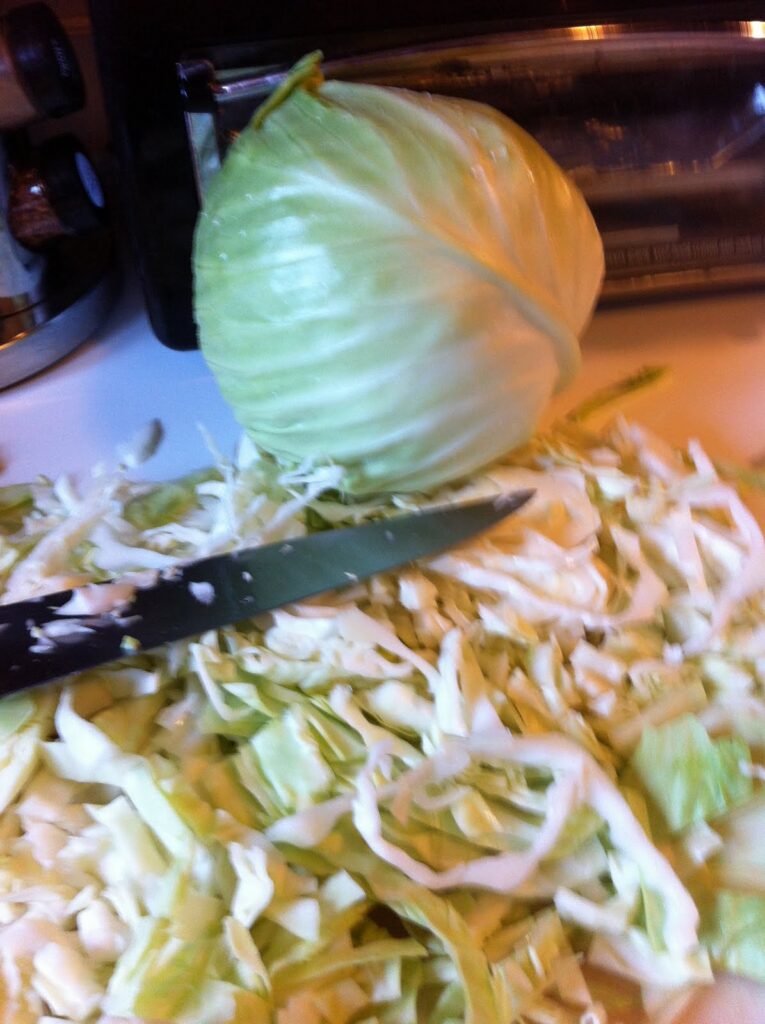
3. Chop the cabbage into 1/4 inch slices. If the slices are long, feel free to chop them in half.
 
 
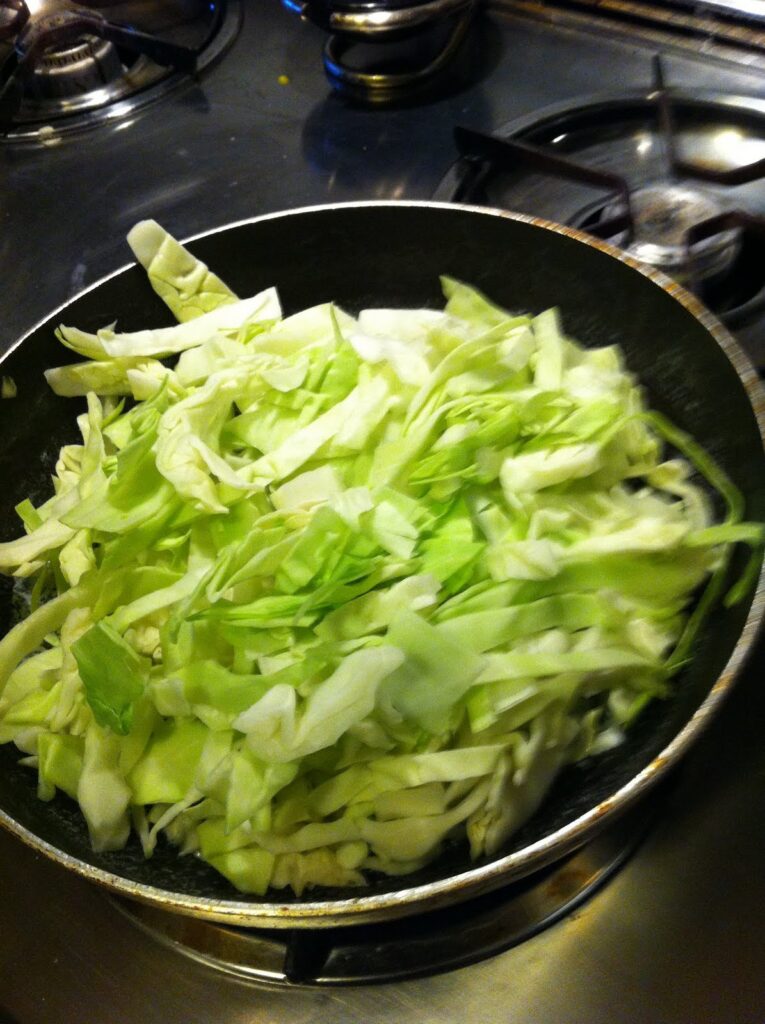
4. Add the cabbage to the butter/onion mixture.  I had so much cabbage that I ended up transferring it all to a large pot.  
5. Cover the pot and cook the cabbage until it is tender; about 15 minutes, stirring often.
 
 
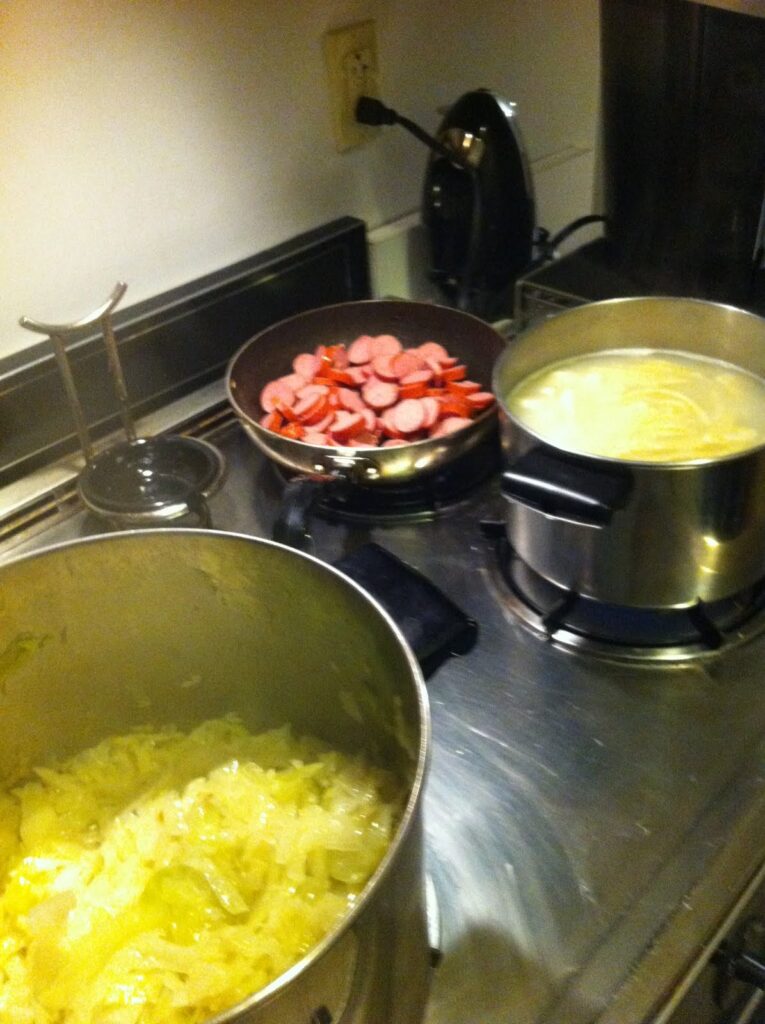
6. Slice up the sausage or kielbasa and cook it in a skillet until browned.  You could also substitute ham in this dish. To prepare the ham, cut the ham slice into small pieces. Brown them in a sauté pan on the stove top. 
 
7. When noodles are floating, cabbage is tender, and sausage is browned, mix all together into one delicious dish.
 
 
Eat it for dinner tonight or deliver it to a friend!