Many times, school-based OTs are asked about normal writing speed. Just how fast should kids be writing and how can you improve writing speed while maintaining legibility? This super easy handwriting trick is one that can be done right now. Pick up your phone, turn on the timer app and start practicing handwriting. Read on for a writing speed activity that you can work on any time. Working on speed of writing is a great way to support bad handwriting issues.
We also love the benefit of using a timer to work on time management skills in general. This is a great tool to have on hand!
Writing Speed Activity
Using a timer to help with reaching a normal writing speed (or FUNCTIONAL writing speed) while maintaining legible letter formation is one way that kids can develop consistency with correct letter formation, speed, and accuracy.
Remember that the main goal is functional handwriting legibility when completing writing tasks independently.
Related, is this resource on a functional pencil grasp, as pencil grasp can also suffer when writers are rushed to complete a writing task. But the main thing to keep in mind is:
Is the written sample legible?
Is the written sample completed within a reasonable amount of time?
Is the written work illegible when required to be written in a specific amount of time?
Remember that when writing in a faster time (as when copying notes that are on a digital slide deck and the material must be copied before the next slide is shown) it is expected that proper letter formation suffers.
Think about the last time you quickly jotted down a phone number. Did the numbers look different than your normal handwriting? Young writers are the same way, but as long as the written work is legible, we are good to go!
How to Use a Timer to Help with Writing Speed
This post contains affiliate links.
Students who are working on handwriting are often times addressing letter formation skills.
The ability to construct letters stems from a top to bottom approach and in correct letter formation order. For example, a child should not be writing a letter in sections or with unnecessary re-trace.
Many times you see preschool children form letters by sections and not constructing the letter correctly. These inaccuracies can be carried over to the later grade years and will absolutely interfere with legibility as the child is required to write more, at faster speeds, and in smaller spaces.
Addressing correct letter formation is a must for legibility.
So, the child who needs to work on “building” correct letter formation can typically perform these tasks when working one on one with an individual who provides differing levels of support.
These might include verbal cues, visual cues, and physical prompts.
But how is the child to transition from varying percentages of cues to more independence in their written work?
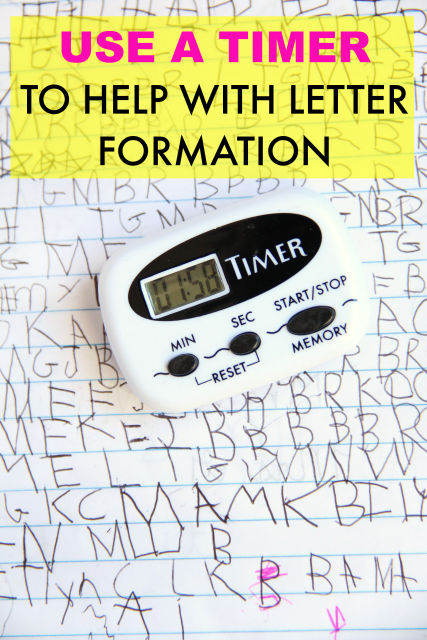
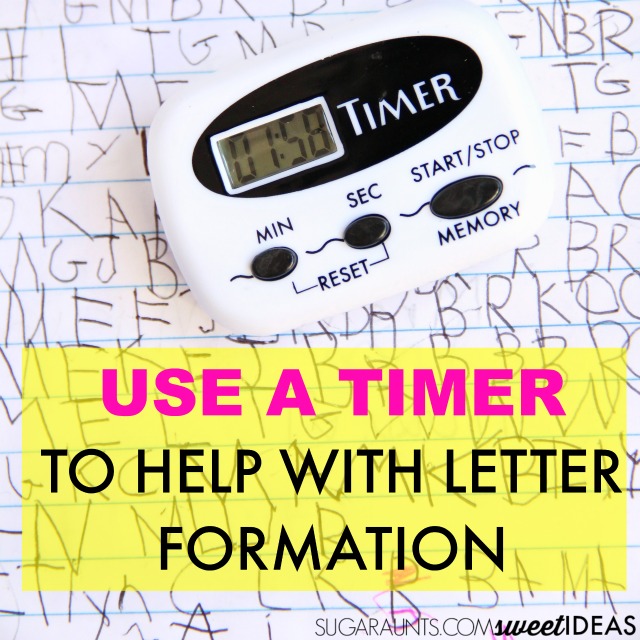
A timer is an easy tool to use in this instance. I love to grab a kitchen timer for practicing written work.
Turn on the timer and use it to work on writing speed AND legibility:
Tell your child that you are going to turn on the timer to count how long it takes them to copy a line or sentence with accuracy.
Then, try to beat that time while maintaining accuracy with correct letter formation. When kids are rushed to complete written work, they tend to speed up and return to comfortable, bad handwriting habits.
Using the timer to copy one line with a goal to beat their own time is a motivating way to encourage carryover of appropriate skills.
Next, check the work. Kids love when they can check their speed and try to beat their time. Try jotting down the time spent writing and check each letter formation.
This is a great time to collect data on legibility, too.
Mark off the number of correct letter formations in a sentence. Or jot down the amount of letters that are legible (or illegible) during a specific amount of time.
Many learners will want to try to beat their score on the next trial!
Timers for Writing
There are many writing timers that can be used to work on hand writing speed.
These timers for writing are great because they are small and easily fit into a therapist’s therapy bag:
This one has a magnetic back, making it convenient to stick to metal desks.
A small timer that fits into the palm of the hand is perfect for the clinician’s therapy bag or for fitting into a desk pencil box.
using a phone timer to work on writing speed
While a phone timer is great, the phone itself can be a distraction for kids.
Some kids can become hyper-focused on the time as it counts and will stare or become anxious about the time as they watch the numbers change.
A wind-up kitchen timer can help in those cases. You will need to count down to figure out the time spent on a handwriting task.
However, a phone timer or the good, old microwave timer will do the job too, and in some cases can be motivating for some children.
This timer trick works best with kids who are working on letter formation and can form letters accurately and with correct formation with extended time, modifications, and/or added cues.
More ways to use a timer in handwriting:
Use a timer to work on speed. For the child that writes very slowly or becomes overly focused on letter formation, use the timer as a countdown to improve speed and accuracy. Mark each trial with time and correction errors.
Set the timer for handwriting time. This is a good way to get kids who are not motivated to work on handwriting skills. Small rewards such as choosing a fine motor or visual perception activity between writing trials can be reward options.
Colleen Beck, OTR/L has been an occupational therapist since 2000, working in school-based, hand therapy, outpatient peds, EI, and SNF. Colleen created The OT Toolbox to inspire therapists, teachers, and parents with easy and fun tools to help children thrive. Read her story about going from an OT making $3/hour (after paying for kids’ childcare) to a full-time OT resource creator for millions of readers. Want to collaborate? Send an email to contact@theottoolbox.com.
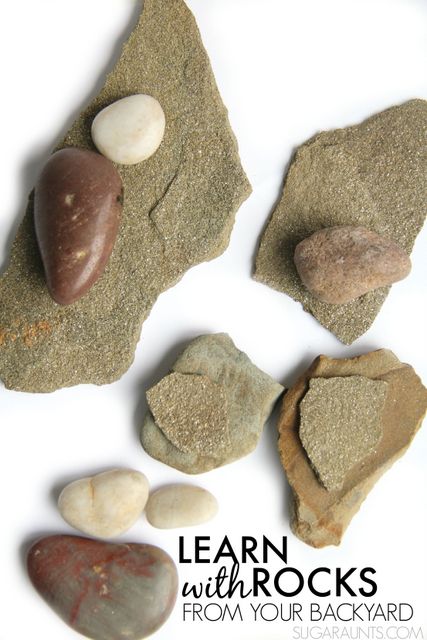
In this activity, we can use rocks to tell time! It’s true…not by shadows and watching the sun as it passes by, but by physically moving and manipulating rocks as a time telling tool. In this rock and learn math activity, we can use rocks found around the home with heavy work input as a clock building time telling activity! This is just one more way to teach kids to tell time through hands on play.
Tell Time Through Rocks
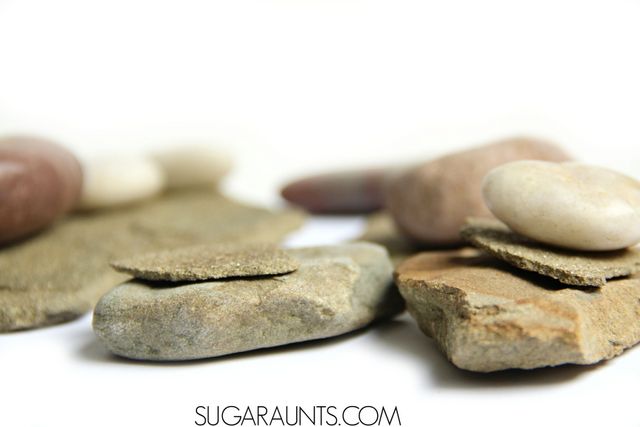
It’s always nice to play and learn with the kids when the supplies are completely free. Learn and play with rocks from your backyard or natures walks with a few fun ideas to Learn using Rocks! You might have seen a few of our other rock activities. (We really have a lot, believe it or not!)
In this activity, though, we are asking kids to lift rocks that offer heavy work input, or proprioceptive input while learning to tell time using a simple rock.
Teach kids for free using rocks!
This post is part of our month-long Learning with Free Materials series where we are sharing learning ideas for homeschoolers and school-extension activities using items that are free or mostly free (i.e. CHEAP or you already have in the home)…and rocks are most certainly free!
This series is part of the 31 Days of Homeschooling Tips as we blog along with other bloggers with learning at home tips and tools. We do have affiliate links in this post for your convenience.
While using rocks in clock building not time telling, but to learn the concepts of time is fun, it’s also functional. Kids can play to learn and learn to play with rocks!
There are a ton of ways to learn at home, either through homeschooling, or as school-based enrichment activities using rocks from your own backyard.
Let’s take a look at more ideas for rocks:
Math with Rocks
Count rocks in a line.
Add and subtract with rocks.
Sort rocks by characteristic.
Arrange rocks and pebbles into patterns with AB, ABA, ABBA, ABAB, and more complex patterns.
Create charts on the ground using rock markers.
Write numbers on rocks as a manipulative in math problems.
Tell Time with rocks.
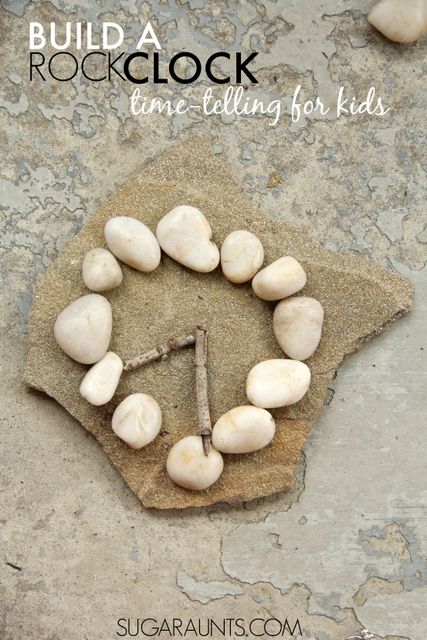
Teach Time Telling with a Rock Clock
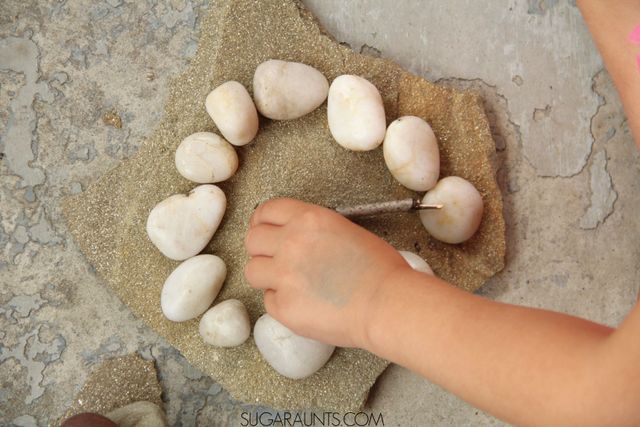
We used smooth rocks to create and build a clock. Clock building and time telling is a fun and common activity for us recently, so building a clock with rocks was a challenge when the rocks didn’t have numbers written on them.
Teach kids to position the “3”, “6”, “9”, and ” 12″ rocks first then fill in the other “numbers”.
You could also write the numbers on the rocks using a (Amazon affiliate link) paint marker. Use twigs to create the minute and hour hands and work on time telling outdoors with nature.
Use smaller pebbles to teach time with rocks. We found smooth pebbles from a garden that worked well as the numbers on a clock.
Kids can move them around to the correct position on the rock clock face. This is a fun hands on activity for kids learning to tell time.
Engineering with Rocks
Rocks are a great material in STEM for kids:
Build towers.
Create bridges using rocks.
Explore balance. How does one rock balance on another. Will a different rock stay put in the same way?
Explore force and movement. How can rocks move items?
Building a small tower of rocks is a great eye-hand coordination and fine motor activity, and you can show kids how to mark shadows from the sun to mark the passing of time.
As the sun moves across the sky and the shadow from the rock tower moves along the ground, kids can associate the passage of time with this visual. Then move the hands on the clock to show how much time has passed.
While teaching time isn’t something that is always addressed in occupational therapy, we can support the need to learn time as it relates to time management and functional task completion. After all, if one can’t note the time on the clock, they can’t be out the door to school or an appointment, resulting in many issues.
OTs do support their clients in the educational space, and sometimes telling time is a challenge, especially for those with executive functioning issues, visual perceptual issues, or cognitive impairments. So in theses cases, OT can intervene to support the educational curriculum or to offer alternatives that help the individual to succeed at their goals.
When working with this clock activity, learners or clients can build on educational goals as well as executive functioning skills.
These kids rock ideas develop many skill areas:
They can learn clock concepts
Participants can manipulate small objects to develop fine motor skills.
Clients or students can use the hands-on approach to develop motor planning and eye-hand coordination skills while learning time to the nearest five minutes
They can develop and learn relationships between time elements.
Participates can learn through play.
Students can develop and create, using rock manipulatives as a models to support learning.
Participates can develop skills and experience in using symbols in learning, organization, working memory, communication, mathematical skills, and more.
How will you use this rock clock activity to teach time or time telling skills through play?
Colleen Beck, OTR/L has been an occupational therapist since 2000, working in school-based, hand therapy, outpatient peds, EI, and SNF. Colleen created The OT Toolbox to inspire therapists, teachers, and parents with easy and fun tools to help children thrive. Read her story about going from an OT making $3/hour (after paying for kids’ childcare) to a full-time OT resource creator for millions of readers. Want to collaborate? Send an email to contact@theottoolbox.com.
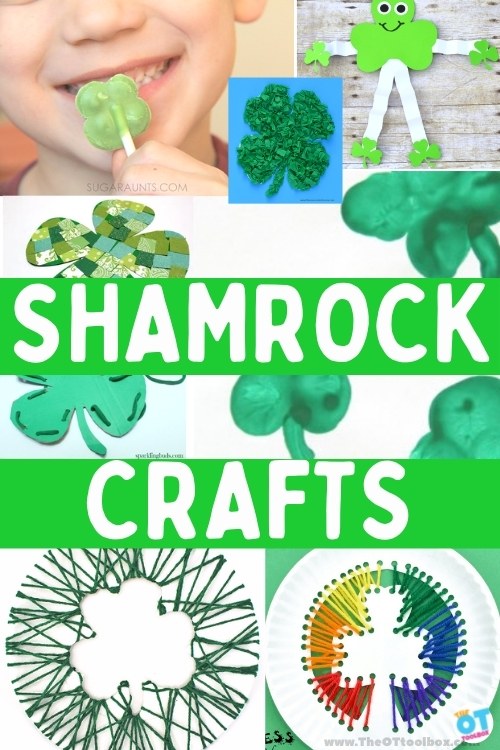
Are you feeling lucky? Well, you should as you’ve hit the pot o’ gold upon finding this collection of shamrock crafts! Check out all of the shamrock and clover crafts below…you’ll find St. Patrick’s Day activities that are great additions to your occupational therapy crafts. They are not only fun to make and get kids engaged and motivated, but they are meant for the kiddos in your life to engage in this holiday season. There are festive fun and even sweet-tooth candy crafts included in this post. Kids will love the crafts they will be able to produce during a holiday that is not as actively celebrated in the United States, but should be!
Shamrock Crafts
These shamrock crafts can work onmuch needed skill development and practice! That’s right, crafts that build important skills such as fine motor, visual motor, gross motor, sensory motor, and even oral motor.
So, read on below and find some shamrock fun that will help you combine this holiday theme with some educational and therapeutic activities to get festive while having some fun!
Wearable Shamrock Crafts:
These fun, festive crafts are all about creating wearable jewelry, like rings and necklaces, but there is also a craft for a wearable puppet glove too.
These can easily be used to give to a friend or make for an awesome therapy group activity! They will encourage separation of the two sides of the hand, in-hand manipulation, precision grasp, dexterity, and arch development making them purposeful and productive.
Pipe Cleaner Shamrock Rings is an activity that generates a wearable ring, but incorporates important fine motor skills as well as sequencing in order to be able to follow the directions to build the ring successfully.
Definitely a craft for older children as it needs more advanced hand skills and the ability to sequence the steps for the most success.
2. Twizzler Rainbow Necklaces is an activity that doesn’t really use shamrock shapes necessarily, but does give younger kiddo the opportunity for participation in the making of a craft for the holiday that doesn’t require advanced cutting skills, only snipping if you want them to engage in the preparation.
If not, no worries, they simply need the use of fine motor precision, bilateral hand use, and eye-hand coordination skills to string the Twizzler pieces.
You can also add a shamrock adornment to really make it festive! Read about using licorice as an oral sensory tool to calm and regulate emotions or sensory needs.
3. Shamrock Puppet Glove Craft is an activity that doesn’t necessarily have to be made by a kiddo, but is definitely used by a kiddo and think about all of the skills you can work on with this puppet glove.
Not only can you work on the skill of donning the five-fingered puppet glove, but you can work on finger isolation, finger awareness, dexterity, and eye-hand coordination to wiggle those puppets.
Edible Shamrock Crafts:
These tasty craft ideas are all about the color of St. Patrick’s Day with the end result being a tasty treat reward. What child would not won’t to do these, right? They easily address bilateral and eye-hand coordination, color recognition and patterning, pincer grasp and precision skills.
Cooking with kids is a powerful tool for developing executive functioning skills, fine motor, and sensory needs, so when you combine shamrock themed snacks and crafts, you’ve got a pot of gold therapy tool!
Shamrock Chocolate Pops is an activity that is quick to put together and ideal for the younger kiddos to engage in as they require only a few steps to do with adult supervision and the end result is a tasty shamrock treat.
2. Rainbow on a Stick is an activity that uses colorful Fruit Loops and marshmallows, so really, it’s more like a party or snack food idea. It uses bilateral hand skills and eye-hand coordination as well as fine motor precision to thread, plus a little finger strength to be able to push the marshmallow completely onto the end of the stick to use as a tip and prevent the cereal from falling off. No shamrocks here, but an idea could be just to have kiddos use green Fruit Loops.
3. These rainbow snacksare not shamrock themed, but they go perfectly with a St. Patrick’s Day activity set. Kids will love to help prepare the rainbow pepper snack but not realize they are working on so many fine motor skills.
Fine motor shamrock crafts:
These shamrock crafts include folding, tearing, painting, cutting, pasting, weaving, beading, direction following, and sequencing.
All of these fine motor actions will help a child of most any age and skill level to work on bilateral hand use, eye-hand coordination, scissor grasp, hand dominance, strengthening, finger isolation, and grasping patterns.
Clover Thumbprint Craftuses finger isolation skills and the targeted use of the index finger in isolation. This clover fingerprint art allows for isolation of one finger and the flexing of the remaining fingers into the fist. This helps to build separation of the two sides of the hand. This craft also incorporates eye-hand coordination too!
2. You can take the finger isolation skill craft further with this Rainbow Finger Isolation Craftwhich uses ALL of the fingers with each finger making the curve of the rainbow using a different color of paint.
3. Beaded Shamrocks use a pincer grasp to place the beads onto the pipe cleaner shamrock, but the design of the actual shamrock address advanced hand skills, direction following, and sequencing skills to shape the pipe cleaners into shamrocks while also placing beads.
4. Crepe Paper Shamrock is a fun activity that is perfect for practicing the fine motor pinch pattern and improving strength and endurance. Children will tear crepe paper strips into squares and then pinch the squares into balls to glue onto the shamrock template.
5. Shamrock Twirler Craft is a simple cutting, painting, and assembly craft that produces a fun pinwheel-like craft that can also give the opportunity for children to work on some oral motor skills as they can learn to blow the twirler. Blowing can help to generate some deep breathing which can be used as a festive self-regulation tool.
6. Mosaic Paper Shamrock is similar to the crepe paper shamrock in that a child has the opportunity to cut various shades and patterns of green paper into strips and then cut or tear those strips into small squares to glue them onto a shamrock template. This crafty idea works on eye-hand coordination skills to cut and glue, scissor grasp to cut, and if tearing, finger strength and bilateral coordination too.
7. Fine Motor Shamrock Craft is a craft that includes a little tactile tolerance with the use of glue and salt and then allows for finger strengthening and grasp work to squeeze an eye dropper repeatedly to color the salt with green food dye and create shamrocks!
You can also work on tripod grasping skills too as they repeatedly must fill up the eye dropper.
8. Rainbow (and Shamrock) Windsock Craft is a craft that can be hung outdoors once it is finished! It allows for advanced direction following and sequencing as a child will paint, cut yarn, use a heart puncher, glue hearts into shamrocks, and then completely assemble the windsock together using all craft materials.
Older kid groups will love this activity to engage in and hang outdoors.
9. Shamrock Man Craftis a whole-body craft that is similar to the Mat Man figure from Handwriting without Tears™ in that children assemble the body, eyes, legs, arms, feet, and hands, but with a shamrock theme.
Children will have the opportunity to cut out pieces, fold accordion style, and then glue to assemble. Lots of multiple skills can be addressed with this craft to include grasp, bilateral hand use, eye-hand coordination, and body awareness.
Downgrade and upgrade as needed to meet the level of challenge of child needs. You can find our version of this craft in your OT Toolbox Member’s Club March materials.
10. Yarn Wrapped Shamrock Craft is an activity that addresses bilateral coordination and hand dominance to wrap the yarn string around the cardboard shamrock to cover it in greenery yarn.
The best part? This is a freestyle craft that most any child can engage in and simply wrap as desired. It makes for a great holiday ornament as the end result too.
11. Shamrock Nature Crafthas children venture into the outdoors to select greenery that would make a great contribution to the image of a shamrock created on the pavement or sidewalk with chalk.
This is a different approach to crafting for kiddos and depending on what aspects you want them to engage in, they can work on finger and hand strengthening, bilateral hand use, visual discrimination, and freedom in creativity.
12. I’m slipping in this Fine Motor Rainbow Craft here that also includes work on fine motor skills to string the beads onto pipe cleaners and sequencing skills to assemble the pipe cleaners into a 3D rainbow. It makes for a great display!
13. One more rainbow slip-in as it is so pretty and festive! The Yarn Wrapped Rainbow Craftis a fun activity that addresses bilateral coordination and hand dominance as these hand skills are needed to wrap the yarn string around the cardboard rainbow to cover it in a stunning rainbow appearance. The best part? This is another freestyle craft that most any child can engage in and simply wrap as desired. It makes for a great holiday ornament!
14. Shamrock Template– In the OT Toolbox Member’s Club, under March activities, you’ll find a shamrock template which can be used to develop scissor skills, eye-hand coordination, and fine motor skills as kids pinch paper and glue it to the template. Or glue on other small objects like green beads or craft pom poms. The shamrock printable template can be used in so many ways!
Visual motor shamrock crafts:
These fun visual motor crafts are for younger and older kiddos as you can downgrade and upgrade as needed to address a variety of skills with the children in your life. Maybe they need to work on tool use such as scissor cutting, hole punching, and lacing or maybe they need a more simplified version where lacing or wrapping is the only skill needed to complete.
Shamrock Lacing Crafts- I just LOVE everything about this Shamrock Lacing Craft! It includes cutting skills, hole punching skills, bilateral hands skills to lace around the shamrock, pinch grasp and bilateral hand skills to pinch and push the yarn through the eyeholes, and lastly, eye-hand coordination skills to organize hand and finger movements to lace this craft while also following a sequence pattern. OT practitioners will LOVE this one too as it can easily be upgraded and downgraded as needed to make it a great intervention activity. Oh, did I mention it is rainbow colored too? So festive!
2. This Shamrock Lacing Craftis a simple lacing craft for younger kiddos to engage in and practice some fine motor precision and bilateral coordination while they push and pull the lace through the holes and don the shamrock with an outline lace.
3. Here is a different version of the Yarn Weaving Shamrock Craftthat includes yarn wrapping, but you loop the lace around the outer edge of the paper plate that has the shape of as shamrock cut out of the middle. It’s a fun visual effect and there’s no need for a hole punch with this one!
Sensory shamrock crafts:
We have to mention sensory crafts that can easily be created with the use of shamrocks.
Shamrock Balance Beam- You can have a child cut out the shamrocks themselves so they can take this fun Shamrock Balance Beam Craft home. Balance beams are an easy way to incorporate some vestibular input into the day of a child, allowing them to refocus, improve behavior and impulsivity, regulate their arousal level, improve overall attention, gain better balance and help with their posture.
2. Making these Salt Dough Shamrocksprovides tactile input as the child can work on making the dough, molding the dough, and cutting the dough to create festive shamrocks that can easily be turned into ornaments.
3. Shamrock Play and Craftprovides light tactile input as the child smears and moves the shaving cream around on a heavy weight paper shamrock to color it…it’s something similar to puffy paint.
Now it’s time to go gather your supplies and get your shamrock crafting on for the holiday. This lucky round-up will make for productive use in the therapy room or just for enjoying at home. Good luck and happy crafting as you work with kiddos on building important skills that are golden in motivation and productivity!
Prefect for this time of year is our Colors handwriting kit! Celebrate the colors of the rainbow with this motivating and engaging handwriting tool:
Rainbow Handwriting Kit– This resource pack includes handwriting sheets, write the room cards, color worksheets, visual motor activities, and so much more. The handwriting kit includes:
Write the Room, Color Names: Lowercase Letters
Write the Room, Color Names: Uppercase Letters
Write the Room, Color Names: Cursive Writing
Copy/Draw/Color/Cut Color Worksheets
Colors Roll & Write Page
Color Names Letter Size Puzzle Pages
Flip and Fill A-Z Letter Pages
Colors Pre-Writing Lines Pencil Control Mazes
This handwriting kit now includes a bonus pack of pencil control worksheets, 1-10 fine motor clip cards, visual discrimination maze for directionality, handwriting sheets, and working memory/direction following sheet! Valued at $5, this bonus kit triples the goal areas you can work on in each therapy session or home program.
Regina Parsons-Allen is a school-based certified occupational therapy assistant. She has a pediatrics practice area of emphasis from the NBCOT. She graduated from the OTA program at Caldwell Community College and Technical Institute in Hudson, North Carolina with an A.A.S degree in occupational therapy assistant. She has been practicing occupational therapy in the same school district for 20 years. She loves her children, husband, OT, working with children and teaching Sunday school. She is passionate about engaging, empowering, and enabling children to reach their maximum potential in ALL of their occupations as well assuring them that God loves them!