Rainbow Writing Letter Formation Activity

rainbow writing

This quick and easy rainbow writing activity is an easy handwriting activity to working on letter formation and letter construction.  Rainbow writing handwriting is a strategy to work on letter formation as a multisensory learning activity for kids. This handwriting activity is an Easy Handwriting strategy that can be so helpful in teaching letter formation and pencil control. 

rainbow writing

You can practice letters with rainbow writing using different utensils. We used rainbow writing with chalk before too.

What is Rainbow Writing

Rainbow writing might be a handwriting activity that you’ve heard of before. Many times, we see rainbow writing as an option for practicing sight words or high frequency words, especially as a multi-sensory learning options.

Typically, you’ll see rainbow writing as one way that kids can practice writing words and letters: They are asked to write the words in a color of the rainbow and then trace over those letters with another color, thus making a rainbow of letters.

Rainbow writing is a great strategy for practicing handwriting! Kids get multiple attempts at forming letters, working on motor planning, pencil placement, and repetition (practice) that very much plays a part in handwriting legibility.

Things to Watch for with Rainbow Writing

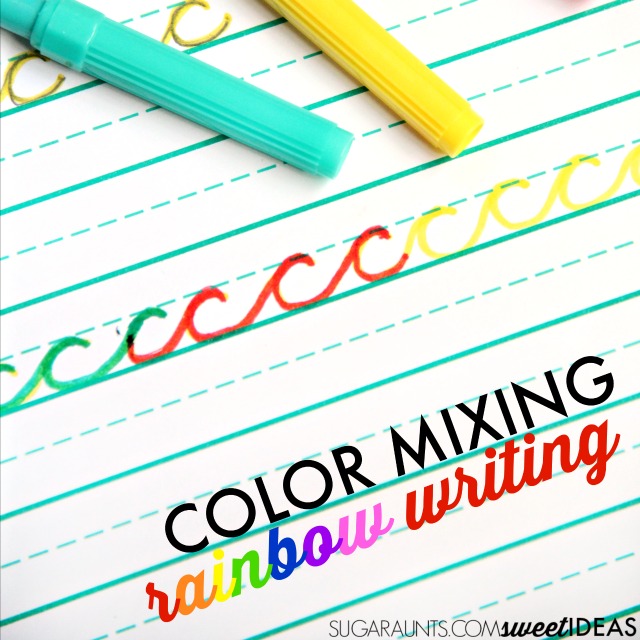
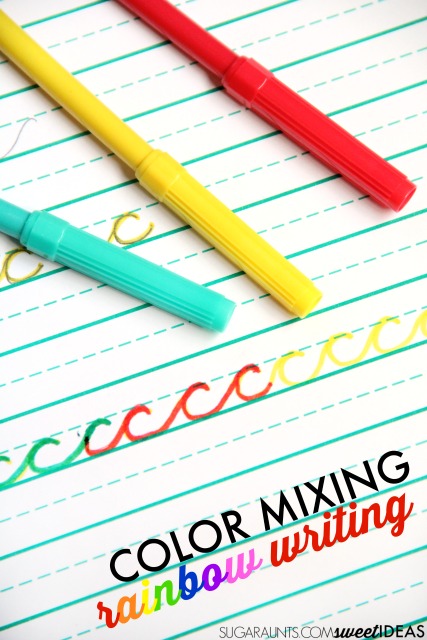
Color mixing rainbow writing activity for helping kids with letter formation

When tracing, there are some things to consider. Especially with rainbow writing, kids can develop bad letter formation habits. Read through this resource on tracing sheets to see the pros and cons of tracing with kids.

Some things you’ll want to consider about rainbow writing activities:

  • Be sure to watch how the student starts the letters when they rainbow write. It can be easy to start a poor muscle memory for writing the letters if they start at the wrong starting point or form the letters incorrectly. When they rainbow write each letter and it progressively gets worse, this can create an incorrect motor plan in the handwriting process.
  • Make sure the child that is using rainbow writing to practice letters don’t progressively move their pencil in bigger and bigger strokes as they include each color.
  • Some kids tend to make the rainbow letters with colors next to each other like a rainbow rather than tracing on top of each color. Ask the student to make a mixed up rainbow by tracing right on top of each color.

How to use Rainbow Writing for handwriting

Rainbow writing is a way to work on legibility of written work.

Helping kids write letters with correct letter formation is essential for legibility, especially as kids get older and are required to produce more written work at a faster rate.  Consider the high school student that needs to rapidly jot down notes.  If letters are formed from bottom to top or in sections, their speed and legibility will drastically drop. Sometimes it is speed OR legibility  that suffers when a child needs to produce more amounts of written work in a specific period of time (i.e. copying down notes as a teacher rattles off details.    

The younger student will be affected by inaccuracies in letter formation as well. Around the third grade, students are responsible for jotting down their homework assignments into a planner.  

When the child is bombarded by classroom sensory input (pencil sharpeners, students, desk chairs moving, hallway distractions, coughing classmates…) difficulties with letter formation can result in illegible homework lists and trouble with re-reading the assignment list when the student attempts to start on homework.  

Rainbow Writing Color Changing Activity

There’s more to rainbow writing than incorporating colors and sensory experiences into handwriting. Color Mixing Rainbow Writing is a creative way to help kids learn the right way to actually form letters, because the task allows children to self-correct their written work right in the moment.

They can see where their letter formation has veered into poor letter size or placement. Rainbow writing then becomes a strategy to improve motor planning in handwriting and pencil control as well.    

Affiliate links are included below.

In the handwriting activity shared here, we are taking rainbow writing a step further.

This letter formation activity is really simple and a LOT of fun.  Kids can work on typical motor pattern of letters by exploring color mixing.  

MATERIALS for Rainbow Writing

When you rainbow write, a student can use different colors of crayons, markers, colored pencils, or even chalk. You can use colors of the rainbow, or if you want to work on color changing, use just a couple of the colors.

  • You’ll need just three markers for this activity.   
  • Red, Yellow and Blue markers  are all you need to work on letter formation with color mixing.  We used dollar store markers, but also tried these washable markers and the activity worked too. 

How to rainbow write with color changing

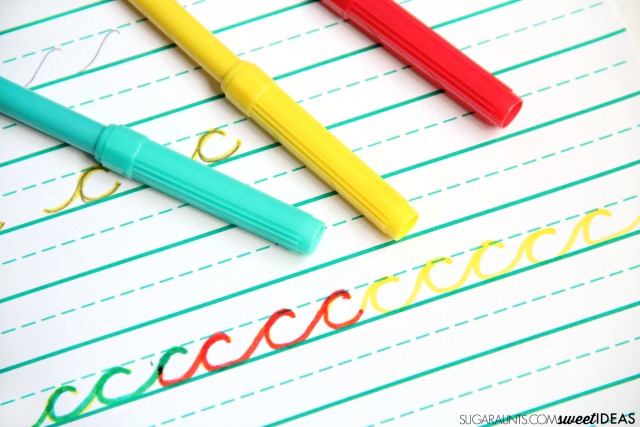
  1. For this activity, you’ll need to first write the letters that you are working on in one color. Then, using another color, trace over the letters to create a new color.  

2. Mixing the yellow and red made orange letters and mixing the yellow and blue markers made green letters.  

Kids can work on letter formation but experience the color changing of the markers when they write over letters in different colors.

Some different options to try with this rainbow writing activity:

  • Use just 2 colors so kids can try mixing two primary colors to see what the colors make
  • Not when the colors do not change: did they marker lines go off the lines? Can letters be written again or can the student try again to make the colors change?
  • Some kids may benefit from a model that is written in one color by the teacher, therapist, or parent. Then, the student can try to keep their letters on the lines to ensure proper size, spacing, and formation
  • Try making color coded messages to one another using the color changing activity
  • Work on phonetic awareness, by making vowels or phenomes one color and consonants or letter blends another color.
Rainbow Writing Activity with Color mixing for handwriting.


Tips for Rainbow Writing

Because kids can develop bad habits with rainbow writing, here are some things to keep in mind.

  1. Work on letter formation with this activity by providing kids with the amount of assistance they need to form letters correctly.  At first, they may need verbal, physical, and visual cues to form letters correctly.
  2. Encourage students to form the letters from top to bottom and in the correct way.  When they re-trace the letters with a second color, be sure they are forming and tracing the letters correctly.    
  3. When kids trace over the colors, they will be forming letters slowly in order to trace over the letters and ensuring the colors mix.  
  4. By tracing over the lines to form letters, they are building the typical motor patterns needed to write the letters correctly and efficiently.  

We worked on cursive letters with this activity, but it would work very well with printed letters, particularly letters that are typically reversed or confused like b and d reversals.  

Here is more information on letter reversals to consider.

Color mixing rainbow writing activity for helping kids with letter formation

 Looking for more creative ways to work on handwriting?  Check out these creative ways to help kids work on their written work:  

Functional Handwriting Practice Ideas

What is Visual Spacing

Visual Tracking Tips and Tools

Handwriting Spacing Tool and Spatial Awareness Tips and Tools

DIY Dry Erase Board Handwriting Travel Kit

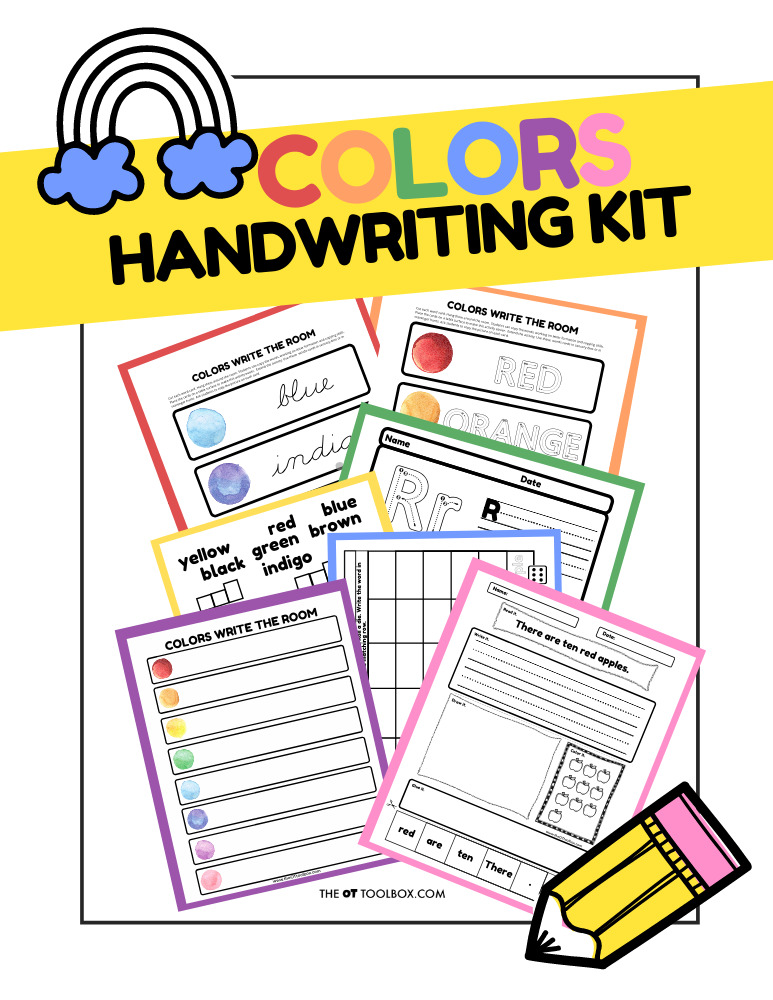
Colors Handwriting Kit

Rainbow Handwriting Kit– This resource pack includes handwriting sheets, write the room cards, color worksheets, visual motor activities, and so much more. The handwriting kit includes:

  • Write the Room, Color Names: Lowercase Letters
  • Write the Room, Color Names: Uppercase Letters
  • Write the Room, Color Names: Cursive Writing
  • Copy/Draw/Color/Cut Color Worksheets
  • Colors Roll & Write Page
  • Color Names Letter Size Puzzle Pages
  • Flip and Fill A-Z Letter Pages
  • Colors Pre-Writing Lines Pencil Control Mazes
  • This handwriting kit now includes a bonus pack of pencil control worksheets, 1-10 fine motor clip cards, visual discrimination maze for directionality, handwriting sheets, and working memory/direction following sheet! Valued at $5, this bonus kit triples the goal areas you can work on in each therapy session or home program.

Click here to get your copy of the Colors Handwriting Kit.

Colleen Beck, OTR/L has been an occupational therapist since 2000, working in school-based, hand therapy, outpatient peds, EI, and SNF. Colleen created The OT Toolbox to inspire therapists, teachers, and parents with easy and fun tools to help children thrive. Read her story about going from an OT making $3/hour (after paying for kids’ childcare) to a full-time OT resource creator for millions of readers. Want to collaborate? Send an email to contact@theottoolbox.com.
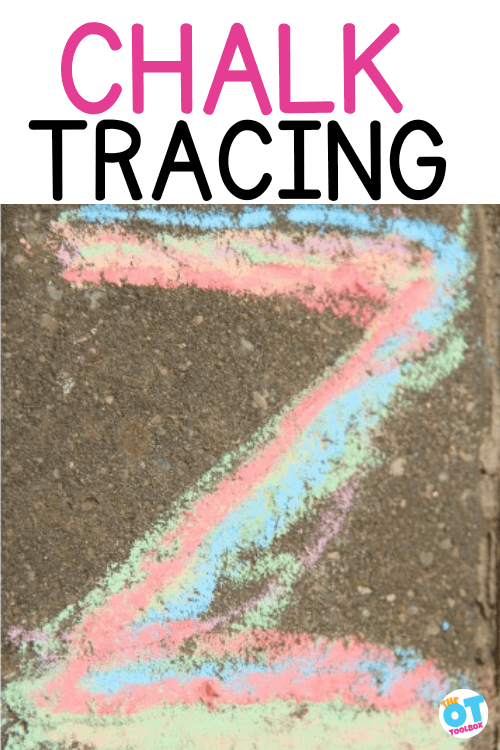
Tracing Letters with Chalk

tracing letters with chalk

Have you heard of rainbow writing? How about chalk rainbow writing? There are many fine motor and visual motor skills that are used when using rainbow writing as a handwriting practice strategy! Let’s break down what rainbow writing is and how this chalk writing activity is a skill-builder for letter formation. Also check out our handwriting library for more ideas.

tracing letters with chalk

Tracing letters with chalk is a handwriting practice strategy that helps to build muscle memory when learning letter formations. You can rainbow write on paper or with different utensils such as crayons, colored pencils, markers, or chalk!

Tracing Letters with Chalk

Tracing letters with chalk is a colorful way to practice letter formation. The strategy builds skills in visual motor and hand eye coordination in order to trace over the lines of a letter.

When you use chalk tracing to practice a letter or a word, the child traces over the letter with each color of the rainbow.

They will end up with 6 or 7 trials in writing over the letter.

Some things to consider with tracing with chalk

Tracing over letters with chalk, crayons, or colored pencils is a powerful strategy when practicing letter formation and the line awareness needed for letter size and line placement.

Read through this resource on tracing sheets to see the pros and cons of tracing with kids.

Some things you’ll want to consider about chalk tracing writing activities:

  • Be sure to watch how the student starts the letters. It can be easy to start a poor muscle memory for writing the letters if they start at the wrong starting point or form the letters incorrectly. This creates an incorrect motor plan in the handwriting process.
  • Make sure the letters don’t progressively get worse as the student traces over the letters when rainbow writing.
  • Some kids tend to make the rainbow letters with colors next to each other like a rainbow rather than tracing on top of each color. Ask the student to make a mixed up rainbow by tracing right on top of each color.

Rainbow Writing with chalk

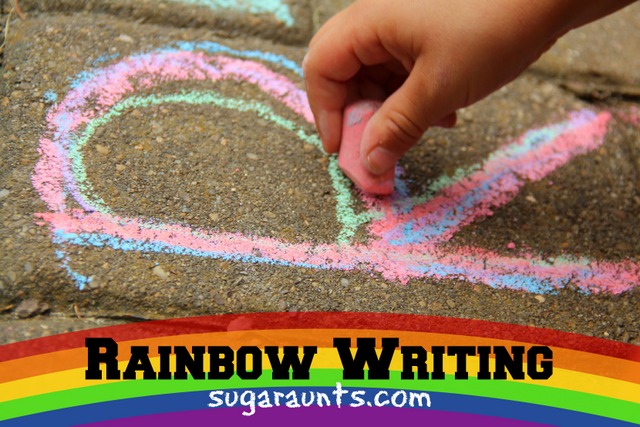
We did rainbow writing with chalk one day. This was a great way to work on letter formation while outside because there was the added benefit of playing on the ground.

Using chalk to practice letters supports development by adding proprioceptive input through the core, strengthens the shoulder girdle for adding more stability for writing, as well as adding strength and stability to the wrist.

Upper body strength in this way supports distal dexterity and mobility needed for writing.

Chalk Rainbow Writing

This chalk tracing activity was a lot of fun.

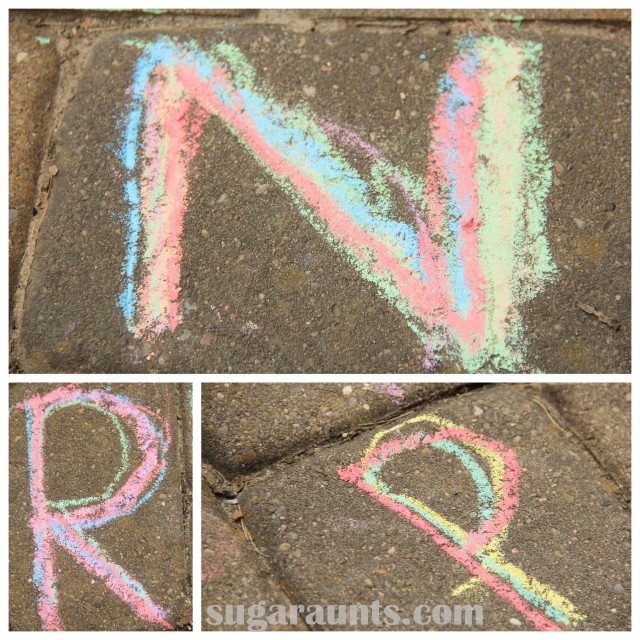
We have a big ol’ bucket of chalk that we play with almost everyday.  Our sidewalk and driveway have been know to be very colorful at times!  We took the chalk to our sidewalk squares one day this week and practiced a little letter formation.

Our sidewalk squares were the perfect area to practice forming letters accurately.  I used simple verbal cues to describe the formation of each letter (big line down, little curve around, little line) and we started in the corner of each square as we made the letters. 

I made the letter first and Big Sister and Little Guy watched.  Then we went to work making our letters very colorful!

Tracing the letters over and over again was a great way to practice accurate formation.  Big Sister got into this activity.  Little Guy only wanted to make a few letters that are in his name.

When the child is tracing the letters over and over again, they become more efficient at planning out and executing the movements needed to make a letter accurately.  This activity is great for a new writer because they are given a confined space to practice a letter, and visual cues (and verbal prompts from mom).


Use the activities and ideas in The Handwriting Book for more ways to work on writing skills.

The Handwriting Book is a comprehensive resource created by experienced pediatric OTs and PTs.

The Handwriting Book covers everything you need to know about handwriting, guided by development and focused on function. This digital resource is is the ultimate resource for tips, strategies, suggestions, and information to support handwriting development in kids.

The Handwriting Book breaks down the functional skill of handwriting into developmental areas. These include developmental progression of pre-writing strokes, fine motor skills, gross motor development, sensory considerations, and visual perceptual skills. Each section includes strategies and tips to improve these underlying areas.

  • Strategies to address letter and number formation and reversals
  • Ideas for combining handwriting and play
  • Activities to practice handwriting skills at home
  • Tips and strategies for the reluctant writer
  • Tips to improve pencil grip
  • Tips for sizing, spacing, and alignment with overall improved legibility

Click here to grab your copy of The Handwriting Book today.

Colleen Beck, OTR/L has been an occupational therapist since 2000, working in school-based, hand therapy, outpatient peds, EI, and SNF. Colleen created The OT Toolbox to inspire therapists, teachers, and parents with easy and fun tools to help children thrive. Read her story about going from an OT making $3/hour (after paying for kids’ childcare) to a full-time OT resource creator for millions of readers. Want to collaborate? Send an email to contact@theottoolbox.com.

Cursive Writing Order to Teach Cursive Letters

order to teach cursive letters

Did you know there is a specific order to teach cursive letters to promote cursive writing legibility and carryover of cursive handwriting? Occupational therapy providers work with the occupation of handwriting and cursive letters are part of that process. In this post, you’ll learn about cursive writing order to teach letters of the alphabet, including the Handwriting Without Tears letter order for teaching cursive. The order that kids should learn the cursive alphabet, including print letter patterns that are directly transferable to cursive alphabet letters.

order to teach cursive letters

Using a developmental approach to teaching cursive letters supports children and sets them up for success.

order to teach cursive letters


The order that cursive letters are taught is based on development of skills. Just like the order to teach printed letter formation is based on development of pencil control skills, visual motor skills, cursive letter order is also taught developmentally.

This means that letters are grouped into similar pencil strokes, or letter families.

Learning to write the alphabet in cursive, writing one’s name in cursive, and writing words in cursive is something that many kids want to do around the second grade.

It’s around second grade, or 7-8 years of age that fine motor skills develop in such a way that pencil control and graded precision are developed to enable greater in-hand manipulation, and movement through the range of mobility in the thumb and intrinsic muscles within the hand.

This enables pencil movements to become more mobile and fluid, which are pre-requisites for cursive writing skills.

Prior to this skill achievement, handwriting is taught based on pencil strokes, including uppercase letters before lowercase letters because of the developmental aspect of learning letter formations.  

Cursive seems like a “grown up” style of communication that kids see adults or older students using and they try to make swoopy writing on their own.  

Some children can be very motivated to learn to write the alphabet in cursive and use it in their written work.

Cursive writing alphabet and how to teach kids cursive handwriting with correct cursive letter order.


However, one tip for teaching children to write in cursive is to go through the letters in an order that makes sense according to the pencil movements needed to create the letters.

Writing cursive letters in a group of similar pencil strokes is helpful for carryover of pencil control practice and letter formation. Here is more information on teaching groups of similar cursive letters together in a chunk, or cursive letter families.


Once kids have a start on cursive letter formation, they can practice in creative ways like on the window.


Other children who may not be exposed to cursive written work might have their first exposure to cursive in the classroom.  Still other students might be in a public or private classroom where cursive handwriting has been dropped from the curriculum.  These kids may need extra practice at home or might need to learn cursive handwriting from the very beginning.


But where to start when teaching kids (or adults!) the cursive writing alphabet and how to form words in cursive?  Read on for tips and strategies to get started on learning cursive letters.


Cursive Letters Order


We’ve touched on cursive handwriting in previous posts, include a small piece about starting to teach cursive letters.  This strategy will outline the alphabet and the letter order to make learning cursive more easy, based on learning letters in a developmental and progressive order.

RELATED READ: Practice letters in a Cursive Writing Journal.


There are print letter patterns that are directly transferable to cursive letters.


These are cursive letters that are formed similarly to their printed letter counterparts. The muscle movements of the hands that are used to form some printed letters are directly related to the same letters.  For this reason, it’s a good idea to start with these letters when learning the cursive writing alphabet.


The printed letter patterns that make up some letters will transfer directly to cursive, and when formed with a few subskills, cursive letter formation will easily follow (in most cases):

  • Left-to-right strokes
  • Good starting points
  • Direction of movement
  • Consistent stopping points
  • Control of downstrokes
  • Smooth rhythm

Given the subskills noted above, cursive letter formation will lend to more legible letter formation.  Often times, learning correct letter formation and motor practice will help with legibility and ease of cursive writing into a viable form of written communication.

Cursive Letter Order Patterns

If you take a look at cursive letters, you might see a pattern that is similar among the letters. This is part of why we use a cursive pre-writing lines approach when teaching cursive for the first time.

You’ll see pencil and paper activities that support this pencil movement with different pencil strokes:

  • Upswing (the line to start a cursive i or t)
  • Downswing (the line to start a cursive c or a)

Both of these movements can transfer to different starting lines for the other letters. The muscles used to make these lines can then transfer to the other starting movements. Check out our blog post on cursive beginning lines for more information on this concept.

Heling kids to start off with confidence in pencil control to make these beginning strokes supports confidence when learning cursive letters from the start!

When teaching the cursive alphabet, where to begin?

These letters have print patterns that are directly transferable to their cursive letters. This is related to the pencil strokes that are used to form the cursive letters. For this reason, there is a different order to teach cursive lowercase letters compared to their uppercase letter counterpart.

When we consider printed letters, we can directly translate the pencil strokes to some of the cursive letter counterparts. This means that learning the cursive letter form of the letter should be easier based on knowledge of the printed letter’s form.

Having letter recognition skills for printed letters supports the ability to learn cursive letters. For example, there are printed letters which directly translate to the pencil strokes in cursive:

  • t, i, and u and w transfer to their cursive letter counterparts.
  • e and l transfer to their cursive letter counterparts.
  • n, m, p, and h transfer to their cursive letter counterparts.
  • a, c, d, q, and o transfer to their cursive letter counterparts.
  • j and g transfer to their cursive letter counterparts.

This means that the remaining letters are the only ones that need to be taught as a new handwriting motor plan in mind. Those letters include:

  • b, f, k, r, s, v, x, y, and z

We can help learners with this group by calling them cousins or relatives to their printed letter counterpart because they are similar, but different.

Lowercase Cursive Letters

The following letters transfer directly to their cursive letter forms: c, a, d, g, o, q, i, t, u, j, e, l, f, h, p, n, and m.

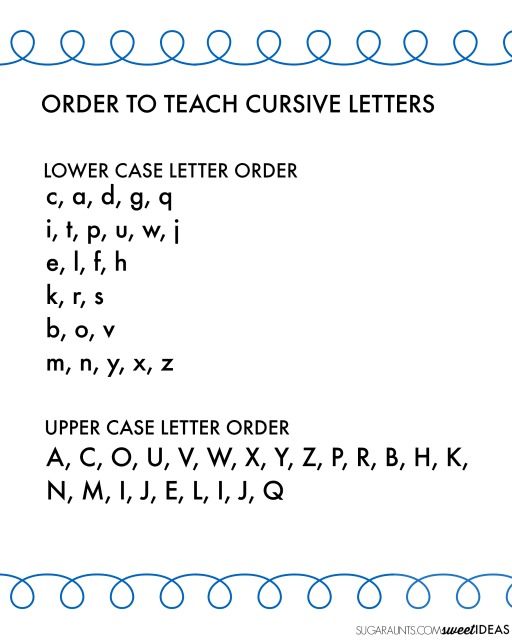
Knowing that there are letters that use similar motor plans as a starting point, it is recommended to follow an order when teaching lowercase cursive letters:

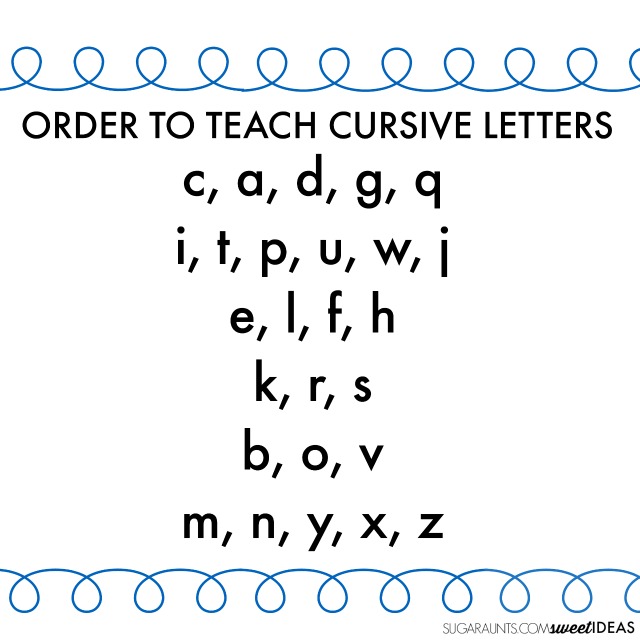
  • c, a, d, g, q – These letters can be considered “wave letters” because of the beginning stroke.
  • i, t, p, u, w, j – These letters can be considered the “tree letters” because of the beginning line to swing up.
    e, l, f, h – These letters can be considered the “loop letters” because of the loop that the pencil makes.
  • k, r, s
  • b, o, v – These letters can be considered the “tow truck letters” because of the ending connection.
  • m, n, y, x, z – These letters can be considered the “bump letters” because of the beginning pencil stroke.

Uppercase cursive letters

Upper case cursive letters should be presented in a specific order as well:

A, C, O, U, V, W, X, Y, Z, P, R, B, H, K, N, M, I, J, E, L, I, J, Q


This letter order uses a combination of research-based strategies and focuses on movement based patterns as well as common letter formations, i.e. the way the letters connect to form words. Read about how to connect cursive letters for specifics.

In general, it’s considered that the baseline connecting letters are taught prior to the middle line connecting letters. This isn’t accurate for the Learning Without Tears program (Handwriting Without Tears cursive letter order) when it comes to letter w which is taught near the beginning, due to it’s direct translation from the printed version of letter w.

This upper case cursive letter order (or cursive capital letters) order teaches upper case letters that are similar to lower case letters first.  Always teach lower case cursive letters before upper case letters.

Print out the Free printable version for the classroom or home.

Cursive writing alphabet and how to teach kids cursive handwriting with correct cursive letter order.

Affiliate links are included below.

WOrk on Cursive Letter Order with these Ideas:

Here, you’ll find More creative ways to work on learning cursive writing:

Cursive Writing Order

Looking for more information on how to teach cursive writing? You’ll love our 31 day series on How to Teach Cursive Writing.  

The Handwriting Book breaks down the functional skill of handwriting into developmental areas. These include developmental progression of pre-writing strokes, fine motor skills, gross motor development, sensory considerations, and visual perceptual skills. Each section includes strategies and tips to improve these underlying areas.

  • Strategies to address letter and number formation and reversals
  • Ideas for combining handwriting and play
  • Activities to practice handwriting skills at home
  • Tips and strategies for the reluctant writer
  • Tips to improve pencil grip
  • Tips for sizing, spacing, and alignment with overall improved legibility

A final note on teaching cursive letters

Sometimes, cursive letters are taught as a writing format for children that struggle with the motor plan to form and use legible printed handwriting. This might be the case for several reasons:

  • The motor plan to form printed letters is choppy and difficult to recall the different pencil strokes for each letter.
  • Cursive letters use a smoother flow to form letters. The continuous hand movements can be easier for some students because it involves fewer stops and starts compared to print writing.
  • The challenge of letter reversals and letter confusion that occurs with dysgraphia can mean that cursive writing may be easier to learn and use than printed handwriting. This is because cursive letters connect with continuous pencil strokes, leading to less letter reversals and other common writing errors associated with dysgraphia.

Just like printed handwriting, cursive letters are one form of written expression however, there are differences when it comes to legibility. Perfect formation and pencil strokes are not always necessary!

Cursive Letters Tips

We have many blog posts here on The OT Toolbox that support cursive letter writing. Explore these activities and tools to teach the cursive alphabet.

Colleen Beck, OTR/L has been an occupational therapist since 2000, working in school-based, hand therapy, outpatient peds, EI, and SNF. Colleen created The OT Toolbox to inspire therapists, teachers, and parents with easy and fun tools to help children thrive. Read her story about going from an OT making $3/hour (after paying for kids’ childcare) to a full-time OT resource creator for millions of readers. Want to collaborate? Send an email to contact@theottoolbox.com.

Pencil Control Worksheets

pencil control worksheets

Part of handwriting legibility is the visual motor skills needed for pencil control and one tool in our toolbox are pencil control worksheets. Pencil control in isolation isn’t always addressed, but actually focusing on the refined pencil strokes and controlled movements of the pencil makes a huge difference in overall legibility. In this blog post, you’ll find many pencil control worksheet ideas and even have the ability to access a few of our favorites.
pencil control worksheets

Pencil Control Worksheets

Pencil control worksheets, or printable PDFs that target specific visual motor skills needed to move the pencil with precision and refined movements are tools that support handwriting.

When we use pencil control worksheets, it’s more than just moving the pencil to make marks.

Pencil skills worksheets can target many aspects of writing with a pencil:

  • Making small lines within a given space
  • Writing a letter on a small space, such as on our code breaker worksheets
  • Tracing over lines (Read here about the benefits of tracing lines)
  • Using precise movements in order to re-trace over letters when forming the alphabet correctly (letters like h, m, n, and r have re-trace where the pencil moves over an already formed pencil line).
  • Erasing the pencil marks
  • Writing with an appropriate and legible pencil pressure
  • Fluid and coordinated pencil strokes

Using worksheets to target specific skills like practicing letter formation isn’t always ideal. The occupational therapy practitioners may actually sway away from rote handwriting practice.

We’ve all seen it: A child is copying letters on a worksheet and the letters progressively get worse as they go across the page…or the margin creeps in as the child writes down the paper.

That is not to say that all letter formation worksheets are bad! In fact, we LOVE to target specific skills using letter writing practice on printable PDFs.

The OT trick is to facilitate the underlying skills, special themes that make the worksheet fun and engaging, and even using interactive worksheets that support skills in games or play-based learning.

The multisensory aspect is what turns an ordinary writing worksheet into a therapy tool!

All of these reasons are why using pencil control worksheets are great ways to target specific skills leading to handwriting legibility and functional writing skills.
Below, you’ll find ideas to make DIY pencil control worksheets, and then some of our favorite pencil control sheets. You can also grab a printable pencil control worksheets pdf at the very bottom of the page.

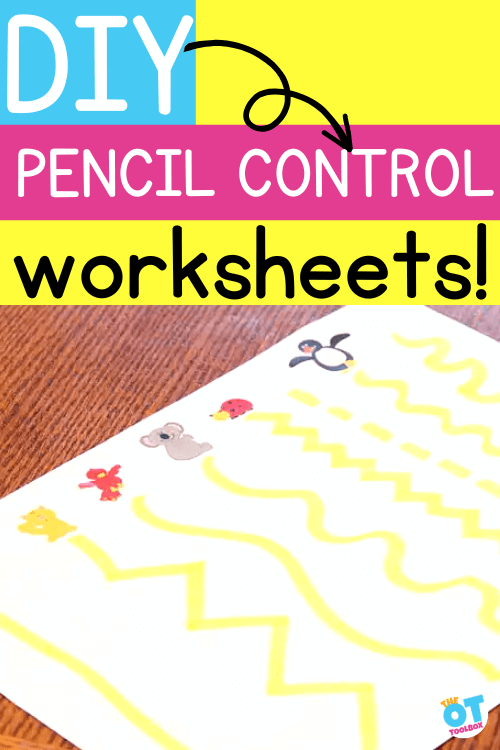
DIY pencil control worksheets

DIY Pencil Control Worksheets

The ideas below are some of our favorite ways to create your own DIY pencil control worksheets.

Does your school-aged child have difficulty with line awareness, pencil control, or letter formation?  Is your preschooler just learning to control the pencil while making straight lines, the diagonal lines of an “X” or the angled, connecting lines of shapes like a square, rectangle, or triangle? Do you know a child who is learning to control the “wobble” of the pencil while making a circle that connects the start to the finish?

All of these are pencil control skills!

It is easy to make fun worksheets that apply to your child’s needs/age-appropriate level/skills…and interests!

To make your own worksheets, you need just a few items:

  • plain paper
  • lined paper
  • graph paper
  • marker or highlighter
  • markers
  • pencil
  • stickers
  • dice

You don’t need to use all of these items…the activities below can be created over the course of several days or weeks. Pick and choose an activity and then go from there!

 
We shared one of our favorite pencil control exercises previously.
 
Use that idea along with these other worksheet ideas for more visual motor and fine motor work.
 
These are some easy handwriting exercises that can be done at home, or in the classroom. However, going from personal experience, the school-based OT doesn’t always have a ton of supplies on them. Depending on the setting and schedule, you may only have a marker, a pencil, and some paper in your possession. That’s where these DIY pencil and paper worksheets come into play.


Pencil control worksheet with stickers
 

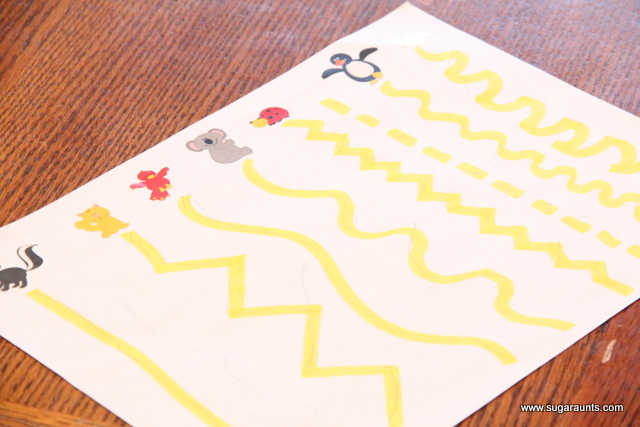
DIY Pencil Control Sheet with Stickers

 
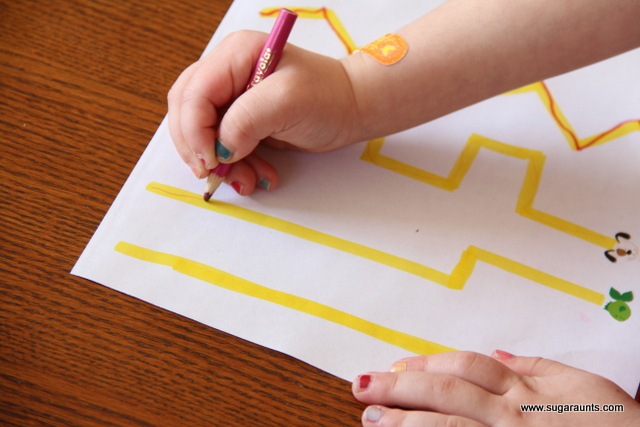
This worksheet activity is great because it targets pencil skills with a motivation factor. Using fun stickers makes it engaging for the user. Plus, you can factor in the benefits of playing with stickers by asking the child to place the sticker at one end of the lines.
 
Try to find some stickers that work with your therapy theme of the week or just are fun and motivating for the child’s interests.
 
Don’t have stickers? It’s not a big deal. Draw a small smiley face, simple car for the child that loves vehicles, or even colors of the rainbow. You can easily factor in so many personal interests to make this activity motivating with a simple drawing.
 
To make this pencil control activity:
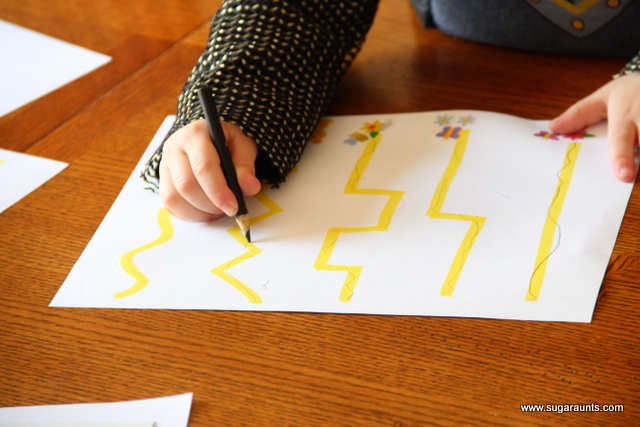
  1. Use a highlighter to make straight, angled, and curvy lines going across the page…or add different twists and turns for your older child to trace along. 
  2. Grade the activity with the line width. Use thicker lines for a new writer and the school-aged child can work on very thin lines.
  3. Add a sticker at one end of the line. You can also add another sticker at the other end of the line if you like. 
 
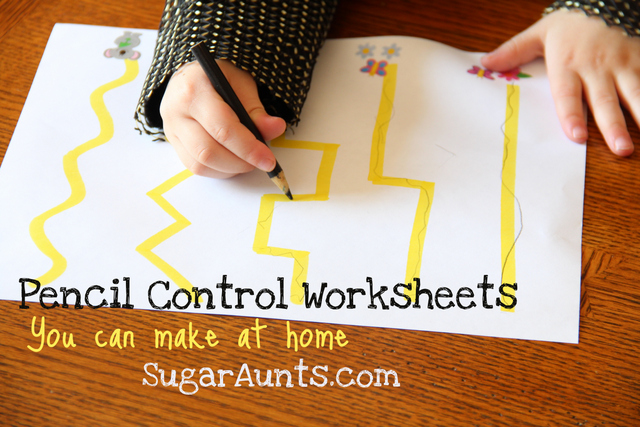
Ask the child to keep the pencil lines inside of the yellow guide.  Fun stickers at the end of the lines always help 🙂
 
 
DIY pencil control worksheet


Graded Pencil Control Activity

This handwriting activity can be “graded” (adjusted to start out very easy for the child and then changed just slightly to make it more and more challenging).  Grading an activity is helpful for the learner because it allows the child to feel success and gain confidence during a task, but also builds success with more difficult  levels.
 
 Ideas to grade these pencil worksheets:
 
  • Consider orientation: By changing the direction of the lines, you can target different skills.
  • Lines that start at the top of the page and go down toward the child’s body are easiest. Start there. Consider placing this style of worksheet activity on a slant board or vertical surface for strengthening, support, or upper body positioning. 
  • Lines that go from left to right across the page cross the midline. This is a need for many children and can also target visual scanning skills.
  • Consider using all curved lines or all angled lines, depending on the needs of the individual.
((I love Little Guy’s knight costume sleeve in this picture.  He rocks the knight costume at lease once a day  haha!))


DIY Pencil Control Sheets- Shapes

 
For the preschool child who is just learning to control the writing utensil, requiring them to write letters or write their name is beyond the scope of their development. We cover this in our resource on what happens when preschoolers are asked to write.
 
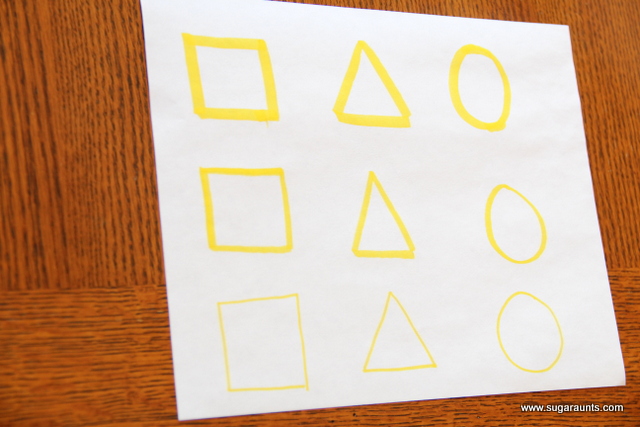
The pre-writing skills preschoolers actually need involve lines, shapes, coloring, and of course, fine motor play! We can target these skills using a pencil control sheet on shapes.
 
Think of it this way: To make a letter “A”, a child needs to create diagonal lines, which are two separate pencil strokes. The pencil needs to be placed at the correct point as the second line is created. The diagonal lines are further down the line-up, developmentally. Then, the middle line needs to connect two diagonal lines. For the child with an “A” in their name, asking them to make these marks before typical developmentally ready, you may end up with curved lines, shaky pencil marks, and misaligned connecting lines.
 
Practicing these skills in preschool over and over again leads to a motor plan for a poor letter formation.
 
That’s where pre-writing lines pencil control tasks are key.
 
We can foster the line markings of letters by making shapes and lines that ARE developmentally appropriate.
 
Pre-writing skills that can be targeted with pencil control shapes include: 
  • Straight lines
  • Starting the pencil at a certain point
  • Stopping the pencil at a certain point
  • Diagonal lines of an “X”
  • The angled, connecting lines of shapes like a square, rectangle, or triangle (making a sharp corner)
  • Smooth pencil strokes to create a curved line of a circle
  • Connecting shapes completely to close the shape
  • Hand strength and endurance to color in the shapes
  • Lifting the pencil and placing it on a specific point (Like adding a triangle to the top of a square to create a house, which is a skill needed to form some letters like adding the middle line to an “A”)
 
 
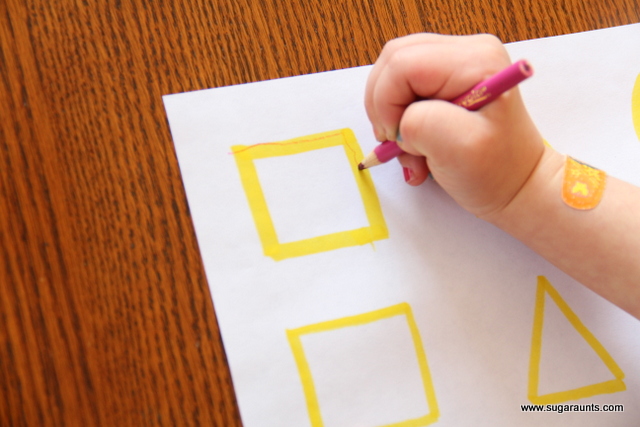
This DIY worksheet is similar to the one described above. Simply draw shapes using a marker. Create thicker or thinner lines. Then ask the child to trace over the lines.
 
You can then ask the child to color in the shapes using a crayon. We explained the skills behind this task in our pencil control activity which used colored pencils to fill in circles. 


DIY Pencil Control WORKSHEET with Line Awareness

The next worksheet idea focuses on spatial awareness skills in handwriting. This is also a pencil control technique.
 
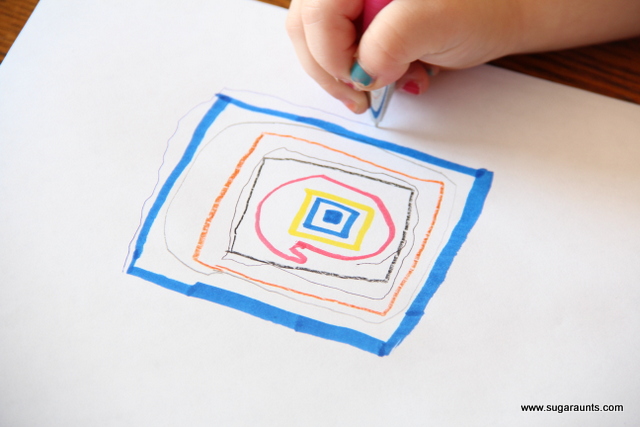
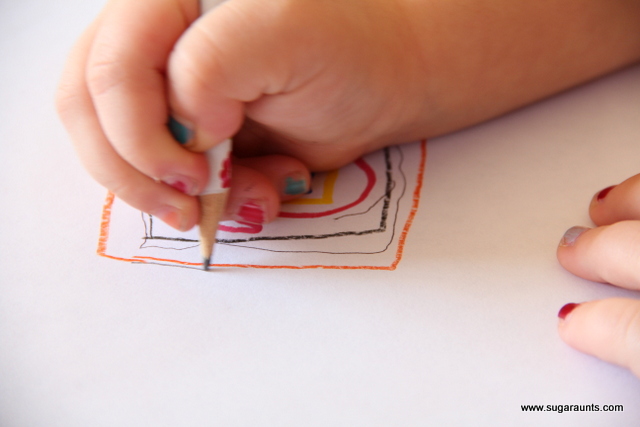
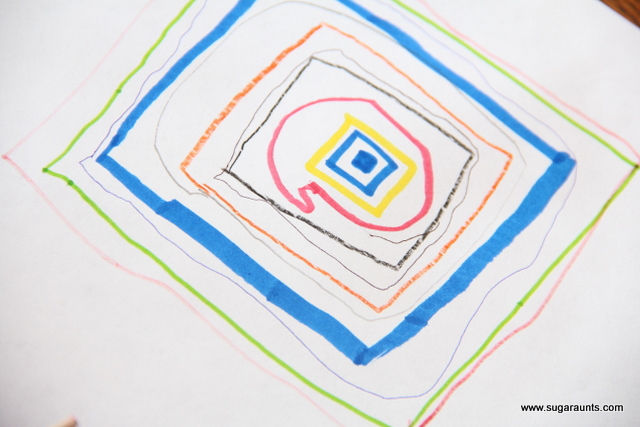
  1. Use a blank piece of paper and using a marker, draw a shape such as a square.
  2. Draw a square around it. 
  3. Take turns with your child to make larger and larger shapes.

This activity is an easy way to work on pencil control skills using pre-writing shapes, but also focuses on the sharp angle of lines as they turn a corner. 

When the child makes the shape around your shape, they can work on pencil control for evenly spaced pencil strokes.

 
It’s a lot like doodling you did in your notebooks or while talking on the phone, right?
 
 
Taking turns with your little handwriting student helps them to see an accurate shape right next to the lines that they are drawing…with sharp edges and straight lines.


DIce Pencil Control Worksheet

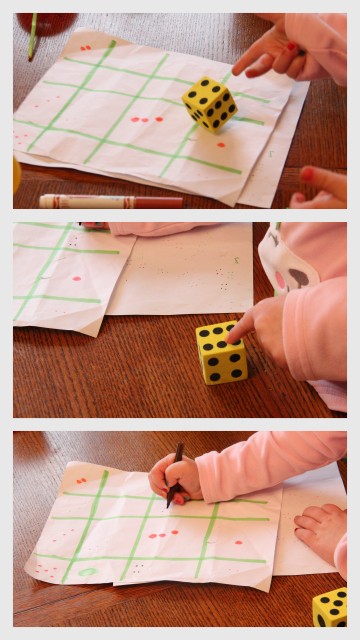
Big Sister LOVED doing this one.  She filled out the whole sheet and had so much fun!  She would roll the dice, count the dots, and draw the dots (in the correct arrangement) in the squares on the page.
 
To create this DIY worksheet, you’ll need:
  • Blank paper
  • Marker
  • Dice
  • Pencil, crayon, or marker

You can work on so many skills with this activity. Counting, Copying, and Drawing with accurate spacing all work on her visual perceptual skills and spatial awareness.  

Set this activity up by:

  1. Draw lines to create a large grid on the paper. 
  2. Roll a dice. We used a large dice but a regular game dice would work too.
  3. Count the dots on the dice using the point of the pencil. Touch each dot. (A GREAT activity for targeting graded precision skills with the pencil)
  4. Then draw the dots on the paper in one of the spaces. Draw the dots exactly as they are on the dice.
 
These skills are essential for forming letters on lines, placing letters close enough to others in a word, and when copying lists of words. It’s a great beginner activity for near point copying skills.


Make early handwriting fun and your preschooler will have success…and love it!


Printable Pencil Control Worksheets 

Printable pencil control PDFs are an easy way to work on skills in therapy. You can print off a handful of the worksheets for your therapy caseload and use them in a variety of ways to target different OT goals and by grading the activities.

In The OT Toolbox Membership Club, we have over 130 printable pencil control worksheets (along with a thousand+ other skill-building activities and PDFs!). Membership Club members can log in and then head to our Pencil Control Skill to access them all.

Some of our favorites include:

  • Pencil control mazes
  • Dot games
  • Simple line printables
  • Eraser skill PDFs
  • Pencil control roads
  • Mazes
  • Connect the dot PDFs
  • Pre-writing pencil mazes
  • Pencil shading worksheets
  • Pencil line drawing activities like adding textures, dot features, or symmetry activities
  • Word search printables
  • Connect the matching items
  • So many more!
free pencil control worksheets

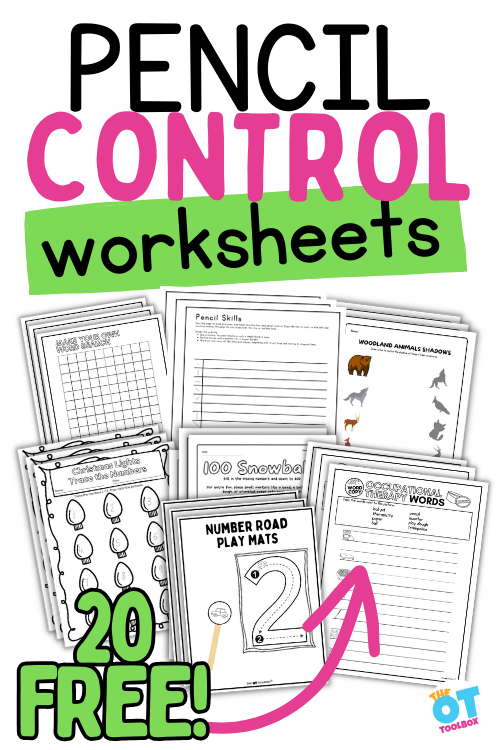
20 Free Pencil Control Worksheets

To get some printable pencil control worksheets, head to these blog posts. Each one addresses various aspects of handwriting skills, but in them, you can get a free printable pencil control PDF.

To get these printable worksheets, simply go to the bottom of the blog post and enter your email address into the form. (Each printable is also found in Level 1 of our membership, where are all “freebies” can be found. Level 2 members also get this benefit as well).

  1. Pencil Control Exercise– Copy pre-writing lines and shapes in a given space, between writing lines
  2. OT Coloring Pages– target hand strength and coloring in the lines
  3. Copy OT Words onto lines
  4. Mitten I Spy and Writing Pages– Color the shapes with a colored pencil and then write the words on the lines
  5. Number Formation Worksheet– Trace numbers on the shaded numbers
  6. Winter Color By Number– Color in the given space with controlled pencil/crayon motions
  7. New Years Maze– Keep your pencil in the path of the lines
  8. Number Road Playmats– Great for pencil control when making numbers
  9. Blank Word Search– Place letters inside the squares of the wordsearch grid
  10. 100 Snowballs Worksheet– Place numbers inside the circles
  11. Snowball Letter Practice– Trace letters on snowballs
  12. Holiday Lights Letter Tracing worksheet
  13. Hannukah Word Scramble– write the letters in the boxes
  14. Christmas Word Match– write the letters in the boxes
  15. Arctic Animal Word Search– circle single letters or the words to work on pencil skills
  16. Shadow Matching Worksheet– Connect the matching animals with pencil lines
  17. Dinosaur Worksheet– Connect the matching dinos with lines
  18. Owl Directed Drawing– Use pencil lines to create a simple owl
  19. Cotton Swab Art PDF– Break a cotton swab in half and use it to dot the lines
  20. Fine Motor Writing Sheets– Place play dough or small objects in the dots…or mark each dot with an X to fill the picture. Then write on the lines

For more resources, check out our library of letter formation worksheets. These printables are free and can be used to target a variety of skills.

The OT Toolbox membership club

Get all of the items listed above when you join The OT Toolbox Member’s Club! Free printables are available in our Level 1 membership and the freebies PLUS 1500+ more printable tools are available in our Level 2 membership!

Join The OT Toolbox Member’s Club today!

Colleen Beck, OTR/L has been an occupational therapist since 2000, working in school-based, hand therapy, outpatient peds, EI, and SNF. Colleen created The OT Toolbox to inspire therapists, teachers, and parents with easy and fun tools to help children thrive. Read her story about going from an OT making $3/hour (after paying for kids’ childcare) to a full-time OT resource creator for millions of readers. Want to collaborate? Send an email to contact@theottoolbox.com.

Back to School Writing Prompts

Back to school writing prompts

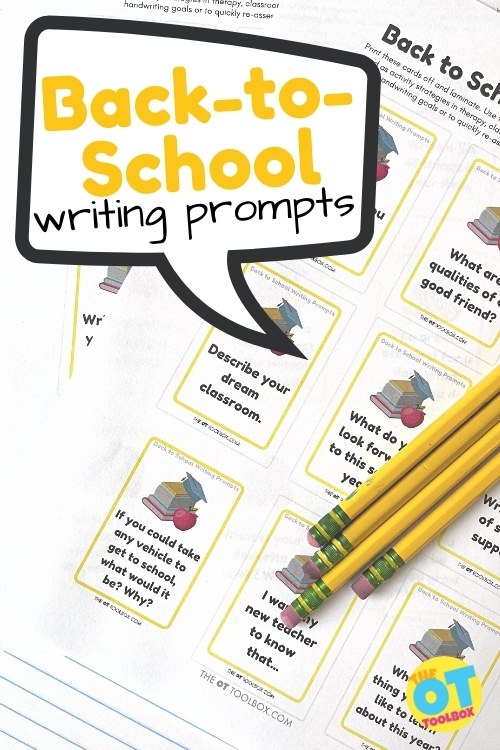
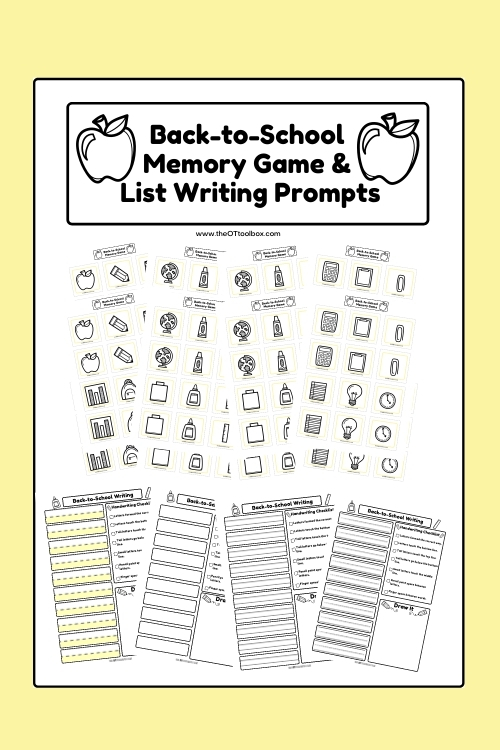
Looking for first day of school writing prompts? The free back to school writing prompts in this blog post is a great addition to your back-to-school occupational therapy ideas. Grab the printables below and let’s head into the new school year with tools to support students!

First Day of School Writing Prompts

It’s that time of year! Getting back into the classroom means switching from summer fun mode to handwriting, reading, writing, and learning. These Back to School Writing Prompts are a fun way to get to know new students and get those pencils moving.

Handwriting can be an overwhelming topic to dive into at the start of the school year, so let’s make it easy and low-stress. Print off these free back to school writing ideas and start the school year off right (or write)!

Free back to school writing prompts for first day of school writing ideas

Back to School Writing Prompts

Sometimes you need some back to school activities and specifically, ideas for back to school writing that are “no brainer” for the student. In other words, kids can struggle with getting back into routines of the classroom. They might not have picked up a pencil all summer long, in some cases! That’s where these back to school writing activities come into play.

There are several ways you can use these free writing prompts with kids this school year:

First day of school writing Prompts

The first day of school is all about learning the classroom, setting up expectations, getting to know the building, the schedule, and getting to know the teacher and peers. But what about easing into handwriting and writing tasks?

Setting up a first day of school writing activity that is low-key, fun, and all about the student is the way to go. Use these first day of school writing prompts to get kids back into the routine of a daily writing prompt.

First day of school writing prompts may include:

  • Favorite things
  • All about me info (Use these All About Me PDFs)
  • Things done over the summer months
  • Favorite vacation
  • Goals for the new school year

Another resource for first day of school writing are these middle school journal prompts for older kids.

Writing prompt of the day

Continuing with the thought that returning to school after a summer break means a few days of getting used to classroom rules and schedules, you can use these writing cards for the first week or more.

Print off the cards and randomly select a card each day of the first week of school. This is a great way to get to know students and incorporate handwriting into each day of the first week of school.

Give the student a choice

Handwriting can be like pulling teeth for some kids. It’s just hard. Whether their hand hurts when they hold the pencil, or handwriting is hard to read, it can be a real challenge for some kids. Offering a choice can give the student some say in the matter. Allow them to select a card randomly and then they can write out their response to the writing prompt. Or, give them a choice between two writing prompts.

Play a writing game

Use these printable writing prompts in a game! Print off the writing prompt cards and then allow the students to pick one card. They can use that card as their back to school writing topic. It’s a great way to get to know the students in the classroom or on your therapy caseload while getting an idea of their current handwriting levels and abilities.

So, how will you use these back to school writing prompts?

Print off these back to school writing prompts for a writing prompt of the day the first week of school.

To grab your copy of this free resource, just enter your email address into the form below. Print them off and get ready to start the school year off on the right foot!

FREE Back-to-School Writing Prompts

    We respect your privacy. Unsubscribe at anytime.

    More Back to School Writing ideas

    Add these writing prompt cards to your back-to-school line up of activities:

    First, be sure to check out our back to school sensory activities for meeting self-regulation needs in the classroom.

    Colleen Beck, OTR/L has been an occupational therapist since 2000, working in school-based, hand therapy, outpatient peds, EI, and SNF. Colleen created The OT Toolbox to inspire therapists, teachers, and parents with easy and fun tools to help children thrive. Read her story about going from an OT making $3/hour (after paying for kids’ childcare) to a full-time OT resource creator for millions of readers. Want to collaborate? Send an email to contact@theottoolbox.com.

    Letter Learning with Bottle Caps

    bottle cap letters

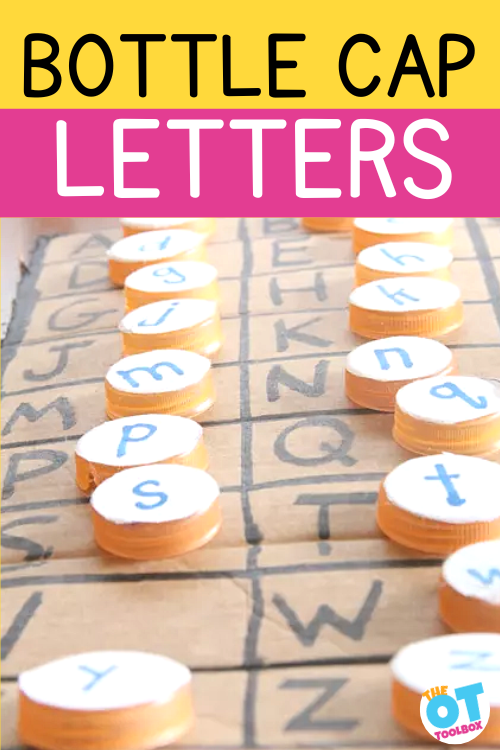
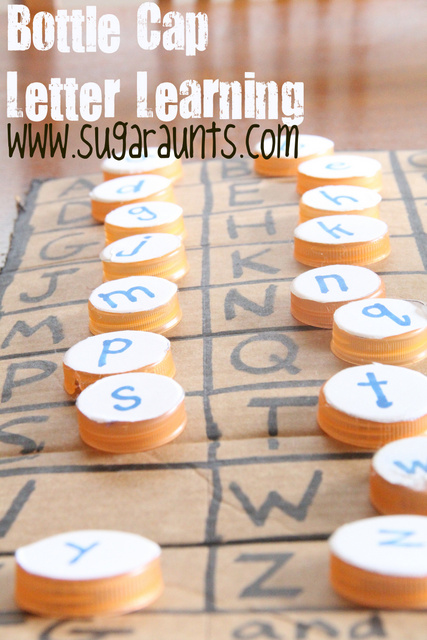
    In this older blog post, we shared how to make your own bottle cap letters for multisensory learning and fine motor play. Creating DIY instructional materials can be both educational and fun. One creative idea is to make bottle cap alphabet letters.

    Bottle Cap Letters

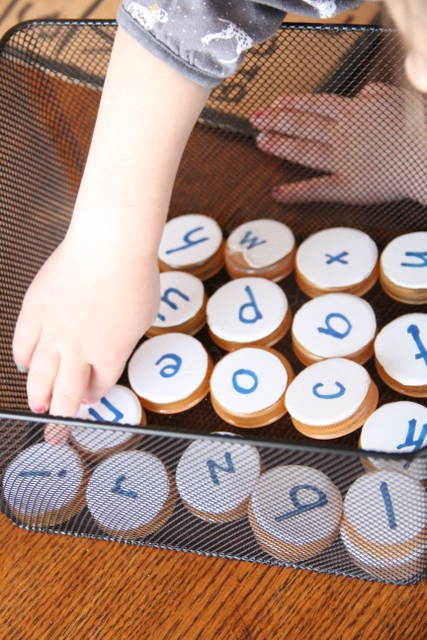
    By collecting various bottle caps and adding individual letters to them, you can create a unique set of bottle cap letters. This homemade alphabet set can be used for matching big and small letters, helping children learn the alphabet in an engaging way. Kids can enjoy the tactile experience of sorting and matching the big and small bottle cap letters, making it a hands-on learning activity that enhances their letter recognition skills!


    This Letter Learning game was something I made for Big Sister a couple of years ago.  We have played with the letter bottle caps so many times and in a ton of ways.


    How to make bottle cap letters

    You’ll need just a few materials:

    • 26 bottle caps (one for each letter of the alphabet)
    • Label paper
    • Marker
    • Cardboard for a play mat
     
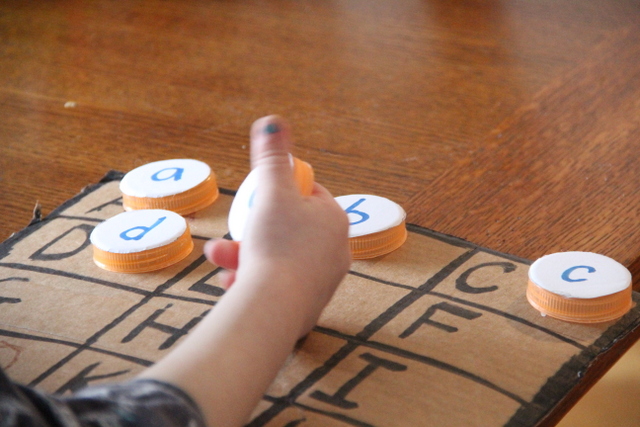
    The cardboard has upper case letters and the bottle caps are used to match the letters. 
     
    It doesn’t matter what size bottle caps you use because you cut the label paper to fit the caps. If you use a lot of milk in your home, or have access to a bunch of bottle caps in the same size, use those.
     
    In our case, we had a case or two of Gatorade bottles and used those bottle caps to make our letters.
     
     
    1. I used a sheet of label paper to make the lower case letters.
    2. Trace a bunch of circles in the correct size.
    3. Cut out the circles.
    4. Write the letters.
    5. Stick them to the bottle caps.  Easy!


    How to use alphabet bottle caps

    Our homemade bottle cap letters are a great DIY instructional material to use in learning and play. 
     
    • We’ve also played with the bottle caps in play dough,
    • Use them to spell names and words.
    • Move the bottle cap alphabet to label objects with it’s starting letter.
    • Work on learning which direction the “p”, “b”, and “d” should go. This is a great hands-on activity to target letter reversals!
    • They are so great to manipulate and play with in a sensory bin filled with corn, too.
    • Or, pair the letter bottle caps with our alphabet exercises to target fine motor and gross motor skills. 
     
    How else can we play with these bottle caps??
     
    bottle cap letters


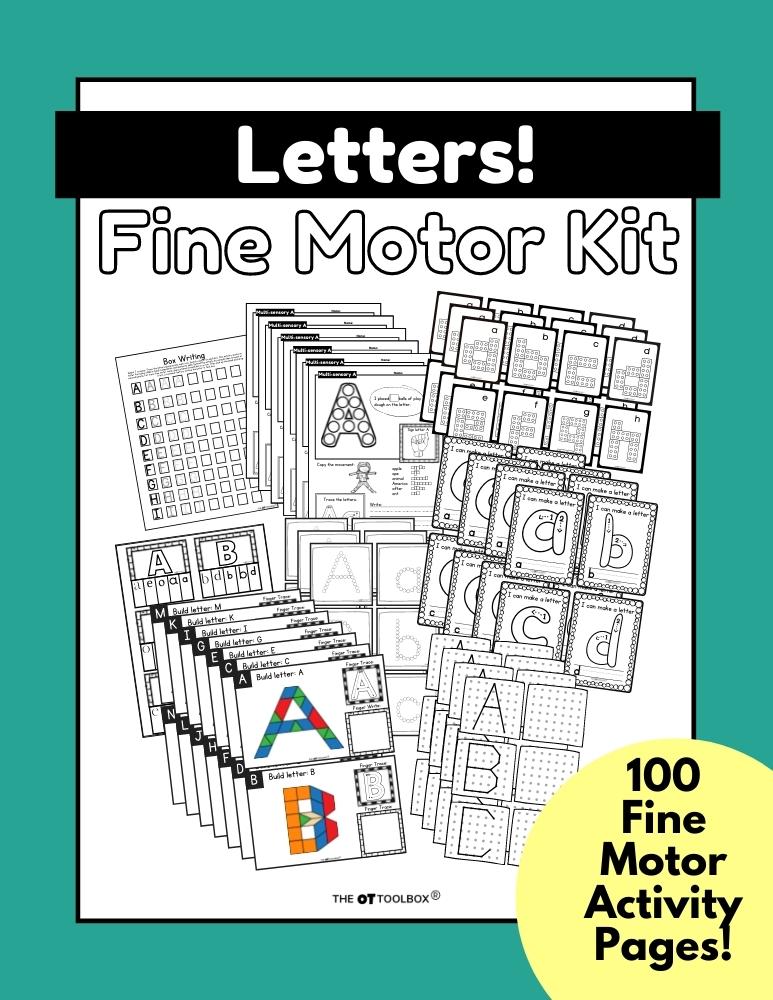
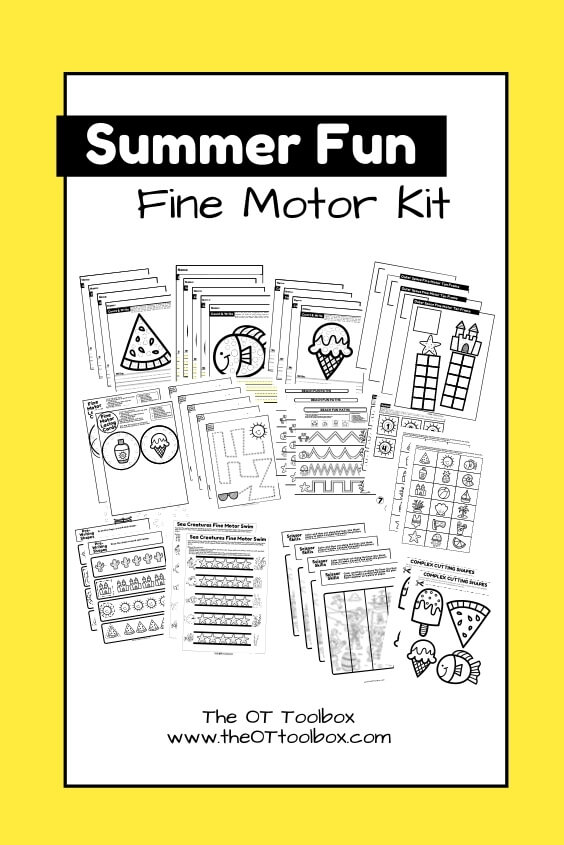
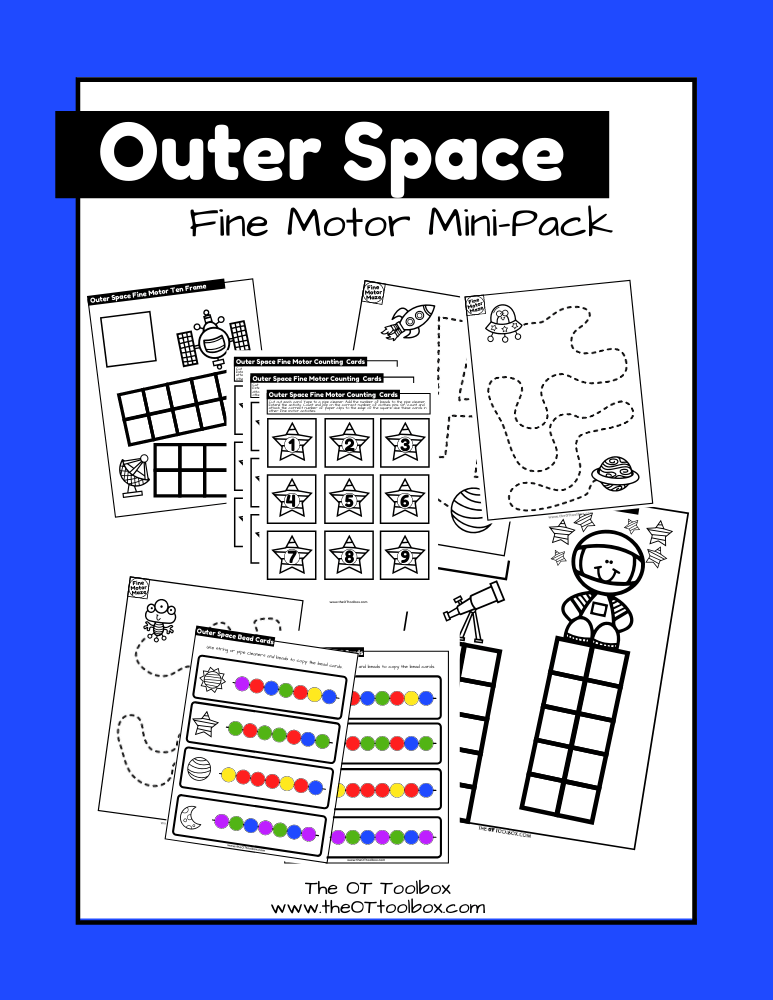
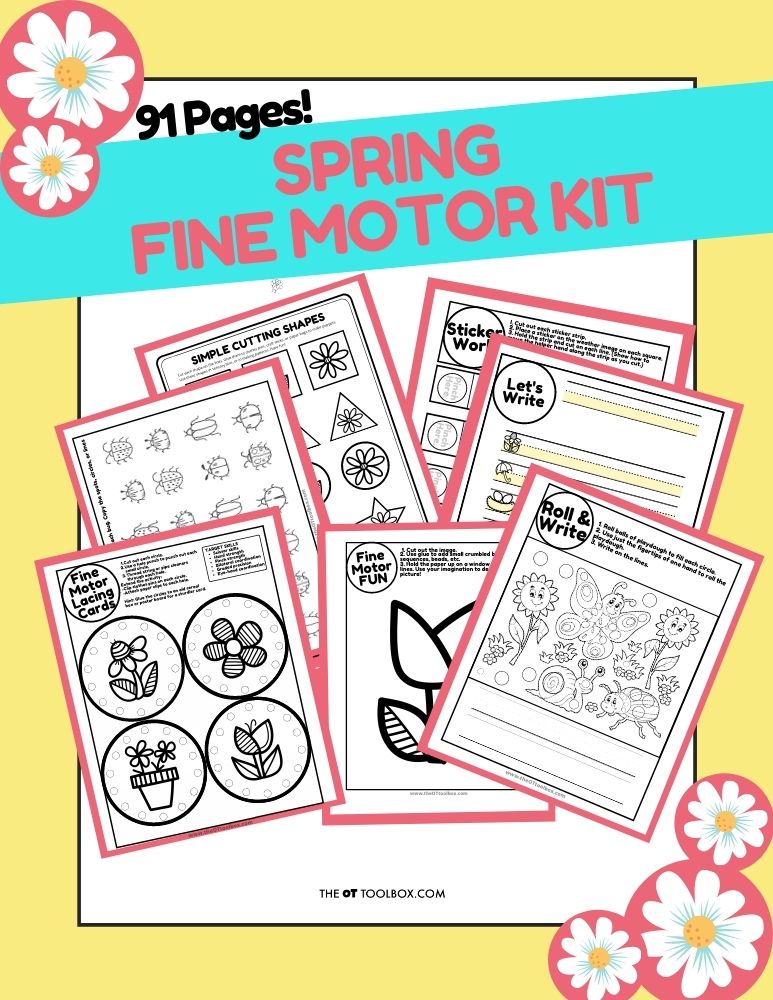
    Working on fine motor skills, visual perception, visual motor skills, sensory tolerance, handwriting, or scissor skills? Our Fine Motor Kits cover all of these areas and more.

    Check out the seasonal Fine Motor Kits that kids love:

    Or, grab one of our themed Fine Motor Kits to target skills with fun themes:

    Want access to all of these kits…and more being added each month? Join The OT Toolbox Member’s Club!

    Colleen Beck, OTR/L has been an occupational therapist since 2000, working in school-based, hand therapy, outpatient peds, EI, and SNF. Colleen created The OT Toolbox to inspire therapists, teachers, and parents with easy and fun tools to help children thrive. Read her story about going from an OT making $3/hour (after paying for kids’ childcare) to a full-time OT resource creator for millions of readers. Want to collaborate? Send an email to contact@theottoolbox.com.

    Writing Trays for Handwriting

    sand writing tray

    Writing trays are a fantastic way to help kids work on handwriting, letter formation, and pre-writing skills.  There are so many benefits to a sand tray (or other sensory writing materials) in helping with letter formation and handwriting. There is a reason that writing trays are a popular way to encourage fine motor skills and an introduction to handwriting; They use a tactile sensory strategy to encourage movement in learning in a multi-sensory way.  Writing Trays make letter formation fun and meaningful in a play-based manner.


    Try this easy rice writing tray for a simple sensory writing experience.

    Writing trays are sensory activities to teach handwriting

    What is a writing tray?

    I’ve used writing trays in my occupational therapy interventions and with my own kids for years. Writing trays are such a powerful tool to add a multi-sensory component and moveemnt to learning to write.

    Writing trays are a dry or wet sensory material in a low tray or bin type of container. Children can use their finger or a tool such as a pencil, paint brush, or other item to draw, write letters, or form numbers into the sensory material.

    Writing Trays are a creative way to help kids learn to write letters, numbers, shapes, and pre-writing strokes.  There are a ton of different ways that writing trays can be set up and used in letter formation. Essentially, a writing tray uses a low container (or TRAY) and a medium that can be moved and shifted for writing.

    Sensory writing trays can contain sensory fillers of any type. If you are able to move the material in a way that letters can be drawn in the tray, then the sensory writing tray is a success. With a sensory writing tray, children can write letters independently or copy letters from a visual letter card.

    You can find them used in schools, clinics, preschools, early learning centers, and homeschool dinging rooms.  

    Writing trays are one tool to support development of Near point copy skills skills.

    Writing tray sensory filler ideas for handwriting

    Writing Tray Sensory Filler Material

    Affiliate links are included in this post.

    What is in a Writing Tray? (Writing Tray Fillers)

    Writing Trays are filled with a filler that us manipulated and shifted so that letters or writing lines are visible.  Some ideas for filling a writing tray include the sensory materials listed below.

    Sand
    Colored Sand
    Rice
    Dyed Rice
    Salt
    Dyed Rice
    Play Dough
    Other Doughs
    Sugar
    Flour
    Cornmeal
    Slime (Check out the fun we had with slime in a writing tray!)
    Spices
    Crushed Chalk


    While sometimes, a child can use their finger to form the lines in their writing tray, a writing tool is typically recommended. (More on that below.)
    Use writing trays for handwriting and letter formation

    Sensory Writing Tray Benefits

    Kids can use writing trays to practice letter formation, or pencil control and stroke sequence in writing letters.  Typically, they will be provided with a visual cue or cue card for copying the letters/numbers/shapes.  Other times, kids can form the letter/number/shape independently when prompted to make a specific letter. This is a great way to work on visual memory and independent letter formation.
     
    Be sure to verbally prompt children to form letters or build letters with correct stroke sequence.  This is essential for carryover of accuracy with letter formation in handwriting.  Otherwise, the child is simply playing in the sensory tray and not effectively using the writing tray as a tool for improved handwriting.  Encouraging the child who is learning pre-writing strokes and beginning letter formation can use a writing tray as a base for forming letters independently. Try using visual and verbal cues to promote correct letter construction.
     
    A few more must-dos when using a writing tray for addressing letter formation:
    • Make sure letters are not formed in parts.  In other words, don’t allow kids to make a circle and then a line to form an “a”. 
    • Make sure letters are formed from top to bottom. 
    • Realize that the motor plan to form letters with your finger is different than the motor plan to form letters with a pencil or other pencil-like writing tool.

    The nice thing about writing trays is that they are very versatile. Students of all ages can use writing trays to work on different levels of handwriting. Some ways to work on handwriting include:

    • Copying pre-writing lines
    • Copying shapes 
    • Letter identification
    • Uppercase letter formation
    • Lowercase letter formation
    • Letter copying
    • Letter writing from memory
    • Cursive letter formation
    • Cursive letter writing from memory
    • Word copying
    • Sight word writing
    • Spelling word writing
    Writing trays for handwriting, letter formation, and fine motor skills.


    Fine Motor Skills and Writing Trays

    A writing tray can be an effective tool in boosting fine motor skills.  Kids can use their finger to form lines and letters while strengthening finger isolation and separation of the two sides of the hand, including an opportunity for the ulnar side fingers to tuck into the palm for a more effective pencil grasp when writing.
     
    Children can also use a tool to form letters in a writing tray.  This can be an opportunity to develop pencil grasp.  However.  There are a few items that should be mentioned about using a writing tray to address pencil grasp and appropriate motor plan for letter formation.
     
    Writing Trays are a common tool.  But if you just place a writing tray in front of a child, you will likely see an inefficient writing activity.  You will probably see most kids forming letters with an awkward grasp on the writing tool, a flexed and deviated wrist, an abducted shoulder, and generally ineffective positioning.  


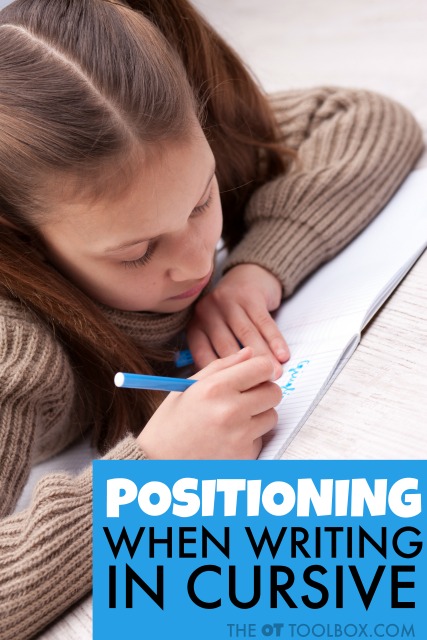
    Positioning absolutely carries over to letter formation and handwriting.
     
    A writing tray can be used to address pencil grasp and handwriting needs.  However, it is essential to use the tray in a proper manner.  There are a few ways to do this:
    • Place the writing tray on a slight slant. Try using a DIY slant board.
    • Use a low edged tray.
    • Use verbal, physical, and visual cues for appropriate positioning. 
    • Position the writing tool in your child’s hand with an appropriate tripod or modified tripod grasp.
    • Show the child how to hold the tool at the end of the tool as if they were holding a pencil.
    Once you’ve got your writing tray set up and positioning taken care of, it’s on to the fun stuff…making a writing tray!


    How to make a Writing Tray

    Making a writing tray to gain benefits of teaching sensory handwriting is easy. You can use materials found around the home. The options are limitless when it comes to writing tray combinations! You can create a writing tray in any theme or to meet any need. You’ll need just a few items: a container, a filler, a tool, and letter cards.

    Writing Tray Ideas

    First, you’ll need a low tray, basket, bin, or other container. We’ve used a variety of containers in our sensory writing trays. You’ll want a container that will hold the sensory writing material within its edges. In some cases, you can even scatter the sensory material on a flat surface like a table or a plastic table cloth on the floor. For example, we used dyed rice right on the kiddie picnic table for a pre-writing and hand strengthening activity.

    Kids will be using a tool or their hands to write letters and the sensory material can scatter. Some specific ideas include:

    • Kitchen baking trays (jelly roll pan or cookie sheet with edges)
    • Food storage containers
    • Melissa and Doug wooden puzzle boxes
    • Cardboard boxes cut low on the sides
    • 9×11 cake pan
    • Shirt box
    • Tray
    • Low basket

    Writing Tray Tools

    Next, you’ll need a tool to use to write the letters. This can be items found in the home as well.  Some writing tray tools include:

    • Finger
    • Eraser end of a pencil
    • Paint brush
    • Feather
    • Straw
    • Pointer stick
    • Stick from a tree
    • Craft stick
    • Chopsticks
    • Toothpick (Incorporate our toothpick holder activity to further fine motor skills!)
    • Craft pom pom attached to a clothes pin

    Writing Tray Letter Cards

    Next, an important part of a writing tray is the letter model. As mentioned above, writing trays are great for copying pre-writing lines, shapes, letters, numbers, and words. 

    Cards can be used as a visual model for forming letters or words. Some cards include direction arrows. Others might include a sight word or spelling word for the child to copy. These cards can be positioned in different positions to address different needs. 

    • Position the letter cards right in the tray for near-point copying.
    • Position the writing tray cards in a vertical position near the writing tray to challenge vision shift. 
    • Hang the writing cards on a wall for far point copying to work on visual shift, visual attention, visual memory, and copying from a distance. 

    Writing Tray Fillers

    You’ll also need a sensory material to act as a filler. This is the material that the child will actually “write” in. When we say “write”, they are using the tool to form letters as the sensory filler moves in the tray. They will not actually write a letter with a pencil or other marking device. Sensory filler material can be as creative as you let it. Some writing tray fillers include these materials:

    Click each link for ideas on how to set up these creative writing trays.


    Dyed Rice


    As you can see, the ideas are limitless when it comes to sensory handwriting! Use a theme or materials that meet the needs of your child or client and are motivating and fun!
     

    More sensory Handwriting Activities

    Sensory Writing Bag

    Sensory Handwriting Camp at Home

    Teach letters with sensory textures

    Pencil pressure activities


    Colleen Beck, OTR/L has been an occupational therapist since 2000, working in school-based, hand therapy, outpatient peds, EI, and SNF. Colleen created The OT Toolbox to inspire therapists, teachers, and parents with easy and fun tools to help children thrive. Read her story about going from an OT making $3/hour (after paying for kids’ childcare) to a full-time OT resource creator for millions of readers. Want to collaborate? Send an email to contact@theottoolbox.com.

    Sand Writing Tray

    One very easy way to create a sand writing tray is to use a child’s picnic table placed either outside in a sandbox or over a tarp (or outdoor space where it’s ok that sand goes into the ground and lawn).

    We loved using our kid’s picnic table in this way to make a sand writing tray.

    sand writing tray

    For this sand writing tray, we made it super simple and just dumped a thin layer of sand onto our (Amazon link) Little Tykes picnic table. Then, I invited the kids to all sit down and draw in the sand using their fingertips. This is a great exercise in finger isolation.

    sand writing tray

    Practicing letters in a sensory surface like writing and drawing in sand on a picnic table surface is a motivating and fun activity for kids because it’s not something they typically do.

    Kids learn new skills well with a multisensory learning experience and a sand writing tray is a great, inexpensive way to do just that.

    To encourage vocabulary and verbal expression, tell stories on the table surface and ask questions that extend the story further. Then, while practicing lines and drawing shapes and figures, gently smooth the sand with the palm of your hand and start over again!

    sand writing tray for preschool

    Preschoolers can practice pre-handwriting lines, while older kids can form letters and numbers in the sand. They can also copy and trace letters to improve their penmanship skills.

    DIY Light Box for Tracing

    DIY light table for tracing

    This DIY light box for tracing is an easy light box we put together in minutes. All you need is an under the bed storage container and a string of lights to make a tracing tool that kids will love. There are benefits to tracing and this tool is a fun way to build fine motor skills and visual motor skills as a visual motor skill leading to better handwriting.

    DIY light box for tracing

    A light box is a fun activity, and one you see in preschool classrooms, as it’s intended for hands-on play and exploring the senses. But did you know there are many benefits to using a light box for tracing (and other exploring play)?

    How to Make a DIY Light Table for Tracing

    This DIY Light Box was something I’ve seen around Pinterest and have wanted to try for a while…Once we had our Christmas lights outside, I thought we would definitely be doing this project after we pulled all of the lights back in.  So, after we brought the Christmas lights in from the outside bushes, this was easy to put together for a cold evening’s play!

    You need just two items to make a DIY light table:

    (Amazon affiliate links)

    1. Strand of white Christmas lights
    2. Clear, plastic under-the-bed storage bin

    Important: The under the bed storage bin needs to be made of clear plastic or have just a slight opaque color to the plastic. Also, the top should be smooth. Many storage bins have textured surface or a white surface. The flat, smooth lid is important for sensory play as well as tracing with paper on the DIY light table. This brand is a good one to use.

    Instructions to make a DIY light box:

    1. Plug in the lights.
    2. Place them into the bin.
    3. Either cut a hole in the base of the bin for the lights to go through or cut a small notch into the lid so the strand of lights can go under the lid.

    To make this homemade light box safer and not use plug in lights, you can use battery operated button lights inside the storage bin. Or, there are many battery operated LED lights available now too. These are a great idea because many of them have a color-changing capability and can be operated from an app on your phone.
    IMPORTANT: This homemade light box project should always be done under the supervision of an adult. The lights can get warm inside the bin and they should be unplugged periodically.

    This is not a project that should be set up and forgotten about. The OT Toolbox is not responsible for any harm, injury, or situation caused by this activity. It is for educational purposes only. Always use caution and consider the environment and individualized situation, including with this activity. Your use of this idea is your acceptance of this disclaimer.

    I put all of the (already bundled-up) strands of Christmas lights …seriously, this does not get much easier…into an under-the-bed storage bin, connected the strands, and plugged in!


    DIY light box for tracing

    A DIY light box made with Christmas lights
     

    Once you put the top on, it is perfect for tracing pictures!
     
    Tracing on a DIY light box


    Tracing pictures on a light table

     
    This is so great for new (or seasoned) hand-writers.  They are working on pencil control, line awareness, hand-eye coordination…and end up with a super cool horse picture they can be proud of!
     
    Use printable coloring pages and encourage bilateral coordination to hold the paper down. You can modify the activity by taping the coloring page onto the plastic bin lid. 
     
    Tracing a picture on a DIY light table
     
     Big Sister LOOOOVED doing this!  And, I have to say, that she was doing the tracing thing for so long, that we had to turn the lights off because the bin was getting warm. 


    trace letters on a light table
     

    Other ways to use a DIY Light Table

     
    We went around the house looking for cool things to place on top of the bin.  Magnetic letters looked really neat with the light glowing through…Baby Girl had a lot of fun playing with this.
     
    You can add many different items onto the DIY light table:
    • Magnetic letters (the light shines through them slightly)
    • Sand for a tracing table- We cover how to use a sand writing tray in another blog post and all the benefits of tracing in a sensory medium. With the lights under the tracing area, this adds another multisensory component to the learning.
    • Shapes (Magnatiles would work well)
    • Feathers
    • Coins
    • Blocks
    • A marble run
     
    letters on a light table
     
    What a great learning tool…Shapes:
     
     
    Letter Identification, spelling words:
     

     Color and sensory discrimination:


    …All in a new and fun manner!  We had a lot of fun with this, but have since put our Christmas lights back up into the attic.  We will be sure to do this one again next year, once the lights come back out again 🙂
     

    Please: if you do make one of these light boxes, keep an adult eye on it, as the box did warm up…not to burning warmth, but I would worry about the lights becoming over heated.  This is NOT something that kids should play with unsupervised!

    Colleen Beck, OTR/L has been an occupational therapist since 2000, working in school-based, hand therapy, outpatient peds, EI, and SNF. Colleen created The OT Toolbox to inspire therapists, teachers, and parents with easy and fun tools to help children thrive. Read her story about going from an OT making $3/hour (after paying for kids’ childcare) to a full-time OT resource creator for millions of readers. Want to collaborate? Send an email to contact@theottoolbox.com.

    Working on fine motor skills, visual perception, visual motor skills, sensory tolerance, handwriting, or scissor skills? Our Fine Motor Kits cover all of these areas and more.

    Check out the seasonal Fine Motor Kits that kids love:

    Or, grab one of our themed Fine Motor Kits to target skills with fun themes:

    Want access to all of these kits…and more being added each month? Join The OT Toolbox Member’s Club!