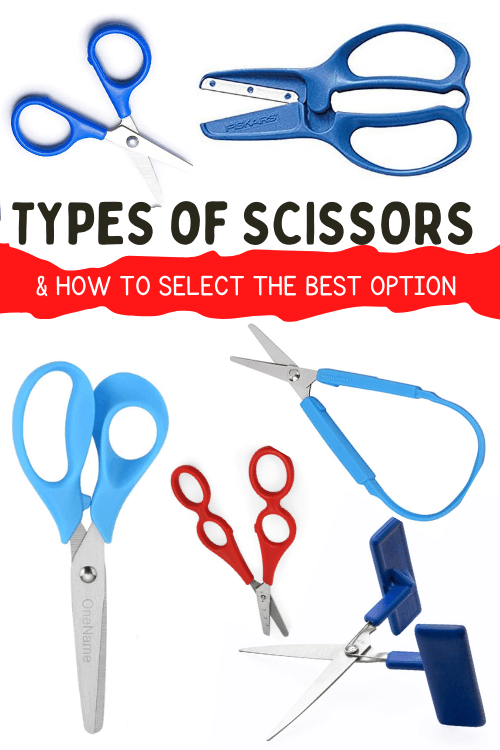
Did you know there are many different types of scissors to support development of scissor skills? It’s true! No matter the motor skill ability, there are different type of scissors that supports that ability or skill development. Cutting skills, like writing, are a foundational fine motor skill. Just as you would spend time selecting the right pen/pencil, makeup, hair accessory, or pair of shoes, it is important to select the correct types of scissors.
Why do different types of scissors matter?
What do you look for when selecting that perfect pair of shoes?
- Fit
- Size
- Price
- Durability
- Reputation, reviews
- Quality
- Functionality
Believe it or not, the same care can be placed in selecting the correct pair of scissors. This is especially important if your learner has fine motor delays, hand weakness, difficulty with motor planning/coordination, small/large/irregular hands, or a diagnosis impacting their skills.
Here are a few real life examples:
- Lula is 4 years old with dwarfism. Her hands are tiny. Her parents would be very unlikely to buy her shoes that fit a grown man. At her school, Lula was provided with regular sized scissors, thus struggling to learn this important skill.
- James is 7 and has Down Syndrome. Not only are his hands weak, but they are small. While care is taken to select the right shoes and clothes for him, selecting the right scissors is just as important.
- Marcy is 5 year old and has cerebral palsy, limiting her hand and arm movements. She too should have extra consideration in the type of scissors that she uses.
What are the options for types of scissors?
*Disclamer – Many of the following product recommendations are affiliate links from Amazon. This does not mean these are the best, just the easiest to find. If you prefer another vendor, check out the examples below, then type them into your Google search bar.
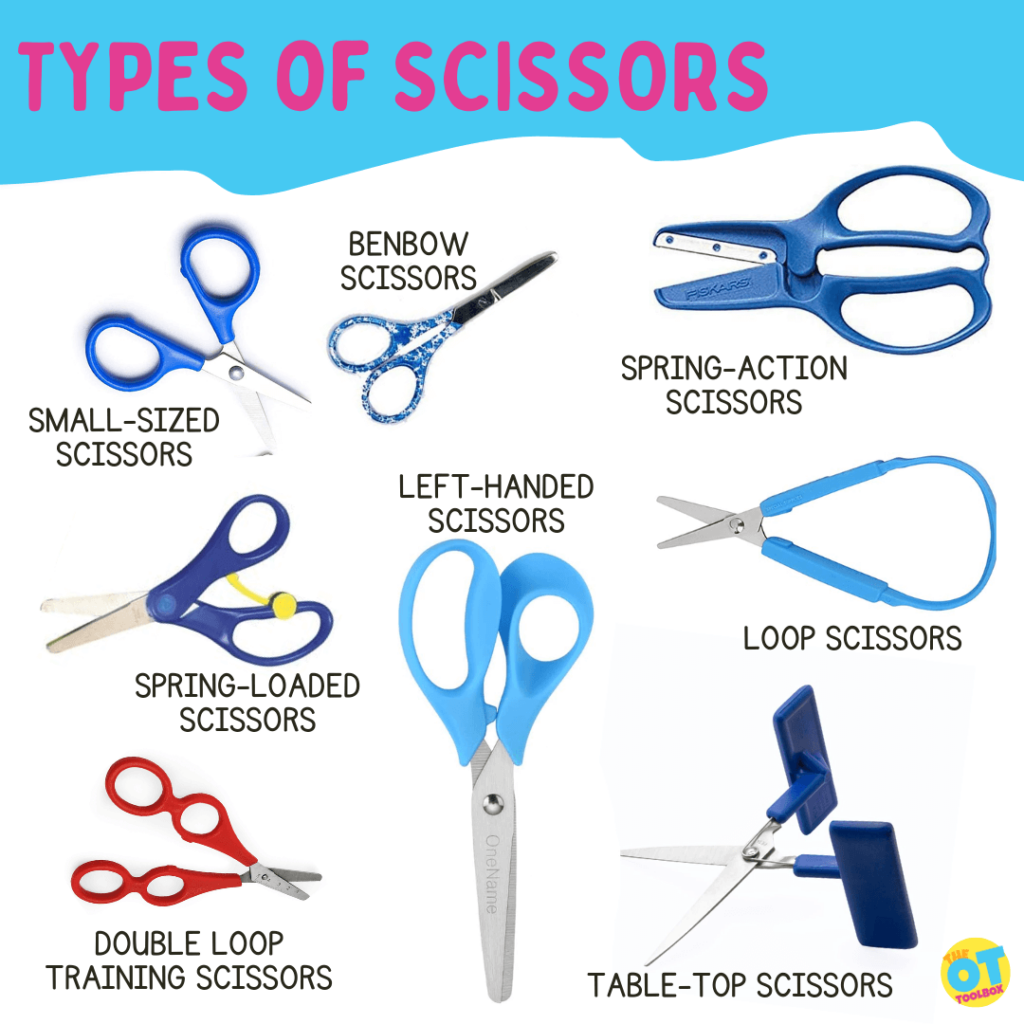
1. Small Sized scissors
Beginner small-sized scissors- These scissors are all small in size. They are not just for small hands. These are great for learners with all types of fine motor issues, and hand weakness.
These beginner scissors are Amazon affiliate links.
- I like these toddler sized scissors because they are very small. They are great for tiny hands, or learners with fine motor weakness.
- This learning pack of scissors contains toddler sized scissors, as well as training scissors. See below for more information about training scissors.
- Sewing scissors are great because they are tiny, however, they are SHARP! If you are going to use these, either dull the edges with a file, or be extra careful with your learners.
- These Benbow Scissors, made by Mary Benbow are the gold standard of training scissors.
2. Training Scissors
Training scissors should be used as a stepping stone to graduating to a higher level type of scissors, once they are mastered. If training scissors are not mastered, your learner can use these indefinitely.
The training scissors listed below are Amazon affiliate links.
- Self-opening scissors: many learners are able to pinch their fingers together long before they can open them during cutting at will. The key to motivation is success. While using these scissors, the hands get valuable feedback of this cutting motion. These self opening scissors fit the price and durability category, but they do not fit the functionality definition. These blunt scissors, while inherently safer than sharp scissors, do not cut well, and cause more frustration than progress.
- Spring-assist scissors- This pair of self opening scissors or these soft-grip scissors fit the function, and durability categories. They are more expensive, but cut better than safety scissors. They are larger than the toddler scissors, so be sure that size is not a concern first
- Double loop scissors – While I do not like that these are labeled “mother and child scissors” (because this is not inclusive), they work well. People learn by doing. Kinesthetic awareness is learning by moving. These double loop scissors give your learner the feedback needed to practice and learn the cutting motion
- Trialing two kinds of scissors- This scissor pack has double loop scissors and self opening scissors to trial different kinds of scissors with your learners, or progress forward as they develop skills.
3. Scissors for Special Needs
There are times when traditional scissors do not work and a specific adaptive scissor type is required. If your learner has weakness, a hand injury, tremors, increased/decreased muscle tone, or another long term condition, various scissors for special need areas are a good option.
Scissors in this category include loop scissors, block scissors, tabletop scissors, and electric scissors.
For learners with small hands, or who are developing hand strength, I would recommend self opening scissors first, or using these adaptive scissor types for a very short period of time.
These different types of scissors designed to meet specific needs are Amazon affiliate links.
Loop scissors – These are also described as self-opening scissors. Some learners can not isolate their fingers enough to work traditional scissors, or have a sensory aversion to sticking their fingers into the little holes on the handles of the scissors. These spring open once depressed. They do take a fair amount of strength to grip for a prolonged amount of time, so these may not be the best choice for your learners with low tone or decreased strength (unless of course you are looking for a tool to increase strength).
- While these mini loop scissors at 5.5 inches are smaller and take less grip strength, they also do not cut very fast, instead making small snips.
- These larger loop scissors at 8 inches are a great choice for stronger hands.
- These self opening loop type scissors are popular. They require less dexterity than traditional scissors, but they do not cut very well. Because the mouth of the scissors does not open wide, they do not make large cuts.
Scissors for Limited mobility – For learners missing digits, or with limited grasp, such as amputees or quadruplegic patients, use of just one upper extremity, visual challenges, or other mobility and coordination concerns, these tabletop scissors can be fastened to a table with a clamp or velcro to assist in opening containers. They are not great for intricate cutting, as they are labor intensive and can be frustrating, but more usable for self help skills.
Power option – for learners with limited mobility or fine motor dexterity, electric scissors can be a motivating option for cutting. They take some strength and coordination, but can be helpful for learners who can not use traditional scissors. These types of scissors take some practice to get used to them.
Left handed Scissors
Similar to questions on left-handed writing, teachers and parents are forever inquiring about left handed scissors and how to help with left handed cutting.
What is the left handed scissors difference?
There is definitely a difference between left-handed scissors and right-handed scissors. Right-handed scissors have the right blade positioned on top, whereas left-handed scissors have the left blade positioned on top. This prevents unnecessary bending and tearing of the paper. This difference between left and right handed scissors also allows each user to maintain a clear visual view of the cutting line.
Scissor handles are often molded to accommodate either the left or right hand. When manufacturers claim they have created a pair of ambidextrous scissors, be aware that such a thing does not exist. They have simply created a “neutral” handle accessible for the both left and right hand. The blades are still right-hand oriented. Thus, left-handed users should not be given scissors marketed as being appropriate for both left-handers and right-handers.
True left handed scissors have the cutting blade positioned on the top. Neutral scissors or scissors that can fit both left and right hands may cause additional frustrations.
Read more on the term ambidextrous and what this means for functional tasks such as cutting with scissors.
There are several types of scissors for lefty’s available, but what are the best left handed scissors?
These basic lefty scissors (affiliate link) are ideal. If it wasn’t such a right handed world, I would recommend these to all lefties.
Being a lefty myself, I understand the benefit and fit of left handed scissors. The majority of scissors your learner will encounter will be right handed, so it is better to learn and adapt to traditional scissors. There are only a few left handed items that are necessary (can opener, ice cream scoop, binder, ladle, vegetable peeler.)
Tips for Left handed cutting:
- Use sharp scissors – this way the blade has less chance of just bending the paper instead of neatly slicing through it
- Don right handed scissors upside down – for some reason putting the thumb in the fingers hole changes the blade position, and makes cutting easier.
- Lefties cut CLOCKWISE. Righties cut COUNTERCLOCKWISE. This is important. If your learner cuts in the wrong direction, this leaves them without the ability to hold onto and turn the piece of paper that is being cut. Try it!
time to learn to cut
Now that you have selected the right fit, durability, functionality, and quality of scissors for your learner, it is time to learn to cut! The OT Toolbox has multiple posts and products available for practicing scissor skills. There is a comprehensive scissor skills guide available also.
The key to cutting skills –
- Thumb and middle finger in the scissor loops. You can add ring finger into the loops if they are large. Pointer finger stays out and points the way. This adds to hand stability and opens the arches of the hand further.
- Thumbs up! The helper hand grips the object being cut, with their thumb facing up. This gives the object being held greater stability, and ease of movement. All of the various types of scissors could have a sticker added as an additional adaptation to help with positioning.
- How to hold scissors – check out this helpful post on the OT Toolbox
- Steps of scissor skill development
- Scissor Skills
- Scissor Skills Crash Course
Guide to Types of Scissors
Want a printable guide to the various types of scissors? You are in luck. We have a one page printable guide that shows images of the different versions of scissors on the market. These are the different scissor types you might see in a therapists’ therapy bag!
Now you can quickly share information on why each type of scissor might be used and determine which type of scissor to use based on the individual needs of the learner.
To get your copy, just enter your email into the form below.
This handout set is also available in our OT Toolbox Member’s Club.
Current Membership Club members can log into your account and head to the dashboard toolbox labeled “Scissor Skills Downloads“. Print off the handouts without the need to enter an email address.
Want to add this resource to your therapy toolbox so you can help kids thrive? Enter your email into the form below to access this printable tool.
Want to add this resource to your therapy toolbox so you can help kids thrive? Enter your email into the form below to access this printable tool.
This resource is just one of the many tools available in The OT Toolbox Member’s Club. Each month, members get instant access to downloadable activities, handouts, worksheets, and printable tools to support development. Members can log into their dashboard and access all of our free downloads in one place. Plus, you’ll find exclusive materials and premium level materials.
Level 1 members gain instant access to all of the downloads available on the site, without enter your email each time PLUS exclusive new resources each month.
Level 2 members get access to all of our downloads, exclusive new resources each month, PLUS additional, premium content each month: therapy kits, screening tools, games, therapy packets, and much more. AND, level 2 members get ad-free content across the entire OT Toolbox website.
Join the Member’s Club today!
a final note on selecting the correct types of scissors
Pamper your learner with a great pair of scissors, just like you do when you purchase those amazing shoes. Fit and function over price. Quality always wins. Fiskars are the gold standard for traditional scissors, and the one type almost every therapy provider has in their OT bag of tricks. They cut paper well and come in tons of sizes and designs.
So…what are the worst scissors? Most therapists agree that those “safety scissors” that don’t cut anything except maybe playdough are absolutely the worst. Save those for playdough, and upgrade when it comes to cutting anything else.

Victoria Wood, OTR/L is a contributor to The OT Toolbox and has been providing Occupational Therapy treatment in pediatrics for more than 25 years. She has practiced in hospital settings (inpatient, outpatient, NICU, PICU), school systems, and outpatient clinics in several states. She has treated hundreds of children with various sensory processing dysfunction in the areas of behavior, gross/fine motor skills, social skills and self-care. Ms. Wood has also been a featured speaker at seminars, webinars, and school staff development training. She is the author of Seeing your Home and Community with Sensory Eyes.
*The term, “learner” is used throughout this post for readability, however this information is relevant for students, patients, clients, children of all ages and stages, or whomever could benefit from these resources. The term “they” is used instead of he/she to be inclusive.

Looking for tips, strategies, and activities to support development of scissor skills? Grab a copy of The Scissor Skills Book!
The Scissor Skills Book breaks the functional skill of cutting with scissors into several developmental areas including:
- Developmental progression of scissor use
- Fine motor skill involvement
- Gross motor development
- Sensory considerations and visual perceptual skills
Each section includes strategies and tips to improve these underlying areas.
- Help for kids who struggle with cutting accurately
- Creative tips to keep things interesting for kids who lose interest easily
- Quick, practical strategies that can be put into action today!
- Ideas for kids who cut too fast or too slow
- Support for kids who can’t grasp scissors efficiently
- Strategies for right-handed and left-handed children
