This Fall leaf activity is a fine motor task that supports development of so many skill areas. I love that you can gather a handful of colorful leaves from your lawn and work on areas like scissor skills, fine motor skills, line awareness, and bilateral coordination. Then, you can use the snippings as leaf mulch in a compost bin or right back in the lawn. This is a fun activity that kids love! It would be a great addition to a Fall sensory bin, too.
Use colorful fall leaves to work on scissor skills with kids this Fall.
Leaf Cutting Activity
This simple leaf cutting activity can be modified to meet a variety of skill needs. You can make the lines thicker or thinner, or make curved lines or angled lines. You can cut smaller leaves or bigger leaves. It’s easy to adapt to the needs of the student.
I have a small obsession with helping kids learn how to use scissors. It was one of my favorite areas to work on in the school-based Occupational Therapy setting. (And I’ve got a few scissor skills activities to show for it!)
Add this leaf cutting activity to our other Fall leaves activities:
Leaf Handwriting– These Fall writing prompts include leaf writing prompts, among other fall themed prompts. Includes sentence prompts and single words, all with a Fall and leaf theme.
Pre-Writing Lines Activity- Work on Pre-writing activity with real leaves. Use real leaves to work on eye-hand coordination, visual motor skills, and pre-writing lines with hands on fine motor work.
Bilateral Coordination Activity: Use this Leaf Craft to address bilateral coordination skills. Use real leaves to make a craft that builds bilateral coordination, heavy work proprioceptive input, and scissor skills.
Cut Real Leaves for Scissor Skills
Let’s get on with the Fall leaves cutting activity…
Today’s activity is all about scissors, cutting on lines, and leaves. This Fall, use those pretty leaves before they are covered with snow and practice cutting on lines.
This scissor skills activity is completely easy.
Go outside and gather some pretty fall leaves. Like our leaf hole punch activity (also very good for working on scissor skills), you want leaves that are not crunchy and are freshly fallen.
You might want to gather leaves that are still on the tree for easier cutting of lines. If you are working simply on the snipping of scissors, totally go for those crunchy leaves. They provide a fun auditory feedback to the snipping of scissors and fun Fall confetti!
Cutting the leaves gets you whiffs of the leaves, too. What a great way to incorporate the sense of smell into a scissor activity.
All you need are colorful leaves for this activity!
Practice line awareness with scissors using Fall leaves
I drew lines on the leaves for the kids to practice cutting along, but you can use just the lines of the leaves for older kids. Holding the small leaf and snipping along the veins is a fantastic bilateral hand coordination activity for kids. When cutting with scissors, bilateral hand coordination is essential for the assisting hand to move the paper accordingly as the dominant hand snips with scissors.
Cutting along lines in simple and complex shapes is an issue when visual perceptual skills are difficult for a child.
They might demonstrate difficulties with cutting within a line. Cutting choppy lines is apparent when a child has poor scissor control or visual motor skills with tools like scissors.
Cutting leaves is a creative scissor activity (Find a ton more creative scissor activities here!) and will be a hit with your kids this Fall. Save it for spring and cut those green leaves, too!
Colleen Beck, OTR/L has been an occupational therapist since 2000, working in school-based, hand therapy, outpatient peds, EI, and SNF. Colleen created The OT Toolbox to inspire therapists, teachers, and parents with easy and fun tools to help children thrive. Read her story about going from an OT making $3/hour (after paying for kids’ childcare) to a full-time OT resource creator for millions of readers. Want to collaborate? Send an email to contact@theottoolbox.com.
Did you know there are many different types of scissors to support development of scissor skills? It’s true! No matter the motor skill ability, there are different type of scissors that supports that ability or skill development. Cutting skills, like writing, are a foundational fine motor skill. Just as you would spend time selecting the right pen/pencil, makeup, hair accessory, or pair of shoes, it is important to select the correct types of scissors.
Why do different types of scissors matter?
What do you look for when selecting that perfect pair of shoes?
Fit
Size
Price
Durability
Reputation, reviews
Quality
Functionality
Believe it or not, the same care can be placed in selecting the correct pair of scissors. This is especially important if your learner has fine motor delays, hand weakness, difficulty with motor planning/coordination, small/large/irregular hands, or a diagnosis impacting their skills.
Here are a few real life examples:
Lula is 4 years old with dwarfism. Her hands are tiny. Her parents would be very unlikely to buy her shoes that fit a grown man. At her school, Lula was provided with regular sized scissors, thus struggling to learn this important skill.
James is 7 and has Down Syndrome. Not only are his hands weak, but they are small. While care is taken to select the right shoes and clothes for him, selecting the right scissors is just as important.
Marcy is 5 year old and has cerebral palsy, limiting her hand and arm movements. She too should have extra consideration in the type of scissors that she uses.
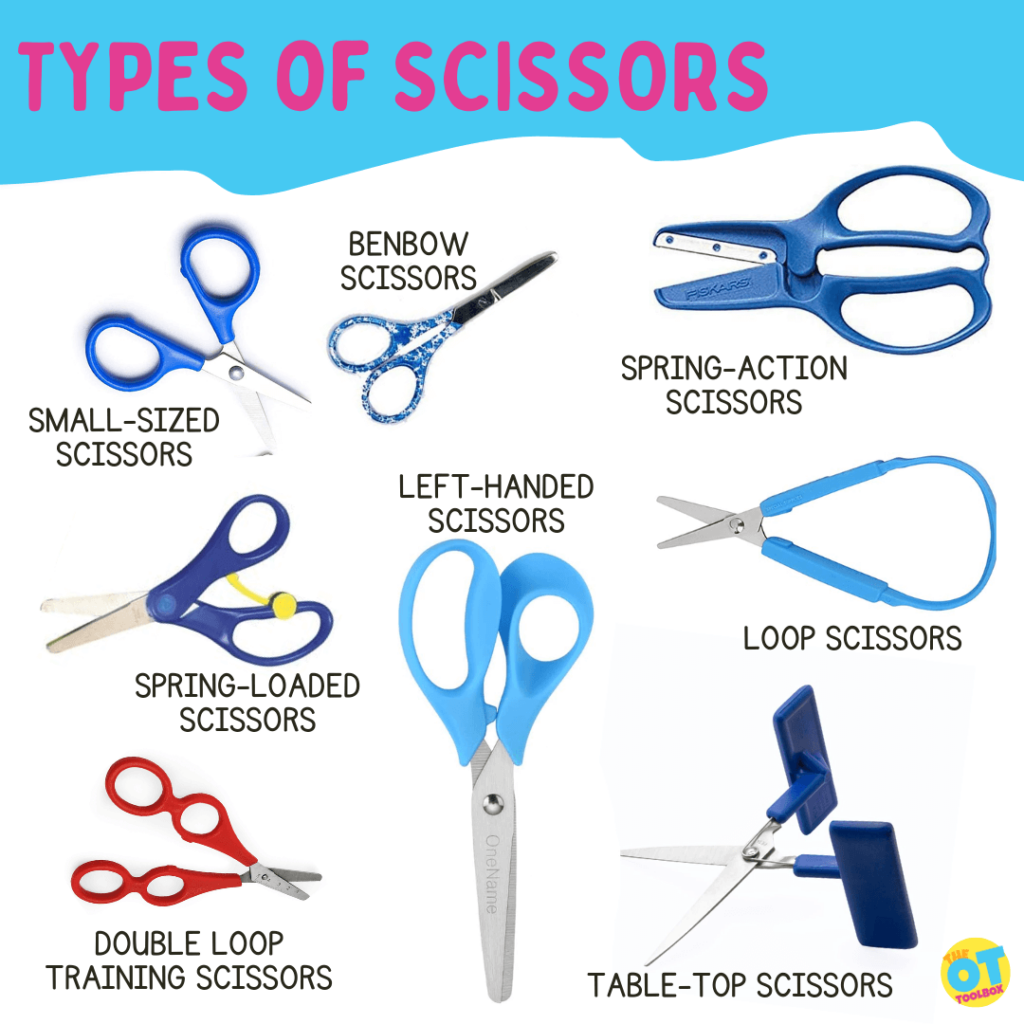
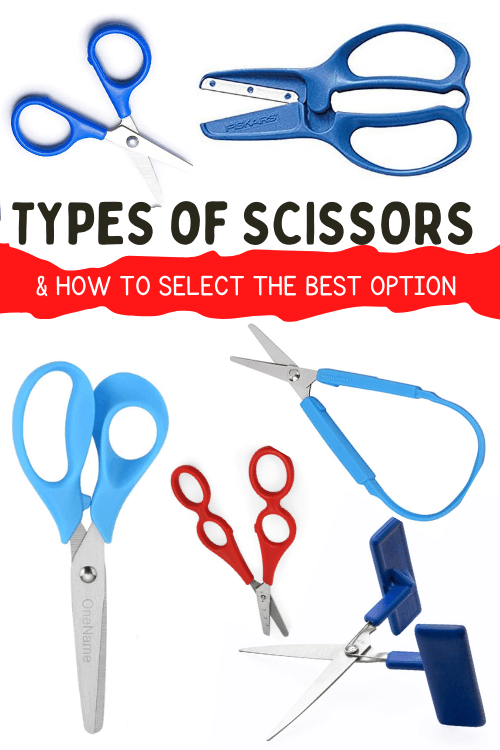
What are the options for types of scissors?
*Disclamer – Many of the following product recommendations are affiliate links from Amazon. This does not mean these are the best, just the easiest to find. If you prefer another vendor, check out the examples below, then type them into your Google search bar.
1. Small Sized scissors
Beginner small-sized scissors- These scissors are all small in size. They are not just for small hands. These are great for learners with all types of fine motor issues, and hand weakness.
These beginner scissors are Amazon affiliate links.
I like these toddler sized scissors because they are very small. They are great for tiny hands, or learners with fine motor weakness.
This learning pack of scissors contains toddler sized scissors, as well as training scissors. See below for more information about training scissors.
Sewing scissors are great because they are tiny, however, they are SHARP! If you are going to use these, either dull the edges with a file, or be extra careful with your learners.
These Benbow Scissors, made by Mary Benbow are the gold standard of training scissors.
2. Training Scissors
Training scissors should be used as a stepping stone to graduating to a higher level type of scissors, once they are mastered. If training scissors are not mastered, your learner can use these indefinitely.
The training scissors listed below are Amazon affiliate links.
Self-opening scissors: many learners are able to pinch their fingers together long before they can open them during cutting at will. The key to motivation is success. While using these scissors, the hands get valuable feedback of this cutting motion. These self opening scissors fit the price and durability category, but they do not fit the functionality definition. These blunt scissors, while inherently safer than sharp scissors, do not cut well, and cause more frustration than progress.
Spring-assist scissors- This pair of self opening scissors or these soft-grip scissors fit the function, and durability categories. They are more expensive, but cut better than safety scissors. They are larger than the toddler scissors, so be sure that size is not a concern first
Double loop scissors – While I do not like that these are labeled “mother and child scissors” (because this is not inclusive), they work well. People learn by doing. Kinesthetic awareness is learning by moving. These double loop scissors give your learner the feedback needed to practice and learn the cutting motion
Trialing two kinds of scissors- This scissor pack has double loop scissors and self opening scissors to trial different kinds of scissors with your learners, or progress forward as they develop skills.
3. Scissors for Special Needs
There are times when traditional scissors do not work and a specific adaptive scissor type is required. If your learner has weakness, a hand injury, tremors, increased/decreased muscle tone, or another long term condition, various scissors for special need areas are a good option.
Scissors in this category include loop scissors, block scissors, tabletop scissors, and electric scissors.
For learners with small hands, or who are developing hand strength, I would recommend self opening scissors first, or using these adaptive scissor types for a very short period of time.
These different types of scissors designed to meet specific needs are Amazon affiliate links.
Loop scissors – These are also described as self-opening scissors. Some learners can not isolate their fingers enough to work traditional scissors, or have a sensory aversion to sticking their fingers into the little holes on the handles of the scissors. These spring open once depressed. They do take a fair amount of strength to grip for a prolonged amount of time, so these may not be the best choice for your learners with low tone or decreased strength (unless of course you are looking for a tool to increase strength).
While these mini loop scissors at 5.5 inches are smaller and take less grip strength, they also do not cut very fast, instead making small snips.
These self opening loop type scissors are popular. They require less dexterity than traditional scissors, but they do not cut very well. Because the mouth of the scissors does not open wide, they do not make large cuts.
Scissors for Limited mobility – For learners missing digits, or with limited grasp, such as amputees or quadruplegic patients, use of just one upper extremity, visual challenges, or other mobility and coordination concerns, these tabletop scissors can be fastened to a table with a clamp or velcro to assist in opening containers. They are not great for intricate cutting, as they are labor intensive and can be frustrating, but more usable for self help skills.
Power option – for learners with limited mobility or fine motor dexterity, electric scissors can be a motivating option for cutting. They take some strength and coordination, but can be helpful for learners who can not use traditional scissors. These types of scissors take some practice to get used to them.
Left handed Scissors
Similar to questions on left-handed writing, teachers and parents are forever inquiring about left handed scissors and how to help with left handed cutting.
What is the left handed scissors difference?
There is definitely a difference between left-handed scissors and right-handed scissors. Right-handed scissors have the right blade positioned on top, whereas left-handed scissors have the left blade positioned on top. This prevents unnecessary bending and tearing of the paper. This difference between left and right handed scissors also allows each user to maintain a clear visual view of the cutting line.
Scissor handles are often molded to accommodate either the left or right hand. When manufacturers claim they have created a pair of ambidextrous scissors, be aware that such a thing does not exist. They have simply created a “neutral” handle accessible for the both left and right hand. The blades are still right-hand oriented. Thus, left-handed users should not be given scissors marketed as being appropriate for both left-handers and right-handers.
True left handed scissors have the cutting blade positioned on the top. Neutral scissors or scissors that can fit both left and right hands may cause additional frustrations.
There are several types of scissors for lefty’s available, but what are the best left handed scissors?
These basic lefty scissors (affiliate link) are ideal. If it wasn’t such a right handed world, I would recommend these to all lefties.
Being a lefty myself, I understand the benefit and fit of left handed scissors. The majority of scissors your learner will encounter will be right handed, so it is better to learn and adapt to traditional scissors. There are only a few left handed items that are necessary (can opener, ice cream scoop, binder, ladle, vegetable peeler.)
Tips for Left handed cutting:
Use sharp scissors – this way the blade has less chance of just bending the paper instead of neatly slicing through it
Don right handed scissors upside down – for some reason putting the thumb in the fingers hole changes the blade position, and makes cutting easier.
Lefties cut CLOCKWISE. Righties cut COUNTERCLOCKWISE. This is important. If your learner cuts in the wrong direction, this leaves them without the ability to hold onto and turn the piece of paper that is being cut. Try it!
time to learn to cut
Now that you have selected the right fit, durability, functionality, and quality of scissors for your learner, it is time to learn to cut! The OT Toolbox has multiple posts and products available for practicing scissor skills. There is a comprehensive scissor skills guide available also.
The key to cutting skills –
Thumb and middle finger in the scissor loops. You can add ring finger into the loops if they are large. Pointer finger stays out and points the way. This adds to hand stability and opens the arches of the hand further.
Thumbs up! The helper hand grips the object being cut, with their thumb facing up. This gives the object being held greater stability, and ease of movement. All of the various types of scissors could have a sticker added as an additional adaptation to help with positioning.
Want a printable guide to the various types of scissors? You are in luck. We have a one page printable guide that shows images of the different versions of scissors on the market. These are the different scissor types you might see in a therapists’ therapy bag!
Now you can quickly share information on why each type of scissor might be used and determine which type of scissor to use based on the individual needs of the learner.
To get your copy, just enter your email into the form below.
Current Membership Club members can log into your account and head to the dashboard toolbox labeled “Scissor Skills Downloads“. Print off the handouts without the need to enter an email address.
Want to add this resource to your therapy toolbox so you can help kids thrive? Enter your email into the form below to access this printable tool.
This resource is just one of the many tools available in The OT Toolbox Member’s Club. Each month, members get instant access to downloadable activities, handouts, worksheets, and printable tools to support development. Members can log into their dashboard and access all of our free downloads in one place. Plus, you’ll find exclusive materials and premium level materials.
Level 1 members gain instant access to all of the downloads available on the site, without enter your email each time PLUS exclusive new resources each month.
Level 2 members get access to all of our downloads, exclusive new resources each month, PLUS additional, premium content each month: therapy kits, screening tools, games, therapy packets, and much more. AND, level 2 members get ad-free content across the entire OT Toolbox website.
a final note on selecting the correct types of scissors
Pamper your learner with a great pair of scissors, just like you do when you purchase those amazing shoes. Fit and function over price. Quality always wins. Fiskars are the gold standard for traditional scissors, and the one type almost every therapy provider has in their OT bag of tricks. They cut paper well and come in tons of sizes and designs.
So…what are the worst scissors? Most therapists agree that those “safety scissors” that don’t cut anything except maybe playdough are absolutely the worst. Save those for playdough, and upgrade when it comes to cutting anything else.
Victoria Wood, OTR/L is a contributor to The OT Toolbox and has been providing Occupational Therapy treatment in pediatrics for more than 25 years. She has practiced in hospital settings (inpatient, outpatient, NICU, PICU), school systems, and outpatient clinics in several states. She has treated hundreds of children with various sensory processing dysfunction in the areas of behavior, gross/fine motor skills, social skills and self-care. Ms. Wood has also been a featured speaker at seminars, webinars, and school staff development training. She is the author of Seeing your Home and Community with Sensory Eyes.
*The term, “learner” is used throughout this post for readability, however this information is relevant for students, patients, clients, children of all ages and stages, or whomever could benefit from these resources. The term “they” is used instead of he/she to be inclusive.
Looking for tips, strategies, and activities to support development of scissor skills? Grab a copy of The Scissor Skills Book!
The Scissor Skills Book breaks the functional skill of cutting with scissors into several developmental areas including:
Developmental progression of scissor use
Fine motor skill involvement
Gross motor development
Sensory considerations and visual perceptual skills
Each section includes strategies and tips to improve these underlying areas.
Help for kids who struggle with cutting accurately
Creative tips to keep things interesting for kids who lose interest easily
Quick, practical strategies that can be put into action today!
Ideas for kids who cut too fast or too slow
Support for kids who can’t grasp scissors efficiently
Strategies for right-handed and left-handed children
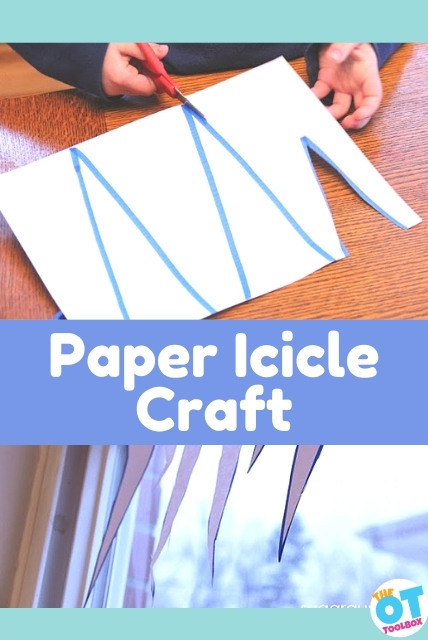
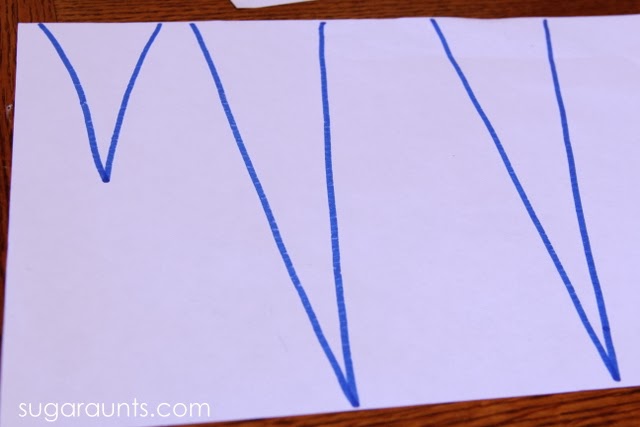
This paper icicle craft is a fun one for wintertime occupational therapy activities. If you are working on Scissor skills, cutting icicles into paper is a great fine motor task that builds eye-hand coordination, crossing midline, and visual motor skills to cut basic shapes. Be sure to add this paper icicle template for more tools for your winter occupational therapy toolbox.
Take fine motor work a step further by grabbing our new winter crossword puzzle to incorporate a whole winter theme.
Paper Icicle Craft
Do you have a little one who is just learning to master scissors? Scissor Skills for children who have never picked up a pair of scissors before can be very daunting. Frustrations can build and the next thing you know, your little sweetheart is spiking the scissors across the table!
Kids learn all things at different paces. Every developmental milestone and functional activity are achieved at different paces.
Scissor use is no different. Kids as young as two can start to snip paper (and probably with an awkward-two handed grasp on the scissors!) And as their fine motor skills develop, will achieve more and more accuracy with scissor use.
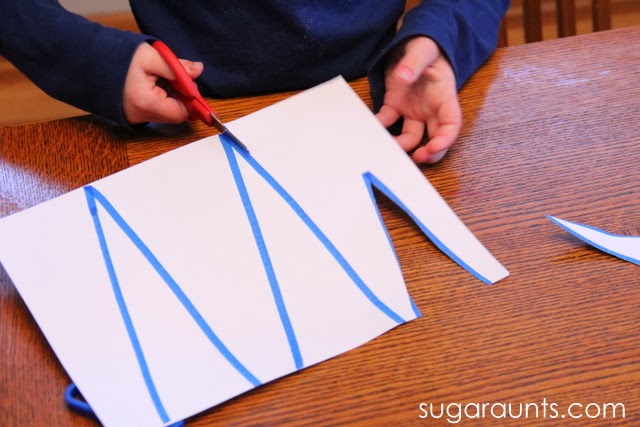
This winter themed Icicle cutting activity is a great beginner project for new scissor users. The strait cuts, bold lines, and even paper type are good modifications for a new little scissor-hands!
Winter Icicle Craft
Preschoolers are just beginning to gain more control over scissors. Preschool activities like this icicle craft at the way to go when it comes to building motor skills.
Strait lines are the perfect way to gain confidence when they are learning to cut…and ensure that they’ll want to pick up the scissors and try another craft again soon! We started out with nice strait lines on these icicles. Little Guy could cut the whole way across the page without needing to rotate the page to cut a curve or angle.
Note: This post contains affiliate links.
How to Modify this Icicle Craft
The smallest icicle could have been a harder task for him to cut, if he turned the whole page around like he started out doing.
We used a few different strategies to scaffold this paper icicle craft:
Cut through the page instead of turning around corners
Adjust the paper weight to a thicker resistance
Thicker cutting lines
Trials with thinner lines to carryover the task with practice
Verbal and visual cues
I prompted him to start one line from the edge of the paper and then instead of rotating the whole page (which would have probably given him a big chopped off icicle point), I showed him how to start the other side from the edge as well. He was much more accurate with the lines and wanted to keep going!
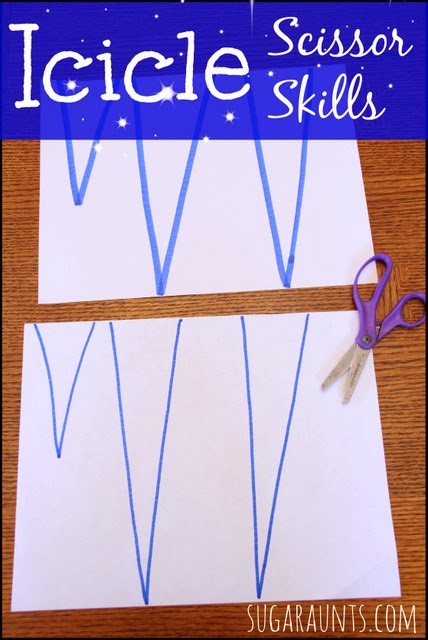
We had two different types of paper for our icicles. The first set was drawn on a sheet of white cardstock.
Cutting from this thicker paper is a great beginning step for new scissor users and a modification often used for kids with fine motor difficulties.
The thicker paper requires slower snips and allows for more accuracy. I also drew the icicles on the cardstock with nice thick lines. This gave Little Guy more room to cut within the lines and allowed for less line deviation.
The second set of icicles were drawn with thinner lines on printer paper. After practicing on the first set, he was game to cut more icicles. The thinner paper and lines requires more control of the scissors and better line awareness, and bilateral hand coordination.
This looked like so much fun, that even Big Sister wanted to get in on the icicle-making action!
We hung our icicles in the window to match the icy conditions outside.
You’ll love these other cut and paste crafts for winter. Use them in winter fine motor ideas for occupational therapy activities
Winter crafts using paper and a variety of textures for sensory play, motor planning, and motor skills.
Paper Icicle Craft is an actual printable template that you can print off and use to work on the scissor skills we covered in this post. It’s a great way to make an icicle craft.
Build a Snowman Craft– Work on scissor skills and fine motor strength to build a paper snowman
Colleen Beck, OTR/L has been an occupational therapist since 2000, working in school-based, hand therapy, outpatient peds, EI, and SNF. Colleen created The OT Toolbox to inspire therapists, teachers, and parents with easy and fun tools to help children thrive. Read her story about going from an OT making $3/hour (after paying for kids’ childcare) to a full-time OT resource creator for millions of readers. Want to collaborate? Send an email to contact@theottoolbox.com.
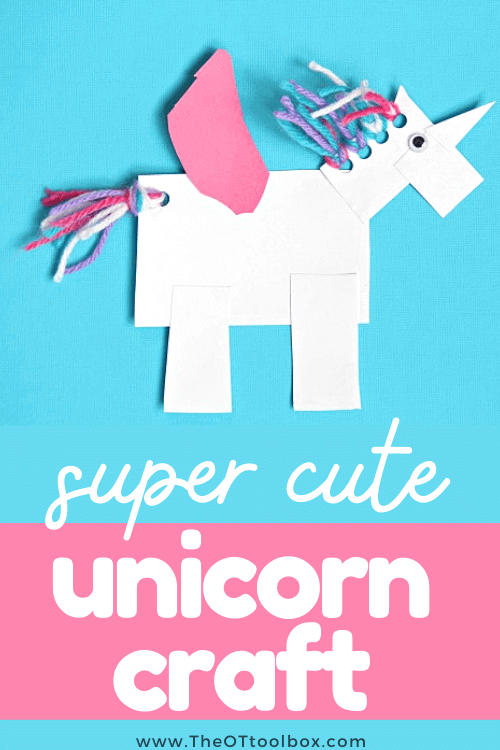
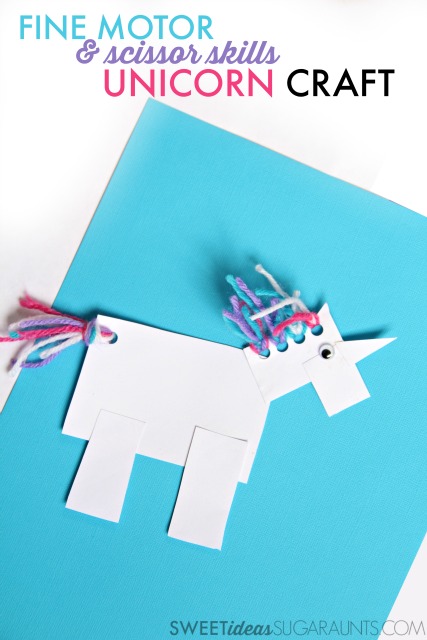
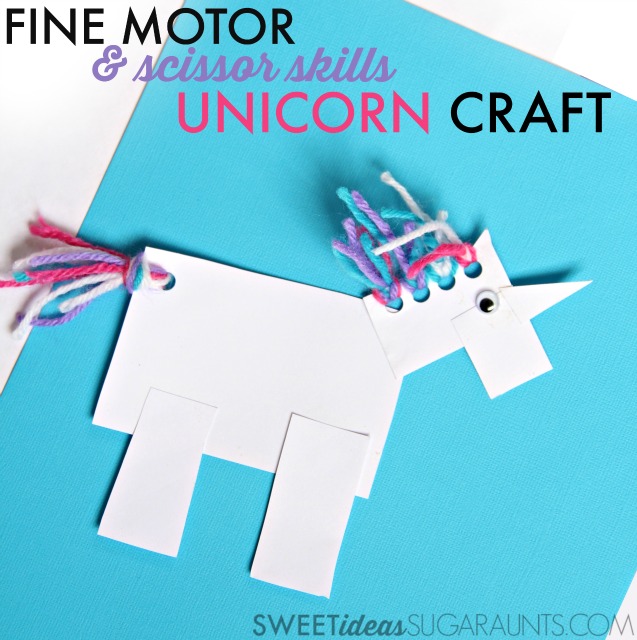
If you have a child that loves all things unicorns, then this unicorn craft is the way to go. It’s a craft that develops fine motor skills and scissor skills but has magical fun of unicorns! For more unicorn activities, try this Unicorn Yoga activity as well.
I love creating crafts for kids that serve a purpose. There are a lot of anti-kids craft-ers out there, but as an Occupational Therapist, I am in the camp that kids crafts are GREAT for working on fine motor skills. Direction following, task completion, fine motor work, and dexterity (among other goal areas) can all be addressed with a fun craft that kids will have fun making and be proud of!
Unicorn Craft
(AND, the bonus to a purposeful craft is that it’s fun for the kids to make something that interests the child…whether it’s a specific animal, a favorite character, or a season…crafts build up a child with excitement and smiles.)
I do have to say, though that process-oriented arty creations are equally precious in child development and learning. It’s all about balance!
This super cute Unicorn craft is one that my kids loved making, and we worked on scissor skills and fine motor skills. And they didn’t even know it!
How to make a Unicorn CraftFull disclosure: This post contains affiliate links.
You’ll need these materials to make a Unicorn Craft:
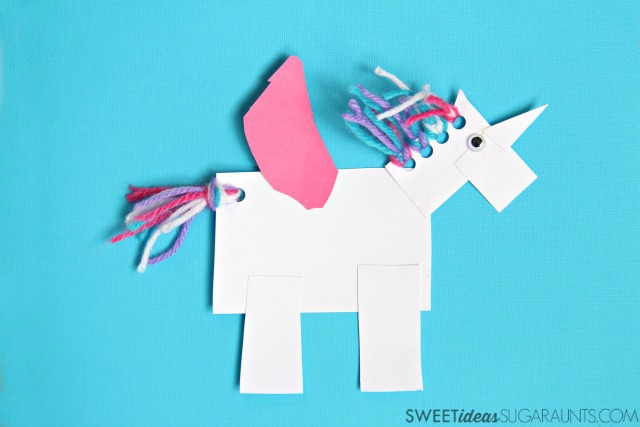
First, you’ll need to cut the white card stock into several shapes: One large rectangle, three small rectangles, a square, and a triangle.
Cut the pink card stock into a wing shape.
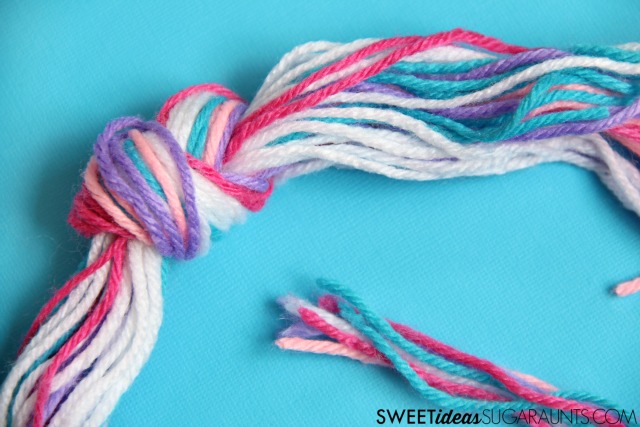
Cut the yarn into small pieces about 4 inches long.
Once all of the shapes and yarn pieces are cut, glue the paper shapes together in a unicorn shape.
Use the hold punch to create holes along one of the small rectangles and on the corner of the large rectangle.
Tie the yarn into the hole punch holes. To do this, pinch the center of the yarn and push it into the hole. Then, pull it halfway through the hole and slip the tail ends of the yarn into the loop. Do this for the unicorn’s mane and tail.
Trim the unicorn’s hair and tail so the yarn is shorter and an even length.
Use this uncorn craft to build therapy skills
This unicorn craft is a great craft for occupational therapy sessions because it works on so many areas and skills:
Direction following and executive functioning skills
Visual motor skills (copying the shapes and placing them on the paper to make the unicorn)
Eye-hand coordination to cut along lines
Scissor skills and graded hand precision
Hand strength using a hole punch
Fine motor precision to thread string through the holes
Bilateral coordination to cut with scissors, use hole punch, and tying knots
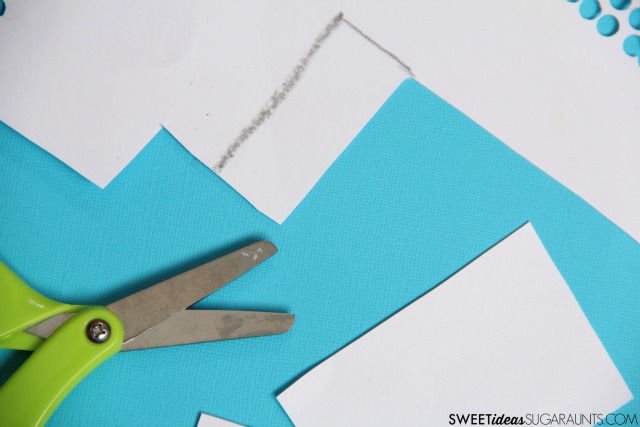
Making this craft is a great way to work on and practice scissor skills including cutting multiple-angled shapes like rectangles, squares, and triangles. I made an example of the unicorn craft and had my preschooler practice cutting on the lines.
Cutting card stock is a great medium for younger kids because of the thicker paper and more resistance to the scissors during cutting. This, along with a thick line like a crayon line provides an easier task for younger kids. Thicker lines and paper provide a child with a graded down component to the craft and allow for more accuracy.
Another way to make this activity easier or grade the craft is to provide help to a younger child who is completing this craft is to position the shape on the edge of the paper, so a rectangle would have only two cutting lines into the paper. The child can then reposition the paper instead of cutting around a corner.
Cutting the yarn is a great way to work on scissor skills: A child needs to hold the yarn with one hand and cut with the other, working on bilateral coordination skills. A different medium like yarn or string is a fun way to encourage more scissor practice, including accuracy and precision of snips.
So, how can you encourage fine motor skills with this craft? Simply by doing it! It’s a powerhouse of fine motor work. From cutting, snipping, hole punching, and threading the yarn through the holes, knotting the yarn, and gluing on the Googly eye: it’s a fine motor work out!
National Unicorn Day is April 9th. Who knew?! If you have a kiddo that loves all things unicorns, it’s a great theme to use in therapy or in home activities to help kids develop fine motor skills, visual motor skills, motor planning, and all of the areas described above.
Colleen Beck, OTR/L has been an occupational therapist since 2000, working in school-based, hand therapy, outpatient peds, EI, and SNF. Colleen created The OT Toolbox to inspire therapists, teachers, and parents with easy and fun tools to help children thrive. Read her story about going from an OT making $3/hour (after paying for kids’ childcare) to a full-time OT resource creator for millions of readers. Want to collaborate? Send an email to contact@theottoolbox.com.
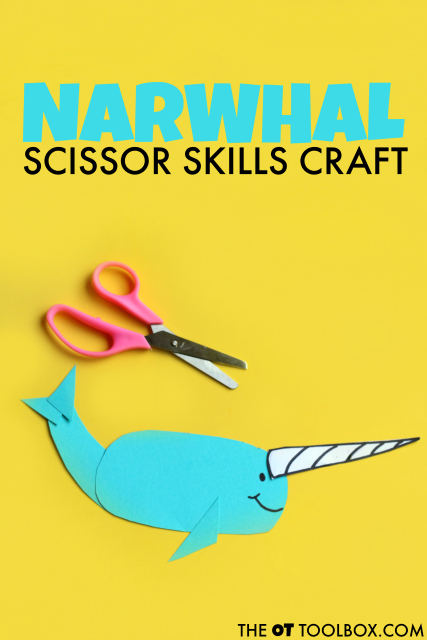
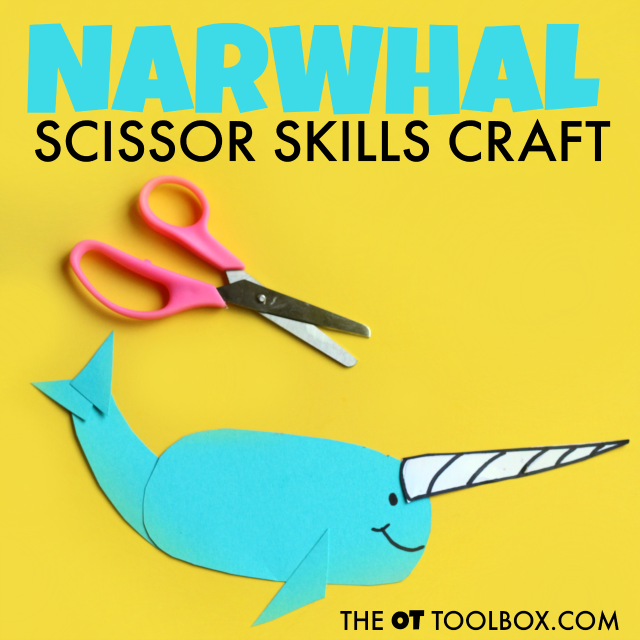
This narwhal craft is perfect for an ocean theme, or for kids who are heading off to the beach this summer. It’s a great narwhal craft for preschool, grade school or to go along with a fun narwhal book. Add this activity to your favorite kids crafts that build skills in OT or at home.
Narwhal craft
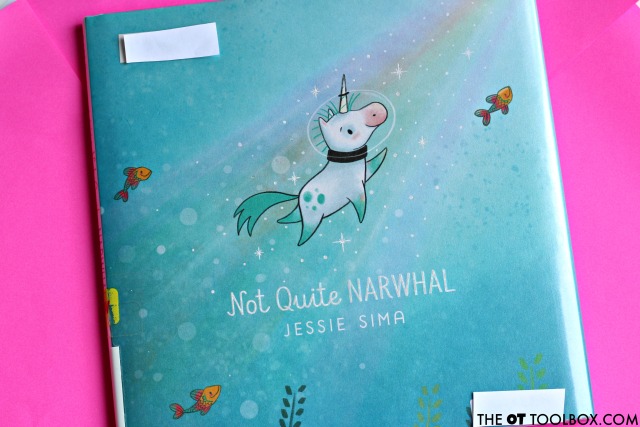
Sometimes, adding a themed craft to a favorite children’s book is just what kids need to get crafty while working on skills like scissor use and fine motor skills. We used one of our favorite new books, “Not Quite Narwhal” by Jessi Sima to come up with a fun narwhal craft that is heavy on the scissor skill practice. If you are looking to help a child with scissor use, we’ve got TONS of scissor skill activities here on the site.
Affiliate links are included in this post.
Narwhal Craft
This narwhal craft was a fun one for us! I have a few girls in the house who are crazy about all things mermaids, unicorns, and rainbows. While an actual narwhal has nothing to do with these things, there is just something fun and whimsical about narwhals!
When you read Sima’s Not Quite Narwhal, you definitely feel the fun and whimsy of unicorns and narwhals! We picked up the book in the new release section of our library and it has quickly become a hit in our house.
This book is a creative and fun story about Kelp, who is born among the narwhals but always thought he seemed a little different. One day, Kelp is carried by a current to meet mysterious creatures who seem more like him and make him wonder if he might not be a narwhal after all. This is a sweet library book find that we’ll definitely check out again!! You know those books that show up in your library bag again and again.
We’ve been reading Not Quite Narwhalover and over again and noticing new adorable details in the illustrations with each read-through! We decided to make a few narwhals of our own to join Kelp in his adventures!
Make a Narwhal Craft and work on Scissor Skills
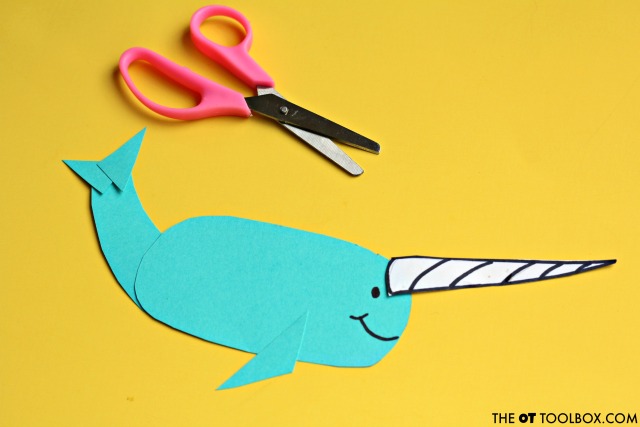
This narwhal craft has double duty: It’s super cuteness goes along perfectly with the book AND it sneaks in scissor skills. Kids can work on cutting on lines with simple shapes in order to build a narwhal.
We made an easy version with simple geometric shapes and a more complex narwhal craft that would be perfect for older kids.
To make the narwhal craft, you’ll need just a few materials:
Blue cardstock (cardstock is thicker paper, so it’s excellent for slowing down scissors to ensure more accuracy when cutting along lines, especially for younger scissor users.)
Draw simple shapes on the cardstock. For kids who are learning to cut, use thicker lines made with a marker. You’ll need:
One large oval for the narwhal’s body
One curved rectangle for the tail
One long triangle for the bottom fin
Two small triangles for the tail fin
One long white triangle for the narwhal’s tusk
Kids can cut on the lines and build a narwhal. Use the picture above to construct the narwhal.
You can also use this craft as an opportunity to develop visual perceptual skills like form copying and eye hand coordination.
It’s a lot like building pictures with tangrams!
For a more complex craft, draw the narwhal on the blue cardstock in one big, and curved shape. Cutting on lines with multiple turns is appropriate for young tweens and older kids.
Find more crafts that address skills like scissor skills, direction following, and fine motor development on our crafts for kids page.
More Narwhal and fish Crafts to Build Fine Motor Skills
You’ll find more fish and narwhal crafts in our Summer Fine Motor Kit. Check out all of our seasonal and themed fine motor kids below:
Working on fine motor skills, visual perception, visual motor skills, sensory tolerance, handwriting, or scissor skills? Our Fine Motor Kits cover all of these areas and more.
Check out the seasonal Fine Motor Kits that kids love:
A narwhal craft is a fun and educational activity for preschoolers and kindergarten students. This cute arctic whale is a fascinating animal, with its long tusk and unique adaptations for life in the frigid waters of the Arctic. By creating a narwhal craft, children can learn about this amazing creature and develop their artistic skills at the same time.
There are many different types of narwhal crafts for preschoolers and toddlers. Some popular options include using a narwhal craft template to cut out a paper narwhal, creating a narwhal drawing or painting, or using narwhal clipart to decorate a cardboard or foam narwhal cut-out. These crafts can be adapted to suit different skill levels and interests, and can be completed with a variety of materials, including paint, markers, glue, and glitter.
To make a narwhal craft for kids, start with some basic materials like construction paper, scissors, glue, and crayons or markers. Cut out a narwhal shape from the paper and then decorate it with your chosen art supplies. You can also use a narwhal craft template to create a more detailed design, or look for narwhal pictures online for inspiration.
For a more challenging narwhal art preschool project, consider creating a 3D narwhal using foam, felt, or other materials. You can also incorporate other arctic animals into the craft, such as a walrus craft, to create a diorama or display.
In addition to making a narwhal craft, there are many other narwhal activities and resources available for preschool and kindergarten students. These include not quite narwhal activities, narwhal worksheets, and narwhal information for kids. By exploring these resources, children can learn about the habits, habitat, and adaptations of narwhals in a fun and engaging way.
Whether you’re looking for an easy narwhal craft or a more challenging narwhal project, there are many options available for kids of all ages and skill levels. By creating a narwhal craft, children can develop their artistic skills, learn about a fascinating arctic animal, and have fun in the process. So why not dive into the world of narwhals today and create your own amazing narwhal craft!
Colleen Beck, OTR/L has been an occupational therapist since 2000, working in school-based, hand therapy, outpatient peds, EI, and SNF. Colleen created The OT Toolbox to inspire therapists, teachers, and parents with easy and fun tools to help children thrive. Read her story about going from an OT making $3/hour (after paying for kids’ childcare) to a full-time OT resource creator for millions of readers. Want to collaborate? Send an email to contact@theottoolbox.com.
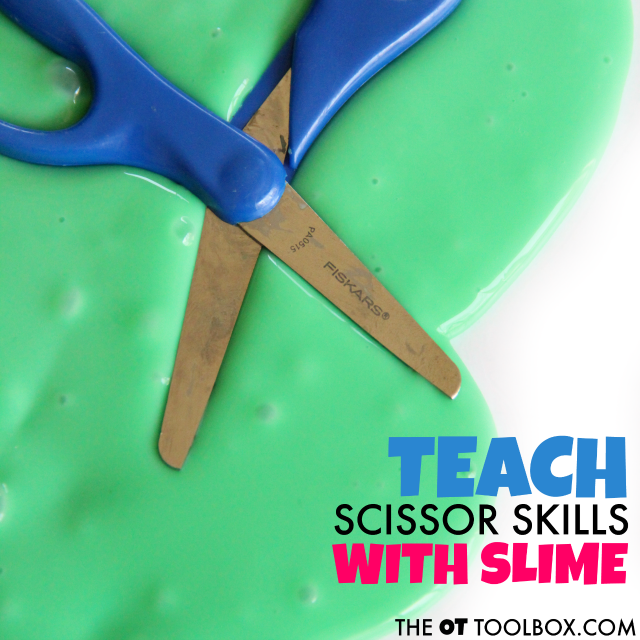
If your house is like mine, slime, making slime, and playing with slime is a daily activity and conversation piece. Slime is all the rage right now in the school-aged kids. So, you might be like me and wonder what to do with those six batches of slime that are sitting around the house. Why not use slime to work on scissor skills? It’s a nice texture for practicing scissor use and teaching kids how to snip with scissors. We shared fun ways to use slime for fine motor skills and adding scissors to the mix is one more way to use that slime!
Teach Scissor Skills by Playing with Slime
Affiliate links are included in this post.
First, you’ll need a batch of slime. Here are directions to make slime. Be sure to use caution with ingredients and research the best options for your family. Some recipes can cause inflammation to the hands.
Next, pull out your scissors. When teaching kids to use scissors, you’ll want a great pair that helps with scissor control and positioning. These are my favorite type of scissors as a therapist.
To work on scissor skills, you’ll need to have an understanding of how scissor skills develop. The new book by the Functional Skills for Kids therapy team is an excellent resource for promoting healthy development of scissor skills.
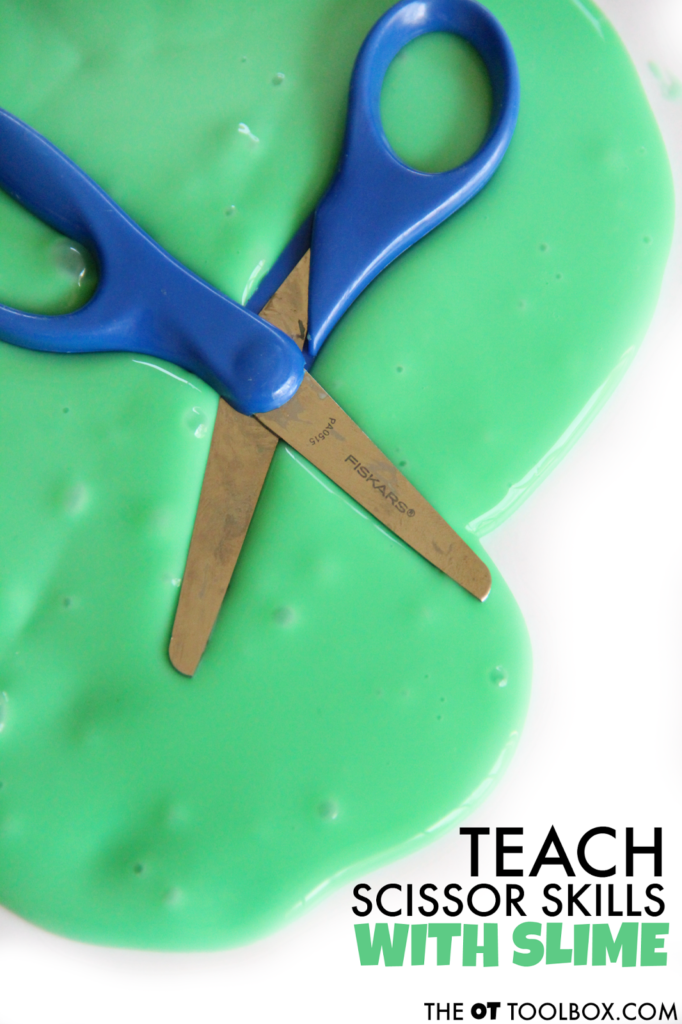
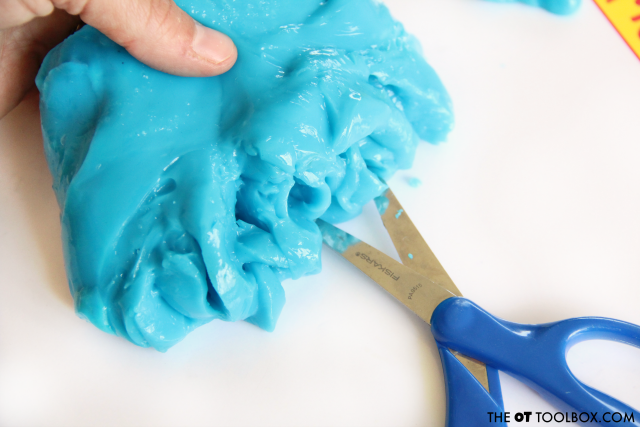
Use the slime to promote graded opening and closing of the scissor blades in order to cut across strips of slime. There are several other ways to address scissor skill development with slime:
Bilateral coordination to hold the slime with one hand while cutting it with another.
Cut snips into a lump of slime.
Roll a band of slime and cut one snip across.
Pull the slime into a thin sheet. Cut across the slime with forward motions.
Create a wide band of slime. Cut lengthwise down the slime, promoting bilateral coordination and forward cutting motions.
Affiliate links are included in this post. Ten Occupational Therapists and Physical Therapists have gotten together to write The Scissor Skills Book. It’s a book with resources for every underlying area needed for scissor use. It’s got tons of motor activities to address the areas needed for scissor skills. There are pages and pages of accommodations and creative ways to work on scissor use. This e-book is a giant resource for anyone who works with kids on cutting with scissors!
The therapists behind the Functional Skills for Kids series include a team of 10 pediatric physical and occupational therapists with years of experience in the field. Together, we have created the ultimate resource for tips, strategies, suggestions, and information to support scissor skill development in children. Read more about The Scissor Skills Book here.
Most parents have wondered at one point of another if they should allow their child to cut with a pair of scissors. But what if they decide to cut their hair off? Or what if they snip a hole in their best jeans? It can be a real struggle to allow your child to hold and use a pair of scissors!
Scissor skills are not easy skills to master! Many children start out holding and using scissors with an awkward grasp. They might switch hands when they hold the scissors or they might nip their crafts into a billion pieces because they can’t control or grad the force needed to snip and cut.
That’s why I’m excited to bring you The Scissor Skills Book!
(Affiliate links are included in this post.)
Challenges with Scissor Skills
You might have seen kids struggle with scissors before:
The child who struggles with holding scissors again and again.
The child who holds the scissors up in the air to attempt to gain control.
The child who snips their cutting worksheets into a million pieces.
This child who tears the paper as they cut and seems to plow the scissors through the paper.
The child who can not grade their cuts and over cuts lines or has jagged cutting lines.
The child who snips corners from shapes.
There are many different ways that kids struggle with scissor use and accuracy when cutting with scissors. Kids with underlying developmental difficulties need to go through the process of learning to use scissors and can experience struggles during that development, too.
Children who have developmental or neurological difficulties that impact scissor use will experience difficulty coordinating fine motor skills, gross motor skills, visual perceptual skills, visual motor skills, sensory processing skills, attention and behavior, and cognitive functions while cutting with scissors.
All of these areas are addressed in the new book by the Functional Skills for Kids therapy team.
The Scissor Skills Book
Ten Occupational Therapists and Physical Therapists have gotten together to write The Scissor Skills Book. It’s a book with resources for every underlying area needed for scissor use. It’s got tons of motor activities to address the areas needed for scissor skills. There are pages and pages of accommodations and creative ways to work on scissor use. This e-book is a giant resource for anyone who works with kids on cutting with scissors!
The therapists behind the Functional Skills for Kids series include a team of 10 pediatric physical and occupational therapists with years of experience in the field. Together, we have created the ultimate resource for tips, strategies, suggestions, and information to support scissor skill development in children. Read more about The Scissor Skills Book here.
The Scissor Skills Book is an 81 page PDF document that is delivered electronically. The book includes the following chapters:
Chapter 1: Developmental Progression of Scissor Skills
Chapter 2: Teaching Your Child to Use Scissors
Chapter 3: Gross Motor and Scissor Skills
Chapter 4: Fine Motor and Scissor Skills
Chapter 5: Visual Perceptual and Scissor Skills
Chapter 6: Sensory Processing and Scissor Skills
Chapter 7: Attention Challenges and Scissor Skills
Chapter 8: Helping Kids who Struggle with Scissor Skills
Chapter 9: Creative Ways to Practice Scissor Skills with Kids
Resources for Typical and Adaptive Scissors, Cutting Materials, and Further Information
References
Click on the Buy Now button to purchase The Scissor Skills Book for $11.99 for one week only!
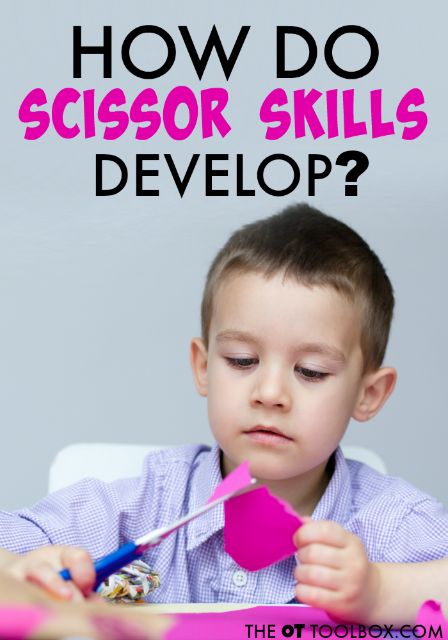
Cutting with scissors is fun for many children. When a child starts to show an interest in learning to cut with scissors, it is possible that they have already started the developmental progression of skills needed for scissor use. The steps of scissor skills development typically happens through play. So how do you know how a child learns to cut with scissors? And you may be wondering just how to teach a child scissor skills. In this post, I’m sharing the progression of development that allows a child to understand what scissors are to allowing them to use scissors accurately in order to cut complicated shapes.
How do scissor skills develop
They might see older siblings or a parent using scissors on a regular basis and be familiar with how the scissors fits on their hand (although they may position them incorrectly at first). Or they might only know that that shiny tool can cut paper into two!
There are many skills needed for cutting with scissors:
Because these skills develop both individually and in coordination with one another, and because the progression of scissor skill accuracy greatly depends on practice, I am not going to include typical age-ranges in this particular scissor skill post.
What you will see below is the general progression of scissor use. This development is important because we can see where accuracy and skill may breakdown with scissor use, safety, positioning, and accuracy when the underlying developmental stages are skipped or not successful.
Another huge impact relating to successful scissor use is practice time. Kids that head into kindergarten without ever having held or used a pair of scissors will struggle more greatly with the cut and paste learning activities that happen in the typical kindergarten classroom.
So, when it comes to helping kids learn to successfully use scissors, the greatest tip may be more practice!
Of course, when there are underlying areas that hinder successful scissor use such as fine motor control, visual motor integration, cognitive impairments, or other areas, then adaptations and accommodations to scissor tasks should be made.
But how can we know if kids are on the right track when cutting with scissors? The steps of development below are one way to put together the big pieces of the scissor use puzzle!
Child understands that scissors are used to cut paper
Child is able to hold scissors (incorrect hand placement)
Child is able to maintain a correct grip on scissors when positioned by an adult
Child is able to hold scissors in a correct grip without assistance
Child begins to open and close scissors
Child is able to open and close scissors using a controlled action (precision of grip begins to develop)
Child is able to hold paper and make small and random snips
Child is able to make consecutive cuts with a forward motion of the scissors, tearing the paper
Child is able to make consecutive cuts with a forward motion of the scissors, without tearing the paper
Child is able to cut straight lines forward across a page, while moving the helper hand forward (moving the paper with the scissors as in raising the shoulders/extending the elbows)
Child is able to cut straight lines forward without experiencing forward movement of the helper hand
Child is able to cut simple curves and angled lines (one direction change) without moving the assisting hand on the paper to re-position
Child is able to cut simple curves and angled lines (one direction change) while moving the assisting hand on the paper to re-position
Child is able to cut out simple lines with more than one direction change
Child is able to cut circles
Child is able to cut complicated shapes with straight and curved lines
For MORE information on scissor skills, you will want to check out The Scissor Skills Book, an e-book by myself and other pediatric Occupational Therapists and Physical Therapists. It contains everything you need to know about scissor skill development, practice, modifications, underlying challenge areas, and more! Check out The Scissor Skills Book.
The Scissor Skills Book
Affiliate links are included in this post.
Ten Occupational Therapists and Physical Therapists have gotten together to write The Scissor Skills Book. It’s a book with resources for every underlying area needed for scissor use. It’s got tons of motor activities to address the areas needed for scissor skills. There are pages and pages of accommodations and creative ways to work on scissor use. This e-book is a giant resource for anyone who works with kids on cutting with scissors!
The therapists behind the Functional Skills for Kids series include a team of 10 pediatric physical and occupational therapists with years of experience in the field. Together, we have created the ultimate resource for tips, strategies, suggestions, and information to support scissor skill development in children. Read more about The Scissor Skills Book here.
The Scissor Skills Book is an 81 page PDF document that is delivered electronically. The book includes the following chapters:
Chapter 1: Developmental Progression of Scissor Skills
Chapter 2: Teaching Your Child to Use Scissors
Chapter 3: Gross Motor and Scissor Skills
Chapter 4: Fine Motor and Scissor Skills
Chapter 5: Visual Perceptual and Scissor Skills
Chapter 6: Sensory Processing and Scissor Skills
Chapter 7: Attention Challenges and Scissor Skills
Chapter 8: Helping Kids who Struggle with Scissor Skills
Chapter 9: Creative Ways to Practice Scissor Skills with Kids
Resources for Typical and Adaptive Scissors, Cutting Materials, and Further Information
References
When you teach kids to cut with scissors, it can be quite difficult. There are many “parts” to scissor skills and cutting out a shape. Holding the scissors correctly, extending the wrist, grasping and turning the paper, opening and closing the scissors with precision, cutting along the line, and using graded cuts to stop and cut sharp corners and angles.
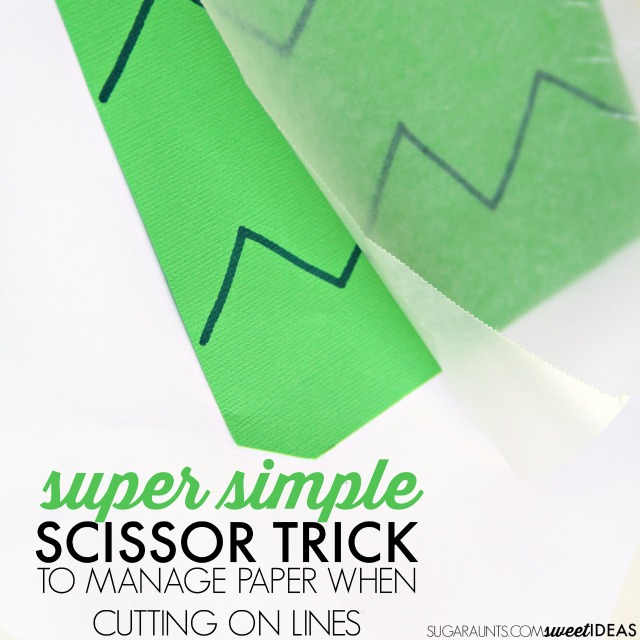
This simple trick to teaching kids to cut with scissors will help kids learn to hold and turn the paper with their assisting and non-dominant hand in order to accurately cut along lines, curves, corners, and angles.
This simple scissor skills trick is super easy to set-up and a creative way to build scissor skills, no matter what particular type of scissors are used.
Teach Kids to Cut with Scissors Using this Simple Trick
This post contains affiliate links.
When kids are learning to cut with scissors, one obstacle can sometimes be holding and turning the paper. In order to cut out shapes, one needs to hold the paper with their non-dominant and assisting hand.
They need to use bilateral coordination to use both hands together in a coordinated manner with integration of eye-hand coordination. The hands must come together at midline and manipulate the scissors and assisting hand together.
When a child has difficulty holding the paper with a neutral or supinated wrist or maneuvering the assisting hand to hold and turn the paper, scissor skills can be problematic. Teaching kids to hold and move the non-dominant hand while they cut along a line may require verbal or visual cues for accuracy, yet sometimes continues to be problematic and result in inaccuracies with cutting skills.
This simple trick to teach kids to cut with scissors provides a visual and tactile cue for moving the non-dominant hand along the paper as they cut a line or shape.
It’s a simple way to improve bilateral coordination with visual motor integration of the non-dominant hand in a tasks that requires both hands working together smoothly.
Help kids turn the paper when cutting with scissors.
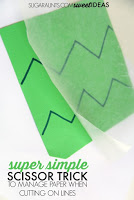
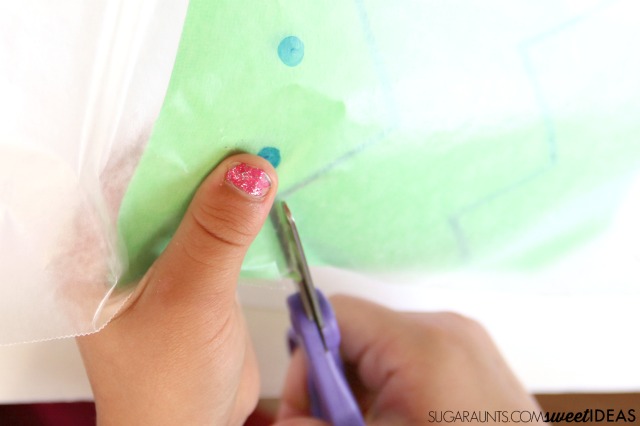
To help kids learn to hold the paper, simple place a piece of wax paper over the paper that they are cutting. They wax paper will allow them to see through to the line and they can practice holding and pinching the paper between their thumb and lateral index finger. Some lines may need darkened with a marker.
If kids are having trouble managing the paper and the wax paper, use a piece of tape to attach the wax paper to the main page. Leave the remaining sides open without tape to encourage pinching the wax paper to the page.