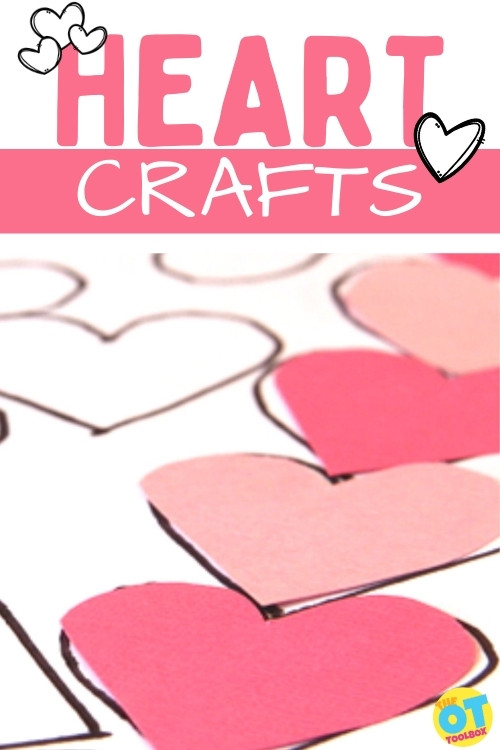
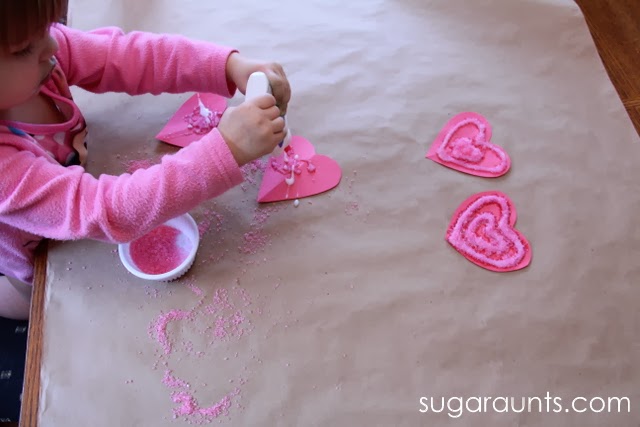
Let’s face it, the heart candy and chocolates are already in the stores and children are already anticipating the consumption of all the sweet treats they are going get. Some children have even begun to plan their Valentine’s gifts and handouts for their friends and family. Add these heart crafts to your Valentine’s Day occupational therapy activities!
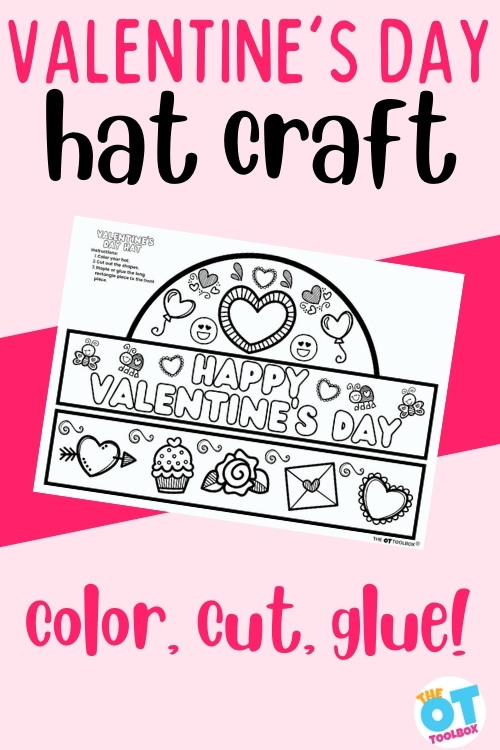
One of our newest heart crafts is this free Valentine’s Day Hat Template. Kids can color, cut, and assemble the heart hat in OT sessions, in the classroom, or at home. This printable heart hat makes a great craft during February, but it doubles as a skill-builder: Use it to work on fine motor skills, hand strength, scissor skills, eye-hand coordination, executive functioning skills, and more.
Heart Crafts for Occupational Therapy
Whether it is a pink, red, or purple heart, OT practitioners simply love crafts that incorporate a variety of skills and give the flexibility for each step to be modified, so as to upgrade or downgrade as needed, to allow all children to engage in the craft making process while achieving some level of success.
You’ll find heart craft creations that range from easy to more complex, making them accessible by younger or novice learners that have fewer hand skills, or more advanced learners that need more skill advancement and require increased time to complete.
There are numerous enjoyable heart craft ideas in this post. If you need something sweet to jazz up your therapy session, classroom, or at-home theme, this post is right where you need to be. Read on and get ideas that don’t include tasty sweets, but do include all the sweetness of the Valentines holiday!
Wearable Heart Crafts:
These fun, festive heart crafts can include wearable jewelry, ornaments, or provide a source of Valentine’s Day gifts. They will encourage separation of the two sides of the hand, in-hand manipulation, precision grasp, and arch development, making them purposeful and productive.
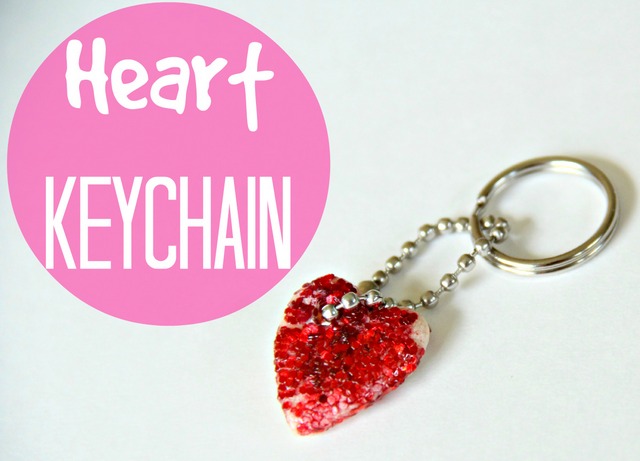
Heart Keychain Craft– Make a batch of salt dough and create a heart keychain. This is a great multi-step activity for learners to develop executive functioning skills.
These paper crafts include folding, painting, cutting, pasting, weaving, and writing.
All of these actions will help your learner of most any age and skill level to work on bilateral hand use, eye-hand coordination, scissor grasp, hand dominance, delicate touch, grasp patterns, and visual motor skills.
Another easy heart craft for preschoolers is to simply cut out paper hearts and then fold the paper in half. You can also reverse the steps and first fold paper in half and then cut along lines to make a heart. Then unfold the paper.
Foam Crafts:
These foam crafts are not only cute, but they help learners develop skills such as proper scissor grasp, cutting skills, rotational manipulation, sequencing, and precision skills.
Once complete, some provide a functional use in the end – a bookmark!
Cardboard is a material that develops hand strength, pincer grasp, bilateral coordination, hand dominance, stability, and eye-hand coordination. Some of the crafts listed will provide opportunity for lacing, wrapping, poking, cutting, and tearing, all of which give hand skill development a real challenge.
These fun cardboard crafts will allow focus on a variety of skills while being highly engaging and rewarding.
While these food inspired heart crafts, do use food as a medium, these festive food crafts will include only decorations and a few ideas for a way to feed the birds.
Learners will work on building precision grasp, gross grasp, bilateral coordination, and eye hand coordination skills.
These tin foil crafts are unique in appearance, but also help build maker grasp, fine motor control, and tool pressure. If the child tears off their own piece of foil from the roll and wraps the foil themselves, they will also be working on bilateral coordination and touch pressure.
Older or more advanced learners can be presented with the opportunity to use a glue gun (always use caution with these as even the cold glue guns get hot at the tip). Learners can display their own creativity with these crafts.
In The Valentine’s Day Kit offered by the OT Toolbox, you will find printable heart activities and craft materials. Just download, print, and start building skills. This pack is a great tool for developing a variety of fine motor skills for Valentine’s day or all year round!
We hope you enjoyed all of the crafts included in this round-up of ideas and that you have found exactly what you are looking for to help the learners in your life enjoy Valentines day and celebrate the LOVE of this season!
Regina Parsons-Allen is a school-based certified occupational therapy assistant. She has a pediatrics practice area of emphasis from the NBCOT. She graduated from the OTA program at Caldwell Community College and Technical Institute in Hudson, North Carolina with an A.A.S degree in occupational therapy assistant. She has been practicing occupational therapy in the same school district for 20 years. She loves her children, husband, OT, working with children and teaching Sunday school. She is passionate about engaging, empowering, and enabling children to reach their maximum potential in ALL of their occupations as well assuring them that God loves them!
Grab a copy of the Valentine’s Day Fine Motor Kit for fine motor and visual motor activities with a heart and Valentine theme.
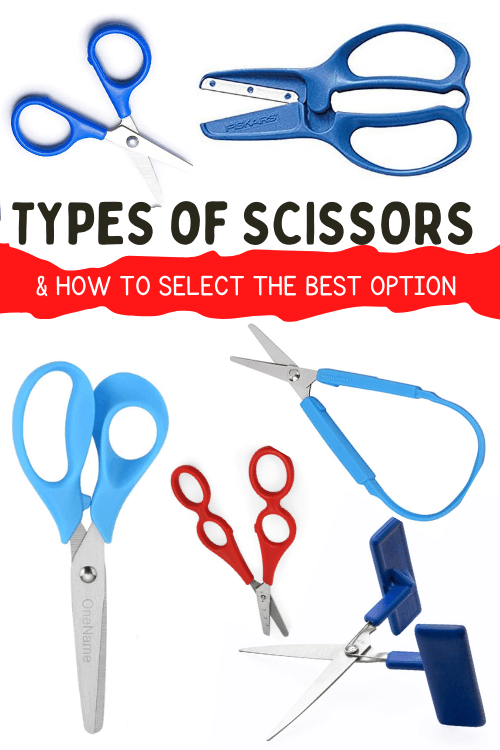
Did you know there are many different types of scissors to support development of scissor skills? It’s true! No matter the motor skill ability, there are different type of scissors that supports that ability or skill development. Cutting skills, like writing, are a foundational fine motor skill. Just as you would spend time selecting the right pen/pencil, makeup, hair accessory, or pair of shoes, it is important to select the correct types of scissors.
Why do different types of scissors matter?
What do you look for when selecting that perfect pair of shoes?
Fit
Size
Price
Durability
Reputation, reviews
Quality
Functionality
Believe it or not, the same care can be placed in selecting the correct pair of scissors. This is especially important if your learner has fine motor delays, hand weakness, difficulty with motor planning/coordination, small/large/irregular hands, or a diagnosis impacting their skills.
Here are a few real life examples:
Lula is 4 years old with dwarfism. Her hands are tiny. Her parents would be very unlikely to buy her shoes that fit a grown man. At her school, Lula was provided with regular sized scissors, thus struggling to learn this important skill.
James is 7 and has Down Syndrome. Not only are his hands weak, but they are small. While care is taken to select the right shoes and clothes for him, selecting the right scissors is just as important.
Marcy is 5 year old and has cerebral palsy, limiting her hand and arm movements. She too should have extra consideration in the type of scissors that she uses.
What are the options for types of scissors?
*Disclamer – Many of the following product recommendations are affiliate links from Amazon. This does not mean these are the best, just the easiest to find. If you prefer another vendor, check out the examples below, then type them into your Google search bar.
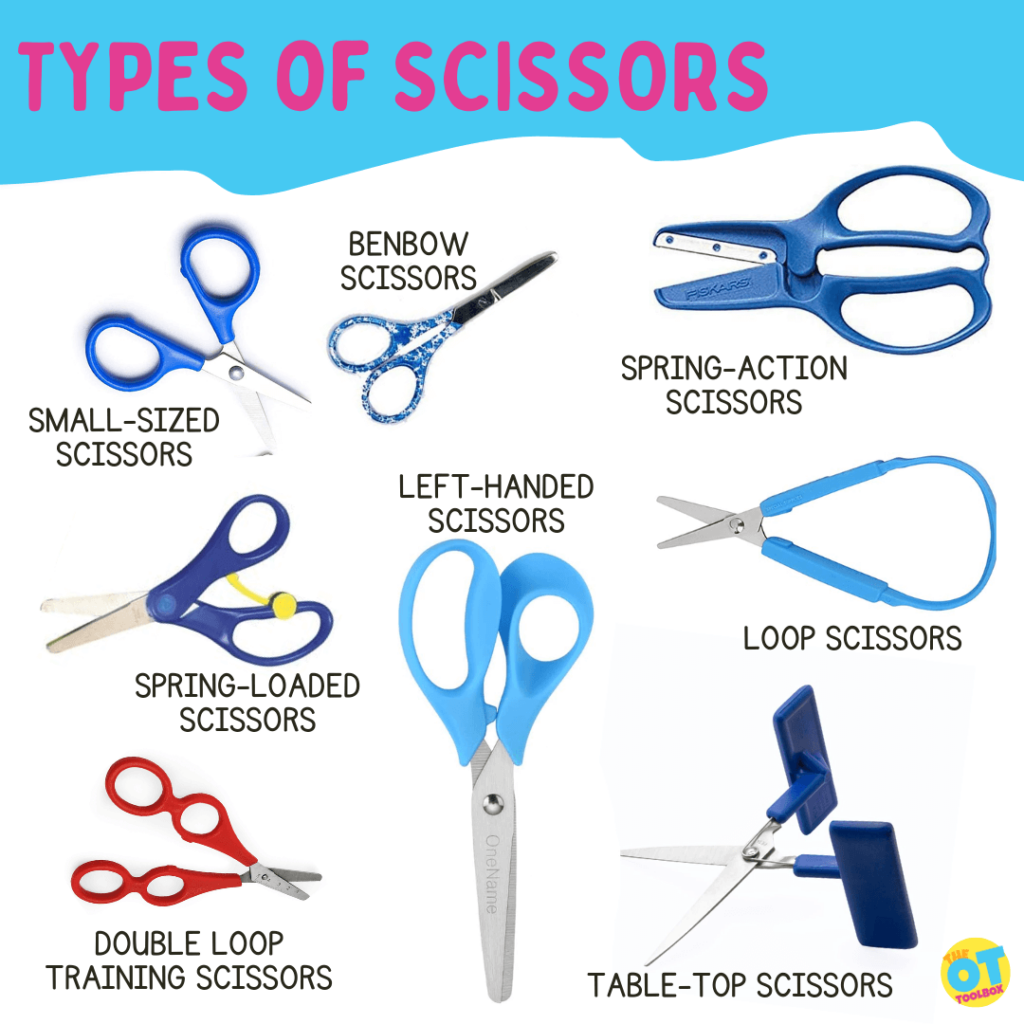
1. Small Sized scissors
Beginner small-sized scissors- These scissors are all small in size. They are not just for small hands. These are great for learners with all types of fine motor issues, and hand weakness.
These beginner scissors are Amazon affiliate links.
I like these toddler sized scissors because they are very small. They are great for tiny hands, or learners with fine motor weakness.
This learning pack of scissors contains toddler sized scissors, as well as training scissors. See below for more information about training scissors.
Sewing scissors are great because they are tiny, however, they are SHARP! If you are going to use these, either dull the edges with a file, or be extra careful with your learners.
These Benbow Scissors, made by Mary Benbow are the gold standard of training scissors.
2. Training Scissors
Training scissors should be used as a stepping stone to graduating to a higher level type of scissors, once they are mastered. If training scissors are not mastered, your learner can use these indefinitely.
The training scissors listed below are Amazon affiliate links.
Self-opening scissors: many learners are able to pinch their fingers together long before they can open them during cutting at will. The key to motivation is success. While using these scissors, the hands get valuable feedback of this cutting motion. These self opening scissors fit the price and durability category, but they do not fit the functionality definition. These blunt scissors, while inherently safer than sharp scissors, do not cut well, and cause more frustration than progress.
Spring-assist scissors- This pair of self opening scissors or these soft-grip scissors fit the function, and durability categories. They are more expensive, but cut better than safety scissors. They are larger than the toddler scissors, so be sure that size is not a concern first
Double loop scissors – While I do not like that these are labeled “mother and child scissors” (because this is not inclusive), they work well. People learn by doing. Kinesthetic awareness is learning by moving. These double loop scissors give your learner the feedback needed to practice and learn the cutting motion
Trialing two kinds of scissors- This scissor pack has double loop scissors and self opening scissors to trial different kinds of scissors with your learners, or progress forward as they develop skills.
3. Scissors for Special Needs
There are times when traditional scissors do not work and a specific adaptive scissor type is required. If your learner has weakness, a hand injury, tremors, increased/decreased muscle tone, or another long term condition, various scissors for special need areas are a good option.
Scissors in this category include loop scissors, block scissors, tabletop scissors, and electric scissors.
For learners with small hands, or who are developing hand strength, I would recommend self opening scissors first, or using these adaptive scissor types for a very short period of time.
These different types of scissors designed to meet specific needs are Amazon affiliate links.
Loop scissors – These are also described as self-opening scissors. Some learners can not isolate their fingers enough to work traditional scissors, or have a sensory aversion to sticking their fingers into the little holes on the handles of the scissors. These spring open once depressed. They do take a fair amount of strength to grip for a prolonged amount of time, so these may not be the best choice for your learners with low tone or decreased strength (unless of course you are looking for a tool to increase strength).
While these mini loop scissors at 5.5 inches are smaller and take less grip strength, they also do not cut very fast, instead making small snips.
These self opening loop type scissors are popular. They require less dexterity than traditional scissors, but they do not cut very well. Because the mouth of the scissors does not open wide, they do not make large cuts.
Scissors for Limited mobility – For learners missing digits, or with limited grasp, such as amputees or quadruplegic patients, use of just one upper extremity, visual challenges, or other mobility and coordination concerns, these tabletop scissors can be fastened to a table with a clamp or velcro to assist in opening containers. They are not great for intricate cutting, as they are labor intensive and can be frustrating, but more usable for self help skills.
Power option – for learners with limited mobility or fine motor dexterity, electric scissors can be a motivating option for cutting. They take some strength and coordination, but can be helpful for learners who can not use traditional scissors. These types of scissors take some practice to get used to them.
Left handed Scissors
Similar to questions on left-handed writing, teachers and parents are forever inquiring about left handed scissors and how to help with left handed cutting.
What is the left handed scissors difference?
There is definitely a difference between left-handed scissors and right-handed scissors. Right-handed scissors have the right blade positioned on top, whereas left-handed scissors have the left blade positioned on top. This prevents unnecessary bending and tearing of the paper. This difference between left and right handed scissors also allows each user to maintain a clear visual view of the cutting line.
Scissor handles are often molded to accommodate either the left or right hand. When manufacturers claim they have created a pair of ambidextrous scissors, be aware that such a thing does not exist. They have simply created a “neutral” handle accessible for the both left and right hand. The blades are still right-hand oriented. Thus, left-handed users should not be given scissors marketed as being appropriate for both left-handers and right-handers.
True left handed scissors have the cutting blade positioned on the top. Neutral scissors or scissors that can fit both left and right hands may cause additional frustrations.
There are several types of scissors for lefty’s available, but what are the best left handed scissors?
These basic lefty scissors (affiliate link) are ideal. If it wasn’t such a right handed world, I would recommend these to all lefties.
Being a lefty myself, I understand the benefit and fit of left handed scissors. The majority of scissors your learner will encounter will be right handed, so it is better to learn and adapt to traditional scissors. There are only a few left handed items that are necessary (can opener, ice cream scoop, binder, ladle, vegetable peeler.)
Tips for Left handed cutting:
Use sharp scissors – this way the blade has less chance of just bending the paper instead of neatly slicing through it
Don right handed scissors upside down – for some reason putting the thumb in the fingers hole changes the blade position, and makes cutting easier.
Lefties cut CLOCKWISE. Righties cut COUNTERCLOCKWISE. This is important. If your learner cuts in the wrong direction, this leaves them without the ability to hold onto and turn the piece of paper that is being cut. Try it!
time to learn to cut
Now that you have selected the right fit, durability, functionality, and quality of scissors for your learner, it is time to learn to cut! The OT Toolbox has multiple posts and products available for practicing scissor skills. There is a comprehensive scissor skills guide available also.
The key to cutting skills –
Thumb and middle finger in the scissor loops. You can add ring finger into the loops if they are large. Pointer finger stays out and points the way. This adds to hand stability and opens the arches of the hand further.
Thumbs up! The helper hand grips the object being cut, with their thumb facing up. This gives the object being held greater stability, and ease of movement. All of the various types of scissors could have a sticker added as an additional adaptation to help with positioning.
Want a printable guide to the various types of scissors? You are in luck. We have a one page printable guide that shows images of the different versions of scissors on the market. These are the different scissor types you might see in a therapists’ therapy bag!
Now you can quickly share information on why each type of scissor might be used and determine which type of scissor to use based on the individual needs of the learner.
To get your copy, just enter your email into the form below.
Current Membership Club members can log into your account and head to the dashboard toolbox labeled “Scissor Skills Downloads“. Print off the handouts without the need to enter an email address.
Want to add this resource to your therapy toolbox so you can help kids thrive? Enter your email into the form below to access this printable tool.
Want to add this resource to your therapy toolbox so you can help kids thrive? Enter your email into the form below to access this printable tool.
This resource is just one of the many tools available in The OT Toolbox Member’s Club. Each month, members get instant access to downloadable activities, handouts, worksheets, and printable tools to support development. Members can log into their dashboard and access all of our free downloads in one place. Plus, you’ll find exclusive materials and premium level materials.
Level 1 members gain instant access to all of the downloads available on the site, without enter your email each time PLUS exclusive new resources each month.
Level 2 members get access to all of our downloads, exclusive new resources each month, PLUS additional, premium content each month: therapy kits, screening tools, games, therapy packets, and much more. AND, level 2 members get ad-free content across the entire OT Toolbox website.
a final note on selecting the correct types of scissors
Pamper your learner with a great pair of scissors, just like you do when you purchase those amazing shoes. Fit and function over price. Quality always wins. Fiskars are the gold standard for traditional scissors, and the one type almost every therapy provider has in their OT bag of tricks. They cut paper well and come in tons of sizes and designs.
So…what are the worst scissors? Most therapists agree that those “safety scissors” that don’t cut anything except maybe playdough are absolutely the worst. Save those for playdough, and upgrade when it comes to cutting anything else.
Victoria Wood, OTR/L is a contributor to The OT Toolbox and has been providing Occupational Therapy treatment in pediatrics for more than 25 years. She has practiced in hospital settings (inpatient, outpatient, NICU, PICU), school systems, and outpatient clinics in several states. She has treated hundreds of children with various sensory processing dysfunction in the areas of behavior, gross/fine motor skills, social skills and self-care. Ms. Wood has also been a featured speaker at seminars, webinars, and school staff development training. She is the author of Seeing your Home and Community with Sensory Eyes.
*The term, “learner” is used throughout this post for readability, however this information is relevant for students, patients, clients, children of all ages and stages, or whomever could benefit from these resources. The term “they” is used instead of he/she to be inclusive.
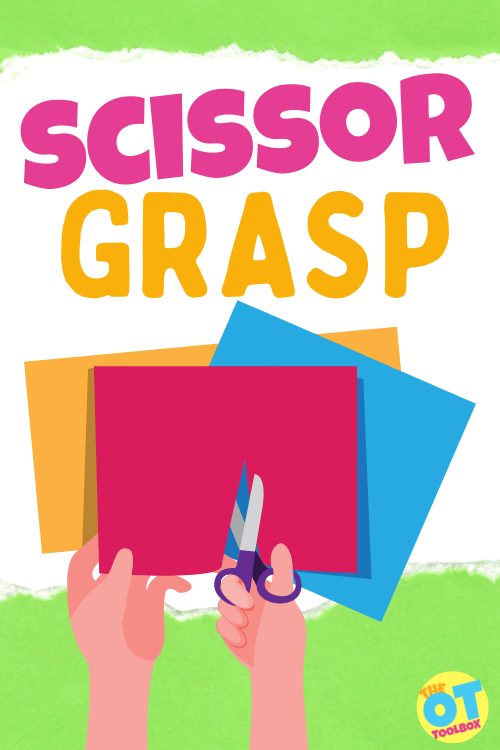
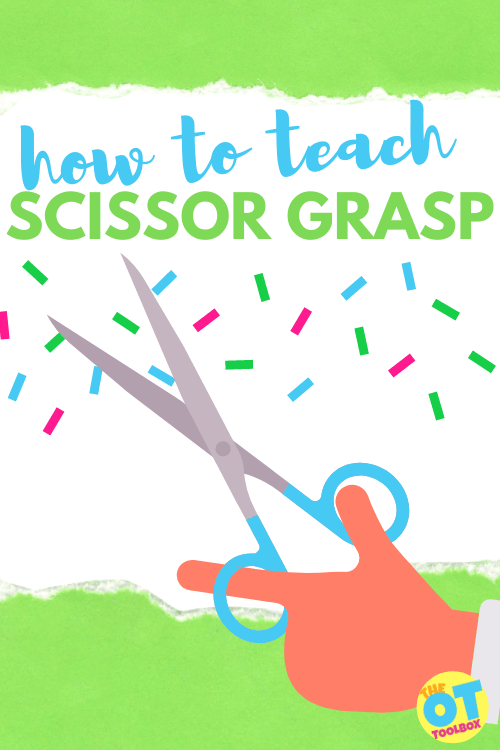
Part of teaching scissor skills is knowing how to hold scissors. Holding scissors correctly is a skill that some children struggle with achieving. You can walk into any classroom and see multiple ways children grasp scissors. This impacts the way they are able to cut with good hand and finger control. If bad habits are learned early, these can be difficult to correct, but not impossible. Check out the Steps of Scissor Development for a more detailed development of how to hold scissors, and learning scissor skills.
How to Hold Scissors
For the purpose of this post, we are focusing on the proper and effective grasp of scissors and how this can be achieved. Think of it as a basic pyramid or hierarchy of skill building that begins with pre-scissor skills and advances to scissor skills. You could consider this the hierarchy of holding scissors.
This post will address each step in learning to hold scissors, and provide information/activities to help at whatever stage your learner is stuck.
Take a look at each level related to holding scissors correctly:
a. Pinch and release finger movements
b. Scissor grasp
c. Open and close hand and finger movements while snipping paper
d. Repetitive open and close hand and finger movements while cutting
When teaching how to hold scissors correctly, first observe their current skill level. If they have learned some bad habits or techniques, back track to an earlier stage of scissor skill development, moving forward from there.
It is best to catch a child while they are first learning a skill, but we all know that may not be possible.
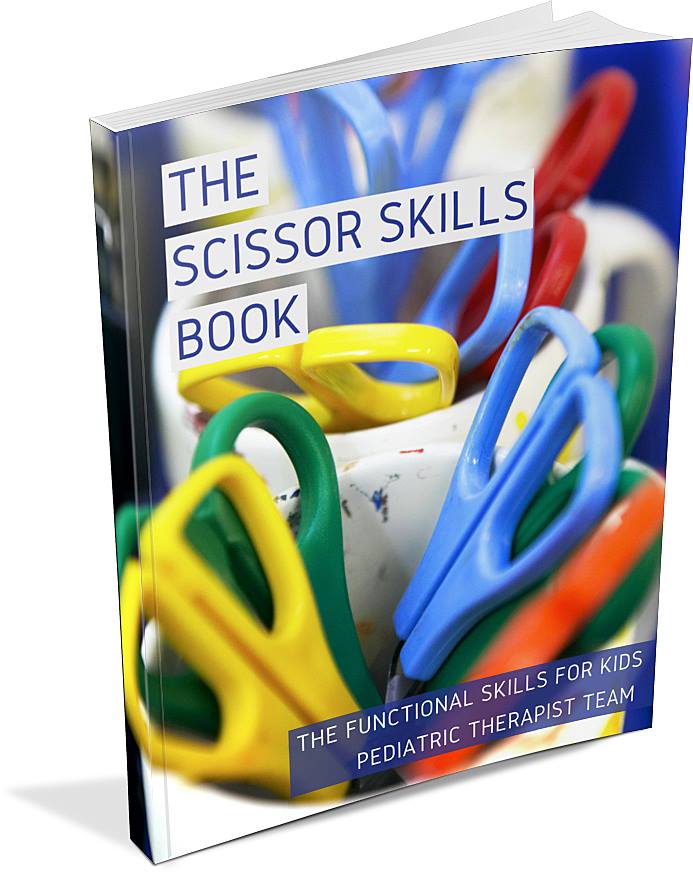
The OT Toolbox has a great Cutting with Scissors Program. You’ll find some fun ideas and strategies for every stage of scissor skill learning. There is a great Scissor Skills Book in the shop section of the website.
how to hold scissors: Pre-scissor skills Pinch and release
Before scissor skills can be mastered, young children need to establish the pre-scissor skills of pinch and release. These are preschool scissor skills that are established through play. Similar to the preschool pre-writing skills established in the preschool years, learning to hold scissors starts with grasp and release of small objects in play.
Step one focuses on pre-scissor skills with the use of fun, inexpensive tools that are wonderful for hand strengthening. These teach the hand/finger actions of pinch, squeeze, and release to help learners get ready for being successful holding scissors.
Tearing or ripping materials is a great way to work on pinch and release. Be sure your learner is not using a gross grasp to twist and rip. Have them work on pinching and tearing with use of the tips of the fingers. If this is too difficult, give a little help by making a slight tear to start with, then encourage them to finish.
Tearing teaches children how to use two hands together in a coordinated manner. Try these activities:
tear small squares and other shapes from strips of paper to create a paper salad or pizza
tear small pieces of tape from a roll and stick on an outline
tear tissue paper or crepe paper into small squares and pinch up into small balls to make a picture craft
tear small pieces from leaves as part of a nature tray
rip cotton balls into smaller pieces to create an art piece or stuff a baggie
pull apart strips of Velcro to separate the hook side from the loop side
You’ll want to check out this blog post to discover how to tear paper with specific activities that are developed and activities to work on this fine motor skill using just paper and the hands.
Pinching and squeezing can build hand and finger strength, while releasing objects with precision (in hand manipulation) works on the beginning stages of open and close hand actions.
pinch and release small play dough balls into flat pieces called ‘mini-pies’
pinch along a play dough log from left to right to make small indentations
pinch clothes pins (this blog post shares several pinch exercises and activities using clothes pins)
pinch bubble wrap bubbles to make them pop
pinch and squeeze small sponge squares to wring out water
pinch the end of a craft stick and play tug-o-war with a partner
pinch and release coins into a bank, change it up and alternate with coins, buttons, and game chips
pinch and stack blocks or mini-erasers
blow bubbles and attempt to pinch and pop small bubbles in the air
Also check out this blog post on pincer grasp activities for precision of pinching activities.
This resource on hand strengthening activities covers additional scissor skills for preschoolers to develop for holding scissors correctly.
Scissor Grasp
Teaching kids how to hold scissors can be difficult. Placing scissors in the loops can be a test of visual perceptual skills and fine motor skills. To help with holding scissors, you can break the process down into several areas: thumb positioning, placement of the other fingers in the loops, and wrist positioning.
When it comes to scissor grasp, you can use additional supports to ensure proper, or functional, finger placement on the scissors.
First, let’s go over a point about functional scissor grasp.
Functional Scissor Grasp
Much like a functional pencil grasp, scissor grasp should be functional as well. What is meant by this is that not all scissor grasps may look the same. One child may hold the scissors with the pointer finger, or index finger through the guiding loop and others may place both the index finger and the middle finger through the guiding loop of the scissors. What is most important is that the child is able to cut age-appropriate shapes, materials in an effective, efficient, and safe manner.
A functional scissor grasp might look differently for each individual. But if a middle school student is able to cut worksheet items, coupons on the lines, cut gift wrap, or other materials in order to learn, function at an age-appropriate level, with safe use of the scissors, then you have functional scissor grasp. Focusing on precise placement of the fingers on the scissors isn’t necessarily an important area of focus.
However, when teaching scissor grasp, there are important things to keep in mind.
How to Teach a Thumbs Up Scissor Grasp
When it comes to grasping the scissors, your learner should use a thumbs-up approach to grasp scissors or the paper being cut.
There are several strategies for teaching kids to hold scissors with “thumbs up”:
You can simply just use a verbal cue.
Place a sticker or draw a smiley face on the thumbnail to provide a visual cue.
Place a sticker or tape on the scissors to visually remind learners of proper scissor placement in the hands.
Add a “shark fin” to the thumb scissor loop. The fin should be up when cutting.
Playing thumbs-up games, like thumb wars, can help to encourage use of this position with more automaticity.
Let’s look at the other fingers needed for correct scissor grip.
The skill fingers of the hand need to be used to open and close tools, and are essential when working on scissor skill development. Skill fingers are the thumb, index, and middle fingers and they are responsible for grasping, and manipulation of tools.
We covered the thumb positioning on the scissors above, but the placement of the other fingers can be where holding scissors correctly gets a little sticky.
Pointer Finger Placement- Most often the first finger stays out of the scissors’ loops. It is used to “point the way.” When the pointer finger is positioned around the bottom loop rather than inside the loop, it helps to guide the scissors. This opens up the arches of the hand, especially for your learners with small hands. This may feel awkward at first, but will soon become a habit.
Middle, Ring, and Pinky Finger Placement- Placement of the remaining fingers depends on the type of scissors used. Some scissors have a small circle loop that require only the middle finger to go through the loop while the ring and pinky finger are tucked into the palm. Other scissors have a larger bottom loop that allow the middle, ring, and pinky fingers to all fit in the loop.
The main job of the ring and pinky fingers are to stabilize the scissors. They curl into the hand to help stabilize, supporting the arch of the hand, much like in a pencil grasp. This is where motoric separation of the sides of the hand is important, much like in holding a pencil or crayon. To encourage your learner to keep the stability fingers curled into the palm, give the child a small pom-pom ball to hold in their palm with the ring and pinky fingers while the skill fingers work.
When teaching young children to hold scissors, it is best to use a pair of scissors and stick to that scissor type to reduce confusion between holding patterns.
Wrist Position when Holding Scissors- A stable wrist is needed to ensure a functional grasp on the scissors. If the wrist is bent, the scissor blades will not be able to open/close effectively and line accuracy will suffer. The wrist should be positioned in a neutral position, and not flexed (bent forward) or extended (bent backward). This blog post on wrist stability covers activities to address this motor skill.
Elbow and Forearm Position- Always check the child’s elbow position when using scissors to cut. Their elbows should be by their sides and not winging outward. You can use a hack trick by having the child hold a piece of paper under their cutting arm while cutting. Tell the child to be careful and not let the paper fall!
Activities for holding scissors: addressing open-close
Next, we’ll look at the scissor skill for the open and close hand movements necessary for correct scissor grip. There are various tools that can be used to promote open and close hand and finger movements while maintaining a grasp and positioning of the scissors.
Tongs or clothespins– Learners can use a variety of tongs to help learn open-close actions. These can be simple kitchen tongs, toaster tongs, (Amazon affiliate link) strawberry huller, clothespins, or something as fun as scissor tongs or bubble tongs.
Show learners how to open and then close tongs to pick up and place small objects such as cotton balls, marshmallows, or pom-poms. Play a game to race and fill a small container. Learners can use clothespins to hang up socks or washcloths on a clothesline. These activities will help them understand and learn the concept of open and close before transitioning to actual scissors.
Pickle Picker– A (Amazon affiliate link) pickle picker is a therapist favorite when it comes to building strength and stability in the thumb and arches of the hand. To use a pickle picker as a therapy tool, one needs to maintain a stable wrist, isolate the thumb to slowly press down on the plunger of the tool. To lower the claws of the pickle picker, you need to add force through the thumb with a stable hand in order to grab a small object. Then, to grasp the item, you need to slowly release force through the thumb allowing for graded release. We use pickle pickers to grab and sort craft pom poms, mini erasers, and other small objects (not just pickles!) Pickle pickers are a great eye-hand coordination and strengthening tool to use with our craft pom pom activity sets.
Hole punch– Children can use a hand-held hole punch to punch holes in paper. You can use a regular hole punch or you can use festive hole punchers that have different shapes like hearts, stars, and raindrops. Use the hole shapes to paste on paper and create fun bugs, snow scenes, or fireworks. This activity will help build hand strength and work on the open-close hand action.
Water squirters/Spray Bottles– Practice grasping and releasing the trigger on water squirters using the skill fingers to pull the trigger. Show them how to make the water come out to spray on objects such as dirty toys, chalkboards, pavement, and sidewalks. This helps to strengthen the fingers and hand and teach grading their movement patterns. Be mindful how parents feel about squirters that resemble weapons. Choose animal shaped squirters or spray bottles instead.
Mini staplers – Use mini-staplers to work on similar movements needed with scissor use – grasp, squeeze, and release. Color the staples with a permanent marker or buy the staples in different colors to make the activity more fun! This works on hand and finger strength as well as open and close.
Eyedroppers – Play with eyedroppers to squeeze water drops onto coins, or colored water onto coffee filters or paper towels. This works on finger strength, grading their movement through proprioception, and finger movements.
Wind-up toys – Try wind-up toys to work on bilateral hand use with one hand holding the toy while the other hand twists the crank. Bilateral hand use is needed for cutting with scissors.
Finger game songs – Play finger game songs to work on separation of the two sides of then hand. Try The Itsy-Bitsy Spider, Two Little Blackbirds, Where is Thumbkin, and Open Shut Them. Want other finger rhyme ideas? Grab the free Favorite Finger Play Rhymes and Songs at Your Kids OT website. These work on finger and hand movements needed for holding scissors.
holding scissors with open-close for snipping
Next, let’s look at holding scissors and working on open-close motion with snipping movements. This is a good how to hold scissors preschool activity to use when teaching young children to cut and maintain a functional hold on the scissors. At the preschool and Pre-K age, snipping with scissors is age appropriate.
You can first approach snipping by performing some fun warm-ups using the correct hand position and motion without scissors in hand. Then move to doing these same movements while holding the scissors, without cutting anything yet. Focus on having them learn to hold scissors correctly.
When first introducing the scissors to your learners, start with correct finger placement and orientation of the scissors. A mature way to hold scissors looks like this:
The thumb goes inside the top loop of the scissors.
The middle finger goes into the bottom loop of the scissors.
The index finger goes on the outside of the bottom loop to stabilize and provide directional control of the scissors. (As a visual cue, you can place a sticker or dot on the exterior of the bottom loop for where the index finger holds the loop.)
The ring and pinky fingers go curled into the palm.
The wrist is slightly rotated inward as the thumb is up.
The assisting hand holds and manipulates the paper.
If the learner is a beginner cutter, the index and middle finger can go into the bottom loop at the same time, until their grasp becomes more mature and the index finger can shift to the exterior of the bottom loop.
Keep in mind leaving the first finger out of the loop will open up the hand arches for easier cutting. A tip for the placement of the middle finger in the bottom hole: rest the scissor handles on the middle knuckle of the middle finger (the one closest to the fingertip).
Prevent the child from shoving their fingers into the loops all the way down to bottom knuckle as this makes it very difficult for the child to open and close the scissors skillfully.
Poem to Teach Scissor Grasp
Here’s a fun poem to help a child remember where their fingers go in the scissor loops:
Thumb on top,
two below,
two get curled,
and away you go!
Don’t forget that a visual cue with use of a sticker or smiley face drawn on the thumbnail, along with a pom-pom ball curled into the palm with the ring and pinky fingers, can be used to assist with correct scissor grasp.
Here are some fun activities for holding scissors:
Pretend their fingers or scissors are: a train using “choo-choo” as open and close verbal cues.
How about a car using “beep, beep” as open and close verbal cues (you can draw headlights on the tips of the scissor blades and play an open-close game).
Or a crocodile and use “chomp, chomp” as open and close verbal cues (you can draw teeth and an eye on a pair of scissors and play an open-close game)
Exercise those scissor holding fingers by doing open and close movements like the ASL (American Sign Language) hand sign for scissors
Snipping activities for learning to cut with scissors
This involves the use of scissors and singular snipping of objects to work on initial development. Snipping movements begin as random snips with simple open and close of the blades, and as skill improves advancing to snipping with more control.
Snipping Activities:
Pretend the scissors are a crocodile, train, or car and work on random snipping
Snip play dough that is rolled into a log or snake form, Playdoh barbershop is a great tool for snipping!
Cut straws, yarn, tape, packing peanuts, small strips of paper into pieces, small bands of paper can be snipped to rescue an item in a box
Go outside and trim the grass by snipping it with the scissors
Paper or yarn can be cut, that is part of a fun craft such as haircut, pizza, snowman, critter rescue
Try thicker paper (cardstock, construction) or thinner copy paper around the edge to create fringe while working on the helper hand holding and manipulating the paper. This resource covers the progression of paper grades to support cutting skills.
Snip on lines drawn around the edge of a paper plate or on small strips of paper to begin snipping with more control and precision of the scissors
Place stickers along the edge of paper or index cards and have the child chomp through the stickers with snipping action
how to hold scissors with repetitive open-close for cutting
The final skill is the repetitive open and close hand and finger movements, moving forward with the scissors to cut with control and precision on cutting lines.
This begins with straight lines, advancing to curved lines, circle shapes, to angled lines and shapes with corners. All of these require good bilateral hand use with the assisting hand to advance and turn the paper.
Thicker lines are the easiest for early scissor learners to manage, while thinner lines are for more advanced learners, who have developed more control and precision with scissor use.
Consider the paper and materials used while teaching scissor skills as thicker paper such as cardstock and construction paper may have more stability, while copy and tissue paper is flimsier making it harder for a younger kiddo to manage.
Below is a progressive list of lines and shapes to work on cutting. They are ordered easiest to most difficult, as the child gains more skill.
Short straight lines
Long straight lines
Short curved lines
Long curved lines
Short angled lines
Long angled lines
Simple shapes
Complex shapes
Modifications to help correct scissor grip
Modifications and adaptations sometimes cannot be avoided, often becoming necessary to achieve a consistent and functional grasp.
There are many modifications that can be made to help learners be successful with finger placement, keeping bad habits from forming. Try these before jumping into adaptive scissors:
Draw a smiley face on the thumbnail or the thumb to provide a visual cue for thumbs-up.
Glue googly eyes, draw a face, place a sticker, or wrap a piece of tape on the exterior of the thumb hole to cue the child to orient the scissors properly and for correct thumb placement.
Use permanent marker to draw a line on the exterior of the scissor blade that needs to be on top, which is the thumb hole side. They should see this line while cutting.
If the bottom loop is too large and encourages the child to place many fingers in the loop, you can tape up part of the loop providing a blocker for the other fingers.
Wrap a rubber band around the base of the blades to prevent the child from ‘chomping’ the paper and instead promote a snipping movement as the band prevents full opening of the scissor blades.
With the same idea as above, you can wrap just the bottom handle with a rubber band and this prevents complete closure of the blades to also work on snipping.
Create a sock glove that has holes in it for the thumb, index and middle fingers while the ring and pinky fingers must stay curled inside the sock.
One last thing, PLEASE use left-handed scissors with left-handed kiddos. Do not force these children to cut with right-handed scissors. It is easy to purchase left-handed scissors for kids. Yes, it matters! So, get some for your clinic or your classroom and please use them!!
*Editors note: Left handed children can and will learn to adapt to right handed scissors. Unfortunately it is a right handed world, and lefty scissors are not always available. Unless they are going to carry lefty scissors around with them forever, it is easier to learn with something more mainstream.
Regina Parsons-Allen is a school-based certified occupational therapy assistant. She has a pediatrics practice area of emphasis from the NBCOT. She graduated from the OTA program at Caldwell Community College and Technical Institute in Hudson, North Carolina with an A.A.S degree in occupational therapy assistant. She has been practicing occupational therapy in the same school district for 20 years. She loves her children, husband, OT, working with children and teaching Sunday school. She is passionate about engaging, empowering, and enabling children to reach their maximum potential in ALL of their occupations as well assuring them that God loves them!
*The term, “learner” is used throughout this post for readability, however this information is relevant for students, patients, clients, children of all ages and stages or whomever could benefit from these resources. The term “they” is used instead of he/she to be inclusive.
Looking for tips and tools from pediatric occupational therapists and physical therapists to help with all things scissor skills? The Scissor Skills Book is a comprehensive resource that covers all aspects of development related to cutting with scissors.
If you’re a parent who is reluctant to let your child cut with scissors…
If you’re a teacher who is tired of watching students snip their crafts and worksheets into tiny pieces…
If you’re a therapist looking for creative ways to promote scissor skills in your treatment sessions…
This book is for you!
Written by a team of 10 pediatric physical and occupational therapists with years of experience in the field, The Scissor Skills Book is the ultimate resource for tips, strategies, suggestions, and information to support scissor use by kids.
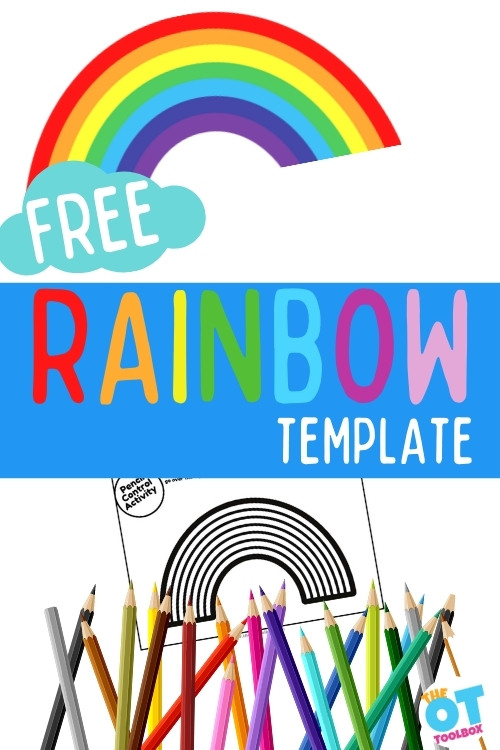
Coming up is the Rainbow Template Printable! This March activity is perfect for a St. Patrick’s Day theme or a rainbow theme in occupational therapy sessions. Whether you are working on pencil control, scissor skills, eye-hand coordination, or direction-following, this rainbow template can be used to address any skill area.
What is so enticing about rainbows? Could it be the pot of gold at the end? Or the promise of sunshine? I think rainbows don’t make you choose. You can have all of the colors at once. For a lot of people, especially those with anxiety, choosing one or two of anything is difficult. It seems so final and limiting. Not so with rainbows, you can have it all!
When I was a child we sang The Rainbow Song, “red and yellow and pink and green, orange and purple and blue. I can sing a rainbow, sing a rainbow, sing a rainbow too.” Is indigo the new pink? Maybe it is because we learned this in Australia. Do rainbows look different there?
Do you remember the mnemonic for the colors of the rainbow? ROY.G.BIV (red, orange, yellow, green, blue, indigo, and violet).
However your learner decides to design their rainbow in this Rainbow Template Printable activity, there are a dozen ways to make this activity fun and functional.
Add the printable rainbow activity to our rainbow breathing exercise for more rainbow fun in therapy sessions (or the classroom or home!)
What ways can you think of to design this rainbow printable?
Draw vertical lines in each section with the desired color, making sure the lines stay between the top and bottom borders
Make small circles in each section, controlling the pencil to stay between the lines
Write the first letter of the color,like RRRRRR, across each section
If your learner is more of a beginner, simply coloring each section will help develop fine motor skills in this pencil control activity
Copy a pattern like wavy, zigzag, or swirl lines in each section
Add glitter! There is never a wrong time to add glitter
All of the OT Toolbox resources, including this rainbow printable template, can be modified to meet the needs of all of your learners. There are several posts related to Pencil Control and Rainbows on the OT Toolbox. Here is a post on Rainbow Activities to make lesson planning easier.
Ways to adapt and modify this rainbow template printable task:
Laminate the page for using markers and wipes. This can be useful for reusability, as well as the enjoyment learners have using dry erase markers. Note: not all learners like reusable items, some prefer to take their work home.
Printing this rainbow template or some of our other great pencil control worksheets on different colored paper may make it more or less challenging for your learner
Enlarging the font may be necessary for beginning learners who need bigger space to write.
Have students cut out each section of the rainbow and paste in order on another page – this adds a cutting and gluing element
Make changes to the type of writing utensil, paper used, or level of difficulty
Have students write on a slant board, lying prone on the floor with the page in front to build shoulder stability, or supine with the page taped under the table
Project this page onto a smart board for students to come to the board and write in larger form.
Grade the level of prompting depending on the level of the task and that of your learners
Make this part of a larger lesson plan including gross motor, sensory, social, executive function, or other fine motor skills
The OT Toolbox has a great Color Handwriting Kit incorporating fine motor skills, colors, and handwriting
A classic book, (Amazon affiliate link) the Rainbow Fish, would be a great addition to this rainbow fine motor worksheet, or lesson plan. Plus it has GLITTER!
What skills are you addressing when using this rainbow template printable?
There are no wrong or right answers to this question. Your focus can vary from learner to learner, or follow a common theme.
Pencil control
Fine motor skills
Pre-writing skills
The three above are the obvious, and more common skills to be measured during this task. In addition, it is possible to shift the focus and attend to different aspects of the task:
Following directions
Task avoidance/compliance
Frustration tolerance
Behavioral reactions
Attention, focus, impulse control
Ability to complete a task
Level of independence
Social skills – sharing, turn taking, waiting
there are no right or wrong answers
Again there are no right or wrong answers. The focus might be entirely on developing fine motor pencil control without regard to behaviors, social function, or executive function.
Conversely, the data you gather might not include how their fine motor skills look at all. Of course you can combine all of the above.
document, document, document
Be sure to clearly document what you are observing and measuring. Data collection is what’s required now. Use percentages, number of trials, number of verbal or physical prompts, or minutes of focus.
Gone are the days of writing, “learner completed task with min assist.” Min assist can look different to five different observers. The only clinical phrases that are somewhat accurate are “independent” and “dependent”, meaning 100% or 0%.
After all of this activity, maybe your learners need to slow down and take a breather with Rainbow Breathing Exercises. However you choose to create your treatment plan, find ways for it to be motivating and meaningful.
Free Rainbow Template
Want to add this resource to your therapy toolbox so you can help kids thrive? Enter your email into the form below to access this printable tool.
This resource is just one of the many tools available in The OT Toolbox Member’s Club. Each month, members get instant access to downloadable activities, handouts, worksheets, and printable tools to support development. Members can log into their dashboard and access all of our free downloads in one place. Plus, you’ll find exclusive materials and premium level materials.
Level 1 members gain instant access to all of the downloads available on the site, without enter your email each time PLUS exclusive new resources each month.
Level 2 members get access to all of our downloads, exclusive new resources each month, PLUS additional, premium content each month: therapy kits, screening tools, games, therapy packets, and much more. AND, level 2 members get ad-free content across the entire OT Toolbox website.
Note: the term, “learner” is used throughout this post for consistency, however this information is relevant for students, patients, clients, school aged kids/children of all ages and stages, or whomever could benefit from these resources. The term “they” is used instead of he/she to be inclusive.
Victoria Wood, OTR/L is a contributor to The OT Toolbox and has been providing Occupational Therapy treatment in pediatrics for more than 25 years. She has practiced in hospital settings (inpatient, outpatient, NICU, PICU), school systems, and outpatient clinics in several states. She has treated hundreds of children with various sensory processing dysfunction in the areas of behavior, gross/fine motor skills, social skills and self-care. Ms. Wood has also been a featured speaker at seminars, webinars, and school staff development training. She is the author of Seeing your Home and Community with Sensory Eyes.
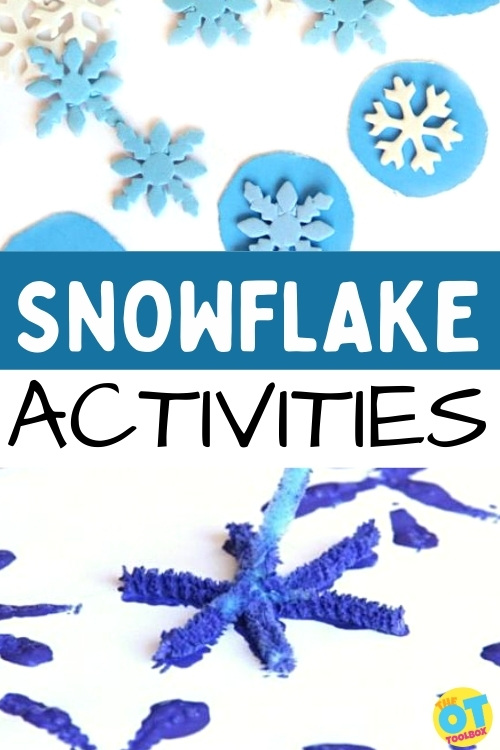
Who doesn’t love snowflake activities? Here, you will find all of the snowflake activities we have shared on the OT Toolbox, linked in one place. When working on creating a classroom or therapy session using a snowflake theme, you can pop right to this post and find everything snowflake related. From snowflake games and crafts, to sensory motor activities, and fine motor fun. You’ll find gross and visual motor activities too! Simply add any of these ideas to a winter snowflake treatment plan, and you’ve got interventions and fun for the whole season, with winter occupational therapy plans!
Whether it is a wintery day or just chilly outside, add these snowflake lesson plans. Learners of all ages will be able to get out some energy, while developing important skills.
Snowflake Activities
If you are looking for a fun snowflake game, or maybe some snowflake art, these skill-based wintery ideas from the OT Toolbox will have you covered!
Marbled Milk Paper Towel Snowflakes| By creating these snowflakes, there is a little science and art involved (check out STEM learning) while learners swirl a toothpick around in the food coloring and milk. Children will work on light touch as they swirl the toothpick, and pick up/drape the snowflakes to dry. This is a fun craft that is beautiful to display!
Winter Snowflake Stamp Art| Make winter snowflakes using pipe cleaners (chenille stems) creating art that is wintery, beautiful, and unique! Stamp art promotes fine motor skills as learners work on a functional grasp, separation of the two sides of the hand, arch development, and an open web space. A creative winter painting idea that has a sensory component, too! Here’s how to paint snow for more winter fun.
Craft Pom Pom Snowflake Line Awareness Craft | This snowflake activity is a great one for preschoolers or novice learners, as it promotes a variety of grasp patterns when manipulating the pom-pom balls. It is a fun craft that uses pom-poms placed on the outline of a snowflake to create a colorful design that can be hung at home, or given to family/friends. The learner works on placing the pom-poms directly on the line, they are working on line awareness, which is important for drawing and handwriting.
Snowflake Party| Have a fun snowflake party with children while creating several snowflakes using a variety of materials, working on a variety of skills. A few of these ideas include snowflake sensory play, snowflake art and crafts, and snowflake snack food. Check out the post to see what we did at our party. It was FUN!
DIY Snowflake Stampers| Use different foam stickers to create these fun stampers for art projects.
Kindergarten Sight Words with Winter Tic Tac Toe| The adult can either make the tic tac toe board, or work with the learner and make it together. Either way, when using the board, the learner will be working on visual perceptual skills that are needed for forming and writing letters.
Gross Motor Snowflake Activities
Snowflake balance beams, catching snowflakes, and throwing or dancing with snowflakes are great gross motor snowflake activities to add to occupational therapy sessions during the winter months. Try these wintery activities:
Snowflake Balance Winter Gross Motor Indoor Play Therapy Idea| Learners will benefit from the vestibular input this activity provides as they play. The use of balance beams challenges the vestibular system. Work on balance and motor planning while using their visual skills to scan the balance beam, tracking the snowflake line they need to walk along.
Super Simple Snowflake Frisbee Indoor Play | This basic activity creation uses paper/Styrofoam plates, tape, and a paper snowflake. This activity provides vestibular input as learners perform slight head movements as they throw the frisbee to their partner. Frisbee also promotes upper extremity coordination to grasp/hold/release the frisbee, flex/extend their wrists, cross midline, and use good postural control.
Proprioception Winter Activity Throwing Snowflakes| Are you working on scissor skills? If so, try this paper snowflake activity that goes along well with this winter theme. You can make them the typical way with copy or cardstock paper, or try using cupcake liners instead! This helps to boost hand strength, and provide proprioceptive input with the end reward of a pretty, colorful snowflake!
This collection of snowflake themed activities will provide enough activities for your classroom, therapy sessions, or at-home programming to use all season long. They provide a range of skill development with a bunch of craftiness all your learners will enjoy!
more great Winter resources!
Add our Winter Fine Motor Kit from the OT Toolbox to your wintery treatment plan to help learners develop their fine motor strength and endurance, grasp, and dexterity skills while engaging in these easy, no-prep activities. Just print and go!
Check out the OT Toolbox Snowman Therapy Activity Kit to your cold weather lesson planning to help children work on core strengthening, motor planning, hand skills, visual motor skills while also getting some sensory input too! Just download, print, and go!
Regina Parsons-Allen is a school-based certified occupational therapy assistant. She has a pediatrics practice area of emphasis from the NBCOT. She graduated from the OTA program at Caldwell Community College and Technical Institute in Hudson, North Carolina with an A.A.S degree in occupational therapy assistant. She has been practicing occupational therapy in the same school district for 20 years. She loves her children, husband, OT, working with children and teaching Sunday school. She is passionate about engaging, empowering, and enabling children to reach their maximum potential in ALL of their occupations as well assuring them that God loves them!
*The term, “learner” is used throughout this post for consistency, however this information is relevant for students, patients, clients, children of all ages and stages or whomever could benefit from these resources. The term “they” is used instead of he/she to be inclusive.