These Christmas Stampers were a big hit with Big Sister. And seriously so easy to put together. We did this little project while the potatoes for our dinner were boiling! We are big fans of EASY art. Simple is better in our house. And these Christmas stampers were definitely easy! They would be the perfect kid-made Christmas card (and simple to knock out enough cards for the whole extended family in one crafty afternoon. Wouldn’t Grandma love to receive her gift wrapped in paper with these Christmas stampers? A sheet of dollar store wrapping paper with these stamped on the back side would make a great wrap for anyone! A page of these Christmas stampers would even make a great gift as a piece of art for someone special!
{Note: This post contains affiliate links. In other words, this blog will receive monetary compensation when any purchases are made through the links in this post. Our opinions and ideas are in no way affected. As always, we thank you for your support and community here at Sugar Aunts.}
Christmas Stampers
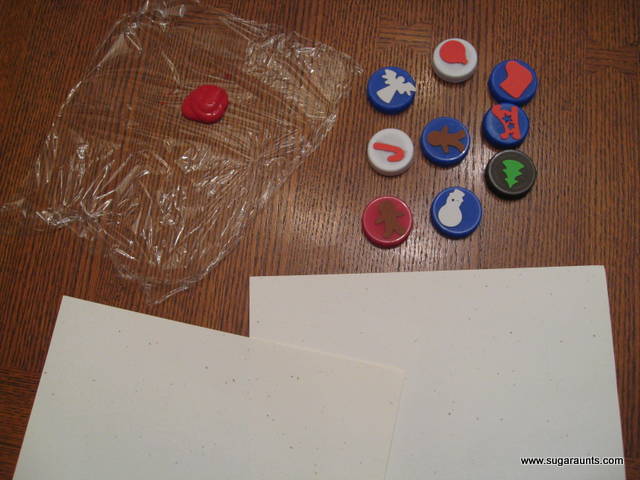
I had a pack of foam stickers from the dollar store, or you could find them here. We always have a box of bottle caps saved up for crafting activities. If you’re not saving your lids, start now. There are so many fun activities and crafts that you can do with them!
Splat a little paint on some plastic wrap…
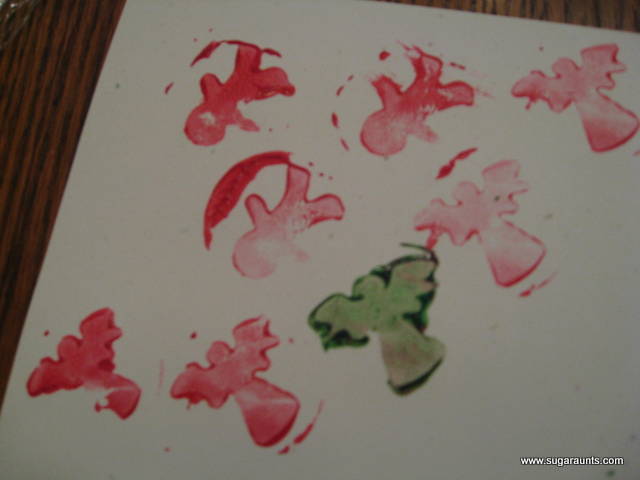
And Stamp away!!
We will cut these up and use them as gift tags…and Big Sister had a ton of fun while she waited for dinner!
There are a lot more fun Christmas Play ideas to explore in the 25 Days of Christmas Play tab at the top of our site.
I hope you are having as much fun with your kids this Christmas season as we are!
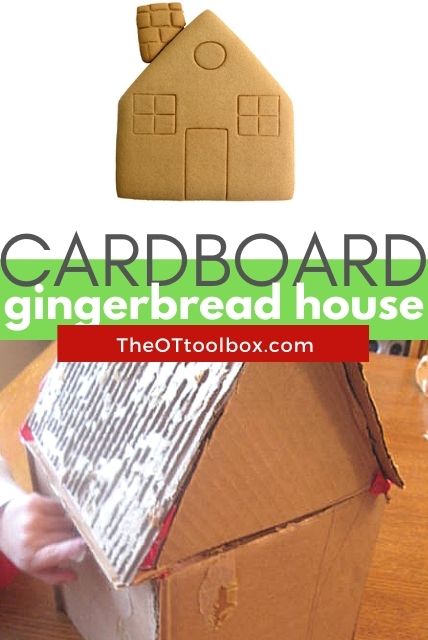
This cardboard gingerbread house is a process art activity that helps kids create and build fine motor skills with a gingerbread house theme! Pair this with our decorate a gingerbread house Google slide deck for hands-on fun that the kids will love this holiday season.
It was really easy and Big Sister and Little Guy played with it for a long time. The creating part lasted a while when the babies were sleeping. Sleeping Beauty looooves her new house 😉
To make it, I cut up a box into enough pieces, just eye-balling the size. No need for measuring. The kids don’t notice and you never know when a superhero might accidentally destroy the house 😉
How to make a cardboard gingerbread house
Little Guy wanted me to use his special red duct tape.
To easily get the house shape, lay the tape on one piece then stick the corner piece onto the strip of tape.)
You can make a row of four squares then close up the last shape by putting the tape on from the inside.
After all the seams are taped up, turn the whole thing upside down. You don’t need a floor…so princesses and superheros can get in a little easier…
Tape the triangle roof pieces on.
Make the cardboard gingerbread house roof
Then, cover with two more squares for a roof. I pulled one side of the cardboard off for a shingled look.
To tape the roof on, work from the inside and tape one roof side on first by taping the inside edges.
Then, stick tape to the edge of the other side of the triangle. Slightly bend the long piece of tape and place the other cardboard roof piece ontop so it sticks to the bent tape.
It looks cute, I think 🙂 Spiderman really liked his new home.
Decorate the cardboard gingerbread house
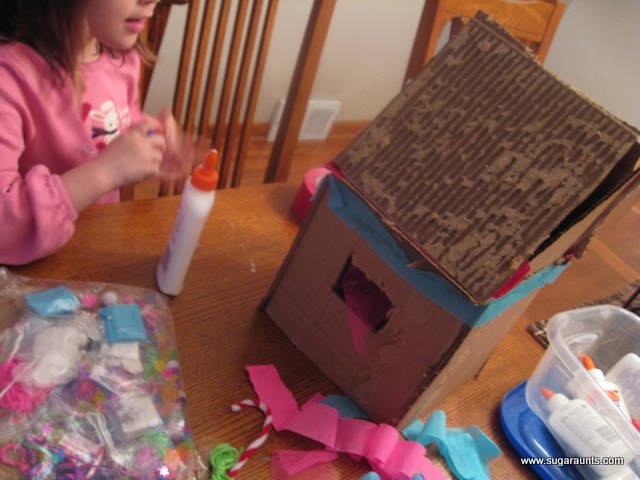
After it was built, I pulled out a bag of mixed crafting materials and a ton of glue.
Big Sister had so much fun. She went crazy gluing stuff on.
Use colored tape, beads, craft pom poms, pipe cleaners, tissue paper, crepe paper, and other craft materials to decorate the cardboard gingerbread house.
We had a fun day with our Candy-less Gingerbread House…but Little Guy said needed a little bit of candy to east while he was helping to build it. “You have to eat a Gingerbread house, Mom!”
We are having so much fun with our Christmas Play activities…Check out the new tab at the top for all of the 25 Days of Christmas Play that we’ve done so far.
Colleen Beck, OTR/L has been an occupational therapist since 2000, working in school-based, hand therapy, outpatient peds, EI, and SNF. Colleen created The OT Toolbox to inspire therapists, teachers, and parents with easy and fun tools to help children thrive. Read her story about going from an OT making $3/hour (after paying for kids’ childcare) to a full-time OT resource creator for millions of readers. Want to collaborate? Send an email to contact@theottoolbox.com.
We put up the Christmas tree the day after Thanksgiving and my daughter has been confused as to how many days there are until Christmas.
She has been waking up in the morning asking me, “Is today the day?!?!”
I decided we needed a visual way of showing her how many days she has left until Santa comes.
I remember doing this chain link count-down when I was little and I am sure lots of you still do this.
This is a fun activity that can be used to count down any big day…vacation, birthday, holiday, sleepover…anything really!
{Note: This post contains affiliate links. In other words, this blog will receive monetary compensation when any purchases are made through the links in this post. Our opinions and ideas are in no way affected. As always, we thank you for your support and community here at Sugar Aunts.}
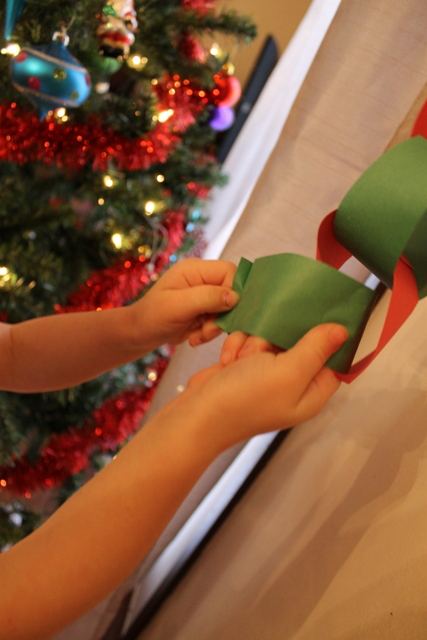
Cut out some red and green Construction Paper
into however many days you have left until the big day. This is an easy activity for your preschooler to help- cut straight lines across the construction paper. You or your child can number the links if you want. My daughter just wanted to decorate one of the links- the one for the big day!
Link them all together with glue or tape and let it dry laying flat on a table out of little hands way.
Once it is dry hang it up. What an easy visual aide for the kiddos!
We hung ours off of the curtain rod next to the Christmas Tree to make it look festive and to keep it away from baby brother who really wanted to rip it to shreds.
Have the kids tear off the link and count the remainder of the days. Only 23 days left!
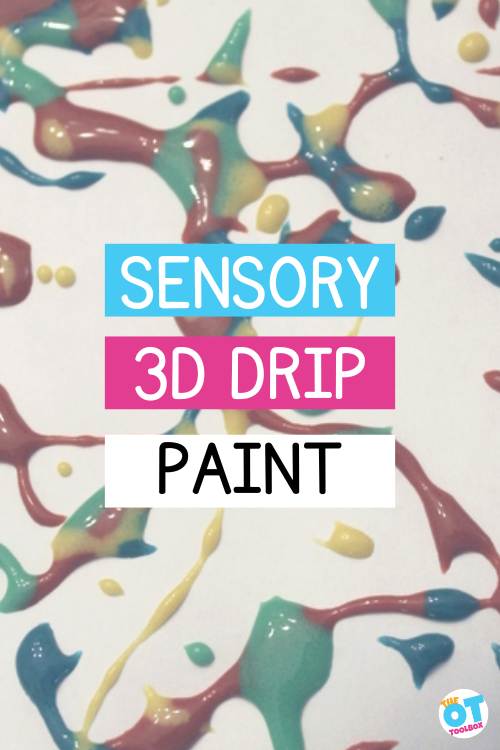
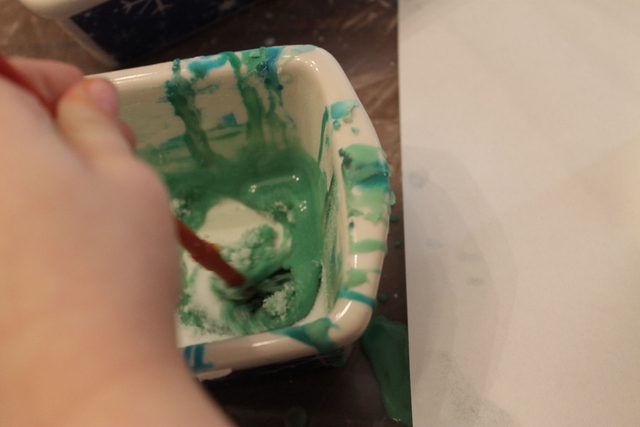
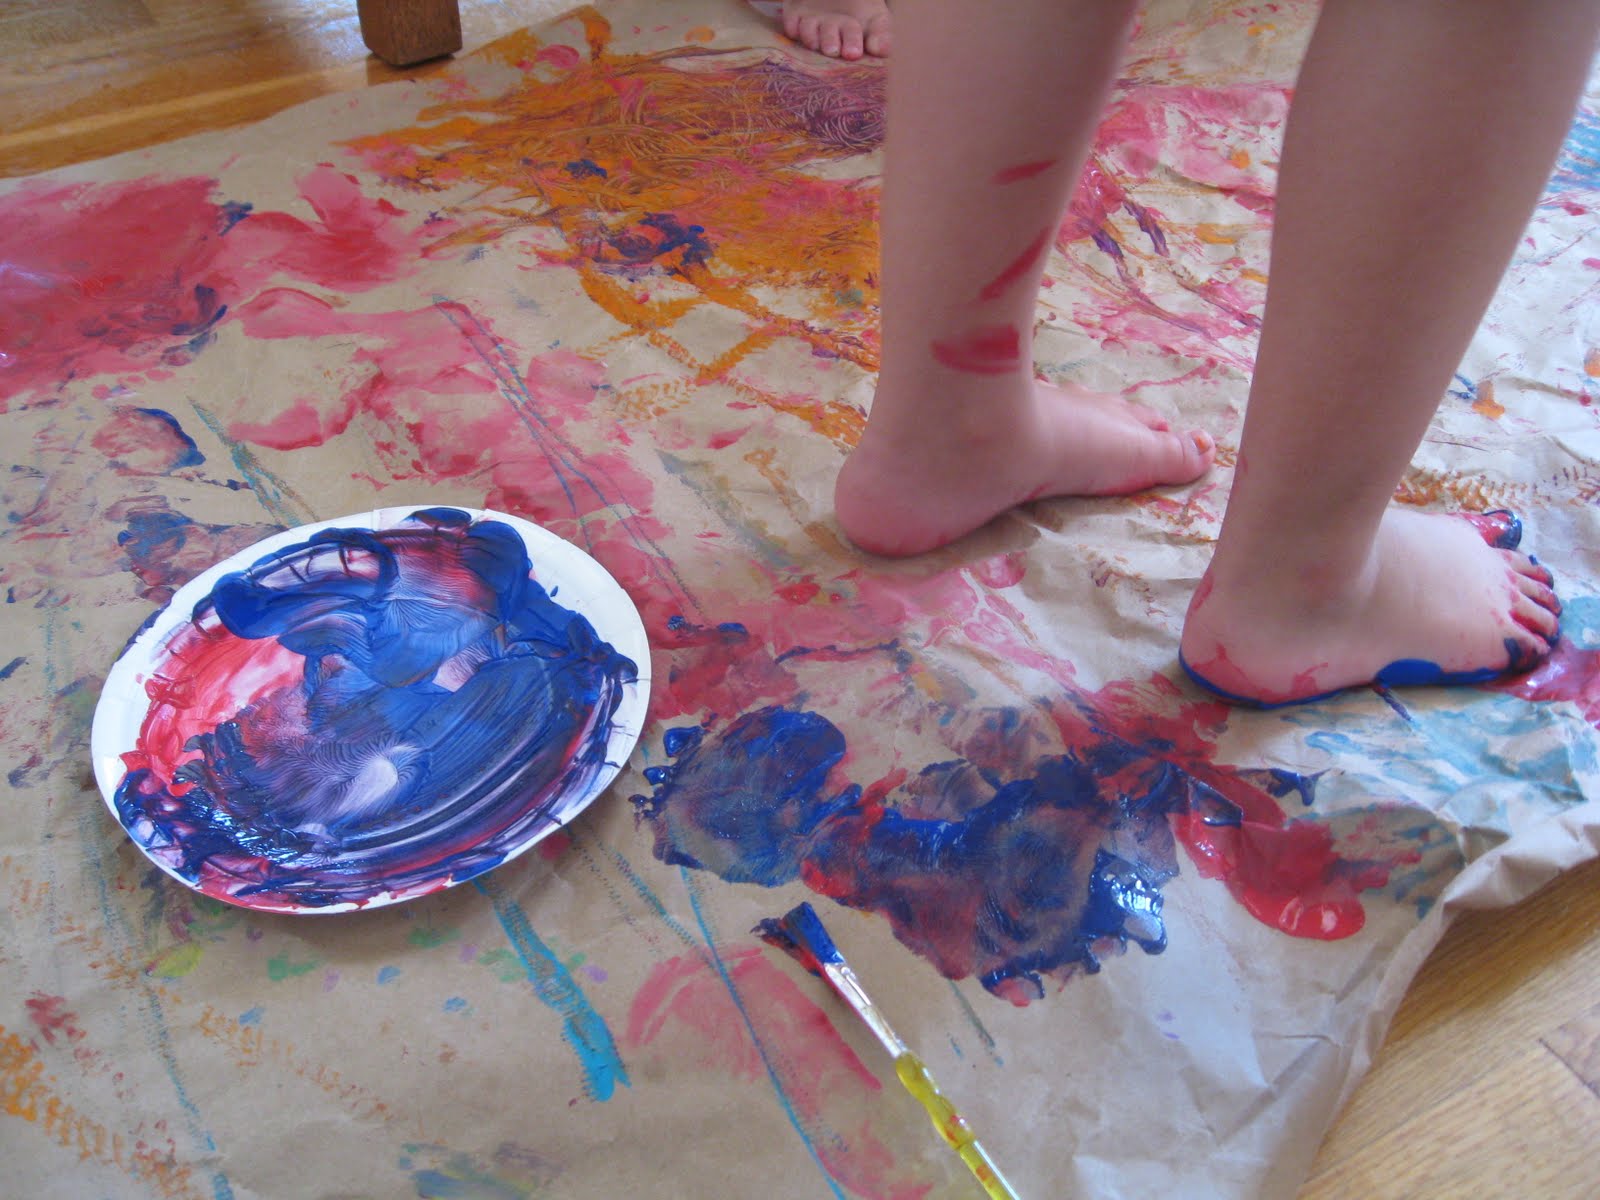
Today we have a fun messy play idea to do with kids: making 3D Drip Paint! This creative painting idea is an old one on the blog, but it’s a fun and creative way to explore the tactile sense with creative expression. Plus, occupational therapy practitioners know the value of activities that drive interest, and this one is sure to do just that! Check out all of the other ways drip paint can target development in kids, too!
You’ll want to check out some of our other sensory paint ideas too!
Drip Paint with kids
Engaging in messy sensory activities, such as making homemade drip paint with your kids, may seem daunting at first, but rest assured that it is a valuable experience for their development.
Messy paint like drip paint offers sensory touch which plays a huge part in sensory experiences, sensory tolerance and challenging behaviors (the actions we see) as a result of difficulties regulating tactile sensory input.
These messy activities provide a unique opportunity for children to explore their senses, enhance their creativity, and foster important skills. When children immerse themselves in tactile experiences like drip painting, they engage their fine motor skills as they grip brushes, squeeze bottles, and control the flow of paint.
The sensory stimulation supports their cognitive development, helping them understand cause and effect as they observe how paint drips and spreads.
Not only that, but occupational therapy providers love to try fun and engaging activities to support skill development when working with their clients and patients, (and students in the school-based setting).
Activities like making a batch of drip paint with kids supports so many areas that can be targeted and graded (made easier or harder depending on the needs of the child).
Some of the ways drip paint can be used to foster skills includes:
So, embrace the messiness and enjoy the countless benefits that come along with it – it’s not just about the end result, but also the wonderful journey of growth and development that messy sensory activities provide for your children.
how to make drip paint
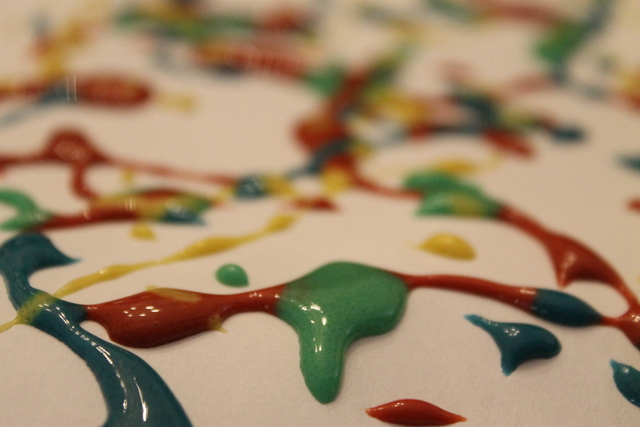
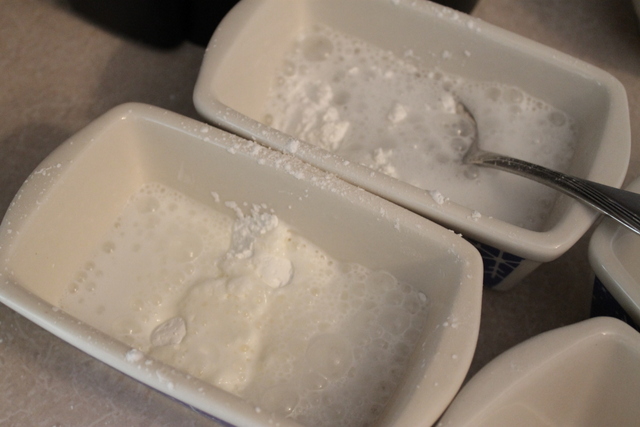
This is an easy activity that will keep the kids busy indoors during the cold weather. We were trying to make watercolor paints with a bit of a twist. We added some salt to make it sparkle and added a little more vinegar and baking soda to make it drip.
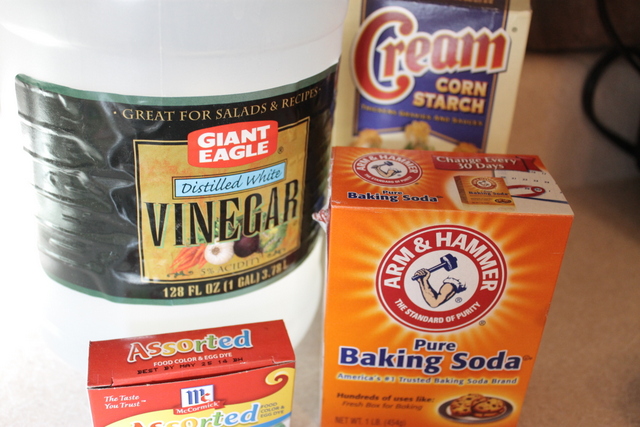
The starting ingredients are:
3T baking soda
3T corn starch
3 T vinegar
a few teaspoons of salt (not in the picture above)
food coloring
You can adjust the ingredients to your liking…adding more corn starch makes it thicker…adding more vinegar will make it thinner…not sure what adding more baking soda does…just makes it fun to watch it bubble!
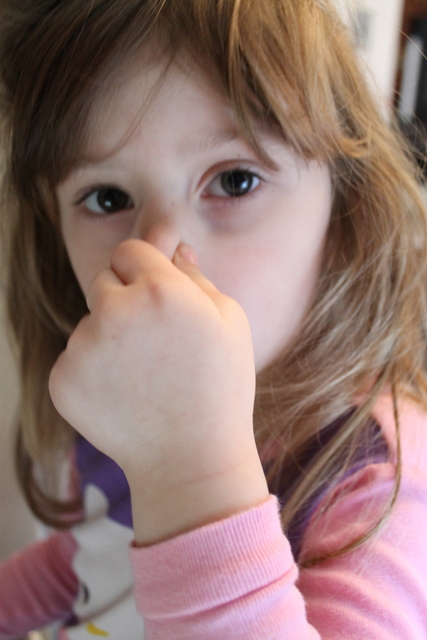
It was like a science experiment…my daughter found it a little stinky!
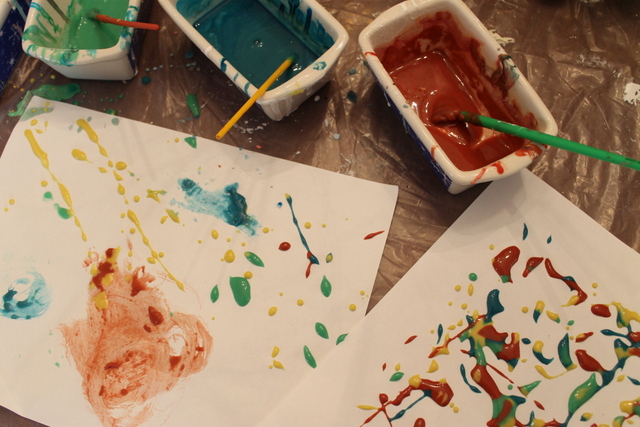
To make the 3D Drip Paint
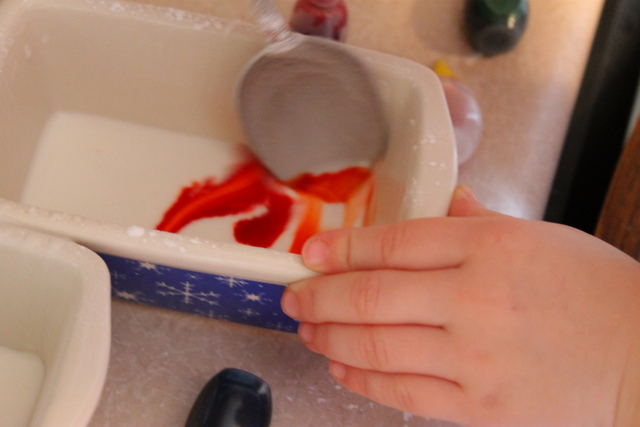
Mix all the ingredients together. We used 4 separate containers to make red, yellow, green, and blue. My daughter had fun mixing the colors and watching them turn from one color into another. On the paper we made orange, purple and brown.
2. Make sure you line your table with plastic.
3. At first the paint was a little runny so we added a little more corn starch.
4. Then we decided to add a little salt. Just be careful that no one eats it and keep it away from the animals.
It turned into a beautiful mess!
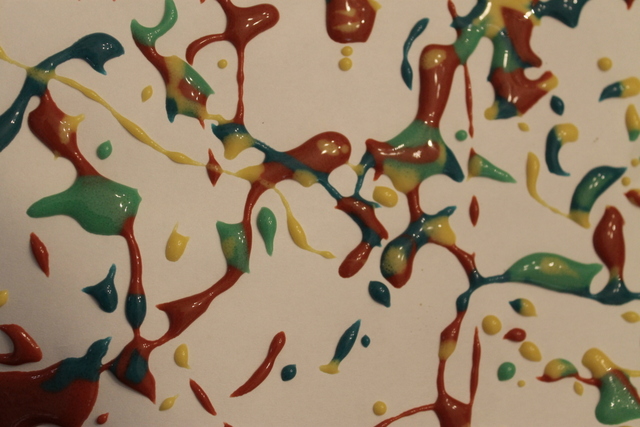
The paint was perfect for dripping onto paper and making 3D art. Once dry, the kids had fun peeling the paint off of the paper. We hung the picture on the window and it turned into a really neat sun catcher.
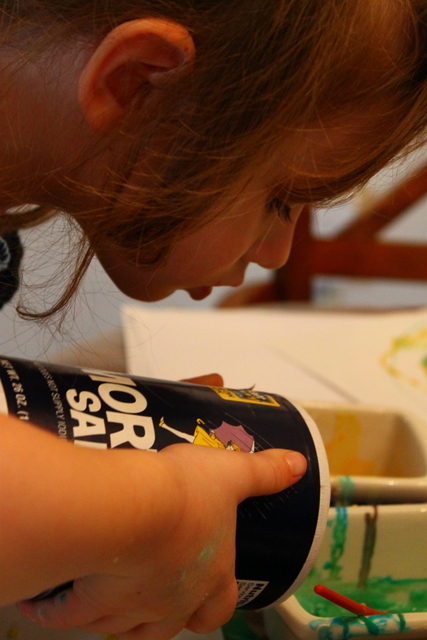
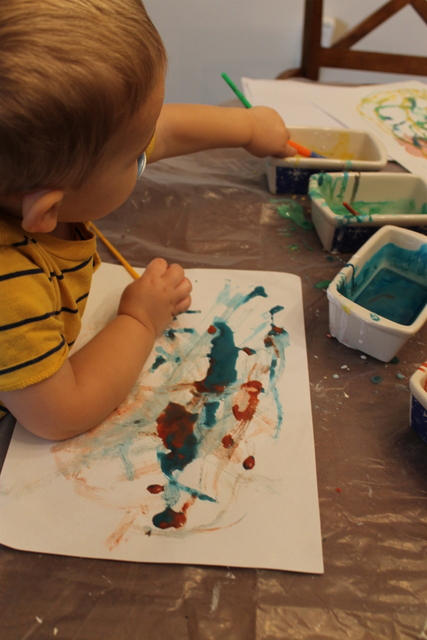
Even the little guy got in on this one.
He found the drips to be pretty amazing!
This was a fun activity that we will do again. Once you let the paint sit for a little while in the containers, they harden and can be used again and again…just add a little vinegar to the paint and it will thin out again.
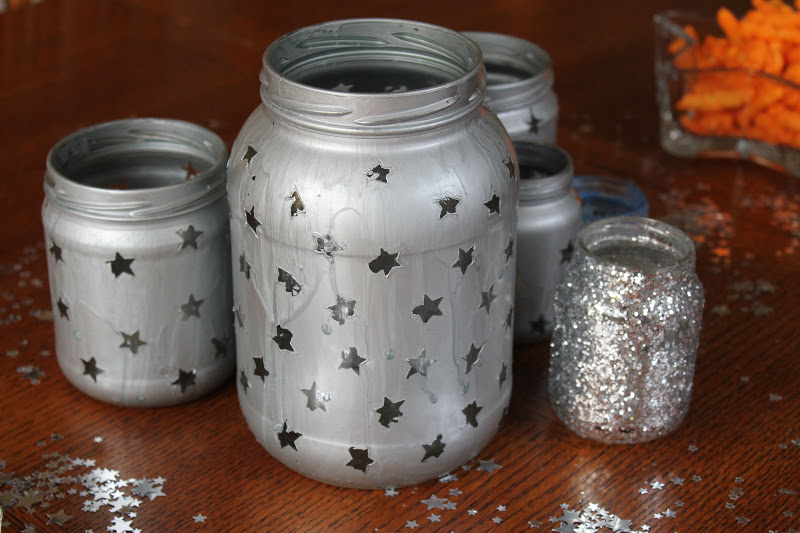
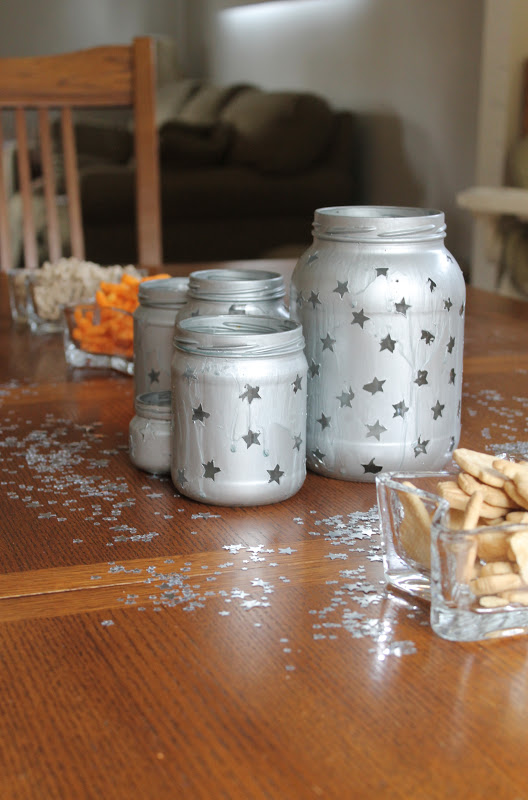
These cute jars were part of the centerpieces for Baby Girls’ 1st birthday party. I tried to pull star details into as many parts of the party as I could. My colors for the party were pink, navy, and silver. I tried a blue sprayed jar and it didn’t turn out as nice as the silver. These luminaries look a little like a tin jar when lit!
This could have turned out a little better (it could have been a little easier to pull off the star stickers…) had I used a different type of spray paint. This paint was metallic silver spray paint and peeled really easily. So pulling the stickers off once the paint had dried was tricky.
I started with clean, dry glass jars from of different sizes. A couple were salsa jars, one was a cheese dip jar. A few were baby food jars. The big guy was a pickle jar.
Big Sister helped me stick star stickers all over the jars.
Spray the jars…
Peel off the stickers and arrange in a cluster. I scattered silver star confetti all around the jars.
(I tried a couple of jars covered in glitter to change it up a little. It looked pretty nice when they were all lit!)
Planning a cowboy birthday party? This kids party theme is a fun way to celebrate a child’s birthday. Use the cowboy invitation ideas, cowboy party activities to take cowboy theme beyond the rodeo!
Cowboy Birthday Invitation
Baby Boy was turning one, and my husband and I wanted to throw him a special birthday party. We decided on a cowboy themed bash (mainly because of our recent trip to Nashville and a $4 cowboy hat bought at a souvenir shop.)
I will be writing several blogs about this party, but for now I wanted to show the invitation we sent out for our hoe-down.
We wanted the invites to feature our little cowboy. And we thought it would be neat if the front looked more like a photo than an invitation. That way people would have something cute to hang up on their fridge before the event. And they could even keep it as a memento after the party.
My husband (a Sugar Uncle???) came up with this absolutely ADORABLE family portrait. Baby Boy looks so gosh darn cute in just his cowboy boots, hat, and cloth diaper. (We use Gdiapers on Baby Boy, and their cuteness has lent themselves to many a half-naked picture.) I also love how Daddy and I (along with our cowboy boots) are present in the photo without taking
the attention away from Baby Boy.
What might be the most impressive thing about this photo is that my husband and I pulled this off without any assistance. We used up a tripod, camera, and the self-timer feature to get our shot.
How-To Hint: Play an Elmo video on a laptop and set the laptop riiiight next to the camera. Baby Boy loved watching Elmo sing and dance and gave us a cute smile.
My hubby, once again, hit it out of the park with the back of the invitation. He put his graphic design skills to work and created this western inspired card. I love the fonts he used and the sunburst and stars. To make it extra fun, we used as much cowboy lingo as we thought our guests could stomach.
To make the cards, we printed each side on regular printer paper. We used spray glue to bond the two pieces together. Being a graphic designer, he insisted on it being “full-bleed with crop marks.” I don’t know much about his process, but the end result was perfect.
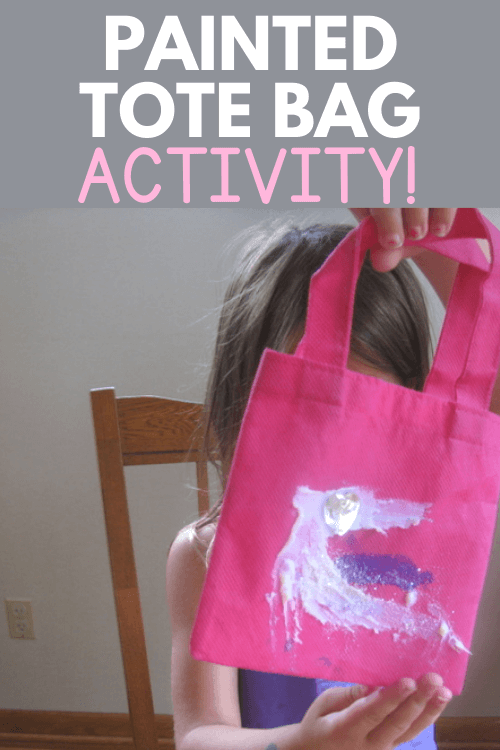
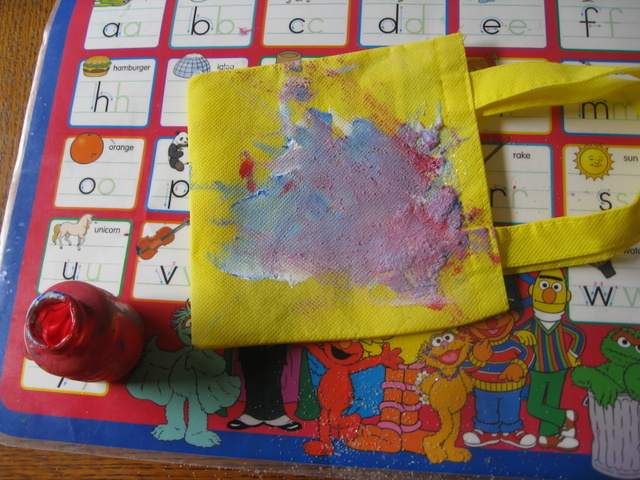
Many years ago, we had this totebag painting idea. Actually, we received small tote bags as a party favor and decided to decorate the tote bags. There are actually many ways to hand paint a tote bag, but this was a kids’ craft idea that we loved. We even used the totebags as travel sensory kits for a while.
Totebag Painting Idea
Let’s get started with this totebag painting activity.
We went to a fun birthday party this past weekend, and got these little bags as part of the party favor.
Little Guy brought his out today and was so sad that his bag was yellow and not his favorite color, RED.
I started to say, “Well, what can we do about this problem?”
Big Sister cut in and said “I know!!! We can PAINT them and GLUE STUFF to them!” This was a really creative painting idea that she came up with on her own, so we went with it!
This girl is SO my daughter!
Little Guy thought that was a pretty smart idea. So, we pulled out the paints, glue, glitter, sparkly hearts, and puffs.
crisis adverted…for now!
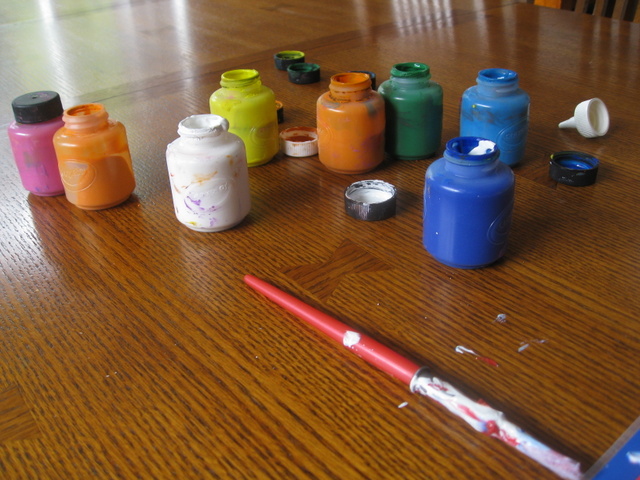
Tips for Making Hand Painted Tote Bags with Kids
Painting a tote bag can be a creative and fun sensory activity. It can get a little messy, but with some prep work, you can make this activity with kids and then use the bag to hold all kinds of fine motor items or sensory tools.
Here are some tips for making a hand painted tote bag:
Choose the Right Tote Bag for Painting: Select a tote bag made of a material suitable for painting. Canvas bags are a popular choice as they provide a smooth surface for painting. You’ll want a tote bag that is a solid color. Smaller is a great size for younger kids. There are miniature tote bags on Amazon (affiliate link) which would be great for a therapy caseload or a classroom activity.
2. Add a Piece of Cardboard so the paint doesn’t bleed through the sides of the bag: Before starting to paint the tote bag, slide a piece of cardboard into the bag. This way, when you paint, it only ends up on one side of the bag. You can even paint one side and allow it to dry, then paint the other side.
When you have that piece of cardboard in the bag, you can even use it to prop up the bag to allow the paint to dry faster.
3. Select Paint to Paint the Tote Bag: We used washable paints because we knew we wouldn’t be washing our tote bags and my kids were very young at the time that we hand painted tote bags. You could use other types of paints, however, especially if you want to wash your bag at some point. Good paints to use are acrylic paints or fabric paint.
4. Prepare Your Workspace: Lay down a protective covering to prevent paint from spreading onto surfaces. Have all your materials organized and within reach to create a comfortable and accessible workspace. We just used a laminated placemat as our workspace, but you could place sheets of newspaper or plastic table cloths, too.
5. Plan Your Design: Before applying paint, sketch your design on the tote bag with a pencil. This will help you visualize the final product and make adjustments before committing with paint. For my kids, we just kind of painted, and that worked out great!
6. Use Appropriate Brushes: Select brushes of different sizes based on the details of your design. Larger brushes are ideal for broad strokes, while smaller brushes are better for intricate details.
If you are creating a hand painted tote bag with features like a child’s name, flowers, or other details, a finer brush would help. If you are using washable paints with a younger child, a sponge brush or even finger painting is fine, too.
7. Apply Thin Layers: Instead of applying a thick layer of paint, use thin layers to achieve a more even and professional-looking finish. Allow each layer to dry before adding the next.
8. Add Texture or Patterns: Experiment with adding texture or patterns to your design. You can use sponges, stencils, or even household items to create unique effects.
9. Seal the Design: Once your design is complete and fully dry, consider sealing it with fabric sealant or ironing it according to the paint manufacturer’s instructions. This helps ensure the longevity of your painted tote bag. We didn’t need to do this step because we just used washable paints.
What do you think? Will you make a painted tote bag in your therapy sessions, at home, or in the classroom?
Colleen Beck, OTR/L has been an occupational therapist since 2000, working in school-based, hand therapy, outpatient peds, EI, and SNF. Colleen created The OT Toolbox to inspire therapists, teachers, and parents with easy and fun tools to help children thrive. Read her story about going from an OT making $3/hour (after paying for kids’ childcare) to a full-time OT resource creator for millions of readers. Want to collaborate? Send an email to contact@theottoolbox.com.