As an occupational therapist, I look at color learning as more than just an early academic milestone. The ability to recognize colors, name colors, and use colors is directly connected to how a child participates in everyday activities. And, we use these skills in every therapy session! Think about a typical therapy session: pick up the green craft pom poms and sort them into the green cup. This is a visual perceptual skill and we use these multi-step directions as part of our skill therapy interventions. Or, maybe we use the colors of the Alert program when working on self-regulation. Then, we use color directions to work on handwriting skills (stop at the red baseline on modified paper).
These are just some of the ways that colors come into our therapy sessions.
This is a recently updated article where we’ve added a ton of information on color recognition, because it’s something we can use in occupational therapy as a tool to support development through play. (example: a color sorting activity for toddlers or a creative painting for our older kids)
Color recognition in child development
But, maybe the most important reason we need to address color recognition in occupational therapy is that when we work with children, we are working with the whole family, and parents have questions about child development! We are often-times the go-to expert within reach of that parent who has many questions about their child’s development. We might be the only professional a parent feels comfortable enough to ask questions like,
“When do kids learn colors?” Or,
“When do babies learn colors?”
“When should my child know their colors?”
Color learning shows up in daily routines more than we often realize. A child is expected to “grab the red folder,” “find the blue marker,” or “sort the toys by color.” These directions require not only color recognition, but also attention, expressive language processing, and the ability to act on that information. When a child struggles with color identification, it can impact independence, confidence, and overall task performance.
When children develop strong color recognition skills, they are better able to follow directions, engage in classroom tasks, and interact with their environment in meaningful ways.
We cover more on vision’s impact on learning in a related article. You’ll want to check that out as well.
In school settings, color is often used as a visual cue to support learning. Worksheets, charts, schedules, and early reading materials rely heavily on color coding. If a child has difficulty with color perception or identifying colors, they may miss important visual information, which can affect participation in learning activities.
As parents, we are constantly amazed by the curiosity displayed by our toddlers. Every day is an opportunity for them to discover something new, and what better way to nurture their inquisitive minds than by introducing them to the vibrant world of colors?
Learning colors is not only an engaging and exciting experience for toddlers, but it also plays a crucial role in their overall cognitive and sensory development.
Learning Colors
In the toddler years, learning explodes. And when toddlers learn colors, it’s a great chance for them to show off their skills and expand their vocabulary.
We will share a few creative activities about teaching colors to toddlers, but also share a wonderful experience with one of our own little ones!
Here’s the thing: colors are everywhere around us, from the blooming flowers in the garden to the vibrant pictures in storybooks. For toddlers, grasping the concept of colors is a significant milestone in their early development. Describing the world around them is very much a part of their environment, and this is something we really focus on in occupational therapy.
Understanding colors helps children enhance their visual discrimination skills, develop language and communication abilities, and stimulate their creativity.
And, (this is important as an OT), learning colors supports cognitive growth by promoting executive functioning at an age-appropriate level, pattern recognition, and memory retention.
It also lays the foundation for more advanced concepts, such as color sorting, classifying, and categorizing objects based on their attributes.
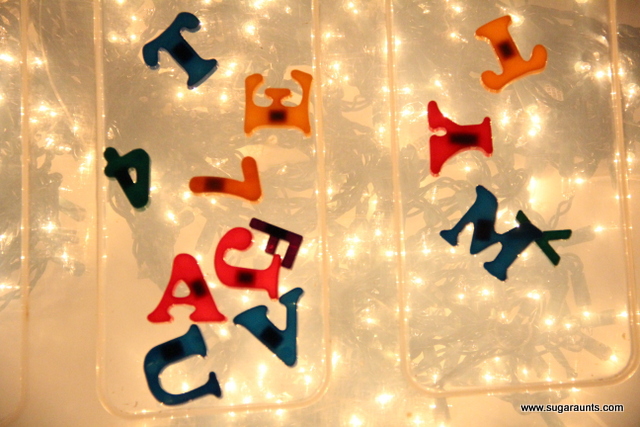
Not to mention, we love the power of a simple pack of crayons as an OT tool…and naming and finding the colors in a box of crayons is a powerful eye hand coordination activity in itself!
Color Recognition in Child Development
Color recognition is a foundational visual perceptual skill that develops gradually in early childhood. It involves both the ability to visually detect color differences (color perception) and the cognitive ability to label and categorize colors (color identification).
In child development color recognition, children move from simply noticing visual contrast (light vs. dark) to recognizing, naming, and applying colors in meaningful ways. This process is influenced by visual system maturation, language development, memory, and experience with the environment.
From an occupational therapy perspective, color recognition supports:
- Early learning and reading colors in books and materials
- Sorting, categorizing, and problem-solving
- Following directions (e.g., “grab the red crayon”)
- Participation in classroom tasks
Color Perception: The Early Foundation
First, let’s talk about vision in babies. There is a lot happening in this developmental process, from birth, especially with vision in general. Part of it is spatial awareness that babies develop, and the development of aspects of the eye, too.
Color perception begins in infancy as the visual system develops. Research shows that babies are not born with fully developed color vision. Instead, their ability to perceive color improves over time as the retina and visual pathways mature.
In early infancy:
- Babies first detect light and dark contrast
- Color vision emerges gradually as cone cells in the retina develop
- Neural pathways between the eyes and the visual cortex strengthen
By around 3-6 months, infants begin to differentiate basic colors such as red, green, and blue. This early perception is the foundation for later color identification in child development.
So When Do Babies Learn Colors?
Parents often ask, “when do babies learn colors?” The answer is that babies begin seeing colors early, but understanding and naming colors comes much later.
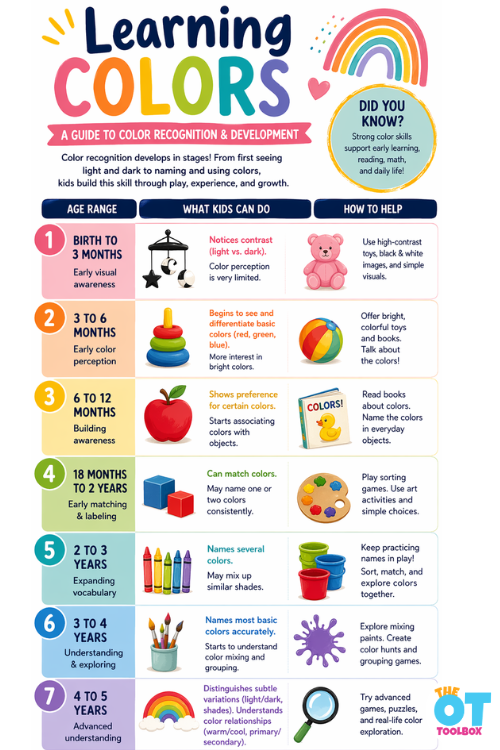
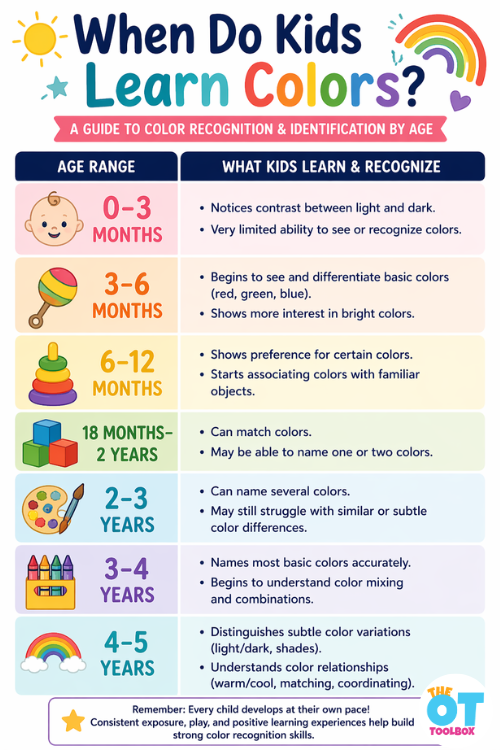
- 0-3 months: Detects contrast (light/dark), limited color perception. This is why we see so many baby toys or books that are black and white or black, white, red. These bold colors contrast and are appropriate for the babies’ vision at this stage.
- 3-6 months: Begins to differentiate basic colors
- 6-12 months: Shows preference for certain colors
At this stage, babies are developing visual awareness. They are not labeling colors yet. Exposure to colorful toys, books, and environments supports this early stage of color perception.
When Do Kids Learn Colors?
Another common question that comes up is, “when do kids learn colors?”
The quick answer is that kids learn colors at a really young age…even before they can speak! You can start to see young babies sorting colors.
This question is probably related to the toddler stage when kids are starting to follow directions like get your green boots, or pick a blue shirt, or find your other yellow sock. Or, we might see small kids starting to name various items like book, dog, ball, etc. At this point, parents can start expanding their child’s vocabulary by adding the adjective of a color. They can say, “pick up the red block” instead of just “Pick up the block”. In this way, we can help kids to start using a larger vocabulary, AND we are helping them build neural connections in the brain to expand their learning. It’s really cool when you think about how much a small child can and does learn, right?
Color learning happens over several years and depends on both cognitive and language development.
Most children begin:
- Recognizing colors before they can name them
- Learning color names through repetition and exposure
- Using color words meaningfully between ages 2-4
Be sure to check out our article on baby brain building, because this is one of my absolute favorite activities to do with babies, especially at the 1-2 year stage. They are learning SO much and it’s really cool to see in action.
When Should Kids Know Colors?
So let’s rephase the question above to when SHOULD kids know colors. Because this is a different concept.
By preschool age, many children can identify and name basic colors, though consistency varies.
Parents and educators may wonder, “when should kids know colors?” While there is a developmental range, general expectations include:
- 2-3 years: Begins naming a few colors
- 3-4 years: Names most basic colors consistently
- 4-5 years: Understands color relationships and variations
If a child is not recognizing or naming colors by age 4-5, it may be helpful to provide more structured opportunities for learning or consider underlying visual or language factors.
Color Identification in Child Development
Color identification child development involves more than just seeing color. It requires:
- Visual discrimination (telling colors apart)
- Memory (recalling color names)
- Language (labeling colors)
- Cognitive flexibility (understanding that objects can vary in color)
Children often learn colors best through meaningful experiences rather than isolated drills. For example, identifying the color of a favorite toy or choosing a color during play is more effective than rote memorization.
How to Learn Colors Through Play
If you’re wondering how to learn colors, the most effective approach is through play and daily interaction.
Try:
- Sorting objects by color
- Matching colored items
- Reading books that highlight colors
- Using art activities like painting and coloring
- Playing games that involve color choices
From an OT perspective, multisensory learning (seeing, touching, moving) strengthens color learning and retention.
Engaging Activities to Learn Colors:
- Sensory Play: Encourage your toddler to explore colors through sensory activities like finger painting, playing with colored playdough, or sorting objects by color. These hands-on experiences not only stimulate their senses but also strengthen their fine motor skills.
- Color Walks: Take your little one on a family nature walk with a color-themed adventure outdoors. Spot colorful flowers, birds, or vehicles and engage them in identifying and naming each color they encounter. This activity not only encourages outdoor exploration but also helps them make connections between colors and the real world.
- Color Sorting Games: Set up simple sorting games using colored blocks, buttons, or toys. Your child can enjoy sorting objects into different color groups, enhancing their cognitive abilities while having fun.
- Rainbow Crafts: Engage your toddler in crafting activities that revolve around creating rainbow crafts. Whether it’s using colored paper, finger paints, or even recycling old magazines, these crafts provide an opportunity for creative expression and reinforce color recognition. A simple crayon activity is perfect! Try these best crayons for toddlers.
- Colorful Story Time: Explore children’s books that focus on colors. Read aloud and discuss the different colors with your toddler, allowing them to associate specific colors with familiar objects or characters in the stories.
Reading Colors and Early Learning
The next stage is connecting “knowing” to “reading” and “understanding”. Reading colors is an important early literacy skill. Before children can read words, they learn to recognize visual information like colors, shapes, and symbols.
Color recognition supports:
- Identifying objects in books
- Following visual cues in learning materials
- Building vocabulary
- Supporting comprehension
Books, visual schedules, and classroom materials often rely heavily on color cues, making this an essential developmental skill.
Developmental Progression of Color Recognition
Above we went into specifics for each age, but we wanted to put this all together into list format, so you can see how the progression happens.
Birth to 3 Months
- Notices contrast between light and dark
- Limited ability to perceive color
- Visual system is still developing
3 to 6 Months
- Begins distinguishing basic colors
- Increased visual attention to bright objects
- Strengthening visual pathways
6 to 12 Months
- Shows preferences for certain colors
- Starts associating colors with familiar objects
- Improved visual clarity
18 Months to 2 Years
- Begins matching colors
- May label one or two colors
- Early memory and language connections forming
2 to 3 Years
- Expands vocabulary of color names
- May confuse similar colors
- Learning through repetition and play
3 to 4 Years
- Identifies most basic colors consistently
- Begins exploring color mixing and relationships
- Improved categorization skills
4 to 5 Years
- Recognizes subtle differences between shades
- Understands how colors relate to each other
- Uses color knowledge in learning tasks
Pretty cool to put it all into sequential development, right?
Color recognition is not just an academic skill. It supports participation in daily activities, classroom routines, and early learning experiences.
From an occupational therapy perspective, color recognition is connected to:
- Visual processing
- Attention and focus
- Task completion
- Functional independence
When children understand and use colors effectively, they are better able to engage in learning and everyday tasks.
Underlying Skills Needed for Color Recognition
So, when things don’t happen as expected, and your child gets colors mixed up, or can’t seem to remember the names of colors consistently, it’s helpful to know what’s really happening here.
Learning colors is not just about memorizing names. It is a complex skill that relies on multiple underlying systems working together. When a child is having difficulty with color identification, it is important to consider these foundational areas.
Visual Processing Skills
At the core of color learning is visual processing, specifically the ability to perceive and discriminate between colors. Children must be able to notice differences between shades, recognize similarities, and visually attend to color features in their environment.
This includes:
- Visual discrimination (telling colors apart)
- Visual attention (noticing color in busy environments)
- Visual memory (remembering color names and associations)
Remember above, how we said executive functioning skills at an age appropriate level? This is where those skills come into play. And the skills transfer and are practiced for other situations.
If these skills are not well developed, a child may confuse colors or struggle to consistently identify them.
Language Development
Color learning is closely tied to language. A child may be able to see and recognize a color but not yet have the vocabulary to label it. This is why some children can correctly match colors but cannot name them.
Language skills involved include:
- Receptive language (understanding color words)
- Expressive language (naming colors)
- Concept development (understanding categories like “red” or “blue”)
This is an important distinction when considering color identification in child development.
Cognitive Skills and Memory
Children need working memory and attention to learn and retain color concepts. They must remember what a color looks like, connect it to a word, and apply that knowledge across different contexts.
Cognitive processes involved include:
- Categorization (grouping items by color)
- Concept formation (understanding color as a property)
- Flexible thinking (recognizing that objects can change color)
These skills develop gradually and support higher-level learning tasks later on.
Sensory Processing and Attention
Some children may have difficulty with color recognition due to sensory processing differences. For example:
- Visual sensitivity may make it harder to focus on certain colors
- Difficulty filtering background input can reduce attention to visual details
Attention plays a key role in how to learn colors, as children need to focus on relevant features in their environment.
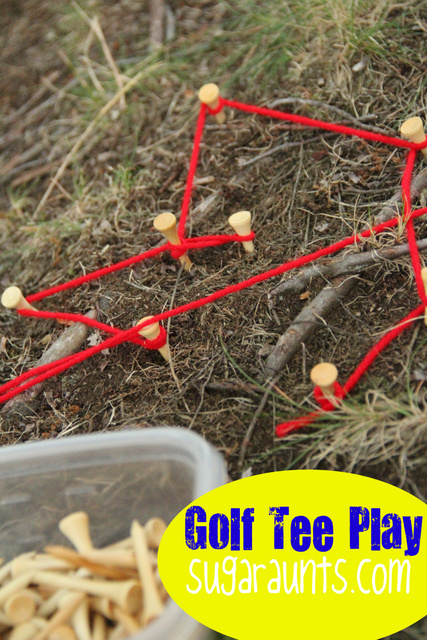
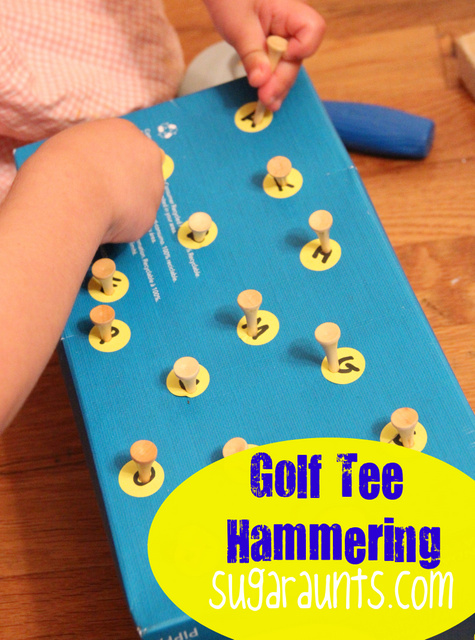
Fine Motor and Visual Motor Integration
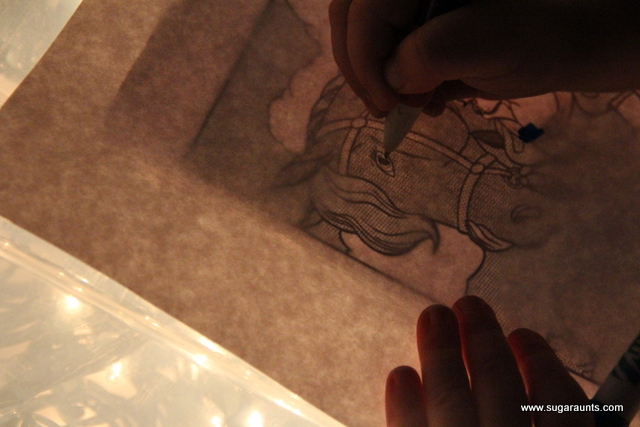
Color learning is often paired with activities like coloring, sorting, and drawing. These tasks require fine motor skills and coordination between the eyes and hands.
When children color within lines, choose specific crayons, or complete color-based tasks, they are integrating:
- Visual input (what they see)
- Motor output (how they respond) aka visual motor skills
Difficulties in these areas can impact participation in color-related activities.
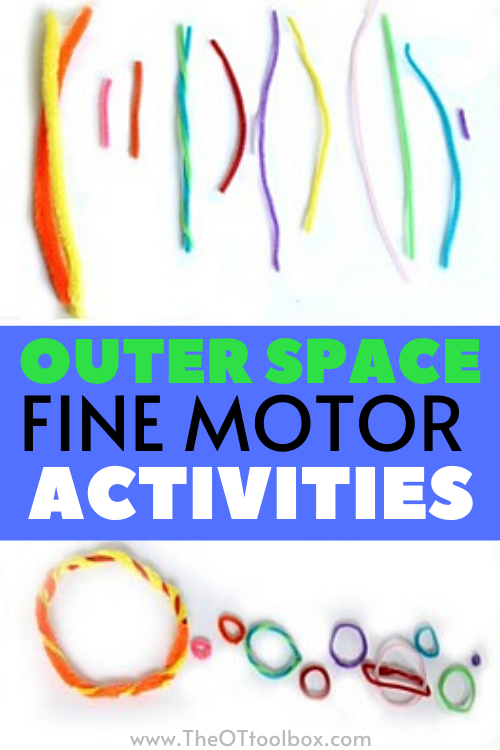
This rainbow sorting activity is one way to combine fine motor and visual motor skills.
Why This Matters for Functional Performance
When we look at color learning through a functional lens, we see how it impacts real-life tasks:
- Following classroom directions
- Participating in art and play activities
- Completing worksheets and early academic tasks
- Engaging in sorting and organizing tasks
- Building early literacy and reading skills
If a child struggles with color recognition, it can affect their ability to keep up with peers and participate fully in daily routines.
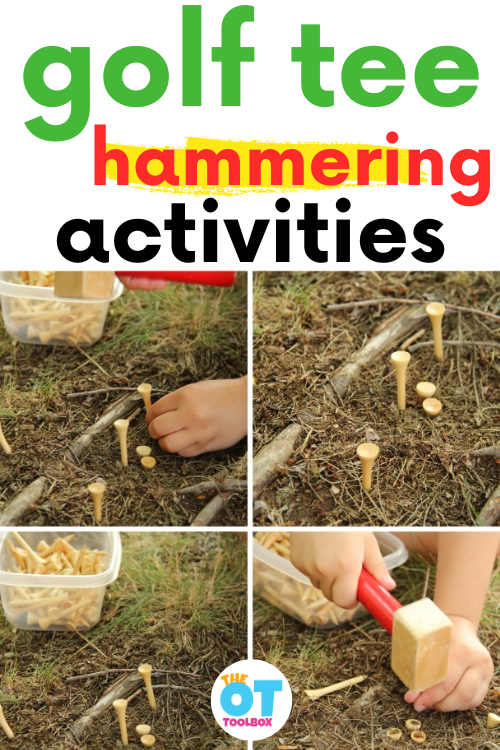
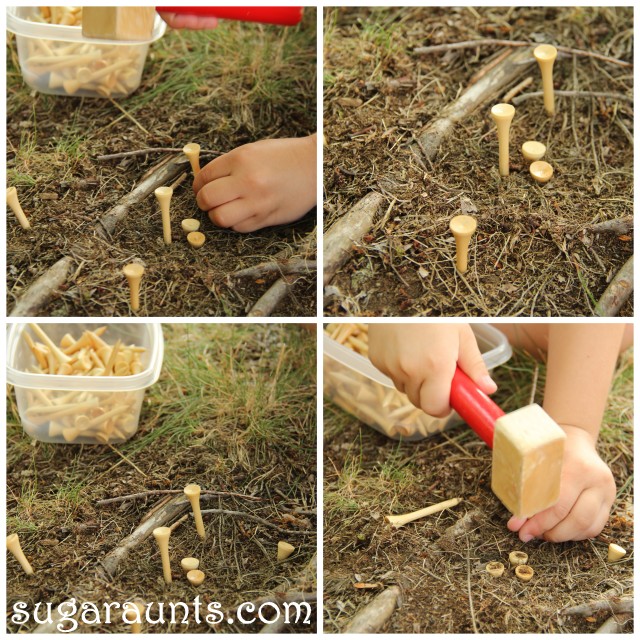
Color Recognition Activities
The image graphics we have in this article explain some ideas for helping kids learn colors. So, if you are wondering exactly HOW to learn colors, this list of activities is the way to go, from the perspective of a pediatric occupational therapist.
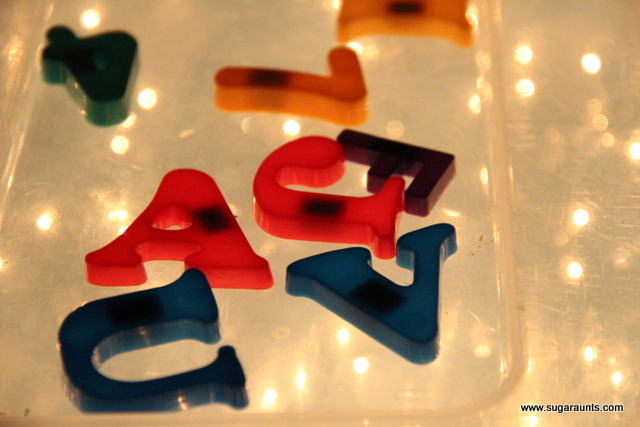
- Color sorting with pom-poms, beads, or blocks
- Matching colored clothespins to colored cards
- Color scavenger hunt around the room or home
- Sorting laundry by color
- Color matching with stickers on paper
- Painting with primary colors and mixing new colors
- Using dot markers to match colors on worksheets
- Color-coded obstacle course
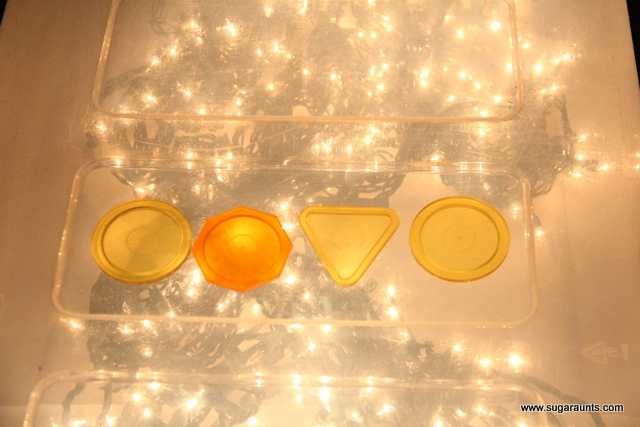
- Matching colored lids to containers
- Building patterns with colored blocks
- Color bingo
- Sorting crayons or markers by color
- Matching colored puzzle pieces
- Color memory matching game
- Sorting food by color during snack time
- Threading beads by color pattern
- Using colored tape lines for movement paths
- Color hop game (jump to called color)
- Matching colored shapes to outlines
- Sensory bins with color sorting tasks
- Coloring by color code worksheets
- Matching socks by color
- Sorting buttons by color
- Color graphing activities
- Using colored cups to sort small objects
- Painting objects and matching to color cards
- Color-themed I Spy activities
- Matching colored magnets on a board
- Sorting Legos by color
- Using flashcards for color identification
- Color stamping activities
- Matching colored pegs on pegboards
- Color sequencing activities
- Sorting colored paper scraps
- Color-coded task cards
- Matching colored ribbons or strings
- Sorting colored erasers
- Using colored bins for cleanup tasks
- Color tracing activities
- Matching colored balls to targets
- Sorting natural items (leaves, flowers) by color
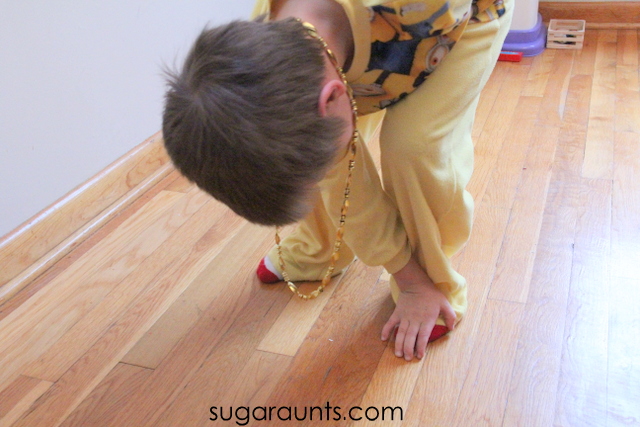
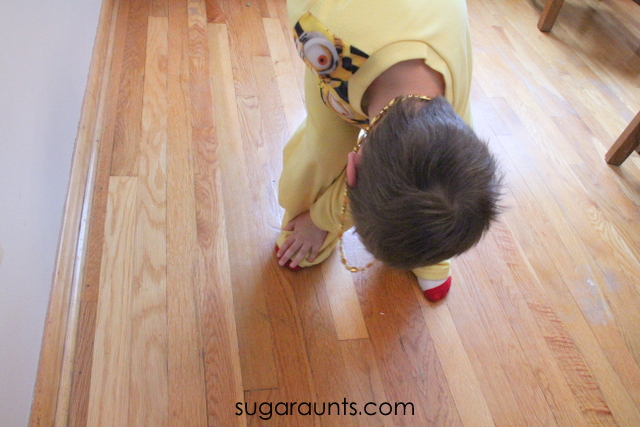
One Day when we Learned Colors…
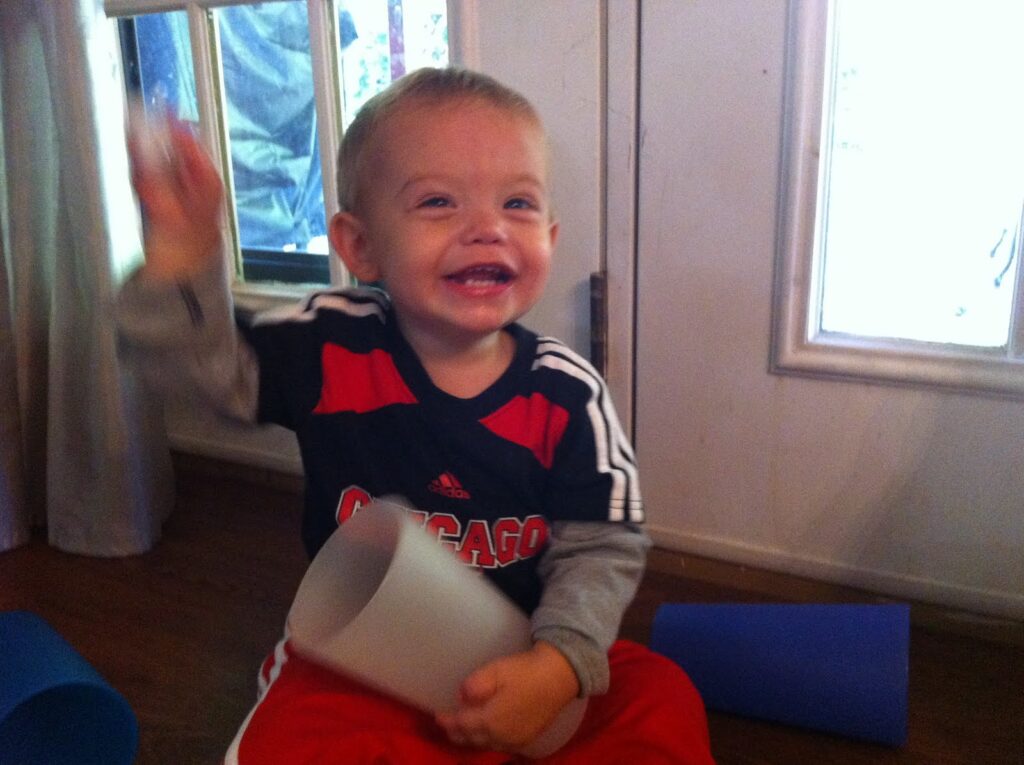
We invented a fun game that we named “Find the Binky”(he is a binky addict and any game involving finding the binky he enjoys…hehe).
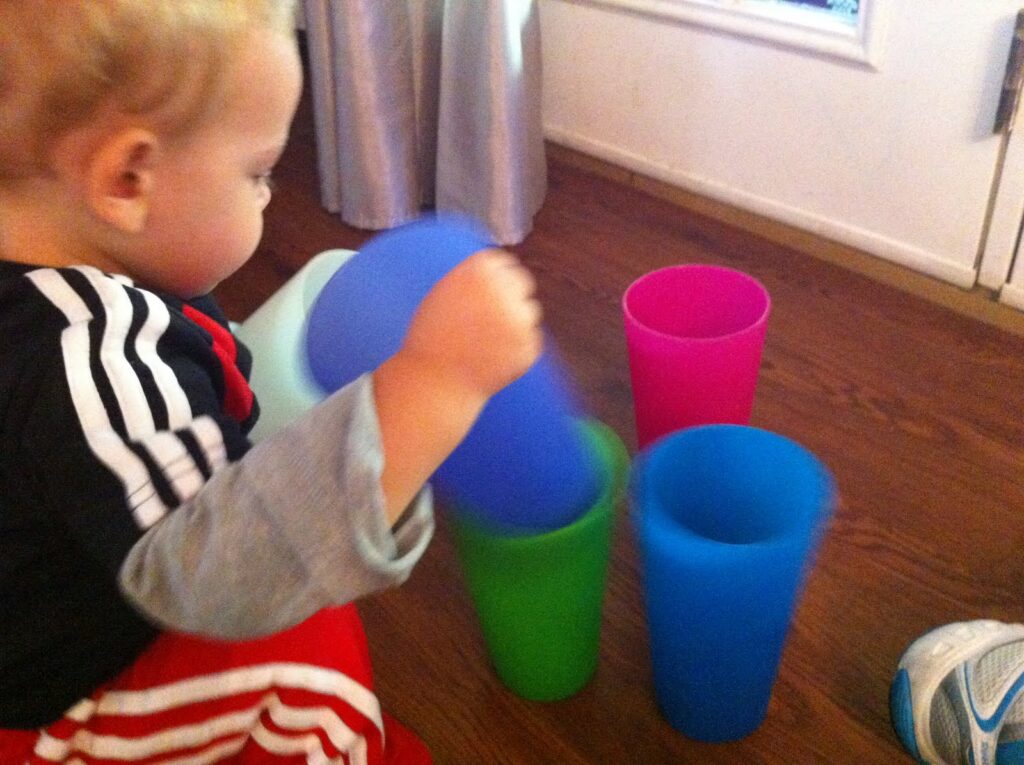
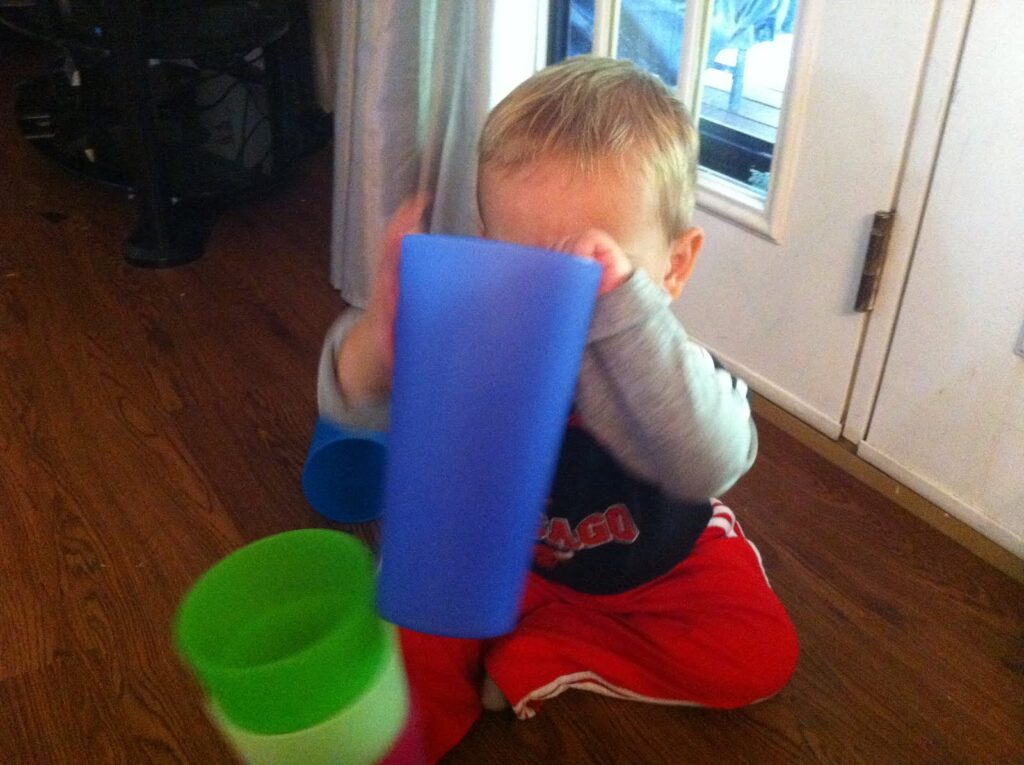
I pulled out these big plastic cups and separated them by color. He would put the binky in a cup and I would say the color.
He would try to repeat the color (or some word that kinda sounded like it). Most of the time he was wrong and I would correct him. He thought that was hilarious!
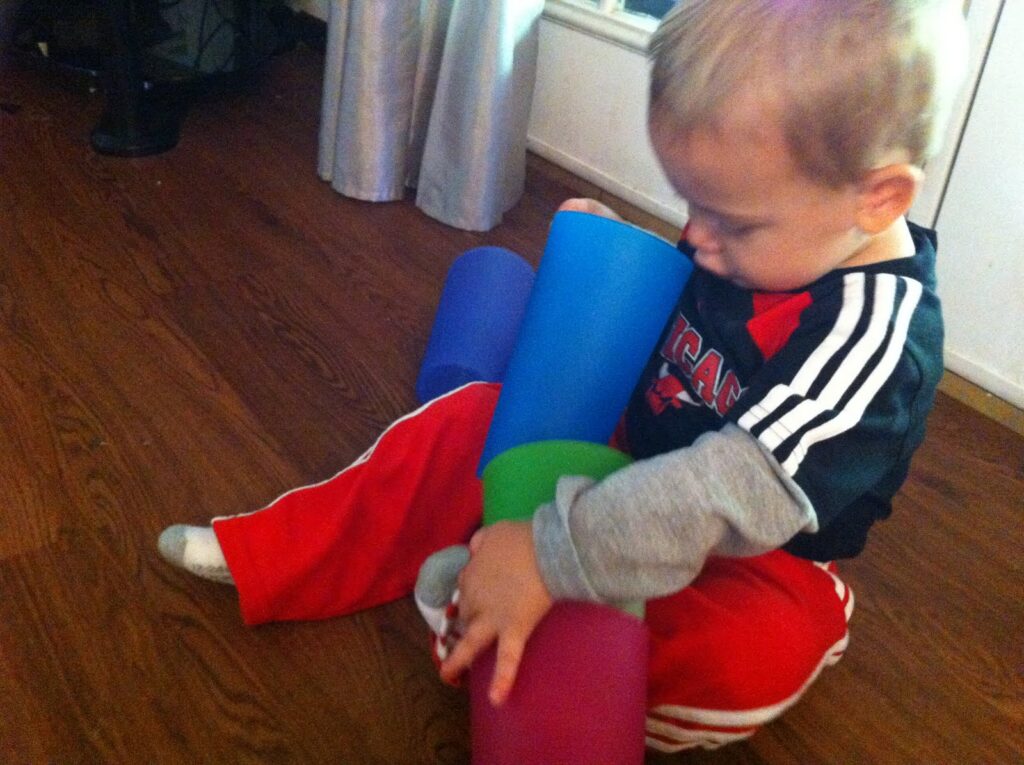

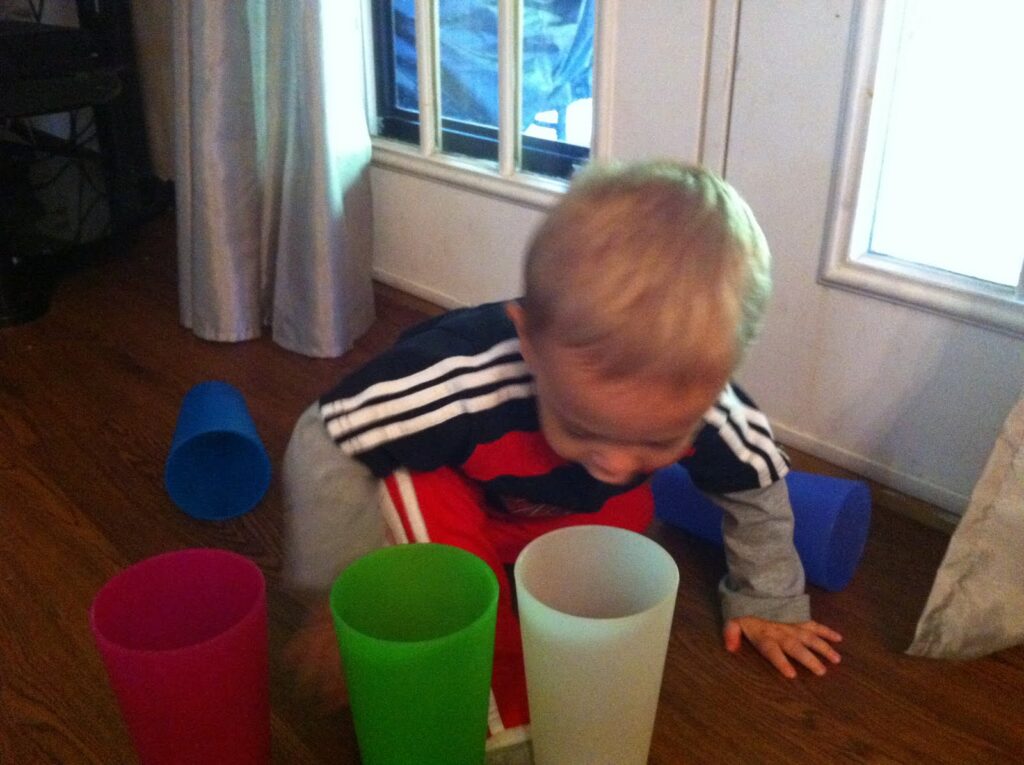
I later found him playing this game he made up by himself…he is such a boy. He made a t-ball stand with the cup and was swinging at the soccer ball with another cup. What a great imagination he has already. I love watching him think.

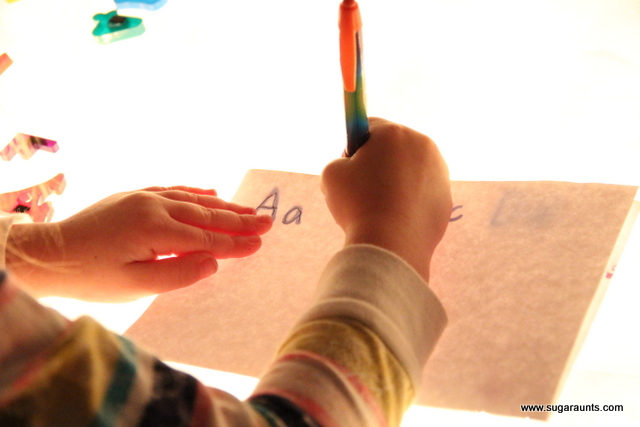
Rainbow Handwriting Kit– This resource pack includes handwriting sheets, write the room cards, color worksheets, visual motor activities, and so much more. The handwriting kit includes:
- Write the Room, Color Names: Lowercase Letters
- Write the Room, Color Names: Uppercase Letters
- Write the Room, Color Names: Cursive Writing
- Copy/Draw/Color/Cut Color Worksheets
- Colors Roll & Write Page
- Color Names Letter Size Puzzle Pages
- Flip and Fill A-Z Letter Pages
- Colors Pre-Writing Lines Pencil Control Mazes
- This handwriting kit now includes a bonus pack of pencil control worksheets, 1-10 fine motor clip cards, visual discrimination maze for directionality, handwriting sheets, and working memory/direction following sheet! Valued at $5, this bonus kit triples the goal areas you can work on in each therapy session or home program.

Colleen Beck, OTR/L has been an occupational therapist since 2000, working in school-based, hand therapy, outpatient peds, EI, and SNF. Colleen created The OT Toolbox to inspire therapists, teachers, and parents with easy and fun tools to help children thrive. Read her story about going from an OT making $3/hour (after paying for kids’ childcare) to a full-time OT resource creator for millions of readers. Want to collaborate? Send an email to contact@theottoolbox.com.