Cowboy Party Invitation

Planning a cowboy birthday party? This kids party theme is a fun way to celebrate a child’s birthday. Use the cowboy invitation ideas, cowboy party activities to take cowboy theme beyond the rodeo!

Cowboy Birthday Invitation

Baby Boy was turning one, and my husband and I wanted to throw him a special birthday party.  We decided on a cowboy themed bash (mainly because of our recent trip to Nashville and a $4 cowboy hat bought at a souvenir shop.)

I will be writing several blogs about this party, but for now I wanted to show the invitation we sent out for our hoe-down.
We wanted the invites to feature our little cowboy.  And we thought it would be neat if the front looked more like a photo than an invitation.  That way people would have something cute to hang up on their fridge before the event.  And they could even keep it as a memento after the party.
My husband (a Sugar Uncle???) came up with this absolutely ADORABLE family portrait.  Baby Boy looks so gosh darn cute in just his cowboy boots, hat, and cloth diaper.  (We use Gdiapers on Baby Boy, and their cuteness has lent themselves to many a half-naked picture.)  I also love how Daddy and I (along with our cowboy boots) are present in the photo without taking 
the attention away from Baby Boy.  
What might be the most impressive thing about this photo is that my husband and I pulled this off without any assistance.  We used up a tripod, camera, and the self-timer feature to get our shot.  
How-To Hint: Play an Elmo video on a laptop and set the laptop riiiight next to the camera.  Baby Boy loved watching Elmo sing and dance and gave us a cute smile.
My hubby, once again, hit it out of the park with the back of the invitation.  He put his graphic design skills to work and created this western inspired card.  I love the fonts he used and the sunburst and stars. To make it extra fun, we used as much cowboy lingo as we thought our guests could stomach.

To make the cards, we printed each side on regular printer paper.  We used spray glue to bond the two pieces together.  Being a graphic designer, he insisted on it being “full-bleed with crop marks.” I don’t know much about his process, but the end result was perfect.

-Erin

Cute Halloween Treats

Happy Halloween!
Tomorrow is Halloween…I procrastinated a bit in making some treats for my little girl’s preschool class.  I was a little last minute making these treats, but maybe you could use this idea for next year!
 
 They were so easy to make, just melt some white chocolate chips, spread the melted chocolate on the top of the marshmallow, dip in Halloween sprinkles. Then I added a dot of melted chocolate for the eyes and mouth and added M&M’s.
I had a little helper (taste-tester) finding all the green, brown, and orange M&M’s..this was a fun task!
Boo!

I added a tangerine jack-o-lantern for a little healthy snack.

The cute little treats could be altered it a bit for Christmas! I am thinking red/green sprinkles…poking a few broken pretzels in as antlers and giving it a red M&M nose!
~Leanne

Process vs Product Focused Play

Recently, I went to a continuing education course at Little Guy’s preschool.  It was offered up to parents, teachers, child care workers…all about Education Through Play.  
One tip for educational play was the concept of process play vs. product play.  Product Focused Play is working toward a specific end (“here, copy this cute little brown owl that is sitting on a branch, using this paper plate and those cupcake liners”).
Process Focused Play, the instructor outlined, is creative, open ended, and works on the child’s thought processes. The child is provided with materials and given an open-ended opportunity to create.  Imagine.  Explore materials.  There is no specific end product with process play.  Only, the opportunity to express themselves through language, creativity, open-ended motor development.  As an OT, this is great! …Provide the fine motor dexterity tasks, sensory opportunities, and age-appropriate tools (scissors, pencils, crayons, paint brushes), and assess and observe the child’s abilities in order to develop goals to meet functional levels!

Of course, Product Focused Play (making that specific art project) is SO important for a child’s development too…direction following, cutting a strait/curved/angled line, sequencing, specific media use, and much more…all are needed to succeed in the school setting.  
We did a little Process Focused art this week, bringing out all kinds of materials and a big old piece of cardboard.  The kids went to it, learning throughout the process of creating!
The only thing I told them was “make something”.  (I didn’t say this and then go off to change out laundry or put away dishwasher dishes…I sat there with them, engaged in their process, and we talked. About the stuff they were using, about what they were making, about why they were using what they were, and about what’s for lunch…hey, we were hungry!) Language development at its finest!
As they created (and we talked lunch), they had no clue about the number of skills they were refining!
Scissor skills while cutting yarn…

Fine pincer grasp to pick up the yarn, Bilateral coordination to work both hands together…

Letter formation, Tripod grasp and Separating the two sides of the hand to sprinkle glitter, Gross hand grasp to squeeze the glue bottle, Sensory exploration…

Tripod grasp to hold the yarn, Eye-hand coordination to cut along the length of yarn, Controlled use of scissors…
No wonder they were hungry!
Little guy made a fire with red yarn.  He then decided to add logs all around it and played with this allll day! He used his Lincoln logs to make a house to go with it and the little cowboy and Indian guys to play out all kinds of stories.
Big Sister made made spaghetti and meatballs.  She drew in a fork, spoon, and salad.  She had her baby dolls eating from this little scene.  
Imagination, Creativity, Exploration
We had a lot of FUN with our Process Play! 
~Colleen

S’more Bites

These lil cuties were something I threw together for my nephew’s 1st birthday.  I was in charge of making a bite sized s’more to fit a Cowboy Birthday Party theme.  These were really quick and easy to put together.  I experimented with the ingredients and baking time, and want to share with you just how simple it is to have mini s’mores any old time (now that could be dangerous)! 
Seriously, they are so tiny and cute, how can they be bad for you???!!! 😉

Start out with the basics for S’mores.  These Honey Maid Lil’ Squares are so cute! Baby Girl loves them (and so does Big Sister and Little Guy).  They are really little…one inch squares. Perfect for little one’s snack time too!
Chop the chocolate bars into little squares. I broke each bar up along the lines then cut those into thirds.
Spread out the mini-grahams on your cookie sheet.  I put a layer of aluminum foil down first because I was experimenting and wasn’t sure if the chocolate would spread over the graham.  It didn’t. No need to use the foil.
Bake the grahams and chocolate in oven at 350 for 2-3 min…Keep a close eye on this and pull them out when the chocolate starts to get shiny.  I tried another batch for a halloween party this weekend and totally baked them too long. the chocolate burned and the whole batch went into the garbage 🙁

Press a mini marshmallow into each chocolate square.

Pop the cookie sheet back into the oven for a minute or two.  Keep an eye on them, again…You want the marshmallow to puff up a bit.

Pull them out of the oven and turn on the broiler. When the oven has heated up, stick them back into the oven for just a minute.  Watch closely…You can keep the oven door slightly opened to make sure they don’t burn.  Out comes perfect mini-s’more bites!
(This picture is terrible, I know)
These were so good and I got so many compliments on them!  Even a request to make these every time we have a pot luck dinner!  That says something!!
~Colleen

Star Shaped Food Ideas

We were seeing stars at this party! This is just a quick post overflowing with star shaped party food pics! Many years ago, we had a Twinkle Twinkle Little Star party for my daughter’s first birthday. The star shaped food was a hit! Here are some things we had at the party…also had stuffed shells & salad (completely NOT star-shaped, but…yummmmm…)!

Star Shaped Food

We made a few different star shaped foods and star shaped snacks to serve. The best thing is that they were all fairly easy to pull together. The star shaped food ideas you’ll find below include:

  • Star pretzel rods (homemade icing candy stars)
  • Star cookies
  • Star shaped tortillas (so easy to make!)
  • Star cherry pie
  • Star shaped brownies

Other items that we used to create a star theme for the party food were star toothpicks, star garland, and sugar sprinkles to top chocolate covered Oreo cookies.

Star Shaped Icing Candy- To make this star treat, I used royal icing in a piping bag. I spread out a piece of wax paper and drew small stars on the wax paper, in rows. After the icing dried, I simply peeled away the wax paper. You can read the full instructions and see pictures of the candy making process on our blog post about the star candy recipe.

The star candies would be fine on their own, or use them to decorate chocolate dipped pretzel rods like we did.

My star sugar cookies
Pretzel rods dipped in pink chocolate melts with my icing candy stars
Aldi’s Sassy Apple Salsa (Go out now and buy this! It is SO good!)
with…
Star Tortilla Chips- Star shaped dippers! These were so simple to make and you could use any shape really to make your own fun tortilla chips.
  1. Use a cookie cutter to cut store-bought tortillas.
  2. Toss them on a cookie sheet with a little olive oil.
  3. Bake at 350 for 20 min.
  4. Stir them up every once in a while with the spatula. Think of the shaped possibilities using cookie cutters…
Star food toppers- This was another fun and easy way to decorate food for a star themed party. Simply cut out stars or use a star shaped hole punch. Glue two to the top of a toothpick and poke into any snack or appetizer.
Cherry Pie using this recipe.  I love the star top!
Star shaped brownies- Use a mix, pour into a jelly roll pan to bake. They are so thin and perfect for cutting with a cookie cutter.  Sprinkle with confectioners sugar once you pull them out of the oven.  Eat all of the brownie scraps before the party 🙂
((Not food!  But a shot of my star garland.  Stars were were taped to thread.))
Buffalo Chicken Dip Cups and Barbecue Chicken Dip Cups, posted about here.
Not star shaped, these chocolate covered Oreos were sprinkled with silver sugar…from the baking aisle at the grocery store.  So good!  They were actually Aldi brand Oreos and had chocolate filling. Very yummy!
Maybe some of these star shaped foods could go along with a 4th of July Party??
~Colleen

Halloween Sensory Table

When the Babies woke up from their naps today, I had a surprise waiting for them…a Halloween sensory table! 
They had so much fun checking out all of the things on the table…picking them up…moving them around…
smacking pumpkins off of the table…
They loved carrying the pumpkins around, bringing them to each other.
We headed outside after a while. Couldn’t resist being outside on this beautiful fall day!
The smell of and sound of crunchy leaves…there is nothing like the senses experienced during the fall.


Enjoy today!

~Colleen

Spider Web Obstacle Course

Spider web obstacle course activity for kids

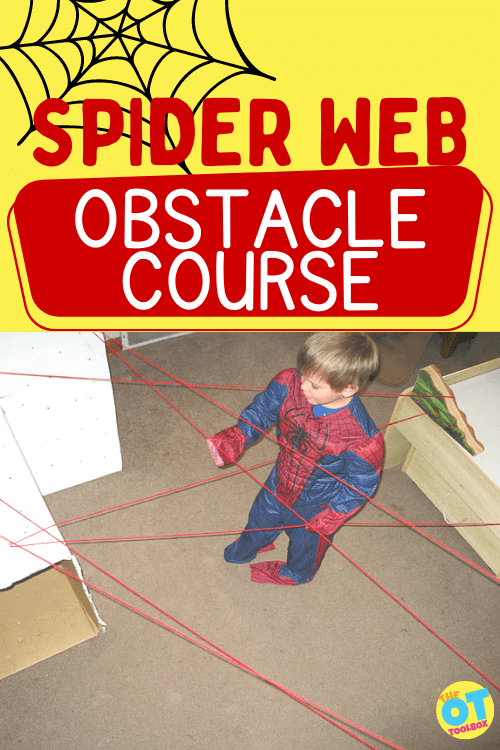
This spider web obstacle course is a gross motor activity that kids love. Not only will it get them moving around the life size spider web, but you’ll see tons of whole-body movements: crouching, lunging, leaning, bending, crawling, and motoring around string spider webs! Kids love spider activities and this web obstacle course is a great addition. This gross motor coordination activity is a great activity kids love!
Spider web obstacle course activity for kids

Spider Web Obstacle Course

There are so many reasons why occupational therapy practitioners use obstacle courses in therapy practice. This obstacle course idea is a “spin” on our fine motor spider maze. Just like in that activity, participants will develop motor planning skills in order to get through the maze.

The nice thing about this spider web course is that you can make it as easy or as difficult as you need, depending on the level of the child.

By crawling over and under the string maze, kids are developing skills in:

And, as a benefit, kids that participate in this spider web obstacle course also gain benefits of heavy work, vestibular input, and proprioceptive input. Each of these sensory systems result through play.

How to Use a Spider Web Obstacle Course

Above, we mentioned a few motor skills that can be strengthened by moving through the string spider web. Let’s dive into those gross motor skills a bit further:

  • Standing on one foot
  • Balancing while lifting one leg up high
  • Crawling
  • Arching the back
  • Creeping on the floor
  • Standing on tip toe
  • Lunging
  • Squatting
  • Reaching high
  • Stepping over
  • Reaching under

By completing these movements to move through a web of string or rope, motor skills and strengthening develop.

There are many ways to use a spier web obstacle course in an occupational therapy session or in the home. Use the course along with a visual schedule for the therapy session or even as part of a sensory diet.

  1. Set up the obstacle course as a transition activity by having the child move through the web to retrieve a visual card with the next motor or self-care task.

2. They can then move through the course again to obtain another visual card on the therapy schedule.

How to Make an Obstacle Course Spider Web

One day last week, we decided to build a spider web in the living room.  Little Guy had a blast with this one!  

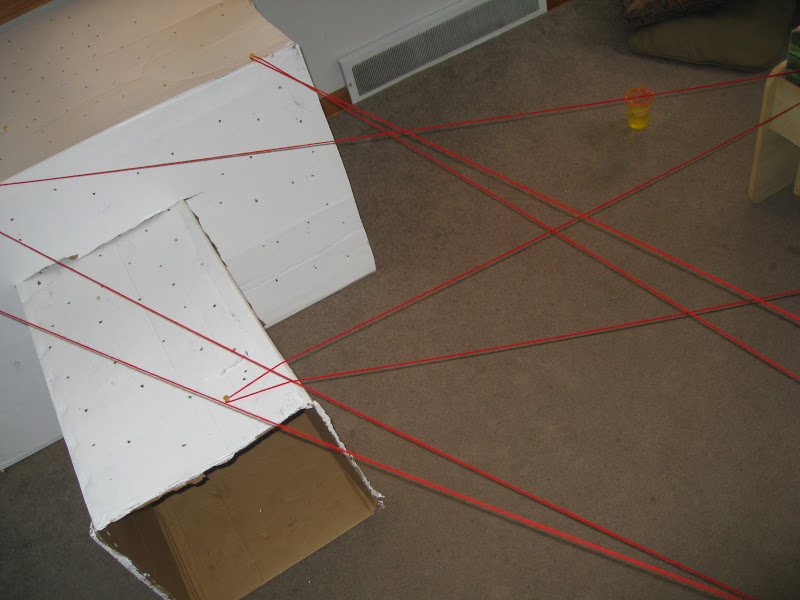
To make the obstacle course, use a skein of yarn or thread. String the yard around the room. Go around chair legs, over toys, or other items. If you are wrapping the yard around household items, remember that the string will pull on the objects and the string may pull on the object, so only use heavy duty objects like furniture when planning out your spider web.

Other items you can add to the spider web obstacle course include:
  • Spider web deep breathing exercise– Print off the deep breathing exercise and when kids get to the printable in the obstacle course, they can stop and do the deep breathing exercise.
  • Spider rings- Add a bunch to a small basket, along with tongs. Kids can pick of the spider rings and drop them into containers.
Make a spider web obstacle course by stringing thread around the living room.

    He decided to put on his Spiderman costume.  

Indoor spider web activity

There was some great motor planning needed to go through this web! Motor planning is the ability to think of, organize, and carry out actions needed for a task.

Kids with motor planning problems appear clumsy, disorganized, or inattentive.

They may have problems with clothing management, shoe tying, handwriting, or any fine/gross motor task.

Child in Spiderman costume moving through a spider web obstacle course.

Big Sister had to make one too, using her preference of pink yarn.  

Spiderweb obstacle course with pink yarn

    Even teddy bears can pretend to be Halloween spiders.  

Colleen Beck, OTR/L has been an occupational therapist since 2000, working in school-based, hand therapy, outpatient peds, EI, and SNF. Colleen created The OT Toolbox to inspire therapists, teachers, and parents with easy and fun tools to help children thrive. Read her story about going from an OT making $3/hour (after paying for kids’ childcare) to a full-time OT resource creator for millions of readers. Want to collaborate? Send an email to contact@theottoolbox.com.
Pumpkin activity kit
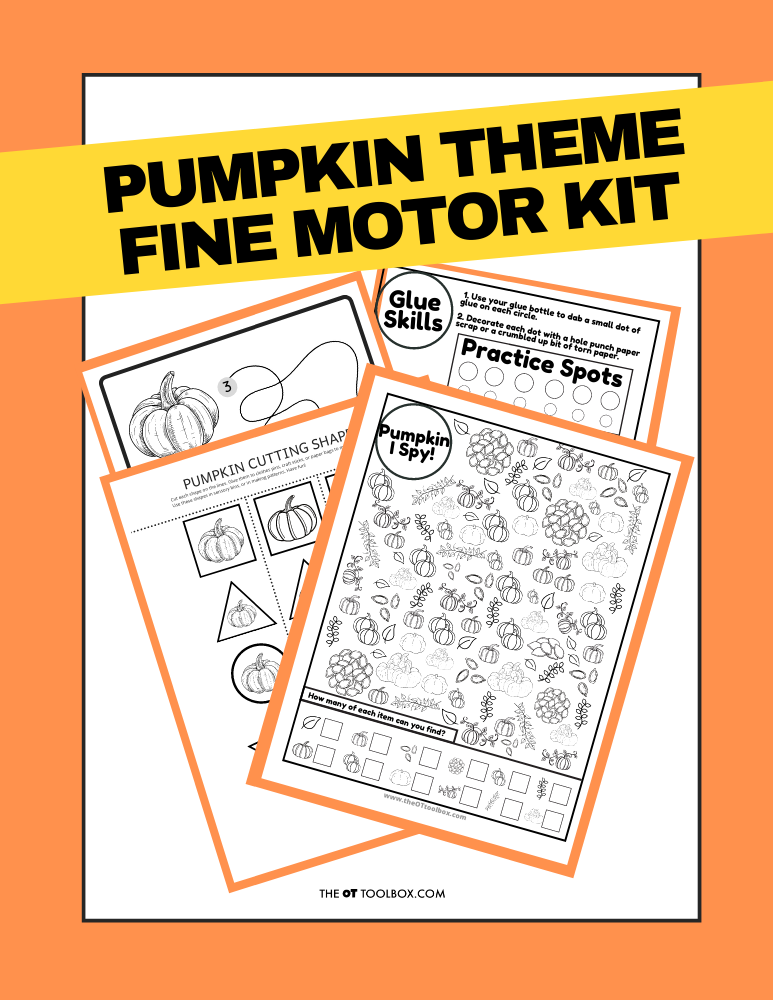
Pumpkin Fine Motor Kit

Grab the Pumpkin Fine Motor Kit for more coloring, cutting, and eye-hand coordination activities with a Pumpkin theme! It includes:

  • 7 digital products that can be used any time of year- has a “pumpkins” theme
  • 5 pumpkin scissor skills cutting strips
  • Pumpkin scissor skills shapes- use in sensory bins, math, sorting, pattern activities
  • 2 pumpkin visual perception mazes with writing activity
  • Pumpkin “I Spy” sheet – color in the outline shapes to build pencil control and fine motor strength
  • Pumpkin Lacing cards – print, color, and hole punch to build bilateral coordination skills
  • 2 Pumpkin theme handwriting pages – single and double rule bold lined paper for handwriting practice

Work on underlying fine motor and visual motor integration skills so you can help students excel in handwriting, learning, and motor skill development.

You can grab this Pumpkin Fine Motor kit for just $6!

Colleen Beck, OTR/L has been an occupational therapist since 2000, working in school-based, hand therapy, outpatient peds, EI, and SNF. Colleen created The OT Toolbox to inspire therapists, teachers, and parents with easy and fun tools to help children thrive. Read her story about going from an OT making $3/hour (after paying for kids’ childcare) to a full-time OT resource creator for millions of readers. Want to collaborate? Send an email to contact@theottoolbox.com.
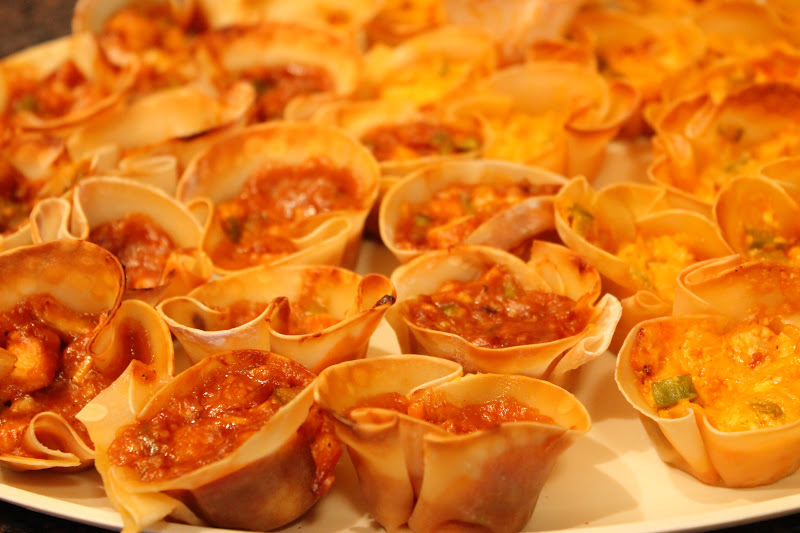
Buffalo Chicken Dip & Barbecue Chicken Dip Cups

These apps are SO good and SO easy!
This is a basic recipe split into two bowls with only one different ingredient added to make an entirely different and delicious appetizer.  So easy!  

I don’t usually measure when making buffalo chicken dip, but I know lots of people like to see the measurements of ingredients when they cook, so I did my best to get the amounts in here for ya. 
Start like you are making your typical buffalo chicken dip…1/2 cup of ranch, 1 (8 oz) block of cream cheese, 3/4 cup of shredded cheddar cheese, 2 chicken breasts shredded.  (you could use canned chicken if you want to go reeeeally simple, but I had some frozen shredded chicken breasts in the freezer, so it was pretty quick to just thaw…and much better than canned, in my opinion).
I added one small diced green pepper to this.
At this point, split the mixture into two bowls.  In one bowl, add 1/2 cup of hot sauce.  In the other bowl, add 1/2 cup of barbecue sauce.
How easy is that!!??

Mix your two bowls well and let them sit for a little bit while you do this next part.  It lets all of the flavors get acquainted 🙂

This next part is so easy and your guests will think you’re all fancy.  Really, who doesn’t love an appetizer in a pretty little cup??
You can find the potsticker wrappers in the frozen section of the grocery store.  BTW, the recipe on the back of the potsticker package is GOOOOD! Try it. You will love it.

You have to let the wrappers sit out for a bit so you can easily separate them.

Place into a mini muffin tin. No need to bake them first.  Baking them with the filling in them makes for a soft bottom and crunchy tops.  Perfect combo!

Fill half of the cups with the buffalo mixture and half with the barbecue mixture.  Bake at 350 for 10 min.  Check on them…You want the edges to be crispy brown and the filling to be bubbly.  You can make these ahead of time and re-heat on a cookie sheet.  They are just as awesome the next day.  I know this for a fact 😉

Enjoy!
~Colleen

Linked Up:

Ghost Catch Game

We have been playing a fun Halloween game recently.  We used empty milk jugs to make these friendly ghost scoops.  It was a multi-step activity…with lots of fine motor work and fun.


Ghost Catch Craft and Game
I cut the tops off of the milk jugs, keeping the handle on.  While I did that, I had Big Sister and Little Guy paint white contact paper with black washable paints.  They covered a big square, painting the whole thing black.  Little Guy said he was making “tracks” with his paint brush in the paint. We let it dry for a day…
Then, Big Sister cut out shapes from the painted contact paper.  I didn’t draw circles for her.  I wanted her to work on rotating the paper, using her mind’s eye to picture the shape she wanted for eyes and mouths. 
She did pretty well!  Her ghost’s eyes are pretty similar in size and shape, and those smiley face mouths are pretty good!  She was really working those bilateral coordination skills, to hold and turn the paper, while cutting a shape she saw in her mind.

Ghost Catch Craft and Game
Figuring out how much space she had on the sheet for all of the shapes she needed for four ghosts was really great visual-spatial organization.  This is so important in handwriting.  When a writer gets to the edge of a sheet of paper while writing a sentence, she needs to be able to determine how much space is left, and if the word will fit…or decide that she better write the word on the next line of the page.  
Neatness in handwriting is very dependent on visual-spatial organization.
Big Sister and Little Guy worked together to stick the shapes onto the milk jugs.  They look pretty cute! 

 Ghost Catch Game

We have been using these ghost catchers for a ton of fun catching games…catching leaves as they fall from trees outside, catching bubbles, scooping up balls in a fun catch game, tossing bean bags into them.
Even the babies have been loving this activity.  They put toys into the ghosts and take them back out again, over and over and over….
Have you been playing any fun Halloween themed games?