Today, I have an update on a very old blog post for a specific reason. This fake snow messy sensory play activity is a valuable tool in addressing tactile defensiveness, or tactile sensitivity. In general descriptions, this simply means an over-sensitivity to touch, or over-responsiveness to touch sensations. For kids with sensory issues, this can be a very big deal. Tactile defensiveness can mean poor tolerance to certain clothing, textures, food sensitivities, closeness of others, wearing socks or the feel of seams or clothing. Sensitivity to these touch sensations can look like many different things! Today we are discussing all about tactile sensitivity, what that looks like in children, and a sensory challenge that can be used for tactile sensitivity.
If you are looking for more information on sensory processing, start here with our free sensory processing information booklet.
What is Tactile Defensiveness
I briefly explained the meaning of tactile defensiveness above, but let’s break this down further.
The tactile system is one of our 8 sensory systems: touch, taste, smell, sight, hearing, proprioception, vestibular, and interoception. The sense of touch is a very big piece of the whole picture.
The Tactile Sensory System is one of the earliest developed senses of the body, with studies telling us this sensory system begins to develop at around 8 weeks in utero. The sense of touch completes its development at around 30 weeks in utero when pain, temperature, and pressure sensations are developed.
Understanding Tactile Defensiveness
Tactile defensiveness is often discussed within the broader concept of sensory modulation, which refers to how the nervous system organizes and responds to sensory information.
In some individuals, the nervous system reacts more intensely to everyday sensations than expected. This pattern is often described in the research literature as sensory over-responsivity, a type of sensory modulation difficulty in which reactions to sensory input may be stronger, last longer, or feel overwhelming compared to what the situation typically requires.
It is important to understand that this is not simply a matter of a child noticing sensations more easily than others. Current understanding suggests that the nervous system itself is responding with a heightened emotional, physiological, and behavioral reaction to certain stimuli.
In other words, the child is not choosing to overreact; their nervous system is reacting in a way that signals discomfort or threat.
Some clinicians and organizations have begun using the term heightened sensory responsivity when discussing these patterns. This language reflects a shift toward more respectful and person-centered terminology. While the research base still frequently uses the term sensory over-responsivity, both phrases are generally referring to the same nervous system pattern, an amplified response to sensory input.
What Is Tactile Defensiveness?
When this heightened response occurs specifically in reaction to touch, it is commonly referred to as tactile defensiveness. Children who experience tactile defensiveness may react strongly to everyday sensations that others barely notice. Clothing seams, tags, certain fabrics, unexpected touch, or messy textures may trigger discomfort or distress.
The word “defensiveness” is helpful because it reflects what the child’s nervous system is doing. Instead of interpreting touch as neutral or pleasant information, the brain may interpret it as something that needs to be protected against. The body then moves into a defensive response, which can look like pulling away, avoiding certain clothing, refusing messy play, or becoming upset when touched unexpectedly.
How the Nervous System Contributes
The tactile system plays an important role in helping the brain determine whether touch is safe, alerting, or potentially threatening. For some children, this system sends signals that lead the brain to respond quickly and intensely to certain types of touch. As a result, everyday sensory experiences, such as getting dressed, standing in line, or participating in art activities, can become challenging.
When the nervous system reacts in this way, children may appear sensitive to textures, avoid certain fabrics, dislike grooming routines, or become distressed when their skin is touched unexpectedly. These responses are not simply behavioral choices; they reflect how the child’s nervous system is processing sensory input.
Types of touch
The skin performs unique duties for the body, based on different types of touch input, and tactile sensitivity can be considered to occur in the various aspects of touch. These types of touch include: light touch, pressure, discrimitive touch, pain, temperature.
Most importantly for our ancient ancestors, especially, the skin protects and alerts us to danger and discriminates sensation with regard to location and identification. This is important because touch sensations alerts us to both discrimination and danger. These two levels of sensation work together yet are distinctively important. And furthermore, the skin is the largest and the most prevalent organ.
Touch discrimination- Discrimination of touch allows us to sense where on our body and what is touching us. With discrimination, we are able to
discern a fly that lands on our arm. We are able to sense and use our fingertips in fine motor tasks. We are able to touch and discern temperatures, vibrations, mount of pressure, and textures and shapes of objects.
Danger perception– The second level of the tactile system alerts us to danger. It allows us to jump in response to the “fight or flight” response
when we perceive a spider crawling on our arm. With this aspect of touch, we are able to discern temperature to ensure skin isn’t too hot or cold. We can quickly identify this temperature or sharpness of an object and quickly move away to avoid burning, freezing, or sharp objects.
When either of these levels of sensation are disrupted, tactile
dysfunction can result. This presents in many ways, including
hypersensitivity to tags in clothing, a dislike of messy play,
difficulty with fine motor tasks, a fear of being touched by
someone without seeing that touch, a high tolerance of pain, or a
need to touch everything and everyone.
Sensitivity to touch can mean over responding to touch input in the form of textures, temperatures, or pressure. Touch sensitivities mean that the body perceives input as “too much” in a dangerous way. The touch receptors that perceive input are prioritized because the brain believes we are in danger. The body moves into a state of defensiveness, or safe-mode in order to stay safe from this perceived danger. This is tactile defensiveness.
What does Tactile Defensiveness looks like?
Hyper-responsiveness of the tactile sense may include a variety of things:
- Overly sensitivity to temperature including air, food, water, or
- objects
- Withdrawing when touched
- Avoids certain food clothing textures or fabrics
- Dislikes wearing pants or restrictive clothing around the legs
- Refusing certain foods due to food texture issues
- Dislike of having face or hair washed
- Dislikes hair cuts
- Dislikes having fingernails cut
- Dislike seams in clothing
- Excessively ticklish
- Avoidance to messy play or getting one’s hands dirty
- Avoidance of finger painting, dirt, sand, bare feet on grass, etc.
- Avoids touching certain textures
- Clothing preferences and avoidances such as resisting shoes
- Resistance to nail clipping, face washing
- Resists haircuts, hair brushing
- Dislikes or resists teeth brushing
- Overreacts to accidental or surprising light touches from
- others
- Avoids affectionate touch such as hugs
- Dislikes closeness of other people
As a result of this avoidance, development in certain areas can be delayed, in a way that functional performance of daily tasks is impacted. What you see in as a result of a poorly integrated tactile sensory system:
- Delayed fine motor skills
- Rigid clothing preferences
- Behavioral responses to tasks such as putting on shoes or coat
- Impaired personal boundaries
- Avoids tactile sensory activities
- Poor body scheme
- Difficulty with praxis
- Poor hand skill development
More information on sensory processing of each of the sensory systems and how that impacts daily life can be found in The Sensory Lifestyle Handbook. You’ll also find practical strategies for integrating sensory diets into each part of every day life, in motivating and meaningful ways. Check out The Sensory Lifestyle Handbook for moving from sensory dysfunction to sensory function!
Supporting Children with Tactile Sensitivities
Understanding tactile defensiveness as a nervous system response helps shift the focus from correcting behavior to supporting regulation. When adults recognize that a child’s reaction is rooted in sensory processing, they can begin to create supportive strategies that gradually build tolerance and comfort with different tactile experiences.
Occupational therapy approaches often include providing predictable sensory experiences, respecting the child’s comfort level, and introducing new textures in ways that feel safe and controlled. Over time, this supportive approach helps the nervous system learn that touch can be experienced without triggering a defensive response.
Recognizing tactile defensiveness through this lens helps parents, educators, and therapists respond with understanding, empathy, and effective support strategies that promote participation in daily activities.
How to help with tactile sensitivity
There are ways to help address these areas, so that the child is safe and can function and perform tasks in their daily life. While addressing tactile sensitivities doesn’t mean changing the child’s preferences, it can mean understanding what is going on, what the child does and does not prefer in the way of sensory processing, and it can mean providing tools and resources to help the child.
This should involve an occupational therapist who can take a look at sensory processing and integration and make specific recommendations.
Some strategies that can impact tactile sensitivity include:
- Understanding the child’s sensory systems, and integration in the daily life of the child. Grab the Sensory Lifestyle Handbook to read more on sensory diets that are meaningful and motivating. These are sensory activities that can be integrated right into tasks like baths, tooth brushing, hair brushing, dentist visits, clothing changes, etc.
- Take a look at clothing sensitivity red flags for areas of sensitivity to clothing that stand out for the individual child.
- Read more on proprioception and the connection of heavy work input as a calming and regulatory tool for sensitivities.
- Work on touch discrimination with activities at the level of the child.
- Provide verbal input to warn the child prior to light touch
- Provide visual cues and schedules for tasks that must be completed such as tooth brushing or hair brushing.
- Trial tactile experiences at a graded level, introducing various sensory experiences in a “safe space” at a just right level for the child.

Tactile Defensiveness Sensory Activity
That’s where this messy sensory play activity comes in. By taking out the “messy” part of this sensory experience, children who dislike messy play or touching certain textures can explore the sensory activity and challenge tactile exposure. In this way, they are experiencing a new and novel texture (temperature and squishy, messy experiences), but at a safe level, or “just right” level for them.
This snow sensory play activity has the opportunity for tactile challenges, but it uses a plastic bag to contain the actual mess, allowing for a mess-free sensory experience, at different grades of texture exposure.
Fake Snow Recipe
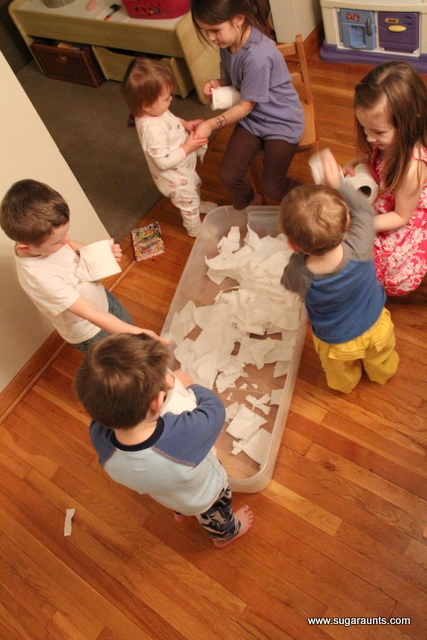
We made fake snow one recent weekend, when we had a big cousin sleep over. There were six kids aged five and under staying overnight at our house. I had this activity planned for us to do together, (because I procrastinated ) and had to get it together to take to a Winter Festival at our church the next day. It was a fun messy play idea for indoor snow.
We’ve made this fake snow before and I have the recipe listed on our Messy Play Day post.
This fake snow is easy, because it includes only 2 ingredients:
- Toilet paper
- Ivory soap
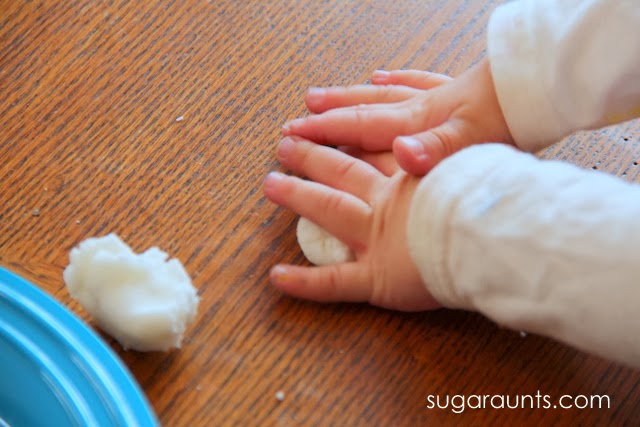
With these two ingredients, there are many opportunities for tactile sensitivity challenges, and each child can experience sensory exploration at a level that suits their preferences. Some children may enjoy experiencing the dry texture of the toilet paper. (See the kids below…they sure enjoyed this texture.)
Other children may prefer (or avoid) the tactile experience of touching and manipulating the squishy, warm soap texture.
Others may tolerate mixing the two textures together.
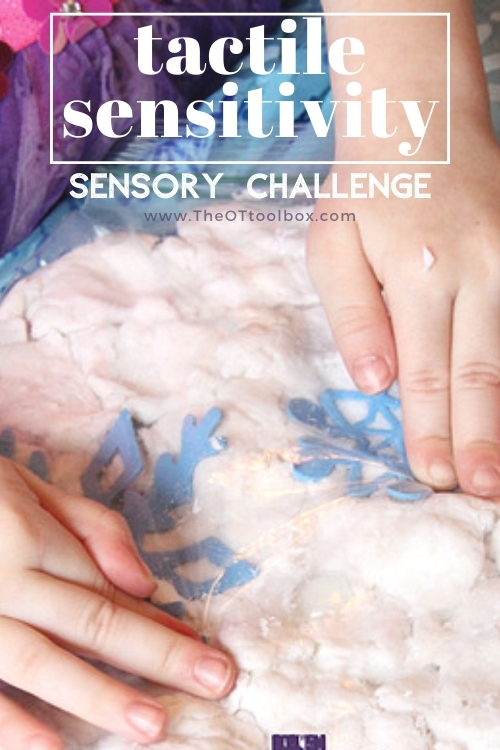
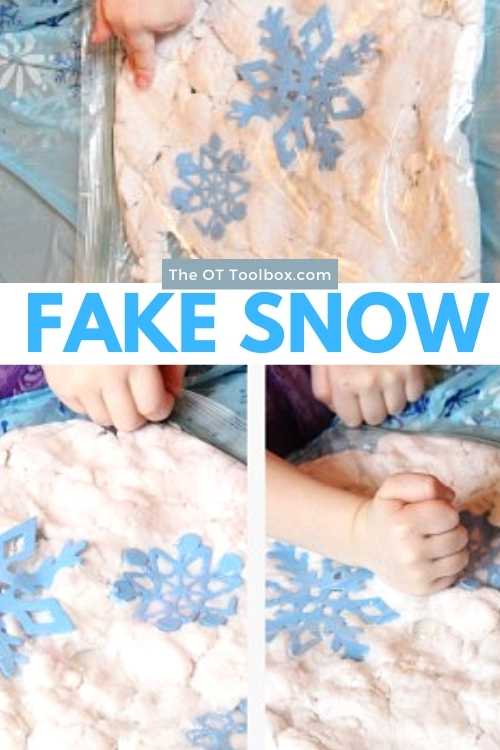
Still others, may prefer none of these textures. In this case, move to the last level of this tactile experience, which is placing the fake snow into the plastic baggie. Then, they can squeeze and touch the sensory fake snow with a barrier in place. they will still experience the warm temperature and firm, heavy work of squeezing through their hands, but they will experience this sensory input in a “safe” level with that plastic bag barrier.
Fake Snow Dry sensory Bin
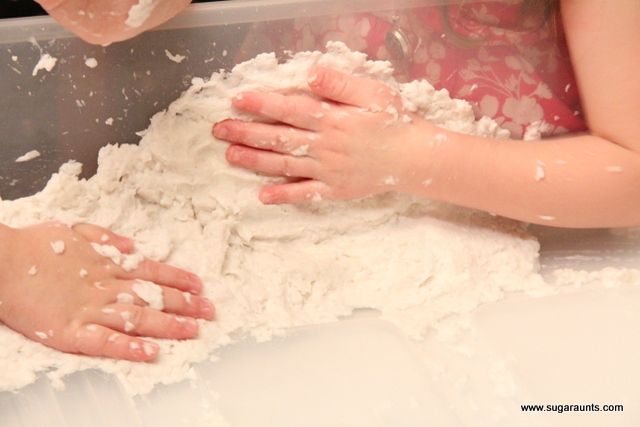
Step 1: Tear the toilet paper into shreds. Keep this in a bin or large container. We used an under-the bed storage bin because I was making a large quantity of fake snow for our Winter Festival.
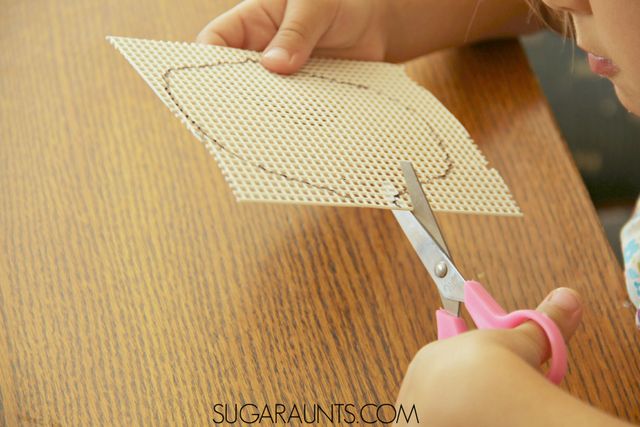
We shredded the toilet paper and the kids had a BLAST! It started out so neat and kind. Tearing the toilet paper is a fantastic fine motor activity for those hands, too. It offers heavy work input through the hands which can have a regulating, calming impact on the joints of the hands. This can be a nice “warm up” exercise for the tactile challenge of exploring and manipulating the dry toilet paper texture.
For kids with tactile sensitivities, this might be “too much” for them to handle. Try using tongs and ask them to explore the toilet paper shredding sensory bin to find hidden items. Some of the paper cards and winter words in our Winter Fine Motor Kit are great additions to this sensory bin.

And then turned in to this.
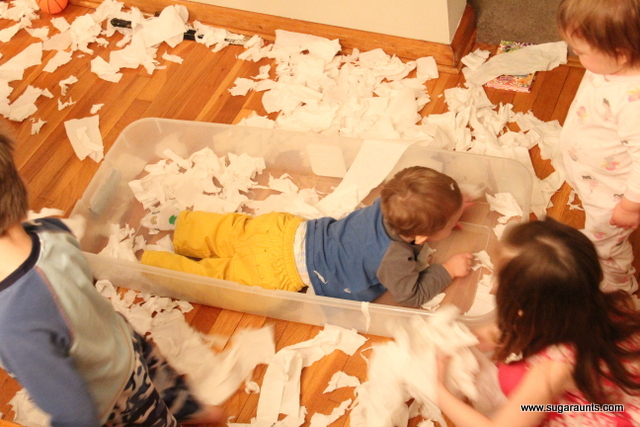
And this.

Slightly off-course in our sensory bin, but of course it did. Why wouldn’t it when you have 6 cousins together? ((Ok, that part of this post was NOT mess-free…the end result is mess-free. I promise.)) So, then we popped the Ivory soap into the microwave…
Fake Snow Wet Sensory Experience
Step 2 in the tactile sensory experience is the wet fake snow portion. Following the fake snow recipe, we popped a bar of ivory soap into the microwave and ended up with a cloud of sensory material.

Children can touch and explore this sensory material for a warm, sensory experience.
Step 3 in the tactile challenge is mixing the dry material with the wet material. This can definitely be a challenge for those with tactile defensiveness or touch sensitivities.
If it is too much of a sensory challenge, invite the child to mix with a large spoon or to touch with a finger tip.
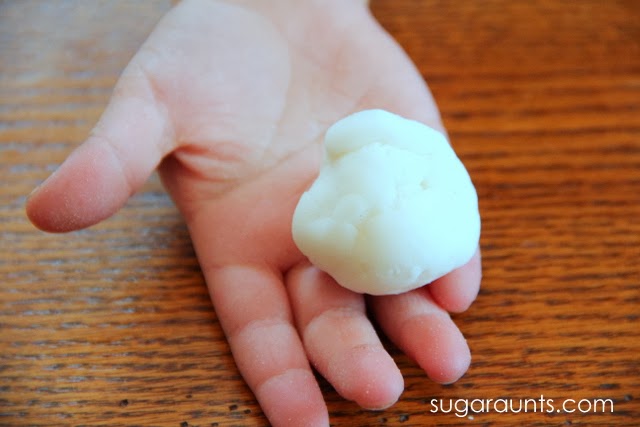
Other children may enjoy this part of making fake snow. The melted soap can be mixed with the toilet paper…to make fake snow!
Fake Snow Sensory Play for Tactile Sensitivities
THIS is the mess-free part that many children with tactile defensiveness may enjoy. 🙂
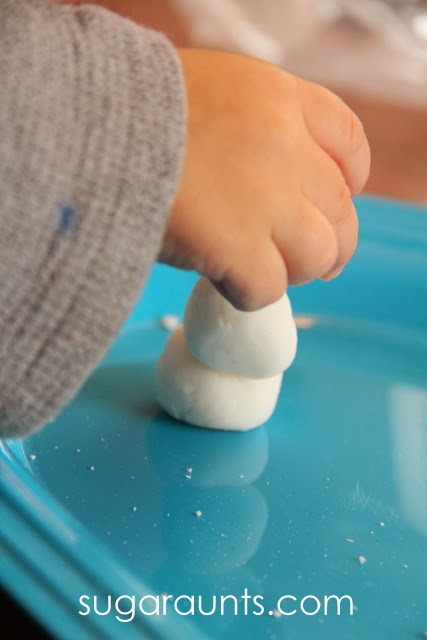
Simply place some of the fake snow material into a zip top plastic bag. You can tape the top shut to keep the material in the bag.
By manipulating the fake snow in a safe sensory manner, kids get exposure to a calming warm temperature. This is one low-level challenge to the tactile system. The warm temperature is a calming, regulating aspect that can be powerful in self-regulation.
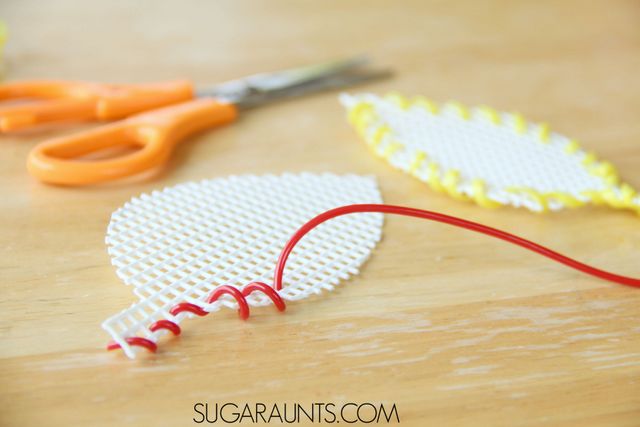
Children can also squeeze, manipulate, pound, and spread the fake snow within the plastic baggie. This offers heavy work input through the hands and upper body in a way that is calming and regulating.
By placing the fake snow into a bag for sensory play, kids are exposed to tactile experinces in a way that may help with tactile discrimination by incorporating the proprioceptive sense.
Challenge motor skills further by adding items such as foam snowflake stickers, glass gems, and glitter. This was so much fun for my crew of kids and nieces and nephews and I hope it’s a tactile experience you get to play with as well!


Products mentioned in this post:
The Sensory Lifestyle Handbook– The Sensory Lifestyle Handbook is your strategy guide for turning sensory diets and sensory activities into a sensory lifestyle.
A Sensory Diet Strategy Guide The Sensory Lifestyle Handbook is a strategy guide for sensory processing needs. With valuable insight to the sensory system and the whole child, the book details how sensory diets can be incorporated into a lifestyle of sensory success. The thoughtful tools in this book provide intervention strategies to support and challenge the sensory systems through meaningful and authentic sensory diet tactics based on the environment, interests, and sensory needs of each individual child.

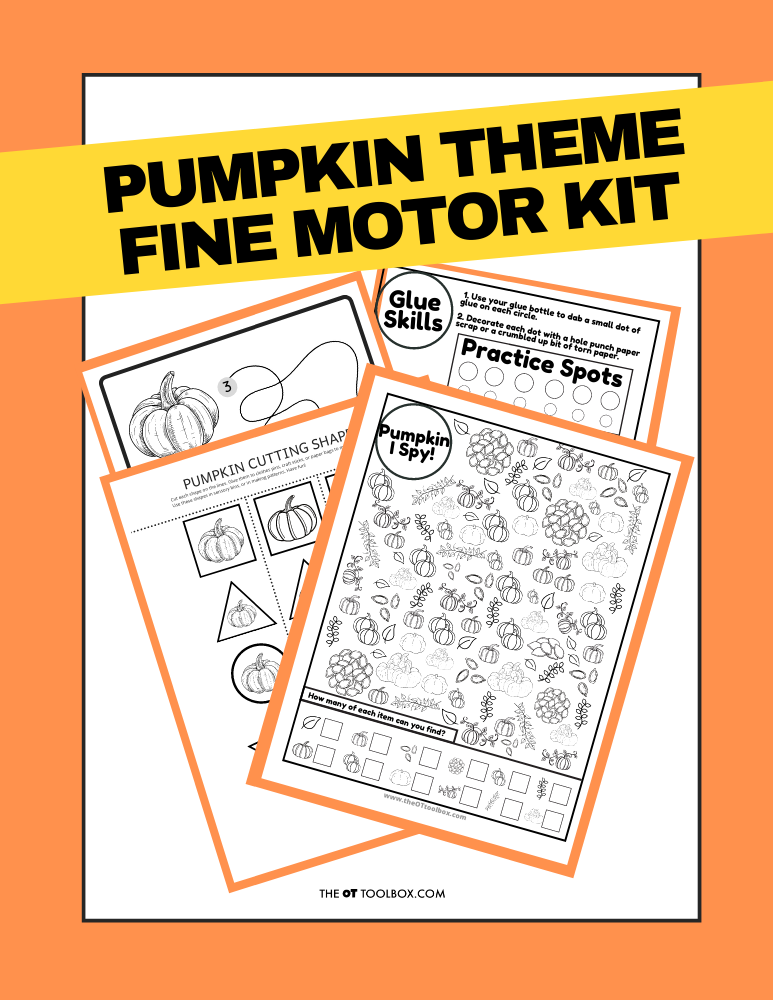
The Winter Fine Motor Kit– Done-for-you fine motor plans to help kids form stronger hands.
This print-and-go winter fine motor kit includes no-prep fine motor activities to help kids develop functional grasp, dexterity, strength, and endurance. This 100 page no-prep packet includes everything you need to guide fine motor skills in face-to-face AND virtual learning. Includes winter themed activities for hand strength, pinch and grip, dexterity, eye-hand coordination, bilateral coordination, endurance, finger isolation, and more.

Colleen Beck, OTR/L has been an occupational therapist since 2000, working in school-based, hand therapy, outpatient peds, EI, and SNF. Colleen created The OT Toolbox to inspire therapists, teachers, and parents with easy and fun tools to help children thrive. Read her story about going from an OT making $3/hour (after paying for kids’ childcare) to a full-time OT resource creator for millions of readers. Want to collaborate? Send an email to contact@theottoolbox.com.