Occupational therapists (OTs) treat a wide range of conditions in children. This post focuses on occupational therapy for children with cerebral palsy and treatment. One of the more common neurological diagnoses that OTs treat is cerebral palsy. This post breaks down what cerebral palsy is, and how an occupational therapist can provide interventions and services to address the functional deficits caused by this condition. Some families may need to start with this post: What is Occupational Therapy?
WHAT IS CEREBRAL PALSY?
Cerebral Palsy (CP) is a group of disorders that can affect the body in different ways, depending on the type and severity. According to the CDC, it is the most common motor disorder among children in the United States.
The broad condition is better understood by breaking down the meaning of the words: “cerebral” meaning brain, and “palsy” meaning muscle weakness. In the case of CP, the muscles of the body become weak due to an injury to the brain.
This injury in the brain can happen during the brain’s development in utero, or early on in an infant’s life. The neural pathways get interrupted or damaged, causing a dysfunction in the way that the brain communicates to the muscles of the body.
types of cerebral palsy
It’s important to cover the various types of cerebral palsy because each type can involve differing occupational therapy interventions. The most common types are spastic, ataxic, dyskinetic, and mixed cerebral palsy.
Spastic Cerebral Palsy- The most common type of Cerebral palsy is spastic CP. The term”Spastic” refers to the presentation of the musculature affected by the condition. The muscles are spastic, or stiff and tight. The stiffness in the affected muscles, or increased muscle tone, causes difficulties with movement. They may be too “stuck” to move properly.
Occupational Therapy for Spastic Cerebral Palsy
Occupational therapy for spastic Cerebral Palsy can include:
Self care interventions
Participation in meaningful activities
Education on adaptive tools
Build on strengths
Manage sensory and emotional regulation needs
NDT interventions
Splinting
Positioning
Adaptive equipment
Compensatory techniques
Ataxic Cerebral Palsy- Results in balance and coordination deficit. This type of palsy results in abnormal gait patterns, decreased safety in mobility, low muscle tone, tremors, and generally reduced coordination for fine or gross motor activities.
Occupational Therapy for Ataxic Cerebral Palsy
Occupational therapy for Ataxic Cerebral Palsy can include:
Environmental modifications
Weight Bearing
Self-Care
Participation in meaningful activities
Education on adaptive tools
Build on strengths
Manage sensory and emotional regulation needs
Positioning
Adaptive equipment
Functional mobility
Compensatory techniques
Dyskinetic Cerebral Palsy– This type of CP describes many different muscle deficits: dyskinetic means uncontrolled muscle movement. Those with dyskinetic CP may have too tight or loose muscles, uncontrollable movements that are fast or slow, or an ever-changing combination of any of these symptoms. In more severe cases, these uncontrollable movements occur often, resulting in requiring more assistance for daily activities. In milder cases, the involuntary movement may be smaller and infrequent, therefore the individual can be more independent.
Occupational Therapy for Dyskinetic Cerebral Palsy
Occupational therapy for Dyskinetic Cerebral Palsy can include:
NDT interventions
Self-care interventions
Participation in meaningful activities
Education on adaptive tools
Build on strengths
Manage sensory and emotional regulation needs
Splinting
Positioning for safety and function
Adaptive equipment
Compensatory techniques
Mixed Cerebral Palsy– There is also a category of “mixed” cerebral palsy, meaning more than one type of palsy is present. The diagnosis of Mixed Cerebral Palsy is given when a child shows symptoms of multiple types of cerebral palsy. When this occurs, there may be differences in different areas of the brain. Mixed cerebral palsy type can present with a wider variety of physical and neurological symptoms.
Occupational Therapy for Mixed Cerebral Palsy
Occupational therapy for Mixed Cerebral Palsy can include:
Any of the occupational therapy interventions listed above, depending on the specific needs of the individual and based on symptoms.
No matter the type of CP, every case will be different, because each child comes with their own unique abilities.
Occupational Therapy for children with Cerebral Palsy
Aspects of the occupational therapy interventions for cerebral palsy are listed below. Because each individual with cerebral palsy diagnosis is so different in the way of tone, musculature, abilities, difficulties, environmental considerations, family environment, and other aspects, there will be no two treatment plans that are exactly alike.
Neurodevelopmental Treatment (NDT): NDT is a holistic movement based approach, involved in handling and moving the child. In the most serious cases of cerebral palsy, an individual may require total assistance, or be dependent, for the majority of their activities of daily living.
An OT and a PT provides treatment to control the muscles, and reduce the likelihood of joint contractures. If a joint is bent for too long due to high spasticity, the bones of the joint may begin to “fuse” and a joint contracture is formed.
This happens often at the elbows, hips, and knees preventing that joint from moving.
In order to avoid joint contractures, therapists can provide skilled therapy, such as NDT, to correct the spasticity and promote functional movement in the affected muscles.
Splinting for Cerebral Palsy: In milder cases, a child with spastic CP may be able to perform most tasks independently, but benefit from a splint to guide their upper extremity posture.
A commonly used splint is a thumb splint with a supinator strap. Many children with cerebral palsy present with tightly closed fingers, and a pronated forearm.
A thumb splint with a supinator strap can help to position the thumb, wrist, and forearm in a more functional position. This splint is typically prefabricated, made of a soft fabric, attached with velcro.
Environmental Modifications: Safety is the number one priority. Occupational Therapy and for children with cerebral palsy might involve an environmental assessment for safe mobility in the home.
Recommendations may include: non-slip mats, professional railings installed in bathroom/ hallways/stairs, lighting accommodations, removal of clutter/cords/rugs/other tripping hazards, depending on the unique needs of the child.
Weight Bearing: Occupational therapy for children with cerebral palsy includes upper extremity weight bearing activities. These can be used on the affected arms to help increase muscle tone in a child with ataxic CP.
Weight bearing can also increase bone density, to reduce the chance of fractures. It can also improve sensory awareness and proprioception that sends information to the brain about where the body is in space.
Effective strength and sensory processing can increases safe, functional movements. To make weight bearing fun and playful, try placing the child prone over a physioball, having them reach for preferred toys with one hand, then the other.
Adaptive Equipment: Feeding tools like the ones in this article on adaptive feeding equipment from the OT Toolbox, may help increase independence, by compensating for shaky movements while feeding.
To increase coordination for handwriting skill, a variety of adaptations can be used (Amazon affiliate links):
It is important to make these activities as client-centered and motivating as possible. Having uncontrollable movement can be very frustrating, especially for small children who don’t understand what his happening to their body. Celebrate the little victories and find out what motivates your client to try, try again!
Compensatory Techniques: Based on the unique movement needs of the child, occupational therapy for children with cerebral palsy may include alternative methods for the child to complete activities as independently as possible. One example; practice and identify the most functional order to get dressed and undressed.
Teach which arm to thread into a sleeve first, when to pull the shirt over their head, or how to orient the shirt to efficiently motor plan the following step. Create a song, social story, or picture book to help the child and their family learn.
A Final Note on occupational therapy and cerebral palsy
It is important to note that while some children with cerebral palsy may also have cognitive deficits, it is not a trademark of this diagnosis. Many children with CP meet their cognitive milestones.
A cerebral palsy diagnosis does not mean an individual can not learn, see, hear, and communicate as well as their peers. Seizure disorders, communication deficits, feeding, and swallowing disorders are common comorbidities for individuals with cerebral palsy.
Be sure to understand the medical needs of your clients in order to provide the best practice and occupational therapy for children with cerebral palsy.
As with any other patient, once you understand what their barriers and goals are, therapy can be meaningful and fun!
Sydney Thorson, OTR/L, is a new occupational therapist working in school-based therapy. Her background is in Human Development and Family Studies, and she is passionate about providing individualized and meaningful treatment for each child and their family. Sydney is also a children’s author and illustrator and is always working on new and exciting projects.
Do you remember hand clapping games and activities as a kid? I do! We didn’t have the time occupiers of video games and an abundance of technology, so it was bike riding, roller skating, basketball, board games, and well, hand clapping. Finger games and hand clapping games go “hand-in-hand”! This was done with a sibling or a friend, and definitely a go-to when there were sleepovers and visits to the neighbor’s house. But, did you ever think about the eye-hand coordination benefits, or bilateral coordination, and even crossing midline benefits?
Clapping Therapy?
Hand clapping games are a fun and engaging way to interact with kids during therapy. Have you tried it? It’s a fun activity, whether it be to a classic game, a made-up song, or just as a quick transition between activities.
There are so many benefits to hand clapping games, from motor skills, sensory motor, visual motor, and even executive functioning skill development. We cover how each of these areas (and the sub-skills) are developed through the simple clapping activity in therapy.
But did you know there is a thing called “clapping therapy”? This was a new concept to me but one that piqued my interest. Essentially, the use of clapping therapy is the act of clapping hands to heal. This is considered a viable therapy because clapping the hands together activates skin and joint receptors in the hands (and upper extremities) to activate various systems within the body and brain.
Some of this idea is linked to reflexology but other considerations can be connected to the proprioception. We know that heavy work or deep pressure through the joints brings awareness and “wakes up” the muscles and joints. So clapping hands is a great way to activate the sensory systems.
Another consideration with clapping therapy is the fact that clapping stimulates blood circulation. This can be a potential way to promote healing.
I wasn’t able to find research on clapping therapy, but these are some things to think about when using hand clapping games to build on therapy goals.
Build Skills with hand clapping Games
Hand clapping actually does have many benefits to skill development, and can be a great way to work on specific skills with children. Why? Hand clapping activities are the ‘no-tools needed’ approach to building so many skills!
In fact, research shows that hand clapping rhymes and games make an improvement in motor and cognitive skills. The study found that kids that participate in hand clapping games have neater handwriting, write better and make fewer spelling errors.
Read on to see what skill areas the simple use of hand clapping can help develop:
Executive function skills– To complete a hand clapping activity, a child develops cognitive skills, but some of the softer skills might be overlooked. When playing a cooperative game like clapping together, there is a component of impulse control, task completion, working memory, attention, sequencing, self-reflection, emotional control, and self-monitoring. These skills can be carried over because of the confidence built up while playing with a friend in a low-stress situation.
Eye hand coordination skills– clapping hands together with a friend requires motor coordination to move and place hands together at the same time and positioning. Too far and you over-shoot the target. This is a great way to work with a friend on hitting targets and visual motor integration.
Bilateral coordination – hand clapping activities work on the use of both hands and arms to coordinate and reach with good timing either to a song, rhyme, a game with a partner, and even when hand clapping alone.
Motor planning – Most any clapping game involves a lot of motor planning to practice the movements needed repetitively. Once the movements are learned, they become more automatic.
Crossing midline – Let’s consider crossing midline for a moment: left to right, right to left, reaching diagonally across going up or down. Adding verbalizing the correct hand when in use, will help them to build left and right side recognition, and improve body awareness.
Visual tracking – During hand clapping games with a partner, children must move their eyes continually from left to right, up and down. With a song or rhyme, children also learn to visually track with fluidity and rhythm. They need to watch and track their hands and their partner’s too.
Sequencing – Many hand clapping games involve some sort of story telling in the sequence. This helps some children recall the lyrics more easily. When using hand clapping games and songs that tell a story, children develop important sequencing skills. They may also make a mental picture of that story in their minds as they play. Clapping along to a metronome app is excellent for building sequencing and rhythm.
Cognitive skills – The brain gets quite a workout when learning and doing hand clapping songs and games. You can use hand clapping to help children learn to spell a problematic word, or even learn the alphabet! Children can use a problematic word, or the alphabet as part of the song which can help them to recall the letters in sequence. They can also learn to sequence a storyline, making it easier to learn how to include a sequence when writing in the classroom.
Social skills – Have a group in therapy? Hand clapping is ideal to help develop teamwork, collaboration, tolerance, and patience, which are all essential to successful socializing within a peer group. Switch it up and have kids work with varied partners, or work together as a larger group. These varied interactions can help build self-confidence, and proper interaction during play.
Memory – Let’s consider memory for a moment. Significant memory skills are needed when recalling simple to moderately complex hand clapping songs, these can require various levels of memory. Think about the lyrics and movements needed for: Patty Cake, A Sailor Went to Sea, Down, Miss Mary Mack, See See My Playmate, Miss Susie, etc.
Rhythm – Hand clapping is a great tool for rhythm and beat development, as the hands must develop a rhythm to match the lyrics and time with a partner. Interactive Metronome is a popular program involving rhythm and timing.
Listening – It is a given that hand clapping games help work on listening skills, in order to learn the movements that match the lyrics. During this process, children are also developing the skills needed to combine memory, rhythm, and sequencing, as they listen attentively to follow the directions that are given within a song or rhyme.
Vocabulary skills – Many hand clapping rhymes or songs include singing the lyrics while clapping which can help build new vocabulary as the songs are learned. When working with a partner, communication skills can be addressed too.
Proprioception– Hitting the palm of the hand against another hand offers feedback through the fingers, wrists, and whole upper extremity with heavy work input. This quick jolt of force through the upper body is a way to add proprioceptive input through play. The benefit for learning the clapping rhyme hand movements and positioning is through practice and that physical touch feedback is a loop that builds on itself.
Hand Clapping Rhymes
Below is a round-up list of hand clapping rhymes and/or games that you will probably recall from your childhood, but if not, there are links below to YouTube videos that will demonstrate them for you. It is a great idea to practice these before performing with your students.
Patty Cake Patty Cake Baker’s Man
Pat-a-Cake – Actually titled Pat-a-Cake, many children call this rhyme Patty Cake Patty Cake Baker’s Man. This one is instructed by a physical therapist and I love it because she adds great motor planning movements and does it with her 3-year-old co-instructor.
Here are the lyrics:
Pat-a-cake, pat-a-cake, baker’s man. Bake me a cake as fast as you can; Roll it, pat it, and mark it with B, (or any letter of your first name) Put it in the oven for baby and me.
miss mary mack Hand Game
Miss Mary Mack – This one is instructed by a K-5 music teacher. She makes the video using a complete tutorial to teach the lyrics and the movements slowly, and then in rhythm to the song by herself, and then with a partner. The Miss Mary Mack clapping game is a fan favorite among children.
Here are the Miss Mary Mack lyrics:
Miss Mary Mack, Mack, Mack All dressed in black, black, black With silver buttons, buttons, buttons All down her back, back, back.
She asked her mother, mother, mother for fifty cents, cents, cents To see the elephants, elephants, elephants Jump over the fence, fence, fence. They jumped so high, high, high they reached the sky, sky, sky And didn’t come back, back, back Till the 4th of July, -ly, -ly.
rockin’ robin clapping game
Rockin’ Robin – The Rockin’ Robin clapping game is demonstrated and instructed by a homeschool mom who gives a short demonstration of the hand movements needed to complete the hand clap patterns to the lyrics, in slow motion. It’s only four hand movements that stay repetitive to the lyrics of the song, so it’s an easier one to teach and to do.
Here are the Rockin Robin lyrics:
He rocks in the treetops all day long, hoppin’ and a-boppin’ and singing his song
All the little birds on Jaybird Street love to hear the robin go tweet-tweet-tweet
Chorus: Rockin’ robin, Rock-rock-rockin’ robin’ Go rockin’ robin ’cause we’re really gonna rock tonight
Every little swallow, every chick-a-dee, every little bird in the tall oak tree
The wise old owl, the big black crow flappin’ their wings singin’ “go bird, go”
Chorus: Rockin’ robin, Rock-rock-rockin’ robin’ Go rockin’ robin ’cause we’re really gonna rock tonight
The size awareness concept of the tall oak tree and the little swallow can be carried over to work on tall, tail, and short letters, as well as body awareness considerations. Take the activity a step further with our tall and short worksheet which has a fine motor and visual motor component that can be incorporated into whole-body movement activities to teach these concepts that carryover into functional tasks.
double this double that
Double This Double That – This clapping hands rhyme is also demonstrated and instructed by the same homeschool mom who will show the simple hand movements needed, and discusses briefly how it can be used as a fun elimination game. You can do this one at various speeds, making it a super coordination activity in therapy. Use it with a partner, or part of a group activity.
Double This Double That Lyrics:
Double, double this this,
Double, double that that,
Double this, double that,
Double, double this that.
twinkle twinkle little star
Twinkle, Twinkle, Little Star – This one has a unique teaching approach performed by an occupational therapist using this familiar song to work on hand movements in three different patterns. Go OT! I like this one as it can be done on the table top, but you could easily do the same movements with a partner too. There are no actual lyrics with this version of the activity, but they can easily be added during game play.
Twinkle Twinkle Little Star lyrics:
Twinkle, twinkle, little star How I wonder what you are Up above the world so high Like a diamond in the sky Twinkle, twinkle, little star How I wonder what you are
clap RHyme
Clap – This Clap rhyme activity uses hand clapping as an exercise that is great for a whole-body warm-up, or as a sensory break. It uses upbeat music that the instructor claps along with, showing other body movements that are used in coordination with the clapping to improve body awareness, motor coordination, and endurance too!
There are few lyrics with the Clap rhyme activity, but there is a tune or beat that is played in the background as the video plays.
avocado Hand Game
Avocado – This hand clap video is demonstrated by Miss Mortimer who is a K-5 Music Teacher. The video is funny because the dog feels left out, and wants to participate too! She does a great job doing the demonstration of the Avocado hand game slowly, then along with the lyrics. Later Miss Mortimer shows an additional hand movement to make this clapping game more challenging. She also shows how you can speed it up, and then how you change the song when you lose the game.
Here are the lyrics to the Avocado hand game:
Avocado, avocado, avocado, is the name of the game
If you mess up you have to change the name
a, b, c, d, e, f, g, h, i, j, k, l, m, n, o, p, q, r, s, t, u, v, w, x, y, z.
Hot cross buns Rhyme
Hot Cross Buns – This hand clapping demonstration is done by a homeschool mom with her child. They demonstrate how to do this hand clapping to the Hot Cross Buns rhyme in a variety of ways. I like the hand movements she uses as they incorporate a variety of motor planning skills.
Here are the lyrics to the Hot Cross Buns rhyme:
Hot cross buns! Hot cross buns! One ha’ penny, two ha’ penny, Hot cross buns! If you have no daughters, Give them to your sons One ha’ penny, Two ha’ penny, Hot Cross Buns!
Concentration Clapping Game
In the concentration clapping game, you sit or stand across from a friend. Clap hands together after saying each line from the rhyme. This game supports development of attention, working memory, focus, and impulse control, as well as emotional control when the inevitable mistake happens. Players can list out numbers or they can substitute the numbers for different categories such as fruits, animals, sports, foods, etc. The slaps and claps can be hitting hands face to face followed by crossing the arms to clap. Then player one, continuing the rhythm, says a number or other word (colors, sports, foods, etc.) twice. Then the other player repeats those words and adds their own words in the same category. This goes back and forth as the players keep adding more words to the list.
Here are the lyrics to the Concentration Clapping Game:
Concentration (slap slap clap clap)
Are you ready? (slap slap clap clap)
If – so – (slap slap clap clap)
Let’s – go! (slap slap clap clap)
For example: cat, cat (slap slap)
The other player then does the same, starting with their own number and following with someone else’s:
cat, cat, dog, dog (slap slap clap clap)
Use these clap games in therapy or at home
So, do you feel inspired to get your hands clapping yet? Does this bring back memories of the playground songs, “Say Say my Playmate, Down Down Baby, or Miss Suzie? Once you view these fun videos, you’ll want to start using hand clapping as an intervention tool in your therapy sessions where you’ll start seeing children build important developmental skills while having some fun and getting a few laughs in too!
Regina Parsons-Allen is a school-based certified occupational therapy assistant. She has a pediatrics practice area of emphasis from the NBCOT. She graduated from the OTA program at Caldwell Community College and Technical Institute in Hudson, North Carolina with an A.A.S degree in occupational therapy assistant. She has been practicing occupational therapy in the same school district for 20 years. She loves her children, husband, OT, working with children and teaching Sunday school. She is passionate about engaging, empowering, and enabling children to reach their maximum potential in ALL of their occupations as well assuring them that God loves them!
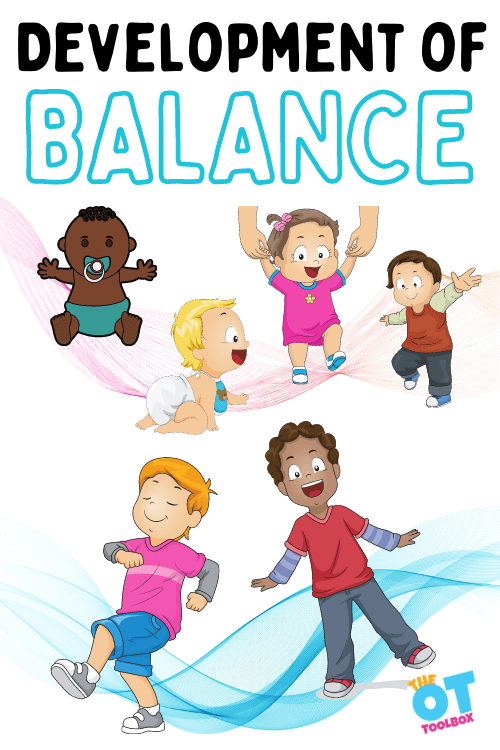
Balance development is a pivotal part of child development. Gross motor coordination, balance and motor planning are all part of the processes of acquiring these skills. Here, we cover balance development, strategies to support this skill, and specific balance activities.
Balance Development
Acquiring or practicing balance can be seen in a toddler swaying step by step, a child pretending the sidewalk curb is an Olympic balance beam, or a teenager managing their new crutches.
Strong standing and walking balance equal safe mobility, which opens the door to so many wonderful new things; running, jumping, cartwheels, backflips…you get the picture.
Achieving physical balance plays an important role in the development of many different skills, some of which may surprise you!
WHAT IS BALANCE?
Before officially diving into the development of balance, we first need to define and understand it.
Balance – According to the Harvard Medical School, balance is the ability to distribute your weight in a way that lets you stand or move without falling, or recover if you trip. Good balance requires the coordination of several parts of the body: the central nervous system, inner ear, eyes, muscles, bones (Check out this list of bone names), and joints
Static Balance – maintaining body position during an unmoving task, such as sitting or standing
Dynamic Balance – the ability to remain standing and stable while performing movements or actions that require displacing or moving oneself
The various muscles of the body contract or relax in order to maintain the proper balance for our daily activities, as controlled by our balance center in the brain; the cerebellum.
In addition to the cerebellum, the inner ear also sends signals to the brain, to give a status report on the environmental changes that affect balance. The inner ear is where the vestibular system is located.
Its’ fluid picks up on the motion and position of the head, constantly sending information back to the brain via the eighth cranial nerve. When there is a medical issue within the ear, such as an ear infection or torticollis, it may affect balance. This is generally in the form of dizziness or unsteadiness.
The primary source of information for the following list of balance developmental milestones was primarily sourced here.
Information from different sources may vary slightly, largely due to the fact that developmental patterns fall into different ranges. For a general list of developmental milestones, refer to the CDC resource here.
The vestibular system is developed at five months pregnancy
0-3 MONTHS
Primitive reflexes (uncontrolled movement) lay the groundwork for future motor development
Tummy time develops vision and postural control required for optimal balance later on
4-6 MONTHS
Rolling prone to supine (front to back), then supine to prone (back to front)
Supported sitting, then unsupported sitting
7-9 MONTHS
Picks up a dropped toy, may fall while reaching
Begins to army crawl, cruise crawl, or scoot
Holds majority of their own weight while standing supported
May squat up and down while standing
10-12 MONTHS
Pulls self up to stand, then stands unsupported
Manipulation of toys/ movement of arms while sitting unsupported
Moves in and out of laying and seated positions with control
Cruises along furniture or walks supported
Development of Balance in Toddlers
13-16 MONTHS
Walking unsupported, but may tumble easily
Crawls up and down furniture and stairs with support for safety
Begins to learn how to walk faster/run
17-19 MONTHS
Is able to get onto small chairs without help
Walks up stairs while holding on with one hand
Runs stiffly and falls often
Can pick up objects while standing, without losing balance
2 YEARS
Pulls off socks without losing balance
Runs with improved coordination
Can kick a ball without losing balance
Development of Balance in PReschoolers
3 YEARS
Can briefly balance and hop on one foot
May walk upstairs with alternating feet (without holding the rail)
Able to pedal a tricycle
4 YEARS
Hops on one foot without losing balance
Throws a ball overhand with coordination
5 YEARS:
Skips, jumps, gallops, and hops with good balance
Stays balanced while standing on one foot with eyes closed
The majority of our balance skills have developed by age 5, but will continue to fine-tune up until around age 12. Remember to keep in mind, these are averages for the typically developing child.
Balance is required to do just about anything in daily life.
Balance is needed to stand at the mirror while brushing teeth, get out of the car, and put on socks, to name just a few. Without the development of this balance skill, support aids (walkers, crutches, braces) may be necessary for safety and function.
Static Balance
Did you know that balance is also related to non-physical, or static tasks?
Research suggests that when balance is improved, so are attention and learning skills. Good balance helps children develop better reading, writing, and language skills, as well as improved concentration.
One way balance is theorized to improve academic skills, is through increased body control, and knowing where the body is in space (proprioception). Having better body control and knowing how to coordinate movement in various environments is important.
Correct body awareness makes it easier to have a comfortable seated posture. Good balance also makes activities such as sitting still while moving the head to look up at the chalkboard, and then back down to write easier.
Without proper body control, it is just that much more difficult to perform the tasks of a student: copying from the board, holding and reading long textbooks, carrying materials from space to space, and supporting an upright seated posture for many hours a day.
How to Support Balance Development
Knowing the huge impact that balance has on the body, what can you do to improve it?
If you love all of the great resources found above, consider becoming a member.
Want to add this resource to your therapy toolbox so you can help kids thrive? Enter your email into the form below to access this printable tool.
This resource is just one of the many tools available in The OT Toolbox Member’s Club. Each month, members get instant access to downloadable activities, handouts, worksheets, and printable tools to support development. Members can log into their dashboard and access all of our free downloads in one place. Plus, you’ll find exclusive materials and premium level materials.
Level 1 members gain instant access to all of the downloads available on the site, without enter your email each time PLUS exclusive new resources each month.
Level 2 members get access to all of our downloads, exclusive new resources each month, PLUS additional, premium content each month: therapy kits, screening tools, games, therapy packets, and much more. AND, level 2 members get ad-free content across the entire OT Toolbox website.
Sydney Thorson, OTR/L, is a new occupational therapist working in school-based therapy. Her background is in Human Development and Family Studies, and she is passionate about providing individualized and meaningful treatment for each child and their family. Sydney is also a children’s author and illustrator and is always working on new and exciting projects.
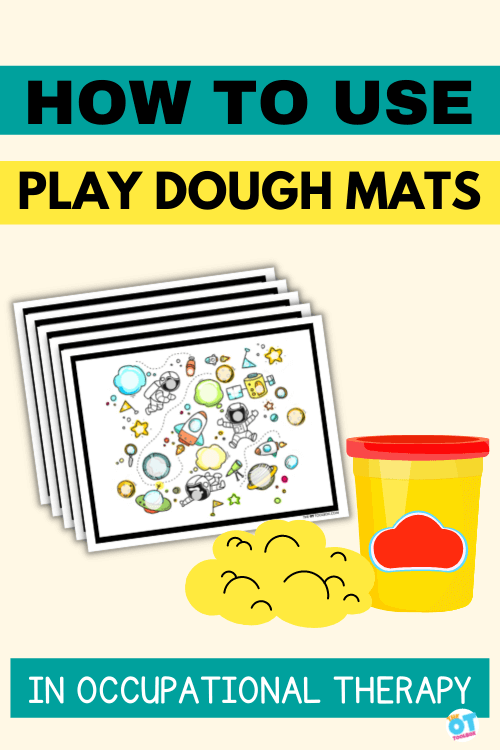
After reading below about the benefits of playing with play dough mats, go grab some of them for FREE. When using these fun play dough mats, you will start helping children work on important developmental skills. In addition to all the fun children will have while using these mats (which is a win), they will be developing the necessary fine motor hand skills needed for everyday functional tasks such as; fastener manipulation, classroom tool use, grasp patterns, and overall dexterity/manipulation used in multiple fine motor tasks. Be sure to check out our resource on playdough activities for fine motor skills to support this area.
The benefits of using play dough mats
Play dough is an AWESOME tool in itself! We know that in itself, there are so many benefits of play dough in building skills in kids.
With all of the attractive colors, and the sensory feel of it, playdough can be very enticing to children. With a little preparation and care, play dough mats can be almost mess-free! If pieces fall off, just tap with another blob of dough, and it blends back in with little need for clean-up. (Just avoid the carpet!) While engaging with these super fun play dough mats, children can stay occupied for a lengthy time in either independent play, or cooperative play with a partner.
You can easily use play dough mats during an OT session, as part of a home program, or as a fine motor station in the classroom. Each mat provides a theme to compliment any learning or skill building you might be looking for. After you read about all of the benefits, you’ll want to get all of these mats and start right away, but first let’s look at those specific skills they help develop.
Play dough can easily be made or purchased, and used with play dough mats to focus on developing so many skills.
Many Benefits of play dough mats:
Hand and finger strengthening skills – squeeze, press, poke, and pinch the play dough while manipulating. Hand strength is a skill needed for most functional tasks. This helps build intrinsic hand musculature, and improves fine motor endurance.
Grasp skills – Tools such as plastic knives, scissors, cookie cutters, pizza cutters, and rolling pins, provide the opportunity to work on varied grasp patterns.
Bilateral integration skills – use both hands together in a coordinated manner to manipulate the play dough, therefore building bilateral coordination. They adjust the dough’s size, shape, and weight as needed for mat play. Bilateral coordination skills are needed for functional tasks like writing, dressing, cooking, and essentially all functional participation.
Manual dexterity skills – manipulate the putty to shape and pinch the dough to match the theme the of each mat. This gives them the opportunity to develop precise finger movements and thumb opposition.
Self-regulation skills – When children squeeze, press, poke, pinch and roll out the dough, they get deep proprioceptive input, which can be soothing and calming to a child. As an added benefit, these emotions play dough mats support the social learning and identifying emotions names to help with emotional self regulation.
Eye-hand coordination skills – While creating and placing the shapes on the play dough mats to match the theme, learners are coordinating their hand and eye movements, working on important visual motor coordination skills. Eye hand coordination skills can impact functional participation.
Gross motor skills – Engaging with play dough works the larger muscles of the upper extremity (shoulder and arm) in order to push, pull, press, and roll the dough. Don’t forget, development occurs proximally to distally, so those larger muscles need engagement!
Creativity and play skills – Learners use their play dough creativity and imagination to add their own details to the mats, with their own play dough creations. They can add small beads, sequins, buttons, or pegs in addition to their playdough shapes.
Social skills – If mats are used with a partner, children will have the opportunity for cooperative and collaborative play They will be learning self-control and communication, coupled with pretend play, as they work to build items together on a single mat, or by trading mats and sharing details. These would make a great tool for social skill groups!
Visual perceptual skills – Play dough mats work on visual figure ground skills, as learners visually scan the boards to locate the circles for play dough ball size, location, and placement. Visual discrimination skills are needed to identify any size differences in the circles, and make the play dough balls larger or smaller as indicated.
Olfactory skills – Adding a little scent, such as an essential oil to the play dough will provide children some olfactory input, making the experience more multi-sensory.
Tactile skills – The addition of a little glitter, rice, or sand to the play dough, will provide children further tactile input. For some learners with tactile aversion, working with playdough may be difficult at first.
Play dough does not need to be store bought. Go to our link here for some of the Best Dough Recipes.
How to Use Play Dough Mats
Using play dough mats is pretty self explanatory. Kids love using the fun and engaging play activities and often times don’t realize they are developing skills at the same time. You can definitely pair these play dough mats with theraputty exercises for more strengthening!
These steps will help with using your play dough mats in therapy, the classroom for a fine motor brain break, or in the home for a play activity:
1. You’ll need to print off the play dough mat that works for your needs. You can find different printable playdough mats for different themes.
2. Laminate the page, or slide it into a page protector sheet.
2. Select play dough, either home made or store bought. Select play dough consistency and resistance based on the individual’s needs.
3. Consider how to adapt the activity based on the needs of the individual. Some considerations include thinking about fine motor skills, bilateral coordination needs, visual motor needs, or sensory needs.
4. Position play dough mats and play dough to meet the needs and areas of development for the individual.
5. Work on opening and closing the play dough container if this is an area of concern (it’s a great functional activity!)
Adapting Play Dough Mats
Play dough mats can be used in occupational therapy to develop skills and work on goal areas through play. They can also be used to support needs and integrate adaptations in play for practice.
Play dough mats are a fun way to play and build skills at home, too. They can be used in the classroom for a brain break, a sensory break, or a tool to build fine motor skills with a classroom theme.
How can you adapt playdough mats for specific skill adaptations in OT sessions? There are so many ways…
Motor Skill Needs- For individuals struggling with motor skills, you can tape the page protector sheet to the table surface. Another idea is to use sticky tack on the back of the page protector. This can secure the play dough mat to the table and limit it’s movement during play.
Another motor skill strategy is to use a play dough mat with larger areas or smaller areas for the play dough. This can require more or less small motor movements, and can offer more or less opportunities for precision work.
Bilateral coordination needs- Encourage bilateral coordination by asking the user to hold the play dough mat on the table. This is a great way to encourage paper positioning during writing tasks, too.
Sensory needs- Play dough consistency will provide a varied tactile experience such as, sticky, slippery, firm, and partially dry. Much like different grades of thera-putty, different play dough recipes can be used to build fine motor skills or offer more or less heavy work through the hands.
Some play dough to meet tactile preferences and tactile challenges include:
Orange Zest Salt Dough– This dough recipe has bits of orange zest, giving it a texture and scent.
Blue/Yellow Foaming Dough– This is a moldable dough with a dry texture, but when you add the secret ingredient, you get a very foamy, wet texture that can be a great transition tool for messy tactile resistance.
Some play dough to meet tactile preferences and tactile challenges include:
Crayon play dough recipe– This recipe is very smooth and depending on the amount of oil or crayons added, can be very silky in texture.
Baking Soda Dough– This dough recipe is very soft and offers a lower resistance
Marshmallow Play Dough– This play dough recipe has a tough texture and adds a lot of heavy work input. Think black theraputty for this grade of resistance.
Regulation needs- Building on the sensory aspect, you can offer movement-based heavy work through the hands and upper body by offering less resistant play dough (more of a silky and fluid feel to the play dough consistency) or you can offer more heavy work using a heavier grade to the resistance.
Visual needs- For users with visual processing needs, there are ways to adapt the play dough mats. Try outlining the areas where play dough is placed for a darker visual cue by using a dark marker. You can then slide the sheet into a sheet protector and play from there.
Core strength/Stability/Visual Gaze- For some, maintaining an upright posture is difficult. You can easily position play dough mats on a slant board, easel, or vertical surface using sticky tack, tape, magnets, etc. This positioning strategy can be used to either support positioning and visual gaze needs to to challenge these areas to reach a “just right” level in therapy sessions.
Free Printable Play Dough Mats
Each of the free play dough mats below can be printed off and used over and over again. A few tips for using play dough mats in therapy or in the home or classroom:
Space Play Dough Mat| gives learners the opportunity to strengthen their hands while developing essential skills that are needed for pencil writing, as well as the dexterity and precision skills that are needed for many daily, fine motor tasks.The simple thing about this outer space mat, is that it works on a specific set of muscles in the hand.
Astronaut Play Dough Mat| can be used as part of space theme, or a solo activity. Ask your learner to pull off a small piece of play dough and roll it between the fingers and thumb of one hand. It’s important to use just that one hand as it’s part of the challenge! Doing this hand activity will help build hand strength, dexterity, coordination, and endurance of the smaller muscles of the hand and fingers.
Play Dough City| complements any geography lesson as children fill in the circles of the city sky, while helping them to build their fine motor skills and endurance, which are needed for tasks like writing/coloring, pencil control for forming letters, functional pencil grasp, manipulation of clothing fasteners, opening/closing containers, and so much more. This cute mat can be used along with any other city activities including books, travel, and anything about city life.
Ice Cream Play Dough Mat| create small balls of play dough that fit on ice cream images, while working on hand strength and other motoric skills needed for pencil grasp, endurance for coloring, accuracy with scissors, and dexterity for manipulation of buttons, zippers, and coins. This mat can be a great take home mat for use over the summer break. Be sure to include instructions on what you want the child to do!
Toy Theme Play Dough Mat | helps children use their fingertip and thumb to roll a small ball of play dough, placing and pressing the dough onto the circles on the mat. They need just a small piece of dough to make the ball small enough to fit into the circles. This is a great activity for developing and defining the arches of the hand, strengthening the intrinsic musculature, and boosting visual perceptual skills too! This toy theme mat builds on the fundamental “job” that kids have, which is play! Use this themed mat during down time, or a rainy day, to add a little productive playtime.
Play Dough Bird Mat | gives kiddos a hand workout, while they create small balls of dough rolled with their fingers, to match the circle sizes on the mat. There are various sizes to challenge the child’s precision and dexterity. Children can count the birds and match the colors of the birds too. Another way to use this mat is to write numbers or letters in the circles in random order and then have the child scan the mat to challenge their visual perceptual skills.
Roll and Write Play Dough Mat Bundle| all about helping kids warm-up their hands prior to handwriting. It makes handwriting more fun when using one of these 7 themed play dough mats. Children warm-up using dough, then work on letter formation, words, and sentences.
These printable play dough mats include a themed play dough area plus a writing area. Use the play dough as a fine motor warm up and then move to the handwriting aspect.
Numbers 1-20 Sky/Ground Play Mats | helps children to work on 1-20 number formation, provides sensory input, encourages motor planning, and spatial relations.
A-Z Sky/Ground Play Mats| work on upper case and lower case A-Z letter formation, provides sensory input, encourages motor planning, and spatial relations.
Intrinsic Muscle Strengthening Play Dough Mat– This simple play dough mat limits the visual background and offers different sizes of circles. Users can create small balls of play dough to build intrinsic hand strength.
All of the free play dough mats are available in our Member’s Club. There, you can just click and download the play dough mats!
Want to add this resource to your therapy toolbox so you can help kids thrive? Enter your email into the form below to access this printable tool.
This resource is just one of the many tools available in The OT Toolbox Member’s Club. Each month, members get instant access to downloadable activities, handouts, worksheets, and printable tools to support development. Members can log into their dashboard and access all of our free downloads in one place. Plus, you’ll find exclusive materials and premium level materials.
Level 1 members gain instant access to all of the downloads available on the site, without enter your email each time PLUS exclusive new resources each month.
Level 2 members get access to all of our downloads, exclusive new resources each month, PLUS additional, premium content each month: therapy kits, screening tools, games, therapy packets, and much more. AND, level 2 members get ad-free content across the entire OT Toolbox website.
Do you want to use any of the play dough mats multiple times? Simply laminate them, or place in a sheet protector so children can use them repeatedly, any time they want. Play dough mats are a fun and engaging way for young children to work on problem-solving, pretend play, pre-academic skills, and other developmental functions. They don’t even know they are doing it, as they are having so much FUN!
Regina Parsons-Allen is a school-based certified occupational therapy assistant. She has a pediatrics practice area of emphasis from the NBCOT. She graduated from the OTA program at Caldwell Community College and Technical Institute in Hudson, North Carolina with an A.A.S degree in occupational therapy assistant. She has been practicing occupational therapy in the same school district for 20 years. She loves her children, husband, OT, working with children and teaching Sunday school. She is passionate about engaging, empowering, and enabling children to reach their maximum potential in ALL of their occupations as well assuring them that God loves them!
Note: Only use play dough with the appropriate aged children. take sensible precautions with small or differently abled children, as play dough and small manipulatives can be a choking hazard. Adult supervision should be provided.
In this blog post, we are addressing trauma informed occupational therapy, including trauma informed interventions and how to take a trauma informed approach in occupational therapy.
Imagine your mental, physical, and emotional health as a backpack. Some days, that backpack may be really heavy, full, and wear you down. Other days, it may be a bit lighter, and you are quicker on your feet, but the backpack is always there. This is the visualization of health that I think is just perfect when discussing trauma-informed occupational therapy practice.
Trauma Informed Care: the hypothical backpack
Everyone wears this hypothetical “backpack”; young and old, rich and poor. It’s up to us as health care professionals, to do our best to consider what we know about what load a person is carrying, while knowing that we won’t ever fully understand someone’s story.
Having an awareness of this emotional health, allows one to shift perspectives on how one behaves, acts, speaks, and functions. Cognitive and emotional health can be a large factor of someone’s overall health.
WHAT IS TRAUMA-INFORMED PRACTICE?
It’s important to understand the definition of trauma informed practice.
The effects trauma and adverse childhood experiences have on a person have been understood for some time now. Infant, child, and adolescent mental health is still a growing field.
The “backpack” visual helps to remember that even though occupational therapists may not work in a mental health setting, an individual still carries their traumatic history, anxiety, or depression as they walk into your office.
Trauma informed care is different than trauma-specific interventions. Where trauma informed refers to the awareness and recognition of various traumas and the impact of organizations or systems impact individuals, families, groups, communities, etc. the specific interventions address assessments, treatments, and specific recovery supports to impact trauma.
Example of Trauma Informed occupational therapy
Take 5-year-old ‘Thomas’ as an example. His aunt brings him to therapy at your outpatient clinic, and you notice that he is really shy and resistant to join you in a treatment room.
Thomas was referred to OT for delayed fine motor skills, but you are unable to convince him to do much with his hands at all. He won’t even look at you for more than one second.
After a few sessions pass, and there are no improvements in his participation, you ask the aunt how things are going at home, and learn a new perspective about Thomas’ overall health. You still must provide services for his fine motor skills, but now you do so through a new lens that respects, and includes his needs as a child with a traumatic history.
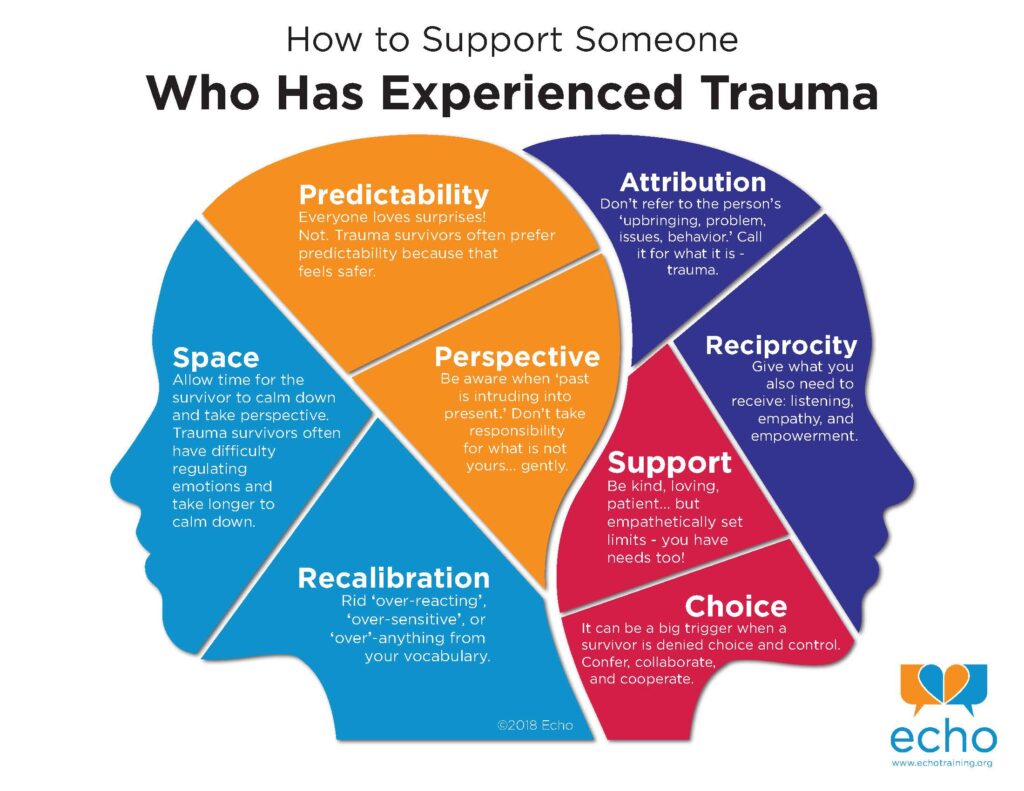
An individual’s traumatic history may not be the reason they are seeking services, but it should always be considered, and assess for. Traumatic experiences shape the way we perform our occupations.
The trauma response and/or triggers should be considered in all aspects of practice; when writing treatment plans, speaking to the individual and their family, and designing the treatment environment.
This is trauma-informed occupational therapy practice in a nutshell.
GUIDELINES FOR TRAUMA-INFORMED Occupational Therapy
How will you adjust your services to meet the unique needs of an individual who has experienced trauma?
“Given the long-term effects of adverse experiences in childhood, it is particularly important that all disciplines working in health care assess trauma; address safety in schools and the community; build strengths and resilience; and provide opportunities for educational, economic, and social successes” (AOTA, 2019).
Evidenced-based practice is always the best place to start. The AOTA’s guidelines from the May 2019 continuing education articleUnderstanding and Applying Trauma Informed Approaches across Occupational Therapy Settings, breaks down trauma-informed practice in occupational therapy. This resource highlights best-practice standards from the Substance Abuse and Mental Health Services Administration (SAMSHA).
6 Trauma-informed Principles:
The 6 principles of trauma informed care are as follows:
1. Safety
2. Trustworthiness and transparency
3. Peer support and mutual self-help
4. Collaboration and mutuality
5. Empowerment, voice, and choice
6. Cultural, historical, and gender issues.
The table below is a modifed version of Figure 1 from the AOTA (2019) article. It provides examples of what to do and what not to do in accordance with the principles above.
Trauma Informed Occupational Therapy Do’s and Don’ts
Table Adapted From Figure 1, AOTA (2019)
Do
Don’t
Principle
Ask permission before doing anything.
Assume an individual’s comfort level.
#1 Safety #4 Collaboration and mutuality #5 Empowerment, voice, and choice
Acknowledge what you cannot change
Ignore things over which you cannot control
#2 Trustworthiness and transparency
Always ask preferred pronouns
Assume based on appearance, etc.
#6 Cultural, historical, and gender issues
Recognize that trauma manifests in many different ways.
Automatically attribute challenging behaviors to personality
#1 Safety
Becoming a trauma-informed provider is not an easy shift for everyone. Considering the current pressures that healthcare professional face, having to adapt towards trauma-informed care is not always supported by staff or administration.
The AOTA provides resources and valuable information for occupational therapists based on the setting they work in.
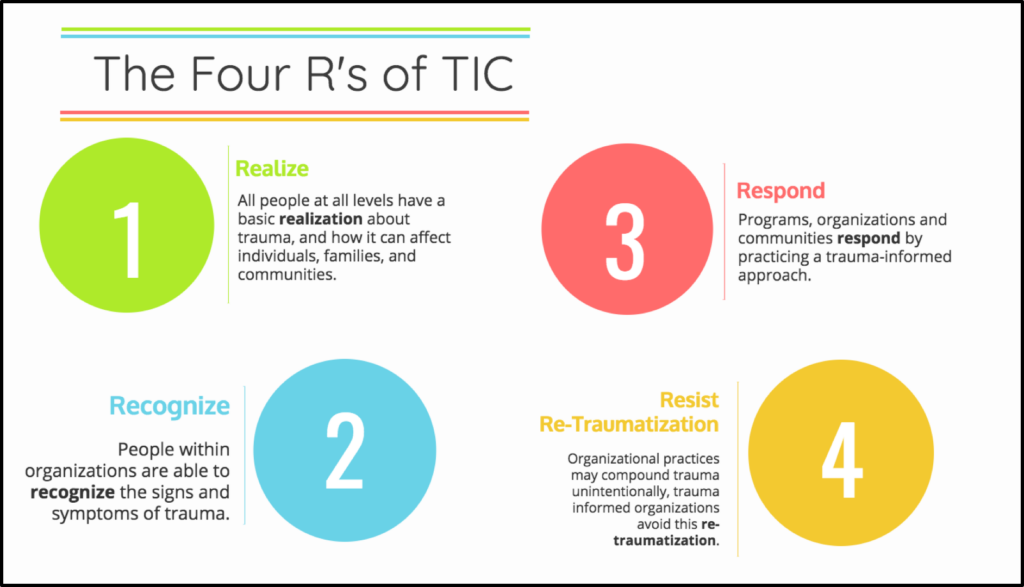
The table above takes into consideration, the Four R’s of Trauma Informed Care: realize, recognize, respond, and resist re-traumatization.
Trauma Informed Strategies for Occupational Therapy
Many of the following guidelines will assist all healthcare providers, educators, and caregivers in learning trauma-informed practices.
Early Childhood Settings: Increase Collaboration to Promote Prevention
Promote early bonding through skin-to-skin, kangaroo care, private rooms, and opportunities for parent decision-making
Increase the amount of collaboration with all involved, and identify the barriers to involving family members in the care of their child
Similar to the above, but suggested practice in Tier 3 intervention, including students and their families, in collaboration with community mental health providers.
The AOTA (2019) offers more information about occupational therapy’s role in trauma-informed care in various settings, including primary care, community, residential, and foster care settings.
Regardless of the setting, location, or age group you may work with, trauma-informed practice is necessary.
We hope this article gave you some insight on a very important topic, and ideas on how to incorporate trauma informed care it in your practice – wherever you are. What will you do to move towards a trauma-informed practice?
Real or Perceived Trauma
One thing we need to cover is real and perceived trauma. Based on what we have discussed above, you probably now know that trauma can stem from any experience that leaves a person feeling hopeless, helpless, or fearing for their safety, survival, or life. What’s important to understand is that trauma is not always about the actual event itself, but rather how the individual perceives the event.
By that I mean that two different people can experience the same situation, and one may walk away unaffected, while the other may experience significant emotional and physiological responses that impact their daily functioning. This means that the same event can be traumatic for one person and not for another.
This is important to recognize because trauma is subjective. And, both real and perceived threats can trigger a trauma response.
A perceived trauma may not involve an actual immediate danger, but if the individual feels that their survival or safety is at risk, their brain and body can react in the same way as if the threat were real. For occupational therapy professionals working with kids, this is especially important because their understanding of events may differ from that of adults. You might see that a child misunderstands a situation based on a conversation they overheard and then they feel the emotional and physiological results even though the situation isn’t really an issue.
Sydney Thorson, OTR/L, is a new occupational therapist working in school-based therapy. Her background is in Human Development and Family Studies, and she is passionate about providing individualized and meaningful treatment for each child and their family. Sydney is also a children’s author and illustrator and is always working on new and exciting projects.
If you are looking for fun gross motor coordination activities, then these pool noodle games and activities are a great therapy tool to support skill-building. The pool noodle games are great activities to add to therapy sessions, use in home programs, or to add to Field Day or summer therapy camps. Check out these pool noodle games that support development, learning, and sensory motor skills.
Pool Noodle Games
A pool noodle is a swim toy that can be used to build swim skills or have pool-time fun. It can also be used as an OT tool to help build hand/finger skills, overall body strength/coordination, as well as balance, and motor planning skills.
Because they are readily available in stores during the Spring and Summer months, pool noodles are a great addition to your Summer occupational therapy activities.
Pool noodles are a versatile toy that can be cut, divided, and shaped into many tools to benefit children in their skill development, and overall needs. These toys are colorful, inexpensive, and attractive to children, which make them motivating, and facilitates engagement in pool noodle activities created with them.
This is a gross motor toy you’ll want to add to your therapy toolbox, and we’ll cover why that is below.
In addition, imagine all of the equipment needs that can be addressed to help with daily living skills using these noodles.
Add pool noodles to a few other ideas here on the website for a Summer of fun:
Pool noodles can be used by a variety of children, for many needs, and for several purposes. They can easily be used indoors or outdoors, in the home, the classroom, and therapy room. Pool noodle activities can be used with all ages, and in all environments. That’s right all ages. Maybe not in the conventional manner, but there are many imaginative and thoughtful activities that are fun and safe for anyone!
The best part? Pool noodles are cheap, cheap, cheap. They can be more challenging to find, if you look for them off season. My helpful tip to you is to buy them in bulk when they go on clearance at the end of the summer season, and you’ll have them whenever you need them. Sometimes you can even find them on clearance for just a few cents, that’s right, A FEW CENTS!
Let’s take a look at some fun, creative pool noodle activity ideas to get kids up, moving, active and a little ‘noodley’ this season! If you do not need them for pool noodle activities, but want some creative tool ideas instead, I’ve got you covered there too. Just scroll down to the bottom of the page, and you’ll find some innovative ideas for equipment and tools.
Gross Motor pool noodle activities:
These gross motor pool noodle ideas offer strategies to support motor planning and body awareness. It is by adding a simple pool noodle to play activities that can offer challenging motor tasks, while encouraging coordination, balance, body awareness, and motor planning skills.
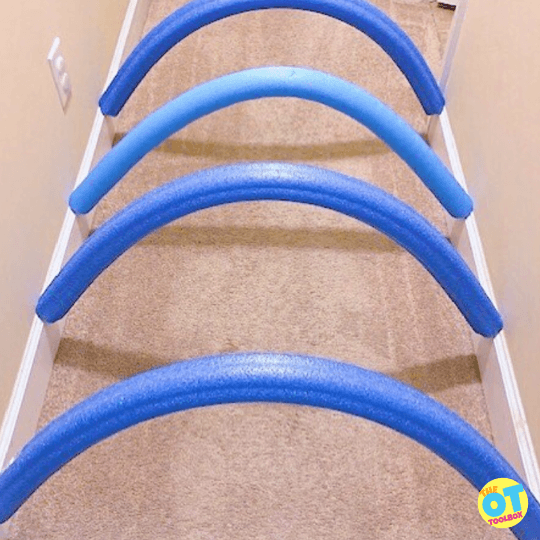
Pool Noodle Tunnel- Use a few pool noodles down a hallway and create a fun pool noodle tunnel for kiddos to crawl under, take a look here at our blog post Play Tunnel Activities. Use skewer sticks to secure noodles outside, and create a pool noodle hurdles.
Pool Noodle Wand- Create a Pool Noodle wand for reaction time, coordination, and balance. All of these skills can be addressed with the simple use of a pool noodle and PVC pipe to create the stick.
Pool Noodle Hurdles- We shared how to make pool noodle hurdles in our Family reunion activities post. Simply cut a pool noodle and use paint stirrers to stick small pieces into the ground. Then balance a long pool noodle on top for a balance, coordination, and gross motor activity that kids can step over, jump, or hop over in an obstacle course.
Pool Noodle Relay Race- This pool noodle game is great for lawn games, outdoor sensory diets, and family fun. Divide players into teams. Each team has a pool noodle. Players can race to a certain spot and then turn around and pass the noodle to the next player in the line. The first team to get all of their players to run with the pool noodle is the winner. This game can also be played in the swimming pool.
Pool Noodle Balance Game- Cut a pool noodle into smaller pieces (about one half of a pool noodle). Each player receives a piece. Balance a ball on top of the pool noodle hole. The players should race across the lawn or room while balancing the ball on their pool noodle. This is also a great addition to an obstacle course while challenging changes in positioning.
Balance Beam- A pool noodle is a great way to create a DIY balance beam, which provides balance opportunities, works on core strength, and provides vestibular input to help improve regulation.
Wobble Board- Use a pool noodle as a wobble board by adding a platform or boogie board over the noodle. Here’s another great idea for a DIY wobble board.
Pool Noodle Limbo- Want to limbo this season? Use a pool noodle for a fun game of limbo at home, or during therapy. Have children perform animal walks under the limbo stick. Easy, simple, effective and FUN! This one allows kids to work on multiple body skills.
Gross Motor Drum Sticks- Use pool noodles as gross motor drum sticks. When you use pool noodles as desk drumsticks, you address core strength, eye-hand coordination, bilateral coordination, and motor planning. Desk drumsticks can build fitness, and give a quick movement break to the entire class, with very little effort and cost. Now, that’s a winner in my book! To add gamification to this pool noodle idea, add music and play to the music. When the music stops, everyone needs to stop playing. It’s a great auditory processing activity.
Pool Noodle Skipping- You can use pool noodles as a tool to teach skipping.
Pool noodles can be used on a small scale, too to work on fine motor skills. Try some of these ideas.
Pool noodles and rubber bands – Cut a pool noodle into smaller pieces. Use rubber bands to wrap around the pool noodle. This is an easy fine motor activity that you can create. Learners work on stretching the bands around the noodle, which will provides a fun, but effective fine motor strengthening tool, and a good bilateral coordination activity.
Press pipe cleaners into pool noodles- This is another easy, but fun activity to work on important fine motor, and bilateral coordination skills. Slide beads onto the chenille stems (pipe cleaners) to work on threading, or have them string in a specific order to add an opportunity for working on listening and following directions.
Threading activity- Use those same pipe cleaners pressed into the pool noodles and add beads, buttons to place onto the pool noodles. Learners will work on fine motor skills, eye-hand coordination, and finger strengthening with these fun activities. You can also thread pool noodles on a jump rope like we did with this pool noodle sensory bin idea.
Pool noodle and pom-pom transfer is just what you are looking for if you need a child to work on tong use, or practice pre-scissor skills using a pair of tongs. Children use tongs to transfer pom-pom balls into the holes of the pool noodle slices. Not only is this for fine motor skill development, but look at the built-in eye hand coordination too!
Put a cork in it! is a super fun activity that works on finger strengthening and bilateral coordination, as children will work to twist and push corks into the holes of pool noodle slices. Where do you find corks without having to drink dozens of bottles of wine (which is not terrible). Go to any craft store and they are available for purchase.
Pool noodle pom-pom shooter is a fun pool noodle activity that works on fine motor strengthening, as children work to pull the rubber band back to shoot the pom-pom from the pool noodle chunk. It most cases, the farther they pull the rubber band backwards, the farther the pom-pom will go. Set up a target using a laundry basket or box, and see if they can shoot the pom-poms into the target to score points.
Make a creature- Cut a pool noodle into small pieces. Affix or draw monstors or pictures of people or animals onto the pieces. Learners can then mix and match creature blocks with pool noodle chunks to build their own creatures. You can take pictures of completed creatures and have children attempt to copy the picture by stacking the appropriate pool noodle pieces, they work on visual perceptual skills.
Sensory pool noodle activities:
Sensory Bins- Use pool noodles as part of a Pool Noodle Sensory Bin to give the illusion of the ocean, and/or bubbles that you see in the ocean. Children can stack, fill, or squeeze them.
Pool Noodle Boats- How about some pool noodle boats for bathtub time, in a water bin? Take a look at how easy making these pool noodle boats are, and what fun they will be to play with during water playtime.
Letter Scoop Race- Cut a pool noodle into small pieces. Write letters on the outside of each piece. Then, place the noodle pieces into a sensory bin or on a tray. Ask the learner to scoop letters and as fast as they can match upper case letters to lower case letters, or letter to letter. They can stack the matching letters on top of one another to work on fine motor skills.
Eye-Hand Coordination using pool noodles:
Marble Maze- After an adult slices the pool noodles in half, have kiddos work on taping a variety of pool noodle pieces onto the wall with painter’s tape to create a fun Pool Noodle Marble Maze. Kiddos can change it up, making new mazes. It makes for a great STEM activity that builds problem-solving, and eye-hand coordination. This is a great DIY marble run for a visual scanning activity.
Pool noodle track- Easily create a visual tracking and bilateral coordination activity with use of a pool noodle circle track which requires a pool noodle sliced in half, taped together in a circle, and a marble inserted for rotating around the track. Making your own race track is a fun and challenging pool noodle activity, as you have to keep the speed of the marble going around the track so it will not fall out. Definitely for higher level learners, but a fun one!
Pool noodle batting is a simple activity using pool noodle pieces and a balloon or a beach ball suspended from the ceiling with a string. This provide a great opportunity to work on eye-hand coordination, upper extremity strengthening, and range of motion.
Javelin Throw– Use pool noodles to create a pool noodle javelin throw activity to work on visual motor skills as children throw a pool noodle javelin through a circled pool noodle suspended from the ceiling.
Pool Noodle Bowling- In this bowling game all you have to do is cut pool noodles into equal sized pieces, and you have a set of bowling pins! Anyone can use a set of simple bowling pins for a fun eye-hand coordination activity. You can use pool noodle slices stacked into a pyramid shape for the same purpose!
Everything listed here is all about tools, adaptations, apparatus, or simple equipment ideas to children at home or school. Take a peek, and see if any of these ideas can help your learners.
Pool Noodle Card Holder- Know a child that has a hard time grasping and holding a set of cards? Make this great pool noodle card holder just for them! It can be used in the classroom, during therapy, and at home. Have a child that cannot hold cards, but needs to see them? Try this quick hands-free card holder adaptation.
Pool Noodle Adapted Seat- Maybe you need a pool noodle seat for a kiddo that has difficulty knowing where their seat ends due to poor body awareness. If so, this simple pool noodle seat will give them the physical cue they need to help with body awareness and balance within a chair. You know that one kiddo who frequently falls out of their chair? Try this and see if it helps! Here are more flexible seating ideas and DIY adapted seating (perfect for pool noodles!)
Pool Noodle Feet Positioner- How about a quick feet fix when a kiddos feet do not quite touch the floor, or they need a little movement for their feet while seated. Check out this pool noodle feet positioner.
Pool Noodle for High Tone Seating Needs- Sometimes there is that one kiddo that needs a little flexion positioning due to their excessive extension pattern, due to have high tone. Take a look at how to use a simple pool noodle and bungee cord to provide a little buffer for the excessive extension.
Therapy Ball Seat Positioner- If you tape a pool noodle into a circle, you can use it as a pool noodle ball chair by placing the therapy ball on top of the pool noodle to hold in place. Kiddos can still move slightly on it, just not excessively. This makes the ball less distractive, and kept within their personal space at their desk!
Summer is fast approaching, run and stock up on pool noodles now. One last thing that I want to remind you about pool noodles, remember to purchase them now, or when they are on clearance at the end of the season! They are just a few cents and you can use them all year long whenever you need them!
Regina Parsons-Allen is a school-based certified occupational therapy assistant. She has a pediatrics practice area of emphasis from the NBCOT. She graduated from the OTA program at Caldwell Community College and Technical Institute in Hudson, North Carolina with an A.A.S degree in occupational therapy assistant. She has been practicing occupational therapy in the same school district for 20 years. She loves her children, husband, OT, working with children and teaching Sunday school. She is passionate about engaging, empowering, and enabling children to reach their maximum potential in ALL of their occupations as well assuring them that God loves them!
The terms kids, kiddos, and children are used throughout this post. These pool noodle activities can be used for learners of all ages and developmental levels.
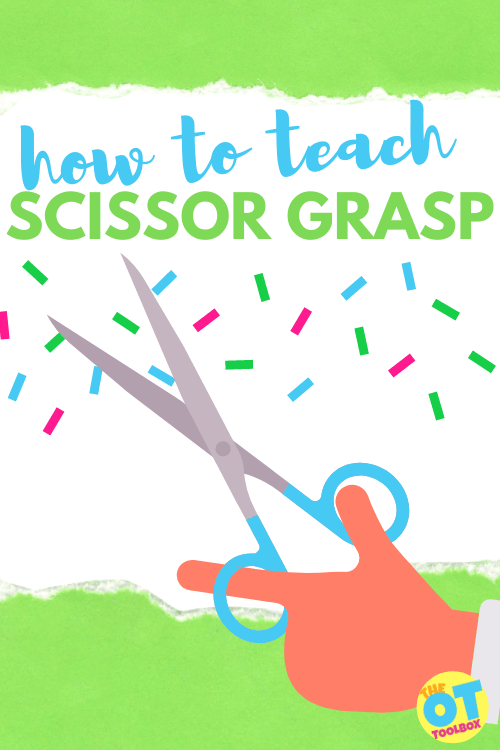
Part of teaching scissor skills is knowing how to hold scissors. Holding scissors correctly is a skill that some children struggle with achieving. You can walk into any classroom and see multiple ways children grasp scissors. This impacts the way they are able to cut with good hand and finger control. If bad habits are learned early, these can be difficult to correct, but not impossible. Check out the Steps of Scissor Development for a more detailed development of how to hold scissors, and learning scissor skills.
How to Hold Scissors
For the purpose of this post, we are focusing on the proper and effective grasp of scissors and how this can be achieved. Think of it as a basic pyramid or hierarchy of skill building that begins with pre-scissor skills and advances to scissor skills. You could consider this the hierarchy of holding scissors.
This post will address each step in learning to hold scissors, and provide information/activities to help at whatever stage your learner is stuck.
Take a look at each level related to holding scissors correctly:
a. Pinch and release finger movements
b. Scissor grasp
c. Open and close hand and finger movements while snipping paper
d. Repetitive open and close hand and finger movements while cutting
When teaching how to hold scissors correctly, first observe their current skill level. If they have learned some bad habits or techniques, back track to an earlier stage of scissor skill development, moving forward from there.
It is best to catch a child while they are first learning a skill, but we all know that may not be possible.
The OT Toolbox has a great Cutting with Scissors Program. You’ll find some fun ideas and strategies for every stage of scissor skill learning. There is a great Scissor Skills Book in the shop section of the website.
how to hold scissors: Pre-scissor skills Pinch and release
Before scissor skills can be mastered, young children need to establish the pre-scissor skills of pinch and release. These are preschool scissor skills that are established through play. Similar to the preschool pre-writing skills established in the preschool years, learning to hold scissors starts with grasp and release of small objects in play.
Step one focuses on pre-scissor skills with the use of fun, inexpensive tools that are wonderful for hand strengthening. These teach the hand/finger actions of pinch, squeeze, and release to help learners get ready for being successful holding scissors.
Tearing or ripping materials is a great way to work on pinch and release. Be sure your learner is not using a gross grasp to twist and rip. Have them work on pinching and tearing with use of the tips of the fingers. If this is too difficult, give a little help by making a slight tear to start with, then encourage them to finish.
Tearing teaches children how to use two hands together in a coordinated manner. Try these activities:
tear small squares and other shapes from strips of paper to create a paper salad or pizza
tear small pieces of tape from a roll and stick on an outline
tear tissue paper or crepe paper into small squares and pinch up into small balls to make a picture craft
tear small pieces from leaves as part of a nature tray
rip cotton balls into smaller pieces to create an art piece or stuff a baggie
pull apart strips of Velcro to separate the hook side from the loop side
You’ll want to check out this blog post to discover how to tear paper with specific activities that are developed and activities to work on this fine motor skill using just paper and the hands.
Pinching and squeezing can build hand and finger strength, while releasing objects with precision (in hand manipulation) works on the beginning stages of open and close hand actions.
pinch and release small play dough balls into flat pieces called ‘mini-pies’
pinch along a play dough log from left to right to make small indentations
pinch clothes pins (this blog post shares several pinch exercises and activities using clothes pins)
pinch bubble wrap bubbles to make them pop
pinch and squeeze small sponge squares to wring out water
pinch the end of a craft stick and play tug-o-war with a partner
pinch and release coins into a bank, change it up and alternate with coins, buttons, and game chips
pinch and stack blocks or mini-erasers
blow bubbles and attempt to pinch and pop small bubbles in the air
Also check out this blog post on pincer grasp activities for precision of pinching activities.
This resource on hand strengthening activities covers additional scissor skills for preschoolers to develop for holding scissors correctly.
Scissor Grasp
Teaching kids how to hold scissors can be difficult. Placing scissors in the loops can be a test of visual perceptual skills and fine motor skills. To help with holding scissors, you can break the process down into several areas: thumb positioning, placement of the other fingers in the loops, and wrist positioning.
When it comes to scissor grasp, you can use additional supports to ensure proper, or functional, finger placement on the scissors.
First, let’s go over a point about functional scissor grasp.
Functional Scissor Grasp
Much like a functional pencil grasp, scissor grasp should be functional as well. What is meant by this is that not all scissor grasps may look the same. One child may hold the scissors with the pointer finger, or index finger through the guiding loop and others may place both the index finger and the middle finger through the guiding loop of the scissors. What is most important is that the child is able to cut age-appropriate shapes, materials in an effective, efficient, and safe manner.
A functional scissor grasp might look differently for each individual. But if a middle school student is able to cut worksheet items, coupons on the lines, cut gift wrap, or other materials in order to learn, function at an age-appropriate level, with safe use of the scissors, then you have functional scissor grasp. Focusing on precise placement of the fingers on the scissors isn’t necessarily an important area of focus.
However, when teaching scissor grasp, there are important things to keep in mind.
How to Teach a Thumbs Up Scissor Grasp
When it comes to grasping the scissors, your learner should use a thumbs-up approach to grasp scissors or the paper being cut.
There are several strategies for teaching kids to hold scissors with “thumbs up”:
You can simply just use a verbal cue.
Place a sticker or draw a smiley face on the thumbnail to provide a visual cue.
Place a sticker or tape on the scissors to visually remind learners of proper scissor placement in the hands.
Add a “shark fin” to the thumb scissor loop. The fin should be up when cutting.
Playing thumbs-up games, like thumb wars, can help to encourage use of this position with more automaticity.
Let’s look at the other fingers needed for correct scissor grip.
The skill fingers of the hand need to be used to open and close tools, and are essential when working on scissor skill development. Skill fingers are the thumb, index, and middle fingers and they are responsible for grasping, and manipulation of tools.
We covered the thumb positioning on the scissors above, but the placement of the other fingers can be where holding scissors correctly gets a little sticky.
Pointer Finger Placement- Most often the first finger stays out of the scissors’ loops. It is used to “point the way.” When the pointer finger is positioned around the bottom loop rather than inside the loop, it helps to guide the scissors. This opens up the arches of the hand, especially for your learners with small hands. This may feel awkward at first, but will soon become a habit.
Middle, Ring, and Pinky Finger Placement- Placement of the remaining fingers depends on the type of scissors used. Some scissors have a small circle loop that require only the middle finger to go through the loop while the ring and pinky finger are tucked into the palm. Other scissors have a larger bottom loop that allow the middle, ring, and pinky fingers to all fit in the loop.
The main job of the ring and pinky fingers are to stabilize the scissors. They curl into the hand to help stabilize, supporting the arch of the hand, much like in a pencil grasp. This is where motoric separation of the sides of the hand is important, much like in holding a pencil or crayon. To encourage your learner to keep the stability fingers curled into the palm, give the child a small pom-pom ball to hold in their palm with the ring and pinky fingers while the skill fingers work.
When teaching young children to hold scissors, it is best to use a pair of scissors and stick to that scissor type to reduce confusion between holding patterns.
Wrist Position when Holding Scissors- A stable wrist is needed to ensure a functional grasp on the scissors. If the wrist is bent, the scissor blades will not be able to open/close effectively and line accuracy will suffer. The wrist should be positioned in a neutral position, and not flexed (bent forward) or extended (bent backward). This blog post on wrist stability covers activities to address this motor skill.
Elbow and Forearm Position- Always check the child’s elbow position when using scissors to cut. Their elbows should be by their sides and not winging outward. You can use a hack trick by having the child hold a piece of paper under their cutting arm while cutting. Tell the child to be careful and not let the paper fall!
Activities for holding scissors: addressing open-close
Next, we’ll look at the scissor skill for the open and close hand movements necessary for correct scissor grip. There are various tools that can be used to promote open and close hand and finger movements while maintaining a grasp and positioning of the scissors.
Tongs or clothespins– Learners can use a variety of tongs to help learn open-close actions. These can be simple kitchen tongs, toaster tongs, (Amazon affiliate link) strawberry huller, clothespins, or something as fun as scissor tongs or bubble tongs.
Show learners how to open and then close tongs to pick up and place small objects such as cotton balls, marshmallows, or pom-poms. Play a game to race and fill a small container. Learners can use clothespins to hang up socks or washcloths on a clothesline. These activities will help them understand and learn the concept of open and close before transitioning to actual scissors.
Pickle Picker– A (Amazon affiliate link) pickle picker is a therapist favorite when it comes to building strength and stability in the thumb and arches of the hand. To use a pickle picker as a therapy tool, one needs to maintain a stable wrist, isolate the thumb to slowly press down on the plunger of the tool. To lower the claws of the pickle picker, you need to add force through the thumb with a stable hand in order to grab a small object. Then, to grasp the item, you need to slowly release force through the thumb allowing for graded release. We use pickle pickers to grab and sort craft pom poms, mini erasers, and other small objects (not just pickles!) Pickle pickers are a great eye-hand coordination and strengthening tool to use with our craft pom pom activity sets.
Hole punch– Children can use a hand-held hole punch to punch holes in paper. You can use a regular hole punch or you can use festive hole punchers that have different shapes like hearts, stars, and raindrops. Use the hole shapes to paste on paper and create fun bugs, snow scenes, or fireworks. This activity will help build hand strength and work on the open-close hand action.
Water squirters/Spray Bottles– Practice grasping and releasing the trigger on water squirters using the skill fingers to pull the trigger. Show them how to make the water come out to spray on objects such as dirty toys, chalkboards, pavement, and sidewalks. This helps to strengthen the fingers and hand and teach grading their movement patterns. Be mindful how parents feel about squirters that resemble weapons. Choose animal shaped squirters or spray bottles instead.
Mini staplers – Use mini-staplers to work on similar movements needed with scissor use – grasp, squeeze, and release. Color the staples with a permanent marker or buy the staples in different colors to make the activity more fun! This works on hand and finger strength as well as open and close.
Eyedroppers – Play with eyedroppers to squeeze water drops onto coins, or colored water onto coffee filters or paper towels. This works on finger strength, grading their movement through proprioception, and finger movements.
Wind-up toys – Try wind-up toys to work on bilateral hand use with one hand holding the toy while the other hand twists the crank. Bilateral hand use is needed for cutting with scissors.
Finger game songs – Play finger game songs to work on separation of the two sides of then hand. Try The Itsy-Bitsy Spider, Two Little Blackbirds, Where is Thumbkin, and Open Shut Them. Want other finger rhyme ideas? Grab the free Favorite Finger Play Rhymes and Songs at Your Kids OT website. These work on finger and hand movements needed for holding scissors.
holding scissors with open-close for snipping
Next, let’s look at holding scissors and working on open-close motion with snipping movements. This is a good how to hold scissors preschool activity to use when teaching young children to cut and maintain a functional hold on the scissors. At the preschool and Pre-K age, snipping with scissors is age appropriate.
You can first approach snipping by performing some fun warm-ups using the correct hand position and motion without scissors in hand. Then move to doing these same movements while holding the scissors, without cutting anything yet. Focus on having them learn to hold scissors correctly.
When first introducing the scissors to your learners, start with correct finger placement and orientation of the scissors. A mature way to hold scissors looks like this:
The thumb goes inside the top loop of the scissors.
The middle finger goes into the bottom loop of the scissors.
The index finger goes on the outside of the bottom loop to stabilize and provide directional control of the scissors. (As a visual cue, you can place a sticker or dot on the exterior of the bottom loop for where the index finger holds the loop.)
The ring and pinky fingers go curled into the palm.
The wrist is slightly rotated inward as the thumb is up.
The assisting hand holds and manipulates the paper.
If the learner is a beginner cutter, the index and middle finger can go into the bottom loop at the same time, until their grasp becomes more mature and the index finger can shift to the exterior of the bottom loop.
Keep in mind leaving the first finger out of the loop will open up the hand arches for easier cutting. A tip for the placement of the middle finger in the bottom hole: rest the scissor handles on the middle knuckle of the middle finger (the one closest to the fingertip).
Prevent the child from shoving their fingers into the loops all the way down to bottom knuckle as this makes it very difficult for the child to open and close the scissors skillfully.
Poem to Teach Scissor Grasp
Here’s a fun poem to help a child remember where their fingers go in the scissor loops:
Thumb on top,
two below,
two get curled,
and away you go!
Don’t forget that a visual cue with use of a sticker or smiley face drawn on the thumbnail, along with a pom-pom ball curled into the palm with the ring and pinky fingers, can be used to assist with correct scissor grasp.
Here are some fun activities for holding scissors:
Pretend their fingers or scissors are: a train using “choo-choo” as open and close verbal cues.
How about a car using “beep, beep” as open and close verbal cues (you can draw headlights on the tips of the scissor blades and play an open-close game).
Or a crocodile and use “chomp, chomp” as open and close verbal cues (you can draw teeth and an eye on a pair of scissors and play an open-close game)
Exercise those scissor holding fingers by doing open and close movements like the ASL (American Sign Language) hand sign for scissors
Snipping activities for learning to cut with scissors
This involves the use of scissors and singular snipping of objects to work on initial development. Snipping movements begin as random snips with simple open and close of the blades, and as skill improves advancing to snipping with more control.
Snipping Activities:
Pretend the scissors are a crocodile, train, or car and work on random snipping
Snip play dough that is rolled into a log or snake form, Playdoh barbershop is a great tool for snipping!
Cut straws, yarn, tape, packing peanuts, small strips of paper into pieces, small bands of paper can be snipped to rescue an item in a box
Go outside and trim the grass by snipping it with the scissors
Paper or yarn can be cut, that is part of a fun craft such as haircut, pizza, snowman, critter rescue
Try thicker paper (cardstock, construction) or thinner copy paper around the edge to create fringe while working on the helper hand holding and manipulating the paper. This resource covers the progression of paper grades to support cutting skills.
Snip on lines drawn around the edge of a paper plate or on small strips of paper to begin snipping with more control and precision of the scissors
Place stickers along the edge of paper or index cards and have the child chomp through the stickers with snipping action
how to hold scissors with repetitive open-close for cutting
The final skill is the repetitive open and close hand and finger movements, moving forward with the scissors to cut with control and precision on cutting lines.
This begins with straight lines, advancing to curved lines, circle shapes, to angled lines and shapes with corners. All of these require good bilateral hand use with the assisting hand to advance and turn the paper.
Thicker lines are the easiest for early scissor learners to manage, while thinner lines are for more advanced learners, who have developed more control and precision with scissor use.
Consider the paper and materials used while teaching scissor skills as thicker paper such as cardstock and construction paper may have more stability, while copy and tissue paper is flimsier making it harder for a younger kiddo to manage.
Below is a progressive list of lines and shapes to work on cutting. They are ordered easiest to most difficult, as the child gains more skill.
Short straight lines
Long straight lines
Short curved lines
Long curved lines
Short angled lines
Long angled lines
Simple shapes
Complex shapes
Modifications to help correct scissor grip
Modifications and adaptations sometimes cannot be avoided, often becoming necessary to achieve a consistent and functional grasp.
There are many modifications that can be made to help learners be successful with finger placement, keeping bad habits from forming. Try these before jumping into adaptive scissors:
Draw a smiley face on the thumbnail or the thumb to provide a visual cue for thumbs-up.
Glue googly eyes, draw a face, place a sticker, or wrap a piece of tape on the exterior of the thumb hole to cue the child to orient the scissors properly and for correct thumb placement.
Use permanent marker to draw a line on the exterior of the scissor blade that needs to be on top, which is the thumb hole side. They should see this line while cutting.
If the bottom loop is too large and encourages the child to place many fingers in the loop, you can tape up part of the loop providing a blocker for the other fingers.
Wrap a rubber band around the base of the blades to prevent the child from ‘chomping’ the paper and instead promote a snipping movement as the band prevents full opening of the scissor blades.
With the same idea as above, you can wrap just the bottom handle with a rubber band and this prevents complete closure of the blades to also work on snipping.
Create a sock glove that has holes in it for the thumb, index and middle fingers while the ring and pinky fingers must stay curled inside the sock.
One last thing, PLEASE use left-handed scissors with left-handed kiddos. Do not force these children to cut with right-handed scissors. It is easy to purchase left-handed scissors for kids. Yes, it matters! So, get some for your clinic or your classroom and please use them!!
*Editors note: Left handed children can and will learn to adapt to right handed scissors. Unfortunately it is a right handed world, and lefty scissors are not always available. Unless they are going to carry lefty scissors around with them forever, it is easier to learn with something more mainstream.
Regina Parsons-Allen is a school-based certified occupational therapy assistant. She has a pediatrics practice area of emphasis from the NBCOT. She graduated from the OTA program at Caldwell Community College and Technical Institute in Hudson, North Carolina with an A.A.S degree in occupational therapy assistant. She has been practicing occupational therapy in the same school district for 20 years. She loves her children, husband, OT, working with children and teaching Sunday school. She is passionate about engaging, empowering, and enabling children to reach their maximum potential in ALL of their occupations as well assuring them that God loves them!
*The term, “learner” is used throughout this post for readability, however this information is relevant for students, patients, clients, children of all ages and stages or whomever could benefit from these resources. The term “they” is used instead of he/she to be inclusive.
Looking for tips and tools from pediatric occupational therapists and physical therapists to help with all things scissor skills? The Scissor Skills Book is a comprehensive resource that covers all aspects of development related to cutting with scissors.
If you’re a parent who is reluctant to let your child cut with scissors…
If you’re a teacher who is tired of watching students snip their crafts and worksheets into tiny pieces…
If you’re a therapist looking for creative ways to promote scissor skills in your treatment sessions…
This book is for you!
Written by a team of 10 pediatric physical and occupational therapists with years of experience in the field, The Scissor Skills Book is the ultimate resource for tips, strategies, suggestions, and information to support scissor use by kids.
Here you will find a number of ADHD tools and supports for individuals with ADHD, including ADHD resources for parents. The statistics of the number of people with Attention Deficit Disorders (ADD) is staggering. These numbers are compounded by the fact that attention deficit is difficult to diagnose. The market is flooded with ADHD resources, and strategies to support attention needs, but what are the right ones? Doctors and other professionals could be over or under diagnosing due to this difficulty in gathering accurate data.
Yes there are ADHD checklists, surveys, and questionnaires, but they are not scientific or 100% accurate. They are often based on opinion and observation versus data. This is a stark contrast to diagnosing down syndrome or hearing loss, that is tracked by concrete data or genetic testing.
ADHD TOOLS
When it comes to specifically ADHD tools, my advice is to take these diagnoses with a grain of salt. Look more for symptoms, behaviors, skills, and difficulties rather than relying on a label. It does not matter as much that this is called ADD, ADHD, or ABCD, but what are the struggles the learner is having?
To best support any diagnosis (attention diagnoses being one), focus on the struggles, creating measurable and relevant goals, instead of focusing on the label.
To best support a child with attention challenges, find ADHD resources you can trust to provide useful information and strategies.
Having any label, diagnosis, or list of symptoms can feel overwhelming. The number of attention related resources available on the internet are astounding. But which are accurate? Who can you believe? There are no easy answers unfortunately.
Which way to turn for ADHD TOOLS?
When there is an overwhelming amount of data presented at one time, the best jumping off point is to rely on the feedback of others. Sometimes it is a trusted doctor or friend, but more often than not, it can be a large crowd of strangers.
When looking for the perfect resource to share with parents, I usually turn to Amazon and start reading the reviews. I read a ton of reviews before making my selections. This is time consuming, however I do not have time to read something that is not a good resource, has incorrect information, or written in a terrible format.
Attention Resources from Amazon
There are some solid attention resources from Amazon available, including ADHD audiobooks, and other formats that have good reviews. I have not personally read them, but have taken the time to research them and read the long reviews.
Amazon affiliate links are included below.
Amazon has some great ADHD audiobook resources for parents and professionals available on Audible and other formats. Audiobooks are a great alternative to paper books, as they can be listened to almost anywhere.
There are tons of resources on attention and ADHD in audiobooks. I tried to find ones that had good reviews, were accurate and easy to read/listen to, and provided useful strategies.
If you are an Amazon Prime member, You’re eligible to claim 2 free titles from our entire selection (one title per month thereafter) with a free Audible 30 day trial. A standard trial includes 1 credit for an audiobook download. After the Audible trial period, all members receive 1 credit per month.
Delivered From Distraction: Getting the most of out Life with Attention Deficit Disorder. This book is written for teens or adults with ADD. This may be helpful for parents as well, as attention deficits tend to run in families. It can be read cover to cover or in sections. The author says, feel free to skip around.
You Mean I’m Not Lazy, Stupid or Crazy?: A Self-help Audio Program for Adults with Attention Deficit Disorder As with most books I have found, there are going to be people who do not like the book. This is to be expected. However, more people say they liked it than the few who did not. I like that this is available in audio, as some people are more auditory learners than visual. Finding an hour in the car to listen seems much easier than trying to carve out that same hour reading on the couch.
Taking Charge of ADHD, Third Edition: The Complete, Authoritative Guide for Parents This book is available in several formats. Audible is one that may be easier for parents to listen to, as their couch time is limited. This book takes a real look at ADHD. Most people found this book helpful. The few that did not, found this book too straight forward or maybe “depressing.”
Organizing Solutions for People with ADHD, 2nd Edition – Revised and Updated: Tips and Tools to Help You Take Charge of Your Life and Get Organized This book points people in the direction of real life solutions. It is fine to spend time researching the “what” and “why” of a diagnosis, but without real solutions, the research just leaves people frustrated. It can be used for adults and adapted for children.
Smart but Scattered Teens: The “Executive Skills” Program for Helping Teens Reach Their Potential Positive reviews praise this book for its information about working with teens with attention issues or decreased executive function. It gives doable strategies that work for teens. The strategies are motivating for modern teens. Critical reviews cite that this book is more about the “what and why” rather than the “what to do about it” side of this diagnosis. Much of the advice centers around driving, and using technology to help teens. On a positive note, this is what motivates teens to perform. On the flip side, not everyone has a driving teen or wants to encourage use of electronics.
Books for younger learners:
Marvin’s Monster Diary: ADHD Attacks! (And I Rock, Big Time): St4 Mindfulness Book for Kids Written in the Wimpy Kid book series, this is a cute motivating book series for children who struggle with attention issues to relate to. It is available in several formats including Audible. This might be a good book to buy in print and listen to Audible at the same time.
Marvin’s Monster Diary 2 + Lyssa!: ADHD Emotion Explosion (But I Triumph, Big Time!) This second book in the Monster Diary series proves to be a winner as well. It has several positive reviews about it’s entertainment value, readability, and writing style. Again because it is a graphic novel type of read, it would be excellent paired with the written version as well as Audible.
A Dragon With ADHD: A Children’s Story About ADHD. A Cute Book to Help Kids Get Organized, Focus, and Succeed. (My Dragon Books 41) This is another great series to keep children interested while learning about ADHD. This series covers a multitude of topics. The nice thing about series is if you buy into one, it sets the reader on a whole journey of discovery. This is written for children, however reviewers say that adults, therapists, and parents will enjoy this book as well.
Focused Ninja: A Children’s Book About Increasing Focus and Concentration at Home and School (Ninja Life Hacks) This book is part of a Ninja series teaching children valuable lessons in an entertaining method. If you were a fan of the Mr. Men book series, you will like this one. Each ninja is named after the skill he lacks or is trying to gain.
The OT Toolbox ADHD and attention resources
The OT Toolbox has become a trusted resource for many of you reading these posts and subscribing to the website. The OT Toolbox does not disappoint and has wonderful articles, activities, and resources to fill your “toolbox”, not only on topics such as ADHD and attention, but fine motor, sensory, gross motor, executive function and so much more.
Type ADD, Attention resources for parents, or ADHD activities into the search bar for a great list of archived posts. Just when you are overwhelmed with information and resources, try wrapping your head around the sensory connection between attention and organization challenges.
It is no wonder there is such misdiagnosis, confusion, and misinformation out there. Autism, ADD, ADHD, Sensory Processing Disorder, Anxiety, and about a dozen other diagnoses have overlapping and similar symptoms. Keep your focus on how to help and move forward rather than where did this come from, or what is this called?
Happy reading, take a deep breath, one moment at a time!
Victoria Wood, OTR/L is a contributor to The OT Toolbox and has been providing Occupational Therapy treatment in pediatrics for more than 25 years. She has practiced in hospital settings (inpatient, outpatient, NICU, PICU), school systems, and outpatient clinics in several states. She has treated hundreds of children with various sensory processing dysfunction in the areas of behavior, gross/fine motor skills, social skills and self-care. Ms. Wood has also been a featured speaker at seminars, webinars, and school staff development training. She is the author of Seeing your Home and Community with Sensory Eyes.
In this mindfulness resource, you’ll find recommendations for mindfulness audiobooks easily accessible for use right now. The term “mindful” literally means to be aware. For example; be mindful of the speed bump in the road. Understanding this, we can deduce that mindfulness has something to do with awareness. The number of resources available such as mindfulness audiobooks, workbooks, YouTube Videos, and reference books available online is mind numbing.
what is Mindfulness?
According to a post on mindful.com, “Mindfulness is the basic human ability to be fully present, aware of where we are and what we’re doing, and not overly reactive or overwhelmed by what’s going on around us.
While mindfulness is something we all naturally possess, it’s more readily available to us when we practice on a daily basis. Whenever you bring awareness to what you’re directly experiencing via your senses, or to your state of mind via your thoughts and emotions, you’re being mindful.
And there’s growing research showing that when you train your brain to be mindful, you’re actually remodeling the physical structure of your brain.
This can be done through progressive relaxation exercises, dialectical behavioral therapy, meditation, calming strategies and more.
This workbook (affiliate link) is fantastic for teens and adults to practice and learn mindfulness through dialectical behavioral therapy.
Mindfulness teaches about being in the present, aware of what is really happening around us.
If you sit still for five minutes, what can you hear around you?
What can you see?
Can you sit quietly and just attend to your senses instead of your grocery list?
This is very difficult for many. Imagine monks can do this for hours at a time. Five minutes feels like an eternity to me. Mindfulness is not just about meditating, it is about separating facts from feelings and emotions.
separating facts from feelings
Separating facts from feelings does not mean feelings are not valid. Sometimes our reactions to a situation are not in line with what happened, or we react with emotion instead of common sense.
When a child screams in the grocery store and lies on the floor, learning to separate facts from emotions is a great tool for parents and the screamer.
First, examine the facts.
Is the screamer bleeding or on fire?
Did a huge dinosaur just bite his leg off, or did you just say no cookies for the 15th time?
Once it has been determined no one is bleeding or on fire, everyone can breathe a sigh of relief. The emotions are valid but perhaps overdone. Teaching the caregiver to take a breath and react based on facts versus emotion, is a great start, hence we are being mindful of what actually happened.
This strategy can then be taught as a strategy to reduce screaming or behavioral responses to emotions.
Teach the screamer to be aware of what is actually happening.
No one has had their leg eaten off.
They are in fact disappointed not to be getting a cookie this trip.
Working on using words and deep breathing can be a valuable tool to thwarting meltdowns, or at least shortening their duration.
great Mindfulness audiobook resources
Amazon affiliate links are included below.
Amazon has some great mindfulness audiobook resources for parents and professionals available on Audible and other formats. Audiobooks (affiliate link) are a great alternative to paper books, as they can be listened to almost anywhere.
There are tons of resources on mindfulness in audiobooks. I tried to find ones that had good reviews, were accurate and easy to read/listen to, and provided useful strategies.
If you are an Amazon Prime member, You’re eligible to claim 2 free titles from our entire selection (one title per month thereafter) with a free Audible 30 day trial. A standard trial includes 1 credit for an audiobook download. After the Audible trial period, (affiliate link) all members receive 1 credit per month.
Breathe Like a Bear– A children’s book on deep breathing and other mindful strategies
Think Like a Monk– Great for adults and informing older students, especially mindfulness in teens
the more principle
The current climate with excessive use of electronics and technology has stunted the ability to calm the mind, be still, focus on a singular item, or just sit and rest. Life is filled with “more”.
It is not enough just to watch tv, or drive, or talk on the phone. Now these tasks are often paired with scrolling the phone, eating a meal, shopping online, or a whole host of other distractions. People will call this multi-tasking, but really it is cluttering the mind, and decreasing the ability to be mindful, or calmly focused.
Can you remember a time when you could sit in a waiting room and calmly wait or people watch? Not anymore. It is difficult to sit and wait without a magazine in one hand and a phone in the other. This is not good for anyone, especially the young developing brain.
The OT Toolbox has some great resources on mindfulness including activities, worksheets, and other tools. Mindfulness for Kids is an excellent post full of ideas and resources. Check out The Benefits of Mindfulness on the Toolbox for links to more great articles.
Take a step back, teach caregivers to slow down, then pass this skill to young learners. Refrain from so much “multitasking”, and just be.
Victoria Wood, OTR/L is a contributor to The OT Toolbox and has been providing Occupational Therapy treatment in pediatrics for more than 25 years. She has practiced in hospital settings (inpatient, outpatient, NICU, PICU), school systems, and outpatient clinics in several states. She has treated hundreds of children with various sensory processing dysfunction in the areas of behavior, gross/fine motor skills, social skills and self-care. Ms. Wood has also been a featured speaker at seminars, webinars, and school staff development training. She is the author of Seeing your Home and Community with Sensory Eyes.