What You Need to Know About Sensory Food Issues

Sensory food issues

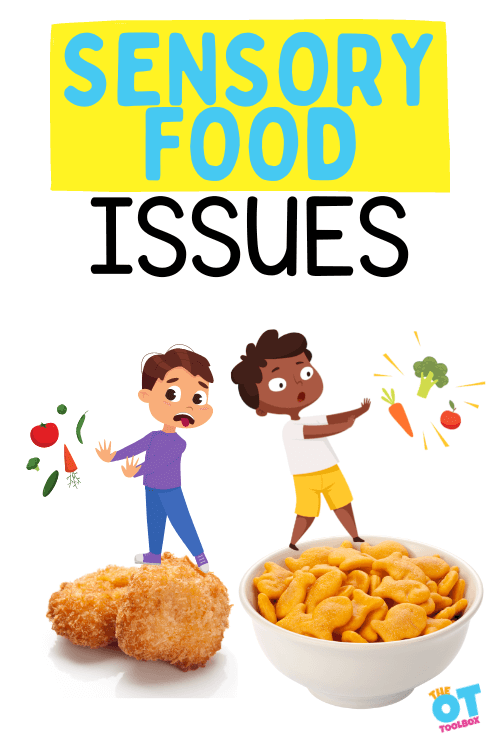
Sight, smell, taste, and touch are some of the contributing factors to a child’s sensory food issues.  How it looks, smells, the consistency/texture of the food, and the way it feels on the fingers or utensils can make a child/learner feel uneasy, uncomfortable, and unwilling to try.  Children and older learners struggling with sensory issues with food, are often lacking a good variety of foods that contain proper nutrition for their health and development. 

Sensory touch is a huge piece of this; not only the texture of foods in the mouth but the “feel” of foods as we handle them and chew them. For therapy providers working with infants and babies, be sure to check out our resource on infant feeding therapy because we can support parents and caregivers with support for sensory food issues in the littlest ones, too.
Sensory food issues

sensory food Issues

There is a range when it comes to determining sensory eating disorders. From extreme food aversion to the simplest of sensory food preferences. We all have probably experienced some aspect of this, at one time or another because everyone of us has different levels of sensory aversions.

Think about a food that you don’t prefer just because of the texture. Maybe it’s biting into a banana or a mushroom. Perhaps it’s chewing the stringiness of asparagus or celery. Does the sensory aspect of food textures like drinking smoothies or biting into a mushroom throw you off? There are many aspects of eating that are rooted in the senses.

We as OT practitioners know that a colorful plate of food is contains essential food groups and healthy eating choices to help a child blossom and thrive. Children and older learners who struggle with sensory food issues, often can not climb this hurdle for themselves without OT intervention. OT practitioners are experts in play-based therapy, and feeding therapy is no different. OT’s enjoy making eating fun while improving the sensory culprits that challenge a child’s success with feeding.

Oral Motor Vs. Sensory Food Aversions

As a side note, picky eating is not always a “sensory” issue. Sometimes there can be oral motor issues at play or other considerations.

We have a variety of resources on the website related to oral motor considerations as this can be a safety issue when it comes to oral motor development and “pushing” kids to try new foods. You’ll want to check out these oral motor resources if you are concerned or questioning a sensory aspect of feeding challenges or an oral motor issue:

It’s important to always seek out professional advice when it comes to feeding challenges in kids.

sensory food exposure and feeding therapy

The hierarchy of sensory exposure during feeding therapy, provides a good introduction and follow-through of steps to sequentially build sensory exposure to foods. The ultimate goal is being successful interacting or eating the non-preferred food. Eating and mealtime is a multi-sensory experience that children with sensory food challenges may have difficulty viewing in a positive way. Even the tolerance of the food in the same space is a successful step! 

Aside from clinical assessment, this Food Inventory Questionnaire can help the therapist, develop a proper treatment plan. It gathers important data about a child’s current preferences, so that likes and dislikes can be established, to begin food introduction and food chaining in feeding therapy.

Children use their sense of sight to look at their plate of food, surroundings, and those who are joining the mealtime experience

We’ve all looked at something and thought, ‘That is really gross…YUCK’! Children who have sensory food aversions are “grossed out” when they see some foods.  Along with “yuck”, comes gagging, coughing, face squinching, head-turning, hands to mouth, plate pushing, and even covering the food to hide it. 

In their state of fight or flight, learners will try anything to avoid looking at the food, let alone eating it. Read more about this aspect in our resource on the limbic system.

Sometimes children get overwhelmed when they look at a plate, especially if the plate is packed to the edges with food, if the food on the plate is touching, or they do not see anything they like. How can you help kids who struggle with a visual aversion to food?

Visual Tips and Tricks

One strategy to support sensory food needs is to use the power of the visual sense. This can be explained in more detail below. We’ll cover several areas:

  1. Food separation on the plate
  2. Fun foods and fun presentations
  3. Motivating snack mats or plates

Food Separation

This is an easy strategy to implement by simply separating the food with a good distance between each food choice, so that food does not touch. A muffin tray is another excellent way to keep food from touching.

Another fun idea is to turn mealtime into a game, to provide a little distraction from the actual act of eating. Hopefully the activity will make eating a more positive experience, rather than a dreaded one.

Take a look at a few products available for this technique, that provide food separation by design:

(Amazon affiliate links below)

  • Dinner Winner Food Game Tray is a food tray that is designed like a board game and the child travels the food sections to get to the end where a special treat awaits
  • SpinMeal Plate is a plate where an arrow is in the center of the sectioned food plate. The child spins the arrow to choose the food compartment to try
  • Divided Kids Dinner Plate is a colorful portioned plate that contains encouraging words to provide ongoing motivation
  • Sectioned Dinnerware Plate is a game board where a child gains points with each section of food trialed or eaten
  • Divided Lunch Trays are simple divided trays that are solid in color, making them less visually distracting for children who may become overwhelmed with all of the visual clutter of the other game trays and plates

Smaller Plate and Utensil – Using a smaller plate with less food, helps the child feel less visually overwhelmed with how much they will have to eat. Using a smaller spoon or fork to scoop or pierce, can give the child a better feeling of manageable food amounts. Read more about tips and strategies to help kids learn to hold a spoon and fork.

Fun Food

Make food look more fun and less ‘foodie,’ as you create images and scenes with the food, making it more enticing to trial. Who doesn’t want to eat rainbow snacks or how about Flower snacks? These treats are fun to look at, and motivating to eat. 

Food Art Snack Mats – Try using fun snack mats you print and laminate. This can be used as a fun visual background while eating. 

It’s easy to get the kids involved in making a variety of food art snack mats, and games to support mealtime with kids. 

Children use their olfactory sense to smell the flavors of the food, both while it is cooking and on their plate

“Shuwee, that stinks!” Yep, we’ve all said it about something. The neighborhood skunk, the car exhaust in front of us, the litter box, and even the spices in the kitchen.

Children who have olfactory sensitivity smell food odor at a much higher level of intensity. They pinch their noses, turn their heads, try and leave the table, or vomit/gag in response to the smell. 

Check out the strategies below to help desensitize a child to the food smell. Slowly introduce smells of varied scents from light to heavy, to build desensitization more easily. 

Olfactory Tips and Tricks

Essential Oil Set-up – Set up the space for eating by using a calming scent of essential oil that is easily tolerated by the child in the eating area. Essential oils can calm anxiety related to eating, and desenstize the system to the food odors. Hopefully this will make a child more tolerant to the less preferred smells

Coffee Bean Support – Use a few coffee beans near meals, as the coffee scent can help neutralize the smell of some foods. If your learner has an aversion to coffee, you might need to try a different neutralizer

Cold vs. Hot – Naturally, cold foods do not smell as strongly as warm/hot foods. If colder foods can be tolerated by the child, try serving foods cooler, to reduce the food odor naturally.

Kitchen and Dining Modification

Addressing environmental considerations can have a big impact. Try these strategies:

  • Consider moving mealtime experiences outdoors.
  • Remove the child from the kitchen/dining area as some of the cooking smells from hot foods will linger for longer periods of time, within these rooms.
  • Open a window or patio door, or using a fan when cooking, to help reduce the amount of odor emitted into the room. This can lessen the aversion to smells.

Meal Prep Warning – Before cooking, warn the child that cooking will begin soon, as this can help the child prepare their sensory system mealtime, as they use some of their learned coping techniques. 

Cover the Smells – If serving food on the tabletop for the entire family, try covering each dish with a napkin to limit the amount of odor from each of the served foods. 

olfactory play

Scented play activitiesScented sensory bins, scented play dough, or other scented play activities can inspire calming or alerting scented play.

Smell Bottles or Sniffing Jars – Create some fun sensory sniffing jars with varied smells to help the child start processing a variety of smells. These jars are created by placing a variety of scented objects into small containers with holes in the lid of the jar. The smell will rise out, and the child can sniff at manageable distances. The larger the hole, the more the scent is dispersed. Some ideas include cinnamon, coffee, coconut, lemon, lavender, peppermint, etc. Create these smell jars to play with, by stacking and matching to the card images of the scents, or play a fun guessing game, by smelling and guessing what scent it is, then matching the jar to the card image. 

Children use their sense of taste to determine if they like the flavor of a food

Lip grimacing, lip tucking, and hiding lips with a hand are some of the actions a child with sensory food issues will make when presented with food toward their lips.

There are a set of steps feeding therapists use to help a child eventually eat a non-preferred food.

  1. First, the food is brought to the lips much like kissing.
  2. Then they lick the food.
  3. Make teeth marks in the food.
  4. Take a bite of the food.
  5. Finally, chew and swallow the food.

These are not all of the steps needed to approach gustatory aversion to food, and it’s important to acknowledge that each individual with sensory food issues will present differently.

Each of these steps will build the skills the child needs to successfully try new foods, eventually adding them to their diet.

Importantly, being a cheerleader for your child with sensory food issues or struggles is important. Try these tips for supporting small successes:

  • Be patient, and celebrate each step as a success.
  • Give a high five, a hug, or a cheer.
  • Focus on whatever motivates the child to keep trying! 

Gustatory Tips and Tricks

Some of these tips may help with the gustatory, or sense of taste as a strategy and powerful component in supporting sensory eating needs:

Sauce and Condiment Support – Use sauces or condiments as a support tool during feeding sessions, to provide a muted or masked taste of a trial food, to build acceptance of the food within the child’s diet. Broccoli with ketchup still has all the nutrients of this vegetable.

Spice Limits – Think about the spices used when cooking food, and try to limit some spices that are non-preferred, until the child can accept small amounts, that can be increased over time.

Children use their sense of touch to understand their food

“That feels gross! It’s mushy, slippery, sticky, hard, bumpy, etc.” There are many ways that texture food aversions can develop in children. The way they imagine it feels, the way it actually feels, or the way it feels transporting to the mouth. The best way to approach textural aversions is to introduce textures in a less threatening way – by play! 

Always remember when playing with food that the goal is not just to eat, but to interact and build positive associations with food, and become more comfortable with the various aspects of it including texture, shape, color, smell, etc. Let the journey begin with the hands and the eyes. 

Tactile Tips and Tricks

Sensory bins – They are a classic OT tool.

  • Make sensory bins use cooked foods too! Remember if the food is cold, the smell is less intense, or many times there is no odor at all. Try using cooked spaghetti, pasta, rice, or veggies, some crumbled-up toasted bread, bagels, or rice cakes as a sensory bin. Note: Always be cautious when using cooked foods, making it a habit to throw out after play, for safety.
  • Another idea is to make sensory bins containing play items that look like the foods a child has an aversion to. Simulated cooked spaghetti could be a yarn bin, toasted bread could be a cut-up sponge bin, and whipped cream could be a shaving cream or cotton ball bin. In addition, use the typical food items like dry beans, dry rice, dry pasta, graham cracker crumbs, oats, and water, as sensory bins for exploration.
  • Make the bins more appealing by tossing in some fun toys, burying them, use fun voices to talk for the toys, or use a Mr. Munchie Man ball to support fun playtime. Kids love to see Mr. Munchie Man try smelling, kissing, and eating some of the textured items in the bins.
  • Model play, by getting your hands into the bin, getting dirty to show the children this is a fun activity.
  • Another strategy is to give the child utensils to poke around in the texture bins if they are resistant to placing their hands inside. Eventually work toward using smaller utensils and tongs until they become more tolerant and willing to dig in with their fingers and hands.
  • Messy eating is another strategy that can work, too.

Food Presentation Changes

Think about the different ways you can change the texture of foods that children dislike, or change the presentation of the food, by adding something or making it differently.

Some ideas include:

  • Presenting toasted bread instead of soft bread
  • Yogurt with granola instead of plain yogurt
  • Roasted or fried potatoes instead of mashed potatoes
  • Banana slices with granola instead of plain banana slices
  • Sliced or chunked apple pieces instead of applesauce
  • Shredded meat instead of whole
  • Shredded cheese instead of sliced or chunked cheese
  • Covering pancakes with apple butter instead of syrup

Food Art Snack Mats

Grab a few food art snack mats and turn food into playtime fun while exploring textures. 

  • Make a Face using fruit pieces on a laminated placemat
  • Cut out circles to create a space for a plate, cup, and on a paper placemat. Then, add paper forks and spoons. Laminate to create a reusable placemat the kids can decorate.

Non-edible Sensory Recipes

Check out these fun sensory dough recipes, and have fun making something that children can play, with while exploring a variety of textures. These recipes are simple to follow, and make the perfect tactile experience, while also providing ownership of the end product, as they make it themselves.

The recipes include play dough, Oobleck slime, Flubber, kinetic sand, silly putty, and cloud dough.  A variety of textures to explore and digital download includes learning activities related to each recipe too! 

Tips for sensory food issues

A few quick last thoughts on making the journey to mealtime a success for each child. When sensory food issues and challenges arise, keep these things in mind:

  • Always honor the child’s responses to food interactions and be sensitive to their feelings.
  • Never force a child to participate in actual eating of food until they are ready. You can nudge, but never make it forceful.
  • Give the child as much control as possible by letting them make some choices, like what spoon or plate to use, or what beverage they want to drink. Try allowing them to pick their placemat or table cloth for setting their meal.
  • Give them choices that are sufficient enough for their needs, but not overwhelming.
  • Understand and accept that helping a child overcome food sensory aversions will take time and effort as your support each step in their journey. 
  • Keep practicing, and keep working. Even the smallest of steps forward are still a success, and they should be celebrated!

This sensory food issues post is part of a feeding series. Be sure to check out the other posts available on this topic. The Sensory Lifestyle Handbook is a great resource to understanding sensory struggles.
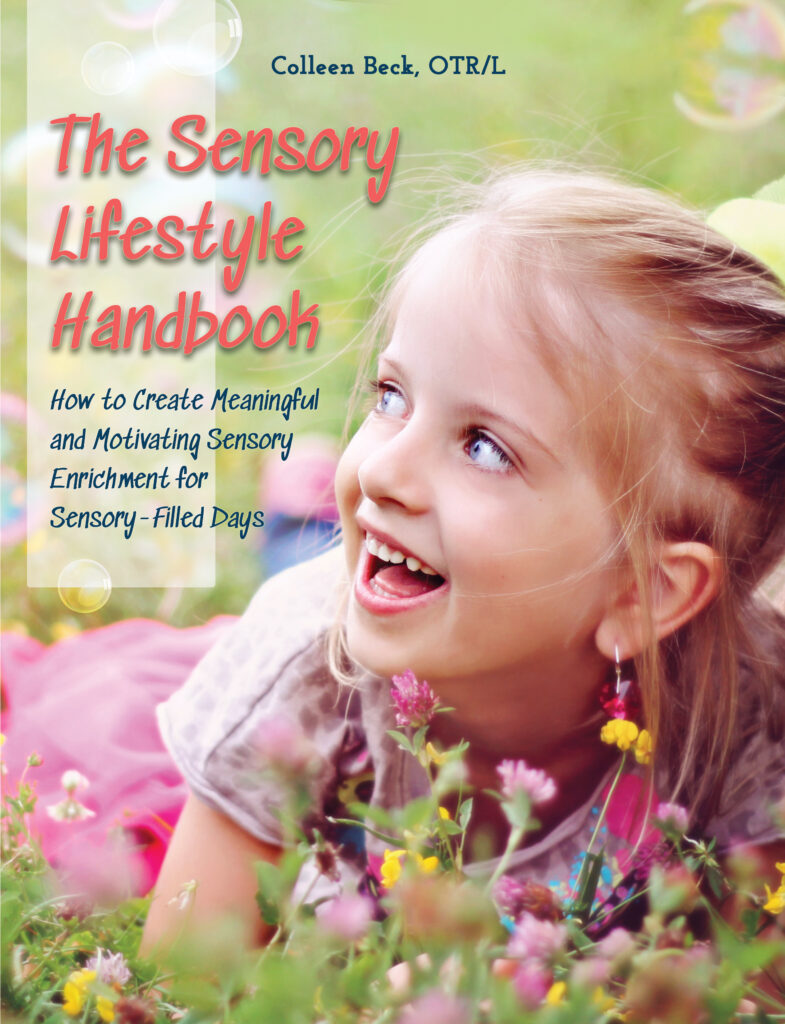
The Sensory Lifestyle Handbook walks you through sensory processing information, each step of creating a meaningful and motivating sensory diet, that is guided by the individual’s personal interests and preferences.

The Sensory Lifestyle Handbook is not just about creating a sensory diet to meet sensory processing needs. This handbook is your key to creating an active and thriving lifestyle based on a deep understanding of sensory processing.
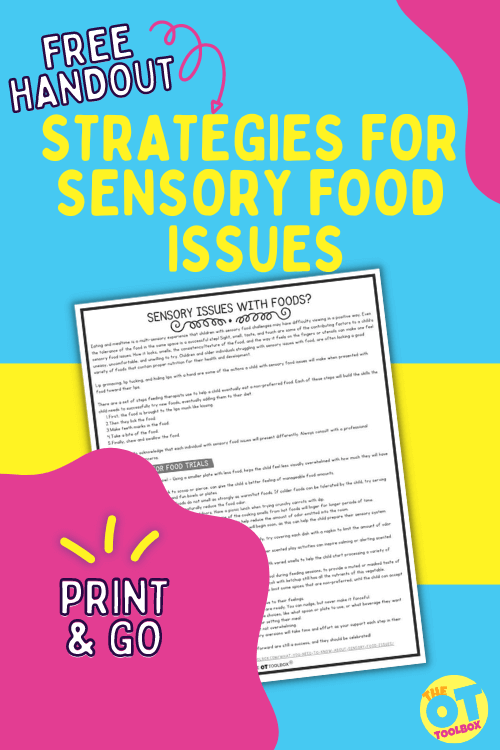
Strategies for Sensory food aversions

Sensory Food Aversion Handout

When sensory food aversion is a real struggle in a household, everyone in the home can be affected. Educating on how to support an individual with sensory food aversions is key.

We’ve created a free handout that does just that. This printable sensory food aversion handout covers the strategies addressed in this blog post as an educational resource. While it’s not intended as a replacement for therapy, the handout covers strategies and supports that can be used along with therapy services and individualized interventions.

Therapy professionals can use this handout as an educational tool to support the needs of families.

Print off this sensory food strategies handout and add the resource to your therapy toolbox.

  1. Enter your email address into the form below.
  2. Check your inbox for the email containing the printable.
  3. Print it off and go!

Or, OT Toolbox Member’s Club members can access this printable resource inside the Member’s Club. Log into your account and head to Educational Handouts. You’ll find the printable there.
Free Handout: Strategies for Sensory Issues with Foods

    We respect your privacy. Unsubscribe at anytime.
    sensory food aversions

    Sensory Food Aversion

    What is sensory food aversion, and how can we “fix” this?  These questions will be answered in this upcoming post. There are many reasons learners are not able or willing to try new foods.  There are many adults that only eat a handful of foods.  This is not news. What is news, is that with the right treatment, and a willingness to change, food aversion is treatable.  The keys are the right treatment, and a willingness to change.  

    What is sensory food aversion?  

    For billions of people, eating is enjoyable and comes naturally.  For the rest, eating is a chore. One research study suggests 35% of Americans consider themselves picky eaters.  In order to provide the “right treatment” it is first important to understand what is going on.  To accurately diagnose a sensory food aversion, it is helpful to rule out what it isn’t. 


    food aversion causes

    When it comes to Sensory food aversions to certain food textures or types of foods, it’s important to rule out medical issues.

    As scary and difficult medical issues feel, apart from eating disorders, they are much easier to treat than sensory based food aversion.  It is akin to prescribing glasses to the visually impaired, rather than enduring months of vision therapy. 

    • Reflux – this condition can cause pain or discomfort minutes or hours after eating. A person may associate this discomfort with a particular food, and avoid it later
    • Vomiting – if you have ever vomited after eating a certain food, you understand this one. Even if it was not the food’s fault, the negative association with the last food consumed can last a long time
    • Tonsillitis – enlarged tonsils can make it feel like the food is getting stuck in the throat, or cause pain/pressure as it passes
    • Eating disorder – ARFID is the term being used for food avoidance.  Avoidance Restrictive Food Intake Disorder is what is often diagnosed instead of picky eating. Anorexia and Bulimia are common eating disorders where the brain isn’t communicating well with the body.  There are mixed messages being sent about body size, the effect of food on the body, or a projected self-image.

    food aversion psychology

    Take into account Social/Emotional Challenges when it comes to sensory food preferences and aversions.

    While these social and emotional challenges are not easy to overcome, they are more straightforward to understand than sensory based eating challenges. 

    • Memories – while some people associate foods with great memories, others associate it with negative experiences. Perhaps this food memory is associated with a medical issue, a food that did not taste right, or a negative eating experience.
    •  Social – eating tends to be a very social event. Eating with friends, eating in front of others, or cooking/serving family and friends. Those with an eating disorder or social anxiety, do not like people to see them eat for a variety of reasons. They may not like watching others eat either.
    • Feeling trapped – once that first bite is in the mouth, there is no going back.  Taking an unknown bite often feels like jumping head first into an icy pool. The risk involved in taking just one bite may be too overwhelming.  Better to stick with the safe crackers instead.
    • Emotions – not being able to eat what others are enjoying can be embarrassing.  It can provoke anxiety, mistrust, frustration, anger, disappointment, or shame. Are these feelings worse when a person avoids the food, or tries and does not like it?
    •  Risk avoidance – Is it better to play it safe, or jump into that icy water? Some people are born risk takers, ready to take a leap, while others prefer to take it slow and just dip one toe in first. Eating something unfamiliar feels risky.

    It might be Sensory Sensitivity.

    Sensory information is bits of data taken in by the sensory receptors. When the information comes in correctly, data is processed, leading to a satisfactory outcome.  When the sensory receptors do not transmit accurate information, trouble ensues.  To the avoider, input can be too noisy, sticky, wet, bumpy, dizzying, heavy, painful, itchy, and 100 other complaints. The seeker, on the other hand, can not get enough input. Things are not loud enough, rough, spicy, hot, cold, exciting, stimulating, sticky, or 100 other needs. The learner who is sensitive may experience the following when it comes to eating:

    • Tactile sensitivity – the mouth has tons of sensory receptors. The sensory receptors send messages to the brain to process the information. For some, the messages come in LOUD.  This food is too sticky, crumbly, soft, gritty, lumpy, dry, or slimy. Touch is not limited to the mouth. The feel of food on the hands can be overwhelming also.
    • Taste sensitivity – there are many different types of taste buds.  Young children have more taste buds than their adult counterparts.  People lose taste buds as they age, possibly making foods more tolerable in adulthood. There are taste buds to register sour, spicy, and sweet. Those taste receptors may be sending messages that register as too sweet, sour, spicy, tangy, salty, bitter, spoiled, or just different.
    • Olfactory (smell) sensitivity – Do you know someone who gags at certain smells? Like the other senses, the receptors in the nose are sending mixed messages. For a foodie, the smell of food cooking is wonderfully intoxicating.  The avoider finds it toxic. Smells may trigger bad memories, signal the brain that it is time to eat, or set off alarm bells. There are some places where food smells seem worse, such as enclosed spaces, (airplanes, offices, cars) or overwhelming places (restaurants, grocery stores, the food court).
    • Auditory – Yes, the sound of food can be a trigger.  It could be the sound of food cooking, or worse, the sounds involved in eating food. Misophonia is a condition of auditory sensitivity that causes rage outbursts, often associated with the sound of people chewing.
    • Visual – How the food appears can be a trigger for many.  It might look “weird or gross” to a picky kid. Just the sight of some foods is enough to turn people off of eating. How easy would it be to eat something that resembled cat food to you?  Watching other people eat is not easy. Some people have terrible eating habits. To someone sensitive, this can easily be another big trigger.

    The seeker craves input, and can not get enough.  Food can be similarly frustrating as it is to the avoider, as the seeker constantly needs something to feel satisfied.

    • Tactile: may play with food, put their fingers in their mouth, eat non food objects, constantly crave food, like cooking with their hands
    • Auditory: these folks love sounds. They like it LOUD. They also do not notice sounds around them.  They are not bothered by their own chewing or gulping, or the noises of those around them
    • Taste: they like it spicy!  The hotter the better.  They like cooking with different tastes and experimenting with foods. These learners like extremes when it comes to foods.  Sour, spicy, hot, icy cold, bitter, mixed tastes, or unusual combinations
    • Visual: the visual seeker loves to surround themselves with input. They are not bothered by bright lights, messes, or visual chaos. They gravitate toward food presentation, watching cooking shows, or simply shopping for food.
    • Smell: seekers in the smell department love the odor of food cooking.  Walking by a bakery is like heaven to them. They tend to smell everything.  Often these smell seekers are unaware of smells around them because it does not register.  They may not notice someone with lots of perfume, a burning smell, or a dirty diaper. 

    Treatment for sensory food aversion

    The first stage of treatment is understanding what is going on.  

    • Help your learner vocalize what they are experiencing. This may feel like a new language for them, so it can take a lot of practice
    • Teach your learner to explore with words, rather than emotions or behavior 
    • Ask questions. What does the food taste like? Is it bitter, sour, spicy, sweet?  How does it make you feel? Are you anxious, frustrated, depressed, angry, or just apathetic about food? What does the food feel like in your mouth? How does it smell?  Try to expand vocabulary beyond “yucky” or “gross”. What can you hear while we are eating?  Try and ask questions to cover all of the senses
    • Present different sensory strategies and input to help your learner understand what is happening and begin to adjust to sensory input. 
    • The book, (Amazon affiliate link) Seeing your Home and Community with Sensory Eyes, is set up in this format to help you understand the how and why these sensory challenges happen, and what to do about it

    The next stage of treatment is balancing the sensory system

    For the seeker, balance may look like adding more of the right input to satisfy the sensory systems.  The avoider will need a dose of systematic desensitization to get the system used to receiving and cataloging sensory input. 

    • Systematic desensitization is a long fancy word for teaching your learner to slowly get used to something.  The Sensory Oral Sequential SOS  method of eating involves slowly desensitizing the brain/body to a new food. It starts with being in the same room as the food, and 27 steps later the food is swallowed.
    • Making small changes to foods, having your learner engage with food, giving them control over food choices is a good start.
    • Tactile – work in and around the hands and mouth. Provide safe choices for touching with the hands such as dry rice, dry beans, sand, play dough, birdseed, shaving cream, or slime. Start with dry textures, moving toward wet and sticky. “Safe choices” refers to something that is not threatening. Playing in birdseed is not threatening to your learner because they know they are not expected to eat it. When comfortable, you can move your learner to engaging with actual food such as whipped cream, pudding, fruits, or a bowl of dry cereal. Decrease tactile sensitivity in the mouth. Use a vibrating toothbrush, an icy washcloth, Twizzlers left out to harden overnight, sour spray, or popsicles to get the mouth used to different temperatures and textures.
    • Auditory – practice listening to different types of sounds and music. There are videos of people eating and chewing to desensitize your learner.  These are difficult to listen to, so wade in slowly. As an alternative, provide noise canceling headphones for a while to help your learner tune out sounds.
    • Visual – check out videos of people eating, food preparation, presentation of foods, cooking channel, kids cooking shows. The idea is to desensitize the learner to reduce triggers.
    • Olfactory – work on smell aversion by providing more smells to balance the sensory system in the nose. These can start out pleasant like lemon or peppermint.  Open the spice cabinet for sniffing. See if your learner can identify items by their smell. Coffee beans are great to have around as they cancel out smells in the nasal passageways.  Once someone is triggered, have them smell the beans to reset their system.
    • Taste – practice tasting and identifying. Make a conscious effort to teach your learner to describe the food.  Try very different tastes.  Some people love spicy foods, others can’t get enough of sour (try Warheads sour spray, or lemon juice).  Different dipping sauces can help.  Ketchup seems to help immensely.  Other dippers could be honey, ranch dressing, mustard, sugar, salt, peanut butter, butter, barbeque sauce, honey mustard, etc.  Many picky eaters do not like spices or anything extra at all.  Be mindful of this. If this is the case, serve very plain foods for a while.  Mixed textures are more difficult to tolerate as they have several different tastes in one. The temperature of food can have different effects.  Some picky eaters like everything at room temperature.  Not too hot or cold for these folks.

    Other strategies to treat sensory food aversion:

    • Keep a food log of what foods are consumed, how they are tolerated, and the response to input. The food log may show similarities and patterns. 
    • Try and work through unusual eating habits such as no food touching, eating all of one food before the others, needing a certain cup/plate/bowl, not being able to pick up finger foods, or refusing to go places that serve food.  While these are not life threatening, they are noticeable and can be changed to be more socially acceptable.
    • Have one meal a day reserved for feeding therapy. The other two meals can be as the learner likes it.  This alleviates some pressure for the learner and their family.  
    • Put foods on the plate and announce they are just there for show.  You don’t expect them to be eaten. Sometimes taking the pressure off of trying allows learners the freedom to try
    • Serve small portions so that sensory receptors are not overwhelmed with too much visual, auditory, or olfactory input. 
    • If your learner is sensitive in many sensory categories, it might be wise to limit stimuli in one or more areas while working on another.  Some examples would include;  noise canceling headphones, having your learner eat without an audience, limiting overwhelming smells, providing utensils and non finger foods. 
    • Take a food vacation sometimes. Once in a while it is ok to just leave this condition at home.  Pack a sandwich if you are going somewhere that offers no favored foods. Let your kid survive on bread rolls for a week on vacation. This is hard to do, but worth it in the long run.  Just don’t make it part of the norm to avoid food tasting. 

    For the non “foodie” this condition is exhausting.  It feels like mealtime comes around 18 times a day.  One meal is finished, and it is time to start working on the next. Enjoyable events like birthday parties and family gatherings evoke anxiety because of the food being served, rather than feelings of happiness. Start by understanding what is happening, talking about it, then finding the right treatment for the learner with sensory food aversion. 

    Regina Allen

    Regina Parsons-Allen is a school-based certified occupational therapy assistant. She has a pediatrics practice area of emphasis from the NBCOT. She graduated from the OTA program at Caldwell Community College and Technical Institute in Hudson, North Carolina with an A.A.S degree in occupational therapy assistant. She has been practicing occupational therapy in the same school district for 20 years. She loves her children, husband, OT, working with children and teaching Sunday school. She is passionate about engaging, empowering, and enabling children to reach their maximum potential in ALL of their occupations as well assuring them that God loves them!

    Note: while this post refers to children, people of all ages and stages suffer from sensory food issues. Many of this information pertains to any age, and can be used for different age groups.
    DIR Floortime and Floor Play

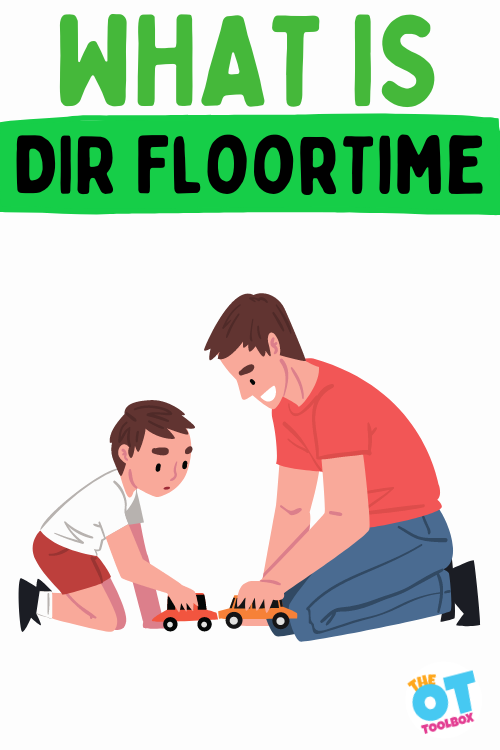
    DIR Floortime

    Have you heard of DIR Floortime as a tool for helping children thrive and achieve their greatest potential?  Occupational therapy professionals often use Floortime, or the DIRFloortime (or Floortime for short) as one of the tools in their therapy toolbelt. The fact is that floor play for infants, babies, and toddlers is so effective in many aspects of play, but we wanted to cover a bit more about the Floortime approach to development and learning.

    In this post we will explore the various types of floor play, including DIR Floortime, for children of all ages, as well as explain why playing on the floor with your child is important. Play age and stage of development guides DIR floortime as well as floor play in a general sense.

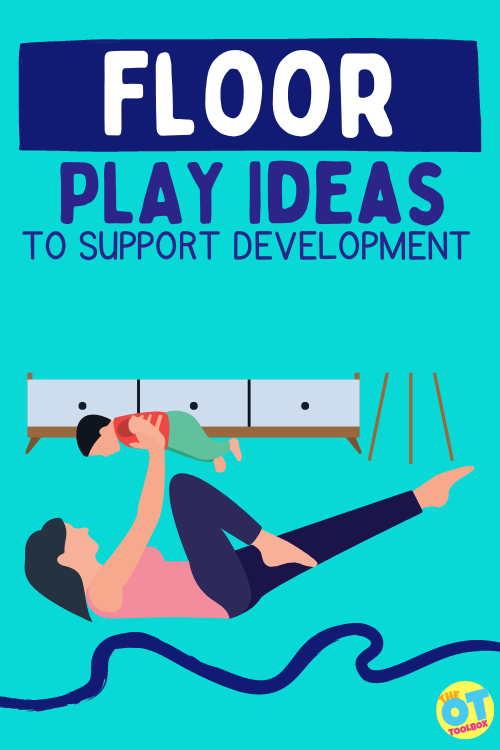
    What is Floor Play?

    First, let’s cover what we mean by floor play. In this blog post, what we mean by floor play is just that: play on the floor!

    Children will play just about anywhere – most are skilled at making any landscape their personal playground. The most commonly accessible playground, however, is the floor! So much play and movement can happen on the floor, which makes it a perfect location for developmental milestones to occur in little ones. Older children continue to be drawn to the floor as they sit down to play with trucks, dolls, and build forts.

    When babies and infants are on the floor, they can develop and learn during tummy time, but also while on a play mat in a variety of positions.

    Older babies strengthen their bodies and learn how their movements are in their own control while playing on the floor. They learn about the world around them this way. They gain motor skills and begin to engage with toys through play on the floor.

    Toddlers develop social emotional skills, refined motor skills, strength, coordination, and eye-hand coordination skills through floor play.

    Older children build more strength, endurance, postural control, social emotional skills, confidence, self-regulation, and executive functioning skills through floor play.

    There are so many benefits to getting down on the ground with your child an engaging in floor play, no matter the age!

    Related, this article on parallel play describes additional information on play at different ages and stages.

    Floor Play For Babies

    Why should I put my baby on the floor? Isn’t it dirty? How do I keep them safe down there? 

    Check out this post on Floor Play for Babies for a specific floor play idea for young children.

    For young children, movement may be reduced as a result of placing babies in “containers” or seats. This limited movement opportunity can impact typical development and reflex integration.

    Floor Play Activities

    Isn’t it dirty? Some floors are dirty. Some houses have dirt floors. Never take for granted that your patient has a great/clean environment to play on the floor. Provide a washable tablecloth, sheet, blanket, or large mattresses on the floor to encourage movement.

    In fact, playing on the floor with our children is so important that a model was born from it, called DIR Floortime. 

    What is DIR Floortime? 

    DIR Floortime stands for Developmental, Individual-Differences, and Relationships. It is a model used primarily to guide caregivers of children with Autism Spectrum Disorder (ASD). As you can imagine, this model guides parents to use the most important place for child-led play,…the floor! 

    The DIR Floortime model emphasizes the importance of following a child’s lead, joining them on the floor, at their height, playing with them based on their choices.

    dir floortime is different than other programs

    Many programs for Autistic children are designed to help them change, in order to act more like children without Autism. However, this can be an area of concern. Floortime therapy encourages acceptance and appreciation of who the child is, and highlights that caregivers can best support the child by following their lead.

    Through this type of interaction, caregivers can build strong relationships, and improve the social-emotional skills of the child. 

    DIR Floortime training is a certification process that teaches and promotes an approach to intervention. The training is appropriate and targeted for therapy professionals working in preschool through school-aged students. Through the DIR/Floortime principles, therapy professionals learn and intervene through practice, self-reflection, and mentorship, while meeting the needs of their clients in different environments and settings.

    Although DIR Floortime interventions are primarily used as a model to better understand and build relationships between an ASD child and their caregiver, I find it a great model for any child-adult relationship.

    Learn more about DIR Floortime principles on their website

    Playing on the floor with your child not only leads to gains in motor development, but as DIR Floortime and various researchers report, playing on the floor is also integral to the development of social and emotional skills! It’s a win-win-win. 

    floor time Activities by Age:

    As your baby ages into a toddler and into a child, they will continue to benefit from playing on the floor with you.

    Infants and Babies

    Floorplay activities for babies is a good resource to check out when it comes to development and the infant/baby. It’s during the early years that the young baby support development of motor, sensory, and cognitive skills. It’s important to engage with your baby during floor play time, both when laying in tummy time or on their backs or sides.

    Babies should be interacted with during floor time play, and not just placed on the floor with some toys or a play mat.

    Some activities for this age include playing on the floor and engaging with baby by:

    • Singing songs
    • Getting close to baby’s face and making eye contact
    • Baby massage
    • Rubbing baby’s back while humming or singing

    During the vast stages of baby development, floor play is about engaging with your little one. Tummy time can still be a challenge for this age, but keep going! This is a great age to engage with eye contact, physical contact while supporting emotional development and continued motor and cognitive skills.

    Spend a lot of time talking to baby during floor play. Use different tones of voice, and make sounds with your mouth and tongue when talking and playing to baby. This is a great way to develop auditory processing skills, too.

    Floor play during the first year can include (among many other play ideas) a means for motor skill development too:

    • Play mats
    • Toys scattered on the floor to encourage reaching, rolling, and sitting
    • Sing and speak nursery rhymes and gently move baby’s arms and legs during floor play
    • Supporting baby on lap and reading books, talking, and interacting/engaging with baby
    • Mirror play

    For older children: toddlers, preschoolers, and older kids, floortime is a fantastic way to support development through engaging with the little one in a respectful and playful way. Floorplay is fun! It’s a joyful way to support a young child’s development.

    When it comes to specific activities and play ideas, the most important thing to remember is to make the play time meaningful. This looks like themes or activities that align with the individual’s interests.

    Consider the following when coming up with floor time activities:

    • Favorite topics
    • Favorite characters (from TV, movies, books, games, videos, etc.)
    • Favorite colors
    • Preferred activities
    • Sports
    • Seasonal activities

    While floortime can cover any topic or theme, the most important piece is getting down on the floor with the child and playing! Let the play be guided by the child and

    the best part of floor play

    The best part of floor play, is how easy and inexpensive it is to support your child by playing on the floor with them. You don’t need the “best” toys or even any traditional toys at all. Your body, voice, household objects (blankets, paper, remote control, books), creativity, and a positive attitude will go for miles.

    For even more ideas of how to play with your infant or child on the floor, check out this great post for toddler play ideas.

    Sydney Thorson, OTR/L, is a new occupational therapist working in school-based therapy. Her
    background is in Human Development and Family Studies, and she is passionate about
    providing individualized and meaningful treatment for each child and their family. Sydney is also
    a children’s author and illustrator and is always working on new and exciting projects.

    Life Skills – Cooking Activities

    Life skills cooking

    Life skills-cooking does not mean learning to make gourmet meals.  It means meal preparation to survive. No teenager should go off to college without the means to cook Ramen, macaroni and cheese, cereal, and a peanut butter and jelly sandwich.  Add pizza and Taco Bell to their meal plan, and voila, a complete teenage diet! Life skills tasks like cooking is an essential Instrumental Activity of Daily Living that occupational therapy professionals address.

    The goal for any caregiver should be to help their child be independent enough to live alone, or at least care for themselves. 

    Learning independence and life skills, starts at a very young age.  Toddlers learn how to dress themselves, basic hygiene, and where to put their belongings. As they become school aged, children need to learn higher level life skills such as laundry, cleaning, grooming, and cooking. 

    For some kids that struggle with manipulating utensils as a result of fine motor, visual motor, or cognitive skills, these cooking activities can support development. This is especially true with learning to hold a fork and spoon as well as using utensils to self-feed and cut with a knife and fork, safely.

    Life skills cooking checklist, recipes, and tips

    Life skills Cooking activities

    Life Skills Cooking activities not only teach important meal preparation, they address a wide variety of areas.

    We’ve covered a bit about the benefits of cooking in previous blog posts:

    1. Develop motor skills through cooking
    2. Executive function skills through cooking
    3. Learn math skill through cooking

    And, these areas are just the beginning. Some other important areas of development that occurs through cooking tasks include:

    • Measuring items involves math, computation, dexterity
    • Reading a recipe – scanning, reading, decoding, processing language
    • Following directions including sequencing, working memory, problem solving  
    • Fine motor skills are needed to use utensils, cut with a knife, stir, scrape with a spatula, use tongs, crack eggs, spread an item, or scoop food
    • Bilateral coordination – pouring from a container, holding an item while cutting with the other hand, holding a pan steady while stirring or flipping objects, opening containers, putting items together
    • Attention to details, timing, frustration tolerance, organization

    The thing about cooking and baking tasks is that these are daily life skills that need to be done to survive. Then there is the cleaning aspect of cooking tasks. These chores can be complicated by executive functioning skill deficits. Check out our resource on chores and executive functioning skills for support.

    The OT Toolbox has an informative post on teaching Following Directions using Cooking

    The amount of skills addressed during cooking activities is a great incentive to use them in your treatment sessions, while working with learners of all levels.  While it is not essential for all of your learners to be able to bake a cake, look at all the skills it addresses!

    Sometimes I ask myself why I am teaching a learner to bake a cake, when it is not a basic necessity.  Then I am reminded of the core skills it teaches to be able to move onto higher level cooking activities. 

    A learner who can not follow a basic recipe on a box, will struggle to read from a cookbook.  Someone who can not mix two to three ingredients, will struggle to work with seven in a salad.

    The OT Toolbox has a great collection of resources called, Cooking with Kids.  It is full of recipes and cooking ideas.

    It’s great when you find recipes that have different steps that can be offered to kids when helping in the kitchen. For example, our Greek turkey burger recipe has different steps that can be offered to target specific skills: chopping, slicing, stirring, mixing, scooping, grilling.

    Life Skills Cooking ideas

    Use these ideas as cooking tasks for learners to start off with. The cooking tasks listed below are great beginner cooking tasks to support development.

    • Cake from a mix- easy to follow directions with minimal ingredients. Tasty results!
    • Muffin mix- Martha White and Jiffy Mix often just call for milk and possibly an egg
    • Macaroni and cheese- this works on a plethora of skills as mentioned above, it is yummy, and a staple for children and young adults. Add some meat and a vegetable, and your learner can have an entire meal
    • Cookies- start with the ones that are pre formed, or slice and bake
    • Ramen Soup- what could be simpler than heating noodles and water on the stove or microwave?  Again, easy to learn, low cost, filling, delicious, and can be served plain, or with add-ins such as meat or veggies
    • Pancakes and waffles are a great staple that work on many skills, using limited ingredients. You can use a mix to grade down the activity or use a homemade pancake recipe to offer more opportunities for measurement and pouring.
    • Sandwich preparation– Sandwiches are a great basic item that involves problem solving, sequencing, following directions, and fine motor skills.  This is a safe option for learners to make on their own, as they do not have to use a heating element, and can spread items with the back of a spoon instead of a knife for added safety.
    • Frozen dinners- early or lower level learners may need to spend time working on making frozen dinners using the microwave.  While this seems like a simple task, it still involves several steps, including problem solving and judgment. 
    • Rainbow Smoothie- This is a great way to add different fruits as nutrition but also a way to practice slicing bananas, chopping different textures, pouring liquid, managing buttons on a blender, and using safety strategies: blender buttons, placing the lid, using a knife, reaching into a blender, plugging in a kitchen utensil, washing dishes, etc.

    Beyond the Basic Cooking Activities

    Once your learner has mastered a few basic skills, it might be important or relevant to teach these next level skills.  If your learner is not likely to ever need these skills, you can continue to work on mastery of basic food items.

    • Cooking vegetables like potatoes, carrots, broccoli
    • Grilling meat, either on an actual grill or countertop grill.  The George Foreman grill is relatively easy to use
    • Using a crock pot to make a soup or stew
    • Baked goods: making cookies or muffins from scratch
    • Cooking meals that involve more than one pan. Learning to time spaghetti and sauce, or meat and vegetables

    Sensory Based life skills Cooking Activities

    Cooking is a great way to engage sensory seekers and avoiders.  It is helpful to work with picky eaters on cooking, as well as those with tactile sensitivity. Making food can be motivating. as your learner may be more excited to try something they have created.

    • Pizza – mixing, kneading, rolling, pounding, stretching the dough. Touching the toppings adds different sensory components
    • Pretzels – similar to pizza, learners have fun creating pretzel shapes
    • Cut out cookies – rolling, cutting, sprinkling, and tasting
    • Meatballs – mixing, rolling the meat into balls
    • Salad – handling different items, cutting, sorting, and preparing
    • Lasagna – while this might not be a young learner’s favorite, it is a messy task that involves several textures

    Tips and Strategies for teaching Life Skills cooking

    These tips are helpful for all learning, not just cooking.

    • Break the tasks down into smaller chunks to make them more manageable. The learner may not be able to do all the cooking, but can probably stir items in a bowl or pour ingredients
    • Choose times for learning when there is not a rush.  Learners cannot work under pressure
    • Set realistic expectations.  Your two year old might not be able to make a sandwich independently.  That’s ok, they can help find the ingredients
    • Accept mediocracy.  Learn to accept food might not look or taste the best.
    • Before starting, think about any sensory/motor/logistical components of the task and problem solve through them
    • Backward or forward chain. Backward chain would be to do all of the work for your learner, then have them come in and finish the final step. This offers a sense of accomplishment.  Forward chaining is having your learner do the first step, just before they become overwhelmed, you finish for them.  This gives confidence that they can do some of the tasks, if not all
    • There are many steps for a learner to remember during any life skills task
    • Minimize distractions and sensory input prior to starting
    • Stay calm and do not add more pressure
    • Let your learner do for themselves, only intervene when they start to get upset. Do not rush to fix everything so quickly. They will not learn that there is a problem if you constantly fix the errors before they notice the problem
    • Give the learner opportunities to be independent, even at a small task

    If your learner has sensory related concerns, the OT Toolbox has a great resource called the Sensory Lifestyle Handbook, with checklists and strategies to weave sensory activities into your learner’s day

    Life skills checklist

    Cooking skills can be developed from a very young age. These cooking tasks listed below promote cognitive development, direction-following, decision making, motor skill work, and many other areas.

    Important things to note:

    We’ve separated these tasks into ages, but this is a generalized list of ages. Some kids will not accomplish the tasks listed below, and that’s ok! It’s a way to know where and when to work on age-appropriate cooking activities with kids.

    This list is also not necessarily guided by age. While ages are listed below, the cooking tasks can be viewed as a sequential progression based on cognitive skills needed, safety considerations, executive functioning development, etc. Look at the list as a guide to progress toward life skills achievement in the area of cooking skills.

    When you view the cooking life skills checklist below in that way, it can be used to support life skills development for any age, including teens, adults working toward more independence with cooking abilities.

    Toddler Cooking Skills

    Generally these tasks can be accomplished from 1-2 years of age, during the toddler years.

    • Help rinse fruit and veggies
    • Pour with assistance
    • Tear lettuce and other leafy foods
    • Stir with assistance
    • Brush butter or olive oil on foods
    • Retrieve and sort ingredients in the kitchen
    • Sort ingredients
    • Turn pages in recipe book
    • Obtain utensils when setting the table
    • Help identify items in the grocery store
    • Help wipe up safe spills
    • Drain small canned foods with drainer
    • Sprinkle seasonings or cheeses
    • Dipping food items into sauces, oils, etc.
    • Learn essential safety rules in kitchen
    • Open/close cabinet doors and drawers

    More specifically, some cooking skills broken down by age include:

    2 Years

    • Stack cups
    • Place utensils into a basket or caddy (not sorted)
    • Wipe up spills with direction and support
    • Bring dinner plate to sink
    • Passive participation in cooking (playing in the kitchen while an adult is cooking)
    • Pretend play cooking with toys, kitchen toy set, etc.

    Preschool Cooking Skills

    During the preschool years, young children are developing more motor skills, behavioral and emotional regulation, and cognitive processes. These relate to less support with some of the previous tasks, as well as more independence with others.

    Some ways your preschooler can help in the kitchen:

    • Rinse fruit and veggies
    • Pour liquids and dry ingredients with assistance
    • Tear lettuce and other leafy foods
    • Stir with assistance
    • Brush butter or olive oil on foods
    • Retrieve and sort ingredients in the kitchen
    • Sort ingredients
    • Obtain utensils when setting the table
    • Help identify items in the grocery store
    • Find recipe in recipe book
    • Help wipe up safe spills
    • Drain small canned foods with drainer
    • Sprinkle seasonings or cheeses
    • Dipping food items into sauces, oils, etc.
    • Learn essential safety rules in kitchen

    Broken down into age group, try using these cooking tasks to develop skills:

    3 YEars

    • Sort utensils into a caddy
    • Help set the table, using support and visual/verbal cues
    • Wash hands before a meal
    • Help clear the table
    • Pretend play to feed and cook for baby dolls or toys

    4 Years

    • Set the table
    • Dry dishes (non-breakable)
    • Pour water from a pitcher into cups (not filled completely) with spilling
    • Help with cooking with one step directions: gathering ingredients, pouring, mixing, kneading, stirring at a counter
    • Cut dough with cookie cutters

    5 Years

    • Help to make snacks
    • Scoop dry ingredients
    • Open containers with assistance
    • Slice bananas or other soft fruits

    Elementary Cooking Skills

    As children gain more precision and dexterity, as well as ability to read and write, they gain more independence in cooking tasks. These activities can be a great help around the home as the child aged 6-8 helps out in the kitchen.

    • Cut and dice fruits and vegetables
    • Use the toaster
    • Crack eggs with some shells
    • Preheat the oven
    • Use a can opener
    • Use a peeler and corer for potatoes and apples
    • Spoon and place food items into pans or trays
    • Begin to stir food on stovetop with supervision
    • Help make the grocery list
    • Clean up simple to moderate spills
    • Transfer food bowls and plates to table
    • Help make a grocery list and identify food items at the store recognizing cost 
    • Begin to read recipes and follow the steps with guidance
    • Whisk and if older, use a mixer with guidance
    • Use the microwave with support
    • Help load and unload the dishwasher

    Broken down by age, these cooking tasks can look like:

    6 Years

    • Empty dishwasher and put away dishes
    • Pour water, milk, or juice without spilling
    • Put away groceries
    • Make a simple snack
    • Pack a basic lunch
    • Make sensory play recipes like slime, goop, oobleck, etc.

    7 Years

    • Mix, stir and cut with a dull knife
    • Pour cereal and milk into a bowl

    8 Years

    • Load the dishwasher
    • Spread peanut butter on bread
    • Read and follow a basic recipe
    • Make a grocery list
    • Crack an egg

    Older Kids Cooking Life Skills

    The cooking tasks listed below can be started with older kids. This list is a great place to start for the teen or young adult who hasn’t had much experience in the kitchen. For graduates heading off to college, or the young adult going out on their own, go through this list to ensure life skill development in the kitchen:

    9- 12 Years

    • Make scrambled eggs
    • Cook hot dogs
    • Read and understand nutrition labels
    • Plan a balanced, healthy meal for the family
    • Write down a recipe
    • Complete cooking tasks in a certain amount of time
    • Use a microwave with assistance
    • Cut, slice, and dice fruits and veggies
    • Crack eggs without shells
    • Use a can opener, peeler, grater, whisk, and corer
    • Drain larger food items
    • Follow basic recipes
    • Complete baked good recipes with guidance
    • Make sandwiches and salads
    • Use stove top to complete simple frying such as grilled cheese and eggs
    • Stir and sauté foods on stovetop with supervision
    • Help plan and develop a grocery list
    • Clean up advanced spills
    • Transfer some hot food bowls and plates to table
    • Help to identify food items at the store recognize cost 
    • Begin to read recipes and follow the steps with guidance
    • If older, use a mixer with guidance
    • Use the microwave with guidance
    • Load and unload the dishwasher

    13 Years and older

    • Slicing raw meats with various knives and utilizing hygiene safety
    • Chopping ingredients using various knives
    • Using stove top and oven
    • More independence with making recipes
    • Using various kitchen appliances such as mixers, blenders, grills, wok, grater, etc.
    • Complete operation of dishwasher
    • Frying foods on stove top
    • Use a peeler, chopper and corer
    • Retrieving hot items from stove top and oven with oven mitts
    • Planning a meal, building a grocery list, and shop with guidance in budget awareness
    • Clean up significant spills utilizing proper sanitation
    • Transfer got food bowls to table
    • Reading and completing multi-step recipes

    Here is another great checklist from the Focus on the Family website. 

    Common Pitfalls with Cooking tasks

    There will be roadblocks with unexpected twists and turns along the way.  Expect these, and learn to adapt quickly as needed. Here are a few:

    • What if the timer goes off but the item is not yet ready?
    • The timer has not gone off yet but the item is clearly burning
    • Your learner adds too much or little of an ingredient (hopefully they will learn from mistakes or the item will still taste ok)
    • There are multiple items to attend to at once, and your learner forgets something
    • The item ends up a complete disaster
    • You realize there are some serious safety concerns (learner does not understand how hot something is, or how to handle hot objects)

    These examples come from my personal experience.  I did not think of these variables that ended up happening in my sessions. I had to learn to let go of some control, as long as my learner was safe. There were definitely some mistakes and disasters.  

    True story: I worked with a sixteen year old for several months.  One of her main goals was life skills cooking.  She had difficulty with problem solving.  I decided to let her make mistakes, so she could learn from them.  I figured that a cup of salt instead of sugar, or a cup of oil instead of a quarter cup, would ruin an item enough to teach her to be more careful.  It turned out by some miracle, each of these items turned out ok!  They tasted fine to her, and she could not tell there was a mistake.  That was one of those life lessons for me, to learn to back up and let go of some control.

    Cooking Tips

    • Start early
    • Practice
    • Be realistic (your learner may never want to learn to cook more than Ramen, PBJ and Mac&Cheese)
    • Create room for error and problem solving
    • Mix things up so your learner can learn to be flexible
    • Do not be that parent who sends their teenager off to college with zero life skills
    • Even the lowest level or smallest learner can often help with some part of the task if they can not do it themselves (I work with a boy whose job is to watch the baby and yell when she wakes up)
    • Cooking with learners can be a fun AND yummy treatment session!
    • Use a picture story sequence to work on individual tasks of cooking. This is a great strategy for all aspects of cooking life skills!

    For the record, my daughters went to college well prepared in the life skills department. The common sense department was clearly lacking (the prefrontal cortex does not develop until mid 20’s).  My stepson, on the other hand, has neither life skills, nor common sense.  Bless his heart!

    Victoria Wood, OTR/L is a contributor to The OT Toolbox and has been providing Occupational Therapy treatment in pediatrics for more than 25 years. She has practiced in hospital settings (inpatient, outpatient, NICU, PICU), school systems, and outpatient clinics in several states. She has treated hundreds of children with various sensory processing dysfunction in the areas of behavior, gross/fine motor skills, social skills and self-care. Ms. Wood has also been a featured speaker at seminars, webinars, and school staff development training. She is the author of Seeing your Home and Community with Sensory Eyes.

    NOTE*The term, “learner” is used throughout this post for readability.  This information is relevant for students, patients, clients, preschoolers, kids/children of all ages and stages, or whomever could benefit from these resources. The term “they” is used instead of he/she to be inclusive.

    Types of self control

    Types of self control

    Did you know there are several types of self-control that impact the way we act, behave, speak, and move? These types of control impact how we learn, communicate with others, and function in our daily tasks. There is more to self control than controlling impulses and self-regulation. Understanding these various differences can make a difference in learning how to stop and think, and gain self control in daily occupations.

    In this article, we will break down what the components and types of self-control are, and provide you options on how to improve this important skill. 

    Types of self control

    WHAT IS SELF-CONTROL?

    Before we can dive into each type of self-control, let’s define it at its basic level. 

    The definition of self-control is a component of inhibitory control, and refers to the ability to regulate one’s emotions, thoughts, and behavior based on and as a result of external and internal temptations and impulses. Self-control is an executive function and is a cognitive process that is necessary for regulating one’s behavior in order to achieve specific goals.

    Break down of Self-control: 

    An executive function that gives the…
    Ability to regulate emotions, thoughts, and behaviors…
    With consideration for temptations and impulses…
    In order to achieve goals.

    3 TYPES OF SELF CONTROL

    Although different sources may describe self-control in different ways, most can agree on 3 types of self-control. 

    Impulse control is one type of self-control

    1. Impulse Control

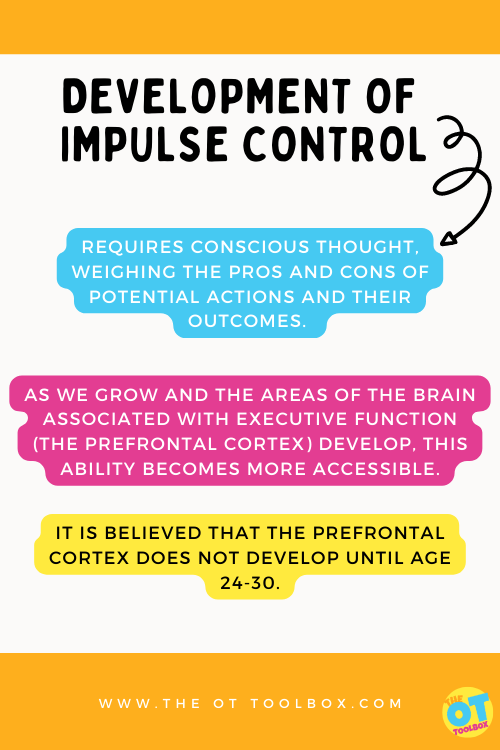
    Impulse control requires conscious thought, weighing the pros and cons of potential actions and their outcomes. For young children, this is nearly impossible. As we grow and the areas of the brain associated with executive function (the prefrontal cortex) develop, this ability becomes more accessible.  

    It is believed that the prefrontal cortex does not develop until age 24-30. Now you understand why teenagers and college students are so impulsive!

    Poor Impulse Control

    Impulsivity, or acting before thinking, is caused by a lack of impulse control. In children, this may be seen as over-eating preferred foods, blurting out answers in class, interrupting others, or acting out in aggression.

    More about what impulse control is here! Additionally, these impulse control strategies will get you started on addressing this area.

    Emotional control is one type of self-control
    1. Emotional Control

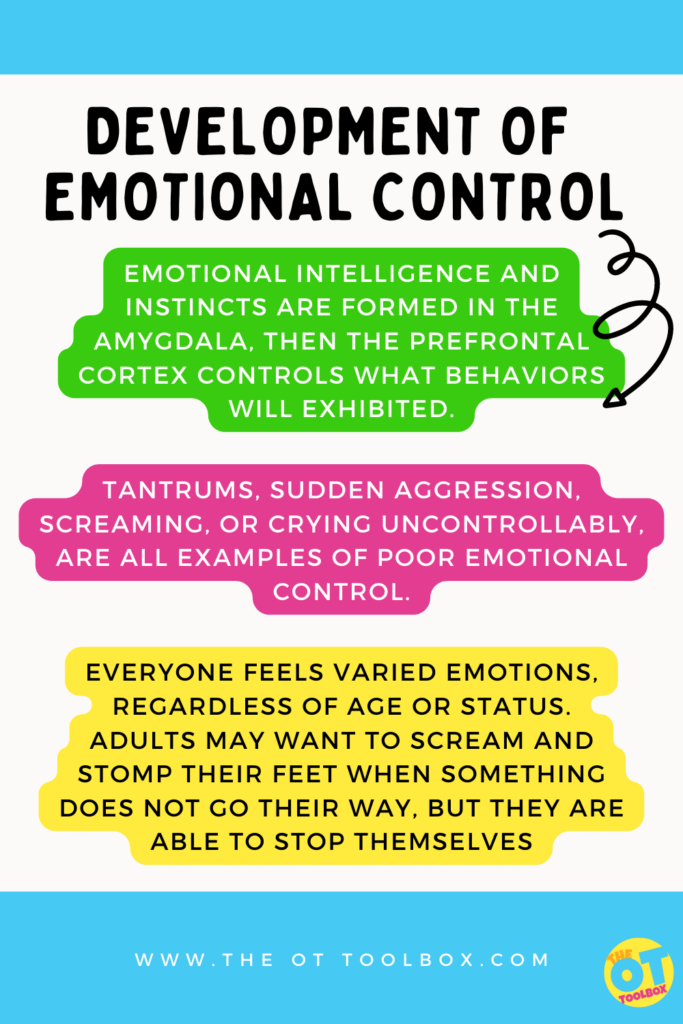
    Everyone feels varied emotions, regardless of age or status. Adults may want to scream and stomp their feet when something does not go their way, but they are able to stop themselves, as such actions would be inappropriate. In fact, they are most often able to stop inappropriate actions, and choose the appropriate emotional response. 

    Emotional control is the result of a collaboration in the brain. Emotional intelligence and instincts are formed in the amygdala, then the prefrontal cortex controls what behaviors will exhibited. As with impulse control, young children will need time and education, in order to use their thinking brains to stop and control their emotional behaviors.  

    Poor Emotional Control

    Tantrums, sudden aggression, screaming, or crying uncontrollably, are all examples of  poor emotional control. Usually it is young people who struggle with poor emotional control. Some adults, particularly those with mental health conditions, may also have limited emotional control. 

    When emotional control is limited, actions may be driven by emotions, not logic. Negative outcomes, that jeopardize health and safety, may ensue. 

    Motor control is one type of self-control
    1. Movement Control 

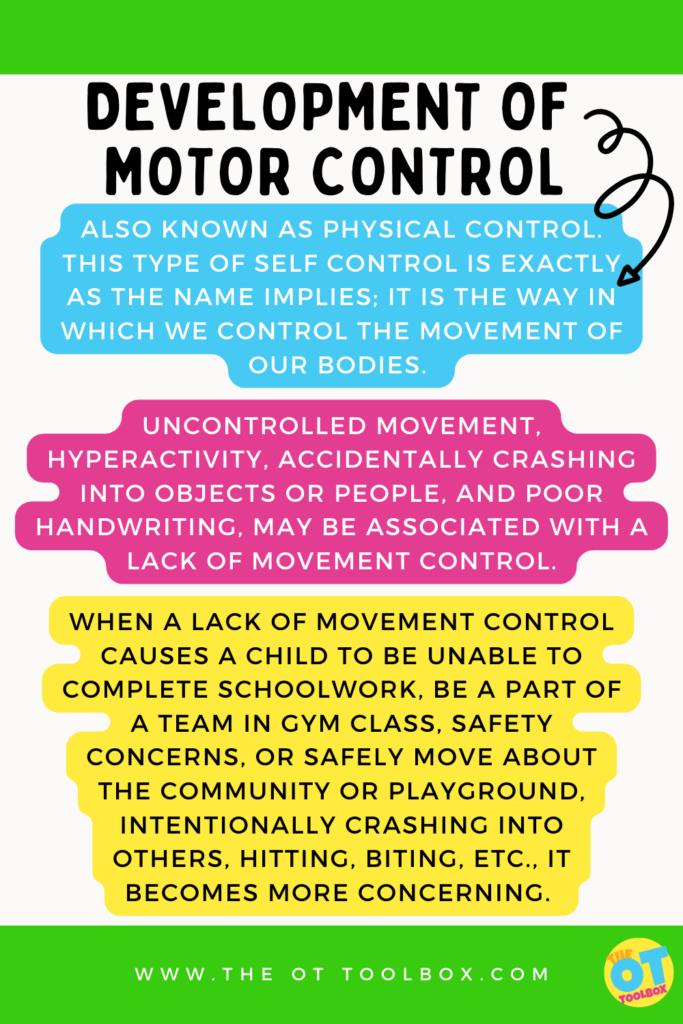
    Movement control, also known in the literature as physical control, is one of the lesser known aspects of self-control. This type of self control is exactly as the name implies; it is the way in which we control the movement of our bodies. 

    The OT Toolbox covers the impact of poor self-control and resulting behavior, in this resource titled attention and behavior. The blog covers safety issues such as darting into a parking lot, touching a hot stove, and other movement related self-control situations.

    Good movement control may be observed when a child sits upright at their desk, quietly, without extraneous movements, clearly ready to learn. Many people in organized sports also have good movement control, as they practice drills, and coordinate their bodies in order to meet a common goal. 

    Poor Movement Control 

    Uncontrolled movement, hyperactivity, accidentally crashing into objects or people, and poor handwriting, may be associated with a lack of movement control. Having some wiggles before recess, then being able to sit still afterwards, does not pose an issue for most. In fact, it is pretty typical to need movement breaks throughout the day. 

    When a lack of movement control causes a child to be unable to complete schoolwork, be a part of a team in gym class, safety concerns, or safely move about the community or playground, intentionally crashing into others, hitting, biting, etc., it becomes more concerning. 

    Resources TO IMPROVE SELF-CONTROL 

    All children should be taught self-control. It is not something that they just inherently “know”. It is a complicated subject, that requires positive adult modeling, education, and of course, practice! 

    The OT Toolbox has tons of great posts on the types of self control and its impact:

    Do you think that self-control should be taught in schools? There is already so much on our educators’ to-do list, but this one may be worth integrating.

    Here’s why: Self-control is integral to the ability to learn and apply knowledge, but it is also important to a healthy social life, too!

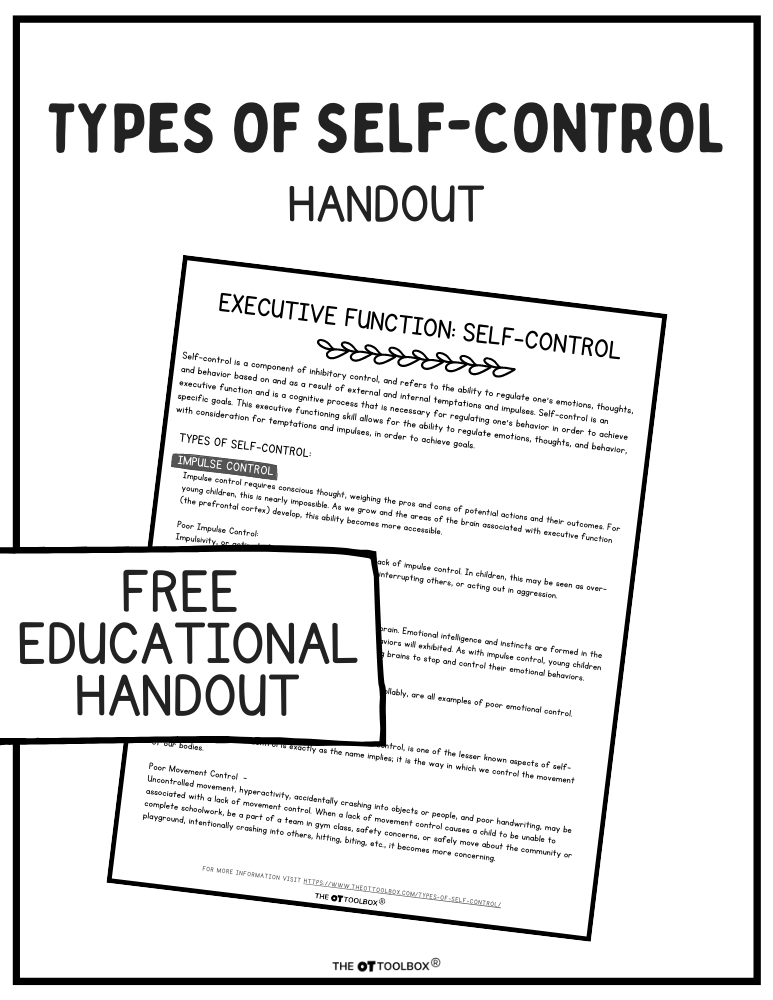
    Types of self-control information handout

    Free Handout: Types of Self-Control

    Education supports advocacy! The information in this blog has been created into a handy handout, designed for advocacy and education on the types of self-control. These aspects of executive functioning are not always connected as an executive functioning skill, so that’s where this handout comes into the picture.

    Want a copy to add to your therapy toolbox? Enter your email address below. You’ll receive a copy in your email inbox.

    This resource is also available inside The OT Toolbox Member’s Club. Members can easily access this printable as well as all of the other of free downloads on the site. No need to enter your email address for each one. Simply head to the dashboard page, go to the Educational Handouts toolbox, and print and go!

    Free Handout: Types of Self-Control

      We respect your privacy. Unsubscribe at anytime.

      Sydney Thorson, OTR/L, is a new occupational therapist working in school-based therapy. Her
      background is in Human Development and Family Studies, and she is passionate about
      providing individualized and meaningful treatment for each child and their family. Sydney is also
      a children’s author and illustrator and is always working on new and exciting projects.

      Impulse Control Journal the OT Toolbox

      The Impulse Control Journal…a printable resource for helping kids strategize executive functioning skill development. When saying “calm down” just isn’t enough…

      When a child is easily “triggered” and seems to melt down at any sign of loud noises or excitement…

      When you need help or a starting point to teach kids self-regulation strategies…

      When you are struggling to motivate or redirect a child without causing a meltdown…

      When you’re struggling to help kids explore their emotions, develop self-regulation and coping skills, manage and reflect on their emotions, identify their emotions, and more as they grow…

      Grab the Impulse Control Journal to build organizational strategies, planning, prioritization, habits, and mindset in kids.

      Co-regulation

      In this blog, you will learn how the environment, and the feelings of those around us, directly affects behavior. You will learn simple ways to support children in calming down, while in our care, through co-regulation. This important skill is part of our emotional intelligence and one that takes fostering and nurturing. Let’s go over what coregulation means, how this skill develops, and how we can support co-regulation through practical strategies.

      Co-regulation information, facts, and references for developing this emotional intelligence skill in children and peers.

      CoRegulation

      The feelings and behavior of people in close proximity to us, directly impact how we feel, and respond to our own emotions. When children become upset, if those areound them stay calm, demonstrating how to calm down, the child can calm down quicker.

      How would you feel if your neighbor was yelling at the mailman for stepping on their freshly cut grass?  Do you feel annoyed? Can you feel the fear the mail man is feeling?

      How would you feel while walking past someone doing yoga in the park? Do you feel calm?

      In the same way adults are impacted by others actions, children pick up the moods of others around them. When people around us are behaving a certain way, we can be directly affected, responding both internally and externally. 

      When witnessing an uncomfortable event such as the confrontation at the mailbox, internally you might feel your heart start to pound, or clench your teeth as nervousness sets in. You might run and hide behind the window curtain to try and separate from yourself from what is making you feel uneasy (while still peeking in horror). 

      Once separated, you are often able to calm down using strategies to regulate your sensory system. I like to sip water and take breaths of lavender. My husband likes to go for a run and lift weights to decompress. As adults, we have learned how to adapt and overcome these intense feelings through different strategies. Children need support to separate themselves from stressful situations, and regulate their emotions.  They are not able to understand the triggers and determine an acceptable calming mechanism.

      Co-regulation definition and terms

      What is co-regulation?

      The definition of co-regulation is– the ability to regulate emotions and behaviors to soothe and manage stressing internal sensory input or external situations, with the support and direction of a connecting individual. Co-regulation is nurturing connection of another individual that supports regulation needs through the use of strategies, tools, and calming techniques in order to self-soothe or respond in times of stress.

      Co-regulation and self-regulation are part of the developmental process. In order to move from a co-existing place to a place of independence, the child needs to develop emotional intelligence and social emotional learning. All of this is part of typical development.

      Development of co-regulation

      Co-regulation is a part of development. Before one can self-regulate, they need to co-regulate.

      • Co-regulation begins in infancy. Before a young child can self-soothe, they need a parent to help them. When an infant is crying a parent picks them up, holds them close, rocks, and wraps them up in a tight swaddle, and offers a pacifier. All of these strategies are tools to provide correct sensory input that calms and regulates the baby’s system. This is co-regulation; the parent is offering tools and strategies to support the infant’s needs. 

      As caregivers we play a huge role in helping children calm down. When children are upset or overwhelmed, they look to us for help with regulating their emotions. This article explains how to support co regulation in infants through three year olds. A caregiver needs to project calmness in order to soothe their infant. This is very difficult for an anxious or upset parent.

      • Co-regulation in toddlers might look similar, but with more input from the child. The toddler prefers to be active and jump, run, roll, or move, rather than be held and cuddled all the time. The caregiver offers toys and activities to get the child moving in the way they enjoy. If the toddler only does these alerting activities, they might run themselves down, and move into a meltdown state. The parent then offers a calming tool such as a cool sip of water, a slow walk, singing a song, a break from the action, or a moment to stop and look at something interesting (also known as mindfulness). All of these are co-regulation strategies for toddlers. The parent offers strategies to the young child, and hopefully, the child accepts them. 

      As children grow into toddlers, the most successful way to support their feelings is to calmly use words and gestures to redirect them when they are upset. When adults are feeling anxious or upset when trying to redirect the child, children respond with increased adrenaline, becoming more upset and dysregulated.

      They match or mirror the energy of their caregivers. When adults stay calm, children can become calm. When children become or stay calm, they are able to listen and problem solve. 

      • Co-regulation in preschoolers can be similar to that of a toddler. As they develop, preschoolers are able to offer more input as to their preferences, interests, and dislikes. For example; the young child can request a certain sippy cup they like. They may not know why they like certain activities or items like the long straw on their favorite cup, or the weight of a plush toy, but they know that it feels good. Similarly, adults often do not understand why they choose to run or listen calming music, they just know it helps. Parents can help young children co-regulate sensory and emotional needs through providing ideas for strategies and activities. 
      • Co-regulation in older children– Preschoolers, kindergarteners, elementary aged children and teens are able to self-regulate using skills taught to them while being supported through co-regulation at a younger age. As children grow, they have more autonomy. They have more ability to move from co-regulation to self-regulation. 

      The ability to self-regulate occurs through co-regulation with parents, teachers, and older peers. Typically, it’s through the first 7 years of life that children need support to regulate emotions, sensory input, and external stressors.  Even after the age of 7, most kids need help! 

      Self-regulation development continues over time, but the ability to co-regulate begins to move from a supported mechanism, to an individual and independent ability.

      Co-regulation parenting tips and strategies to support emotional development.

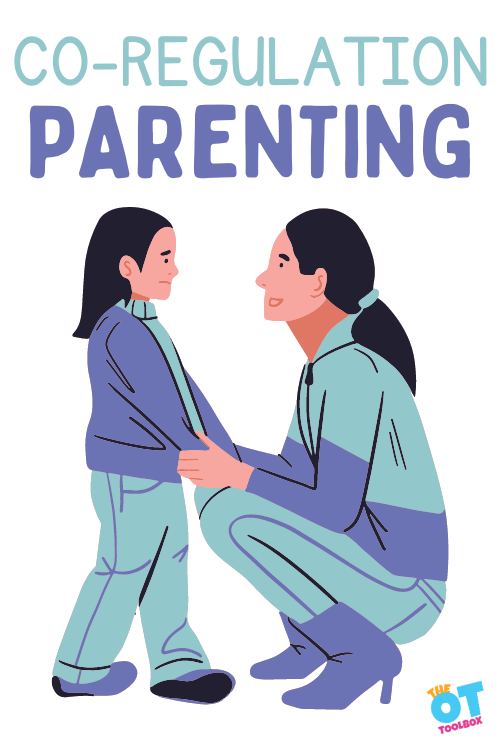
      Co-regulation Parenting

      The above paragraph should help explain what coregulation means in young children, but how can we help support kids with co-regulation, so they can develop these self-soothing skills?

      We can focus on co-regulation parenting as a tool and a means to support our children.

      Many adults struggle with self-regulation. This is where we see additional problems. When young children need support to co-regulate, sometimes the adults in their lives are not offering the tools and strategies as a support person.

      If a parent responds to a young child’s meltdowns or behaviors with emotional outbursts, anger, stress, and anxiety, the young child cannot soothe themselves.

      It is important for adults to take a look at stressors, internal anxiety, and emotional state so they can support the young child. 

      • How many times have you witnessed frustrated teachers/parents/caregivers yelling at children?
      • Does it calm them, or make them afraid and shut down?

      This is why it is important for caregivers to step away from a situation where the toddler is “pushing their buttons”. Take a deep breath, get a date night out, go for a run, or some other mechanism of self-regulation.  I often said, “Mommy needs a time out.”

      self regulation

      You have probably heard the term “self-regulation” which refers to the ability to control oneself in any given situation by balancing and calming internal sensory systems within the world around us. 

      Before young children can self-regulate, they need the support of adults around them to teach and help them develop the abilities to regulate on their own. They need to co-regulate, or co-exist with parents, teachers, and others, who can “show them the ropes” and learn to balance and calm their internal and external systems. Co-regulation comes before self-regulation developmentally.

      Neuroscience of Co-regulation

      What does co-regulation look like in the brain?

      Brains are amazing machines, capable of processing the environment, including the feelings of others. Dr. Caroline Leaf, neuroscientist has stated “As you co-regulate with someone, the mirror neurons in their brain are activated, and this enables the person in the deregulated state to literally ‘mirror’ your calmness,” For long-term benefits and effective results, Johnson recommends practicing co-regulation often. “It will effectively rewire the brain so that over time, things that once were triggering or set off alarms no longer have the same effect and happen less often.” 

      Wow! The brain can process the feelings of others in milliseconds, directly affecting our our own moods and behaviors. No wonder all of the children in a preschool class feel overwhelmed, as soon as one child becomes dysregulated. 

      How do you prevent the whole room from becoming overwhelmed, when only one person is stressed? Co-regulation is the first step for a person to learn self-regulation. 

      According to this research article by Howard Beth, “Neuroscience shows that humans develop their abilities for emotional self-regulation through connections with reliable caregivers who soothe and model in a process called “co-regulation.” … In time, the child internalizes the expectation of a soothing response which provides a foundation for learning self-regulation. “

      It is the responsibility of caregivers to support co-regulation, which directly impacts a child’s ability to self soothe as they grow. When children are upset, the most important thing for caregivers to do, is remain calm.

      If caregivers become upset or overwhelmed in response to another person’s behaviors or actions, everyone will continue to feel stressed, and the situation will explode.

      Co-regulation activities and strategies to help kids with emotional development of cooregulation skills.

      How to help kids with co-regulation

      My own regulation techniques were put to the test once, when I was teaching at a preschool that backed up to a farm. The children (all 2-5 year olds) were inside eating lunch and I was setting up their nap mats. We had a futon in the classroom for children to relax and read books on.

      Out of nowhere, a humongous snake slithered out from under the futon! The initial shock wore off quickly, and my nerves set in. The snake was coming towards me, and I had 24 preschoolers eating lunch only ten feet away! I calmly helped the children walk out the door to the playground with the aide, breathing and saying “It will be okay. No need to worry.” 

      The kids walked out of the room curious, but not frightened. I raced to the phone and called for help (my voice was much more panicked as I talked to the janitor about the huge snake in the room)! I knew nothing about snakes, and I wasn’t about to get in its’ way. Luckily it ended up being a garter snake, removed quickly by a specialist and relocated, far away from my classroom!

      At that moment, I knew that I had to “keep my cool”, so the children wouldn’t become scared. They co-regulated off of my calmness, and were able to safely follow directions and watch the situation unfold from outside.

      Children learn new skills through hands-on activities. Regulation skills are learned the same way.

      Regulation Strategies:

      There are many more self regulation strategies than just the ones listed below. This should give you a good idea for where to start.

      1. Deep Breathing- Deep breathing exercises for kids teaches young children how to calm down through pausing, and taking large breaths. Relaxation breathing is a great strategy for adults and kids to do together. The ones on this site use a fun and engaging strategy that introduces breathing techniques using visuals and imitation. The printables in this resource form the OT Toolbox teach kids all about breath control using fun pictures, arrows, and places to pause, and hold their breath. Print out the free PDFs, show the child the picture and the arrows, and practice deep breaths. When your child becomes upset, immediately start to “breathe like a polar bear”, or “do rainbow breaths” and watch as your preschooler starts to calm down too!

      Some of the most commonly used deep breathing tools include on the OT Toolbox include: 

      1. Toys and stuffed animals- Using a preferred toy or stuffed animal integrates strategies from DIR Floortime therapy strategies.  Kids gain the emotional vocabulary, and strategies to use in co-regulation, through play. I developed the Soothing Sammy (affiliate link) learning system. It is a great tool for co-regulation, because of the picture books and activities included with the emotional regulation toy. 

      In my book, Soothing Sammy, a golden retriever puppy, teaches children how to calm down using a variety of sensory strategies (such as jumping in place, blowing bubbles, sipping water, singing a song and squeezing a ball or play dough). First, read the Soothing Sammy story, where children visit Sammy in his dog house. He provides them with all of the tools needed to calm down. Once calm, the children are ready to play again. Use the stickers and shipping container to have your own preschoolers create a space for their own calm down items and place Sammy, the plush dog, inside! This is your child’s very own Sammy house to visit, just like the children did in the story.  When children are overwhelmed, experiencing big feelings, they are easily redirected to these activities by saying “Sammy Time.” Help children co-regulate by creating your own Sammy House and using items to calm down when they are upset, modeling calm and soothing behaviors.

      1. Go outdoors and co-regulate!

      Sometimes all we need is a little bit of fresh air to help feel better. Use these outdoor sensory diet cards to discover calm down strategies to use outside with children. These cards contain outdoor play challenges to get kids moving, experiencing various sensory systems, and receiving calming input from the great outdoors. Included, are over 180 ideas on how to calm the bod through movement. The outdoors is a great place for a sensory diet. In the backyard there is a variety of movement opportunities. A playground is another great space for calming and regulating play. Check out this blog post on sensory input at the playground

      Children, especially toddlers and preschoolers, depend on adults to show them how to calm down or self-regulate.

      tools for adults to learn self regulation

      Being that co-regulation requires the ability to support another individual with regulation needs, it’s important to address emotional and coping needs as the adult in a parent/child (or other adult/child, peer/peer relationship). As a support person, regulating ones’ own needs can go a long way in modeling appropriate reactions, coping strategies, and following through with regulation needs.

      Below are some great tools for adults to learn, or improve self-regulation so they can be models and important roles in the co-regulation relationship include:

      If you’ve ever flown on a plane, taken a cruise ship, you’ve heard the safety information: In the event of an emergency, adults should place the breathing mask over their faces before they attend to their child.

      Parents should put on their life jacket before they put the life jacket on their children. This seems backwards and selfish, however these life-saving mechanisms are of no use if the adult is struggling.

      If they don’t put on their own face mask or life preserver first, there is no chance to support and help the child. The same is true for regulation; parents must first self-regulate in order to help co-regulate their children’s internal and external needs.

      Empathy versus Empath

      Empathy is being able to understand a person’s feelings, or realize why someone might be angry or sad. It is an important social skill, especially if you are the one causing the upset. Young children do not have the capacity to understand the complexity of empathy.

      An empath is a person highly attuned to the feelings and emotions of those around them. Their ability to discern what others are feeling goes beyond empathy (defined simply as the ability to understand the feelings of others) and extends to actually taking those feelings on; feeling what another person is feeling at a deep emotional level.

      Try this empathy activity to teach these concepts to children.

      According to this article, What we do know is that researchers have discovered what they’ve dubbed “mirror neurons” in the brain which may help us to mirror the emotions of those we come in contact with.1 And it appears some people may have more mirror neurons than others; suggesting that empaths may exist.

      The positives of being an empath are being able to offer support to others, knowing when someone is in need of assistance, and reading a person’s energy to see if they are a good fit for you.

      The cons of this “ability” are that it is draining taking on the emotions of others around you, it feels like you are too sensitive, and you feel burdened taking on so much.

      Being an empath can be described as feeling like a vacuum cleaner, sucking up the emotions of those around you, often before they realize how upset they are.

      Empaths need to be experts at co-regulation because of the amount of sensory and emotional input they are “sucking in”.

      A final note on co-regulation

      Children aren’t born knowing how to manage their feelings in a positive way. As infants, they depend on their caregivers to soothe. As they grow into toddlers and preschoolers, children continue to depend on caregivers to teach them new strategies to calm down. When they sense how calm their caregiver is, they calm down also.

      The best way for caregivers to help children develop their self-regulation skills, is to support them in co-regulation, by showing them calming activities they can learn to use on their own.

      To learn more about sensory processing disorder and strategies, check out The Sensory Lifestyle Handbook and this resource on sensory processing disorder chart to understand all aspects of SPD.

      Additionally, targeting parent and family education on co-regulation as an intervention strategy is highly effective in meeting self-regulation IEP goals so the individual can function in daily tasks.

      *Note: The term caregiver has often been used instead of parent. This is to be inclusive. Caregivers can be parents, older siblings, grandparents, teachers, daycare workers, bus drivers, coaches, and many more.

      Another great resource is our blog post on becoming a tech wise family.

      Jeana Kinne is a veteran preschool teacher and director. She has over 20 years of experience in the Early Childhood Education field. Her Bachelors Degree is in Child Development and her Masters Degree is in Early Childhood Education. She has spent over 10 years as a coach, working with Parents and Preschool Teachers, and another 10 years working with infants and toddlers with special needs. She is also the author of the “Sammy the Golden Dog” series, teaching children important skills through play.

      Types of Scissors

      Types of scissors

      Did you know there are many different types of scissors to support development of scissor skills? It’s true! No matter the motor skill ability, there are different type of scissors that supports that ability or skill development. Cutting skills, like writing, are a foundational fine motor skill.  Just as you would spend time selecting the right pen/pencil, makeup, hair accessory, or pair of shoes, it is important to select the correct types of scissors.

      Types of scissors and why each different type is used

      Why do different types of scissors matter?  

      What do you look for when selecting that perfect pair of shoes?

      • Fit
      • Size
      • Price
      • Durability
      • Reputation, reviews
      • Quality
      • Functionality 

      Believe it or not, the same care can be placed in selecting the correct pair of scissors.  This is especially important if your learner has fine motor delays, hand weakness, difficulty with motor planning/coordination, small/large/irregular hands, or a diagnosis impacting their skills.

      Here are a few real life examples:

      • Lula is 4 years old with dwarfism.  Her hands are tiny.  Her parents would be very unlikely to buy her shoes that fit a grown man.  At her school, Lula was provided with regular sized scissors, thus struggling to learn this important skill.
      • James is 7 and has Down Syndrome.  Not only are his hands weak, but they are small.  While care is taken to select the right shoes and clothes for him, selecting the right scissors is just as important.
      • Marcy is 5 year old and has cerebral palsy, limiting her hand and arm movements.  She too should have extra consideration in the type of scissors that she uses.
      Different types of scissors

      What are the options for types of scissors?

      *Disclamer – Many of the following product recommendations are affiliate links from AmazonThis does not mean these are the best, just the easiest to find.  If you prefer another vendor, check out the examples below, then type them into your Google search bar.

      1. Small Sized scissors

      Beginner small-sized scissors- These scissors are all small in size.  They are not just for small hands.  These are great for learners with all types of fine motor issues, and hand weakness.

      These beginner scissors are Amazon affiliate links.

      • I like these toddler sized scissors because they are very small.  They are great for tiny hands, or learners with fine motor weakness.
      • This learning pack of scissors contains toddler sized scissors, as well as training scissors.  See below for more information about training scissors.
      • Sewing scissors are great because they are tiny, however, they are SHARP!  If you are going to use these, either dull the edges with a file, or be extra careful with your learners.
      • These Benbow Scissors, made by Mary Benbow are the gold standard of training scissors.  

      2. Training Scissors

      Training scissors should be used as a stepping stone to graduating to a higher level type of scissors, once they are mastered.  If training scissors are not mastered, your learner can use these indefinitely.

      The training scissors listed below are Amazon affiliate links.

      • Self-opening scissors: many learners are able to pinch their fingers together long before they can open them during cutting at will. The key to motivation is success.  While using these scissors, the hands get valuable feedback of this cutting motion. These self opening scissors fit the price and durability category, but they do not fit the functionality definition. These blunt scissors, while inherently safer than sharp scissors, do not cut well, and cause more frustration than progress.
      • Spring-assist scissors- This pair of self opening scissors or these soft-grip scissors fit the function, and durability categories. They are more expensive, but cut better than safety scissors.  They are larger than the toddler scissors, so be sure that size is not a concern first
      • Double loop scissors – While I do not like that these are labeled “mother and child scissors” (because this is not inclusive), they work well.  People learn by doing.  Kinesthetic awareness is learning by moving.  These double loop scissors give your learner the feedback needed to practice and learn the cutting motion
      • Trialing two kinds of scissors- This scissor pack has double loop scissors and self opening scissors to trial different kinds of scissors with your learners, or progress forward as they develop skills.

      3. Scissors for Special Needs

      There are times when traditional scissors do not work and a specific adaptive scissor type is required. If your learner has weakness, a hand injury, tremors, increased/decreased muscle tone, or another long term condition, various scissors for special need areas are a good option. 

      Scissors in this category include loop scissors, block scissors, tabletop scissors, and electric scissors.

      For learners with small hands, or who are developing hand strength, I would recommend self opening scissors first, or using these adaptive scissor types for a very short period of time.

      These different types of scissors designed to meet specific needs are Amazon affiliate links.

      Loop scissors – These are also described as self-opening scissors.  Some learners can not isolate their fingers enough to work traditional scissors, or have a sensory aversion to sticking their fingers into the little holes on the handles of the scissors. These spring open once depressed.  They do take a fair amount of strength to grip for a prolonged amount of time, so these may not be the best choice for your learners with low tone or decreased strength (unless of course you are looking for a tool to increase strength).  

      • While these mini loop scissors at 5.5 inches are smaller and take less grip strength, they also do not cut very fast, instead making small snips.
      • These larger loop scissors at 8 inches are a great choice for stronger hands.
      • These self opening loop type scissors are popular. They require less dexterity than traditional scissors, but they do not cut very well.  Because the mouth of the scissors does not open wide, they do not make large cuts.

      Scissors for Limited mobility –  For learners missing digits, or with limited grasp, such as amputees or quadruplegic patients, use of just one upper extremity, visual challenges, or other mobility and coordination concerns, these tabletop scissors can be fastened to a table with a clamp or velcro to assist in opening containers.  They are not great for intricate cutting, as they are labor intensive and can be frustrating, but more usable for self help skills. 

      Power option – for learners with limited mobility or fine motor dexterity, electric scissors can be a motivating option for cutting.  They take some strength and coordination, but can be helpful for learners who can not use traditional scissors. These types of scissors take some practice to get used to them.

      Left handed Scissors

      Similar to questions on left-handed writing, teachers and parents are forever inquiring about left handed scissors and how to help with left handed cutting. 

      What is the left handed scissors difference?

      There is definitely a difference between left-handed scissors and right-handed scissors. Right-handed scissors have the right blade positioned on top, whereas left-handed scissors have the left blade positioned on top. This prevents unnecessary bending and tearing of the paper. This difference between left and right handed scissors also allows each user to maintain a clear visual view of the cutting line.


      Scissor handles are often molded to accommodate either the left or right hand. When manufacturers claim they have created a pair of ambidextrous scissors, be aware that such a thing does not exist. They have simply created a “neutral” handle accessible for the both left and right hand. The blades are still right-hand oriented. Thus, left-handed users should not be given scissors marketed as being appropriate for both left-handers and right-handers.

      True left handed scissors have the cutting blade positioned on the top. Neutral scissors or scissors that can fit both left and right hands may cause additional frustrations.

      Read more on the term ambidextrous and what this means for functional tasks such as cutting with scissors.

      There are several types of scissors for lefty’s available, but what are the best left handed scissors?

      These basic lefty scissors (affiliate link) are ideal.  If it wasn’t such a right handed world, I would recommend these to all lefties. 

      Being a lefty myself, I understand the benefit and fit of left handed scissors. The majority of scissors your learner will encounter will be right handed, so it is better to learn and adapt to traditional scissors. There are only a few left handed items that are necessary (can opener, ice cream scoop, binder, ladle, vegetable peeler.)

      Tips for Left handed cutting:

      • Use sharp scissors – this way the blade has less chance of just bending the paper instead of neatly slicing through it
      • Don right handed scissors upside down – for some reason putting the thumb in the fingers hole changes the blade position, and makes cutting easier. 
      • Lefties cut CLOCKWISE.  Righties cut COUNTERCLOCKWISE.  This is important.  If your learner cuts in the wrong direction, this leaves them without the ability to hold onto and turn the piece of paper that is being cut.  Try it!

      time to learn to cut

      Now that you have selected the right fit, durability, functionality, and quality of scissors for your learner, it is time to learn to cut!  The OT Toolbox has multiple posts and products available for practicing scissor skills.  There is a comprehensive scissor skills guide available also.

      The key to cutting skills

      • Thumb and middle finger in the scissor loops.  You can add ring finger into the loops if they are large.  Pointer finger stays out and points the way.  This adds to hand stability and opens the arches of the hand further.
      • Thumbs up!  The helper hand grips the object being cut, with their thumb facing up.  This gives the object being held greater stability, and ease of movement. All of the various types of scissors could have a sticker added as an additional adaptation to help with positioning.
      • How to hold scissors – check out this helpful post on the OT Toolbox
      • Steps of scissor skill development
      • Scissor Skills
      • Scissor Skills Crash Course

      Guide to Types of Scissors

      Want a printable guide to the various types of scissors? You are in luck. We have a one page printable guide that shows images of the different versions of scissors on the market. These are the different scissor types you might see in a therapists’ therapy bag!

      Now you can quickly share information on why each type of scissor might be used and determine which type of scissor to use based on the individual needs of the learner.

      To get your copy, just enter your email into the form below.

      This handout set is also available in our OT Toolbox Member’s Club.

      Current Membership Club members can log into your account and head to the dashboard toolbox labeled “Scissor Skills Downloads“. Print off the handouts without the need to enter an email address.

      Want to add this resource to your therapy toolbox so you can help kids thrive? Enter your email into the form below to access this printable tool.

      Want to add this resource to your therapy toolbox so you can help kids thrive? Enter your email into the form below to access this printable tool.

      This resource is just one of the many tools available in The OT Toolbox Member’s Club. Each month, members get instant access to downloadable activities, handouts, worksheets, and printable tools to support development. Members can log into their dashboard and access all of our free downloads in one place. Plus, you’ll find exclusive materials and premium level materials.

      Level 1 members gain instant access to all of the downloads available on the site, without enter your email each time PLUS exclusive new resources each month.

      Level 2 members get access to all of our downloads, exclusive new resources each month, PLUS additional, premium content each month: therapy kits, screening tools, games, therapy packets, and much more. AND, level 2 members get ad-free content across the entire OT Toolbox website.

      Join the Member’s Club today!

      FREE Handout: Types of Scissors

        We respect your privacy. Unsubscribe at anytime.

        a final note on selecting the correct types of scissors

        Pamper your learner with a great pair of scissors, just like you do when you purchase those amazing shoes.  Fit and function over price. Quality always wins.  Fiskars are the gold standard for traditional scissors, and the one type almost every therapy provider has in their OT bag of tricks.  They cut paper well and come in tons of sizes and designs. 

        So…what are the worst scissors?  Most therapists agree that those “safety scissors” that don’t cut anything except maybe playdough are absolutely the worst.  Save those for playdough, and upgrade when it comes to cutting anything else. 

        Victoria Wood, OTR/L is a contributor to The OT Toolbox and has been providing Occupational Therapy treatment in pediatrics for more than 25 years. She has practiced in hospital settings (inpatient, outpatient, NICU, PICU), school systems, and outpatient clinics in several states. She has treated hundreds of children with various sensory processing dysfunction in the areas of behavior, gross/fine motor skills, social skills and self-care. Ms. Wood has also been a featured speaker at seminars, webinars, and school staff development training. She is the author of Seeing your Home and Community with Sensory Eyes.

        *The term, “learner” is used throughout this post for readability, however this information is relevant for students, patients, clients, children of all ages and stages, or whomever could benefit from these resources. The term “they” is used instead of he/she to be inclusive.

        Looking for tips, strategies, and activities to support development of scissor skills? Grab a copy of The Scissor Skills Book!

        The Scissor Skills Book breaks the functional skill of cutting with scissors into several developmental areas including:

        • Developmental progression of scissor use
        • Fine motor skill involvement
        • Gross motor development
        • Sensory considerations and visual perceptual skills

        Each section includes strategies and tips to improve these underlying areas.

        • Help for kids who struggle with cutting accurately
        • Creative tips to keep things interesting for kids who lose interest easily
        • Quick, practical strategies that can be put into action today!
        • Ideas for kids who cut too fast or too slow
        • Support for kids who can’t grasp scissors efficiently
        • Strategies for right-handed and left-handed children

        Click here to get your copy today.

        Caregiver Stress and Burnout

        professional caregiver burnout

        If caregiver stress and burnout wasn’t a common condition prior to the Coronavirus shutdown of 2020, it certainly is now. During the height of the pandemic, people found themselves caring for their children (typical and with special needs), elderly parents, and spouses 24/7. 

        Caregiver stress and burnout

        Prior to this life changing event, caregivers did not realize what a blessing school and daycare were, in terms of lifting some of the responsibilities and stressors for a few hours.  During the shutdown in 2020, caregivers flocked to social media, and were incensed that they had to be the ones to teach their children at home, or provide circle time and socialization all day.  

        As a therapist and parent of grown daughters, I was frustrated by the comments from these angry parents.  I wanted to exclaim, “this is YOUR child!”  YOUR responsibility!  I understand the toll caring for others takes on a person, however I never considered teachers to be a requirement, or a given; they were privileges and gifts. 

        Instead of unleashing fury about having to take care of your loved ones, let’s rewrite the narrative.  How about, “this is hard, day after day. Their teachers must be miracle workers. Or, “I can’t understand how their daycare teachers manage this so well,  I’m exhausted.”

        caregiver stress and burnout

        No matter what the narrative is or was, the end result is caregiver stress and burnout. Ron Ingbur, JD writes, “caregiver stress syndrome is a condition characterized by physical, mental and emotional exhaustion. It typically results from a person neglecting their own physical and emotional health because they are focused on caring for an ill, injured or disabled loved one”

        Check out this article on caregiver stress. People were (and still are) blurring the boundaries between their roles, trying to do too much, not wanting to ask for help, and attempting to be perfect in this imperfect world.

        The OT toolbox has a great post on family wellness and a research article on wellness that are good resources to have.

        Professional Caregiver Burnout

        Caregiver burnout and stress is not limited to families. Healthcare workers, daycare attendants, teachers, therapists, and many more adults take on the role of caregiver, often neglecting their own needs. 

        Professional caregiver burnout is a real thing.

        As an Occupational Therapist (and a mom and wife)  I hit a wall right before the pandemic took over. I tried changing jobs, reducing hours, decreasing my caseload, none of these relieved my symptoms.  The pandemic was a blessing of sorts for me. 

        While it was not 100% solitude, (my husband and teenage stepson still roamed the house looking for food) it was eye opening to realize the change that was happening in my mental and physical health, by having a few months off of work to breathe and reflect.

        The lesson I learned, (too late) was I should have taken better care of myself and my needs, before hitting a wall I could not recover from.  Check out these self-care strategies for therapists.

        A self-reflection journal for therapists can be a great tool to add to your own toolbox when battling professional caregiver burnout.

        common signs of caregiver stress and burnout

        Though everyone differs, the common signs of caregiver stress syndrome are:

        • Changes in appetite, weight, or both
        • Depression – feeling blue, hopeless, irritable, helpless, loss of interest in activities
        • Withdrawal from friends and family – these are just one more added stressor
        • Changes in sleep patterns – either sleeping too long due to exhaustion and burnout, or not getting enough sleep due to responsibilities and stress
        • Getting sick more often – not only are caregivers exposed to more illness, their own immune systems are often compromised by their exhaustion and stress
        • Negative thoughts of wanting to escape, hurt yourself, or the person you are caring for
        • Emotional and physical exhaustion
        • Anxiety – intrusive thoughts, obsessions, perseveration on beliefs and feelings

        Caregivers find they snap at the ones they love, have nothing left to give when they come home, can not spread their attention across everyone in the family, or constantly feel they are failing.  

        caregiver burnout quiz

        Think you might have caregiver burnout? 

        In addition to the emotional toll caregiving places on a person, there are physical manifestations as well.  According to Igbur, 45% of caregivers reported chronic and possibly life threatening conditions, 58% of respondents said their eating habits were not the same as before, and 72% reported they did not go to the doctor as often as they should.  

        What about the little things?  I see caregivers who have not had a hair cut, been to the dentist, or bought new clothes forever.  One of my patient’s moms was wearing old shoes that were duct taped together, using a computer missing several keys (she is a writer, so this is kind of critical), because she put everyone else’s needs so far above her own.  

        Once you (or a loved one) recognize the symptoms or caregiver burnout, it is time to take action.  Caregivers who feel they need to do it all, (I was one of them) are the most reluctant to get help.  It is important for these caregivers to realize that they are not going to be of any help to anyone if they are lying in a hospital bed, dead, or having a nervous breakdown.  

        how to alleviate caregiver stress and burnout

        • The first step is to take a break.  While a two week vacation in the Bahamas is just what everyone needs, this is not always possible.  Sometimes a break means twenty minutes of alone time in the bath, or a stroll through Target without anyone asking for anything.  Seek assistance from friends, family members, neighbors, church members, groups, organizations, or professional respite care agencies. Caregivers do not need to leave the house while their respite carer, or other helper is in their home.  They can take a nap, do some gardening, lie in the sun, watch Netflix, or whatever they find relaxing. Some of these respite care resources are voluntary, grant funded, or paid agencies.
        • Next, lighten the load.  What tasks or responsibilities do you have that someone else could easily do?  Maybe someone else can clean the house, do the grocery shopping, pick up the other kids at school, take grandma for a stroll, or deliver meals.  Don’t be too proud to share the workload.
        • If you are working outside of the home, talk to your employer about your options.  Maybe you can flex your hours to include a little downtime, take family medical leave if necessary, or cut down work hours.  People are often afraid to ask their bosses for fear of being laid off. To reiterate, if you are so overworked you end up in the hospital, or deceased, your job won’t matter.
        • Once a little time has been freed, take care of yourself. Go to the doctor, visit the dentist, talk to a therapist, join a support group, reconnect with friends, get your hair colored, get some rest, exercise, meditate, color, take a bath, or whatever you have been neglecting while caring for others.

        Whether you are a parent, child, healthcare worker, teacher, spouse, or other caregiver, make sure your entire tribe knows what responsibilities you have.  Let your child’s OT know you only have about 15 minutes to spare each day to work on their home program. Talk to their teacher about what amount of homework you and your child can get done each week. Have a discussion with your coworkers about dividing the workload more evenly, and speak to your friends and family so they understand what you should/not take on, and how they can help.  

        control what you can

        In a caregiver role, there are many things out of your control.  As a teacher you may not be able to control the number of students in your class, but you could streamline your day to be more efficient, or get a housekeeper and a cook to lessen the load when you get home.  You may not be able to decrease your hours at work, but you can make the most of your lunch time by going outside for a walk, eating a yummy snack, taking a nap, or catching up with a friend. Parents may not be able to send their children to school or afford daycare, but they may be able to swap babysitting hours with a friend, join a meal sharing group, or create a playgroup, where there is emotional support as a group while the children play.

        Caregiver stress and burnout is huge.  Not just because of the Coronavirus. Adults are living longer, possibly needing more care from their children. There is an increase of children who have special needs requiring extra care, therapies, and appointments.  People are taking on multiple rolesk while juggling a busy job and household. Overscheduling and committing are becoming the norm.

        The hardest step to alleviating caregiver stress and burnout

        While the first step is recognizing the problem, the HARDEST step is doing something about it. It takes a lot of swallowing your pride, compromising, and feeling the agony of defeat, to ask for help.  Caregivers will find it tough to watch someone clean their house while they take a bubble bath or rest.  Some with find it even more difficult to let a respite care worker take care of their loved one, while they head out to the movies.

        This article has some great resources and websites to learn about and combat caregiver stress.

        You will thank yourself later.  While I love the job I landed in, I can’t help but wonder what path my career might have taken if I had recognized the burnout sooner, and done something about it. Now that my girls are grown, I constantly reflect on my parenting with doubt and angst, thinking I might have been more patient if I had taken that nap.  

        Victoria Wood, OTR/L

        Victoria Wood, OTR/L is a contributor to The OT Toolbox and has been providing Occupational Therapy treatment in pediatrics for more than 25 years. She has practiced in hospital settings (inpatient, outpatient, NICU, PICU), school systems, and outpatient clinics in several states. She has treated hundreds of children with various sensory processing dysfunction in the areas of behavior, gross/fine motor skills, social skills and self-care. Ms. Wood has also been a featured speaker at seminars, webinars, and school staff development training. She is the author of Seeing your Home and Community with Sensory Eyes.

        *The term, “learner” is used throughout this post for readability, however this information is relevant for students, patients, clients, children of all ages and stages or whomever could benefit from these resources. The term “they” is used instead of he/she to be inclusive.

        Receptive Language

        receptive language

        This blog discusses the importance of receptive language and how it impacts development. Learn why understanding directions directly correlates to a child’s behaviors. You will discover receptive language activities to support preschoolers in complying with age appropriate requests. Read in this blog how auditory processing and attention play a huge role in receptive language.

        Receptive language information and tools

        What is Receptive Language?

        Receptive language refers to how we understand spoken words, the language around us, and the ability to hear/understand/comprehend spoken language. Language is needed for learning, play, communication with others, understanding directions, safety, and participation in everyday activities. Functional participation requires receptive language in order to thrive and communicate wants, needs, thoughts, and ideas.

        Receptive language can include spoken, written, and implied language. It is the intake of information, therefore receptive language can include un-spoken words. 

        How about Expressive Language?

        Receptive language is the information that is taken in.

        Expressive language, in contrast, refers to the use of language to communicate with others. Expressive language is “expressed” through speech, sign, written words, picture symbols, gestures, body language, or alternative forms of language to communicate wants, needs, thoughts and ideas.

        Receptive and expressive language are different aspects of language but are closely connected.

        Receptive and Expressive Language

        Expressive and receptive language fit together like important puzzle pieces. Any form of communication such as sign language, alternative forms of communication, and non-verbal cues, are types of both receptive language and expressive language. 

        There are many different components that affect a child’s behavior, including the environment, co-regulation, sensory needs, emotional vocabulary development, relationships, and developmental milestones. 

        As children develop, their comprehension skills and ability to interact with the world changes.

        Receptive and Expressive Language in Tantrums

        Miscommunication occurs between adults and preschoolers when children are given directions in ways they don’t understand. When a child has difficulty with understanding what is asked of them, the result is often a tantrum. The same is true when a young child does not have the words to express themselves.

        There are many reasons why preschoolers have difficulty following directions, or responding to age appropriate prompts. Sometimes they do not understand the directions.

        Other times, toddlers do not want to do what is asked of them. When they are upset, overwhelmed and uncooperative, give children the tools to settle down.

        Once a child has calmed down, try giving the direction again. Encourage them to use words to communicate why they are feeling frustrated about the direction, and if they have a different idea on how to complete a task.

        You can see how the receptive language input and expressive language communication output, along with auditory processing, or sensory processing of auditory input, all connect and impact one another as they play a role in tantrums vs. sensory meltdowns. It is all connected!

        Why is receptive language important? This article covers receptive language development.

        Receptive Language Development

        Toddlers and preschoolers learn new words at a rapid rate. One morning you may hear your child say a three word phrase, and the next day they say a five word sentence. A child’s brain is magnificent, growing rapidly through the first five years of their life. Because development is complicated, it may feel overwhelming to new parents. This article explains important milestones by age. 

        When children are born, they understand facial cues, the sounds and tones in voices, and follow gestures. As they grow, children start to understand pointing, hand gestures, spoken words, and picture vocabulary. Receptive language is the foundation to a child’s ability to understand what is being asked them, or others in their environment. 

        As children learn about the meaning of gestures and words, they are able to anticipate and respond to the needs of those in their environment. The process of how our brains collect and decode language, is complex.

        When children are learning how to process language, adults can support their comprehension by providing directions in simple phrases, incorporating gestures, and being patient when a child forgets to complete a task. Being mindful of the environmental surroundings also plays a key role in making sure children are able to focus on the words being directed towards them, with minimal sensorial distractions. 

        For instance, if a parent yells a three-step direction from the kitchen while their four year old is watching a television show in the other room, it is likely the child did not hear the entire direction.

        They may hear the first, middle, or last part of the phrase instead. When a child is given a direction that is new to them, or that they don’t fully comprehend, it may take a few moments for children to process and understand what is asked of them.

        One important tip for receptive language skills is to give a child a moment to process directions before repeating them. If they still do not understand, speak slower, with shorter commands.

        Students who are strong in these skills may be auditory learners.

        The Anatomy behind language

        This peer reviewed article on “The Functional Neuroanatomy of Language states:

        • Recognizing speech sounds is carried out in the superior temporal lobe bilaterally
        • The superior temporal sulcus bilaterally is involved in phonological-level aspects of this process
        • The frontal/motor system is not central to speech recognition, although it may modulate auditory perception of speech
        • Conceptual access mechanisms are likely located in the lateral posterior temporal lobe (middle and inferior temporal gyri)
        • Speech production involves sensory-related systems in the posterior superior temporal lobe in the left hemisphere
        • The interface between perceptual and motor systems is supported by a sensory-motor circuit for vocal tract actions (not dedicated to speech)
        • It is very similar to sensory-motor circuits found in primate parietal lobe
        • Verbal short-term memory can be understand as an emergent property of this sensory-motor circuit.” 

        No wonder language is so complicated!

        Receptive language activities and strategies for receptive and expressive language

        Receptive Language Activities

        Focusing on receptive language activities support the development of receptive and expressive language, because these types of language are so closely tied together.

        Talk

        Encourage children to take part in everyday activities to build language comprehension, understand social cues, and follow directions given to them on a daily basis.

        Talk with them all the time. Have conversation in the car, name all the items in the grocery store, talk about their daily schedule, and encourage opportunities for them to express themselves.

        Age-appropriate activities

        When children are provided with age appropriate cues, and a calm down spot to process their feelings, they can thrive in all aspects of development.

        Focus on auditory attention during these age-appropriate tasks.

        Here are nine simple ways to ensure your kids are hearing and understanding directions:

        1. Make sure to give directions in simple form (one step directions for children under 20 months old; two-step directions for children under three years old; three step directions for children under five years old).
        2. Use visual and auditory cues when giving directions, such as pointing, gestures, words and picture cues. 
        3. Give directions when you are in front of the child, kneeling down at their level. 
        4. Make sure you have their undivided attention (no television, music, electronics, or other distractions).
        5. Encourage eye contact if appropriate (some children with neuro-diverse needs have a harder time making eye contact and this is not appropriate. It is always important to address individual needs, strengths, and goals).
        6. Make sure what you are asking the child to do, is developmentally appropriate for their current skill level. 
        7. Use these first/then visual cards to communicate what you are requesting. 
        8. Implement a visual schedule to support requests around transition times. Read more about transitions for children.
        9. Try the activities in the Auditory Processing Kit found on the OT Toolbox. This printable resource offers tools to support listening skills, whole body listening, listening comprehension, active listening, and auditory processing needs. This printable packet contains active listening activities, hands-on strategies, activity cards, visual cards, handouts, and more.
        10. Try a DIY whisper phone to focus on auditory attention, sounds, and focus on a whisper.

        Why is receptive language important?

        Receptive language development directly affects all areas of development, from attention span, to literacy, social skills, and many more.

        Receptive language development is important for:

        • Learning
        • Comprehension (hearing and deciphering between auditory cues- suffixes, pronunciations, tone, etc. in speech)
        • Communication skills
        • Social emotional development
        • Safety
        • Play and interaction with others
        • Functional development
        • Many other task and participation skills!

        It’s easy to see how language challenges with nuances of receptive input can impact so many areas. These are just some of the difficulties a child with delayed receptive language development may present with. 

        Challenges related to receptive language include:

        • Attention and concentration challenges- Sustained effort is involved in understanding language, and being able to hold that information long enough to get the task done.
        • Behavior challenges- Not being able to understand and perceive directions, can result in social emotional challenges, or maladaptive behaviors.
        • Literacy challenges- Reading and writing struggles can occur in the classroom with if a person has receptive language struggles.
        • Social skills concerns- Participating in social situations can be difficult when engaging in reciprocal interaction with others (either verbally or nonverbally). This can impact social situations, social emotional learning, and functional participation.
        • Sensory processing needs- Auditory registration of sounds, language, and information can be impacted through sensory processing disorders. 
        • Executive functioning requires using auditory information that is received and processed, to complete higher order reasoning and thinking skills, following directions, participating in tasks, and using working memory.
        • Expressive language delays- Expressive language can be impacted by not understanding language from others (receptive language delay), because it is not accurately received correctly, in order to be processed. 
        • Planning and sequencing concerns- Receptive language impacts direction following, and accurate sequential completion of multi-step tasks 
        • Auditory Processing issues- Difficulty in the ability to hear sounds, distinguish between similar sounds or words, and separate relevant speech from background noise.

        A final note on receptive language

        Receptive language impacts a variety of areas of development. When teachers and other caregivers slow down speech, and support receptive language skills, all other areas of a child’s life will benefit.

        Starting at birth, singing, talking, and reading to children, helps develop neuron and synapse development in the brain. 

        Don’t forget to check out all of the great resources on the OT Toolbox, including the Auditory Processing Tool Kit.

        Auditory Processing Kit

        Jeana Kinne is a veteran preschool teacher and director. She has over 20 years of experience in the Early Childhood Education field. Her Bachelors Degree is in Child Development and her Masters Degree is in Early Childhood Education. She has spent over 10 years as a coach, working with Parents and Preschool Teachers, and another 10 years working with infants and toddlers with special needs. She is also the author of the “Sammy the Golden Dog” series, teaching children important skills through play.

        Fine Motor Milestones

        Fine motor checklist

        Let’s break down child development into the fine motor milestones typically seen at each age. This compilation of early childhood physical development includes a fine motor milestone checklist for each age range, birth through six years. This fine motor milestones list can be helpful for parents of young children, teachers in preschool through the early grades, and occupational therapy professionals looking for fine motor developmental resources. 

        Fine Motor milestones impact function. Get this printable fine motor checklist and support kids development of fine motor skills.
        Fine Motor milestones impact function. Get this printable fine motor checklist and support kids development of fine motor skills.
        Access at the bottom of this blog post.

        Fine Motor Milestones

        Developmental milestone guidelines may be shifting as reported in this Evidence-Informed Milestones for Surveillance Tools article, but your friendly neighborhood occupational therapist can help you understand what to look for at each stage of child development. 

        Most children follow a general developmental pattern in early childhood physical development. Understanding the typical and expected development of skills, is important when identifying potential areas of concern. Fine motor skills, the area of development detailed in this post, entails the actions of the arms, hands, wrists, and fingers, in order to manipulate objects. 

        It’s important to note that these fine motor milestones indicate a developmental progression. While not every date is a hard marker, it is important to see progression, and the ability to achieve the motor skills that make up pre-writing skills. Pre-writing fine motor skills are the important skills needed in preschool, before a child is asked to write.

        It is critical that the child is developmentally ready for writing, by learning these early fine motor skills first. 

        If you know a child who is not meeting the early childhood physical development suggestions below, don’t fret – there are many ways to address fine motor skills through these fun activities found on the OT Toolbox! 

        FINE MOTOR MILESTONES – BIRTH to 6 MONTHS

        In the newborn stage of life, starting in utero, foundational movement skills are practiced. Babies move their hands and arms generally and reflexively (check out this article on primitive reflexes), while they learn their bodies and the environment. As they start to grow, you will see a very active and capable 6 month old baby – see below for a fine motor skills checklist.

        NEWBORN – 2 MONTHS

        • Has a strong grasp; Opens and closes fists
        • Brings hand to, or near mouth 
        • Arms stretch out and hands open 
        • Scratches fingers along blanket or clothing
        • Looks toward outstretched hand (often eliciting the ATNR reflex)

        3 – 5 MONTHS

        • Holds a toy when placed in hand
        • Uses arms to purposely swing at toys
        • Brings hands to mouth consistently
        • Pushes up onto elbows/forearms when on tummy

        6 MONTHS 

        • Consistent, purposeful reach using vision to guide movement
        • Transfers objects hand to hand
        • Finger feeds large foods (e.g., biscuit)
        • Shakes/bangs toys 
        • Leans on hand/s to support seated position

        FINE MOTOR DEVELOPMENT 7 to 24 MONTHS

        Gross motor development is very noticeable at this time, therefore fine motor development slows during this stage. Crawling, furniture cruising, and walking usually occur. What about fine motor skills? Read on to see all of the development that occurs in the “small” motor movements in the way of fine motor milestones for toddlers.

        7 – 9 MONTHS

        • Plays using arms (Peek-A-Boo; So Big!)
        • Index finger use to “poke” 
        • Raking cereal with fingers to grasp 
        • Purposeful grasp and release of objects into containers
        • Grasp on thumb side of hand 

        10 – 12 MONTHS

        • Grasps with thumb and 2 fingers
        • Pincer grasp develops; picks up cereal/small objects with thumb and index finger
        • Imitates tool use (e.g. brushing hair, using a toothbrush)
        • Uses hands to push, pull, squeeze and rotate
        • Removes socks 
        • Stacks blocks; may not balance them

        12 – 24 MONTHS

        • Self feeds using hands or utensils
        • Points with index finger
        • Complete simple form shape puzzles (circle, square, then triangle)
        • Brings hands together to midline for use 
        • Scribbles on paper spontaneously 
        • Holds crayon with fisted hand
        • Stacks 2-6 block tower

        FINE MOTOR MILESTONES FROM 2 to 4 YEARS

        As children develop from toddlers into preschoolers, and gross motor development has reached major milestones, tons of fine motor skills begin to shine! Check out this checklist of fine motor milestones for young preschoolers.

        2 – 3 YEARS

        • Pushes, winds, slides to activate toys
        • Self feeds with utensils and open cup, some spillage. 
        • Screws/unscrews lids
        • Strings several large, 1 -1.5  inch beads
        • Imitates, eventually copies from a model, vertical, horizontal lines, and circle 
        • Holds crayon with thumb and fingers
        • Stacks 6-8 block tower, begins to follow block designs
        • Uses scissors to snip paper
        • Turns single pages in book

        3- 4 YEARS

        • Self feeds with utensils and open cup, little spillage.
        • Strings small beads
        • Snaps clothing, zips with assistance, begins to manipulate large buttons
        • Folds and creases paper
        • Imitates, then copies a cross (“t”) 
        • Draws a two part person
        • Holds pencil with thumb and fingers
        • Stack 9-10 block tower, begins to copy block designs (train, bridge, wall)
        • Uses scissor to cut along a thick, straight line 

        FINE MOTOR DEVELOPMENT FROM 4 to 6 YEARS

        Fine motor milestones for kindergarten and young elementary ages are a huge part of development during these years. Somewhere around this time, children with start school. Many of the fine motor skills will be tested here. Think of all of the crafts, puzzles, books, and small play items that they will encounter! 

        4 – 5 YEARS

        • Self feeds with utensils and an open cup, no spillage.
        • Imitates 4-6 part block designs
        • Buttons clothes
        • Laces sewing card
        • Opens all fasteners
        • Imitates then copies a diagonal line, square, triangle, and X
        • Draws a 3 part person
        • Uses scissors to cut simple shapes 

        5 – 6 YEARS

        • Builds complex designs with Legos, Tinker toys, etc. 
        • Imitates, then copies a rectangle
        • Connects two dots with straight line
        • Copies, then prints first name from memory
        • Copies letters and numbers
        • Draws an 6 part (or more) person, and recognizable pictures
        • Uses scissors to cut complex shapes
        • Ties laces together 
        • Cuts food with butter knife 

        RELATED: Interested in more than just fine motor? Read all about Child Development!

        Free Printable Fine Motor Checklist

        Want a printable Fine Motor Checklist with ages for developmental milestones of these fine motor skills? Use it to support child development, progression of fine motor skills, and to check off fine motor accomplishments.

        Want to add this resource to your therapy toolbox so you can help kids thrive? Enter your email into the form below to access this printable tool.

        This resource is just one of the many tools available in The OT Toolbox Member’s Club. Each month, members get instant access to downloadable activities, handouts, worksheets, and printable tools to support development. Members can log into their dashboard and access all of our free downloads in one place. Plus, you’ll find exclusive materials and premium level materials.

        Level 1 members gain instant access to all of the downloads available on the site, without enter your email each time PLUS exclusive new resources each month.

        Level 2 members get access to all of our downloads, exclusive new resources each month, PLUS additional, premium content each month: therapy kits, screening tools, games, therapy packets, and much more. AND, level 2 members get ad-free content across the entire OT Toolbox website.

        Join the Member’s Club today!

        FREE Fine Motor Milestones Checklist

          We respect your privacy. Unsubscribe at anytime.

          Sydney Thorson, OTR/L, is a new occupational therapist working in school-based therapy. Her
          background is in Human Development and Family Studies, and she is passionate about
          providing individualized and meaningful treatment for each child and their family. Sydney is also
          a children’s author and illustrator and is always working on new and exciting projects.