Yarn Fine Motor Jewelry Craft

You know we love to share fine motor activities here on the blog, right? Kids’ crafts that promotes fine motor development is one that can be used to work on developmental goals, functional skills, and dexterity.  This yarn fine motor jewelry craft is a process art project that uses this month’s process art material in the Process Art Challenge.  
 
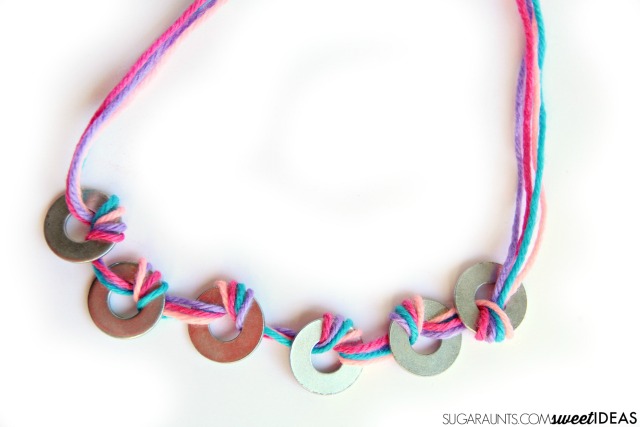
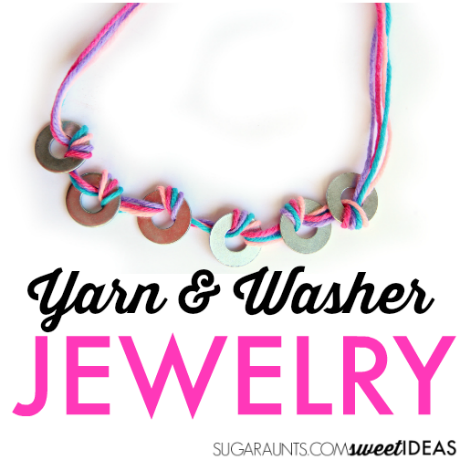
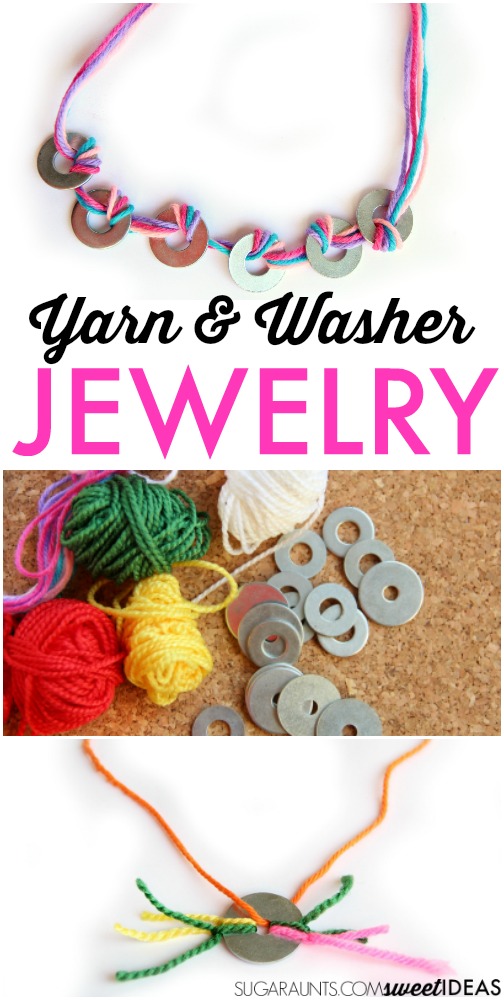
Each month’ we’ll join several other bloggers to create an art project that uses a specific material in a process art activity.  We used yarn and washers to work on fine motor skills with a fun result: yarn washer jewelry!
 
Use yarn and washers to create fun jewelry in this creative process art kids'craft.


Yarn Washer Jewelry Craft

This post contains affiliate links.
 
Use yarn and washers to create fun jewelry in this creative process art kids'craft.
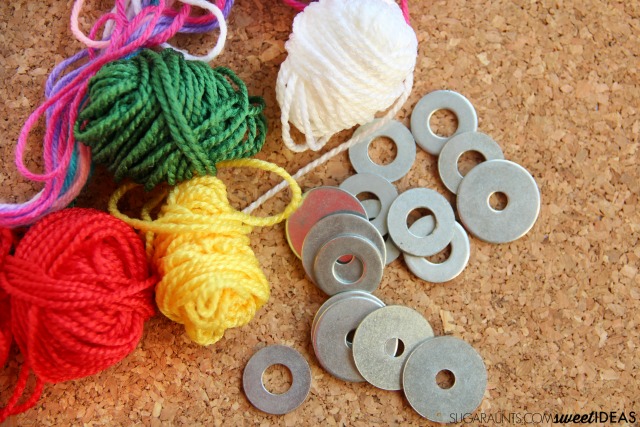
You’ll need just two materials to create this process art project:
Yarn (in several colors)
Washers (different sizes are fun)
 
Use yarn and washers to create fun jewelry in this creative process art kids'craft.
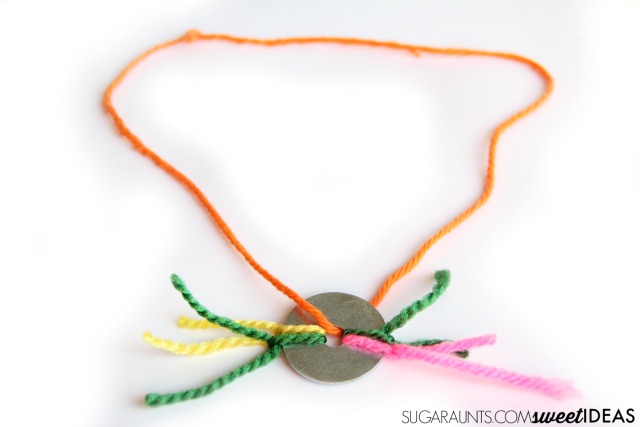
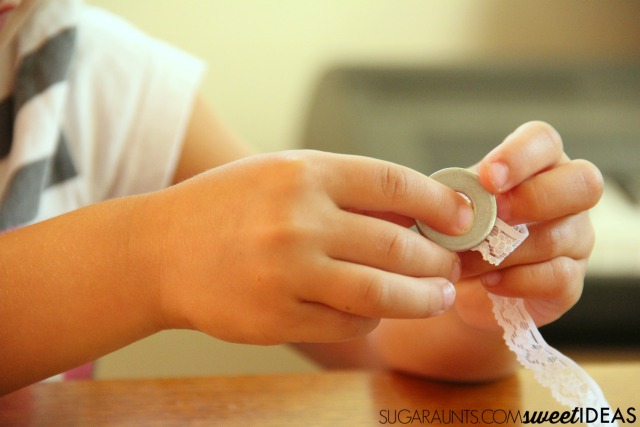
For this art project, I pulled out our supply of yarn, a pair of scissors, and the washers. I showed my kiddos how to push the yarn through the washers and how to tie knots around the edges.  They were pretty excited to try their own version of necklaces, bracelets, and rings.
 
We tried making a few lace ribbon designs, too.
 
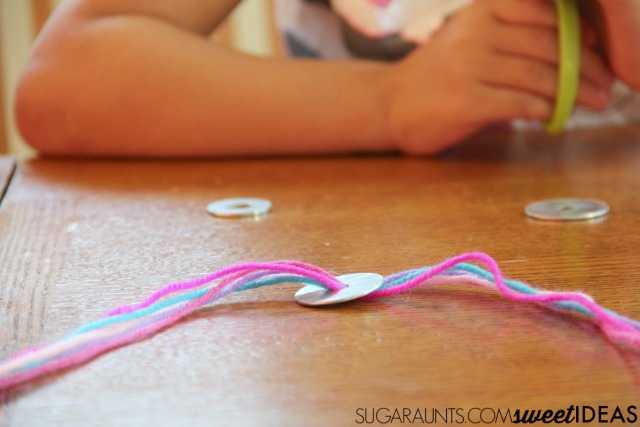
To make the looped washer necklace, push several strands of the yarn through a washer. Send it through another time and then on to the next washer.  To make this task easier, try using tape to create a hard end for threading.
Use yarn and washers to create fun jewelry in this creative process art kids'craft.
Try tying knots for more fine motor work.


Fine Motor Jewelry Craft

Working the yarn through the washer is an exercise in tripod grasp and improving strength of the intrinsic muscles of the hand.  The muscles that define the arches of the hands are essential for separating the two sides of the hand which is needed for tasks such as pencil grasp, manipulating buttons, zippers, snaps, shoe laces, and scissors.  
When a child pushes the yarn through the washer, they are building their visual motor integration skills.  Manipulating the flimsy yarn into the washer can be a difficult task for kids who have difficulties with coordinating and integrating visual input with the coordinated motor output of their hands in order to accomplish this fine motor task.  

Use yarn and washers to create fun jewelry in this creative process art kids'craft.
 
For kids who are struggling with this activity, try using cording as it will not fray with multiple attempts to thread the washers, or for assistance, a thicker cording would work, like this one.
 
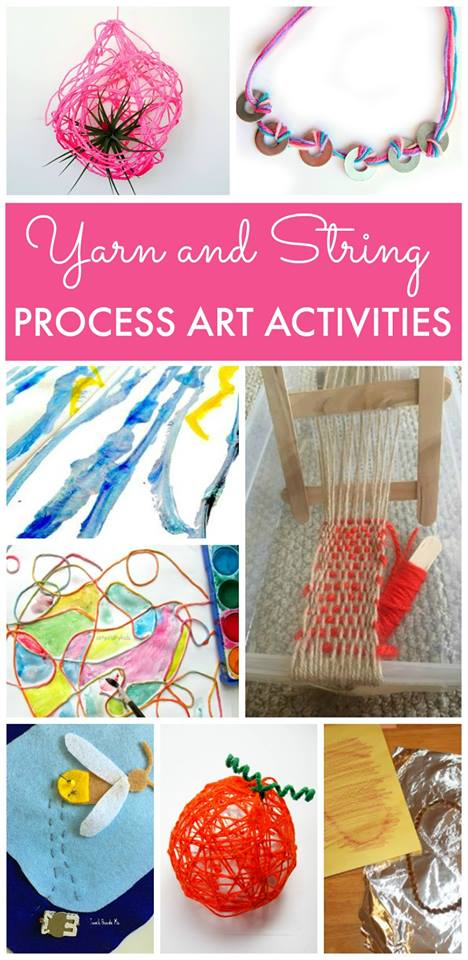
Want to see all of the yarn projects in this series?

Yarn and string process art activities for fun kids crafts
More Yarn and String Process Art Activities:
Sewn Circuits from Teach Beside Me 
Yarn Rubbing Art from Views From a Step Stool 
Yarn Wrapped Pumpkin Lanterns from Mum in the Mad House   
Use yarn and washers to create fun jewelry in this creative process art kids'craft.

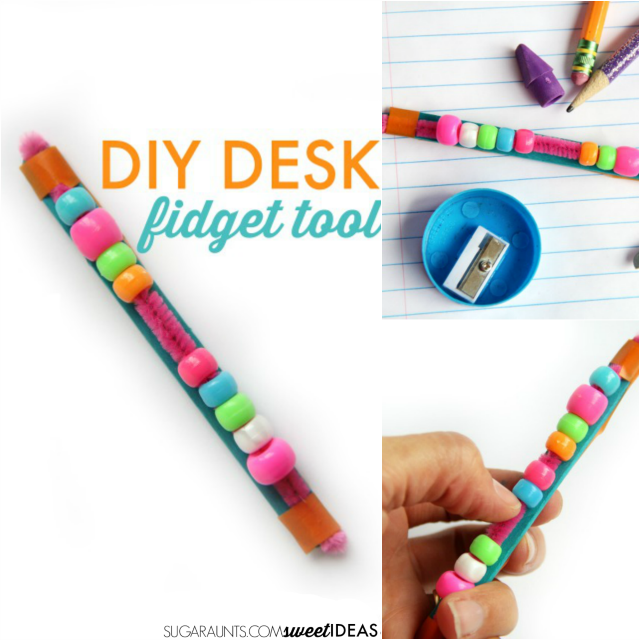
Desk Fidget Tool for School

When kids are working on handwriting tasks, they sometimes show difficulties with attention, focus, or legibility due to heavy pencil pressure, tearing of paper, or smudged pencil lines.  Kids may have sensory needs while sitting at a desk as they are required to attend, or they might have typically developed sensory systems and show typical signs of fidgeting during classroom work.  Whether your child/student/OT client has sensory needs or not, a fidget tool is often times just the key for helping with extra wiggles and movement needs that are interfering with handwriting and thus learning in the classroom.

Craft Stick Fidget

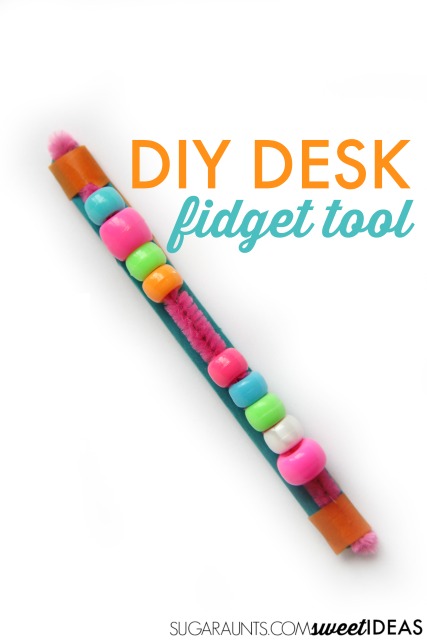
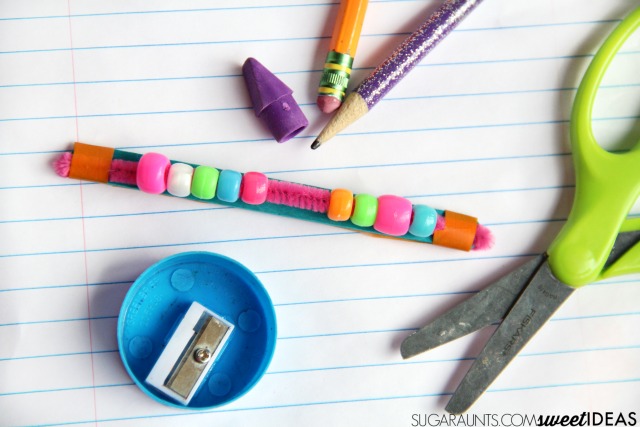
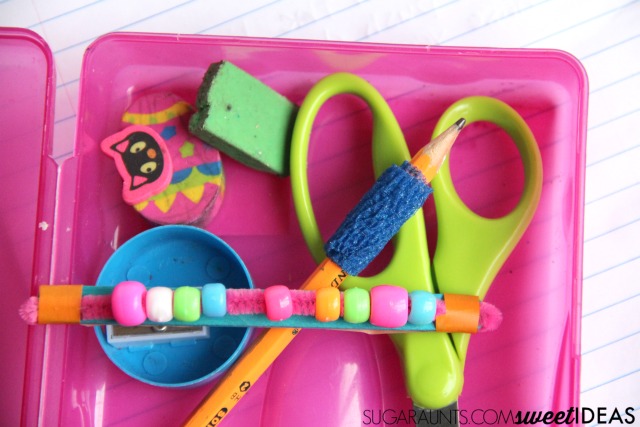
This DIY fidget tool is perfect for the desk because of it’s small, discrete size can be stored right inside the desk or even in a pencil box.  Kids can place this on their desk top as a fidget tool to use while handwriting.  

There are many indications that a child shows a need for a sensory tool like a fidget while writing. Read more about proprioception and handwriting here.

This attention tool is just one idea that might help in the classroom or at home. Here are more DIY fidget toy ideas that you might like.

Make this DIY fidget tool for use in the classroom or at home while writing and reading to help kids focus, attend, and perform tasks with tactile sensory input and movement they need to help with fidgeting.

Fidget toys are a great tool for addressing sensory needs, attention and focus during tasks.  We’ve shared a sensory tools for helping with fidget needs during homework and this tool would be a great addition to the homework time.

You’ll need just a couple of materials to create this DIY fidget tool:

(This post contains affiliate links)

To make the desk fidget tool:

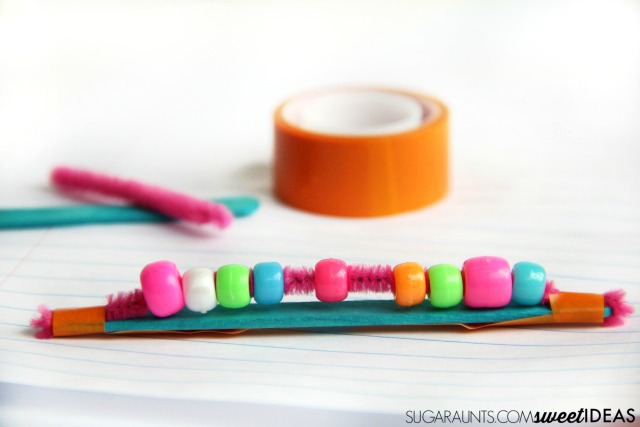
Cut a pipe cleaner to fit the length of a craft stick, including bending both ends over to the reverse side of the craft stick.  

Make this DIY fidget tool for use in the classroom or at home while writing and reading to help kids focus, attend, and perform tasks with tactile sensory input and movement they need to help with fidgeting.

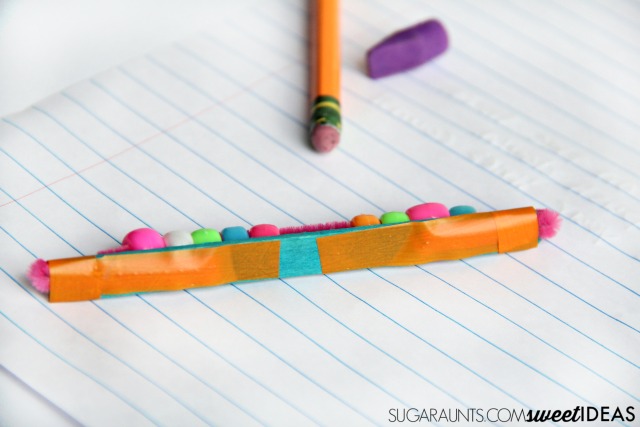
Slide several beads onto the pipe cleaner.  Then, bend both ends over the ends of the stick.  Attach them with a strip of tape over the length of the pipe cleaner that is bent down the backside of the craft stick.  

At this point, you can wrap rubber bands around each end of the craft stick to secure the pipe cleaner.  You will want to cover the rubber bands (or just tape around the end of the craft stick if you omitted the rubber bands). 

Make this DIY fidget tool for use in the classroom or at home while writing and reading to help kids focus, attend, and perform tasks with tactile sensory input and movement they need to help with fidgeting.

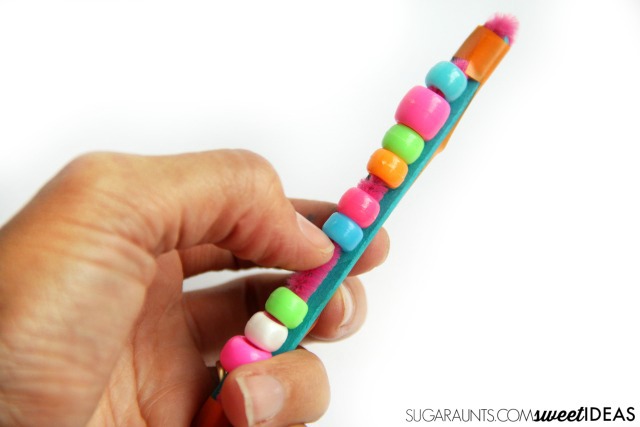
Use the fidget toy to help with attention and movement needs by sliding the beads up and down the pipe cleaner while writing, copying written work, reading, or listening in the classroom.  

The small size and flat back of this fidget tool make it perfect to rest on the desktop surface.  The child that is writing can hold it with their non-dominant hand as they stabilize the paper when writing with their dominant hand.  

Make this DIY fidget tool for use in the classroom or at home while writing and reading to help kids focus, attend, and perform tasks with tactile sensory input and movement they need to help with fidgeting.

Looking for more sensory tools for use in the home and classroom?  Try these:

  •  A ball of play dough or this Pull and Stretch Bounce Ball is a good way to keep kids’ hand occupied as they move with the small motor proprioceptive input. This heavy work for the hands can allow kids to concentrate as they write. 
  •  The DESK BUDDY is great for kids who are doing homework as it can sit on a table surface or it can be a hand-held sensory fidget toy. 
  •  A pencil topper like these Pencil Tops Fidget can help kids while they write, and can be fidgeted with on or off the pencil. 
  •  Try writing with a vibrating pen like this Squiggle Wiggle Writerfor proprioceptive input before a writing homework assignment. 
  •   THE ULTIMATE FIDGET is a quiet fidget toy that kids can keep in their pocket. 
  •  Something as simple as nuts, bolts, and washers can make a great fidget toy for kids. 
  •  A few (Amazon affiliate link) Wikki Stix can give a child just the fidget toy they need to concentrate. Here are more wikki stix activities as well.  Kids can bend them into a ball, and work the bendable strings as they work. 
  •   Grip Pop Beads are one of my favorite fidget toys for kids. They work on the small muscles of their hands as they build the pop beads and have a fidget once they have a strand of beads. 
Make this DIY fidget tool for use in the classroom or at home while writing and reading to help kids focus, attend, and perform tasks with tactile sensory input and movement they need to help with fidgeting.

Be sure to check out all of the easy handwriting tips in this month’s series and stop back often to see them all.  

You’ll also want to join the Sweet Ideas for Handwriting Practice Facebook group for more handwriting tips and tools.
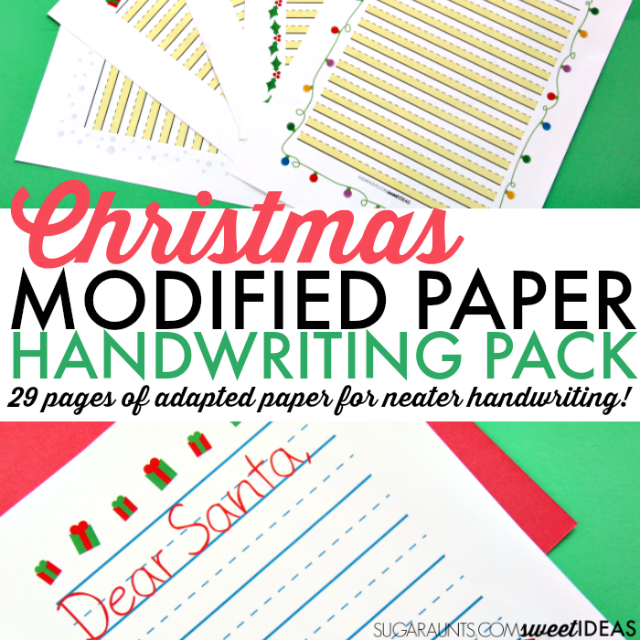
Get 29 pages of modified paper with a Christmas Theme for legible and neat Letters to Santa, Christmas Wish Lists, Thank You Notes, Holiday Lists, and MORE! 

GET YOUR Christmas Handwriting Pack!


Omitting Letters, Words, and Numbers when Copying Written Work

Copying assignments into the homework journal is just one job that student’s have during their day.  But what happens when the student attempts to complete that homework and words, page numbers, and letters are missing, making the assignments completely illegible?
 
When kids copy words from text, there are many visual perceptual skills at work.  Visual Memory, visual spatial relations, visual closure, and figure ground are just some of the skills that may impact ac child’s ability to copy written work from a chalkboard, overhead, or text right in front of them.
 
These tips and ideas are recommendations for helping children accomplish the task of copying written work both from across the room from a chalkboard or from a book or worksheet right on their desk.  These tricks will help the child that is omitting letters, words, and numbers when copying written work.
 
Visual perceptual skills are needed for so many functional skills. You’ll find easy and fun ways to work on visual perceptual skills through play here. 
 
Visual perceptual skills are many times the cause for kids copying written work and omitting letters, words, and numbers. These tricks and tips for helping kids copy from the board or from their book are helpful for kids with dysgraphia as well.

Tips for helping kids who miss words or letters when writing:

  • Remove extra distractions from paper/worksheets/texts.  The extra pictures or page of text can be difficult for the child with figure ground problems to pull out the important information.
  • Teach the student to review their written work.
  • Allow extra time for completing copying tasks.
  • When copying from the chalkboard, provide a copy of the written work that must be copied for the student’s desk.  Position it flat on the desk.  Work on copying it from a vertical position on the desk before requiring the student to copy from the chalkboard.
  • Teach kids to chunk information together, such as several letters or words for copying. 
  • Highlight information that needs to be copied.  When copying from the board, chalk could be used to draw a square around important information. 
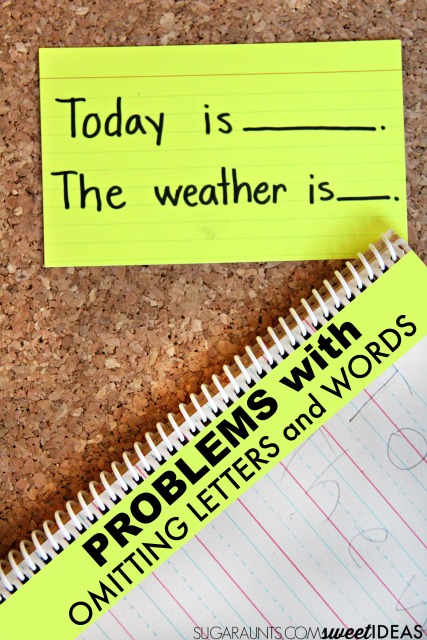
  • Instead of copying from the board, provide the child with a near-point copying point: Write the information on an index card or low-distraction paper that can be placed on the child’s desk. 
  • Write with a larger font on the chalkboard or overhead.
  • Write with a larger font on near-point copying paper on the desk.
  • Provide less information/words for the child to copy.
  • Provide more space for the child to copy to: Provide larger spaced paper.
  • Graph paper for copying one letter/number per square.
  • Position the child closer to the chalkboard or classroom homework station with less had turn needed for copying written work. 
  • When copying form a book, use a copying tool such as a folded piece of paper to line up with the work.  Can also try an index card with a cut out “window” for copying to reduce distracting information.

More ways to work on copying from the board with accuracy and legibility


Work on form constancy skills.


Visual perceptual skills are many times the cause for kids copying written work and omitting letters, words, and numbers. These tricks and tips for helping kids copy from the board or from their book are helpful for kids with dysgraphia as well.
 
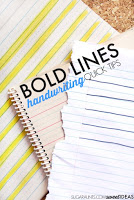
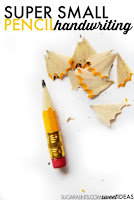
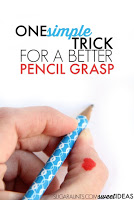
 color mixing letter formation activity bold lines handwriting trick Small pencil trick for helping with a better pencil grasp  Thumb IP joint flexion pencil grasp trick

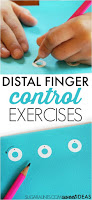
Distal Finger Control Exercises

Distal finger control exercises

Distal Finger Control is a fine motor skill exercise in dexterity that is needed for manipulating the pencil with the fingers.  Without distal finger control, a child uses wrist and forearm motions to move the pencil, form letters, and write with larger pencil strokes.  Those bigger pencil lines tend to be less controlled and can result in legibility issues, spatial awareness difficulties, and line awareness troubles.  

Use these distal finger mobility tasks as finger strength exercises.

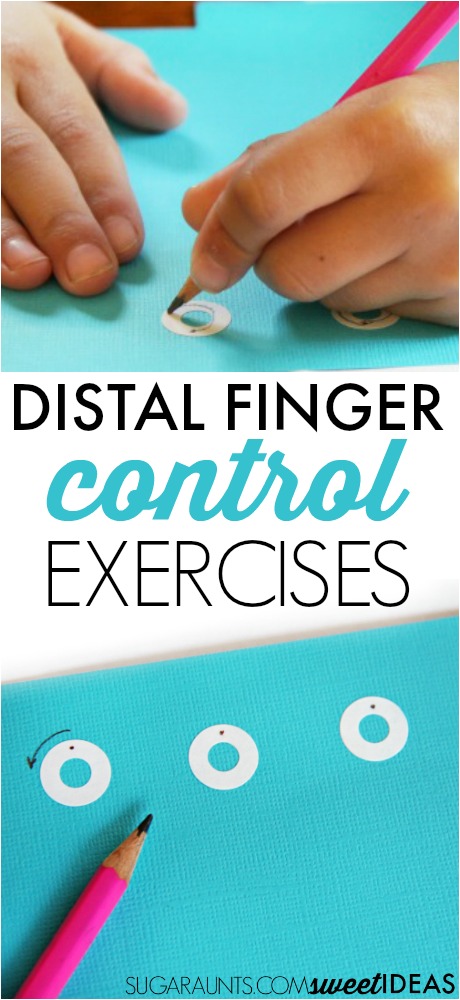
Try these distal finger control exercises using sticker reinforcement labels to develop and build fine motor skills needed for dexterity and legibility in written work. Perfect for a pre handwriting activity!

Helping a child to improve their distal finger control is one way to help improve handwriting.

Distal Finger Control Exercise for Use in Handwriting

There are many ways to encourage motor movements of the digits vs. using larger muscle groups.  Opening of the thumb web space, finger isolation, pincer grasp and pinch grip strength, intrinsic muscle development, thumb IP joint flexion, and arch development are key to ensuring functional use of the distal fingers in tasks like handwriting.


This simple activity is one way to develop distal finger control for use in manipulating a pencil. Below, you’ll find more ideas that can be used as well.


This post contains affiliate links.


We used just a two materials, making it an easy and frugal way to develop motor skills:

  • Paper reinforcement stickers (Amazon affiliate links)
  • Pencil


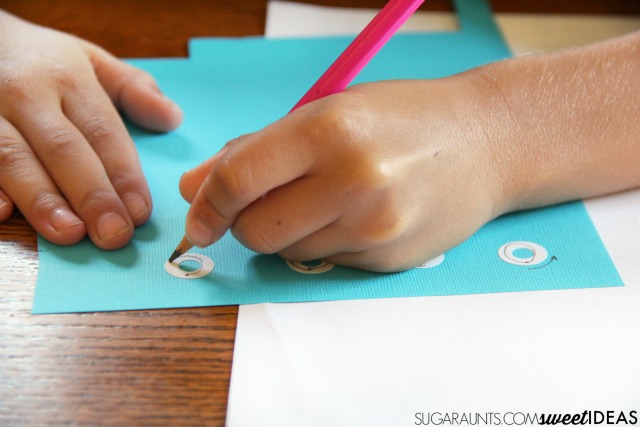
    Have your child stick the labels to a piece of paper.  A colored piece of paper like cardstock is perfect for it’s bright and bold colors.  Peeling the stickers is a great way to encourage fine motor development of neat pincer grasp.

Try these distal finger control exercises using sticker reinforcement labels to develop and build fine motor skills needed for dexterity and legibility in written work. Perfect for a pre handwriting activity!


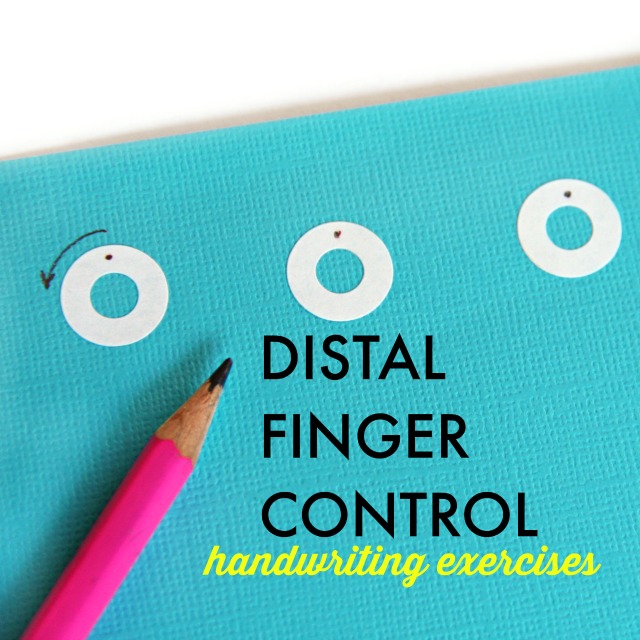
Next, draw a small dot on the top of each reinforcement label.  You can add a curved arrow pointing from the dot and going counterclockwise.  

Show your child how to place their forearm and wrist on the table surface (a slanted surface would be better!) and to use one pencil line to make a circle while staying inside the white boundary of the reinforcement label.


Fill a whole page with reinforcement stickers and work on producing circles in the counter-clockwise direction while staying inside the boundaries of the label.


To grade up this activity, try a timed test.  Turn on a timer and see if the child can stay in the line of the label while using only their fingers to draw the line.


You could also use these brightly colored neon paper reinforcement labels for a pre-colored and high contrast label for practicing motor control exercises.

More ways to develop distal finger control for use in handwriting:

Beading
Tearing small pieces of tissue paper
Manipulating nuts and bolts
Crumbling small pieces of paper
Roll pieces of play dough
Sprinkle sand onto glue
Peel small stickers
Tweezer games
Legos
Wind up toys
Spin tops


Each of these toys and games can be turned into distal finger control exercises by adding a timed component.  Try to encourage your child/student/client to perform the activity with their forearm and wrist on a table surface and “beat the clock” to complete the muscle building activity for longer and longer time periods.  


How can you make these “exercises” a fun part of therapy or a pre-writing task? I would love to hear your ideas! 

Try these distal finger control exercises using sticker reinforcement labels to develop and build fine motor skills needed for dexterity and legibility in written work. Perfect for a pre handwriting activity!


Looking for more ways to use page protectors in therapy? I love these Dot Phonics Mazes for their fine motor and visual motor integration work.  Peeling and positioning the stickers onto the lines requires a coordinated effort of visual processing and fine motor dexterity.  Kids love hands-on busy work like this and when a maze is involved it is even more fun.  By completing the mazes, they are building visual skills such as visual scanning which is essential for reading and writing. 


This activity is part of our month-long handwriting series where we are sharing creative and easy ways to address common handwriting issues in our 30 Easy Quick Fixes for Better Handwriting series.


Working on fine motor skills, visual perception, visual motor skills, sensory tolerance, handwriting, or scissor skills? Our Fine Motor Kits cover all of these areas and more.

Check out the seasonal Fine Motor Kits that kids love:

Or, grab one of our themed Fine Motor Kits to target skills with fun themes:

Want access to all of these kits…and more being added each month? Join The OT Toolbox Member’s Club!

Colleen Beck, OTR/L has been an occupational therapist since 2000, working in school-based, hand therapy, outpatient peds, EI, and SNF. Colleen created The OT Toolbox to inspire therapists, teachers, and parents with easy and fun tools to help children thrive. Read her story about going from an OT making $3/hour (after paying for kids’ childcare) to a full-time OT resource creator for millions of readers. Want to collaborate? Send an email to contact@theottoolbox.com.

Coban Pencil Grip

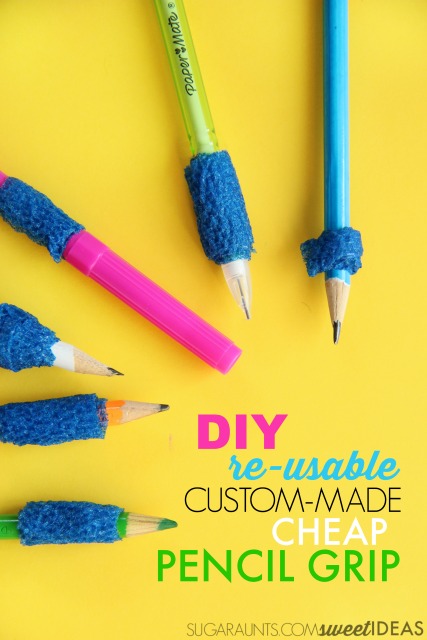
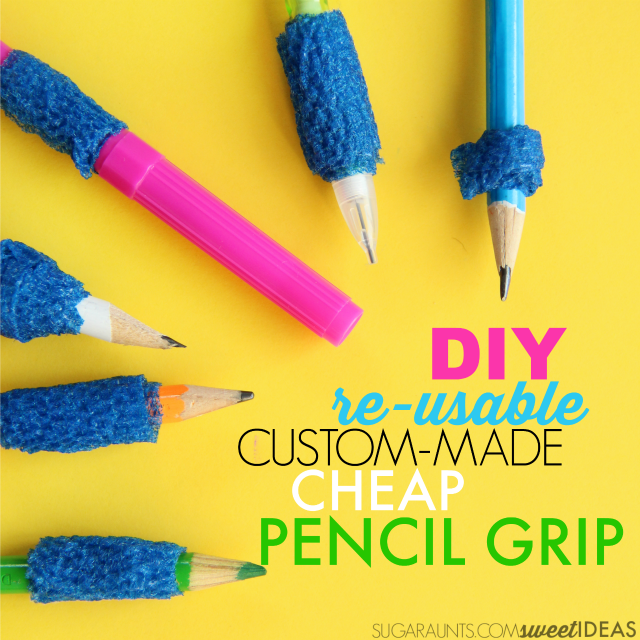
Pencil grips can be pricey, especially if you are buying a big batch to try and find the right fit for a single child.  Then, add a classroom of kids or a caseload of 50-60 children who each have different pencil gasps, different strengths, different handwriting quirks, and you can go pencil grip bankrupt!  This easy, DIY, custom-made, and cheap coban pencil grip is one that will work with every child no matter what their current pencil grasp looks like.  The secret weapon? Self-adhesive, removable (yet still totally stick-able and re-usable) coban!


Use coban to make a customized, re-usable, DIY pencil grip for improving pencil grasp, perfect for the whole classroom or OT clinic.
This activity is part of our month-long handwriting series where we are sharing creative and easy ways to address common handwriting issues in our 30 Easy Quick Fixes for Better Handwriting series.

You’ll also want to join the Sweet Ideas for Handwriting Help Facebook group where you can find support and resources for handwriting. 

Coban Pencil Grip (A handwriting gripper secret weapon!)


This post contains affiliate links.

Use coban to make a customized, re-usable, DIY pencil grip for improving pencil grasp, perfect for the whole classroom or OT clinic.
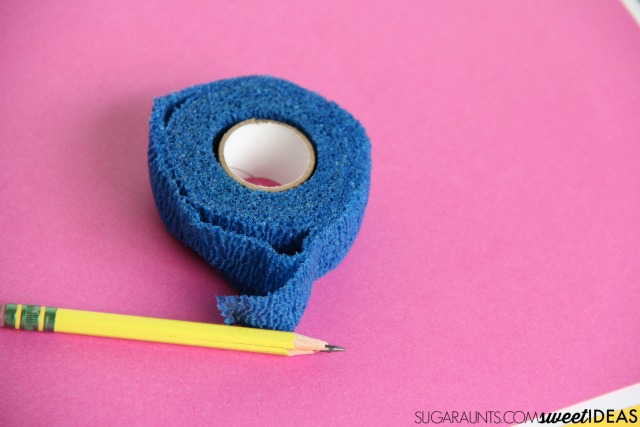
What is coban??? Is a question you might be asking right now.  Perhaps you’ve seen it before.  If you’ve ever had a surgical wound or a bad wound of any kind, you might have come across coban before.  It’s a self-adherent wrap that works a lot like surgical tape.  It’s rally a pretty cool material.  It sticks to itself again and again and it requires no adhesive to stay in place.  My days as a hand therapist brings back memories of coban in my therapy tool box.  It’s a great device for applying compression to edema, immobilization, and a wrap to dressings.  

But it also makes a pretty awesome pencil grip!

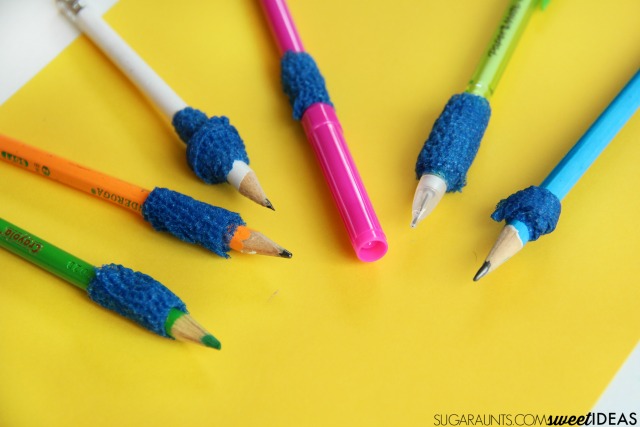
Coban is unique in it’s ability to stick to itself, so why not use it to create a customized and DIY pencil grip?  Being that a roll of it is pretty inexpensive, you can create pencil grippers for every pencil in the pencil box as well as colored pencils, mechanical pencils, and even markers.  These writing tools usually don’t work with conventional pencil grips, but coban can be fit to any writing device.

Use coban to make a customized, re-usable, DIY pencil grip for improving pencil grasp, perfect for the whole classroom or OT clinic.
We tried a bunch of different writing tools and then made a variety of pencil grippers with the coban.  A child that needs just a tactile cue to pinch the tip of the pencil can use a thin ribbon of coban around the tip of the pencil.

The child that needs a molded form can have the coban built up at the top and end of the pencil grip.  (Just keep wrapping the coban around more to create more layers and a thicker portion.)

The child that uses too much pressure on the pencil could benefit from a foam-y thick layer of coban the whole way around the tip of the pencil.

The child that needs cues to open the thumb web space could have a small “pocket” of coban formed at the end of the pencil gripper. 

The possibilities are endless with this custom-made pencil grip material.

And the best part is that when the pencil needs sharpened, you peel off the coban and move it on up the pencil.

We used blue coban but here is a very inexpensive option for purchasing.  If you need a bunch of rolls for one or several classrooms, this bulk purchase might be a better deal. (Note: that bulk purchase is a 3 inch wide material. You can then cut the material to a thinner strip, essentially tripling the amount of coban you have on hand but also having a thicker material to fold for pencil grips.)

Here are a few tips for making your coban pencil grip:
Using a thicker width of coban is fine (it is available in a variety of widths) as it can easily be cut or folded to fit the needs of your child.  

When making your pencil gripper, fold the end of the coban over once to make a thicker end that will be easier to find and peel off when it comes time to sharpen the pencil or adjust the coban.

Let me know how this DIY pencil grip works for you!

Use coban to make a customized, re-usable, DIY pencil grip for improving pencil grasp, perfect for the whole classroom or OT clinic.

Looking for more ways to improve pencil grasp? Start here:

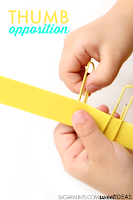
 Pencil Grasp Activity Pencil Grasp Exercise Thumb opposition activity
   

amzn_assoc_placement = “adunit0”;
amzn_assoc_search_bar = “true”;
amzn_assoc_tracking_id = “sugaun-20”;
amzn_assoc_ad_mode = “manual”;
amzn_assoc_ad_type = “smart”;
amzn_assoc_marketplace = “amazon”;
amzn_assoc_region = “US”;
amzn_assoc_title = “My Amazon Picks”;
amzn_assoc_linkid = “c38e496d469ec77338b54bbaab0d1158”;
amzn_assoc_asins = “B00UEHDW04,B0070P25TM,B01AWCCP9Y,B001DND1XG”;

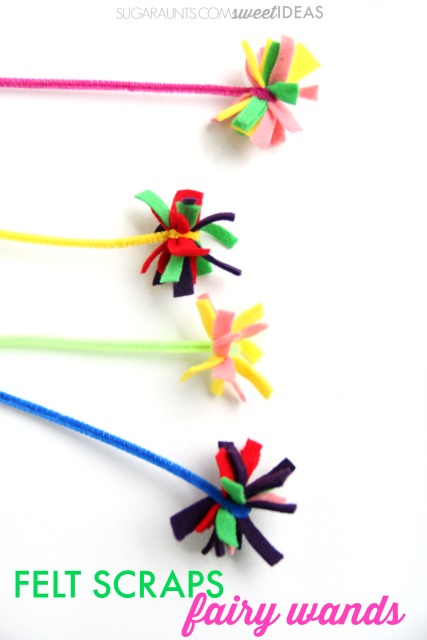
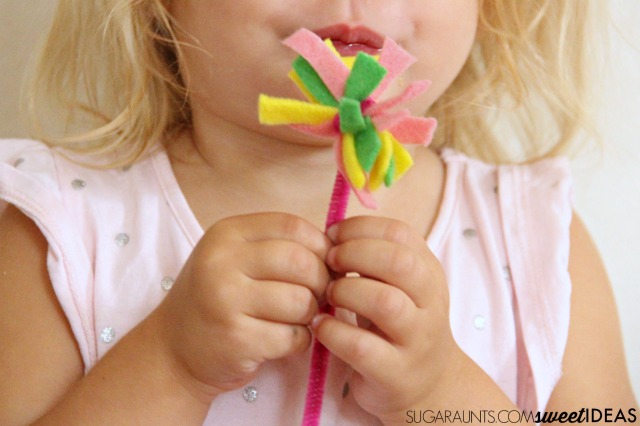
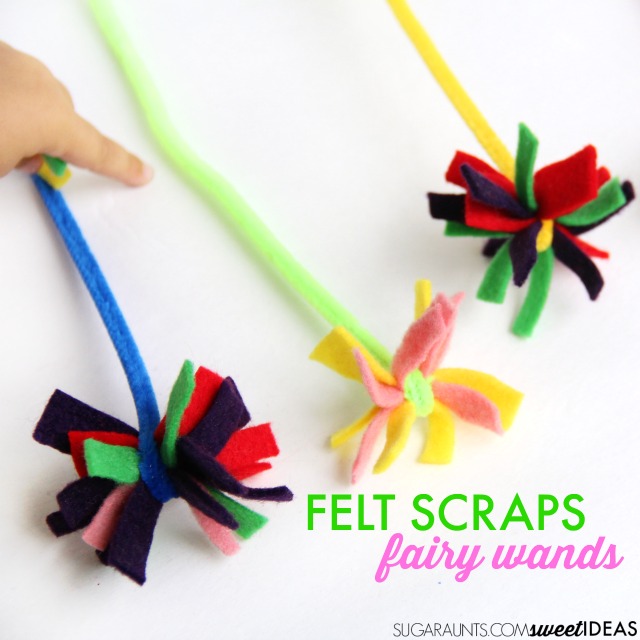
Felt Scraps Fairy Wand Craft

If you are like me, you have a ton of crafting supplies sitting around the house.  And by that, I mean stuff that we used for one kids’ craft project or another and then saved the leftover parts “just in case” we need them in the future.  Sound familiar? It’s a good thing we had felt scraps left over from a previous project because we had a chance to use them in this felt scraps craft!

We joined a few other bloggers in a monthly craft challenge where we are each using one specific medium and coming up with our own crafts.  You can find all of the other bloggers that are in this challenge in an upcoming round-up post (that I’ll link here when it’s live!).

I would love to hear how YOU would use felt scraps in a craft!

Use felt scraps to make fairy wands for pretend play and imagination activities with kids.


Felt Scraps Fairy Wand Craft

This post contains affiliate links.

This craft is super easy to make.  You’ll need just three items:

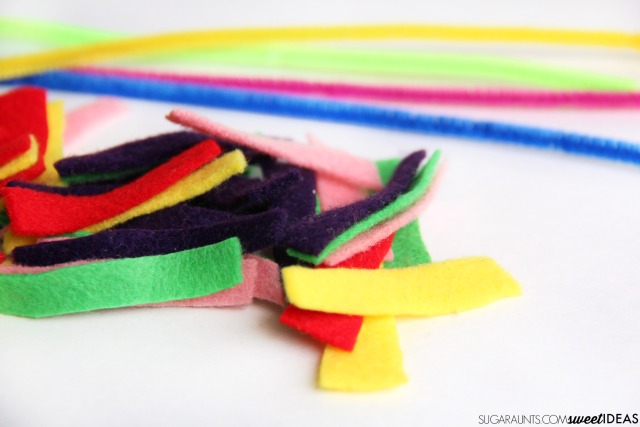
  • Felt scraps in a variety of colors (THIS set has 42 colors for only about $11)
Use felt scraps to make fairy wands for pretend play and imagination activities with kids.
To make the fairy wands, you’ll need to first cut the felt into small 1/4 inch strips.  Cut those strips into 2-3 inch long pieces.  
Use felt scraps to make fairy wands for pretend play and imagination activities with kids.
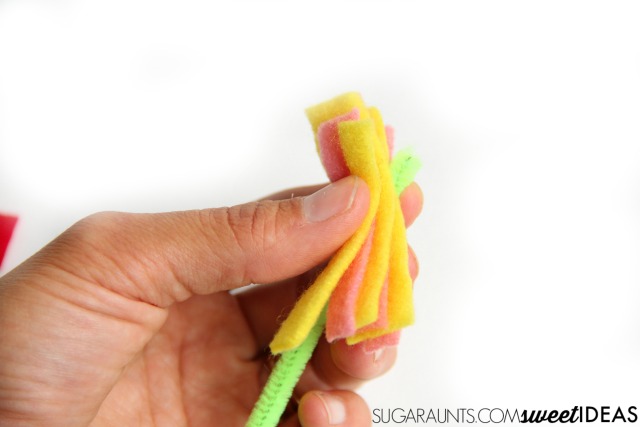
Then, stack several colors together and pinch them in the center.  

Finally, wrap one end of the pipe cleaner around the felt very tightly.  This craft is an excellent way to work on fine motor skills such as pinch strength and scissor skills.

You can also bend the pipe cleaner in half to make the wand more stable.
Use felt scraps to make fairy wands for pretend play and imagination activities with kids.
Now it’s time to play!
Use felt scraps to make fairy wands for pretend play and imagination activities with kids.

amzn_assoc_placement = “adunit0”;
amzn_assoc_search_bar = “true”;
amzn_assoc_tracking_id = “sugaun-20”;
amzn_assoc_ad_mode = “manual”;
amzn_assoc_ad_type = “smart”;
amzn_assoc_marketplace = “amazon”;
amzn_assoc_region = “US”;
amzn_assoc_title = “My Amazon Picks”;
amzn_assoc_linkid = “4f4895894605c9dfb6c4581d9d374f70”;
amzn_assoc_asins = “B0144ARY5K,B0044SEKTG,B00005BZRZ,B00GQE26BK”;

Why Use a Slant Board?

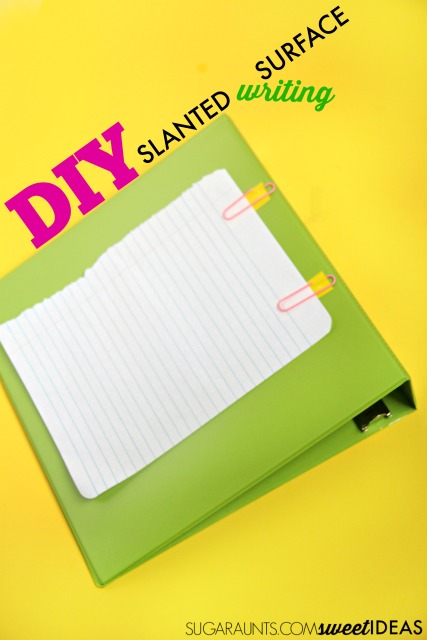
One quick tip for improving handwriting is to use a sloped surface or an angle board.  Writing on an angle is beneficial for many reasons.  Today, I’ve got a run-down of why writing on a slant board or sloped surface is beneficial for kids who are working on thier handwriting, as well as an easy DIY sloped board that can be easily used in the classroom or at home.  Take it along to appointments for homework, too!  This easy DIY sloped writing surface shouldn’t cost you more than a few dollars to make and is a secret tool for improving handwriting, especially if you already have some of the items.


This activity is part of our month-long handwriting series where we are sharing creative and easy ways to address common handwriting issues in our 30 Easy Quick Fixes for Better Handwriting series.

 
You’ll also want to join the Sweet Ideas for Handwriting Help Facebook group where you can find support and resources for handwriting. 
 
What are the benefits of using a slant board or angled surface in writing and learning and an easy DIY how to make a slant board for classroom and home handwriting.

Why Use a Angled Writing Surface When Working on Handwriting?

This post contains affiliate links. 

There are several reasons why writing on an angled surface is beneficial for kids:

 
Wrist Extension– Writing with an extended wrist puts the hand into a functional position and allows the hand to pull the radial digits into opposition. The angled surface forces the wrist and hand into tenodesis, which is a commonly used passive hand grasp pattern for individuals with C6 level quadriplegia or other physical deficits. Using the slanted surface for an individual who has typical range of motion neural pathways benefit by the pulling of the fingers into a flexed position.  In order to hold and grasp the pencil, an individual needs to maintain radial digit opposition to the thumb but may present with increased force on the pencil due to this positioning.
 
 
Posture– Placing paper on an angled surface brings the paper and pencil closer to the child. They automatically assume an more upright posture in the chair prompted by raised shoulder girdle.  This and a raised neck posture can help with breathing and allow the child to become more alert in classroom writing tasks.  By bringing the paper up closer to the child, they raise their neck and head up into a better position.
 
Visual Processing and Learning– This is an interesting article sharing information about research showing there is improved learning when near point visual activities like reading and writing are done in proper conditions.  The article also describes research that shows work done on a sloped surface of 20-23 degrees with appropriate elbow positioning will position the eyes into an optimal distance from the working surface. 
 
Improved Motor Control– By positioning the wrist on a slanted surface, the forearm is used in manipulating the pencil, giving more motor control in moving the pencil to form letters.  Motor control in handwriting is needed to stop on lines, form letters appropriately, and to help with writing speed. 
 
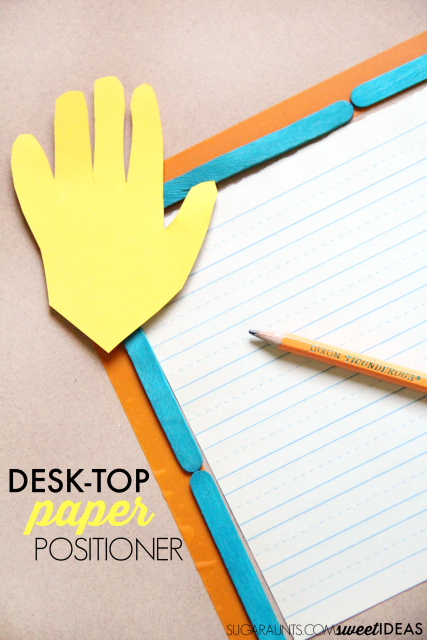
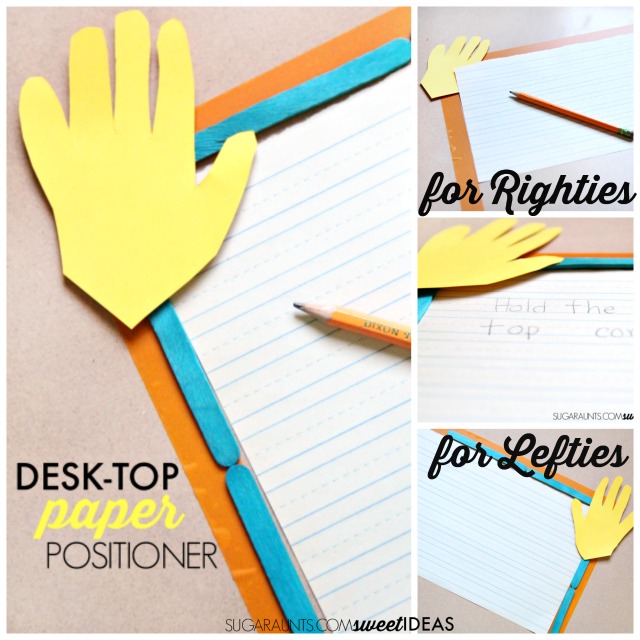
Paper positioning- using both hands together in a writing task can be overwhelming for the child with bilateral coordination difficulties. A sloped surface with a paper attachment can be an easy way to keep paper attached while the child concentrates on letter formation.
 
Copying Skills– Copying written work from a chalkboard or overhead can be quite difficult for some students with visual processing concerns.  Using a slant board is one tool that can be used in the classroom.  The upright posture and less movement of the head and eyes that need to shift to visually scan from the desk to the wall can help with copying when a slant board is used.
 
What are the benefits of using a slant board or angled surface in writing and learning and an easy DIY how to make a slant board for classroom and home handwriting.

How to make a DIY Slant Board

This DIY version of a slant board is very easy to make.  With commercial slant boards being very expensive, it can be difficult to fill a classroom with slant boards (or even find money in the budget for one student!). 
 
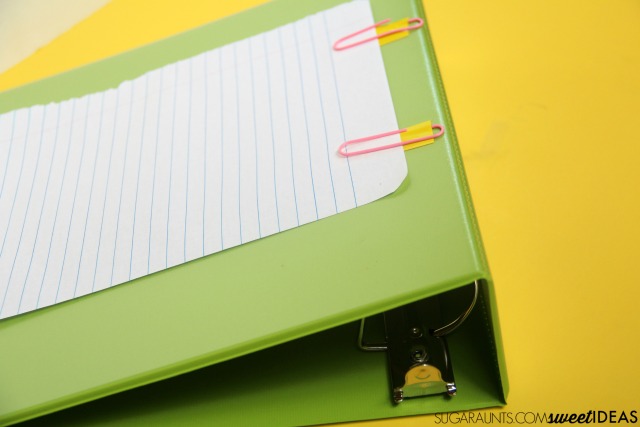
You will need just a few items to make your own version:
 
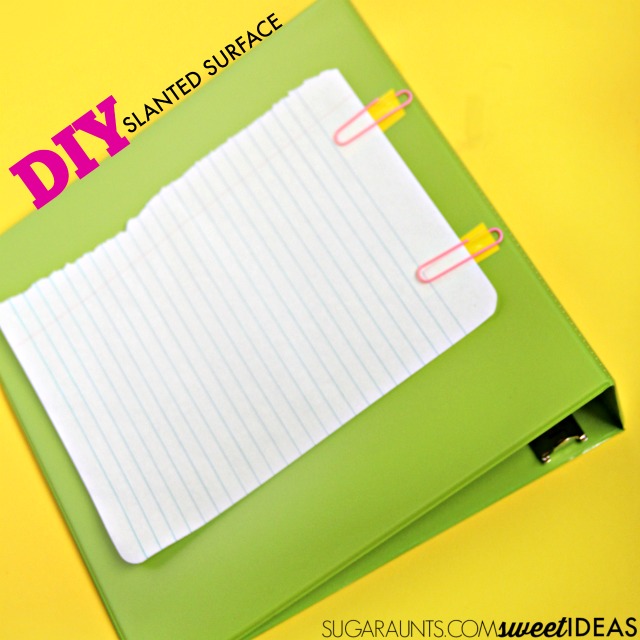
Cut a two pieces of electrical tape and stick it to one side of the inside of the paper clips.  To make this easier, slightly bend the paper clip and slide the tape in.  You can then bend the paper clip back to a flat position.  Stick the tape and paper clip to the binder. 
 
Repeat with the other paper clip and tape.  You can use the angled surface as is or you can attach a pencil with the piece of string. Just tie one end to the eraser end of the pencil and the other end to one of the rings inside the binder.  

Watch the how-to HERE

One final note: 

Be sure to tie the string to the same side as the child is dominant.  If they write with their right hand, tie the string to the right most ring in the binder. If they are left handed, tie it to the left most ring. 
 
What are the benefits of using a slant board or angled surface in writing and learning and an easy DIY how to make a slant board for classroom and home handwriting.


Be sure to check out all of the easy handwriting tips in this month’s series and stop back often to see them all.  
 
You’ll also want to join the Sweet Ideas for Handwriting Practice Facebook group for more handwriting tips and tools.
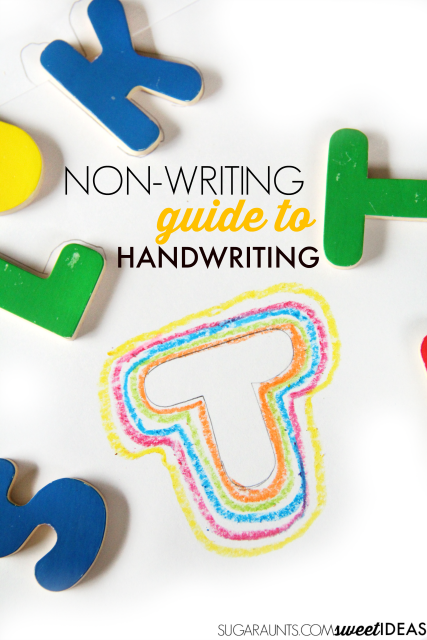
The Non-Handwriting Guide to Practicing Handwriting

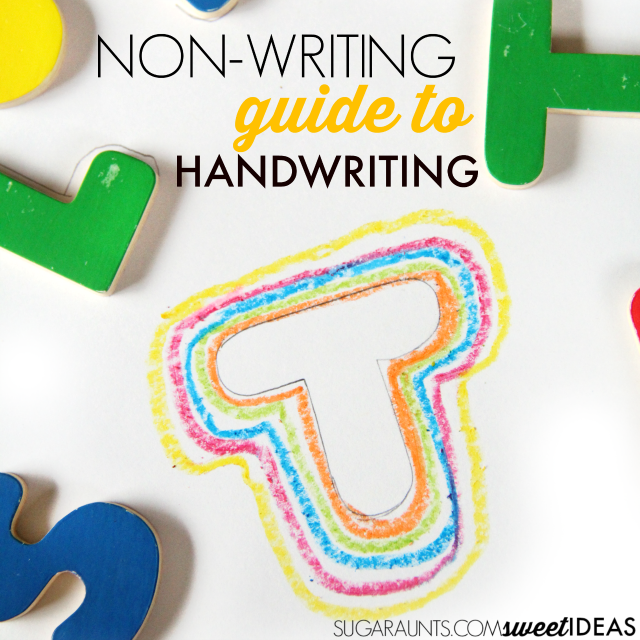
Handwriting practice doesn’t always have to involve writing.  This easy activity helps kids with visual processing difficulties or visual motor integration issues to address spatial and line awareness needed for neatness in handwriting while working on a fine motor component and form producing component that are essential for effective spatial use and line awareness in written work.

This activity is part of our month-long handwriting series where we are sharing creative and easy ways to address common handwriting issues in our 30 Easy Quick Fixes for Better Handwriting series.

You’ll also want to join the Sweet Ideas for Handwriting Help Facebook group where you can find support and resources for handwriting. 


Try this line awareness and spatial awareness handwriting activity using puzzle pieces and crayons to work on handwriting in a fun and creative way that doesn't require writing.

Spatial Awareness and Line Awareness Activity


This spatial awareness and line awareness activity is a powerful way to work on so many skills…without actually working on copying or writing.  We’ve shared a similar activity to this one before with our Improve Handwriting with Cookie Cutters post.  

In this activity, you’ll need just a few items to get started.  (This post contains affiliate links.)
Pencil (Use a mechanical pencil and here’s why.)
Paper

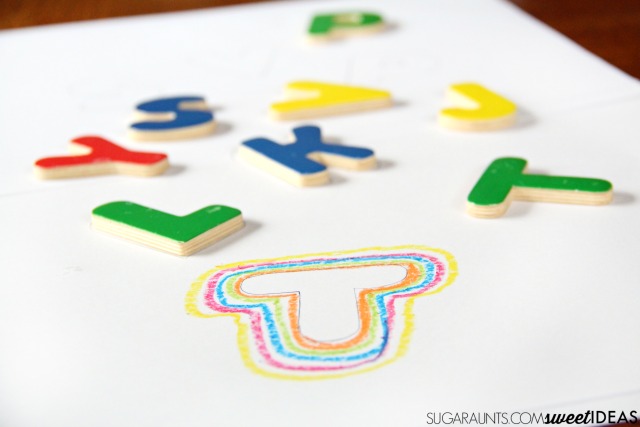
Start by pulling some puzzle pieces out of the wooden frame.  These wooden alphabet puzzle pieces are perfect for this activity because of their size, their simple colors without patterns, and the lack of plastic handle that some wooden puzzle pieces have. (These puzzles have the plastic handle that would get in the way for this activity, in case you are wondering what I’m talking about.)

Try this line awareness and spatial awareness handwriting activity using puzzle pieces and crayons to work on handwriting in a fun and creative way that doesn't require writing.

Bilateral Coordination in Handwriting

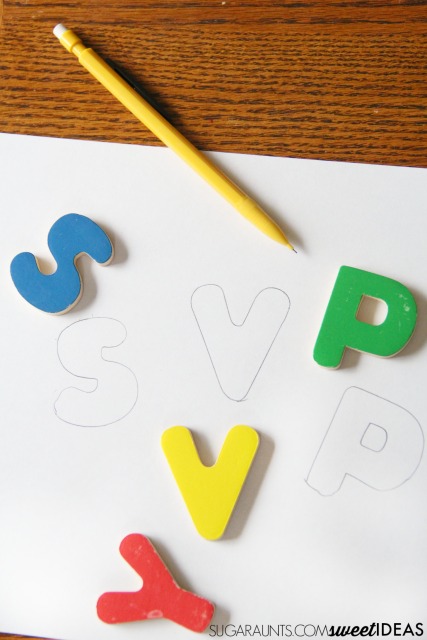
You’ll place a few letters on the paper and use the pencil to trace the puzzle piece.  Tracing the puzzle piece is a great exercise in bilateral coordination. This skill is needed for efficiency in handwriting.  When we write, we often move the paper to adjust for arm placement on the page.  Using both hands together to move and adjust the paper on the desk as we write with our dominant hand helps us to write effectively.  It can be awkward to trace the letters at first, but after a few tries, it should become easier.  

 Try this line awareness and spatial awareness handwriting activity using puzzle pieces and crayons to work on handwriting in a fun and creative way that doesn't require writing.
Note: If you are concerned about getting pencil marks on the edges of the puzzle pieces, use a  mechanical pencil to trace.  The plastic case of the pencil will rub up against the side of the puzzle piece and leave the puzzle letters pencil marking-free.  

It is not necessary to trace all of the letters right-side up.  In fact, positioning them in any position is a good exercise in form constancy for another portion of this activity (I’ll explain more about this part below!)

Try this line awareness and spatial awareness handwriting activity using puzzle pieces and crayons to work on handwriting in a fun and creative way that doesn't require writing.

Visual Motor Integration and Handwriting

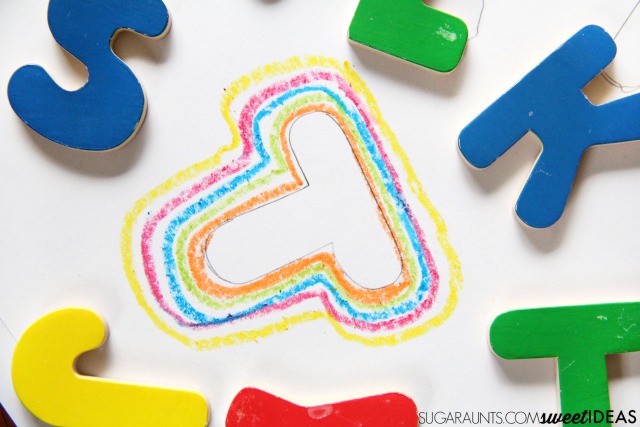
Next, remove the puzzle piece from the paper and use the crayons to trace around the pencil letter.  You want to show the child how to trace the lines with different colors, leaving a small space between each color.  This task helps in several ways.  Tracing the lines in this manner helps to work on visual motor integration skills needed for appropriate line awareness and spatial awareness in handwriting. 

Taking in the visual input that we receive while writing and creating written work in handwriting tasks requires visual motor integration to form letters, position them on lines, and space between the letters and words.

If your child is having trouble with this activity, try taking turns with different colors, like we did in this copying and spatial awareness activity

Once you have traced (and traced and re-traced) the letters so that they have many colorful layers, try placing the puzzle pieces back onto the traced letters.  Because some of the letters might be rotated or turned, locating and identifying the correct match for the puzzle pieces challenges the child to use form constancy skills. This is a skill needed for identifying letters or numbers (or shapes and real items) no matter how they are positioned.  

Try this line awareness and spatial awareness handwriting activity using puzzle pieces and crayons to work on handwriting in a fun and creative way that doesn't require writing.
Looking for more creative ways to work on handwriting without actually working on written work? Try some of the fun ideas you can find here.
Be sure to check out all of the easy handwriting tips in this month’s series and stop back often to see them all.  

You’ll also want to join the Sweet Ideas for Handwriting Practice Facebook group for more handwriting tips and tools.
Fix a Common Handwriting Problem with a Mechanical Pencil

You might have noticed a lot of handwriting activities posted here lately.  It’s all part of our 30 day series on easy handwriting quick-fixes.  Today’s handwriting tip uses a writing tool that will help kids learn to adjust the amount of pressure that they use when they write.  Using mechanical pencils to write is perfect for those kids with proprioception issues.  Sometimes you see kids who write so lightly that it is hard to see the letters on the page.  Other times you see kids who press so hard when writing that they tear the page and smudge all of the words.  A mechanical pencil is a quick fix for these common handwriting problems.
Use a mechanical pencil to help kids who write too dark or too lightly on the paper.

Handwriting and Writing Too Light or Writing Too Dark


This post contains affiliate links.

The proprioceptive system is a valuable source of sensory input during handwriting.  The sensory system receives input from the muscles and joints about body position, weight, pressure, stretch, movement and changes in position in space.  Using this information, our bodies are able to grade and coordinate movements based on the way muscles move, stretch, and contract. Proprioception allows us to apply more or less pressure and force in a task. 

When we write, a functioning proprioceptive system allows us to move the small muscles of the hand to move the pencil in fluid movements and with “just right” pressure.  We are able to mark lines on the paper, erase mistakes, move the paper with our supporting arm, turn pages in a notebook fluidly, and keep the paper in one piece.

Sometimes, children hold their pencil very tightly.  They press so hard on the paper, that lines are very dark when writing.  The pencil point breaks.  When erasing, the pencil marks don’t completely erase, and the paper is torn.  The non-dominant, assisting hand moves the paper so roughly that the paper crumbles.  When turning pages in a notebook, the pages tear or crumble.  Movements are not fluid or efficient.  Handwriting takes so much effort, that the child becomes fatigued, frustrated, and sore.  It may take so much effort to write a single word, that handwriting is slow and difficult. 

Other times, kids write so lightly that you are not able to see the written product. They have difficulty producing written work that is dark enough to read.  

Use a mechanical pencil to help kids who write too dark or too lightly on the paper.

Use a Mechanical Pencil to help with common handwriting problems

A mechanical pencil can help with both of these common handwriting issues.  

When a child writes so hard that they break the pencil tip or smudge the words, using a mechanical pencil can help kids become more aware of the pressure they are exerting through the pencil.  If they try to push too hard on the mechanical pencil, the very thin lead will break.  The mechanical pencil requires a child to press lighter.  

Children can learn to monitor the amount of pressure used and it will provide feedback on modulation of pressure. A pencil with .7mm lead or a .9mm lead is better to start with for heavy writers. A mechanical pencil with a built in grip can help as well.

Use a mechanical pencil to help kids who write too dark or too lightly on the paper.

When a child presses so lightly that you can not see the written work, a mechanical pencil can help because the thin lead requires less pressure to produce lines.  This tool can then become easier for kids to adjust to when writing. 

If you are looking for more tips for helping kids who press too hard or too lightly on the pencil, try these.

Fine Motor Workout with a Mechanical Pencil

There’s another secret reason for using a mechanical pencil with written work.  It’s got a built-in fine motor workout for little fingers!  Pushing down the eraser to provide more lead for writing requires thumb IP joint flexion. As we discussed in a previous post, this motor action allows for a pincer grip and open thumb web space needed for a tripod grasp.  

Walking the fingers up the mechanical pencil from the writing position to the eraser is an in-hand manipulation exercise.  And when kids need to add more lead to the pencil, they are using neat pincer grasp and precision.  What a workout!

Use a mechanical pencil to help kids who write too dark or too lightly on the paper.

Be sure to check out all of the easy handwriting tips in this month’s series and stop back often to see them all.  

You’ll also want to join the Sweet Ideas for Handwriting Practice Facebook group for more handwriting tips and tools.