Virtual Book Club for Kids

Fun news! I am joining a bunch of bloggers in an exciting series starting next week.  The Virtual Book Club for Kids is a book club that uses awesome children’s’ books to encourage learning and play…and it’s all virtual!  The best part is that YOU are invited to join in on the fun.  Join us as we read, create, and share creative ideas based on children’s books in this Virtual Book Club!


Virtual Book Club

Want to get the inside scoop on the books, fun ideas and creative ways to use the books in the series each week?  

Here’s how you can participate in the virtual book club:
1. Check out the books listed below. Select a book.

2. Read the blog post with the hands-on activity associated with that book. Gather any needed materials.

3. Read the book and do the activity!

This virtual book club can be done on your own or with friends. The sky is the limit!

Virtual book club books and hands-on activities
 

For now, check out the books that we’ll be reading in September and October and read along with us!  Start planning out your fun activities to go along with the books because you can share your ideas in the Facebook group.  OR, try out some of the ideas that us co-hosts share each week.  


Each week has a theme and a specific book.  Check out the virtual book club books below and then do the activity.


(Affiliate links are included in this blog post.)

 
Theme: Apples
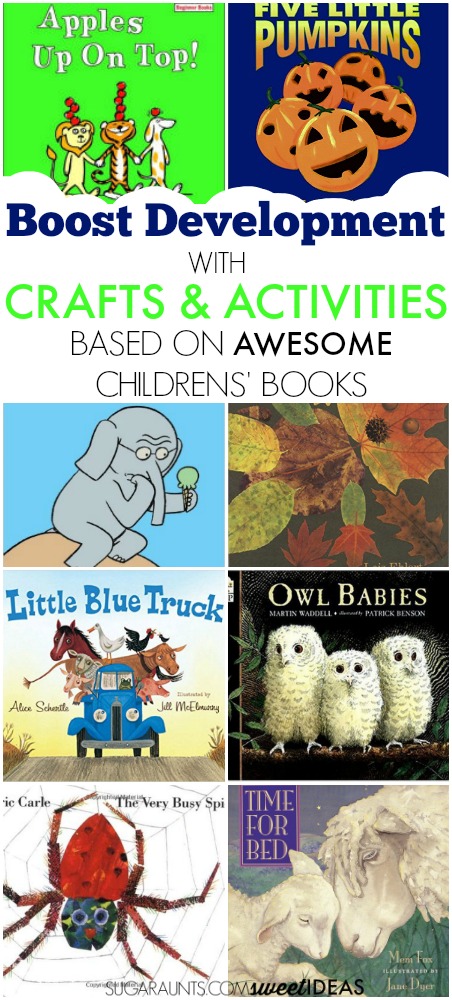
Featured Book: Ten Apples Up On Top by Dr. Seuss
OUR HANDS ON ACTIVITY: Pre-Writing Apple Themed Activity


Theme: Friendship
Featured Book: Should I Share my IceCream? by Mo Willems


Theme: Leaves
Featured Book: Leaf Man by Lois Ehlert
Book-Related ACTIVITY: Leaf Auditory Processing Activity


Theme: Pumpkins
Featured Book: 5 Little Pumpkins by Dan
Yaccarino
Book-Related Activities:

Pumpkin Emotion Activities, Pumpkin Scissor Skills Activity


Theme: Farms
Featured Book: Little Blue Truck by Alice Schertle


Theme: Spiders
Featured Book: The Very Busy Spider by
Eric Carle
Hands-On Activity: Spider Web Obstacle Course
 
 
Theme: Night
Featured Book: Time for Bed by Mem
Fox


Theme: Owls
Featured Book: Owl Babies by Martin Waddell
Hands-On Activity: Owl Activities


Each week of this virtual book club includes activities designed to promote development through play! Read the blog posts to find activities and crafts that will build developmental skills.  We’ve linked them all here so you can save this post for easy locating.
 
Books for kids and creative crafts and activities based on these preschool books while developing motor skills needed in functional tasks.


 Germs kids craft  


Want to see more creative ways to play and learn with books?  See what we did with these awesome children’s books

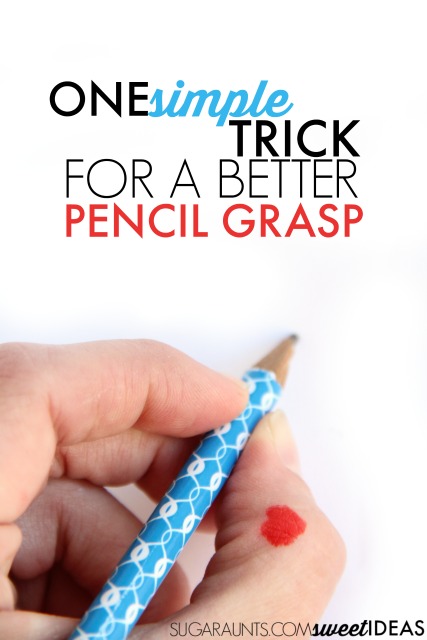
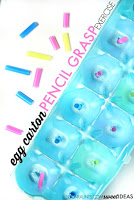
Simple Trick for a Better Pencil Grasp

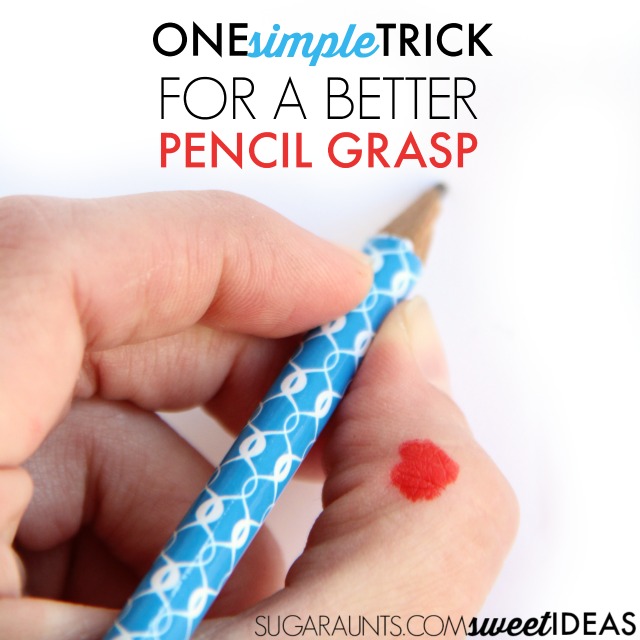
Many parents and teachers that ask about pencil grasp have questions about their child or students’ handwriting and grasps on the pencil. Sometimes, kids hold the pencil with very awkward grips!  This super simple trick for helping kids hold their pencil with a more efficient pencil grasp is really so easy and one that will help promote thumb IP joint flexion and open up the thumb web space for more movement of the fingers while writing.  

Looking for more creative ways to build handwriting skills? Join me in the Sweet Ideas for Handwriting Help Facebook group!  
Try this simple trick to help kids use a better grasp and thier pencil with a tripod grasp


Related Read: Try these handwriting accommodation strategies to address a variety of handwriting challenges. 

Simple Trick for a Better Pencil Grasp


This post contains affiliate links.

Pull out a washable marker.  We chose red.  You can pick a color that your child likes best.  Scented washable markers might be fun for this simple activity, too.

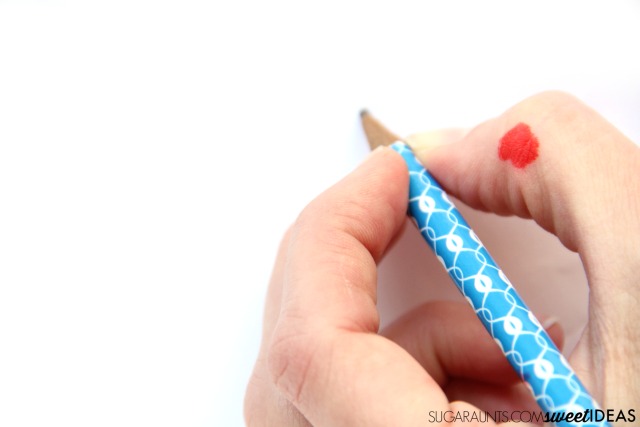
Next, draw a single dot on the thumb IP joint of your child’s dominant hand.  You want the dot to be on the inside of their thumb, so that when they make an “OK” sign with their thumb and pointer finger, they can see the dot.  

What is Thumb IP Joint Flexion?


The dot will go on the IP joint of the thumb, or on the last joint before the end of the thumb.  The thumb interphalangeal joint is responsible for flexing or bending the end of the thumb. the joint allows us to pick up very small items in pincer grasp and enables a functional tripod grasp while holding a pencil. 

Sometimes, kids hold their pencil with the thumb IP joint in a hyper-extended position as a result of weakness or lax ligaments and in effort to provide stability while moving the pencil.  Other times, kids wrap their thumb over the pencil in a thumb wrap grasp as a result of weakness and also in attempt to provide stability in handwriting.  

Use a visual and verbal cue to bend the thumb IP joint and keep an open thumb web space while holding a pencil
Tripod Grasp Trick 


When kids use these types of inefficient pencil grasps, they are putting their joints at risk for wear over time.  One easy trick for addressing thumb IP joint flexion while writing is using that single dot on the thumb’s joint.  

Show your child the dot that you have made on their hand.  This visual cue can help kids become aware of how their thumb is holding the pencil.  You want to see that joint bent.  Show them how to make the “OK” symbol with their hand.  Tell them that they need to remember to make the dot bend when they are writing.  A verbal cue that can be used if they slip into an inefficient grasp is to “make their thumb look OK!” When the child is writing with their pencil, they can see the dot and remember to keep that joint bent.  

What is happening? 

By actively trying to use thumb IP joint flexion while holding the pencil, the writer uses the Flexor Pollicis Longus muscle with Opponens Pollicis. This creates an open thumb web space and a more efficient pencil grasp.  You can read more about this type of grasp and open thumb web space in this very popular post.
Simple trick for helping kids use a tripod grasp while writing.
Looking for more creative ways to build handwriting skills? Join me in the Sweet Ideas for Handwriting Help Facebook group!  

 Easy handwriting tricks and tips

This post is part of my 30 day Handwriting series.  Stop by and see all of the Handwriting ideas.

More tricks for helping with handwriting:


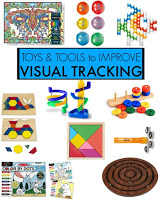
                                    Toys and Games for Reluctant Writers

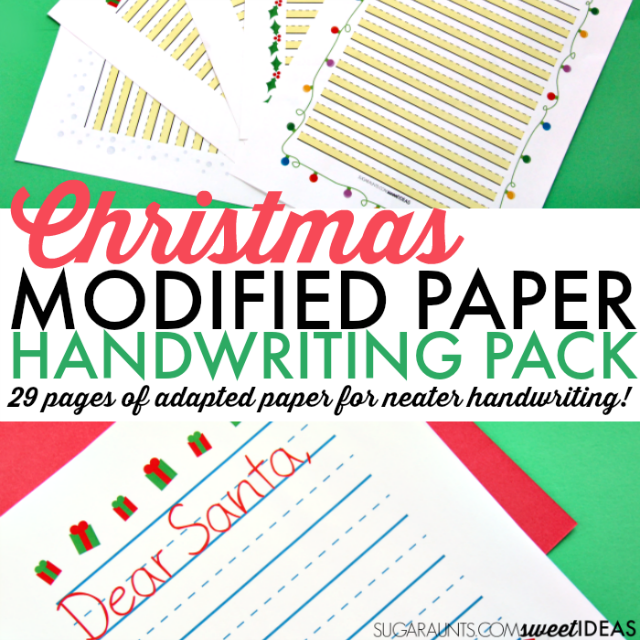
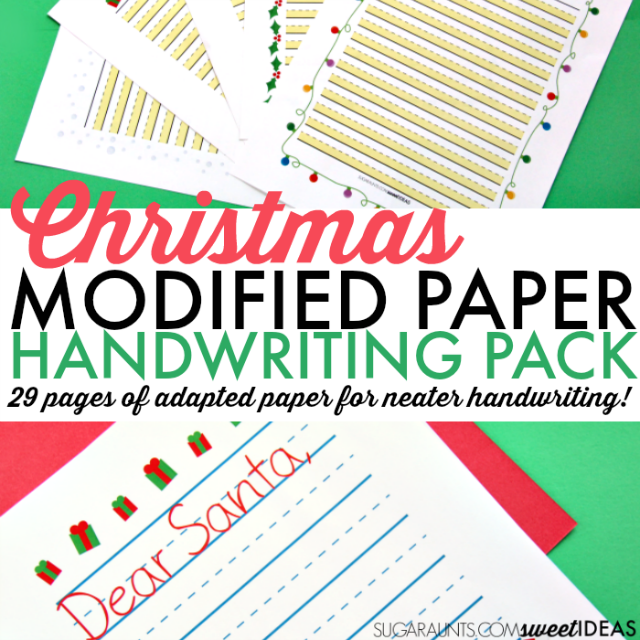
Get 29 pages of modified paper with a Christmas Theme for legible and neat Letters to Santa, Christmas Wish Lists, Thank You Notes, Holiday Lists, and MORE! 

Small Pencil Better Pencil Grasp

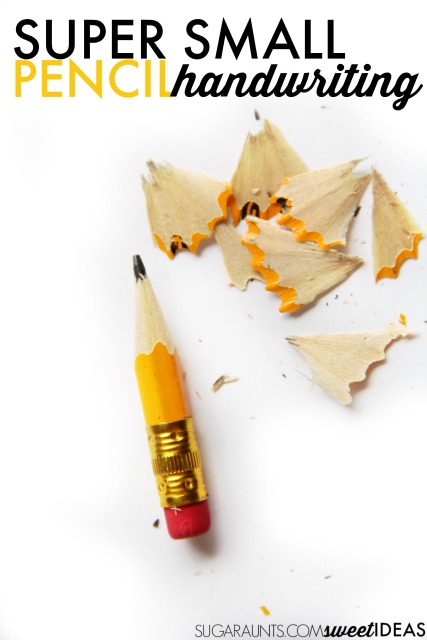
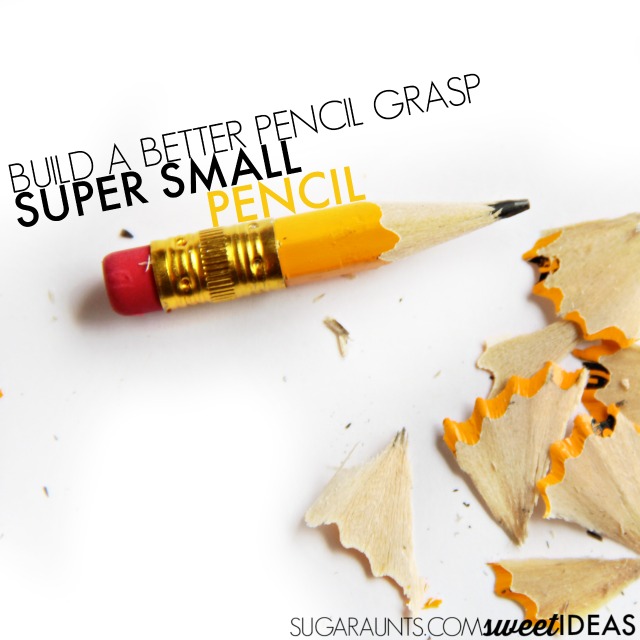
Writing with a small pencil is a fine motor strengthening power tool.  When kids use a small pencil to write (or small crayons to color), they are building the strength in their hands, allowing for increased endurance in writing and coloring tasks.  The positioning of the hand on the pencil promotes a tripod grasp and encourages the motor planning needed for written work.

This post is part of my Easy Handwriting Tips series happening this month. 

Write with a small pencil to build strength in the hands and promoting a tripod grasp.

Writing with a Small Pencil

Affiliate links are included in this post. 

Encouraging kids to write with a small pencil builds the strength of the intrinsic muscles of the hands. Using a very small pencil like the one in these pictures works the the lumbrical muscles.  The lumbricals have a job to bend (flex) the MCP joints and extend (straiten) the PIP and DIP joints.  When the lumbricals are in action, the hand might look like it is holding a plate with the big knuckles bent and the fingers extended. Holding the small pencil typically encourages this same position.

Use a slightly bigger pencil, like a golf pencil. Grab a bunch HERE. This size of pencil promotes a tripod grasp which can be carried over to a functional grasp in handwriting. 

Write with a small pencil to build strength in the hands and promoting a tripod grasp.

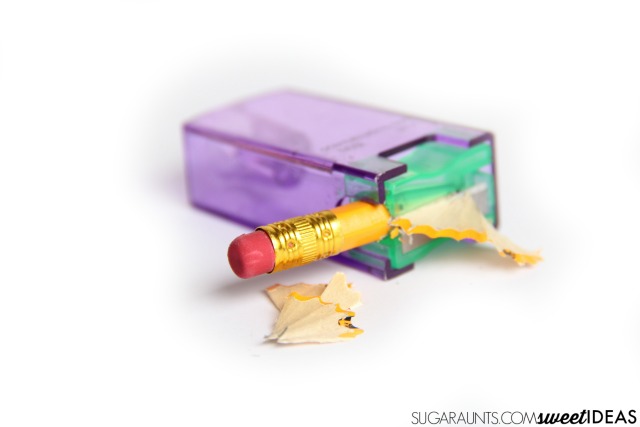
There is another great benefit of these small pencils: When making them by sharpening (and sharpening and sharpening!) use a handheld pencil sharpener.  It is a great tool for encouraging bilateral hand coordination and strength to rotate the pencil within the hand. This is a form of in-hand manipulation and is needed for so many tasks.


Write with a small pencil to build strength in the hands and promoting a tripod grasp.
Looking for more creative ways to work on handwriting?  First, be sure to join the Sweet Ideas for Handwriting Tips Facebook Group.  There will be a lot of resources and tips shared there. 

Next, head over HERE to see all of the handwriting posts in this month’s series on easy quick fixes for handwriting.  Save it because there will be a lot of great tricks and tips for handwriting coming!

Finally, check out these creative ways to help kids work on their written work:

Bold Lines Handwriting Trick

Working on handwriting with kids can be difficult.  There are many underlying factors that play into messy writing: visual perception concerns, fine motor deficits, visual motor integration problems, inefficient pencil grasp, attention, positioning, and cognitive level are just some areas that play into legibility with written work.  When several of these factors co-exist, writing can be downright sloppy.  


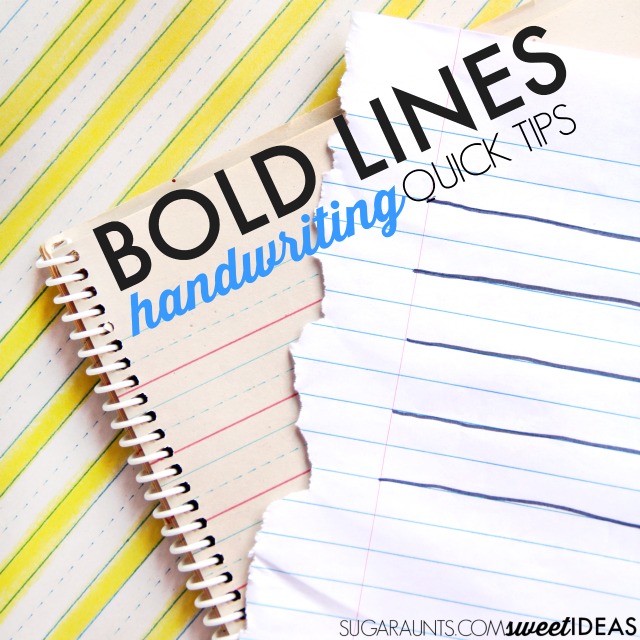
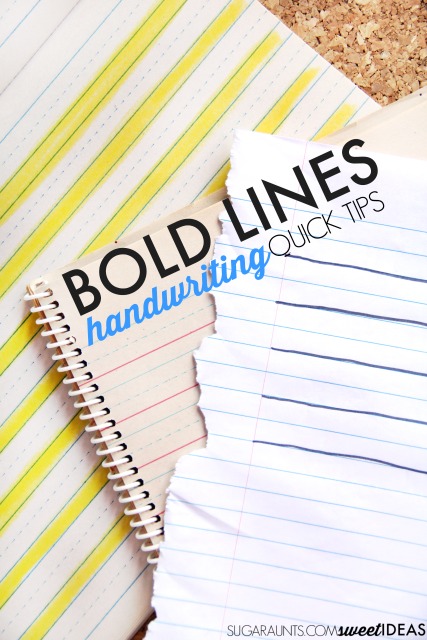
One way to work on handwriting legibility is to add bold lines to the paper.  This is just one easy way to help kids attend to the lines on the page, visualize a stopping point for letter formation, and draw attention to the writing space.  


Today, I’m sharing a quick and easy handwriting trick that is part of a month-long series on easy handwriting tips. Check out the link for a full list of the activities as they go up each day this month.  


Related Read: Try these handwriting accommodation strategies to address a variety of handwriting challenges. 

Use bold lines to help kids write with better legibility

Use Bold Lines on the Paper to Help with Handwriting

This post contains affiliate links. 

Adding bold lines to writing paper or worksheets is a quick way to help kids focus on the lines and be more aware of line awareness when writing.  A quick swipe with a marker or pen is all that it takes, many times.  There are also lined paper packets available for sale.  Try some of these ideas for adding bold lines to paper:
Bold lined paper can help kids write legibility and help with handwriting.


Sometimes, kids are trying their hardest to write neatly on the lines but letters end up being written all over the page with little regard to placement on the lines.  

Try this handwriting easy tip for legibility: add bold lines to paper to help kids write neater.
You might see kids writing with the words drifting down over the lines or you might see younger kids who are making lower case letters the same size as the tall or upper case letters.  They might even write as if they don’t even see the lines on the paper.  

How can a child write neatly on lines of lined paper or worksheets when the letters drop below the lines?  It can become quite difficult to read their writing.  

For older kids, they might not be able to go back over notes and understand what they’ve written in class. Older students who are writing quickly to take notes or finish that homework assignment might have letters written with very little line awareness.

Typically, difficulties with line awareness are a result of visual perceptual problems. Try adding bold lines to paper to help draw attention to writing lines.

Use bold lines to help kids write neater and improve handwriting.

Looking for more handwriting tips?  Stop back tomorrow to see all of the Handwriting Quick Tips. And be sure to join the Handwriting Facebook Group!


Get 29 pages of modified paper with a Christmas Theme for legible and neat Letters to Santa, Christmas Wish Lists, Thank You Notes, Holiday Lists, and MORE! 

September Occupational Therapy Activities Calendar

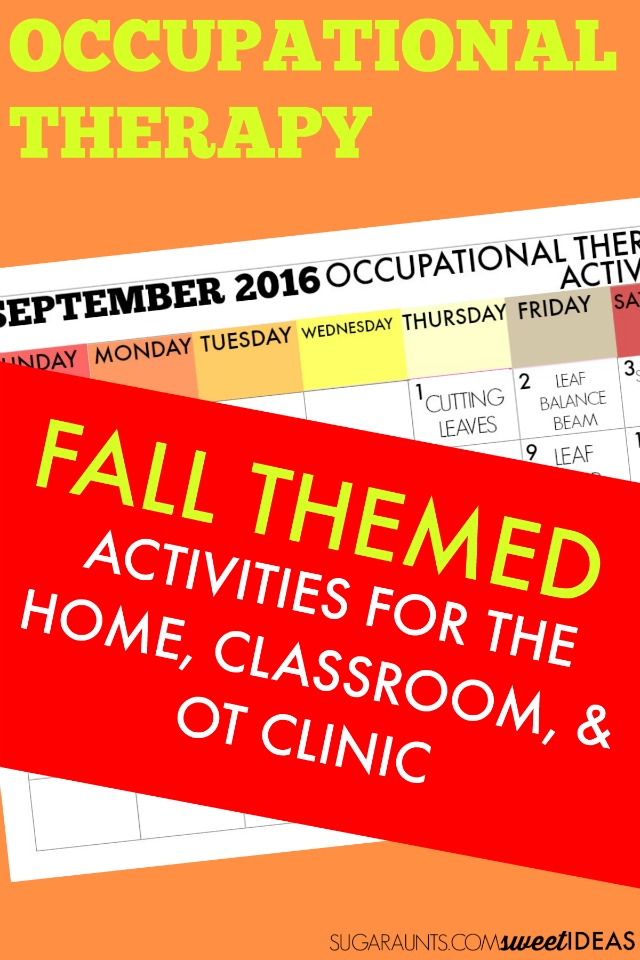
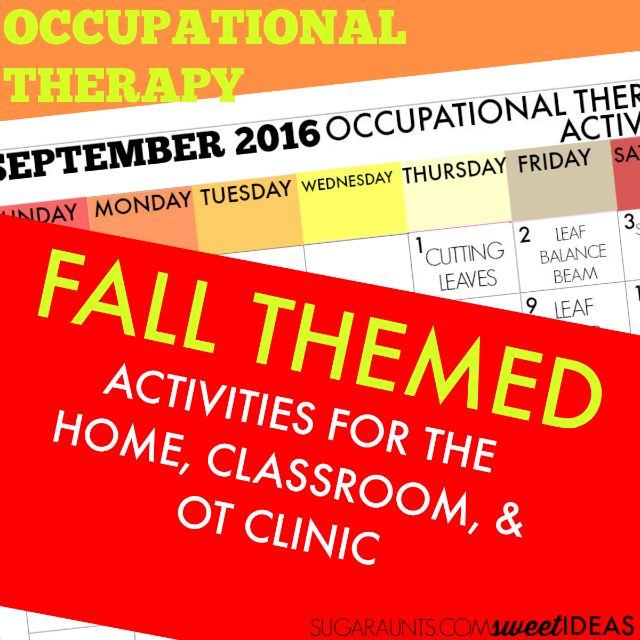
How are we heading into September and back to the routines of Fall already? This month’s September Occupational Therapy activities calendar is full of creative activities designed to build developmental skills through therapeutic activities based around a Fall theme.  This month’s Occupational Therapy calendar is perfect for Occupational Therapists’ who are planning for the month in the clinic or in the school-based OT setting.


You’ll want to check out last month’s calendar for tons of Back-to-School Occupational Therapy recommendations including using sensory strategies in the classroom.


September Occupational Therapy activities and ideas for Fall themed treatment ideas to use with kids in the classroom, home, or clinic setting.

This post contains affiliate links.


September Occupational Therapy Activities 


Grab your September FREE Printable calendar here.


Here are all of the creative ways to build skills this month:


1. Cutting Leaves– Use Fall leaves (or leaves that haven’t yet turned colors) to work on fine motor skills including scissor skills, bilateral coordination, and eye-hand coordination.


2. Leaf Balance Beam–  Use real leaves or artificial leaves for indoors to create a balance beam to work on many skills with a vestibular challenge.


3. Scarecrow Scissor Skills– Create a scarecrow craft while working on scissor skills and eye-hand coordination. We worked on math with this activity, but you could modify it to meet any learning concept.


4. Leaf Hole Punch– This fine motor activity build hand strength and adds proprioceptive input for calming.


5. Fall Fine Motor Activities– Use these fine motor activities to build strength, eye-hand coordination, bilateral coordination, and tool use.


6. Apple Picking– Find a local orchard to pick, climb, bend, toss, and carry buckets of apples.  Don’t have an orchard nearby? Create a pretend play scenario using bean bags for apples.  This is an awesome core and whole body strengthening and proprioception activity for Fall.


7. Farm Animal Walks– Brainstorm animals from the farm and practice animal walks across the room while incorporating gross motor skills, bilateral coordination, motor planning, and proprioceptive nput into the activity. This is a great brain break activity.


8. Lacing Leaves– Work on fine motor skills, bilateral coordination, and eye-hand coordination with this leaf lacing activity.


9. Leaf Jump– Use artificial leaves or real leaves to create a hopscotch-type gross motor game.  Position leaves on the floor or lawn so that kids need to hop and jump from one to another. To add an educational component to this one, write letters or numbers on the leaves.  Jumping provides movement and proprioception input that may help with attention in the classroom when used as a brain break. 


10. Peel Corn– Husking corn is a great fine motor activity for kids during the Fall season or all summer long!  Peeling the husks and corn silk requires a neat pincer grasp and encourages tactile sensory exploration.


11. Chopping Apples– Use apples from your apple picking day (Day 6 above) to create a cooking experience.  Cooking with Kids is a great way to build sensory experiences, fine motor development, and cognitive tasks such as direction following and problem solving.  Choose a recipe with your kids that the whole family will like.  Try this Apple Dumpling Recipe.  For kids that are working on fine motor skills, this child safety knife kit is great for kitchen tasks.  TIP: Cut the apple slices into strips before presenting them to your child.  Peeling the apple will make this task easier.


12. Pumpkin Sensory Bin–  Create a pumpkin sensory bin to build fine motor skills in a tactile sensory play activity.


13. Turn over dirt in the garden– This time of year, the garden is winding down.  Use the cooler temperatures as an excuse to get the garden ready for next year’s harvest.  Show kids how to pull weeds, pull out garden stakes, and turn over dirt to “put the garden to bed”.  If you haven’t created a Sensory Garden, start planning next years for a season of sensory input in the backyard.


14. Apple Tree Balance Beam– Make an indoor apple tree balance beam to address motor planning and balance with an apple theme. This is a great activity for building core strength.


15. Fall Sensory Bin– Create an apple sensory bin using materials you probably have in and around your home.  This Build An Apple Tree Sensory Bin encourages eye hand coordination and fine motor skills with tactile sensory play.


16. Apple Washing– Head to the nearest Farmer’s Market or grocery store and fill a basket with apples.  Wash them off in a sink of water using a fruit and veggie brush. Scrubbing with the brush encourages proprioceptive input while promoting precision to not push too hard to clean the fruit. 


17. Football Toss–  Grab a football and get ready for Fall sporty fun.  Use the football to toss, kick, and even roll the ball to a friend or parent.  Encourage your child to get into different positions to throw the ball.  Some ideas are: standing, sitting, throwing over a shoulder, tossing between the legs, head down and rolling upside down, and laying on belly.


18. Autumn Art Projects– Get into an creative mode with autumn-inspired art projects.  Encourage tool use, direction following, problem solving, and creative process with sensory and autumn art. 


19. Leaf Trace– Find leaves from outside.  Place them on a piece of paper and trace the outline with a crayon or pencil.  This activity requires bilateral coordination, motor planning, eye-hand coordination, and visual perception in order to trace around the leaves.  Try doing this activity standing at an easel or chalkboard to encourage upper extremity strengthening and stabilization or while lying on the floor to center and organize.


20. Farmer in the Dell– Doing action rhymes like the Farmer in the Dell (perfect for Fall and before trips to the farm!) are an excellent way to work on so many skills: Fine and Gross Motor, Social/Emotional Development, Speech and Language, Spatial Concepts, Attention Span, and Behaviors.  Read more about each of these areas and more here


21. Fall Tactile Table– Set up a tactile sensory play experience with Fall’s colors and textures.  This is a great activity for toddlers.


22. Pillow Jump–  One easy way to encourage movement and sensory input while indoors is by using couch cushions.  Set up cushions across the floor for jumping, hopping, and squashing for proprioceptive input.  Make this a Fall activity by adding a football for target practice at the pillows.  Try encouraging hopping and jumping from pillow to pillow while holding a football for more of a balance and core body workout as the hands are holding onto the football.  Grade the activity by spacing pillows out more or moving them closer together.


23. Make applesauce–  Encourage more cooking with kids by using apples to mix up a batch of homemade applesauce.  Use a hand-held food chopper to chop up apples while encouraging proprioceptive input and strengthening.  Use a kitchen mallet to work more proprioceptive input into food prep.  Adding ingredients like cinnamon is an excellent olfactory sensory activity. 


24. Apple Smash Baked Cotton Balls– Sneak proprioceptive input and eye-hand coordination into this FUN apple themed smashing activity.  The kids will love this one!


25. Scarecrow Says– Encourage crossing midline, range of motion, motor planning, eye-hand coordination, and direction following with vestibular sensory input in a “Simon Says” type of game.  The Scarecrow can be Simon and promote motor movements of all kinds.


26. Wheelbarrow Push– This is a fun activity for building balance, core body strength and upper body strength as well as visual perceptual skills.  Use a real wheelbarrow to push and pull fall leaves.  For kids who need assistance, parents or an adult can stand behind the child and help them push the wheelbarrow.  Don’t have a wheelbarrow? No problem.  Make a cardboard wheelbarrow and cart small items around the house.


27. Catch Falling Leaves–  If you live in an area where leaves are falling from the trees, use nature in therapy!  Try to catch leaves as they fall or try hitting them with a racket or catching with a net.  If you don’t have one of those items, use a bucket or basket to try to catch the falling leaves. This activity encourages gross motor skills and visual perception along with motor planning.  If you don’t have falling leaves in your area, try making tissue paper leaves and dropping them from a high spot to your child for them to catch.


28. Autumn Gross Motor Play– Try gross motor activities with an Autumn theme for building strength and core strength. 


29. Jump in Leaves– Make a pile of leaves and JUMP for proprioceptive input.  Don’t have fallen leaves?  Make a pile of blankets and pillows for an indoor, pretend play version of this active gross motor activity.


30. Fall Nature Walk– Go outside and explore the season.  Climb trees, hike, wade in streams as the Fall weather creates sensory experiences. Talk with your child about the scents, textures, and sounds of the outdoors.  Crunch leaves in your hand and under your feet. Pick up and collect items like acorns, pine cones, horse chestnuts, and leaves.  
September Occupational Therapy activities and ideas for Fall themed treatment ideas to use with kids in the classroom, home, or clinic setting.

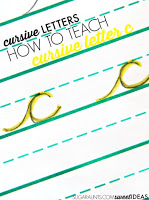
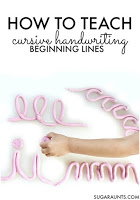
How to Teach Cursive Writing

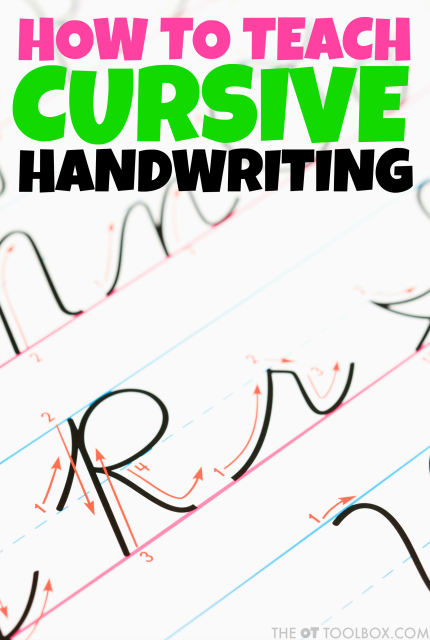
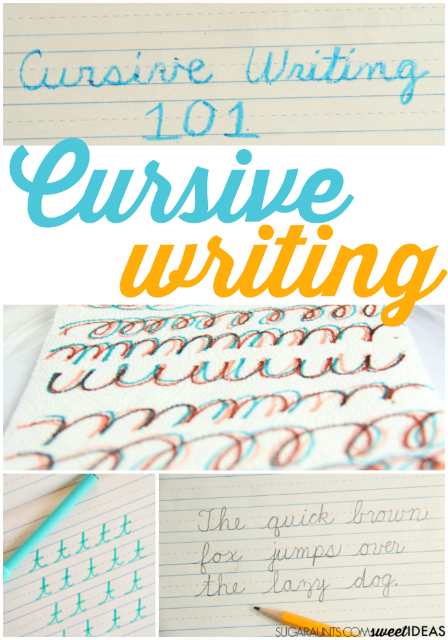
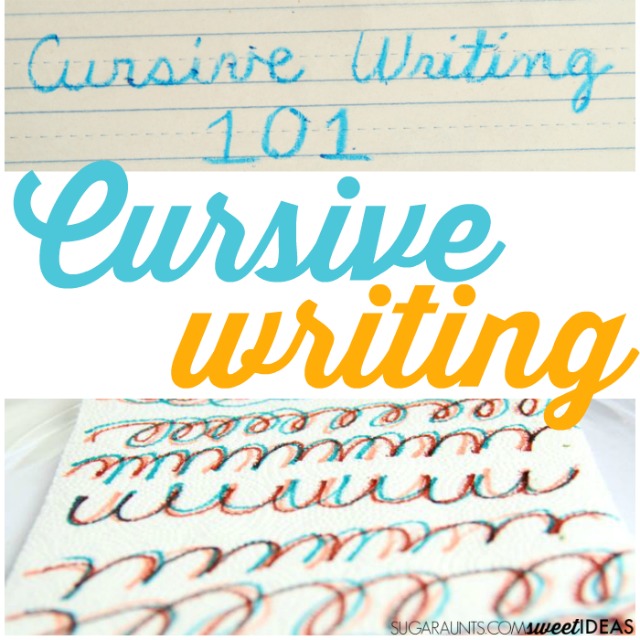
If cursive writing practice (and the order to teach cursive letters) is on your mind, this resource on how to reach cursive writing is for you! You might have noticed a few cursive handwriting activities on the blog recently. I have a new third grader who learned cursive letters last year in second grade and is excited to write more in cursive handwriting this year in third grade.  I loved teaching kids to write in cursive as a school-based Occupational Therapist. 

How to Teach Cursive Writing

Cursive handwriting can be a struggle for many kids.  Many times, it is the lack of practice time that impacts legibility.  

When schools are cutting or limiting cursive handwriting instruction from the daily curriculum, children just don’t get the practice time they need for fluid pencil strokes, cursive letter connectors, and appropriate letter formation in formal instruction time.  

Consider the increased use of screens and technology as a means of written expression and cursive handwriting may fall even further in the lineup of importance.  


At home, parents may be limited in time when it comes to homework help, after school activities, work requirements, dinner preparation, evening activities, and bedtime preparation.  When the daily schedule is filled to the brim, there may not be time to work on handwriting. 

There are a lot of handwriting resources here on the site.  The cursive handwriting strategies are increasing as well.  Adding cursive handwriting practice into play in creative and playful manners can help kids improve letter formation and letter strokes when time is limited for addressing how to teach cursive letters. 

I loved teaching motor planning to form letters, line and size awareness to keep the letters on the lines, and re-trace with the cursive swoops and loops to help make written work legible.  

So, with my own kiddo being so excited to improve her cursive, I decided to work through the alphabet and share tips and tricks to help parents and teachers teach cursive letters.  

There are many school districts that are cutting cursive instruction from their curriculum. For parents who have students in those many school districts, it can be overwhelming to teach their kids cursive letters and written work.  


On this page, you’ll find links to all of the cursive letter posts as they are created.  Be sure to bookmark this page and come back often as we go through the cursive letters of the alphabet.  


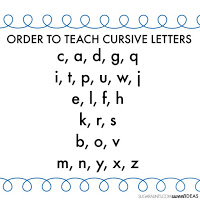
You’ll notice that the cursive letters are not being done in alphabetical order. There is a reason for the cursive letter order that we’re doing.  

How to teach cursive letters to kids and students with creative tricks and tips
 
It’s important to mention that there is a lot of talk and debate about schools cutting cursive instruction from the learning day.  
 
There is even a push to teach cursive handwriting before manuscript. Whatever your thoughts, it might be of interest to teach or supplement your child’s cursive handwriting instruction with creative, hands-on learning styles.  
 
Parents can use these tips to teach kids cursive handwriting at home.  
 
Teachers can use these tips and tools in the classroom. And therapists can use these ideas in the clinic setting.

How to teach each of the cursive letters:

These resources cover how to teach cursive writing from a hands-on approach. Each activity listed below covers a different aspect of cursive writing. 

You’ll find activities that address areas such as:

  • How to teach specific letters in cursive
  • Cursive letter order
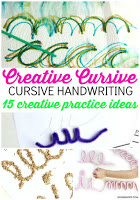
  • Creative cursive practice ideas
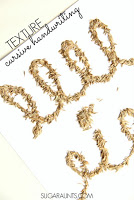
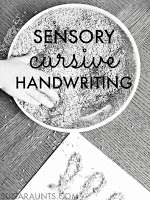
  • Sensory cursive activities
  • Fun ways to teach cursive writing


You’ll find lots of creative ways to practice these cursive letters here: 
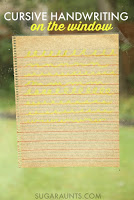
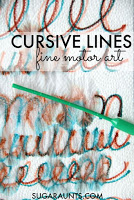
Cursive letter orderLearn cursive writing with this cursive handwriting activity to learn cursive letters, lines, and connecting lines on the window.


So? Which activity do you think you’ll try to teach cursive letters?

A Complete Guide to School Day Functions for Kids

A child has a huge job as he manages a day at school. The classroom includes distractions, multi-step directions, multi-sensory challenges and many tasks that require fine motor skills, gross motor skills, transitions, and appropriate positioning.  This month’s post in the Functional Skills for Kids series is all about the important tasks that happens during a day in the classroom.  
 
Ten Occupational Therapists and Physical Therapists bring you a valuable resource for success in school day functions and tasks that occur in the school classroom or home school environment. 
 
Read through the links below in this complete guide to school day functions and tasks needed for success during the school day:


A complete guide to school day tasks and functional skills occurring naturally in the classroom or homeschool environment with tips and strategies from Occupational Therapists and Physical Therapists.
 

Functional skills and strategies for success in school: 


A complete guide to school day tasks and functional skills occurring naturally in the classroom or homeschool environment with tips and strategies from Occupational Therapists and Physical Therapists.


Anxiety and Sensory-Based Coping Skills for Kids

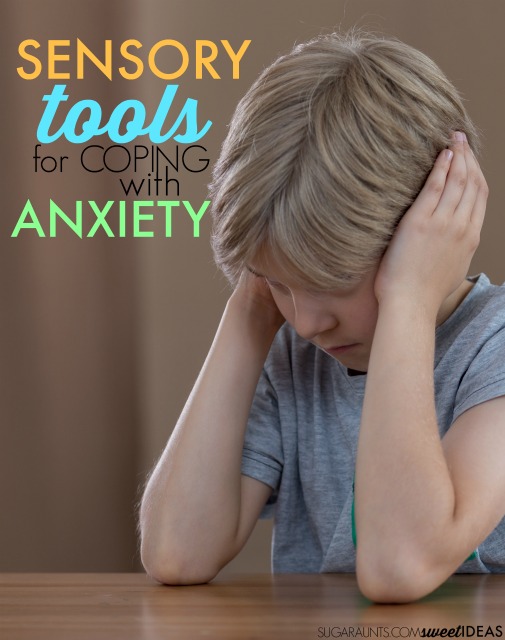
Sensory based coping skills is an effective way to help kids deal with feelings of anxiety.  There is a reason that most of us deal with an uncomfortable situation by cracking our knuckles or cope with anger by punching a pillow.  Sensory based anxiety coping strategies can help kids deal with stress and feelings of anxiety for long term success and social emotional development.


When a difficult situation comes up in school or other social situation, kids can cope with the stress in that very moment.  Teaching these skills to kids requires a little preparation and frequent practice but can be a huge help when kids are feeling completely overwhelmed by feelings of anxiety.


Kids should understand that their body may react in a certain way when they are in a difficult salutation.  Feelings of stress and anxiety can be confusing to kids and can even make them feel more overwhelmed and out of control.


Anxiety in kids can arise for many reasons, including sensory-based causes, difficulty organizing oneself, social reasons, behavioral reasons, or nervousness in new or scary situations.  Kids should know that their body can give them clues  about stress in these tricky situations and that they can understand and use those clues to feel more in control.


Feelings of anxiety might begin during or before anticipated situations that cause the child to feel overwhelmed, nervous, frustrated, or angry.  Then, when they start feeling those clues, they start to feel even more overwhelmed.


What a scary thing for a child to feel!

Anxiety and sensory based coping skills that will help kids overcome their feelings of stress and anxiety

Anxiety and Sensory Based Coping Skills to Help Kids


Imagine the signs that a child might feel when experiencing anxiety:

  • Sweaty palms
  • Fast breathing
  • Upset stomach
  • Sweating 
  • Feeling hot
  • Negative thoughts
  • Feeling angry
  • Wanting to run away
  • Feeling helpless
  • Feeling that the situation is dumb
  • Tense muscles
  • Wanting to wiggle or move
  • Feeling itchy
  • Sore muscles
  • Trouble focusing
It is important to remember that every child is different and how important it is to talk with your child to discuss his or her personal stress signals.  Talk about when they might feel these signals and what happens in the environment that might lead up to their feelings of stress and anxiety.
 
Once you and your kiddo have the clues of anxiety figured out, it is helpful to come up with strategies to cope with anxiety.  


This post contains affiliate links.

Try these sensory activities and tools to help kids with anxiety.


Sensory Based Coping Skills for Kids

Try these sensory-based anxiety coping strategies for helping kids deal with stress:


Proprioception-based Coping Strategies

Knee tapping
Chew gum
Muscle squeezes-Tense the whole body like a rock and hold the position for 10 seconds. Then release with “no muscles”.  Repeat this technique three times.
hand clenches- Squeeze the hands into fists and hold them for 10 seconds.  Release and repeat three times.
Stress ball- (Try this homemade stress ball OR a store bought one)
Punch a pillow


Vestibular-based Coping Strategies

Run in place
Head bend down with deep breaths


Oral-based Sensory Coping Strategies

Suck a lollipop
Blow up a balloon
Deep belly breaths and blowing out through “duck lips”
Hum low and “under your breath”


Olfactory-based Coping Strategies

Smell calming scents


Tactile-based Coping Strategies

Sensory touch bar for desks.  Sticky back velcro is a great cost-effective version of this strategy.
 

amzn_assoc_placement = “adunit0”;
amzn_assoc_search_bar = “true”;
amzn_assoc_tracking_id = “sugaun-20”;
amzn_assoc_ad_mode = “manual”;
amzn_assoc_ad_type = “smart”;
amzn_assoc_marketplace = “amazon”;
amzn_assoc_region = “US”;
amzn_assoc_title = “My Amazon Picks”;
amzn_assoc_linkid = “efea80466a193920a2286cc1aeb57c3e”;
amzn_assoc_asins = “B000FPFBXG,B002LHA064,B01ABVZUES,B00525X8KW”;


Vision-based Coping Strategies


amzn_assoc_placement = “adunit0”;
amzn_assoc_search_bar = “true”;
amzn_assoc_tracking_id = “sugaun-20”;
amzn_assoc_ad_mode = “manual”;
amzn_assoc_ad_type = “smart”;
amzn_assoc_marketplace = “amazon”;
amzn_assoc_region = “US”;
amzn_assoc_title = “My Amazon Picks”;
amzn_assoc_linkid = “efea80466a193920a2286cc1aeb57c3e”;
amzn_assoc_asins = “B00ZY6JHU4,B0047U0XLK,B000M7Z39E,B003CMC5LA”;

Anxiety and sensory based coping skills that will help kids overcome their feelings of stress and anxiety


Teaching kids to use these sensory based coping strategies to deal with anxiety or stress requires thoughtful discussion with your child and practice to prepare for unknown situations.  Try role playing situations where overwhelming feelings have previously presented themselves.  Talk about what led up to those feelings and clues and how the child can use different sensory based strategies to beat the anxiety next time. 
Anxiety and sensory based coping skills that will help kids overcome their feelings of stress and anxiety

Simple Trick to Teach Kids to Cut with Scissors

When you teach kids to cut with scissors, it can be quite difficult.  There are many “parts” to scissor skills and cutting out a shape.  Holding the scissors correctly, extending the wrist, grasping and turning the paper, opening and closing the scissors with precision, cutting along the line, and using graded cuts to stop and cut sharp corners and angles.  
 
This simple trick to teaching kids to cut with scissors will help kids learn to hold and turn the paper with their assisting and non-dominant hand in order to accurately cut along lines, curves, corners, and angles.  
 
This simple scissor skills trick is super easy to set-up and a creative way to build scissor skills, no matter what particular type of scissors are used. 
Teach Kids to Cut with Scissors using this easy trick that helps kids learn to use their non-dominant hand to turn and hold the paper during scissor skills.

Teach Kids to Cut with Scissors Using this Simple Trick

 
This post contains affiliate links.
 
When kids are learning to cut with scissors, one obstacle can sometimes be holding and turning the paper.  In order to cut out shapes, one needs to hold the paper with their non-dominant and assisting hand.  
 
They need to use bilateral coordination to use both hands together in a coordinated manner with integration of eye-hand coordination.  The hands must come together at midline and manipulate the scissors and assisting hand together.  
 
 
When a child has difficulty holding the paper with a neutral or supinated wrist or maneuvering the assisting hand to hold and turn the paper, scissor skills can be problematic.  Teaching kids to hold and move the non-dominant hand while they cut along a line may require verbal or visual cues for accuracy, yet sometimes continues to be problematic and result in inaccuracies with cutting skills.
 
This simple trick to teach kids to cut with scissors provides a visual and tactile cue for moving the non-dominant hand along the paper as they cut a line or shape.  


It’s a simple way to improve bilateral coordination with visual motor integration of the non-dominant hand in a tasks that requires both hands working together smoothly.
 

Help kids turn the paper when cutting with scissors.

Teach Kids to Cut with Scissors using this easy trick that helps kids learn to use their non-dominant hand to turn and hold the paper during scissor skills.
To help kids learn to hold the paper, simple place a piece of wax paper over the paper that they are cutting.  They wax paper will allow them to see through to the line and they can practice holding and pinching the paper between their thumb and lateral index finger.  Some lines may need darkened with a marker.
 
If kids are having trouble managing the paper and the wax paper, use a piece of tape to attach the wax paper to the main page.  Leave the remaining sides open without tape to encourage pinching the wax paper to the page.
 
 
Need more assistance to manipulate the paper with the non-dominant hand? Add visual cues of dots along the wax paper overlay using a permanent marker.
Teach Kids to Cut with Scissors using this easy trick that helps kids learn to use their non-dominant hand to turn and hold the paper during scissor skills.

Looking for more scissor skill tricks and tips?  Try these ideas:

 attention behavior and scissor skills Teach kids to slow down and cut on the lines