Recently, I went to a continuing education course at Little Guy’s preschool. It was offered up to parents, teachers, child care workers…all about Education Through Play.
One tip for educational play was the concept of process play vs. product play. Product Focused Play is working toward a specific end (“here, copy this cute little brown owl that is sitting on a branch, using this paper plate and those cupcake liners”).
Process Focused Play, the instructor outlined, is creative, open ended, and works on the child’s thought processes. The child is provided with materials and given an open-ended opportunity to create. Imagine. Explore materials. There is no specific end product with process play. Only, the opportunity to express themselves through language, creativity, open-ended motor development. As an OT, this is great! …Provide the fine motor dexterity tasks, sensory opportunities, and age-appropriate tools (scissors, pencils, crayons, paint brushes), and assess and observe the child’s abilities in order to develop goals to meet functional levels!
Of course, Product Focused Play (making that specific art project) is SO important for a child’s development too…direction following, cutting a strait/curved/angled line, sequencing, specific media use, and much more…all are needed to succeed in the school setting.
We did a little Process Focused art this week, bringing out all kinds of materials and a big old piece of cardboard. The kids went to it, learning throughout the process of creating!
The only thing I told them was “make something”. (I didn’t say this and then go off to change out laundry or put away dishwasher dishes…I sat there with them, engaged in their process, and we talked. About the stuff they were using, about what they were making, about why they were using what they were, and about what’s for lunch…hey, we were hungry!) Language development at its finest!
As they created (and we talked lunch), they had no clue about the number of skills they were refining!
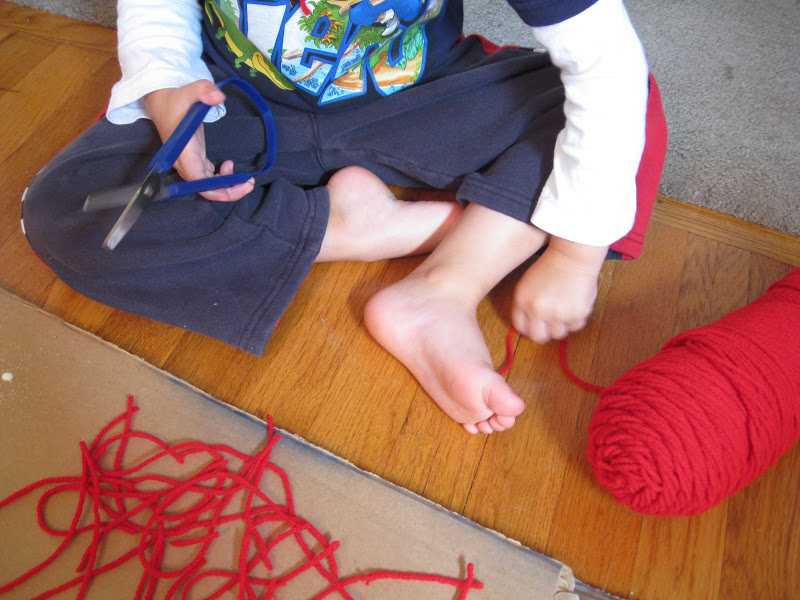
Scissor skills while cutting yarn…
Fine pincer grasp to pick up the yarn, Bilateral coordination to work both hands together…
Letter formation, Tripod grasp and Separating the two sides of the hand to sprinkle glitter, Gross hand grasp to squeeze the glue bottle, Sensory exploration…
Tripod grasp to hold the yarn, Eye-hand coordination to cut along the length of yarn, Controlled use of scissors…
No wonder they were hungry!
Little guy made a fire with red yarn. He then decided to add logs all around it and played with this allll day! He used his Lincoln logs to make a house to go with it and the little cowboy and Indian guys to play out all kinds of stories.
Big Sister made made spaghetti and meatballs. She drew in a fork, spoon, and salad. She had her baby dolls eating from this little scene.
Imagination, Creativity, Exploration
We had a lot of FUN with our Process Play!
~Colleen
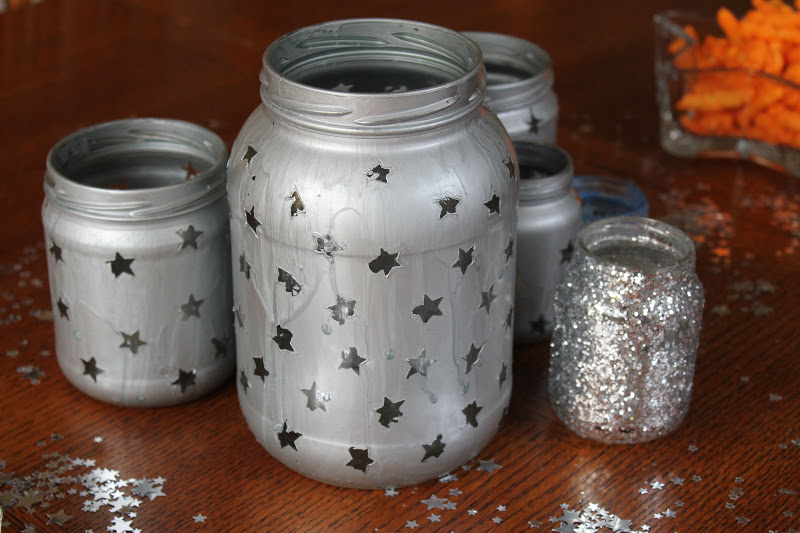
 This could have turned out a little better (it could have been a little easier to pull off the star stickers…) had I used a different type of spray paint. This paint was metallic silver spray paint and peeled really easily. So pulling the stickers off once the paint had dried was tricky.
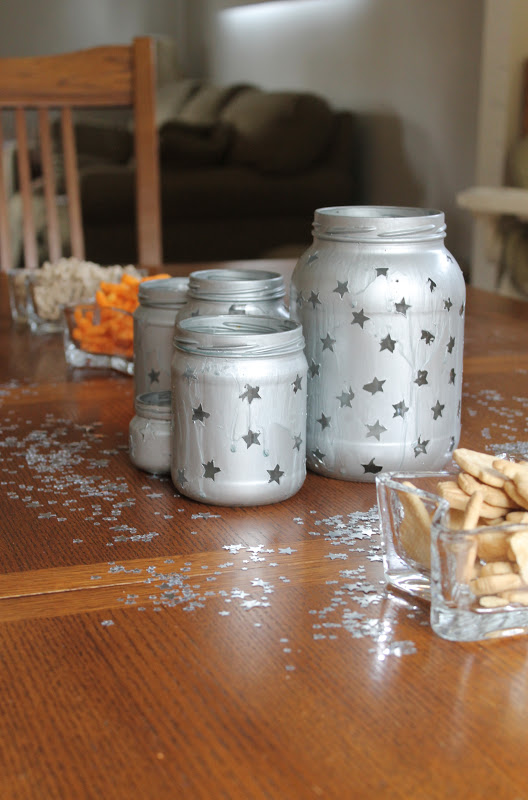
 I started with clean, dry glass jars from of different sizes. A couple were salsa jars, one was a cheese dip jar. A few were baby food jars. The big guy was a pickle jar.