Upper Extremity Activities for Toddlers

Upper extremity hand strength isn’t just about strong hands! Kids need upper extremity strength for tasks such as handwriting, coloring, managing clothing fasteners, and more! The thing is, upper extremity strengthening begins at a very young age. In fact, activities for toddlers can be loaded with the strengthening and dexterity activities that strengthen the upper extremities for improved endurance and coordination down the road. All of these components work together fluidly for strong upper extremities. Check out the upper extremity activities for toddlers to find out how and where to begin with upper extremity strength!  


Upper extremity activities for toddlers

 
Working on upper extremity strength is a key factor in being
able to have the endurance for handwriting. Working on the shoulder muscle strength and flexibility will help to improve the coordination needed for drawing and handwriting. 
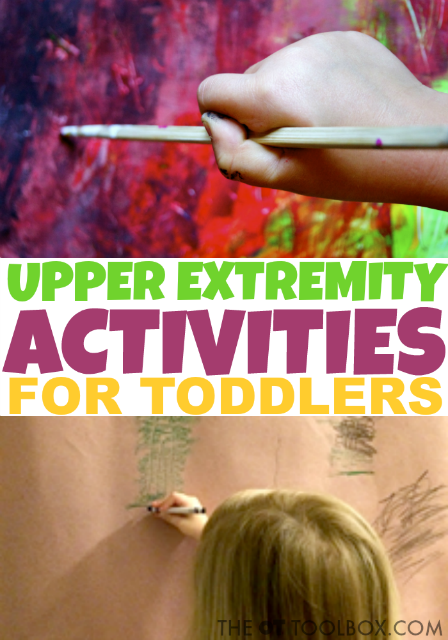
 
We covered some of the best crayons for toddlers with focus on the strength and motor skills that develops during the toddler years. Check out that blog post for information based on strength development during ages 1-3 years.


These upper extremity activities for toddlers will help improve the strength and stability needed for endurance and coordination in handwriting and other tasks.


Importance of upper extremity activities for strength

 
Why is this important? If a child does not have adequate
shoulder strength and core body strength it will be difficult for them to have controlled hand movements.
You may notice that when handwriting or coloring that they position their
shoulder abducted and wrist will be flexed instead of in extension.  Build muscle strength proximal to distal
because if you don’t have strength in your shoulders, back, traps etc. then
your distal function (example handwriting) will not be as controlled.
 
 Below are two easy activities
that can be done at school, in a clinic or at home with a child to address
upper extremity strength. Also try these activities to promote wrist extension.
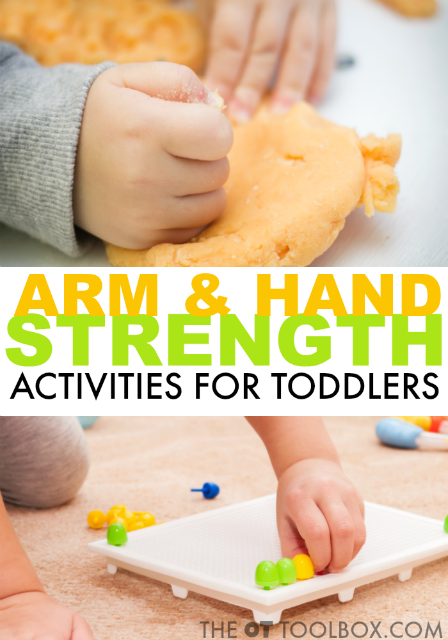
Use these arm and hand strength activities for toddlers to improve upper body strength for better coordination and endurance in handwriting and other fine motor activities for toddlers.

Upper extremity strength activities for toddlers

These are upper extremity activities for toddlers and kids who would benefit from strength and endurance in the upper body.

Gravity Resistive Sticker Activity

 
Have the child lay on the ground under a table. I will
usually place a pillow or blanket to make it more comfortable. Tape a large
piece of paper under the table and have the child, while laying on their back,
place stickers on the paper.
 
I have drawn circles for the child to place stickers in or
had a background theme. For example, a nature background and use stickers such as birds, trees, etc. The other activity I have done is had the child place stickers randomly all over the paper and then then have to use a marker to circle the shapes. Works great if you are working on a child’s pre-writing skills.
They could also put a square, triangle or make an X on the shapes.
 

Crayon Rubbing on a Vertical Surface

I remember when I was younger I really enjoyed taking coins,
placing paper over them and then using a crayon to rub the print onto the
paper. I also did this with leaves in the fall. How exciting to see the print
come out on the paper!
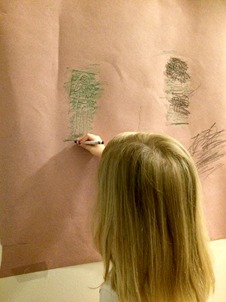
 
One fun way to keep a child engaged with this great upper extremity activity for toddlers, is to tape crayon rubbing plates on the wall, place a large sheet of paper over them and then give the child crayons to rub the paper until they see the print.


Use wall crayon rubbings to help kids strengthen the upper extremities in this upper extremity activity for toddlers.
 
Having a child color on a vertical surface is a great
activity in itself for shoulder stability and flexibility and it puts the wrist
in extension which helps encourage a better pencil/crayon grasp.
I have used crayon rubbing plates with animal pictures on
them and  girls love to color the fashion
plates. To keep the child engaged I won’t let the child see what plates I am
using. That way they continue to color on the vertical surface to see what pictures
they get.
 
This activity also
works on teaching children how to apply more pressure when writing/coloring, as
you need to press hard to have the print come through and softer if the print
is blurred because of how hard the child pushed on the crayon.


Looking for more upper extremity activities for toddlers?

This crayon rubbing activity uses sight words to work on strength and pressure in handwriting.

 
Want some other fun ideas to work on a vertical surface? Check out learning ideas on windows and glass doors!


Stickers are an awesome fine motor tool. Here are 10 ways to use stickers to help with fine motor skills.
 
Read more about the many benefits of coloring with crayons.
 
Read more about working on a resistive surface to build strength and stability.
 
Another great under the table activity is beading! Use resistance and gravity to strengthen and boost skills by beading under a table.
 
 
About Christina:
Christina Komaniecki is a school based Occupational Therapist. I graduated from Governors State University with a master’s in occupational therapy.   I have been working in the pediatric setting for almost 6 years and have worked in early intervention, outpatient pediatrics, inpatient pediatrics, day rehab, private clinic and schools. My passion is working with children and I love to see them learn new things and grow. I love my two little girls, family, yoga and going on long walks.


What is Visual Tracking?

Visual problems can surface in many ways. Visual processing challenges present as difficulty in reading, handwriting, sports, navigating a hallway, or many other areas. Sometimes, the issue is a result of visual tracking challenges. Read on to find out exactly what is visual tracking and what an eye tracking problem looks like in kids, including common visual tracking difficulties that present in the classroom or during academic work. We’ve shared a few visual tracking tips and soon on the site, we’ll share a collection of visual tracking activities, too.

Wondering about visual tracking? This article explains what is visual tracking and what visual tracking difficulties look like, along with visual tracking problem areas and visual tracking red flags that can be used by occupational therapists to help kids having trouble with visual processing.

What is Visual Tracking?

You’ve probably seen it before: The child who struggles with letter reversals..the child who has challenges in navigating obstacles when playing…the child who labors with reading and commonly skips words or lines of words when reading.

These are all signs of a visual tracking problem. There are many more, in fact. The thing is, visual tracking is a part of almost everything we do!

Before we talk more about what visual tracking looks like and other common signs of visual tracking problems, let’s discuss what exactly visual tracking is.

Definition of Visual Tracking

Visual tracking is a visual processing skill that occurs when the eyes focus on an object as it moves across the field of vision. Visual tracking occurs with movement of the eyes to follow a moving object and not movement of the head. The eyes have the ability to track an object in the vertical and horizontal, diagonal, and circular planes. There should also be an ability to track across the midline of the eyes and with smooth pursuit of the object. Visual tracking requires several skills in order to efficiently occur. These include oculomotor control abilities, including visual fixation, saccadic eye movement, smooth pursuit eye movements, along with convergence, and visual spatial attention.

Here is more detailed information on saccades and their impact on learning.

Components of Visual Tracking

These are the visual processing skills that need to occur in conjunction with visual tracking. They are necessary to enable visual tracking in functional tasks.
Visual Fixation- The ability to visually attend to a target or object. Visual fixation occurs while maintaining focus on the object and typically occurs at a variety of distances and locations within the visual field. This is a skill that typically develops at about 4 weeks of age.
Saccadic Eye Movement- These eye movements are those that occur very rapidly and allow us to smoothly shift vision between two objects without turning or moving the heads. Saccadic eye movement, or visual scanning is necessary for reading a sentence or paragraph as the eyes follow the line of words. This skill also allows us to rapidly shift vision between two objects without overshooting. In copying written work, this skill is very necessary.
Smooth Pursuit Eye Movement- This ability allows us to steadily follow an object as it is visually tracked. When a smooth pursuit of eye movements occurs, the eyes do not lose track of the object, and occur without jerky movements or excessive head movements. Visual scanning occurs in vertical, horizontal, diagonal, and circular movements.
Convergence- This ability is the simultaneous shift of both eyes together in an adducted position toward an object. The eyes work together to shift inward toward a target object, with single vision occurring with fixation on the object. Convergence is needed to focus on an object with both eyes together.
Visual Spatial Attention- This skill includes awareness and attention in the body and the environment and allows us to attend to all visual fields. When visual spatial inattention occurs, visual neglect can occur.

Occupational Therapy Vision Screening Tool

Occupational Therapists screen for visual problems in order to determine how they may impact functional tasks. Visual screening can occur in the classroom setting, in inpatient settings, in outpatient therapy, and in early intervention or home care.
This visual screening tool was created by an occupational therapist and provides information on visual terms, frequently asked questions regarding visual problems, a variety of visual screening techniques, and other tools that therapists will find valuable in visual screenings.

This is a digital file. Upon purchase, you will be able to access the 10 page file and print off to use over and over again in vision screenings and in educating therapists, teachers, parents, and other child advocates or caregivers.
Visual tracking red flags can look like many different visual processing needs. Use this list of visual tracking problems and resulting visual needs to address visual tracking in kids.

What does a Visual Tracking Problem Look Like?

So many times, we may see kids who struggle with tasks like reading, writing, coordination, or other areas and miss the visual part of the difficulty. The ability to process visual information plays an important part in everything we do. The areas below are signs that a visual tracking problem may present and visual tracking skills should be assessed.

Visual Tracking Problem Red Flags

  • Incoordination when visual perceptual skills or visual motor skills are required
  • Difficulty with eye-hand or general coordination
  • Difficulty with sports including those that use a ball or target
  • History of delayed developmental milestones
  • Reverse letters or numbers when writing
  • Misjudges distances or heights related to orientation of the body or body parts in movement or activities
  • Difficulty following an object across their field of vision, especially when the object crosses midline
  • Difficulty reading
  • Difficulty writing
  • Trouble copying work from one place to a paper in single plane or multi-plane locations
  • Difficulty keeping up with peers
  • Difficulty managing body on uneven surfaces, including navigaing and managing bleachers, steps, or walkways
  • Difficulty drawing or coloring
  • Trouble shifting gaze in all planes
  • Skips words or a line of words when reading or re-reads lines of text
  • Must use finger to keep place when reading
  • Poor reading comprehension
  • Short attention span
  • Difficulty comprehending or remembering what is read
  • Confusion with interpreting or following written directions
  • Writing on a slant, up or down hill, spacing letters and words irregularly
  • Confusion with left/right directions
  • Errors when copying from a chalkboard or book to paper
  • Misalignment of horizontal and vertical series’ of numbers in math problems
These are just some of the problem areas that may be present when a visual tracking difficulty is present.
Looking for strategies to address a visual tracking problem? Try some of these:


This information on visual tracking skills explains what is visual tracking so occupational therapists, teachers, and parents can better understand common visual processing needs in kids.

The OT Toolbox Contributor Spotlight-Kaylee

Meet Kaylee!


Kaylee Goodrich, OTR/L is originally from Upstate N.Y., but now lives in Texas, and is the Lead OTR in a pediatric clinic. She has a bachelors in Health Science from Syracuse University at Utica College, and a Masters in Occupational Therapy from Utica College. Kaylee has been working with children with special needs for 8 years, and practicing occupational therapy for 4 years. Kaylee practices primarily in a private clinic, but has experience with Medicaid and home health settings also. Feeding is a skill that Kaylee has learned by default in her current position and has come to love and be knowledgeable in. Visual development and motor integration is another area of practice that Kaylee frequently addresses and sees with her current population.


Contributor Posts By Kaylee Goodrich on The OT Toolbox:
Pediatric Feeding: Is it Sensory, Oral Motor, or Both?
Development of Oral Motor Skills

Disclaimer Statement: 
Kaylee Goodrich is a registered occupational therapist, but is in no way representing herself as an evaluating or treating occupational therapist in the publication of any post. The information, ideas or activities presented here are not intended to provide medical advice or physician/therapist instruction nor should they be used as a substitute for occupational therapy or other medical services. The information, activities, and ideas do not replace any relationship with a child and their therapist nor do they provide one to one treatment or consultation for a child with an established plan of care based on an assessment. Consult with a qualified occupational therapist if you have questions regarding the information or ideas presented or how to implement them with a child. If concerned about your child’s development, consult your child’s physician or a licensed occupational therapist regarding specific concerns or other medical advice. Any information, ideas or activities presented here are designed for complete adult supervision. Never leave a child unattended during implementation of any ideas or activities. Always follow and be aware of any age recommendations when using all of the products contained in any activities or ideas. The adult implementing and preparing the ideas or activities is ultimately responsible for using their best judgement when choosing and providing activities to best meet a child’s skill and safety level. Do not provide objects or materials that would pose as a choking hazard to a child. Kaylee Goodrich and The OT Toolbox are not liable for any impairment, damage, accident or loss arising out of the use or misuse of the information, ideas, and activities suggested in the publication of any post.


ClothesPin Pencil Grip

Pencil grip

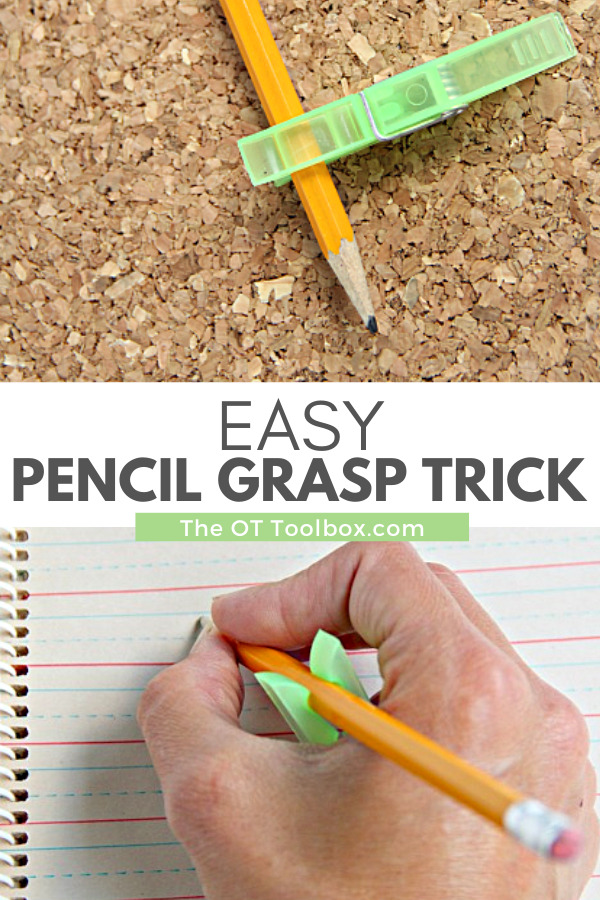
Pencil grips! It can be hard to find the perfect pencil grip. And then, once you find one that works just right, that perfect pencil grip gets lost in the expanse of a backpack or a messy desk. Today, I’ve got a pencil grasp hack for you. This clothespin pencil grip will help kids write with a better pencil grasp, and it’s an inexpensive way to offer cues to position fingers on the pencil correctly.

ClothesPin Pencil Grip

Pencil grasp is a tricky thing! You can remind kids over and over, try all of the pencil grasp tricks and tips, but if a child struggles with fine motor skills, they revert right back to the inefficient and non functional pencil grasp. This is especially true in handwriting problems when kids are rushing to write or holding their pencil inefficiently, and legibility suffers. The easy pencil grasp trick described below is one that provides a frugal option for ensuring a functional pencil grasp and one that plays into the dexterity needed for letter formation and handwriting. Looking for more information on pencil grasp and fun ways to work on pencil grip?  Try these activities designed to boost pencil grasp in creative ways.     

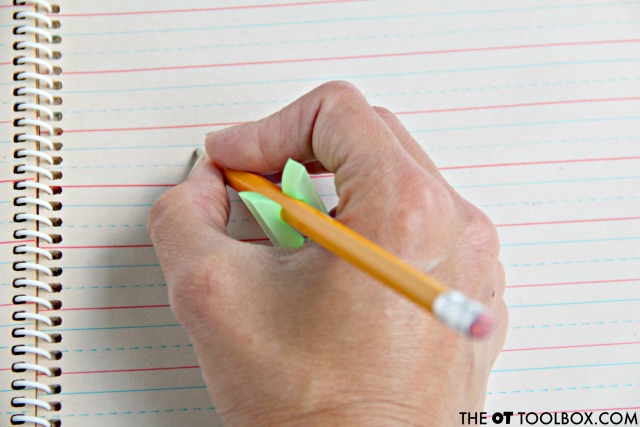
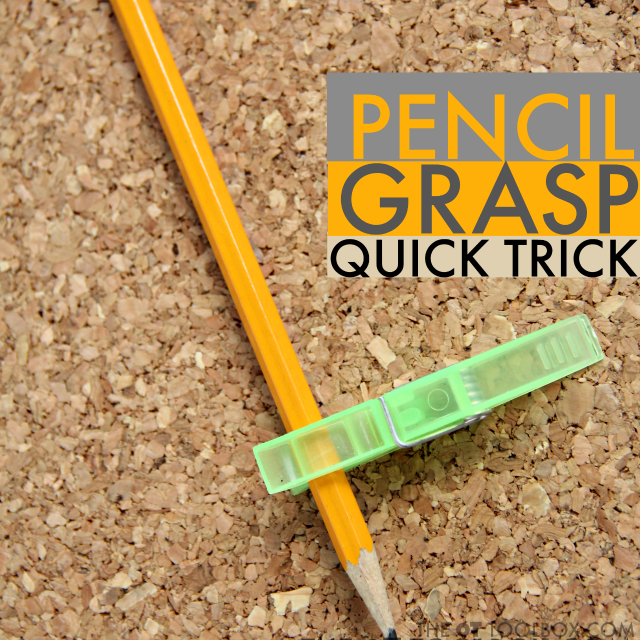
Kids can hold a clothespin clipped onto a pencil to help with pencil grasp and fine motor skills needed for improving handwriting and pencil grasp with this easy pencil grasp trick.

  One of the skills kids need for handwriting is pencil grasp. 

Easy Pencil Grasp Trick…that costs pennies

For this pencil grasp trick, you’ll need to understand why it works.    The issue with many kids who hold a pencil with an inefficient grasp is the dexterity and limited motion that results. They are holding the pencil with their fingers wrapped in such a way that they can’t hold a pencil with dexterity. They lack pencil control needed for efficient handwriting speed. Letter formation suffers and legibility lacks. When a child moves ahead in grade level or age and are required to write more quickly, they can’t keep up with written work requirements and legibility suffers. They then can’t read their class notes, handwritten work, homework lists, etc.    Try these pencil control exercises for more fun ways to work on dexterity and pencil movement in letter formation.  

So why does this clothespin pencil grasp trick work?!

For the child who can’t maintain a proper pencil grasp because of inefficient separation of the sides of the hand, this easy pencil grasp trick can be just the way to ensure the stability side of the hand is separated motorically from the precision side of the hand. Read more about motoric separation of the sides of the hand and what that looks like in fine motor work (such as holding and writing with a pencil).  

When kids hold the pencil with the clothespin “bar”, it provides a physical prompt that allows them to flex or close their pinkie finger and ring finger around the support of the clothespin. This allows the stability side of the hand, or the ulnar side, to provide support in writing.  

The radial side of the hand, or the precision side, is then able to work independently of the other two fingers. This means the middle finger, ring finger, and thumb are free to manually move the pencil with precision. The precision side which primarily consist of the thumb and pointer finger movements in a tripod grasp can move the pencil with control and dexterity as the middle finger supports the pencil.   

For the modified tripod grasp, the middle finger can be a helper digit where it is positioned on the pencil shaft and a worker in moving the pencil with control.   

Both the tripod grasp and the modified tripod grasp are efficient pencil grasps. The primary concern is that the ulnar side is separate and supportive, allowing for endurance and dexterity in written work.   

Here is a fine motor activity that can be used to build and develop the separation of the sides of the hand.

Working on pencil grasp in handwriting? Why not start a handwriting club for kids? Kids can work on handwriting skills in a fun way. Here’s how to start a handwriting club kids will WANT to join!

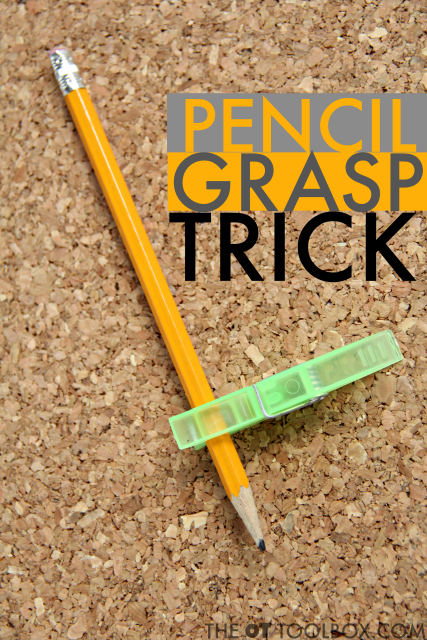
Clip a clothespin onto a pencil to help kids with pencil grasp as a physical cue for better grip on the pencil when writing.

Clothespin Pencil Grip

Affiliate links are included below.  

For this pencil grip trick, you’ll need just a single clothespin. The clothes pin can be the standard wooden variety or a colorful plastic type. Why not make it a project and decorate the clothespins as a group to add a bit of fine motor play?

Check out these fun clothespins we decorated and used as a spacing tool to teach spacing between words when writing.   

Some great clothes pins can be found here:  Wooden clothespin, perfect for decorating and customizing Plastic, colored clothes pin (A great price for 100 plastic clothespins!)

Natural colorful wooden clothespins

Pink and blue decorated clothespins  

I can’t think of a student that would like to make this writing tool their own with some glitter paint, fun washi tape, adhesive gems, or stickers.    

Try this pencil grasp trick that uses a clothespin to help kids with pencil grasp for better handwriting.

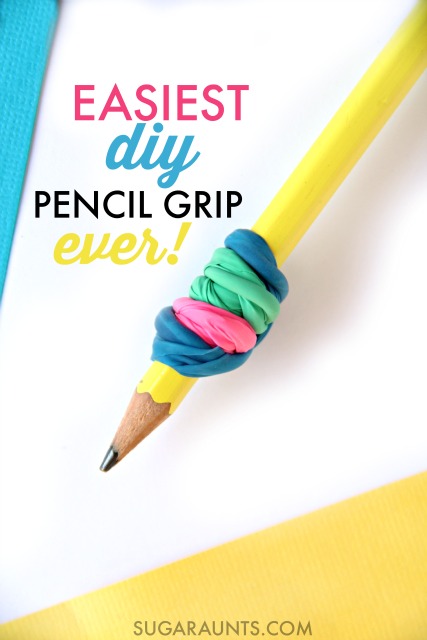
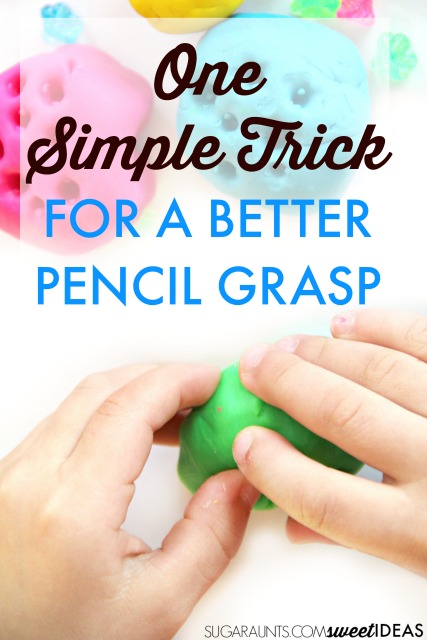
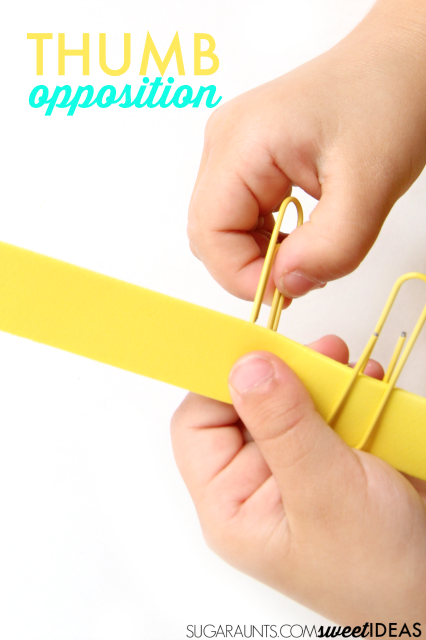
More pencil grip tricks:

Pencil Grip idea
Simple pencil grasp trick
Opposition pencil grasp trick

Join the pencil grasp challenge!

Need to know about the skills that make up a functional pencil grasp? The Pencil Grasp Challenge is open! In this free challenge, you’ll learn what’s going on behind the inefficient and just plain terrible pencil grasps you see everyday in the classroom, clinic, or home. Along with loads of information, you’ll gain quick, daily activities that you can do today with a kiddo you know and love. These are easy activities that use items you probably already have in your home right now.

Besides learning and gaining a handful (pun intended) of fun ideas to make quick wins in pencil grasp work, you’ll gain:

  • 5 days of information related to pencil grasp, so you know how to help kids fix an immature pencil grasp.
  • Specific activities designed to build a functional pencil grasp.
  • Free printable handouts that you can use to share with your team or with a parent/fellow teachers.
  • You’ll get access to printable challenge sheets, and a few other fun surprises.
  • And, possibly the best of all, you’ll get access to a secret challengers Facebook group, where you can share wins, chat about all things pencil grasp, and join a community of other therapists, parents and teachers working on pencil grasp issues.

Click here to join the Pencil Grasp Challenge.

free pencil grasp challenge

Colleen Beck, OTR/L has been an occupational therapist since 2000, working in school-based, hand therapy, outpatient peds, EI, and SNF. Colleen created The OT Toolbox to inspire therapists, teachers, and parents with easy and fun tools to help children thrive. Read her story about going from an OT making $3/hour (after paying for kids’ childcare) to a full-time OT resource creator for millions of readers. Want to collaborate? Send an email to contact@theottoolbox.com.

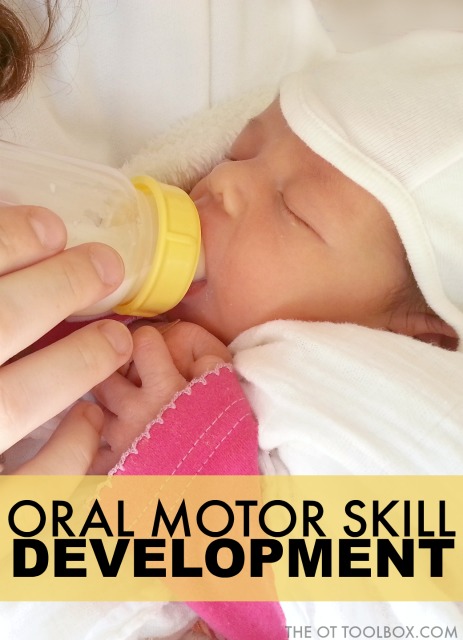
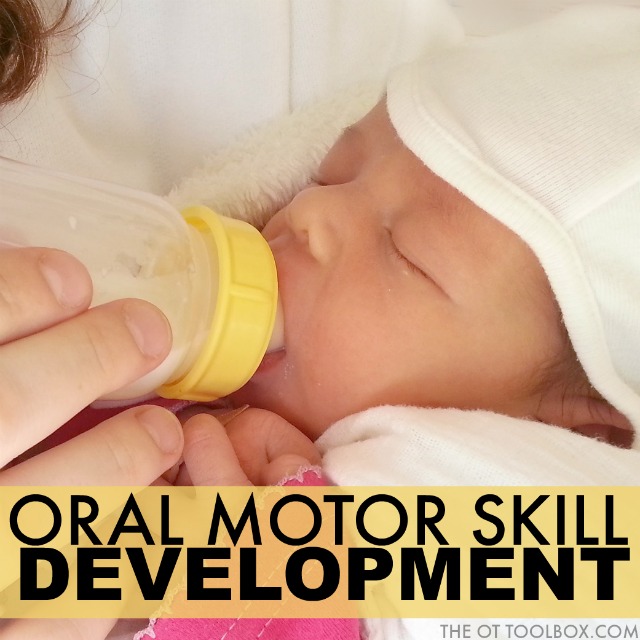
Development of Oral Motor Skills

Wondering about oral motor skills development or where to start with oral motor therapy? Below you will find information related to the development of oral motor skills. This oral motor development information can be used to guide oral motor exercises and oral motor skills for feeding.


Use this guide on development of oral motor skills to address oral motor skill therapy and as a guideline to develop oral motor exercises in oral motor therapy.


Development of Oral Motor Skills

Oral motor skills are the finest of the fine motor skills we develop as human beings. It begins in the womb, and is fully developed and established by 3 years of age. Like many other skills we learn, oral motor development is supported by primitive reflexes, postural control and other physiological milestones developing in synchrony. When the synchrony is broken, problems arise.

Oral Motor Skills: Where it all Begins

Oral motor skills start in the womb with the development of primitive reflexes that support feeding at full term. It is important to note that these reflexes develop in the 3rd trimester between the 28th week and the 37th week gestation. When working with a pre-term baby, these reflexes have not developed and successful feeding will require higher levels of support from an outside source.

Reflexes Established by Term:

* Gag reflex
* Rooting reflex
* Transverse Tongue Reflex
* Non-nutritive sucking
* Nutritive sucking
* Coordinated suck/swallow/breath
* Swallow reflex
* Phasic bite reflex
* Palmomental reflex
* Sucking patterns are non-volitional

A full term infant is ready to breast or bottle feed with the above supports in place.

Oral Motor Skills Birth to 3 Months of Age

As reflexes begin to integrate, feeding becomes more and more voluntary, and less of a non-voluntary response to stimuli from the breast or bottle. This occurs in a full term infant around 6 weeks of age. This is important to note, as unsuccessful feeding in the first 6 weeks of life, can set the tone for developing eating patterns throughout life.

Oral Motor Skills and Feeding at 3 – 7 Months of Age

By 4 months of age, most infants have gained fair head control and are able to remain in an upright position with support, and parents are beginning to introduce puréed foods. As they have grown, the anatomical structure of their jaws and tongues have dropped forward to support munching patterns. They also may open their mouth when a spoon is presented and are able to manage thin purees with minimal difficulties.

Oral Motor Pattern 3-7 Months

* Munching patterns
* Lateral jaw movement
* Diagonal jaw movement
* Lateral tongue movement

The development of these patterns allow infants to be successful with thin and thick purees, meltables and soft foods such as banana and avocado.

Oral Motor Skills and Feeding at 7-9 Months of Age

Between 7 and 9 months of age, infants are now moving into unsupported sitting, quadroped and crawling. This development supports jaw stability, breath support and fine motor development for self feeding skills. Infants at this age now begin to be able to successfully manage “lumpy” purees, bite and munch meltables and softer foods with assistance and the development of rotary chewing begins.

Oral Motor Patterns 7-9 Months of Age

* Lip closure
* Scraping food off spoon with upper lip
* Emerging tongue lateralization
* Movement of food from side to side

The above skills are clearly noted during the 7-9 month age range. If these skills are missing, eating a larger variety of textures will become difficult.

Rotary Chewing

Rotary chewing is broken into stages. The first stage being diagonal rotary chewing, and the second being circular rotary chewing.

Diagonal Rotary Chew

Diagonal rotary chewing is when the jaw moves across the midline in a diagonal pattern and comes back. This type of chewing often looks like an X from a frontal view.

Circular Rotary Chew

As the child develops, a circular rotary pattern emerges. In this pattern, the child’s jaws line up, slide across, jaws line up, and slide across again, looking like a circle from a frontal view.

Rotary Chewing Supports

Rotary patterns begin emerging around 10 months of age. The child at this time is also developing dissociation of his head from his body. This supports increased independence with biting pieces of food, lateralization of a bolus across the midline, and decreased spillage from the lateral sides of the mouth.

Oral Motor Skills at 12-15 Months of Age

By 12 months of age, the child has developed the oral motor basics to support feeding. As time goes on, the child will practice these skills resulting in less messy eating and the ability to handle more challenging foods. At this age, a child is able to manage foods with juice, and chew and swallow firmer foods such as cheese, soft fruits, vegetables, pasta and some meats.

Oral Motor Skills at 16-36 Months of Age

Between 16 and 36 months of age, the child continues to develop their jaw strength, management of a bolus, chewing with a closed mouth, sweeping of small pieces of food into a bolus, and chewing ‘harder’ textured foods such as raw vegetables and meat. A full circular rotary chew should also be developed at this time to support eating all varieties of foods.

Impact of Delayed Oral Motor Skills

Oral motor skills play a large role in a child being a successful eater and having a positive experience with food. When a skill is missing, feeding becomes difficult and stressful for everyone involved. By assessing where the delay in skill is, new skills can be developed successfully, leading to an efficient eater.

Read here about oral motor skills and the sensory components that play into picky eating and problematic feeding.

Looking for more information on oral motor problems? You’ll love these oral motor skill resources: 


Oral motor skill development in kids and how development of oral motor skills translates to feeding problems


Play Dough Hand Strength Astronaut Activity

Today I’ve got a fun astronaut theme play dough hand strength activity. There are so many fine motor benefits to using play dough mats in occupational therapy. And, actually, there are documented benefits of play dough itself as a therapy tool. We’ve had an intrinsic hand strengthening play dough mat on the website for a long time. It’s been one of our most popular fine motor resources ever since it was uploaded! There is a reason why: Kids need to strengthen fine motor skills, badly! It seems like there are more and more students who struggle with the necessary fine motor skills needed for a functional pencil grasp and other skills. They need hand strength!

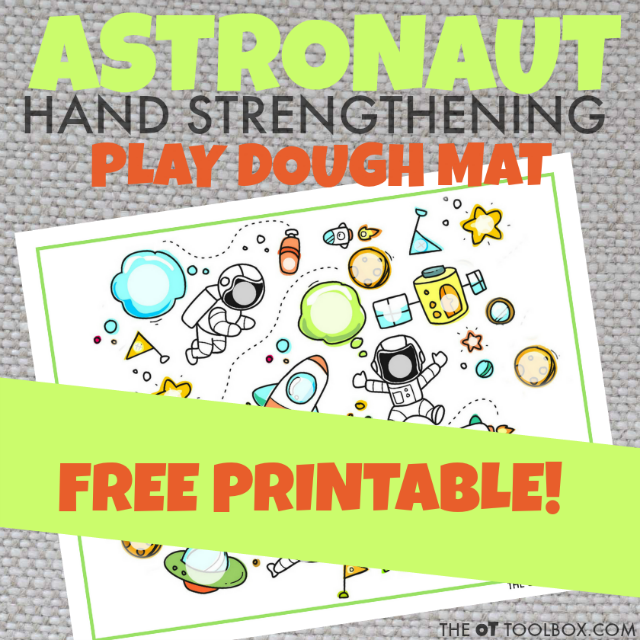
Use this astronaut play dough mat to work on intrinsic hand strength with play dough to build hand strength kids need for fine motor activities, all with a fun play dough activity!

Intrinsic Hand Strength with Play Dough

Using play dough, show the child how to roll a ball of play dough within one hand, using only the fingertips and thumbs.

This promotes development in a variety of areas: 

  • It strengthens the arches of the hands, helps awareness and coordination in separation of the two sides of the hand (finger strengthen exercises through play!)
  • Promotes finger isolation for improved control and dexterity
  • Encourages dexterity and coordination of the thumb and index finger which are important in pencil grasp,
  • Strengthens the intrinsic muscles for improved endurance in fine motor tasks such as maintaining hold on a pencil, manipulating clothing fasteners, managing and using scissors, coloring, and many other tasks.

Because the simple play dough mat offered on this site has been such a need and so successful, We wanted to share a few other play dough mats that can also be used to encourage and develop these fine motor skills.  

A the bottom of this post, you’ll find more ways to improve hand strength with play dough using free playdough mats.

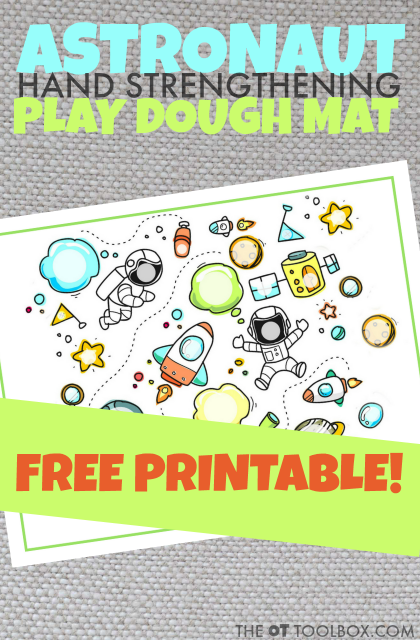
Today we’ve got an Astronaut themed play mat. This mat is nice for incorporating into a space theme or for any child that just loves all things space!  

 For this play dough mat, you can ask children to pull off a small piece of play dough and roll it in their hand using only the fingers and thumb of one hand. To encourage intrinsic hand strength, dexterity, coordination, and endurance of the intrinsics, it’s important to use just that one hand. It’s part of the challenge!  

Other uses for the play mat can include rolling the playdough with the palms of two hands. That’s a great activity too and fits perfectly with many children’s fine motor needs.

Play Dough Mat for Intrinsic Hand Strength

To use this play dough mat over and over again, add a layer of reusability by laminating the paper or slipping it into a sheet protector sleeve. There are different sizes of circles on the mat all with an astronaut theme. Each sized circle , requires the child to roll small or large play dough balls.  This encourages more refined intrinsic muscle use and improved dexterity of the hands.

You can use the mat in several ways:

  • Allow the child to fill the circles with play dough with random colors of play dough
  • Assign different sized circles to different colors of play dough.  This provides a visual scanning component to the activity
  • Write numbers or letters in the circles, providing a visual scanning and letter order cognitive component

Need more hand strength ideas? 

It’s my hope that these resources are a huge help for you! Here are a few more topics related to strength in the hands that you may need in your therapy toolbox: 
Graded Precision in Grasp 


Occupation-Centered Neat Pincer Grasp Activities 


Strengthen Tripod Grasp with Every Day Items 


DIY Clothespin Busy Bags to Strengthen Pinch 


Clay Strengthening Exercises 


Handwriting Warm-Up Exercises 


The Ultimate Guide to Fine Motor Strength

More themed Play Dough Mats

Here are more free play dough mats available:

Here are more free play dough mats that you can print off and use to work on hand strength endurance, and fine motor skills:

Free Ice Cream Play Dough Mat

Free Bird Play Dough Mat

Free Toys Play Dough Mat

Free Astronaut Play Dough Mat

Free City Skyline Play Dough Mat

Astronaut Play Dough Mat

Want to print off this astronaut play dough mat? Enter your email in the form below. You’ll receive an email with a link to access the file.

FREE printable Astronaut themed play dough mat to help kids strengthen the intrinsic muscles of the hands!

    We won’t send you spam. Unsubscribe at any time.
    Kids will love this astronaut play dough mat for building hand strength of the intrinsic muscles using play dough and this astronaut theme play dough mat, perfect for play dough activities and astronaut activities!


    Colleen Beck, OTR/L has been an occupational therapist since 2000, working in school-based, hand therapy, outpatient peds, EI, and SNF. Colleen created The OT Toolbox to inspire therapists, teachers, and parents with easy and fun tools to help children thrive. Read her story about going from an OT making $3/hour (after paying for kids’ childcare) to a full-time OT resource creator for millions of readers. Want to collaborate? Send an email to contact@theottoolbox.com.