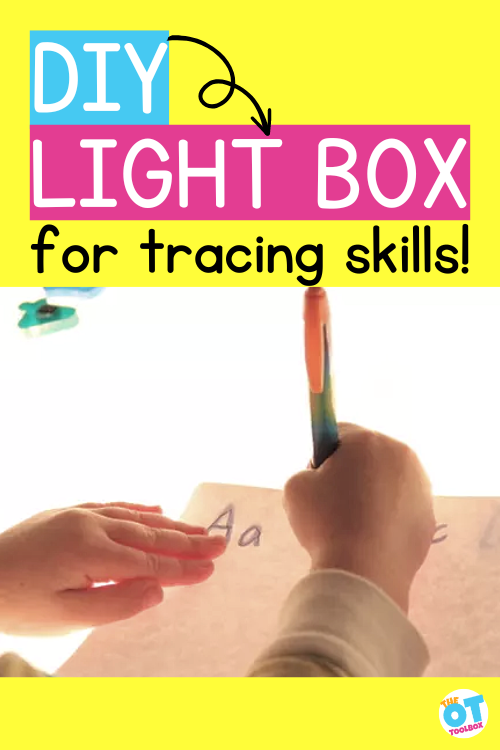
This DIY light box for tracing is an easy light box we put together in minutes. All you need is an under the bed storage container and a string of lights to make a tracing tool that kids will love. There are benefits to tracing and this tool is a fun way to build fine motor skills and visual motor skills as a visual motor skill leading to better handwriting.
Amazon affiliate links are included in this blog post. As an Amazon Influencer, I earn from qualifying purchases.
DIY Light Box for Kids
A DIY light box is a simple and effective tool that can be used for learning, play, and creativity. Light boxes provide a bright surface that makes it easier to see lines, shapes, and images for tracing or visual exploration. You can easily create a light box at home using materials like a plastic storage bin, LED lights, and a translucent lid.
This type of setup is especially helpful for kids because it makes activities more engaging and visually clear. A homemade light box can be used for tracing, drawing, sensory play, and even early writing activities.
DIY Light Box for Tracing
A DIY light box for tracing is perfect for helping children practice handwriting, drawing, and visual motor skills. The light shining through the surface allows kids to clearly see letters, shapes, or pictures placed underneath a sheet of paper.
This makes it easier for children to trace lines accurately, which supports motor planning and control. A DIY tracing box can be used for tracing alphabet letters, numbers, shapes, and simple drawings. It is a great tool for kids who are just beginning to learn how to write or who need extra visual support.
Sensory Light Box and Tracing Table Ideas
A sensory light box adds an extra layer of engagement by combining visual input with hands-on exploration. Kids can place different materials on the light surface, such as colored shapes, beads, or translucent objects, to explore how light changes the appearance of items.
You can also use your light box as a tracing table by placing worksheets or drawings underneath paper. This creates a bright, inviting workspace that encourages focus and creativity. Sensory light boxes are especially helpful for children who benefit from visual and tactile learning experiences.
Can You Make Your Own Light Box?
Yes, you can absolutely make your own light box at home with simple materials. Many DIY versions use:
A clear or translucent storage bin
LED strip lights or push lights. You can also use a tablet or studio lights (a video ring light found at many stores)
Wax paper or parchment paper (to diffuse light)
A flat surface lid
By placing lights inside the bin and covering the top with a translucent surface, you can create an affordable and functional light box. This DIY option works well for home use, classrooms, or therapy settings.
Can I Use My iPad as a Light Box?
Yes, an iPad or tablet can be used as a simple light box alternative. By increasing the brightness and displaying a white screen, the tablet can provide enough light for basic tracing activities.
However, there are some limitations. Tablets are smaller than most light boxes and may not provide as much working space. They are also more delicate, so supervision is important. A tablet can be a convenient option for quick tracing tasks, while a DIY light box offers a larger and more durable surface for regular use.
Reduce glare by upping the brightness when placing the tablet inside the plastic bin.
Specific Tracing Activity Ideas
Using a DIY light box for tracing opens up many opportunities for learning and skill development. Here are some beginner-friendly tracing ideas that parents, teachers, and therapists can start using right away:
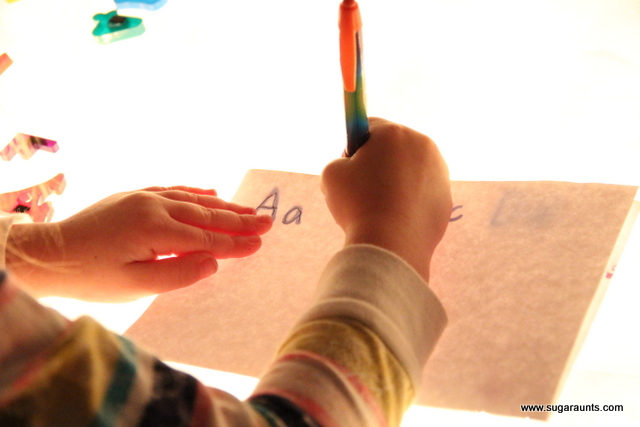
Letter Tracing
Place alphabet worksheets under paper and have children trace uppercase and lowercase letters. This supports handwriting development and letter recognition.
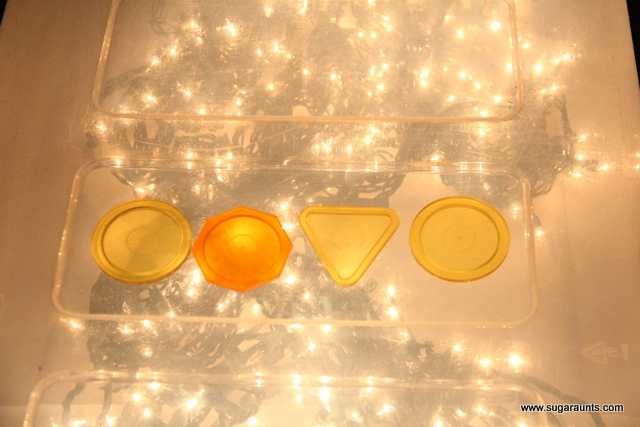
Shape Tracing
Use simple shapes like circles, squares, triangles, and stars. This helps build pre-writing skills and visual motor coordination.
Name Tracing
Write a child’s name in large letters and have them trace over it. This is a motivating way to practice writing.
Picture Tracing
Trace simple pictures such as animals, vehicles, or objects. This supports creativity and drawing skills. Make sure you use white paper to see the objects.
Line and Pattern Tracing
Use straight lines, zig-zags, curves, and waves to build control and precision needed for writing.
Number Tracing
Practice forming numbers by tracing over large, clear models.
Themed Tracing Pages
Create seasonal or themed tracing sheets (weather, holidays, animals) to keep activities engaging.
Why Use a DIY Tracing Box?
A DIY tracing box makes learning more interactive and accessible. The light helps children see lines more clearly, which can reduce frustration and improve accuracy. This tool supports fine motor skills, visual tracking, and hand-eye coordination while making writing practice feel more like play.
DIY light box for tracing
A light box is a fun activity, and one you see in preschool classrooms, as it’s intended for hands-on play and exploring the senses. But did you know there are many benefits to using a light box for tracing (and other exploring play)?
This DIY Light Box was something I’ve seen around Pinterest and have wanted to try for a while…Once we had our Christmas lights outside, I thought we would definitely be doing this project after we pulled all of the lights back in. So, after we brought the Christmas lights in from the outside bushes, this was easy to put together for a cold evening’s play!
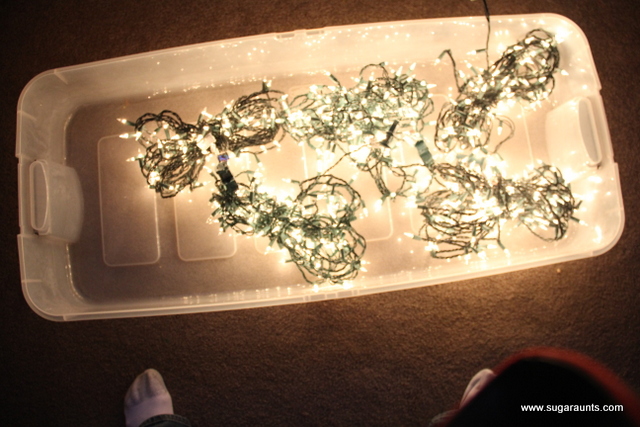
You need just two items to make a DIY light table:
Important: The under the bed storage bin needs to be made of clear plastic or have just a slight opaque color to the plastic. Also, the top should be smooth. Many storage bins have textured surface or a white surface. The flat, smooth lid is important for sensory play as well as tracing with paper on the DIY light table. This brand (affiliate link) is a good one to use.
Instructions to make a DIY light box:
Plug in the lights.
Place them into the bin.
Either cut a hole in the base of the bin for the lights to go through or cut a small notch into the lid so the strand of lights can go under the lid.
To make this homemade light box safer and not use plug in lights, you can use battery operated button lights (affiliate link) inside the storage bin. Or, there are many battery operated LED lights available now too. These are a great idea because many of them have a color-changing capability and can be operated from an app on your phone.
IMPORTANT: This homemade light box project should always be done under the supervision of an adult. The lights can get warm inside the bin and they should be unplugged periodically.
This is not a project that should be set up and forgotten about. The OT Toolbox is not responsible for any harm, injury, or situation caused by this activity. It is for educational purposes only. Always use caution and consider the environment and individualized situation, including with this activity. Your use of this idea is your acceptance of this disclaimer.
I put all of the (already bundled-up) strands of Christmas lights …seriously, this does not get much easier…into an under-the-bed storage bin, connected the strands, and plugged in!
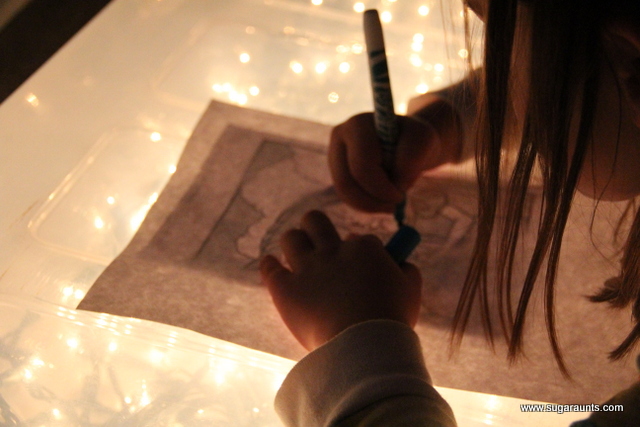
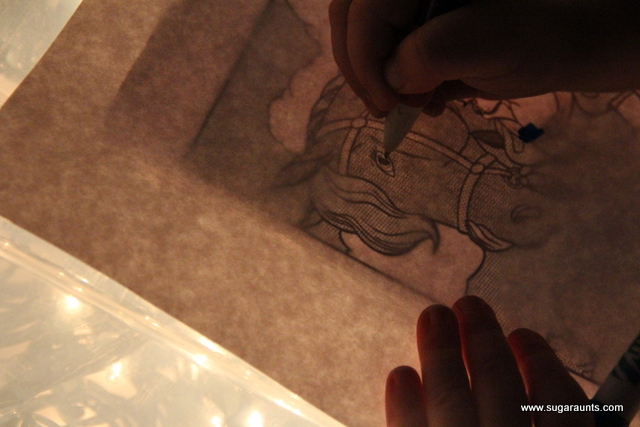
Once you put the top on, it is perfect for tracing pictures!
Tracing pictures on a light table
This is so great for new (or seasoned) hand-writers. They are working on pencil control, line awareness, hand-eye coordination…and end up with a super cool horse picture they can be proud of!
Use printable coloring pages and encourage bilateral coordination to hold the paper down. You can modify the activity by taping the coloring page onto the plastic bin lid.
Big Sister LOOOOVED doing this! And, I have to say, that she was doing the tracing thing for so long, that we had to turn the lights off because the bin was getting warm.
Other ways to use a DIY Light Table
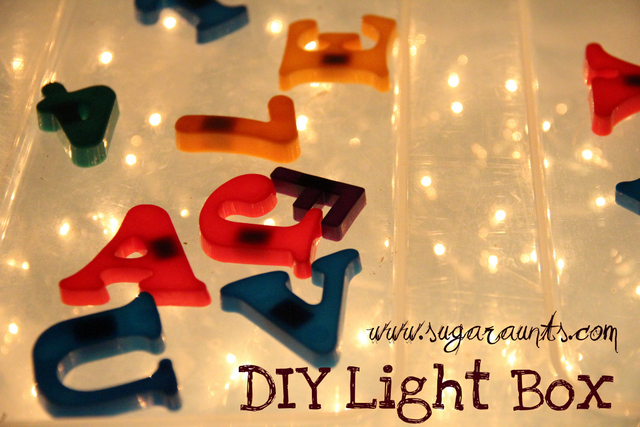
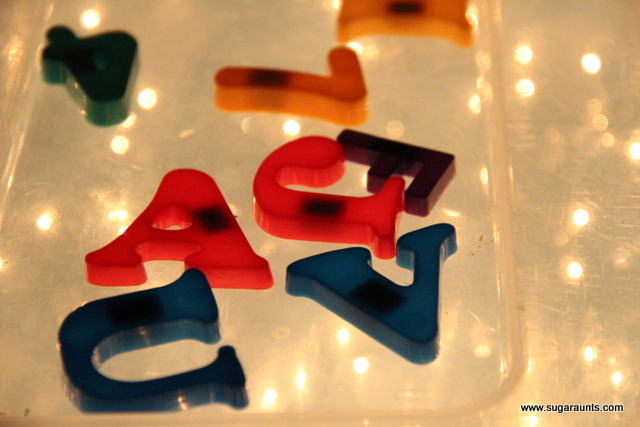
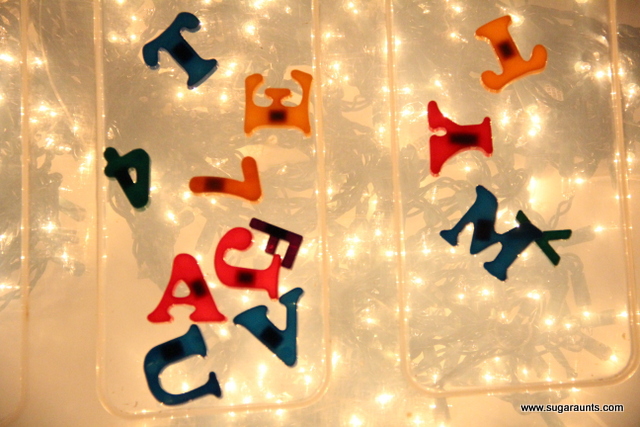
We went around the house looking for cool things to place on top of the bin. Magnetic letters looked really neat with the light glowing through…Baby Girl had a lot of fun playing with this.
You can add many different items onto the DIY light table:
Magnetic letters (the light shines through them slightly)
Sand for a tracing table- We cover how to use a sand writing tray in another blog post and all the benefits of tracing in a sensory medium. With the lights under the tracing area, this adds another multisensory component to the learning.
…All in a new and fun manner! We had a lot of fun with this, but have since put our Christmas lights back up into the attic. We will be sure to do this one again next year, once the lights come back out again 🙂
Please: if you do make one of these light boxes, keep an adult eye on it, as the box did warm up…not to burning warmth, but I would worry about the lights becoming over heated. This is NOT something that kids should play with unsupervised!
Colleen Beck, OTR/L has been an occupational therapist since 2000, working in school-based, hand therapy, outpatient peds, EI, and SNF. Colleen created The OT Toolbox to inspire therapists, teachers, and parents with easy and fun tools to help children thrive. Read her story about going from an OT making $3/hour (after paying for kids’ childcare) to a full-time OT resource creator for millions of readers. Want to collaborate? Send an email to contact@theottoolbox.com.
Working on fine motor skills, visual perception, visual motor skills, sensory tolerance, handwriting, or scissor skills? Our Fine Motor Kits cover all of these areas and more.
Check out the seasonal Fine Motor Kits that kids love:
Today, I have an update on a very old blog post for a specific reason. This fake snow messy sensory play activity is a valuable tool in addressing tactile defensiveness, or tactile sensitivity. In general descriptions, this simply means an over-sensitivity to touch, or over-responsiveness to touch sensations. For kids with sensory issues, this can be a very big deal. Tactile defensiveness can mean poor tolerance to certain clothing, textures, food sensitivities, closeness of others, wearing socks or the feel of seams or clothing. Sensitivity to these touch sensations can look like many different things! Today we are discussing all about tactile sensitivity, what that looks like in children, and a sensory challenge that can be used for tactile sensitivity.
I briefly explained the meaning of tactile defensiveness above, but let’s break this down further.
The tactile system is one of our 8 sensory systems: touch, taste, smell, sight, hearing, proprioception, vestibular, and interoception. The sense of touch is a very big piece of the whole picture.
The Tactile Sensory System is one of the earliest developed senses of the body, with studies telling us this sensory system begins to develop at around 8 weeks in utero. The sense of touch completes its development at around 30 weeks in utero when pain, temperature, and pressure sensations are developed.
Understanding Tactile Defensiveness
Tactile defensiveness is often discussed within the broader concept of sensory modulation, which refers to how the nervous system organizes and responds to sensory information.
In some individuals, the nervous system reacts more intensely to everyday sensations than expected. This pattern is often described in the research literature as sensory over-responsivity, a type of sensory modulation difficulty in which reactions to sensory input may be stronger, last longer, or feel overwhelming compared to what the situation typically requires.
It is important to understand that this is not simply a matter of a child noticing sensations more easily than others. Current understanding suggests that the nervous system itself is responding with a heightened emotional, physiological, and behavioral reaction to certain stimuli.
In other words, the child is not choosing to overreact; their nervous system is reacting in a way that signals discomfort or threat.
Some clinicians and organizations have begun using the term heightened sensory responsivity when discussing these patterns. This language reflects a shift toward more respectful and person-centered terminology. While the research base still frequently uses the term sensory over-responsivity, both phrases are generally referring to the same nervous system pattern, an amplified response to sensory input.
What Is Tactile Defensiveness?
When this heightened response occurs specifically in reaction to touch, it is commonly referred to as tactile defensiveness. Children who experience tactile defensiveness may react strongly to everyday sensations that others barely notice. Clothing seams, tags, certain fabrics, unexpected touch, or messy textures may trigger discomfort or distress.
The word “defensiveness” is helpful because it reflects what the child’s nervous system is doing. Instead of interpreting touch as neutral or pleasant information, the brain may interpret it as something that needs to be protected against. The body then moves into a defensive response, which can look like pulling away, avoiding certain clothing, refusing messy play, or becoming upset when touched unexpectedly.
How the Nervous System Contributes
The tactile system plays an important role in helping the brain determine whether touch is safe, alerting, or potentially threatening. For some children, this system sends signals that lead the brain to respond quickly and intensely to certain types of touch. As a result, everyday sensory experiences, such as getting dressed, standing in line, or participating in art activities, can become challenging.
When the nervous system reacts in this way, children may appear sensitive to textures, avoid certain fabrics, dislike grooming routines, or become distressed when their skin is touched unexpectedly. These responses are not simply behavioral choices; they reflect how the child’s nervous system is processing sensory input.
Types of touch
The skin performs unique duties for the body, based on different types of touch input, and tactile sensitivity can be considered to occur in the various aspects of touch. These types of touch include: light touch, pressure, discrimitive touch, pain, temperature.
Most importantly for our ancient ancestors, especially, the skin protects and alerts us to danger and discriminates sensation with regard to location and identification. This is important because touch sensations alerts us to both discrimination and danger. These two levels of sensation work together yet are distinctively important. And furthermore, the skin is the largest and the most prevalent organ.
Touch discrimination- Discrimination of touch allows us to sense where on our body and what is touching us. With discrimination, we are able to discern a fly that lands on our arm. We are able to sense and use our fingertips in fine motor tasks. We are able to touch and discern temperatures, vibrations, mount of pressure, and textures and shapes of objects.
Danger perception– The second level of the tactile system alerts us to danger. It allows us to jump in response to the “fight or flight” response when we perceive a spider crawling on our arm. With this aspect of touch, we are able to discern temperature to ensure skin isn’t too hot or cold. We can quickly identify this temperature or sharpness of an object and quickly move away to avoid burning, freezing, or sharp objects.
When either of these levels of sensation are disrupted, tactile dysfunction can result. This presents in many ways, including hypersensitivity to tags in clothing, a dislike of messy play, difficulty with fine motor tasks, a fear of being touched by someone without seeing that touch, a high tolerance of pain, or a need to touch everything and everyone.
Sensitivity to touch can mean over responding to touch input in the form of textures, temperatures, or pressure. Touch sensitivities mean that the body perceives input as “too much” in a dangerous way. The touch receptors that perceive input are prioritized because the brain believes we are in danger. The body moves into a state of defensiveness, or safe-mode in order to stay safe from this perceived danger. This is tactile defensiveness.
What does Tactile Defensiveness looks like?
Hyper-responsiveness of the tactile sense may include a variety of things:
Overly sensitivity to temperature including air, food, water, or
objects
Withdrawing when touched
Avoids certain food clothing textures or fabrics
Dislikes wearing pants or restrictive clothing around the legs
Avoidance to messy play or getting one’s hands dirty
Avoidance of finger painting, dirt, sand, bare feet on grass, etc.
Avoids touching certain textures
Clothing preferences and avoidances such as resisting shoes
Resistance to nail clipping, face washing
Resists haircuts, hair brushing
Dislikes or resists teeth brushing
Overreacts to accidental or surprising light touches from
others
Avoids affectionate touch such as hugs
Dislikes closeness of other people
As a result of this avoidance, development in certain areas can be delayed, in a way that functional performance of daily tasks is impacted. What you see in as a result of a poorly integrated tactile sensory system:
Delayed fine motor skills
Rigid clothing preferences
Behavioral responses to tasks such as putting on shoes or coat
More information on sensory processing of each of the sensory systems and how that impacts daily life can be found in The Sensory Lifestyle Handbook. You’ll also find practical strategies for integrating sensory diets into each part of every day life, in motivating and meaningful ways. Check out The Sensory Lifestyle Handbook for moving from sensory dysfunction to sensory function!
Supporting Children with Tactile Sensitivities
Understanding tactile defensiveness as a nervous system response helps shift the focus from correcting behavior to supporting regulation. When adults recognize that a child’s reaction is rooted in sensory processing, they can begin to create supportive strategies that gradually build tolerance and comfort with different tactile experiences.
Occupational therapy approaches often include providing predictable sensory experiences, respecting the child’s comfort level, and introducing new textures in ways that feel safe and controlled. Over time, this supportive approach helps the nervous system learn that touch can be experienced without triggering a defensive response.
Recognizing tactile defensiveness through this lens helps parents, educators, and therapists respond with understanding, empathy, and effective support strategies that promote participation in daily activities.
How to help with tactile sensitivity
There are ways to help address these areas, so that the child is safe and can function and perform tasks in their daily life. While addressing tactile sensitivities doesn’t mean changing the child’s preferences, it can mean understanding what is going on, what the child does and does not prefer in the way of sensory processing, and it can mean providing tools and resources to help the child.
This should involve an occupational therapist who can take a look at sensory processing and integration and make specific recommendations.
Some strategies that can impact tactile sensitivity include:
Understanding the child’s sensory systems, and integration in the daily life of the child. Grab the Sensory Lifestyle Handbook to read more on sensory diets that are meaningful and motivating. These are sensory activities that can be integrated right into tasks like baths, tooth brushing, hair brushing, dentist visits, clothing changes, etc.
Take a look at clothing sensitivity red flags for areas of sensitivity to clothing that stand out for the individual child.
Read more on proprioception and the connection of heavy work input as a calming and regulatory tool for sensitivities.
Work on touch discrimination with activities at the level of the child.
Provide verbal input to warn the child prior to light touch
Provide visual cues and schedules for tasks that must be completed such as tooth brushing or hair brushing.
Trial tactile experiences at a graded level, introducing various sensory experiences in a “safe space” at a just right level for the child.
Tactile Defensiveness Sensory Activity
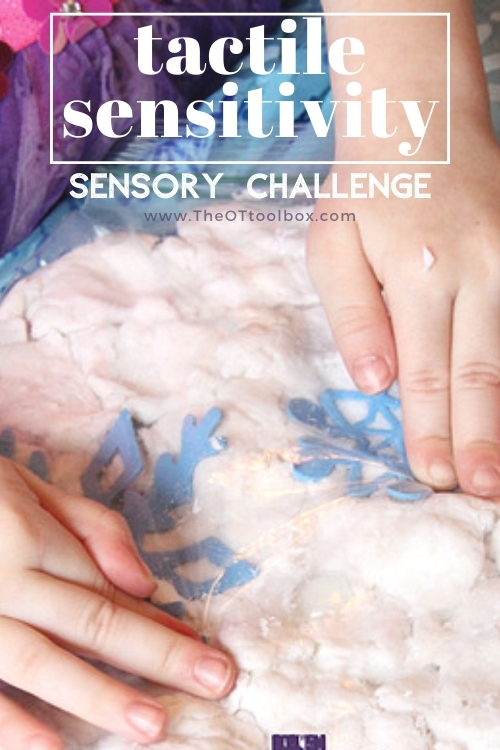
That’s where this messy sensory play activity comes in. By taking out the “messy” part of this sensory experience, children who dislike messy play or touching certain textures can explore the sensory activity and challenge tactile exposure. In this way, they are experiencing a new and novel texture (temperature and squishy, messy experiences), but at a safe level, or “just right” level for them.
This snow sensory play activity has the opportunity for tactile challenges, but it uses a plastic bag to contain the actual mess, allowing for a mess-free sensory experience, at different grades of texture exposure.
Fake Snow Recipe
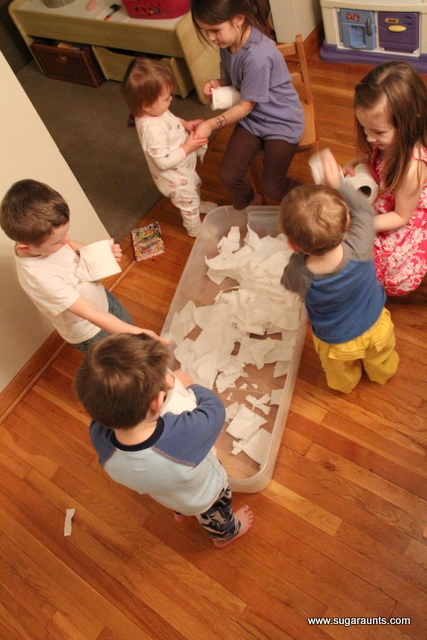
We made fake snow one recent weekend, when we had a big cousin sleep over. There were six kids aged five and under staying overnight at our house. I had this activity planned for us to do together, (because I procrastinated ) and had to get it together to take to a Winter Festival at our church the next day. It was a fun messy play idea for indoor snow.
We’ve made this fake snow before and I have the recipe listed on our Messy Play Day post.
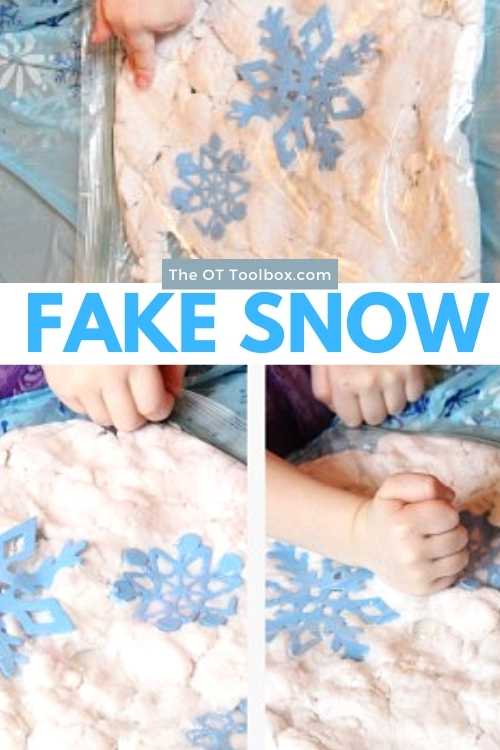
This fake snow is easy, because it includes only 2 ingredients:
Toilet paper
Ivory soap
With these two ingredients, there are many opportunities for tactile sensitivity challenges, and each child can experience sensory exploration at a level that suits their preferences. Some children may enjoy experiencing the dry texture of the toilet paper. (See the kids below…they sure enjoyed this texture.)
Other children may prefer (or avoid) the tactile experience of touching and manipulating the squishy, warm soap texture.
Others may tolerate mixing the two textures together.
Still others, may prefer none of these textures. In this case, move to the last level of this tactile experience, which is placing the fake snow into the plastic baggie. Then, they can squeeze and touch the sensory fake snow with a barrier in place. they will still experience the warm temperature and firm, heavy work of squeezing through their hands, but they will experience this sensory input in a “safe” level with that plastic bag barrier.
Fake Snow Dry sensory Bin
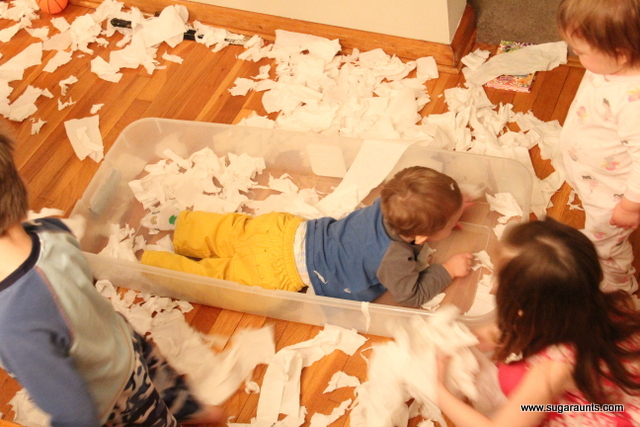
Step 1: Tear the toilet paper into shreds. Keep this in a bin or large container. We used an under-the bed storage bin because I was making a large quantity of fake snow for our Winter Festival.
We shredded the toilet paper and the kids had a BLAST! It started out so neat and kind. Tearing the toilet paper is a fantastic fine motor activity for those hands, too. It offers heavy work input through the hands which can have a regulating, calming impact on the joints of the hands. This can be a nice “warm up” exercise for the tactile challenge of exploring and manipulating the dry toilet paper texture.
For kids with tactile sensitivities, this might be “too much” for them to handle. Try using tongs and ask them to explore the toilet paper shredding sensory bin to find hidden items. Some of the paper cards and winter words in our Winter Fine Motor Kit are great additions to this sensory bin.
And then turned in to this.
And this.
Slightly off-course in our sensory bin, but of course it did. Why wouldn’t it when you have 6 cousins together? ((Ok, that part of this post was NOT mess-free…the end result is mess-free. I promise.)) So, then we popped the Ivory soap into the microwave…
Fake Snow Wet Sensory Experience
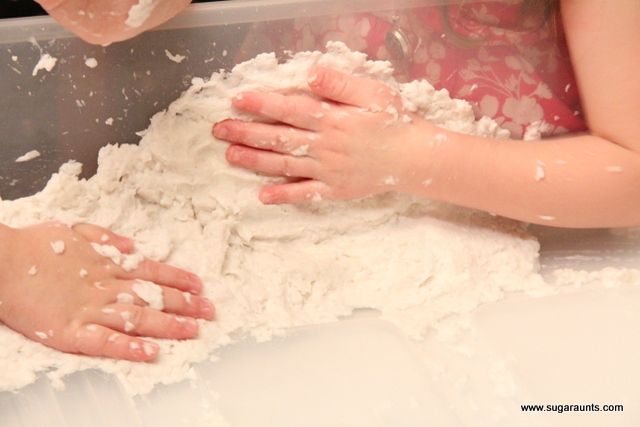
Step 2 in the tactile sensory experience is the wet fake snow portion. Following the fake snow recipe, we popped a bar of ivory soap into the microwave and ended up with a cloud of sensory material.
Children can touch and explore this sensory material for a warm, sensory experience.
Step 3 in the tactile challenge is mixing the dry material with the wet material. This can definitely be a challenge for those with tactile defensiveness or touch sensitivities.
If it is too much of a sensory challenge, invite the child to mix with a large spoon or to touch with a finger tip.
Other children may enjoy this part of making fake snow. The melted soap can be mixed with the toilet paper…to make fake snow!
Fake Snow Sensory Play for Tactile Sensitivities
THIS is the mess-free part that many children with tactile defensiveness may enjoy. 🙂
Simply place some of the fake snow material into a zip top plastic bag. You can tape the top shut to keep the material in the bag.
By manipulating the fake snow in a safe sensory manner, kids get exposure to a calming warm temperature. This is one low-level challenge to the tactile system. The warm temperature is a calming, regulating aspect that can be powerful in self-regulation.
Children can also squeeze, manipulate, pound, and spread the fake snow within the plastic baggie. This offers heavy work input through the hands and upper body in a way that is calming and regulating.
By placing the fake snow into a bag for sensory play, kids are exposed to tactile experinces in a way that may help with tactile discrimination by incorporating the proprioceptive sense.
Challenge motor skills further by adding items such as foam snowflake stickers, glass gems, and glitter. This was so much fun for my crew of kids and nieces and nephews and I hope it’s a tactile experience you get to play with as well!
Products mentioned in this post:
The Sensory Lifestyle Handbook– The Sensory Lifestyle Handbook is your strategy guide for turning sensory diets and sensory activities into a sensory lifestyle.
A Sensory Diet Strategy Guide The Sensory Lifestyle Handbook is a strategy guide for sensory processing needs. With valuable insight to the sensory system and the whole child, the book details how sensory diets can be incorporated into a lifestyle of sensory success. The thoughtful tools in this book provide intervention strategies to support and challenge the sensory systems through meaningful and authentic sensory diet tactics based on the environment, interests, and sensory needs of each individual child.
This print-and-go winter fine motor kit includes no-prep fine motor activities to help kids develop functional grasp, dexterity, strength, and endurance. This 100 page no-prep packet includes everything you need to guide fine motor skills in face-to-face AND virtual learning. Includes winter themed activities for hand strength, pinch and grip, dexterity, eye-hand coordination, bilateral coordination, endurance, finger isolation, and more.
Colleen Beck, OTR/L has been an occupational therapist since 2000, working in school-based, hand therapy, outpatient peds, EI, and SNF. Colleen created The OT Toolbox to inspire therapists, teachers, and parents with easy and fun tools to help children thrive. Read her story about going from an OT making $3/hour (after paying for kids’ childcare) to a full-time OT resource creator for millions of readers. Want to collaborate? Send an email to contact@theottoolbox.com.
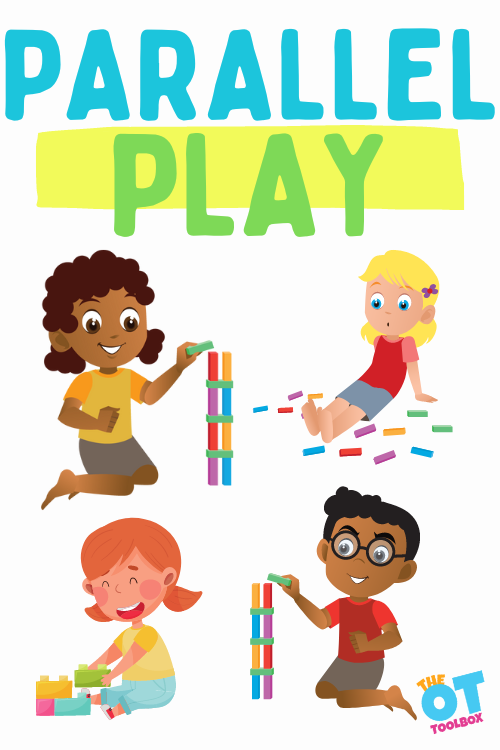
In this blog we will discuss the importance of parallel play in young children, its benefits, and ways adults can support social skill development with young toddlers through this type of play. One aspect of occupational therapy play, parallel play is both a tool and a main job of kids!
What Are Social Skills in Early Childhood?
Social skills are the abilities that allow children to interact effectively with others. In young children, these skills are foundational and still emerging. They include:
In preschool years, social skills are heavily supported by adult scaffolding, modeling, and structured routines.
What Is Parallel Play?
Parallel play typically emerges between 2 and 3 years of age, though it may extend into the preschool years. During parallel play, a child plays near another child using similar materials but does not directly interact or collaborate.
Two children drawing at the same table without conversation
Children using the same sensory bin but not sharing materials
The key feature is proximity without coordinated interaction.
Parallel play is a foundational stage within early childhood development and plays a meaningful role in a child’s development across motor, emotional, and social domains.
During this stage, children engage in independent play while positioned near peers, often using similar play materials, yet maintaining their personal space. This structure allows children to participate at their own pace, which is essential for healthy socialization.
Rather than demanding immediate collaboration, parallel play offers an excellent opportunity for children to observe, imitate, and gradually integrate social awareness without overwhelming demands.
Why Parallel Play Is Important
Parallel play is not a social deficit. It is a developmental bridge.
During parallel play, children are:
Observing peer behavior
Learning social norms
Practicing imitation
Regulating sensory input in a shared environment
Developing awareness of others without the cognitive demand of cooperation
This stage allows children to tolerate shared space before they are ready for cooperative play.
The benefits of parallel play extend beyond simple proximity. As children manipulate blocks, crayons, sensory bins, or “own papers” at a shared table, they strengthen fine motor development while learning how their body moves within a shared environment. Activities such as climbing, pushing, or taking turns on a swing also contribute to developing gross motor skills in the context of nearby peers.
These shared yet separate experiences support regulation and allow children to practice social participation without requiring direct interaction. This balance fosters both motor competence and confidence.
Parallel play also supports emotional growth. When children play side by side, they begin to tolerate shared space, manage frustration, and gradually build the foundations of social problem-solving.
Because the demands are lower than in cooperative play, children can engage successfully with less time needed for adult mediation. This stage of socialization supports language development as children overhear peer dialogue, practice imitation, and begin using simple social phrases. It is active observation and internal learning.
Over time, these early experiences lay groundwork for later collaboration in school and even into adulthood. A child who learns to share materials, manage space, and observe social cues during early childhood development is building the scaffolding for teamwork and group participation later in life.
Parallel play is a developmentally appropriate bridge. Supporting it respectfully allows children’s development to unfold naturally while strengthening regulation, communication, and the foundations for future collaboration.
Developmental Progression of Play
Play skills typically move through stages:
Solitary play
Parallel play
Associative play (beginning interaction and sharing materials)
Cooperative play (shared goals and roles)
Not all children move through stages at the same rate, and progression is influenced by temperament, sensory processing, language skills, and emotional regulation capacity.
When to Look Closer
Parallel play remains appropriate in preschool. However, additional support may be warranted if a child:
Avoids peers entirely
Becomes distressed in shared environments
Does not demonstrate joint attention
Shows limited imitation
Struggles significantly with regulation in social settings
In these cases, assessment may explore sensory processing, communication skills, and executive functioning.
How Adults Can Support Social Skill Development
Rather than pushing children into cooperative play prematurely, adults can scaffold progression.
Helpful strategies include:
Modeling simple language (“Can I have a turn?”)
Narrating shared experiences
Structuring short, low-demand shared tasks
Providing visual supports for turn-taking
Supporting regulation before expecting interaction
Social skills develop most effectively in environments that are emotionally safe and predictable.
Clinical Perspective
From an occupational therapy lens, social participation is an occupation. Parallel play reflects a child’s ability to share space, tolerate sensory input, and observe social cues. These are foundational regulatory and executive skills that precede more complex peer collaboration.
Supporting social skills in young children means supporting:
Sensory regulation
Emotional safety
Language development
Attention and impulse control
What is parallel play?
Parallel Play refers to, playing near or alongside another person. It is a developmental phase of childhood development. The act of participating in building social boundaries by playing along side a peer offers a variety of learning opportunities, especially when adults facilitate interactions through creating an engaging environment.
This stage of play is a crucial stepping stone in navigating friendships. It’s an opportunity to practice social interactions in a “safe” manner as young children play side-by-side.
parallel play age
Parallel play occurs between the ages of 18 months to 2 years of age. Although this age range is a common stage for many children, parallel play can exist beyond the age of two years. This play age is when we see a lot of growth.
Children of all ages can play near or alongside a peer.
Even adults can participate in leisure activities using parallel play!
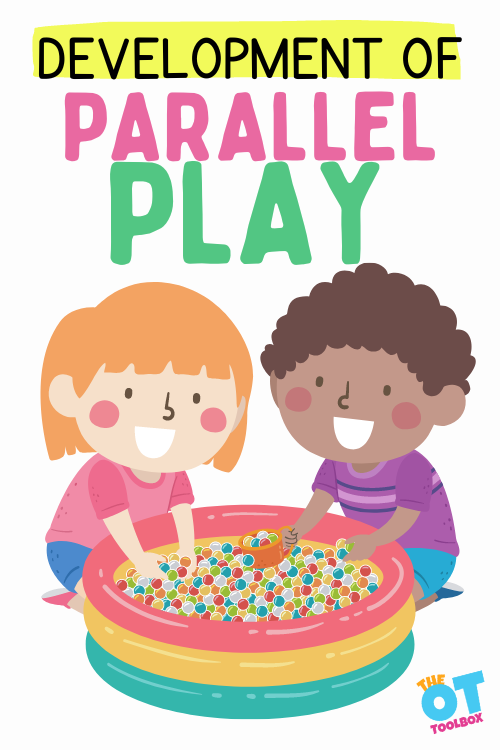
Development of parallel play
Parallel play occurs when children play in groups, in preschool classrooms, day care centers, playdates, or in small groups, including alongside siblings. Playmates that play beside one another may be using the same toys or playthings or they may be using different toys.
It’s an opportunity to build social skills by observing a peer, using new words and building on language development, seeing new vocabulary in action, exploring different scenarios, exploring social behavior, even at a young age.
Parallel play is a process in social emotional learning and social emotional development, and includes practice in the social development that might not happen in stages of play prior to parallel play (unoccupied play, solitary play, and onlooker play).
Because parallel play requires proximity to other children, it’s a great way to practice the skills needed for play stages after parallel play as well, leading to a healthy development of social awareness.
There are six stages of play in early childhood including:
Unoccupied play
Solitary play
Onlooker play
Parallel play
Associative play
Cooperative play
Parallel play is the fourth stage of play development, and the beginning of children exploring relationships with those around them. Child development is centered on play and parallel play is just one of those stages
Parallel Play is one of six stages of development!
Parallel play is just one of the six stages of play. As children navigate sharing space and toys with peers, they are learning communication, sensory, spatial awareness and other developmental milestones in a group setting.
History of Play development
The history of parallel play is discussed in this blog stating that, “Parallel play (or parallel activity) is a term that was introduced by Mildred Parten in 1932 to refer to a developmental stage of social activity in which children play with toys like those the children around them are using, but are absorbed in their own activity, and usually play beside rather than with one another.”
There have been many different studies done on play. One of the most well-known educational philosopher, Maria Montessori, highlights the importance of all stages of play within her research.
Benefits of parallel play
During this parallel play stage, children in this age range learn:
You can see how parallel play is a powerful tool for learning during the preschool years!
Examples of Parallel Play
You have probably seen parallel play in action in the classroom, home, or anywhere more than one child are interacting together in play experiences.
When observing play at a park, children between the ages of 2 and 3 engage in parallel play as they interact with toys in the same area, such as the sandbox.
As they dig and pour the sand, children may allow others into their space, but don’t acknowledge what they are doing, or try to join their play.
Playing alongside one another using similar toys in a pretend play area in a preschool classroom
Playing in a shared space with different toys such as blocks and dolls
Playing in a shared environment with similar toys or experiences, but with individual play experiences (in a block center where each child builds their own blocks, in a play dough center where each child plays with their own play dough, etc.)
Playing on playground equipment at a school playground where each child uses similar or different equipment and participates in their own pretend scenarios
While children are in the imitation stage, adults can support their development by providing large areas where many children can play near each other with similar toys. This includes investigative art opportunities, large motor play, block areas, book areas and open ended spaces.
Parallel Play Activities
Here are five fun parallel play games for you to try.
Investigating art – In the Reggio Emilia philosophy of early childhood education, the atelier (art studio) is a focal point of the classroom. Children of any age, and in any play stage, benefit from exploring different types of art materials. For the child engaging in parallel play, observations of other individuals are often made. Whether indoors or out, providing children with different art supplies, will draw interest in the shared space. Set up this space by providing seating areas that are safe to explore paints, clay, recycled materials and more.
Sensory exploration – Parallel play development can be developed in sensory play. Sensory bins, tubs, and activities provide the opportunity for multiple children to engage in tactile exploration at the same time. Although they may not be engaging directly with the children in their group, they will be enthusiastic about standing/sitting near others. Sensory bins can be filled with a variety of items that are readily available, such as sand, rice, rocks, grass, birdseed, or water. They can also be seasonally themed, like these fall sensory ideas. Messy sensory play with shaving cream is a great tactile activity.
Building areas – blocks, Legos, Lincoln logs, tinker toys, train tracks, and other building materials are fun for children of any age to promote parallel play. A block area creates a smaller space with a variety of opportunities children enjoy. A building area can be set up in the classroom or a home. Scaffolding the learning environment, where adults lay out items that encourage children to explore topics and practice new skills, is a wonderful way to support parallel play. A block area can includes hard hats, road signs, books about building, plastic animals, and more!
Storybook access – A library filled with different types of books interesting to young children is a perfect parallel play environment. As children pick out the book they like, sit on a bean bag or carpet square to read, they are actively being part of a small reading group. Adding some baby dolls, stuffed animals, blankets and pillows entices young children to stay in the reading nook longer. Some classrooms put up a small tent for reading time, or build a treehouse loft in the class.
Small group fine motor play- A small table with four or five chairs is the perfect spot to set up a fine motor activity for the age level you are teaching. This parallel play set up is ideal, allowing young children to have their own space, while still playing near familiar children. Examples of activities to include in this area are stacking cups, building block towers, muffin tin sorting, scissor skill activities, rainbow chain links and play dough. You can find more ideas perfect for toddlers here on the OT Toolbox.
supporting children through conflict
When children are playing near each other, problems don’t often occur, but what happens when one child gets too close to another, or they take a toy that another child is playing with?
Sometimes children become frustrated with the actions of their peers, and need extra visual and tactile support to navigate calming down and problem solving. As children become more comfortable with parallel play through fun and engaging activities, they are able to develop foundational skills necessary for social and emotional development.
As children are developing their play skills, they often need support from adults on how to communicate appropriately. Using visual and tactile tools to support calm down and problem solving skills are necessary when engaging with toddlers who are having big emotions.
Once a child is calm, supporting their conflict negotiation skills through simple questions and narrating the situation, will help toddlers find a solution and also learn skills needed to communicate with peers in the future.
Some short phrases to use with toddlers when helping them identify the cause of their frustration and problem solving are:
I see that _________ took/grabbed/kicked/etc_____________.
You seem mad. What happened?
___________wanted to be closer to you, but you didn’t want that.
How can I help you ______________?
What would you like to do instead?
Do you need a break?
Would you like to try _______ instead?
One program that includes easy-to-understand calming activities for two years olds is the (Amazon affiliate link) Soothing Sammy program I developed.
It includes a story about Sammy, a golden retriever, who lives in a house that children visit when they are sad or upset. Sammy supports children through processing their feelings by sharing with them a variety of sensory objects (water, cold washcloth, crunchy snack, a spot to jump, and more!)
Although parallel play is a short term developmental stage, it is an important step that bridges the gap from independent exploration to building collaborative friendships. Teachers, caregivers, and parents play a critical role in providing safe and interesting opportunities for children to play and socialize with others.
Jeana Kinne is a veteran preschool teacher and director. She has over 20 years of experience in the Early Childhood Education field. Her Bachelors Degree is in Child Development and her Masters Degree is in Early Childhood Education. She has spent over 10 years as a coach, working with Parents and Preschool Teachers, and another 10 years working with infants and toddlers with special needs. She is also the author of the “Sammy the Golden Dog” series, teaching children important skills through play.
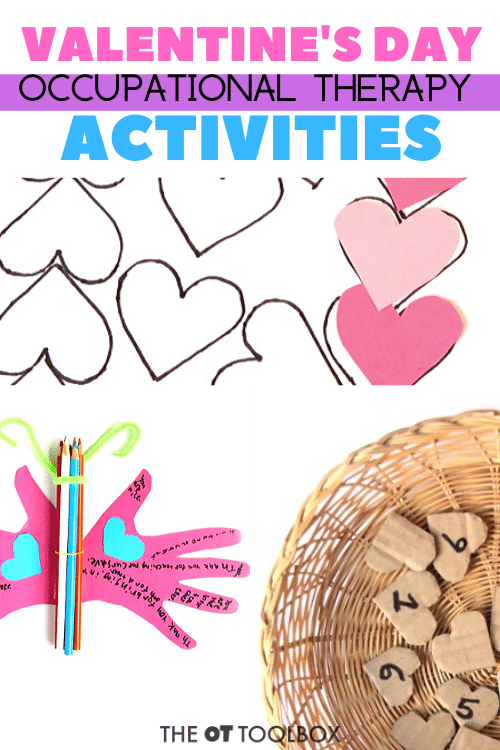
Here, you’ll find Valentine’s Day Occupational Therapy Activities that you can use this time of year to help kids develop skills. This is the time of year that red and pink hearts are everywhere, so why not use the theme of love and friendship in therapy interventions with fun Valentines day activities? Add these heart crafts, and love ideas to your therapy toolbox to work on things like fine motor skills, regulation, scissor skills, and more, all with a Valentine’s Day theme!
There are so many love and heart themed activities here on The OT Toolbox. Over the years, we’ve done a lot of fun activities that double as a skill building strategy. Check out these ideas and pick a few to add to your therapy line up and plans over the next few weeks. Some of these hear crafts and sensory ideas or games would make great additions to a Valentine’s Day party that builds skills, too!
One great tool is our Valentines Day I Spy activity for visual motor and fine motor skill-building.
Valentine’s Day Occupational Therapy Activities for Kids
Valentine’s Day is the perfect time to weave meaningful sensory and motor activities into classroom lessons or therapy sessions.
These Valentine’s Day occupational therapy ideas can build skills like fine motor precision, emotional regulation, sensory processing, and more, all while celebrating the season of love and connection. I like these ideas for school based OT, or outpatient clinical services. You can use them with early intervention or older ages, as well. We tried to pull together ideas that blend fun with functional development.
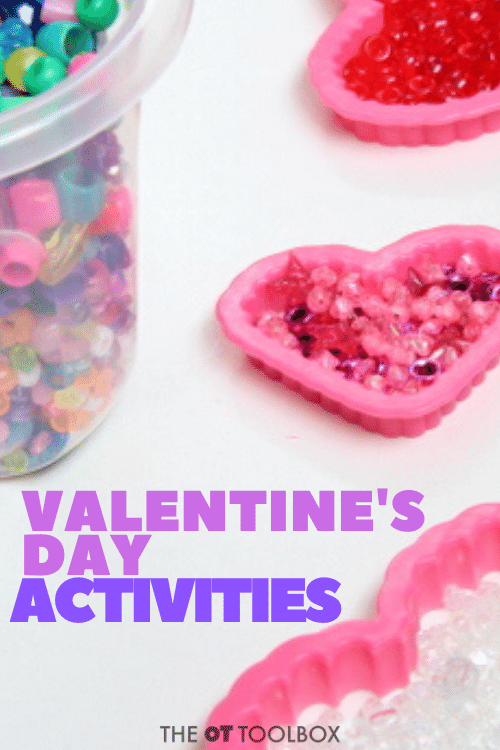
Valentine Sensory Bin Ideas for Therapy and Play
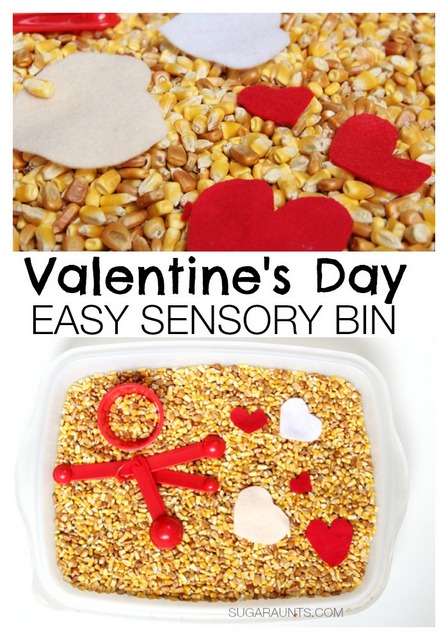
A well-designed Valentine’s Day sensory bin is a classic tool that supports tactile exploration, calming sensory input, and fine motor development.
Try filling a bin with red and pink rice or shredded paper, then add small heart-shaped erasers, mini clothespins, plastic rings, or paper hearts for sorting and tweezing.
For a valentines sensory bin that encourages self-regulation, include soft textures like felt hearts, fuzzy pom-poms, and scented items like lavender sachets.
These are good ideas for valentine activities for preschoolers are great for early learners working on grasping skills and visual scanning. Add clues or tiny hidden objects for a scavenger hunt twist.
Creative Valentine Crafts for Skill Building
February crafts offer so many ways to support motor planning, bilateral coordination, and visual motor integration.
For kindergarten valentine crafts, try a torn-paper heart collage using tissue or construction paper to strengthen hand muscles.
Another fun project: use lacing cards shaped like hearts to practice bilateral coordination and dexterity.
Add a twist by turning the craft into a personalized scavenger hunt, kids find materials based on color, texture, or size, then use them in their final creation.
Valentine STEM Activities for All Ages
We love the multisensory learning that happens with STEM activities and incorporating this into the holiday with Valentine STEM activities will spark curiosity and coordination.
Use candy hearts to build towers or bridges, count and graph colors, or create heart-themed mazes with magnets and paperclips.
These activities challenge executive functioning, planning, and sequencing while offering a creative way to integrate academic concepts.
Add ingredients like baking soda and vinegar to explore fizzy heart experiments. These hands-on activities are ideal for preschoolers through early elementary ages.
Valentine Party Games with a Therapeutic Twist
Turn typical valentine party games into skill-building opportunities. Try a heart bean bag toss to target gross motor coordination and core strength.
Play musical hearts with a playlist of songs to practice motor timing and auditory processing.
Use card games like memory matching with heart symbols or emotion faces to build cognitive and social-emotional skills.
Add a blanket fort in the living room for calming play or a personalized scavenger hunt with heart-shaped paper clues to encourage movement and direction-following.
Creating Meaningful Valentine Experiences at Home or School
Valentine’s Day is a chance to create memorable valentine’s day experiences that foster connection.
A cozy picnic on the floor with heart-shaped snacks, pizza, and dessert can turn into a fun bonding moment.
Use fairy lights, soft blankets, and candles (battery-operated for safety) to set the tone for a movie night that feels like a special event.
These ideas provide quality time, encourage emotional bonding, and offer calming sensory input.
For mom or caregivers, setting aside space for self-care, even five minutes of deep breathing or stretching, can be a powerful model for children learning to regulate themselves.
Free Valentine’s Day Printables
We love to create multi-purpose free worksheets and printable activities that support development. Worksheets can get a bad rap, but we at The OT Toolbox attempt to create occupational therapy worksheets that focus on play as a function.
When we can use a printable founded in play, the user is performing a daily occupation that is important to them, and the play is both the tool and the skill that is being developed. That’s why these Valentine’s Day worksheets are so loveable!
Conversation Heart Sort– Print off this sorting worksheet for a fine motor activity with conversation hearts.
Valentine’s Day Hat Craft– Print off this hat template and work on coloring skills, scissor skills, and executive functioning to build and create the Valentine craft.
Valentine Hole Punch Cards– These free pintables are perfect for occupational therapy Valentine parties. Use the printable activity to build skills in eye-hand coordination, hand strength, bilateral coordination, arch development, visual scanning, and more.
Heart Deep Breathing Exercise– Print off this heart poster and use it to develop skills in mindfulness, self-regulation, and even proprioception through the chest and upper body. It’s a very calming activity that can be a great addition to the sometimes chaos and unexpected situations in a classroom Valentine’s Day party. use it to support sensory needs at a Valentine’s Day party!
Valentine’s Day Activity Sheet– This printable tool is a great activity that can be used to develop many different skills depending on the needs of the individual. Use a single activity sheet to target: visual scanning, visual memory, visual peripheral skills, form constancy, fine motor skills, eye-hand coordination, dexterity, pencil control, motor planning, coloring and more.
Valentine Matching Alphabet Cards– Cut out these love letter cards and match uppercase to lowercase letters. These cards are used for cursive letters to build skills in letter recognition, visual discrimination, and more.
Valentines Fine Motor Worksheet– Print off this Valentine worksheet and build motor skills in many ways. have fine motor races with small objects like beads or mini erasers. Use tweezers to move items along the path. Work on pre-writing lines by using the paths on a vertical or diagonal. Work on a vertical plane to build core strength and shoulder stability. Use the sheets to practice letter formation by writing in the circles. There are so many ways to play and develop skills with a heart theme!
More Valentine’s Day Activities
That’s not all! Use the activity ideas below in planning OT sessions, or in Valentine’s day parties that also build skills.
One thing I love about holiday events this time of year is that kids are excited about Valentine’s Day activities. It’s fun, friendly, and full of kindness and empathy. However, there are so many ways to develop skills with the old-fashioned Valentine fun:
Cut out paper hearts- Cut hearts from cardstock or construction paper for more resistance
Fold paper hearts in half- This is great for bilateral coordination, hand strength, pinch strength, eye-hand coordination, motor planning, and visual perception.
Stick heart stickers on paper- Add small targets by drawing dots and placing the heart stickers on the dots. This is great for fine motor precision and eye-hand coordination. Place the paper on a vertical surface and further develop core strength and balance.
Write on Valentine’s Day cards- what a functional and fun way to work on handwriting and to teach kids to write their name.
Make a Valentine’s Day box- Don’t worry about the fancy Pinterest V-Day boxes! Some of those require way too much parent help. Help a child wrap the box in wrapping paper (anther great functional life skill!) and then cut out hearts or draw right on the box.
Make a Valentine’s Day snack– Work on executive functioning skills, direction following, fine motor skills, and more.
Valentine’s Day Therapy Slide Decks
Working virtually? Use a done-for-you therapy slide deck. These are therapist-created and designed to meet the needs of a variety of levels of users. Adjust the slides and therapy activities to meet your needs and the needs of the learners you are working with.
If you are needing occupational therapy teletherapy resources, check out the hands-on Valentine’s Day activities below. They are great for February parties and therapy at home activities for this time of year, too.
Valentine’s Day Sensory Activities
From sensory bottles, to discovery activities, to heart painting and more, these sensory play activities can be a fun way to help kids develop skills through the senses. How can you use these Valentine’s Day occupational therapy activities in sessions or at home?
Valentine’s Day Sensory Bottle– Use this sensory bottle activity as a way to build fine motor skills while kids help to create the sensory bottle and add materials. Then use it in self-regulation, sensory processing needs as a calm down bottle. Sensory bottles are fantastic to work on visual processing skills like visual discrimination, figure-ground, and other visual perceptual skills.
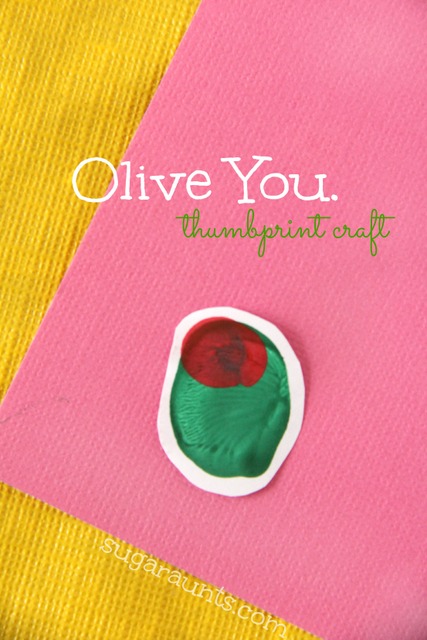
Olive You Thumbprint Craft– Fingerprint art is a great way to work on finger isolation, an essential fine motor skill that kids need to manipulate items and improve pencil grasp. Here is more information on how fingerprint art improves fine motor skills. Add this artwork to a card or Valentine’s Day craft for fine motor fun.
Valentine’s Day Play Dough Activity– Use a recycled chocolates box in a play dough activity that builds skills like strengthening of the intrinsic muscles and arches of the hands. This is a fun Valentine’s Day activity that can be used in classroom parties or in the therapy room to build skills.
Bilateral Coordination Heart Sensory Tray– Use sand, rice, or other sensory bin material to create a bilateral coordination and visual motor activity for kids. They can work on eye-hand coordination, motor planning, and other skills. The point of the activity is to establish direction and orientation relative to the child’s body. The movement activity addresses hand-eye coordination in different visual fields, promotes spatial awareness and visual discrimination, addresses left and right awareness, improves peripheral vision, promotes body awareness and coordination with specialization of the hands and eyes, and works on gross motor movement skills.
Valentine’s Day Fine Motor Activities
Try these Valentine’s Day fine motor activities in your occupational therapy interventions or home programs. The activities here are fun ways to help kids develop hand strength, dexterity, precision, grasp development, and motor control.
Be sure to check out the Valentine’s Day Fine Motor Kit. In the 25 activity printable kit, you’ll fine hands-on activities to build fine motor skills. Activities include coloring and cutting cards, pencil control sheets, heart crafts, Valentine’s Day write the room activities, hole punching exercises, and so much more. Grab the Valentine’s Day Fine Motor Kit here.
DIY Heart Maze- Look out visual motor skills…this heart maze is one you can make and print off for your whole caseload. Adjust the use according to your kiddos. Children can place objects like paper hearts, mini erasers, etc. on the hearts in the maze to double down on fine motor work, or color in the hearts to work on pencil control. This maze is a visual processing powerhouse. Find more information on visual processing here.
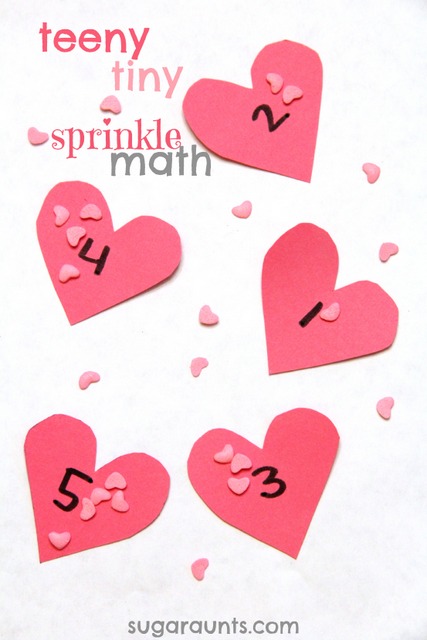
Teeny Tiny Sprinkle Heart Activity– This is a fine motor activity that builds precision and dexterity in the hands. It’s a fine motor workout kids can use to build hand strength and endurance for fine motor tasks. Use it in math centers to work on one-to-one correspondence and counting or sorting.
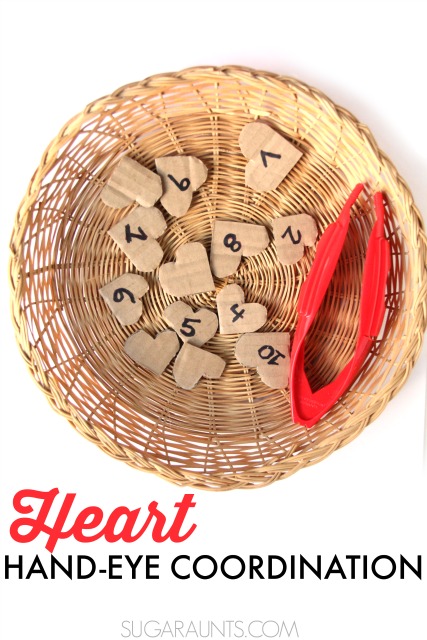
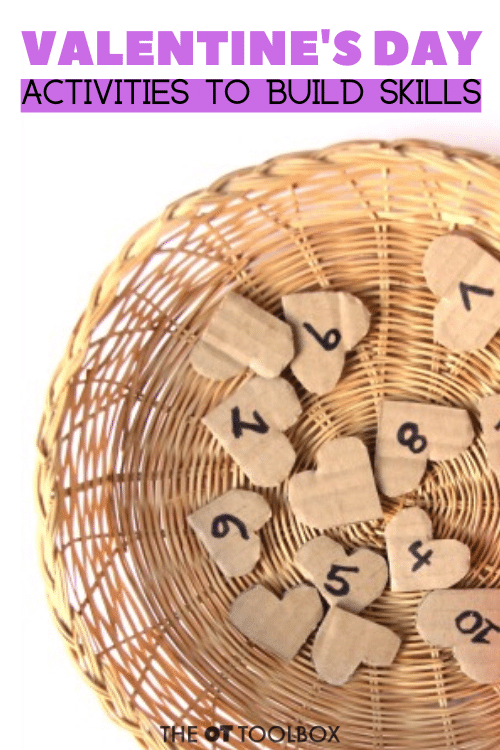
Heart Eye-Hand Coordination Activity– Work on eye-hand coordination and fine motor skills tongs and heart s cut from cardboard. If you are like me, you have a ton of delivery boxes coming to the house. Use those boxes in a fine motor skills building activity. Write numbers or letters on the hearts to make it a sorting, math, or spelling activity.
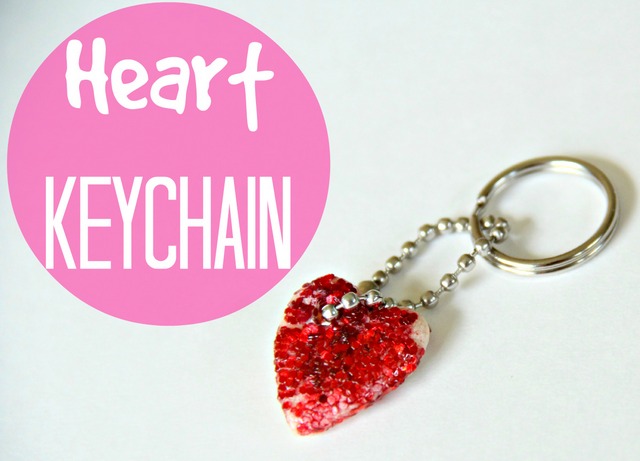
Salt Dough Keychain– This is a fun heart craft that goes along with the children’s book, “The Kissing Hand”. Use it to help kids work on fine motor skills, and hand strengthening. This keychain craft makes a great Valentine’s Day gift idea too!
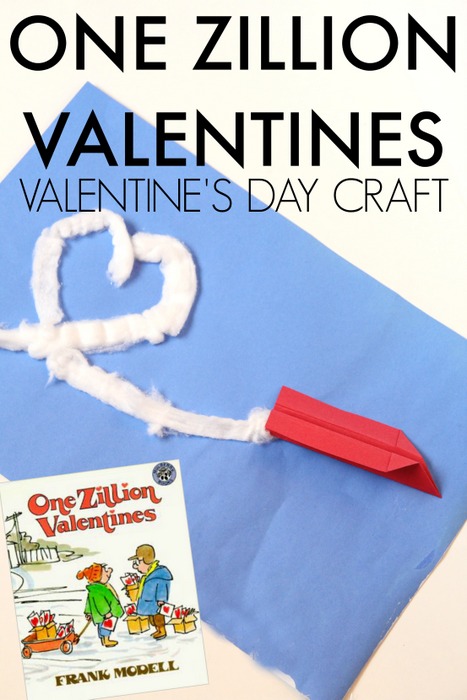
One Zillion Valentines Book and Craft– Pairing a book with therapy or when working on skills with kids is a fun way to open up conversation, problem solving, and strategizing to create a project or activity based on the book. This Valentine’s Day book for kids is just that. One Zillion Valentines is one children’s book that pairs nicely with a fine motor craft for kids. Kids can work on fine motor skills, motor lanning, direction following, and executive functioning skills while folding and making paper airplanes, and the cotton clouds in this fun craft idea.
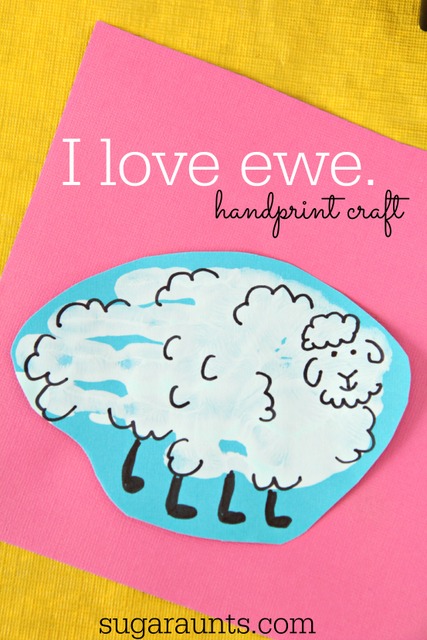
I Love Ewe Handprint Craft– Use a handprint art activity as a tactile sensory experience. Pair scissor skills, pencil control, direction following, and copying skills to work on various areas needed for handwriting and school tasks. Pls, this makes a great Valentine’s Day craft or addition to a card!
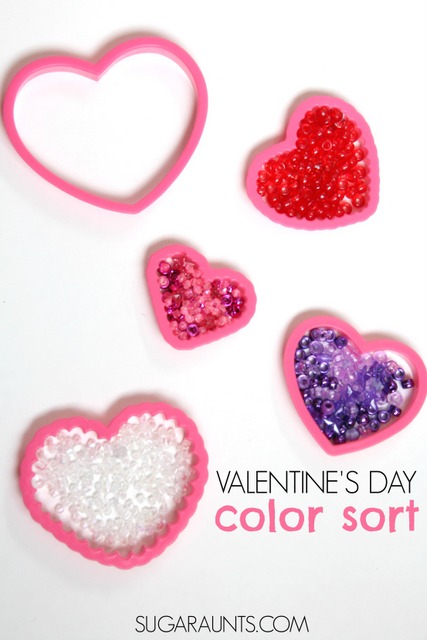
Valentines Day Color Sorting Fine Motor Activity– Grab a couple of cookie cutters and some beads. This is a fine motor activity that kids can use to build skills like in-hand manipulation, separation of the sides of the hand, finger isolation, open thumb webspace, and more.
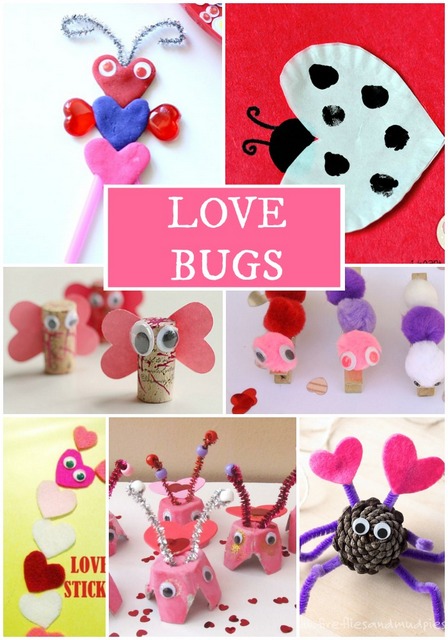
Love Bugs Crafts– Work on fine motor skills, scissor skills, direction-following, eye-hand coordination, bilateral coordination, and more with these cute bug crafts for kids.
Valentine’s Day Sensory Bin– There are so many benefits to using a sensory bin in building fine motor skills. Pour, scoop, and stir with the hands for a tactile sensory experience. Using a sensory bin can be a great way to work on visual perceptual skills like figure-ground, visual discrimination, and other essential visual processing areas. Find and ovate objects or add a learning component by writing sight words or math problems on hearts. This is an open-ended activity that can be used in so many ways.
I Love You Books for Kids– These Valentine’s Day books for kids are a fun way to combine books with crafts or love themed activities. Use them to work on copying words or sentences for handwriting practice. The options are limitless. What love and heart themed books would you add to this list?
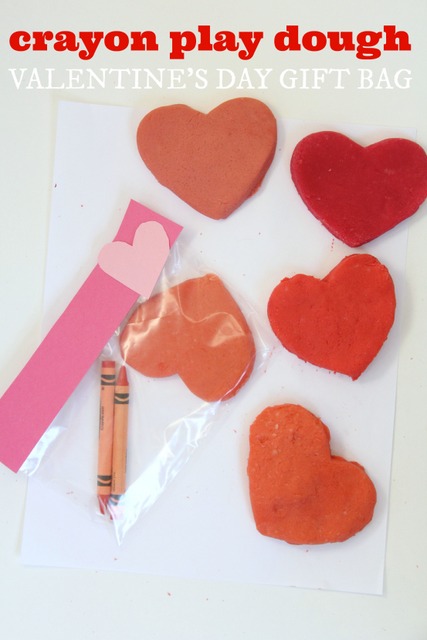
Valentine’s Day Crayon Play Dough– Use play dough to work on so many areas: hand strength, arch development, separation of the sides of the hand, endurance, eye-hand coordination…But have you ever had trouble getting a a really vivid red play dough when using food coloring? The answer to the red play dough problem is using vivid crayons! Here is our crayon play dough recipe that gives you the brightest colors, perfect for using in Valentine’s Day play dough activities!
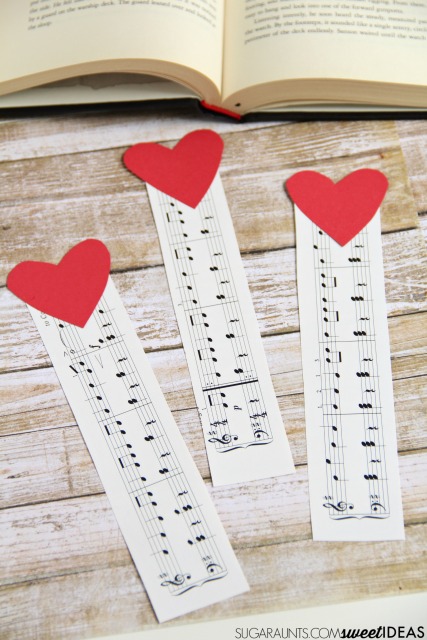
Heart Bookmark Craft– This is such a fun and easy Valentine’s Day craft to use when working on scissor skills with kids. The strait lines of the bookmark and curved lines of the heart make it a great activity for kids just working on the basics of scissor skills.
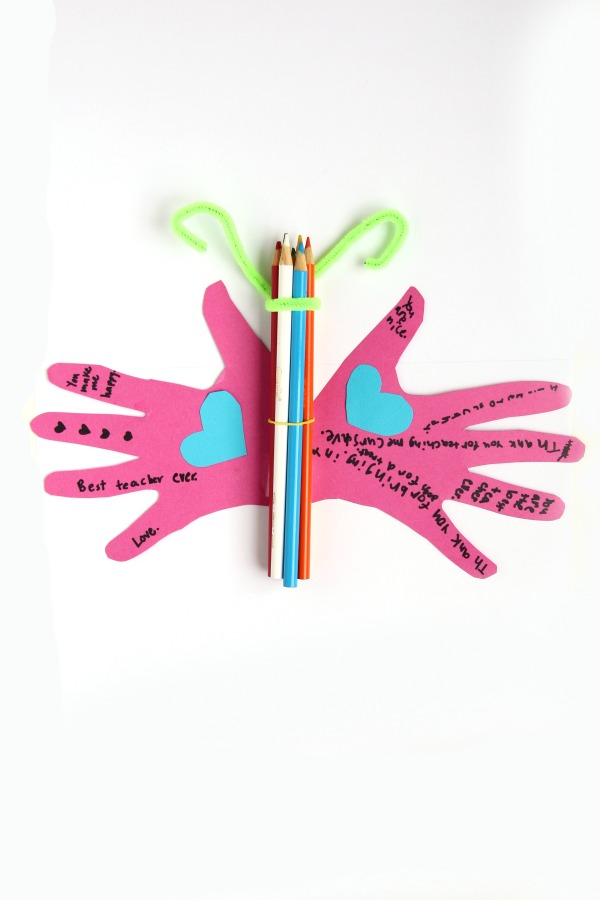
Heart Butterfly Craft- Work on scissor skills, handwriting, and fine motor skills to make this fun card. The directions to make this Valentine’s Day craft are over here on a guest post we did for Hands On as We Grow. Use this fun craft with a group. It’s a great Valentine’s Day party idea!
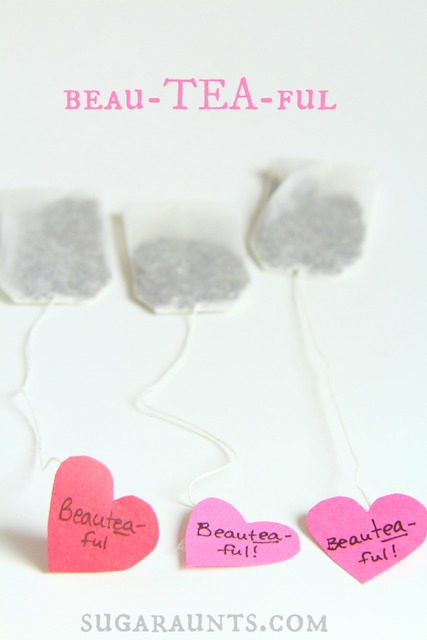
Valentine’s Day Tea Craft– This Valentine’s Day craft is a fun way to work on scissor skills, handwriting, and fine motor skills. Kids can make this craft as a gift for friends or parents and work on skill development, too.
So, what are your favorite ways to work on skills with a holiday theme? Try some of these heart activities at Valentine’s Day parties, at home when making cards for loved ones, or in therapy planning! Have fun!
Want to add more Valentine’s Day activities and movement tools to your skill-building?
he Valentine’s Day Fine Motor Kit is here! This printable kit is 25 pages of hands-on activity sheets designed to build skills in pinch and grasp strength, endurance, eye-hand coordination, precision, dexterity, pencil control, handwriting, scissor skills, coloring, and more.
When you grab the Valentine’s Day Fine Motor Kit now, you’ll get a free BONUS activity: 1-10 clip cards so you can challenge hand strength and endurance with a counting eye-hand coordination activity.
Colleen Beck, OTR/L has been an occupational therapist since 2000, working in school-based, hand therapy, outpatient peds, EI, and SNF. Colleen created The OT Toolbox to inspire therapists, teachers, and parents with easy and fun tools to help children thrive. Read her story about going from an OT making $3/hour (after paying for kids’ childcare) to a full-time OT resource creator for millions of readers. Want to collaborate? Send an email to contact@theottoolbox.com.
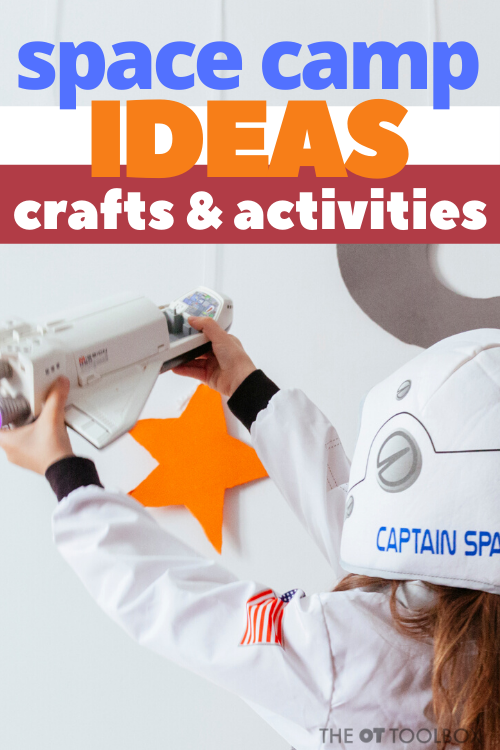
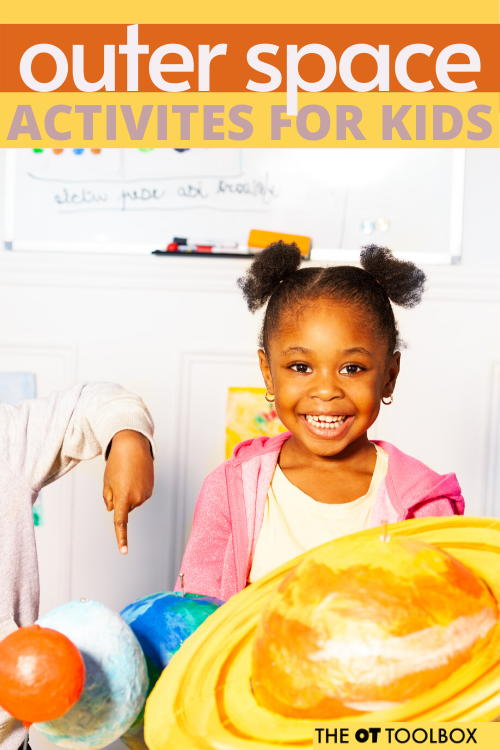
If your kids are outer space enthusiasts, then this space theme activities are just the thing to add learning and skill building with space activities. This collection of space activities for kids are actually part of a DIY summer camp that we designed. When the kids need a backyard summer camp or something fun to look forward to, easy and creative activities based on a space theme can do just that. This summer, create a home summer camp with an Outer Space theme…all while building skills in therapy or at home. Our space theme slide deck is just one way to help kids build skills, and a great way to lead into space theme learning and play with the kids!
For another space themed virtual therapy activity, try this free outer space Connect 4 game. It’s great for kids of all ages.
Here, you’ll find everything you need to plan a space camp fun that builds skills like fine motor skills, gross motor skill development, sensory input, regulation, emotional support, bilateral coordination, eye-hand coordination, executive functioning skills, and more. Read on for all of the outer space fun!
Space Camp for Kids
Whether you are planning a space camp in your therapy programming or trying to think of ways to build skills for kids this summer in a fun and creative way, this space camp idea is for you. For parents that need something out-of-the-box this summer (that doesn’t break the bank!), a backyard space camp can be just the thing to get excited about.
Space theme ideas
You’ll want to check out some other space activities we have here on the Toolbox website. Add these ideas to your space camp planning. These ideas can get you started with planning. Scroll below to find more specific space activities based on skill area.
For more creative ideas with a space theme, be sure to check out my Outer Space Awesome Pinterest board.
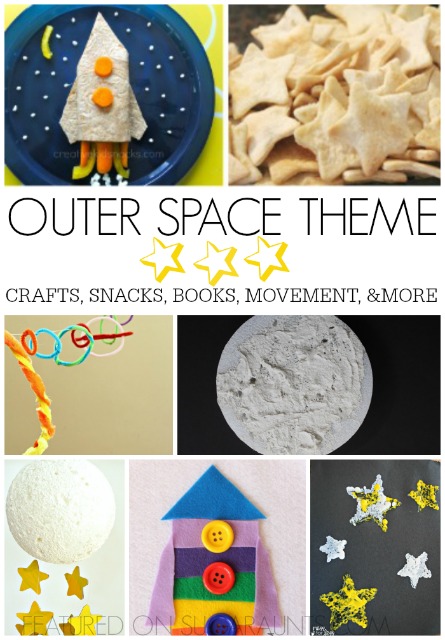
We even grabbed up a handful of our all-time favorite Outer Space books from the library to share with you. If you’re looking for activities to do with the kids this summer, a space theme will be a sure hit. Your Summer Camp at home will be complete with Space crafts, Space snacks, Space sensory, fine motor, and gross motor learning and play.
Space theme
These activities are set up by theme (books, snacks, crafts, solar system models, sensory play, and movement learning activities) so that you can pick and choose activities for each day of your themed camp. Make the week work for you! Choose just one or two activities for each day, or go all out and do one from each category. It’s totally up to you and your little campers!
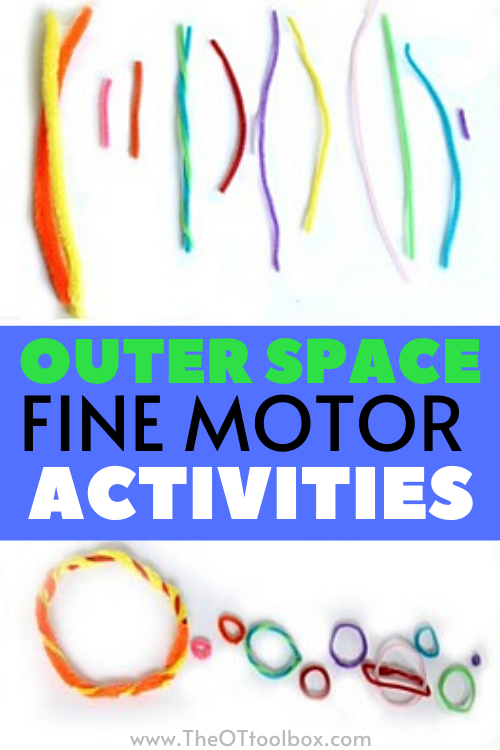
Space Fine Motor Activities
Use this outer space play dough mat printable to work on hand strength, fine motor skills, and eye-hand coordination. Simply print it off and slide into a page protector to use each day during your space camp.
We made this Outer Space model using pipe cleaners. We didn’t get into planet size, but rather checked out the size of each planet compared to the others from The Planets book and crafted them based on the pictures in the book. we strung the pipe cleaner planets along fishing line and taped it between two walls. This was a fun way to explore how the planets are spaced from the sun.
Space Visual Motor Activities
Visual motor skills and visual perception can be worked on with a space theme. Grab this free space visual discrimination worksheet to incorporate visual processing into a space camp.
This space maze is a visual motor activity that my own kids loved. Use Wikki Stix to build a maze and work on eye-hand coordination and other visual processing skills to work through the outer space maze.
Outer Space Books
Start off your daily activities during a week of Space activities with a Space book. Some of our favorites are ones we read weekly and others are ones we love to check out from the library. Here are outer space books for kids.
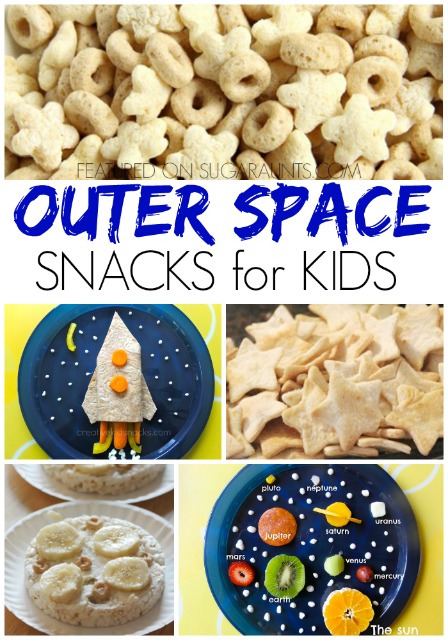
Outer Space Snacks
Cooking with kids is a huge way to build motor skills and executive functioning skills through cooking. Below are outer space snacks that the kids can help to make while building skills.
Affiliate links included below.
We quickly made this space snack while doing a little space reading. Kids will gobble up the stars and planets. We even made it a fine motor sorting activity by sorting the stars and planets from the snack mix. This outer space themed snack will be a hit during your Summer Camp at home or space themed week. We used a cup of Cheerios Cereal and a cup of Puffs snacks to make our stars and planets snack mix. Have the kids sort the planets and stars into separate bowls for fine motor practice that Toddlers and young Preschoolers will love.
More Space themed snacks to fill the rest of your week:
If there is one thing that occupational therapists love, it’s the use of kids crafts as a therapy tool. Be sure to check out our Constellation crafts. There are a bunch of space and star craft ideas based on constellations and outer space…that double as a fine motor and visual motor skill building tool.
Use this space martian craft that the kids can make to build fine motor skills, and then use in handwriting activities to space between letters and words.
Use these outer space crafts to make one each day of the week of your DIY summer camp…or just use them with your space-loving kiddo!
Our Outer Space sensory activities were a huge hit in adding proprioception, vestibular, and tactile sensory play into the day. Use them as part of a sensory diet with learning components. Mix these space sensory ideas into the schedule as a reward that also meets the sensory needs to benefit regulation and social-emotional skills.
These space themed sensory play ideas are ways to teach about planets, with an astronaut theme in mind. Know a little future astronaut? They will love these sensory play and learning ideas.
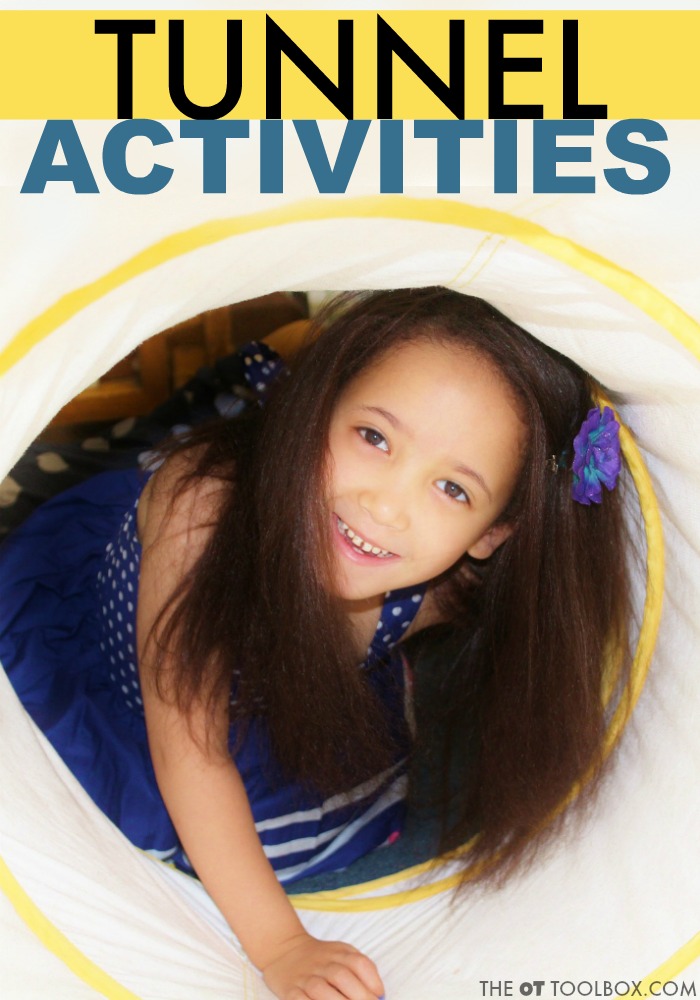
I love the rocket ship in this space themed party! Climb in and out of a cardboard rocket ship for lots of movement and play. Then, use another cardboard box to make this glow in the dark space fort like Lalymom. Nurturestore made a great Space math game.
Space Fine Motor Kit
Know a kiddo that loves all things space, astronauts, and planets? The Outer Space Fine Motor Kit is your chance to develop fine motor strength, dexterity, and coordination skills.
Addressing hand strength, endurance, and precision is out of this world fun! The Outer Space Fine Motor Kit includes:
Fine Motor Mazes
Fine Motor Ten Frames for motor activities
1-20 Star Counting Cards
Bead Copying Strips
Space Alien Directed Drawing Sheets
This fine motor kit includes 24 pages of printable resources. Included in this printable pack are:
Two pages of color coded bead copying strips
Two pages of blank bead copying strips
Four pages of “draw and write” directed drawing activities with a space theme (Includes 3 styles of handwriting lines: highlighted lines, single rule, and double rule)
Nine pages of fine motor mazes
1-20 Outer Space Counting Cards
Four pages of fine motor ten frames activities
These printable activities extend to work on a variety of other functional areas, too: handwriting skills, numbers, math, adding, subtracting, one-to-one correspondence, scissor skills, coloring, and more.
Have fun with your Outer Space themed week of fun!
Outer Space and Star Wars
For even more space themed activities for kids, add some of these Star Wars occupational therapy ideas to your therapy planning. We’ve broken down a bunch of space ideas using the Star Wars theme and include handwriting activities, sensory play, executive functioning ideas, crafts, gross motor ideas, and more. Kids will love it!
Set up Your Own Summer Camp
What’s next? Actually taking the steps to create your own Summer side-gig! If you’re ready to take the leap and turn your camp idea into something real, the Summer Camp & Tutoring Side Business Workbook is your perfect next step. Created specifically for OT, PT, and SLP professionals, this printable guide walks you through everything you need to set up and run your own skill-based summer program. It walks you through everything you need to know about this process, from planning and pricing to registration forms, waivers, and activity templates.
Whether you’re thinking about a handwriting bootcamp, sensory playgroup, or life skills club, this workbook helps you put your ideas into action, on your schedule, with your expertise, and without the overwhelm.
This workbook was inspired by my own experience starting a sensory playgroup while juggling work and mom life. I built it on my own terms, brought my kids along, and created fun, meaningful experiences that supported real skill development, and made extra income while doing it.
…and everything you need to confidently launch a camp, playgroup, or tutoring program this summer.
Whether you want to run handwriting bootcamps, sensory skill groups, or one-on-one sessions, you don’t need a full course or new certification. You just need a starting point. This is it.
Colleen Beck, OTR/L has been an occupational therapist since 2000, working in school-based, hand therapy, outpatient peds, EI, and SNF. Colleen created The OT Toolbox to inspire therapists, teachers, and parents with easy and fun tools to help children thrive. Read her story about going from an OT making $3/hour (after paying for kids’ childcare) to a full-time OT resource creator for millions of readers. Want to collaborate? Send an email to contact@theottoolbox.com.
Celebrating St. Patrick’s Day with engaging and skill-building activities is a fun way to support child development while incorporating a festive theme. At The OT Toolbox, we believe in using hands-on activities to promote fine motor skills, sensory exploration, and movement, all while keeping therapy sessions fun and engaging. Incorporating St. Patrick’s Day occupational therapy activities into your lesson plans or therapy sessions can help children develop essential skills through play and creativity. It’s a therapy theme that’s fun and functional!
From shamrock fine motor activities and leprechaun-themed crafts to rainbow gross motor games (and other rainbow activities), or a fun pot-of-gold sensory play, this page is filled with creative ways to target developmental skills in a fun and meaningful way. Whether you’re working on cutting skills with shamrock templates (find them inside The OT Toolbox membership!), strengthening hand muscles with leprechaun bead stringing, or encouraging movement through treasure hunts, these St. Patrick’s Day OT activities offer something for every child to enjoy while supporting their growth and independence.
Because we love focusing on fine motor skills through play, that means we get to have fun and get creative in our occupational therapy sessions with fun crafts, sensory bins, play-based obstacle courses and more!
Looking for St. Patrick’s Day activities to work on skills in therapy sessions that use a St. Patrick’s day theme? Here, you’ll find four leaf clover activities, rainbow activities, St. Patrick’s Day crafts, snacks, and more. Use these ideas to foster child development of functional skills using a fun theme.
St. Patrick’s Day ideas for Therapy
How is it March already?? We’ve got lion-like weather yet again around here, but spring, rainbows, and lamb-weather are on the horizon, Yay for warmer weather!
These St. Patrick’s Day theme activities and ideas are great for planning therapy sessions based on four leaf clovers, shamrocks, leprechauns, and pot of gold fun. It’s time to get in a spring-like mood and a fun little themed play date or preschool party sounds like just the thing Check out the ideas below for green-themed party ideas for the kids.
St. Patrick’s Day Theme in therapy
Having a weekly theme in your therapy sessions makes planning much easier. Each St Patrick’s Day activity can be adjusted to meet different levels and functional goal area depending on the kids that therapists are serving.
Check out all of the St. Patrick’s Day theme activities below. You’ll find resources for teletherapy, fine motor, gross motor, crafts, and more. If St. Patrick’s Day ideas for kindergarten, preschool, or specific age groups are what you’re looking for, you are in luck.
St. Patrick’s Day PDFs
Feeling lucky for some last minute St. Patty’s day treats? These materials are all click and go. You can download the St. Patrick’s Day PDFs, print them off, and start using to develop fine motor skills, visual perception, handwriting, and more.
You’ll find shamrocks, clovers, and rainbow activities that kids will love:
There are more free St. Patrick’s Day activities and downloads below, too. We’ve sorted these out by free slide decks, and activity areas.
St. Patrick’s Day theme therapy slide decks
Try these St. Patrick’s Day therapy activities in the format of a free Google slide deck. Therapists can go through the slides with the clients on their caseload and foster development of goal areas.
St. Patrick’s Day Write and Sign slide deck– Work on handwriting with these writing prompt activities. Then use ASL to sign the words, building fine motor dexterity, coordination, finger isolation, and motor planning.
Shamrock Visual Perception slide deck– This slide deck includes 7 different visual perception activities. Kids can move the pieces on the slide decks to work on areas such as visual discrimination, visual attention, visual scanning, and much more.
Four Leaf Clover Balance Exercises– Go through the slides and follow the exercises as kids are challenged to balance a pillow or beanbag in different ways (a stuffed animal or roll of socks works too!). Encourage coordination, motor planning, core strength, proprioceptive input, and more.
Rainbow Visual Motor Activities slide deck– Working on handwriting, but the underlying issue of copying forms and visual motor integration is an issue? Kids can copy simple-to-complex rainbow forms and work on pencil control, eye-hand coordination, and more.
More St. Patrick’s day Ideas
St. Patrick’s Day Party Snacks for Kids
To really build fine motor skills and executive functioning in kids, have them make these healthy rainbow snacks. There is a lot of skill-building to happen in the kitchen.
St. Patrick’s Day Songs for Kids
Get the party started with some Leprechaun Songs for St. Patrick’s Day from Let’s Play Music. Wouldn’t these be fun songs to sit the kids in a circle for a preschool sing-a-long?
St. Patrick’s Day Printable Pages for Kids
Set up a little table with some print outs to keep the kids busy and having fun with friends. Scatter a box of crayons and a pile of printable sheets on a little picnic table are all you need.
Cutting strips of paper or foam craft sheets are great fine motor work for beginner scissor users. If you are looking for St. Patrick’s Day activities for kindergarten and preschool ages, have kids cut strips of colorful paper like we did in this rainbow window activity.
St. Patrick’s Day Games and Activities for Kids
If sensory play is your thing, a green rice sensory bin would be so much fun…throw a sheet down on the floor (or a baby pool set up indoors would work, too!) and let the kids in on the sensory fun with 3 Rainbow Sensory Bins!
Rainbow Handwriting Kit– This resource pack includes handwriting sheets, write the room cards, color worksheets, visual motor activities, and so much more. The handwriting kit includes:
Write the Room, Color Names: Lowercase Letters
Write the Room, Color Names: Uppercase Letters
Write the Room, Color Names: Cursive Writing
Copy/Draw/Color/Cut Color Worksheets
Colors Roll & Write Page
Color Names Letter Size Puzzle Pages
Flip and Fill A-Z Letter Pages
Colors Pre-Writing Lines Pencil Control Mazes
This handwriting kit now includes a bonus pack of pencil control worksheets, 1-10 fine motor clip cards, visual discrimination maze for directionality, handwriting sheets, and working memory/direction following sheet! Valued at $5, this bonus kit triples the goal areas you can work on in each therapy session or home program.
Use these St. Patrick’s day theme ideas in working on fine motor skills with kids. Amazon links included below.
6 Fine Motor Activities Using Gold Coins– This printable handout on 6 fine motor activities using coins strengthens those fine motor skills using just a handful of coins. We used plastic gold coins in our activity, but you could use pennies as well.
Shamrock Balance Beam– Cut out shamrocks from paper and use them to make a balance beam to incorporate core strength, coordination, vestibular input, and more.
Finger Isolation Clover Fingerprints– Got paint? Use it to make fun fingerprint 4 leaf clovers and work on finger isolation, separation of the sides of the hand, eye-hand coordination, and more. This would be fun with homemade puffy paints, too (just need flour & water).
Bilateral Coordination Clover Activity– Stick a piece of paper to the wall and draw symmetrical clovers to work on bilateral coordination, visual tracking, visual motor integration, and more.
Four Leaf Clover Deep Breathing Exercise & Coloring Page– Take mindful coloring to the next level with this deep breathing exercise. Kids can color and then use the printout as a deep breathing exercise over and over again.
St. Patrick’s Day Gross Motor Activities
Next up are gross motor activities for a St. Patrick’s Day theme in occupational therapy sessions.
My main favorite activity to address balance, coordination, and motor planning in OT sessions is by creating a shamrock balance beam. You can challenge a variety of skills like walking on tip toes, balancing on one foot, stooping and squatting, and more.
Carry the gold (balance small objects while walking)
Shamrock sack race
Crawling through a rainbow tunnel
Tossing golden coins into a target
Frog jumps over shamrocks
Pot-of-gold bowling using green bottles as pins
Treasure hunt with clues requiring gross motor actions
Parachute games with gold coins or green balloons
Leprechaun chase game (tag with a St. Patrick’s Day twist)
St. Patrick’s Day Fine Motor Activities
We can incorporate fine motor development into therapy sessions in a lot of different ways. Things like using fake gold coins is one favorite idea. You can check out our:
Stringing rainbow-colored beads to make a necklace
Cutting out shamrock shapes from paper
Tearing green tissue paper to create a collage
Using clothespins to clip gold coins onto a string
Tracing and decorating shamrocks with glitter glue
Placing stickers on a rainbow outline
Rolling and shaping playdough into leprechaun hats
Transferring small pom-poms with tongs to a pot of gold
Threading pipe cleaners through a colander to make a rainbow
Pinching and placing small sequins onto a leprechaun craft
Folding paper to make origami four-leaf clovers
Punching holes along the edges of a shamrock to lace with yarn
Peeling and sticking gold star stickers onto a chart
Squeezing a glue bottle to make a rainbow craft
Using Q-tips to paint tiny gold coins
Stamping shamrocks with small sponges
Sorting and placing mini rainbow erasers into sections of an ice cube tray
Using a dropper to transfer green-colored water into a container
Scrunching tissue paper to create a textured rainbow craft
St. Patrick Sensory Bins
The nice thing about a sensory bin is that you can target so many goal areas- work on tactile discrimination. Address crossing midline. Work on attention or visual motor skills. Here are some of our favorite St. Patrick’s Day sensory bin ideas:
Kinetic sand with small St. Patrick’s Day-themed molds
Cotton balls and rainbow-colored pom-poms for a cloud and gold treasure hunt
Dry split peas with hidden letters or numbers for a matching game
Green slime with gold glitter and mini plastic coins
Dry oatmeal with rainbow-colored scoops and spoons
Rainbow-colored sensory foam with hidden gold gems
Green playdough with shamrock cookie cutters and small rolling pins
Crinkle paper or tissue paper squares in rainbow colors with tongs for fine motor play
Water with floating green and gold sensory items
Dyed salt with paintbrushes for tracing letters and shamrocks
Cornmeal or flour “gold dust” with hidden treasure items
Cotton balls with peppermint extract for a “lucky cloud” bin
Ice cubes with frozen gold coins for a melting treasure hunt
Cereal rainbow (Froot Loops) with scoops and tongs for sorting
Colleen Beck, OTR/L has been an occupational therapist since 2000, working in school-based, hand therapy, outpatient peds, EI, and SNF. Colleen created The OT Toolbox to inspire therapists, teachers, and parents with easy and fun tools to help children thrive. Read her story about going from an OT making $3/hour (after paying for kids’ childcare) to a full-time OT resource creator for millions of readers. Want to collaborate? Send an email to contact@theottoolbox.com.
If you are an occupational therapist like me, then you know the power of using play tunnels in an occupational therapy obstacle course. The heavy work input provided by crawling through a tunnel is unmatched, especially when we use it as a warm up to fine motor tasks or functional activities.
Let me explain…
How Play Tunnels Help Kids
Play tunnels are one of the best tools for therapy as you can work on so many skills if you just put a little creativity into it. Tunnel activities simply invite kiddo fun and engagement while working on very important skill development across a spectrum of areas. You can use fabric tunnels or nylon, pop-up tunnels depending on the skills you want to address with tunnel play. With a little imagination you can build your own DIY tunnels too!
Tunnel for Occupational Therapy
There is a reason why OTs love using tunnels in occupational therapy sessions!
Keep reading to get some play tunnel ideas using different materials. For home-based therapists, DIY tunnels are a great tool for families to use in the home environment providing an opportunity for a fun and easy to implement home-based program. Some of these tunnel activities for babies and tunnel activities for toddlers can be used to address specific needs through play.
They also like to use tunnels for sensory needs such as vestibular and proprioceptive input. In the simplest of terms, the vestibular sense is known as the movement sense telling us where our body is in space, while the proprioceptive sense is known as the deep pressure sense telling us the direction, speed, and extent of our body movement in space.
These senses are important to help a child develop balance, body awareness, understand the position of their body in space as well as knowing how much speed and pressure their bodies are exerting when completing an activity or moving within their environment.
Adding a play tunnel into sensory diet activities to meet a variety of needs. It’s an easy way to encourage sensory input in the school environment, home, or clinic.
So, you may be asking, how can
children gather vestibular input from tunnel time activities? You can have
children roll within the tunnel, perform various body movements such as forward
and backward crawling, balancing on all fours while simply crawling through the
tunnel, slither on their backs, or have them crawl in the tunnel placed on top
of cushions and pillows.
These activities are great for supporting the development of crawling in babies and toddlers, especially because we end up seeing challenges down the road for kids that skip crawling. Here’s what an OT has to say about types of crawling.
Proprioceptive input can be obtained while the child is bearing weight on the upper and lower extremities during crawling providing input to the joints and muscles. They can push objects through the tunnel such as large therapy balls or large pillows, army crawl through the tunnel, and shaking the tunnel while child is inside can provide valuable proprioceptive input.
By using a play tunnel to address proprioception to improve body awareness, the proprioceptive sense allows us to position our bodies just so in order to enable our hands, eyes, ears, and other parts to perform actions or jobs at any given moment. Proprioception activities help with body awareness. Using a fabric tunnel that is snug against the body can provide good input which can also have a calming effect for some children.
Play tunnel activities
When using a tunnel, you can work on
other skills that address multiple areas for children. Try some of these fun
tunnel time activities:
Play Connect Four with pieces on one end and the game played on the other end.
Assemble puzzles with pieces on one end and then transported through the tunnel to the other end.
Clothespins attached on end to transport and place on the other end. You can use clothespins with letters to spell words.
Push a large ball or pillow through the tunnel.
Crawl backwards from one end to the other.
Slither through the tunnel (rocking body left and right) to get from one end to the other.
Scoot through the tunnel using hands and feet or even crab walk through the tunnel.
Recall letters, shapes, or words from one end and highlight on paper at the other end.
Recall a series of steps to complete a task at the other end.
Blow a cotton ball or pom-pom ball through the tunnel. Kids love this to see how many they can blow in a timed fashion.
With pennies on one end, have child transport them to the other end to insert into a bank. You can even give them the pennies at end of the session if you want.
Push a car through the tunnel to drive it and park it at the other end.
Build a Lego structure by obtaining blocks at one end of the tunnel and transporting to the other end to build.
Intermittently crawl through the tunnel and lie within one end to work on a drawing or handwriting activity. This is just a different and motivating way to encourage handwriting practice.
Crawl over pillows or cushions placed inside or outside of the tunnel.
Use a flashlight and crawl through the tunnel gathering specific beads that have been placed inside to string at the other end of the tunnel. You could work on spelling words with letter beads or simply just string regular beads.
Place Mat Man body pieces at one end and have child obtain pieces per verbal directive and then crawl through the tunnel to build at the other end.
tunnel activities for preschoolers
Ok, so for the preschool age range, let’s come up with tunnel activities for preschoolers that support development at this stage.
Crawl through a tunnel while holding a puzzle piece like a letter from an alphabet puzzle. Then they can place the puzzle piece in the puzzle when they get through the tunnel.
Set up an obstacle course with tunnels to crawl through
Crawl through a tunnel to match objects or sort colors. I like using blocks to sort into baskets.
Pretend the tunnel is a cave or secret hideout during imaginative play.
tunnel activity for toddlers
Next up are some of my favorite tunnel activities for toddlers. These also help to support development at the toddler stage.
Crawl through a fabric or pop-up tunnel
Push a toy car or ball through a tunnel
Play peek-a-boo at each end of the tunnel
Roll a ball back and forth through the tunnel
Crawl to retrieve objects placed inside the tunnel. I like to pair this idea with our ball in a muffin tin activity.
Next, I want to share some DIY play tunnel ideas because as occupational therapists, we are always coming up with fun play ideas using everyday materials!
DIY Play TUnnel Ideas
So, as mentioned previously, what if
you don’t have a tunnel or you want to create one within a home for developing
a home-based program? Well, make one! How can you do this? Read on for a few
fun ideas.
Create a tunnel by crawling under tables or chairs.
Create a tunnel in the hallway with use of pool noodles. Bend them over in an arch to fit or simply cut them down to size to slide directly between the walls.
Use large foam connecting mats and assemble a tunnel.
Use tape or yarn and string to alternating walls down a hallway to crawl under.
Use sturdy pieces of foam board positioned or connected together to make a tunnel.
Use an elongated cardboard box. Sometimes you can get large boxes at an appliance, hardware, or retail store.
Stretch a sheet or blanket over furniture and crawl.
Simply place a sheet or blanket on the floor and have child crawl under it (a heavier blanket works well).
Place a therapy mat inside a series of hula hoops.
Use PVC pipe to build a tunnel. Add sensory items to the PVC frame to create a fun sensory element to the crawling experience. One such tunnel was built by my wonderful fieldwork student, Huldah Queen, COTA/L in 2016. See the picture below.
Sew a fabric tunnel (if you have that skill).
Use pop up clothes hampers connected together after cutting out the bottoms.
Simulate tunnel crawling with simple animal walks or moves.
Tunnel activities can facilitate
child engagement while providing an optimal skill development setting. Tunnel time can address gross motor and
sensory needs while also incorporating other activities making tunnel time a
skill building powerhouse tool. Incorporate fun fine motor and visual motor
activities to make tunnel time a “want to do” activity every time!
Regina Parsons-Allen is a school-based certified occupational therapy assistant. She has a pediatrics practice area of emphasis from the NBCOT. She graduated from the OTA program at Caldwell Community College and Technical Institute in Hudson, North Carolina with an A.A.S degree in occupational therapy assistant. She has been practicing occupational therapy in the same school district for 20 years. She loves her children, husband, OT, working with children and teaching Sunday school. She is passionate about engaging, empowering, and enabling children to reach their maximum potential in ALL of their occupations as well assuring them that God loves them!
This apple activity is a fine motor activity for occupational therapy sessions with kids that builds many skill areas. I love this fine motor apple activity because you can make it work for the needs of each child. There is power to using hole punch activities with kids! Working on hand strength? Use the hole punch to build skills. Working on dexterity? Pick up the small red circles to place them on the felt apple tree. You can even incorporate it into a vertical plane activity or add apple brain breaks to the session. The sky is the limit!
I love this apple tree activity because you can use dice to work on hand mobility, small apple dots that are precision work, and you can incorporate other skills into the activity.
Pair this apple tree activity with our apple tweezer activity for even more apple themed fine motor fun.
Fine motor strengthening is a hot topic when it comes to back-to-school time. Kids go back into the classroom and need to get back up to speed on all of the fine motor requirements in the classroom. What better way to work on fine motor strength than with a Fall apple theme? This apple themed fine motor activity adds a bit of math, too and it’s super easy to create for hands-on play, learning, and fine motor work.
Fine Motor Strengthening Activity
This apple tree activity is a fun way to build the intrinsic muscle strength of the hands as well as gross grasp strength. It’s an easy activity to throw together, and the steps of the activity help to build strength of the hands, too.
Materials needed to make this apple tree activity:
Scissors (Here are my favorite scissors and why to use each type of scissors for different needs)
To create the apple tree, cut the green felt into a tree-ish shape. Cutting felt is a complex scissor task, so older kids can help with this part. If you are able to use stiff felt, cutting through the material is a strengthening exercise in itself.
Next, cut the brown felt into a trunk shape, by simply cutting strait lines. Consider allowing the child to cut the trunk shape as cutting strait lines on a material such as felt is easier, yet the flimsy material makes it difficult to cut. A stiffer material would work well for this part as well.
Next, cut the red cardstock into small, thin strips of paper. This is not necessary for the end result of the activity, however there is a fine motor benefit to the extra step. Kids can hold the thin strips of paper with a pincer grasp using their non-dominant, helper hand. Using the small strips of paper requires precision. Kids will then be required to slow down while using the hole punch so that they don’t cut the holes over the edge of the strip of the paper.
Need a hole punch that requires less effort for younger kids or those who need to build their gross muscle grip strength? Try this one.
Hole Punch Activity
Before we move on, I want to take a moment to talk about this portion of the activity.
Cutting paper strips and using a hole punch along the strip is an easy fine motor activity that you can set up with items you probably have on hand….Cut strips of paper. Use different grades and remember that cutting thicker paper means more resistance which is good for strengthening the hands.
Use the brown cardstock to make a small apple barrel shape. This can be used in the math part of this activity.
A slower cut with the hole punch allows for the muscles of the hands to exercise with prolonged tension and increases blood flow. Using the hole punch with slow repetitions builds gross grasp strength.
Once the apple tree and apples are created, kids can place them on the tree. The cardstock will not stick permanently to the felt, but they will stay in place for temporary play. Scatter the red cardstock circles, (those are your apples!) onto the table. Show your child or student how to pick up the apples and place them onto the apple tree. Picking up the small cardstock circles is a real workout for the intrinsic muscles of the hand.
To make this activity easier, place the cardstock circles on a piece of felt.
Apple Fine Motor Activity
Add a bit of math to this activity with a pair of dice. Show your child how to roll the dice and then count the number of dots on the dice. They can then add and count the number of apples and place them on the tree.
There are several ways to build on this activity:
Use the dice to add apples.
Subtract by taking away apples from the tree.
Create multiple step math problems by adding and them subtracting the numbers on the dice to put on and then remove apples.
The Apple Therapy Kit is full of fine motor, visual motor, and sensory motor tools to support fine motor skill development needed for handwriting and other functional tasks.
Colleen Beck, OTR/L has been an occupational therapist since 2000, working in school-based, hand therapy, outpatient peds, EI, and SNF. Colleen created The OT Toolbox to inspire therapists, teachers, and parents with easy and fun tools to help children thrive. Read her story about going from an OT making $3/hour (after paying for kids’ childcare) to a full-time OT resource creator for millions of readers. Want to collaborate? Send an email to contact@theottoolbox.com.
Play is a child’s primary occupation. The occupations of a person are the meaningful and purposeful activities and adults have distinctly different occupations than children. A child develops functional skills, learns about their abilities, grows in motor, language, interpersonal skills, and learn the value of their capacities, all through play.
Children are drawn to the pleasure they feel through play activities that provide sensory experiences, ones that allow repetition as they master new skills, and enable them to explore or interact socially. They naturally use play to develop skills and refine deficits.
Fine Motor Skills in Play
And toys and games are tools of function when it comes to using play to build independence in all tasks.
Play activities and games offer numerous ways to build and improve fine motor skills for use in functional tasks such as handwriting, counting individual fingers, clothing fasteners, shoe tying, and other occupations.
Today, I’m sharing ways to work on fine motor skills through play.
It is important to note that a child’s fine motor dexterity is dependent on bigger things. In order for a child to use their hands for fine motor tasks, they first must demonstrate strength and control of their core, shoulder, and arm. If any of these areas are not fully developed in stability or control, then the child will show compensatory strategies as they try to use their hands in play or functional tasks like self-care, handwriting, or cutting with scissors.
Use play to develop fine motor skills:
This post contains affiliate links.
Improve Isolation of the fingers through Play- Isolating the individual fingers is needed for tasks such as typing, pointing, and tasks that require moving individual fingers in isolation from the rest of the hand. These skills can be difficult for some children and result in poor pencil grasp and handwriting, shoe tying difficulties, and other functional tasks.
Finger Isolation Ideas
Amazon affiliate links are below.
Finger games (Where is Thumbkin, Itsy Bitsy Spider)
Motoric Separation of the Two Sides of the Hands- Separation of the two sides of two sides of the hand is important for tasks like holding a pencil while stabilizing the hand along the table, cutting with scissors, tying shoes, holding multiple items in the palm of the hand, and managing coins.
Refinement of fine motor skills in the hand (the radial side) happens when the power half (the ulnar side) is stabilized. A functional fine motor grasp and manipulation of objects is more accurate when the ring and pinky fingers are flexed (bent) into the palm.
An alternative to a flexed position of the ring and pinky fingers are when theses two digits are fully extended out and stretched out away from the hand (abducted). T
his positioning stabilizes the MCP arch and allows for control of the pointer and middle fingers. Separation of the two sides of the hand allow for more precise use of the thumb. Hand separation starts when a baby bears weight through their arm and ulnar side of the hand while carrying a toy in the radial side. This simple activity developmentally lengthens the muscles of the ulnar side.
Separation of the Hand Play Ideas:
Flip coins
Roll play dough into small balls
Squeeze a spray bottle with the pointer and middle fingers
Pick up small items and “squirrel them away” into the hands: mini marshmallows, cereal, small beads, coins, waterbeads. (This is also called translation toward the palm.)
Release the items (This is also called translation away from the palm.) Place coins into a piggy bank or beads into a cup.
Hold a cotton ball in the palm with the ring and middle fingers while coloring, writing, or cutting with scissors.
Hand Dominance-Hand dominance in children is important for refining the skills needed to perform functional tasks.
While Toddlers begin to show a hand preference, a true hand dominance doesn’t typically develop until 2 to 3 1/2 years. While a toddler can show a hand preference, hand usage is experimented with during different activities throughout the Toddler and Preschool years. There is typically variability in hand preference as toddlers and young preschoolers poke, pick up, throw, color, and play.
Another consideration is that often times, kids of this age are influenced in which hand they choose by position of toy, location of the adult or playmate, method materials are presented, and sitting position of the child.
Lateralization refers to the brain’s ability to control the two sides of the body. Each hemisphere of the brain controls different tasks and functions.
When a child shows difficulties with laterality, they might switch objects between the two hands in functional tasks. As a child grows, they are challenged to become more efficient with tools in school.
True hand dominance may not be completely integrated in the child until around 8 or 9 years of age. Use play activities to build consistency with the child’s preferred hand dominance. If your child shows a preferred hand, set up the activity to work on scooping with the typically used hand. If your kiddo uses their right hand most of they time in natural situations
Hand Dominance Play Ideas:
Using tools like a hammer or screwdriver
Threading beads
Scrubbing and “cleaning” with a towel on walls and windows
Driving cars on a floor mat
Scooping beans and beads with spoons, shovels, or scoops
Catching and tossing bean bags into a target
Opening and shutting plastic ziplock bags
Open Thumb Web Space- An open thumb webspace is essential for true opposition of the thumb to the precision side of the hand. A round “O” shape allows the thumb to rotate and oppose the pointer finger in pincer grasp activities. When kids write or color with that web space area squashed shut, it’s a sign of problems.
Then might be compensating for thumb instability, underdeveloped hand arches, and/or poor strength. Each of these problem areas will lead to difficulties with handwriting, dexterity, manipulation of small items like beads, and pencil grasp. Writing with a closed web space is inefficient and will cause poor and slow handwriting, especially as kids grow and are expected to write at faster speeds. A closed web space while attempting to manage fasteners such as buttons and zippers will lead to fumbling and difficulty.
Open Thumb Web Space Play Ideas-
Beading (like our idea we shared above!) Other beading ideas include threading plastic beads on a string, placing cereal O’s onto toothpicks, and stringing straws onto yarn.
Barrel of Monkeys game. Encourage your child to pick up the monkeys with an open web space.
A game like Chinese Checkers encourages an open web space when the child grasps the small pegs with a pincer grasp between their thumb and the pad of their index finger.
Tweezers activities are great for an open web space.
If handwriting and poor pencil grasp is an issue, try a pencil grip.
Pop beads.
Roll play dough into small balls using the pads of the thumb and index finger. This is a great activity for developing arches of the hands and opening the thumb web space.
Pop bubble wrap.
Screw and Unscrew nuts and bolts.
Fold and crease origami. Crease the paper between the thumb and pointer finger.
Pinching clothes pins.
Lacing cards are great for opening the thumb web space. Prompt your child to keep their thumb web space open while managing the thread. We’ve got lots of ideas here.
Precision of Grasp- Precision skills allow a person to manipulate and release of small objects. Precision provides efficient grading movements in very small dexterity patterns like threading a string through a needle.
Difficulty with precise motor movements of the hand may cause fumbling with zippers and buttons and trouble with advancing the pencil on small lines of paper. Precision occurs with development of grasp when child to use the pads of the index finger, middle finger, and thumb to manipulate objects with opposition.
Precision release is needed for stacking blocks without toppling them over, placing cards on a pile, opening scissors just a small amount, or placing small beads into a bowl.
Precision is needed for a child to let go of an item in a controlled manner.
If they are not exercising precision in release, you might see them rolling or tossing an object as they let go. They will knock over a stack of blocks, or over open the scissors when cutting lines, making their accuracy very choppy.
Precision in grasp is related to the picking up of items. A graded lateral grasp is needed to cut with scissors and only squeeze the scissors halfway shut for accurate cutting lines in some situations.
Around 3-4 years, a preschool aged child typically develops a greater variety of grasping patterns, including precision. They begin to grade their scissor strokes so that they can cut a line or shape without opening and closing the scissors completely. Grasps in babies typically begin with a raking motion and work towards a pincer grasp. Precision in this skill occurs when the child is able to pick up very small items like beads with accuracy and graded movements.
Precision in rotation is another task that children develop around age 5. Rotation is a portion of in-hand manipulation and seen when turning a coin on the edges and the child rotates it in a circular motion. Precision in rotation also occurs when holding a pencil between the fingers and the child rotates it over and over.
Blocks like Wooden Color Cubes are perfect for simple block building and stacking while working on precision of grasp and release.
Slide Puzzles for precision of the thumb’s movements.
Neat Pincer Grasp- Neat Pincer Grasp is a precision grasp using the very tips of the thumb and the pointer finger to pick up and hold very small items. Sometimes, the fingernails are used in the grasp of items.
Neat pincer grasp is used to pick up and hold a pin, a needle in sewing activities, or super small beads like Perler Beads. This can be a tricky grasp for kids with difficulties in fine motor skills or core weakness.
Neat Pincer Grasp Play Ideas-
Threading string into a needle for embroidary art.
Beading with string
Quickels or
Sort small items
Art or play with tape
Pinch Strength and Control- There are a few different grip postions of the hand and fingers that are used in play with children. Difficulties in using and maintaining any certain grasp may interfere with tasks that require using the hands. Types of grasp patterns include:
Lateral Pinch Grip (aka Key Pinch Grip)- The thumb opposes the lateral side of the pointer finger. This grasp is used when holding and and using a key. A sub group of this type of pinch is the Lateral Prehension Grip– The thumb is flexed (bent) and it’s pad opposes the lateral side of the tip of the pointer finger. This grip is used to hold an index card or paper, sometimes.
Three jaw Chuck Pinch Grip– The thumb is flexed (bent) and opposes the pads of the pointer finger and middle finger. Holding a small cap like a toothpaste lid uses this grip. This is the grip used in holding a pencil.
Tip to Tip Grip– The tip of the thumb touches the tip of the pointer finger. The thumb and pointer finger form an circle (or open thumb web space). This grasp is also called a pincer grasp. It is used to pick up small items like cereal or beads. If very small items are picked up (like a needle), a Neat Pincer Grasp is being used.
Lateral Grip– Pinching an item between the pointer and middle fingers use this grip. You would use this grip in holding a cigarette. While this is not a functional grasp for kids (obviously), you might see kiddos fiddle with a pencil by holding it between two fingers.
Pinch Strengthening and Control of Grasp Patterns Play Ideas-
Line the edges of an index card with clothes pins. Try using the different pinches described above.
Make clothes pins into superheros and pinch them onto strips of paper.
Create a tree using the clothes pins as the trunks, like in these Cherry Blossom trees.
Gross Hand Strength and Grasp- Gross grasp is used when squeezing all of the fingers shut around an object, like when holding the handle of a suitcase. Gross grasp is important in tasks like handwriting and scissor use.
To do these activities, you need to squeeze your whole hand shut and maintain endurance to complete the activity. Development of hand arch and thumb web space is important for these functional skills and gross grasp plays a part.
Flexion of the Thumb IP Joint- Many times a poor pencil grasp or difficulty with precision in opposition is a result of lacking flexion of the thumb Interphalageal joint.
A flexed tip of the thumb is required to grasp and manipulate items such as a pencil, zipper pull, shoe laces, and buttons. If there are muscle weaknesses in the forearm or hand, a hyperextended thumb IP joint will present as a form of providing stability by the thumb.
Instead of using the opposition muscle of the thumb to grasp the pencil, the child is using the adductor muscle. Rather than manipulating items with the tips of their thumb and index finger, the child is using musculature of their wrist and forearm.
In order to improve this grasp, a child needs to strengthen the opposition muscle, Opponens Pollicis, along with Flexor Pollicis Longus to bend the tip of the thumb or the Interphalnageal Joint (IP Joint) of the thumb. Strengthening the intrinsic muscles along with addressing an open web space will improve IP flexion.
Thumb IP Joint Flexion Play Ideas-
Games that require the thumb to bend
Where is Thumbkin hand games
Thumbprint Artwork
Thump Opposition- Thumb oppositon occurs when the thumb is rotated at the carpometacarpal joint. Opposition of the thumb to the fingertips is essential for tasks such as holding a hairbrush, managing buttons, and even grasping a door knob.
Thump opposition coincides with an open web space in functional tasks.
Palmer Arches- In the palm of the hand, there are arches that shape the hand’s grasp on objects of all shapes and sizes.
There are two transverse arches that cross the hand at the carpals and at the metacarpals. There is a longitudinal arch for each finger.
These arches allow for skilled movements of the hands and first develop during crawling. Arch development is essential for manipulating small objects such as a writing utensil.
In-Hand Manipulation- This skill is essential for managing small items within the hand for accomplishment of tasks. There are three parts to In-hand manipulation…translation, shift, and rotation.
We shared two fun activities to work on these skills here. In-hand manipulation typically begins to develop around 18 months, with the greatest skill development occurring between 2 and 2 1/2 years old.
There are subcategories of in-hand manipulation.
Finger-to-Palm Translation is the movement of an object from the fingers to the palm i.e. picking up a coin and moving it to the palm.
Palm-to-Finger Translation: Movement of an object from the palm to the finger tips. (i.e. moving a coin from the palm to the fingertips to insert into a vending machine.)
Shift: Slight adjustment of an object on or by the finger pads. (i.e. adjusting a pencil up and down in your hand.)
Simple Rotation: Turning or rolling an object 90 degrees or less with the fingers moving as a unit. (i.e. unscrewing a toothpaste lid).
Complex Rotation: Turning an object more than 90 degrees using isolated finger and thumb movements. (i.e. Turning a paper clip)
Each of the above skills can occur with items “squirreled away in the palm using the pinky finger and ring finger. This is called “with stabilization”. If other items are not pocketed away in the palm while in-hand manipulation occurs, it is called “without stabilization”. Stabilization typically occurs around 2 years of age.
Roll play dough into small balls using only the fingertips.
Tear newspaper into strips, crumble it, and stuff an art project.
Use tweezers to pick up small items. This works on the intrinsic muscles of the hands.
Lacing cards
Coin or button matching, sorting, and stacking. We loved playing with coins for fine motor fun.
Pegboards
Dropping small items into bottles with a small opening like we did here.
Pick up beads from the floor and drop into ice cube trays.
Press buttons into a slit cut in the lid of a plastic tub.
Pick-up sticks.
Games with small chips.
Beading.
Twisting lids on/off water bottles.
Bilateral Coordination- Bilateral coordination is the functional use of the two hands together in a coordinated manner. It’s coordinating both hands together and is closely related to hand dominance.
When a child has an established hand dominance, there needs to be a fluid use of the two hands together. In development of the child, children use both hands together then progress to using one hand at a time and finally using both hands together.
Refined bilateral coordination skills allow a child to use both hands in separate tasks fluidly.
Wrist and Hand Development- A prerequisite to controlled movements of the hand and fingers are strength and stabilization of the wrist. Control in the wrist allows for manipulation of small items and grasps with the fingers A functional position for the wrist in most activities requiring fine motor skills is slight extension and neutral positioning.
This is an optimal position for handwriting or tasks such as manipulating buttons. Other activities like using a toothbrush or managing a utensil during feeding require slight ulnar deviation. Stabilization of the wrist is essential no matter what the task.
In order to allow precision of fine motor tasks, the wrist should be stabilized in extension with precision tasks performed on a vertical surface, putting the wrist into optimal positioning and facilitating thumb abduction for distal work to the fingers.
Wrist and Hand Development Play Ideas-
Painting on a chalkboard or easel
Vertically positioning a Magna Doodle, Etch a Sketch, or pegboard
There are so many fine motor skills that can be addressed through play. Fine motor development is not limited to the ideas, games, toys, and activities listed in this resource. There are many more toys and games that can work on these fine motor skill areas.
This post is part of the Functional Skills for Kids series by 10 Occupational Therapists and Physical Therapists. You can see previous months posts here.
Stop by to see what the other professionals have to say about Play:
Are you looking for more ways to build fine motor skills through play? Let me know what you’re working on!
Lastly, let’s cover some important things to keep in mind when working on fine motor skills through play.
Age Appropriateness: Choose activities that are suitable for the child’s developmental stage to ensure they are engaging and challenging, but not frustrating. Don’t try to push kids to do more than they are developmentally ready for.
Variety of Movements: Incorporate a range of motions, such as pinching, grasping, squeezing, and twisting, to target different fine motor muscles and skills.
Focus on the Process, Not Perfection: The goal is to have fun, right?
Adapt Activities as Needed: Modify tasks to match the child’s individual needs and abilities, ensuring they are challenging yet achievable.
Colleen Beck, OTR/L has been an occupational therapist since 2000, working in school-based, hand therapy, outpatient peds, EI, and SNF. Colleen created The OT Toolbox to inspire therapists, teachers, and parents with easy and fun tools to help children thrive. Read her story about going from an OT making $3/hour (after paying for kids’ childcare) to a full-time OT resource creator for millions of readers. Want to collaborate? Send an email to contact@theottoolbox.com.