Box and Dot Handwriting Strategy

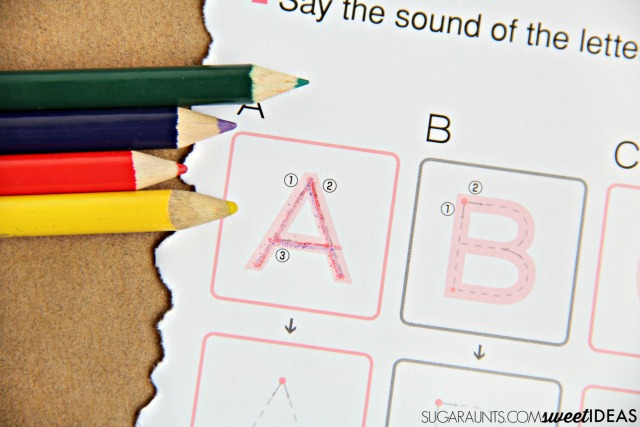
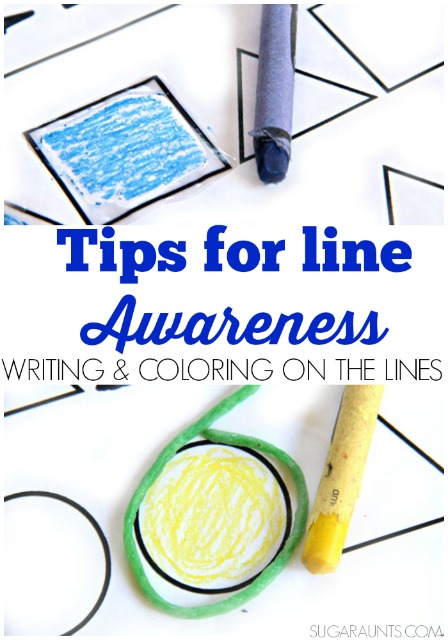
This handwriting technique is a strategy that I’ve used many, many times in school-based Occupational Therapy.  It’s a handwriting strategy that uses boundaries of boxes and starting dots to help kids become more aware of letter size, letter formation, spatial organization, and use of lines.  


The box and dot handwriting strategy is perfect for kiddos who are working on placing letters appropriately on the lines with awareness of tall letters (b, d, f, h, k, l, t) that should touch the top line, small letters that should reach half-way between the top and base stimuli lines (a, c, e, i, m, n, o, r, s, u, v, w, x, z), and tail letters that should drop down below the base line (g, j, p, q, y).


Use a visual cue of boxes and starting dots to work on letter formation, line awareness, space awareness, and size awareness of letters when teaching kids to write.

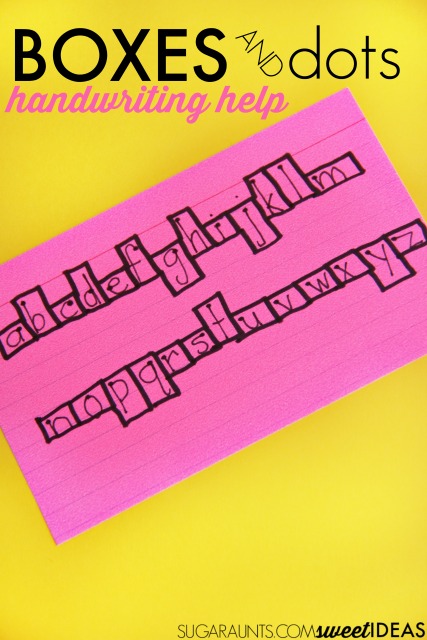
Box and Dot Handwriting Strategy for Better Letter Formation and Spatial Organization

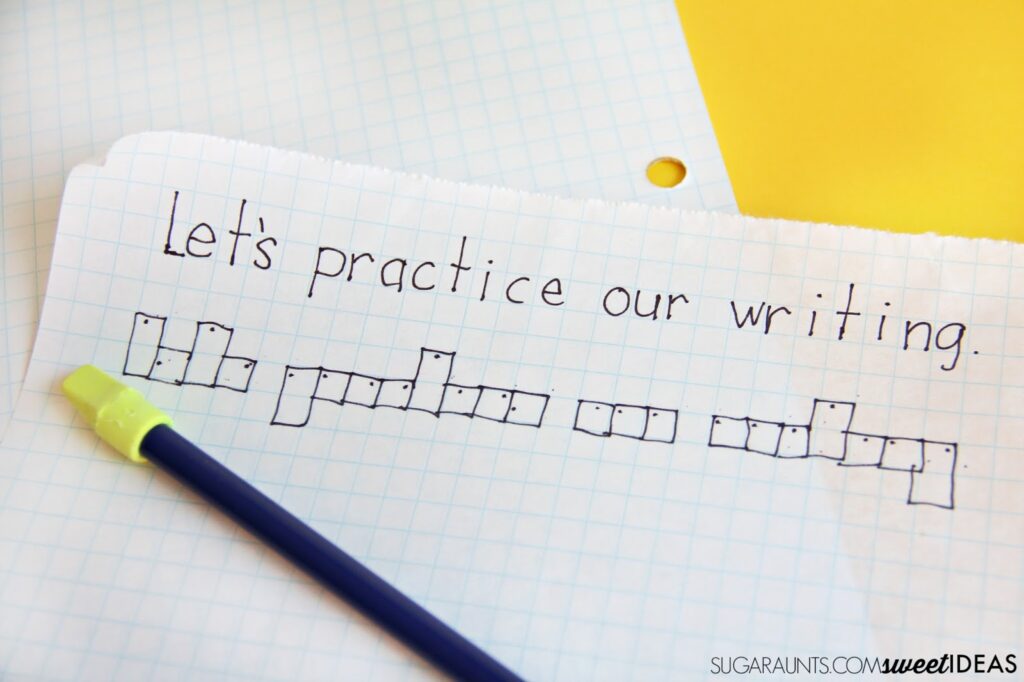
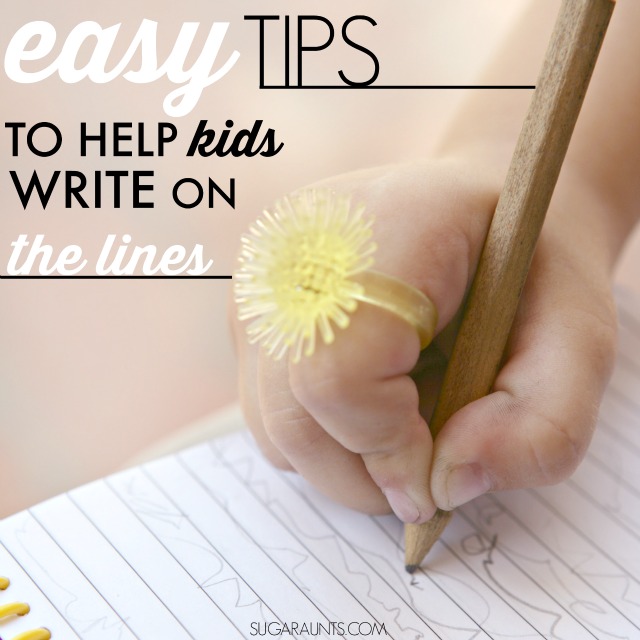
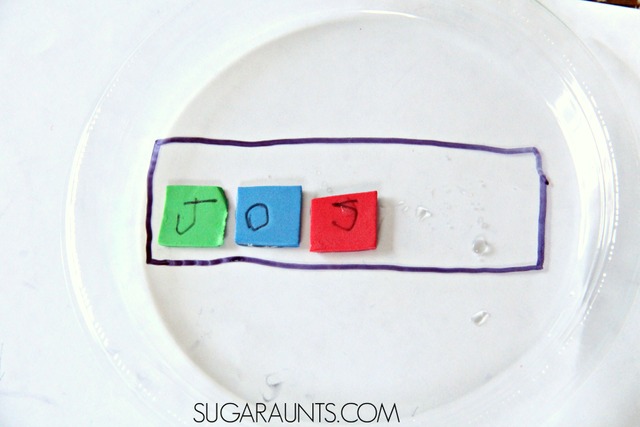
The dots in the boxes allow kids to practice letter formation by starting at the start point using the visual cue of a starting dot.  This is perfect for kids who are working on improving letter formation in a single stroke (r, m, n, etc) or letters that require the writer to pick up their pencil for portions of the letter formation (a, d, etc).  Sometimes, kids form the letters in “parts” as they build the letter instead of forming it accurately for speed and legibility.  The starting dot can help with pencil placement to address this part of letter formation. 


The sized boxes of this handwriting strategy are great for allowing kids to form letters with appropriate spacing, giving kids a definite visual cue for spatial awareness between letters and words.


Use a visual cue of boxes and starting dots to work on letter formation, line awareness, space awareness, and size awareness of letters when teaching kids to write.


This handwriting technique can be used as an accommodation that allows students to learn letter size, placement, and formation.  This accommodation can be used on regular paper, graph paper, or worksheets.  When students start to demonstrate better understanding on letter characteristics, the boxes and/or dots can be faded out and eventually removed.  


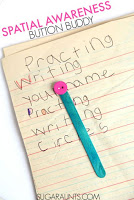
One strategy for grading down this tool is to first remove the dots from the boxes.  Other students may benefit from removing the boxes before the dots.  Simply adding a dot to writing spaces can provide the visual prompt needed for letter formation and placement. 


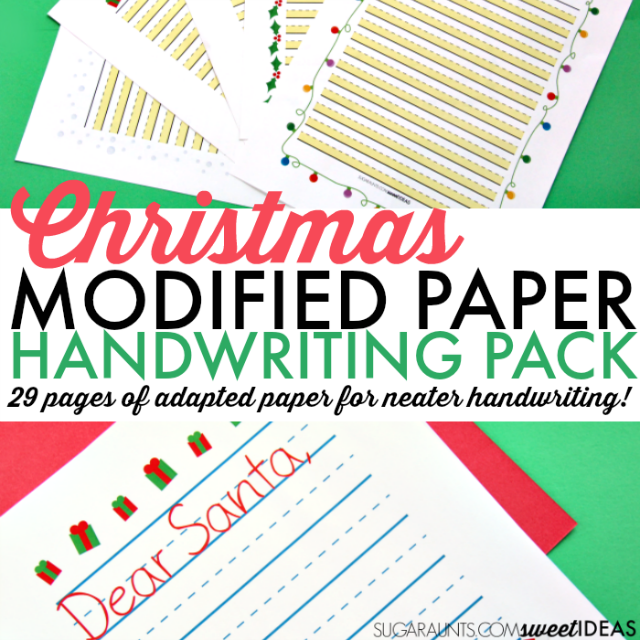
Another technique for lessening the amount of visual cue is to transition students to a highlighter space for the bottom space or bottom half of lined paper. 


Other times, using the boxes and dots on the words that are being copied are all that are needed for carryover of line awareness, letter formation, and spatial awareness. 


Use a visual cue of boxes and starting dots to work on letter formation, line awareness, space awareness, and size awareness of letters when teaching kids to write.

Love this handwriting trick?  Stop over to see all of the simple handwriting tricks for better handwriting in our 30 handwriting series. This post is part of our Easy Quick Fixes to Better Handwriting series. Be sure to check out all of the easy handwriting tips in this month’s series and stop back often to see them all.  


You’ll also want to join the Sweet Ideas for Handwriting Practice Facebook group for more handwriting tips and tools.
Get 29 pages of modified paper with a Christmas Theme for legible and neat Letters to Santa, Christmas Wish Lists, Thank You Notes, Holiday Lists, and MORE! 

Sandpaper Letter Formation Trick

This easy handwriting trick uses an item you probably have in the workshop or garage of your house. Sometimes, a creative technique is all it takes to help kids work on letter formation and line awareness in their handwriting.  We used sand paper to provide proprioceptive feedback through the pencil while working on handwriting skills that might be difficult for some kids on regular paper.


This trick is a fun pencil control activity that is helpful for improving handwriting.


Scroll to the bottom to watch this Sandpaper Handwriting Trick. 


Use sandpaper as a strategy for helping kids to learn how to make letters, number formation, letter formation, spatial awareness, and line awareness in handwriting with a sensory, tactile, and proprioception activity.


Sandpaper Writing Activity


This post contains affiliate links.


Sandpaper might be considered a super tool in the Occupational Therapist’s therapy bag.  It’s a great medium for working on handwriting in several areas:  Using sandpaper as a base sheet when writing provides a surface for feedback through the hand.  This is one easy way to help kids who need to work on pencil pressure.


Read more about helping kids to write with appropriate pencil pressure.


This is such an easy trick for helping kids to work on letter formation, number formation, letter reversals, and organizational issues such as line placement (aka writing on the lines and in the spaces on worksheets).


All you need is a single sheet of sandpaper.  


With kids, sometimes a small twist on what you’ve been doing is all that you need to get the hours of practice to finally “stick”.  You might have been working on letter or number formation over and over again in a bunch of different ways.  The chalkboard, the white board, the fun pencil, writing in the sand bin…but give the kiddo a piece of paper and the letters are choppy, poorly formed, and all over the lines.


What is a mom/teacher/OT to do?  


Some kids respond well to repetition.  Motor planning is a good thing when it comes to letter formation or number formation!  However, other kids work well with all of the tricks but just can’t carryover the skills they’ve learned once they are required to write quickly or write an open-ended response (aka think while writing).


This sandpaper writing trick is one strategy that can help kids slow down, respond to tactile sensory input, and modify their pencil control given proprioceptive feedback.  


Here’s how it works:
Simply lay a piece of paper on top of a sheet of sandpaper.  And then write.


The sandy grit of sandpaper provides feedback through the pencil and allows kids to slow down, write with better pencil pressure, and be more aware of how their pencil is moving in the space they have to write in. 


Sandpaper provides a great proprioceptive strategy for handwriting. Different kids will respond to different grades of sandpaper.  This pack comes in an assortment of grades so that you can try more or less “sandiness” to the paper. A coarse grit will provide more feedback and a fine grit will provide less sensory input.  


Watch the video to get a better understanding of how to complete this activity. Show it to the kiddos, too!


Use sandpaper as a strategy for helping kids to learn how to make letters, number formation, letter formation, spatial awareness, and line awareness in handwriting with a sensory, tactile, and proprioception activity.

This is a great trick to use with workbooks.  Use several colors of colored pencils to practice letter or number formation with rainbow writing.  Simply trace over the letters with different colors to practice letter formation.


Using a sheet of sandpaper under a worksheet can allow for improved placement in a writing space by encouraging the child to slow down while writing. 


Try writing right on the sandpaper with colored pencils to really add a tactile strategy to letter formation.  Try placing starting dots along with verbal or visual cues to form the letter correctly.  The tactile feedback will add a “memory” to forming the letter. 


Use sandpaper as a strategy for helping kids to learn how to make letters, number formation, letter formation, spatial awareness, and line awareness in handwriting with a sensory, tactile, and proprioception activity.

This is a great strategy for helping kids to address letter reversals.

Use sandpaper as a strategy for helping kids to learn how to make letters, number formation, letter formation, spatial awareness, and line awareness in handwriting with a sensory, tactile, and proprioception activity.

One last way to use sandpaper in handwriting is to draw lines on the sandpaper and ask the child to write on the lines with colored pencils.  While this is not a practical strategy for written work, it’s a great way to practice line awareness and spatial organization skills.  Once the sandpaper is filled up with writing, use it as a base for placing paper on top.  


MORE ways to practice handwriting using sandpaper:

Try using these Pencil Mazes over the sandpaper to work on pencil control.
Work on pencil control and accuracy with Pencil Obstacle Courses

Use sandpaper as a strategy for helping kids to learn how to make letters, number formation, letter formation, spatial awareness, and line awareness in handwriting with a sensory, tactile, and proprioception activity.


Like this handwriting tip?  Try all of the strategies in our Easy Quick Fixes to Better Handwriting series. Be sure to check out all of the easy handwriting tips in this month’s series and stop back often to see them all.  


Watch the video on this Sandpaper Handwriting Trick:


You’ll also want to join the Sweet Ideas for Handwriting Practice Facebook group for more handwriting tips and tools.

Improve Handwriting with Art

There are some kids out there who absolutely HATE handwriting.  Let me re-phase that.  There are a ton of kids who completely despise to their core the act of working neat handwriting, pencil grasp, slowing down so people can read their words, and writing on the lines.  A ton.  I’ve worked with many (many!) kids like this.  I’ve recommended fun activities to about a zillion parents and teachers of these kiddos.  It just isn’t fun and it is work for them.  Poor handwriting can result from so many factors: fine motor development, motor planning, visual perceptual skills, and attention, are just a few of the areas that interfere with neatness in written work.  


So how do you possibly get through to build those areas up when the child is resistant to pick up a pencil and copy written work? 


You make it completely NOT handwriting practice.


I’ve got a super creative way to sneak in skills like pencil control, line awareness, spatial awareness, and letter formation.  And kids won’t realize they are building their ability to write on lines, space between words, and form letters the correct size.  And it all uses art!


Work on handwriting skills like line awareness, letter formation, pencil control, spatial awareness, and bilateral coordination with tangle art!


Work on Handwriting with Tangle Art


Affiliate links are present in this blog post. 


I was lucky enough to snag a copy of my friend Jeanette’s new art book, Tangle Art Drawing Games for Kids: A Silly Book for Creative and Visual Thinking.  This book is completely creative with easy and fun ways to get arty.  I flipped through the book and loved every single project.  They are no-prep art ideas that require only a pen and paper for most of the ideas.  You could do every project in the book and then go back to the beginning and re-do them all and still be inspired to create new and fun art.  


Seriously, the new favorrite book in our house is Tangle Art Drawing Games for Kids: A Silly Book for Creative and Visual Thinking!


One project in the book drew me in when i saw it.   Ice pop stick tangle art is the perfect workout to build the skills needed for neatness in handwriting while creating fun art.  

We followed the directions in the book to make shapes using craft sticks.  Just tracing the craft sticks is a great way to work on bilateral coordination.  When a child writes, it is essential that they hold the paper with their non-dominant hand.  Then need to stabilize the paper in order for the pencil to glide across the page.  


Just try writing without holding the pencil and you will notice a difference in neatness.  This small task is often one that slides when kids loose attention in a handwriting task.  You might see them slouch over at their desk and write without holding the paper.  


Tracing those craft sticks is a nice way to physically attend to the bilateral coordination needed in handwriting tasks. 


We used both the jumbo-sized craft sticks and the regular size to build more pencil control.  Use a sharpie marker to get a thicker line for building line awareness. 


After you’ve got your shapes on the paper, hand over a bunch of brightly colored fine point markers.  You can do some tangle art that is described in Tangle Art Drawing Games for Kids: A Silly Book for Creative and Visual Thinking or you can make letters and numbers in the craft stick shapes. Try adding color to a section and then make shapes and letters in the color.  


It is fun for kids to make hidden messages in the shapes by spelling out a name or word with all of the letters.


Work on handwriting skills like line awareness, letter formation, pencil control, spatial awareness, and bilateral coordination with tangle art!

If your kiddo is VERY anti-letters, try working on spatial awareness and pencil control by practicing the writing strokes needed for letter formation.  Instruct them to make counter clockwise circles close to one another, diagonal lines, horizontal and vertical lines, and mountain shapes.  


Encourage them to use those fine point markers to write very closely spaced lines.  We also tried a few cursive line formations.  


Work on handwriting skills like line awareness, letter formation, pencil control, spatial awareness, and bilateral coordination with tangle art!

For the younger crowd, this activity is great for pre-writing skills, too.  Coloring in the shapes encourages the motor skills needed to move the pencil in handwriting.  


Work on handwriting skills like line awareness, letter formation, pencil control, spatial awareness, and bilateral coordination with tangle art!

Now go off and make art while working on handwriting!  Don’t forget to grab your copy of  Tangle Art Drawing Games for Kids: A Silly Book for Creative and Visual Thinking!  You will love it!!

Work on handwriting skills like line awareness, letter formation, pencil control, spatial awareness, and bilateral coordination with tangle art!

Pre-Writing Lines Activity

Pre-writing lines activity to help kids work on handwriting lines and pencil control with an Easter egg theme.

Working on the underlying pre-writing skills of handwriting is SO important in handwriting. This pre-writing lines activity is a fun Easter occupational therapy activity, but it’s also a powerful tool for building the foundation for handwriting. This is one of our favorite Wikki Stix activities to support pre-writing development.

You know we like to share handwriting activities around here, right? This Easter egg pre-writing activity is a fun way for young children to work on pre-writing skills in order to build a base for letter formation and pencil control. While we made this activity an Easter egg-ish shape, you could do this activity any time of year and use any shape to work on pencil control within a confined space.  

Related: Try this pre-writing lines fine motor activity to incorporate heavy work feedback in developing prewriting lines.

Preschoolers and Toddlers will love this early handwriting activity!  All of these skills are needed before a child can form letters and work on line awareness in Kindergarten.  If a child is showing difficulty with forming diagonals in letters like “A” or “M”, this would be a fun way to work on building the skill for improved legibility in written work.

 
Work on pre-writing lines needed for neat handwriting and letter formation with this wikki stix Easter egg (or any time of the year!) pre-writing and pencil control practice activity.


Pre-Writing Lines Handwriting Precursor Activity

 
This post contains affiliate links.
 
We used just a few materials for this activity:

Dry Erase Board 
Dry Erase Markers 
Wikki Stix (Amazon affiliate link)


 Using THIS Dry Erase Board worked out great for this activity, because we did the same writing activity on the reverse side, which has a chalkboard. Writing with small pieces of chalk is a fantastic fine motor and intrinsic muscle strengthening activity to work on the fine motor skills needed for endurance in drawing and coloring, as well as the tripod grasp needed for an appropriate grasp on the pencil. A chalkboard surface for drawing lines is much more resistant than a smooth dry erase surface, providing more feedback during line formation. 


 We used these Dry Erase Markers for their fine point and colorful selection, which made making these Easter eggs a creative activity, too. My preschooler loved picking out the colors to create patterns. 

 The last item we needed for this handwriting precursor activity was (Amazon affiliate link) Wikki Stix. As an Occupational Therapist, I feel like I’m always pushing the benefits of Wikki Stix. The bendable and mold-able sticks are a great fine motor and handwriting tool.  In this activity, I bent one or two wikki stix into an egg shape.  You could also make circles, squares, or any shape for your handwriting task.

Developmental Progression of Pre-Writing Strokes

As a child develops, they are typically able to copy lines and shapes with increasing accuracy.  Here are the general ages of development for pre-writing lines:
 
  • Age 2- Imitates a vertical line from top to bottom
  • Age 2-Imitates a Horizontal Line
  • Age 2-Imitates a Circle
  • Age 3- Copies (After being shown a model) a Vertical Line from top to bottom
  • Age 3 Copies a Horizontal Line from left to right
  • Age 3- Imitates a Cross 
  • Age 4- Copies a Cross 
  • Age 4- Copies a Right and Left Diagonal Line
  • Age 4- Copies a Square 
  • Age 4- Copies an “X”
  • Age 5- Copies a Triangle
 
The developmental progression of these shapes allows for accuracy and success in letter formation.
 
Get a FREE Developmental Progression of Pre-Writing Strokes printable HERE
 
Work on pre-writing lines needed for neat handwriting and letter formation with this wikki stix Easter egg (or any time of the year!) pre-writing and pencil control practice activity.


Easter Egg Pre-Writing Strokes Activity

For this activity, we used the Wikki Stix to right on the dry erase board. I created egg shaped ovals with the wikki stix. I then showed my preschooler how to draw lines across the eggs to create patterns and designs.  
 
We practiced horizontal lines (going from left to right) and vertical lines (going from top to bottom).  We also added circles within the boundaries of the wikki stix and diagonal lines, too.  
 
The physical border provided by the wikki stix gave a nice area and cue for pencil control.  Try doing this activity with progressing level of developmental line skill.  You can also work on writing letters inside the wikki stix to build spatial and size awareness in handwriting.
 
Extend the activity:
Use the wikki sticks to do this activity on paper or a chalkboard.  Other ideas might be using crayons, markers, or a grease pencil for more feedback through resistance and proprioceptive input to the hands. 
 
 
Work on pre-writing lines needed for neat handwriting and letter formation with this wikki stix Easter egg (or any time of the year!) pre-writing and pencil control practice activity.


More Pre-writing Lines Activities

Some of my favorite Handwriting activities are multi-sensory and incorporate motor planning activities for building pre-writing lines as a foundation for handwriting:  

More Easter activities:

Spring Fine Motor Kit

Score Fine Motor Tools and resources and help kids build the skills they need to thrive!

Developing hand strength, dexterity, dexterity, precision skills, and eye-hand coordination skills that kids need for holding and writing with a pencil, coloring, and manipulating small objects in every day task doesn’t need to be difficult. The Spring Fine Motor Kit includes 100 pages of fine motor activities, worksheets, crafts, and more:

Spring fine motor kit set of printable fine motor skills worksheets for kids.
  • Lacing cards
  • Sensory bin cards
  • Hole punch activities
  • Pencil control worksheets
  • Play dough mats
  • Write the Room cards
  • Modified paper
  • Sticker activities
  • MUCH MORE

Click here to add this resource set to your therapy toolbox.

Spring Fine Motor Kit
Spring Fine Motor Kit: TONS of resources and tools to build stronger hands.

Grab your copy of the Spring Fine Motor Kit and build coordination, strength, and endurance in fun and creative activities. Click here to add this resource set to your therapy toolbox.

Colleen Beck, OTR/L has been an occupational therapist since 2000, working in school-based, hand therapy, outpatient peds, EI, and SNF. Colleen created The OT Toolbox to inspire therapists, teachers, and parents with easy and fun tools to help children thrive. Read her story about going from an OT making $3/hour (after paying for kids’ childcare) to a full-time OT resource creator for millions of readers. Want to collaborate? Send an email to contact@theottoolbox.com.

Easy Tips to Help Kids Write On the Lines

Today’s blog post is all about helping kids with writing on the lines (and coloring in the lines!)  You know those pesky places we are told to write and color to keep our papers neat and legible.  As adults, it’s typically an automatic thing to write on the lines.  But for kids who are just learning to write on lines, write longer strings of letters, and sit in one place when what they really feel like doing is wiggling and singing at the top of their lungs…writing on lines is HARD!  I’ve got easy tips to help with writing on lines until it becomes more of, “Oh, so the letters are always that tall and have to rest ON the lines!” automatic writing.
Tips for helping kids to write on the lines in handwriting problems. Ideas to help kids with sloppy handwriting from an Occupational Therapist.


Tips and Ways to Help Kids Write on the Lines

We’ve all been there.  You start filling out a form and misjudge the amount of space you have to fill in the info and you run out of space.  Then you start writing in the area above the line to try to get all of the important stuff in there.  Then, you notice that your form looks more like a Kindergarten kiddo who’s just started writing on lined worksheets.  The letters sort of float in places and sink down below the lines in others.  It happens.  And when a child is introduced to letter formation, letter size, and lines, it can get a little messy.  But, sometimes poor handwriting will extend beyond the kindergarten years and small-spaced-forms.  Kids with visual perceptual difficulties will have even more frustration as they try to keep their letters neat and on the lines.  

Some typical handwriting problems you might see include:
  • Floating letters
  • Letters sinking down below the lines
  • Letters written in all the same sizes.
  • Letters with various size (a lower case letter is the same size as an upper case letter).
So how can you work on these areas with your kids?  And, how can you help your child write on the lines in fun and stress-free ways?  Raise your hand if you’ve got a kiddo who despises writing.   Try some of the ideas below for creative help in the line writing area.


Handwriting Tips: Writing on the Lines

(Affiliate links are included in this post.)
  • Highlight the line with a marker.  A bright color can be a visual cue of where to write.  Letters should rest on the line.  You can start with a nice thick and brightly colored highlighter like this one and move to a thinner pen like these ones. Sometimes the visual cue of that bright line is enough to keep letters placed correctly.
  • What if the bright fluorescent color is too much for your child?  Or if your kiddo needs a bolder line with more contrast?  Try underlining the writing lines with a black marker.  This is also a great way to keep coloring in the lines.  Simply outline the shape with a black marker for a visual prompt.
  • Match the size of your child’s writing with the size of the lined paper.  Most Kindergarten aged kids are given a bottom base line for worksheets and one inch lined paper for handwriting practice.  This size typically continues throughout first grade.  Second graders are typically required to write their letters one space tall and gradually work down to 3/8 inch sized paper in grades 4 and 5. Typically, kids develop more accurate fine motor skills and improved dexterity in pencil control so the smaller size is appropriate for smaller handwriting.
   Tips for helping kids to write on the lines in handwriting problems. Ideas to help kids with sloppy handwriting from an Occupational Therapist.
                                                 
                                                 Move and bend those borders.
  • Use a tactile border like WIKKI STIX.  This works for coloring and handwriting tasks by providing a movable, physical border.
  • For children learning to form letters and working on letters sized one inch and two spaces high, create names for the lines.  You can use “dirt” for letters containing tails (y, j, g), grass for for the midline (a, e, o, r), and sky for tall letters (t, f, l).  Use the terms consistently and when working on letter formation.  You can say, “Letter t starts up in the sky and drops down to the grass.  But it doesn’t go into the dirt!”)
  • Draw pictures of these terms on the lines.  Draw grass and clouds at the start of the lined paper.  Other ideas are shoe line/belt line/hat line, or basement/first floor/upstairs lines.
  • Try Raised Lines Paper  or make your own using glue.  Simply trace the lines with glue and allow it to dry.  The dry glue provides a nice tactile reminder of where to stop writing or coloring.
Tips for helping kids to write on the lines in handwriting problems. Ideas to help kids with sloppy handwriting from an Occupational Therapist.
Raised lines with dry glue.  It’s easy and fun. Try it!

  • For kids that show a great deal of difficulty with writing in a given space, use a stencil made from a thing cardboard like a recycled cereal box.  Cut out a rectangle and place it over the given writing space.  This will help to remove distractions of the rest of the page and proved a designated space to write within.
Tips for helping kids to write on the lines in handwriting problems. Ideas to help kids with sloppy handwriting from an Occupational Therapist.
Love this post?  Share it!  

Looking for more handwriting tips and tools?  You will find a bunch over on our Handwriting Pinterest board.  We’ve also go these ideas you will love:

http://www.sugaraunts.com/2015/10/visual-tracking-tips-and-tools-for.html 

What is Visual Spacing
Visual Tracking Tips and Tools
Handwriting Spacing Tool and Spatial Awareness Tips and Tools

Teaching Kids to Write Their Name the Fun Way!

We are working a lot on writing lower case letters these days.  My five year old has been trying so hard to write his name and is a trooper when it comes to practicing.  Sometimes it’s not a child’s interest to write letters of their name (and other letters needed in handwriting, too!)  This letter forming name writing activity is perfect for kids who need more practice and are just plain tired of writing their name over and over again.  
Adding a sensory and motor spin on forming the letters of their name can add interest and fun to handwriting and name writing.  Sometimes ordering the letters in name writing can be difficult for young kids.  This name building activity is adaptable to so many skill levels of kids who are working on writing their name.


Teaching kids to write their name and practice letter formation with sensory soup

Teaching kids to write their name with sensory and movement:

To practice our name writing with sensory and motor movements, we used these foam craft sticks that we received from our friends at www.craftprojectideas.com.  Draw lines across the sticks in 3/4 to one inch increments.  Have your child snip the craft sticks into pieces along the lines.  This scissor activity was a hit with my son.  Snipping the foam craft sticks provides a satisfying texture and allows accuracy with the thick resistance and thicker lines.  
Use the small foam pieces to practice letter formation.  The small size is perfect for kids who are working on size awareness in their handwriting. 
Pressing a pen into the foam surface provides great feedback for letter formation.  Use verbal and visual cues.
Build your name sensory soup activity
We used those foam letter pieces to make a sensory soup.  Fill a bowl or bin with water and add the foam letters.  They will float on the water surface.  Visual scanning and picking out the correct letter is a great sensory and fine motor experience.  Kids can work on the order of letters in their name as they look for the letters.  
name writing and learning activity for kids
I drew a rectangle on a plastic plate and had my son build his name with the letters.  The wet foam pieces will stick to the plastic plate.  Kids are encouraged to build their name in order while keeping the letters in a line given the visual cue of the rectangle.  This is great for kids who will soon be concentrating on line awareness and spatial awareness in name writing in Kindergarten and in older grades. Related, check out our recommendations for name practice in kindergarten.
Teaching kids to build words and name with letter order, spatial awareness, and line awareness
 
We’ve been having fun with letter formation and handwriting and will be sharing more creative activities soon!  For now, check out these ideas for handwriting

Fun ways to work on Letter Formation:

High-Contrast Letter Formation
Sensory Letter Formation Practice
Tracing Letters: Letter Formation Handwriting Practice with Chalk
Tracing Lines with a DIY Light Box

Tripod Grasp Activities for Kids:

Improving Pencil Grasp With Fine Motor Play Activities
Fine Motor Coordination with a Cereal Box (activity to improve tripod grasp)
Gift Guide: Toys to Improve Pencil Grasp

This post is part of Preschool Powol Packet’s name recognition writing series. Stop by and see all of the great ways to practice name formation.

Craft Pom Snowflake Line Awareness Craft

Snowflake crafts are very big right now.  With the recent freeze we’ve been experiencing this week, paper snowflakes, snowflake drawings, and real snowflakes are seen daily in and around our house!  We made these pom pom snowflakes one morning and not only created a fun wintery craft, we also worked on line awareness and fine motor skills.

Snowflake Line Awareness Craft
{Note: This post contains affiliate links.  In other words, this blog will receive monetary compensation when any purchases are made through the links in this post.  Our opinions and ideas are in no way affected.  As always, we thank you for your support and community here at Sugar Aunts.}
We received the crafting poms from our friends at craftprojectideas.com.  The white color was perfect for a winter-themed snowy craft!

 Crafting Pom Snowflake Line Awareness Craft

We started by using small squares of light blue construction paper.  I wanted to use small squares of paper so that the snowflakes wouldn’t get too big, and then would encourage smaller movements…and more fine motor work.  I drew a basic snowflake shape on the paper with a pencil.  Little Guy used a bottle of glue to trace the lines.  He needed some help with this.  Squeezing the glue bottle and maintaining awareness of the lines to trace the snowflake shape really was a difficult task for a preschooler.  An older child who is working on handwriting and letter placement on lines would be more efficient at this task.  Keeping the glue right on the stimulus line is a great way to work on not only line awareness for use in handwriting, but also visual motor skill.  The ability to move the hand and watch with the eyes in a coordinated manner is visual motor ability, or eye-hand coordination.  This ability is a refined task that is needed for accuracy with lines and spacing in handwriting and ultimately leads to neatness in handwriting.  Line awareness can be addressed by crafts in many ways.  This Beads Sorting & Line Awareness craft was a fun way to create and work on eye-hand coordination.
Line awareness (and eye-hand coordination) is also necessary for scissor use in cutting tasks.  We used Stickers to Help with Scissor Skills while working on line awareness with cutting.
Once our snowflake was drawn in glue, we worked on more line awareness!  Placing the crafting poms in the glue lines was a great activity for Little Guy.  This task was great for the preschool age range.  He had to use a tripod grasp to manipulate the larger poms and a tip to tip grasp to manage the smaller poms.
Keeping those poms on the lines was a fun way to work on line awareness and fine motor skills at the same time.
Small snowflake decoration would be great for a wintery banner, hung in the window, or even on a card to Grandparents!

Christmas Pencil Control Activities for Kids DIY Workdsheets

 
We did a few Christmas Themed Pencil Control Activities with DIY worksheets this week. 
 
This is so good for Little Guy (age 4) who needs a little practice with controlling the pencil when he’s writing letters.  He’s only just begun writing his name, so this is the perfect age to improve pencil control as a preparation for more letter formation and line awareness as he starts to write on lines in coming months and years.  New handwriters and kids who are not yet writing can do these easy (and fun) pencil control activities as a prep activity.  And better yet, these pencil control activities are beginning homemade worksheets with a fun Christmas Theme!


Pencil Control Activities with a Christmas Theme

Little Guy loved this candy cane activity.  I drew a quick candy cane on white paper with thin spaces on a diagonal.  I had Little guy use a red marker to draw lines inside the thin stripes.  We made a few of these candy canes because Little Guy wanted to keep going and make more! 
 
{Note: This post contains affiliate links.  In other words, this blog will receive monetary compensation when any purchases are made through the links in this post.  Our opinions and ideas are in no way affected.  As always, we thank you for your support and community here at Sugar Aunts.}
 
 
For a new pencil user, encourage your child to draw the lines from right to left (**not like in this picture, oops!**) and the child should rest their arm on the table surface.  Little Guy needs verbal and a physical cue to rest his hands on the table surface for better control.  This will improve pencil control when the child is attempting to draw a line in a certain area.


He kept his lines within the stripes very nicely, and did not often go over the edges of the candy cane.  This is a great activity for a new writer!

Our next activity was encouraging tripod grasp to manipulate pony beads.  I had Little Guy pick up the beads and place them onto the bulbs of a Christmas Tree.  You may have seen this picture on our Instagram feed or Facebook page.

Little Guy had to keep the beads on the circles and really concentrate on the lines.  To manage the beads and place them gently on the circles, encouraged a tripod grasp with extended wrist for improved pencil control.


This Christmas tree was another easy DIY pencil control worksheet to throw together.  Baby Girl (age 2) really liked this activity too.

I didn’t capture a picture of the next step, but I had Little Guy connect the bulbs with a  pencil.  I asked him to keep the pencil from going in the bulb, because it might break the light!  Connecting the dots and concentrating on the lines of the circles was a great way to work on pencil control.


More DIY Christmas Pencil Control Worksheets for Kids

Our last pencil control activity was a present themed one.  We started by making presents with some paper tubes shaped into a square.  We used our Spill Proof Paint Cups
to hold the paint and stamped some squares.


We waited until the next day when our present squares were dry.

 
Baby Girl kind of took over this activity before Little Guy got a chance to practice his pencil control

I showed Little Guy how to make crosses on the presents (over Baby Girl’s added decorations!) so he could practice simple copying.  He was to make the lines top to bottom and left to right to encourage improved pencil control in letter formation.  He did pretty well!