Rainbow Writing Letter Formation Activity

Colorful letter As and lowercase a's with overlapping colors. Text reads "rainbow writing"

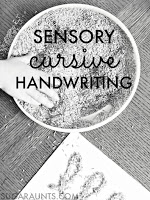
This quick and easy rainbow writing activity is an easy handwriting activity to working on letter formation and letter construction.  Rainbow writing handwriting is a strategy to work on letter formation as a multisensory learning activity for kids. This handwriting activity is an Easy Handwriting strategy that can be so helpful in teaching letter formation and pencil control. 

rainbow writing

You can practice letters with rainbow writing using different utensils. We used rainbow writing with chalk before too.

What is Rainbow Writing

Rainbow writing might be a handwriting activity that you’ve heard of before. Many times, we see rainbow writing as an option for practicing sight words or high frequency words, especially as a multi-sensory learning options.

Typically, you’ll see rainbow writing as one way that kids can practice writing words and letters: They are asked to write the words in a color of the rainbow and then trace over those letters with another color, thus making a rainbow of letters.

Rainbow writing is a great strategy for practicing handwriting! Kids get multiple attempts at forming letters, working on motor planning, pencil placement, and repetition (practice) that very much plays a part in handwriting legibility.

Things to Watch for with Rainbow Writing

Color mixing rainbow writing activity for helping kids with letter formation

When tracing, there are some things to consider. Especially with rainbow writing, kids can develop bad letter formation habits. Read through this resource on tracing sheets to see the pros and cons of tracing with kids.

Some things you’ll want to consider about rainbow writing activities:

  • Be sure to watch how the student starts the letters when they rainbow write. It can be easy to start a poor muscle memory for writing the letters if they start at the wrong starting point or form the letters incorrectly. When they rainbow write each letter and it progressively gets worse, this can create an incorrect motor plan in the handwriting process.
  • Make sure the child that is using rainbow writing to practice letters don’t progressively move their pencil in bigger and bigger strokes as they include each color.
  • Some kids tend to make the rainbow letters with colors next to each other like a rainbow rather than tracing on top of each color. Ask the student to make a mixed up rainbow by tracing right on top of each color.

How to use Rainbow Writing for handwriting

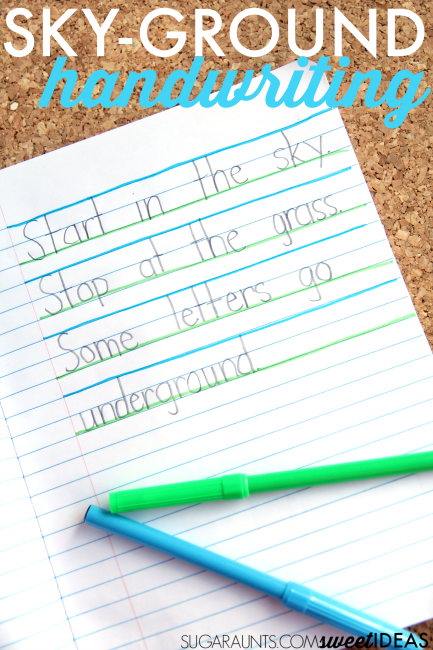
Rainbow writing is a way to work on legibility of written work.

Helping kids write letters with correct letter formation is essential for legibility, especially as kids get older and are required to produce more written work at a faster rate.  Consider the high school student that needs to rapidly jot down notes.  If letters are formed from bottom to top or in sections, their speed and legibility will drastically drop. Sometimes it is speed OR legibility  that suffers when a child needs to produce more amounts of written work in a specific period of time (i.e. copying down notes as a teacher rattles off details.    

The younger student will be affected by inaccuracies in letter formation as well. Around the third grade, students are responsible for jotting down their homework assignments into a planner.  

When the child is bombarded by classroom sensory input (pencil sharpeners, students, desk chairs moving, hallway distractions, coughing classmates…) difficulties with letter formation can result in illegible homework lists and trouble with re-reading the assignment list when the student attempts to start on homework.  

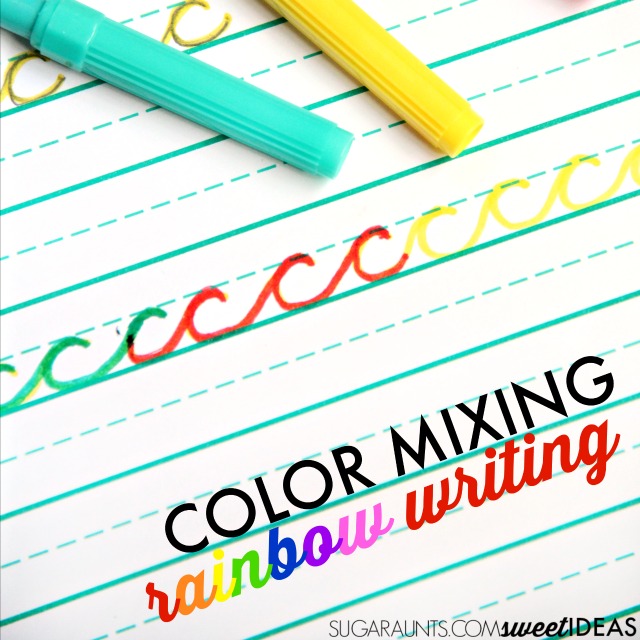
Rainbow Writing Color Changing Activity

There’s more to rainbow writing than incorporating colors and sensory experiences into handwriting. Color Mixing Rainbow Writing is a creative way to help kids learn the right way to actually form letters, because the task allows children to self-correct their written work right in the moment.

They can see where their letter formation has veered into poor letter size or placement. Rainbow writing then becomes a strategy to improve motor planning in handwriting and pencil control as well.    

Affiliate links are included below.

In the handwriting activity shared here, we are taking rainbow writing a step further.

This letter formation activity is really simple and a LOT of fun.  Kids can work on typical motor pattern of letters by exploring color mixing.  

MATERIALS for Rainbow Writing

When you rainbow write, a student can use different colors of crayons, markers, colored pencils, or even chalk. You can use colors of the rainbow, or if you want to work on color changing, use just a couple of the colors.

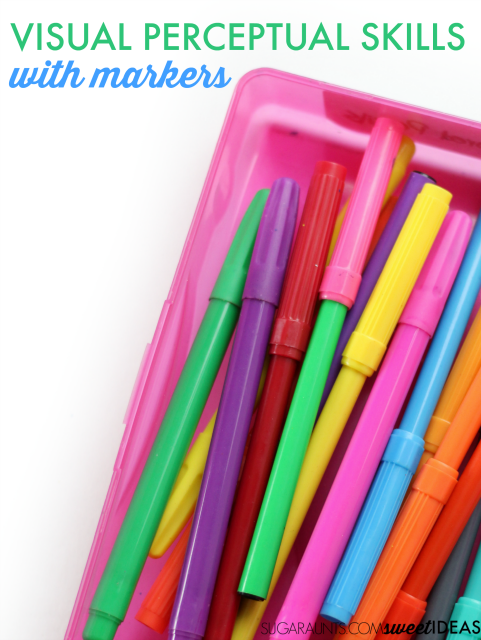
  • You’ll need just three markers for this activity.   
  • Red, Yellow and Blue markers  are all you need to work on letter formation with color mixing.  We used dollar store markers, but also tried these washable markers (affiliate link- As an Amazon Influencer, I earn from qualifying purchases.) and the activity worked too. 

How to rainbow write with color changing

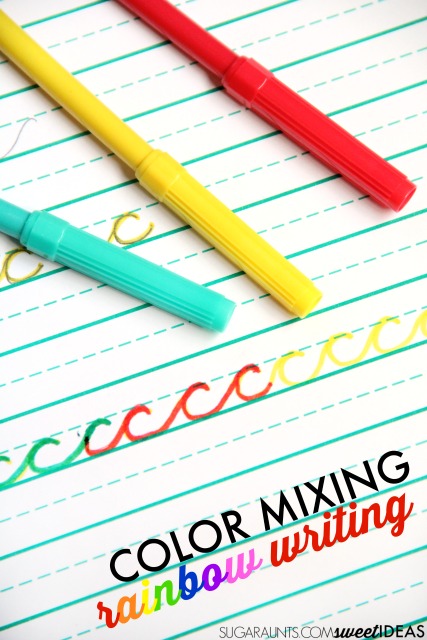
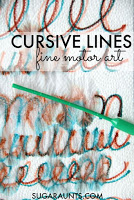
  1. For this activity, you’ll need to first write the letters that you are working on in one color. Then, using another color, trace over the letters to create a new color.  

2. Mixing the yellow and red made orange letters and mixing the yellow and blue markers made green letters.  

Kids can work on letter formation but experience the color changing of the markers when they write over letters in different colors.

Some different options to try with this rainbow writing activity:

  • Use just 2 colors so kids can try mixing two primary colors to see what the colors make
  • Not when the colors do not change: did they marker lines go off the lines? Can letters be written again or can the student try again to make the colors change?
  • Some kids may benefit from a model that is written in one color by the teacher, therapist, or parent. Then, the student can try to keep their letters on the lines to ensure proper size, spacing, and formation
  • Try making color coded messages to one another using the color changing activity
  • Work on phonetic awareness, by making vowels or phenomes one color and consonants or letter blends another color.
Rainbow Writing Activity with Color mixing for handwriting.


Tips for Rainbow Writing

Because kids can develop bad habits with rainbow writing, here are some things to keep in mind.

  1. Work on letter formation with this activity by providing kids with the amount of assistance they need to form letters correctly.  At first, they may need verbal, physical, and visual cues to form letters correctly.
  2. Encourage students to form the letters from top to bottom and in the correct way.  When they re-trace the letters with a second color, be sure they are forming and tracing the letters correctly.    
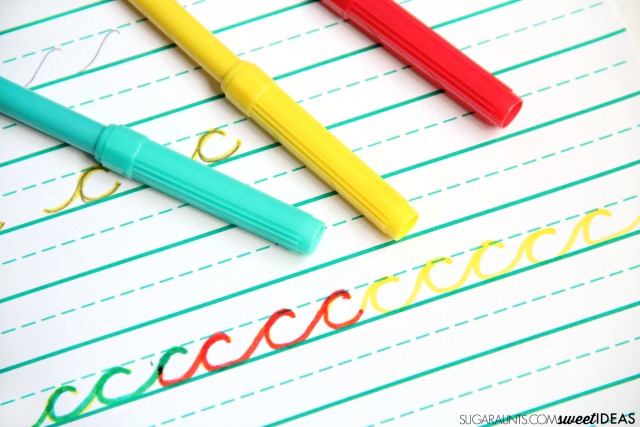
  3. When kids trace over the colors, they will be forming letters slowly in order to trace over the letters and ensuring the colors mix.  
  4. By tracing over the lines to form letters, they are building the typical motor patterns needed to write the letters correctly and efficiently.  

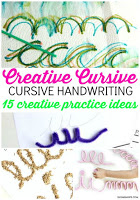
We worked on cursive letters with this activity, but it would work very well with printed letters, particularly letters that are typically reversed or confused like b and d reversals.  

Here is more information on letter reversals to consider.

Color mixing rainbow writing activity for helping kids with letter formation

 Looking for more creative ways to work on handwriting?  Check out these creative ways to help kids work on their written work:  

Functional Handwriting Practice Ideas

What is Visual Spacing

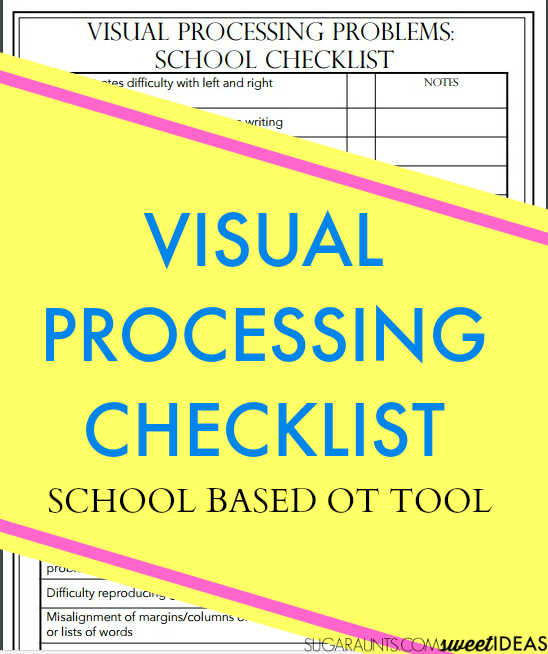
Visual Tracking Tips and Tools

Handwriting Spacing Tool and Spatial Awareness Tips and Tools

DIY Dry Erase Board Handwriting Travel Kit

Colors Handwriting Kit

Rainbow Handwriting Kit– This resource pack includes handwriting sheets, write the room cards, color worksheets, visual motor activities, and so much more. The handwriting kit includes:

  • Write the Room, Color Names: Lowercase Letters
  • Write the Room, Color Names: Uppercase Letters
  • Write the Room, Color Names: Cursive Writing
  • Copy/Draw/Color/Cut Color Worksheets
  • Colors Roll & Write Page
  • Color Names Letter Size Puzzle Pages
  • Flip and Fill A-Z Letter Pages
  • Colors Pre-Writing Lines Pencil Control Mazes
  • This handwriting kit now includes a bonus pack of pencil control worksheets, 1-10 fine motor clip cards, visual discrimination maze for directionality, handwriting sheets, and working memory/direction following sheet! Valued at $5, this bonus kit triples the goal areas you can work on in each therapy session or home program.

Click here to get your copy of the Colors Handwriting Kit.

Colleen Beck, OTR/L has been an occupational therapist since 2000, working in school-based, hand therapy, outpatient peds, EI, and SNF. Colleen created The OT Toolbox to inspire therapists, teachers, and parents with easy and fun tools to help children thrive. Read her story about going from an OT making $3/hour (after paying for kids’ childcare) to a full-time OT resource creator for millions of readers. Want to collaborate? Send an email to contact@theottoolbox.com.

Letter Sizing Activity

letter sizing activities

Working to help a child write with correct letter sizing and placement on the lines? Are you trying to come up with letter sizing activities to help kids write smaller letters that fit between the lines on the paper? Are you struggling with a child that forms letters without regard to size or line awareness? Letter size awareness is a real struggle for some kids!

This post is part of our Christmas in July giveaway series.

Letter sizing activities to teach kids to write the correct size.

Here, you will find suggestions to work on letter size awareness, along with a letter sizing activity that can be including into any handwriting curriculum. It’s one that focuses on how to form smaller letters, numbers so kids use a more precise pencil control that they can use when writing on any paper.

Letter Sizing Strategies

Do your students have trouble making their letters or numbers the right size? You might have seen kids that write without regard to the lines. Or, they may copy or independently write letters that take up the whole space, no matter what lined paper is used.

Other kids form letters that are correctly sized on the lines…but only when they have boxes drawn for each individual letter. But, that accommodation simply isn’t a possible option all of the time, for consistency and carryover.

During their earliest exposure to handwriting activities, young children at the preschooler and kindergarten ages may form large letters. Letters might fill the whole page or the whole available space. These forms are not always completed with a motor plan in place. the lines of the letters might be more of strait lines that intersect.

As kids gain more experience with writing with a pencil and with writing letters, they gain a motor plan that they can use on any surface and without a visual model for the letter.

Students then start to notice and use a letter size differentiation, or letters that are tall letters and reach the top line (e.g. b, d, f, h, k, l, t), letters that have tails that hang below the bottom line (g, j, p, q, y), and letters that rest in the bottom half of the writing space (a, c, e, i, m, n, o, r, s, u, v, w, x, y, z).

Kids will notice the differences between these differently sized letters and the upper case letters which are all the same size.

All of this letter size awareness occurs through experience and practice.

However, when there isn’t experience or practice time…or there is a visual perceptual concern, or a visual motor issue, there may be trouble or inconsistencies with letter placement.

That’s when interventions may be needed to help work on letter sizing.

Try some of these letter sizing activities

>> Using regular notebook paper, or bold lined, baseline paper, highlight the bottom half of the writing space. This is where the small letters are placed. Explain to the child that the tall/Capital letters start in the white, and the little letters start the grey(photocopied paper or yellow highlighted area). This writing paper is an easy fix for many writing situations.

>> Use modified paper. Here are free adapted paper types for all handwriting ages.

>> Try the box and dot strategy. This is a nice way to teach size awareness for kids who are just beginning to notice letter size.

>> Re-teach letter size of the upper case letters. Allow the child to notice where each letter starts. Then work on tall letters which start at the same point on the writing area. Next, teach the letters that are located in the bottom half of the writing space (the small letters). Finally, re-teach the tail letters which hang below the baseline. In each set of letters, allow students to notice where each letter rests.

>> Try any of these letter size activities.

>>Reduce distractions on the page by using black paper with white forms in increasingly smaller form size, like in the BlackBack writing program. This writing program allows students to form the motor plan for upper case letters and lower case letters, as well as numbers.

The BlackBack Writing Program depicts strokes, upper and lower case letters and numbers in white on a black background which helps the child see their strokes as they use the white space. Additionally, there is only one image on the page eliminating distraction from competing images and increasing attention to the single task on the page. Each letter, number and stroke has 6 sizes. The first size is very large and the last is the height of a wide-ruled notebook paper.  

The BlackBack Writing Program can be customized to begin where the child is in his/her writing journey. The letters, numbers, and strokes can be used on its own or as a supplement to any writing program.  The BlackBack Strokes, Letters and Numbers programs can be combined or used separately. 

Black Back Writing Program

I’m so excited to partner with Two Sparrows Learning Systems to offer this Black Back Writing Program.

It’s an awesome handwriting tool that addresses pencil control, motor planning, size awareness, visual motor skills, visual distraction, and more.

The Secret to Cursive Legibility is…

When it comes to handwriting, legibility is a big issue. Students can work on letter formation, speed, copying skills, pencil pressure, and other components of handwriting…but there is one focus that can make all the difference in cursive legibility: letter size! Letter size is a huge area to address if you are concerned with cursive legibility and functional handwriting.


For printed handwriting, size is a big concern and a helpful area to address to boost handwriting legibility but the biggest way to immediately make a difference in legibility to to address spacing between words. When it comes to cursive writing, that key area is letter size.

This post is part of our 31 day series on teaching cursive. You’ll want to check out the How to Teach Cursive Writing page where you can find all of the posts in this series. 

For more ways to address the underlying skills needed for handwriting, check out the handwriting drop-down tab at the top of this site.

Use color-coded visual guides to help kids to work on handwriting letter size tricks to help kids with cursive legibility and consistent cursive handwriting.

Cursive Legibility and Handwriting Letter Size


With cursive handwriting, the natural spacing that occurs with cursive letter connectors help to group words together. Addressing size will help with consistency of letter formation and overall look of cursive writing. 

A smaller letter size is essential for increased speed that is needed for functional use of cursive as a writing form. 

When some tall letters are hitting the top line and others are hitting at the midline, overall legibility suffers. When some small letters hit the top line, the letters can look like a different letter (A cursive e that is formed so it hits the top line will look like a cursive l).

Handwriting Letter Size Activity

Try this easy activity to address consistency of handwriting letter size and cursive legibility. 

You’ll need just a couple of materials for this letter size activity:
Affiliate links are included.

Cut each colored cardstock into small index card-sized pieces. Use these as starting and stopping guides for cursive handwriting. 

The green cardstock can be the guide for a starting point for cursive letters. For some kids, knowing to start on the baseline is a big part of letter formation and cursive legibility.

For other kids, handwriting letter size is limited by the various sizes of cursive letters. For these kids, a visual guide of where to pause and re-trace or curve over to complete the cursive letter can really help with letter formation and cursive legibility.

Use the red cardstock to guide the top point of letters. 

The visual guide can be used effectively when practicing a series of cursive letters such as a line of cursive letter b‘s. Simply hold the guide at the top line as a visual cue to stop at the top writing line. 

The visual cue cards can be used as a visual self-check after writing a word.

Use color-coded visual guides to help kids to work on handwriting letter size tricks to help kids with cursive legibility and consistent cursive handwriting.

Ruler Trick for Cursive Letter Size

Another trick to help with consistent cursive letter size is to use the ruler trick. Use a wooden ruler as a visual guide that can be kept in a desk or binder. Use a red marker to color the edge of a wooden ruler

Color the edge of a ruler to work on handwriting letter size tricks to help kids with cursive legibility and consistent cursive handwriting.

The ruler can then be used to guide or self-check letter height.

Looking for more ways to make cursive handwriting consistent and legible? Try these ideas:

Use these handwriting letter size tricks to help kids with cursive legibility and consistent cursive handwriting.

Teach Cursive Tree Letters

Here on The OT Toolbox, we’ve been sharing lots of ideas on how to teach cursive writing. Today, you’ll find creative activities and tips for teaching cursive letter formation of tree letters. Cursive tree letters are those ones that start with a line up followed by a traced line back down. Lowercase cursive letters i, j, p, t, u, and w  are tree letters. This cursive letter family is a group of cursive letters that are formed with similar pencil strokes.


Breaking letters down into cursive families can help students learn cursive letter formation. Below, you will find information on how to teach cursive letter formation of “tree letters”.


Check out how each letter of the alphabet is broken down into chunks of similar letters in this Facebook video.

Try this cursive handwriting activity to help kids learn to write in cursive, using an image of a tree for cursive letters i, j, t, u, and w.


Teach cursive letter formation “tree” letters

This post is part of our 31 day series on teaching cursive. You’ll want to check out the How to Teach Cursive Writing page where you can find all of the posts in this series. 

For more ways to address the underlying skills needed for handwriting, check out the handwriting drop-down tab at the top of this site.

Cursive Letter Formation of “Tree” Letters


When instructing students in forming these letters, start by outlining a cursive letter lesson plan of activities. You can read more about cursive letter lesson plans here.


Students can start out with learning The Tree Letters, start by practicing a series of upward curves across a line of paper. This can look like a string of cursive letter t‘s joined together. When practicing the curve of the cursive letter t motions in a strand across a page, don’t worry about the crossing of the t’s. Instead, set awareness on re-trace and the start/stop point of each curve.
 
Most important is the re-trace portion. Instruct students to draw the lines with proper re-trace as they trace back over the lines to create another line up and down. 
When beginning with cursive instruction, students should concentrate on an upward curve from the base line to the middle line or top line of the paper. This is the “tree” of a tree trunk visual and is the re-occuring stroke in the letters i, j, p, t, u, and w. 
 

Rainbow Writing Cursive Letter Tree Letters Activity

 
One activity that can practice the formation needed for tree letters is to practice drawing rainbows. Using a variety of colored pencils or markers, ask students to draw a small rainbow that starts at the baseline and peaks at the middle line. They can then trace back over that rainbow with other colors. 
 
Then, ask students to create a series of rainbows across the line of paper using one color. They can then draw over that series of rainbow bumps with each colored pencil or marker. 
 
As students trace over the previous color, ask them to keep their colored pencil or marker on the lines and to continue with re-trace back down to the baseline and back up again. 
 
Try this cursive handwriting activity to help kids learn to write in cursive, using an image of a tree for cursive letters i, j, t, u, and w.
 

Activities for Teaching Cursive Letter Tree Letters

Use short phrases to instruct cursive formation. Phrases like “Pause”, “Stop”, “Trace back”, “Curve up”, “Curve Down”, and “Swing away to connect” can help. 


The verbal prompts should involve starting and stopping points such as “Start at the baseline”, “stop at the middle line”, or “Stop at the top line”. Line names should remain consistent with names used by the student in learning printed handwriting. Bottom Line, Middle Line, and Top Line are simple cues that typically work well.


Try this tree themed activity to teach cursive letter tree letters:


1.) Students learning the Tree Letters will benefit from a visual image of a a series of curved lines up and back down with a visual of a tree’s branches at the top. The tree’s trunk should trace back down over it’s first line to create a single trunk line. Use a green stamp to create a small leaf top on a letter t.
Try this with a series of letter t’s and the other Tree Letters. Be sure to ask students to copy only 2-3 letters at a time while working on formation so that poor habits are not established.


How to Teach Lowercase Cursive i


Use the following verbal prompts to teach lowercase cursive letter i:
 
Start at the baseline. Curve up to the middle line. Pause. Trace back down the tree trunk. Then swing away to connect. Go back and add the dot.
 
Instruct students to trace over the lines and create a small set of “roots” at the bottom of the tree trunk.
 
How to Teach Lowercase Cursive t
Use the following verbal prompts to teach lowercase cursive letter t:


Start at the baseline. Curve up to the top line. Pause. Trace back down the tree trunk. Then swing away to connect. Go back and add the crossline.


Instruct students to trace over the lines and create a small set of “roots” at the bottom of the tree trunk of the t
 

Note about letter t- Older styles of cursive handwriting used a height of letter t that was taller than the middle line yet shorter than the top line. For ease and consistency with children, a height that reaches the top line can be most efficient. 

The tree letters have different sizes which is important for legibility. A cursive t and a cursive i can take on similar appearances when the size awareness is take out. Teaching learners about letter size and the tall letters are tall while the short letters are short. Use this tall and short worksheet to put these concepts into play.

 
How to Teach Lowercase Cursive p
 
Use the following verbal prompts to teach lowercase cursive letter p:

Start at the baseline. Curve up to the middle line. Pause. Trace back down the tree trunk. Pass the baseline. Pause. Trace back up the tree trunk to the middle line. Curve around in a circle. Stop at the tree trunk near the baseline. Then swing away to connect. 


Note about cursive letter p- This letter has a lot of re-trace. It also has a point where the pencil needs to stop without crossing over another line. This closure point can be a difficult precision point for some students. Work on re-trace and motor control for closure points in multi-sensory activities such as with sandpaper or in writing trays. 
 
How to Teach Lowercase Cursive u


Use the following verbal prompts to teach lowercase cursive letter u:


Start at the baseline. Curve up to the middle line. Pause. Trace back down the tree trunk. Then swing away to create a second tree. Curve up to the middle line. Pause. Trace back down the tree trunk. Swing away to connect.


How to Teach Lowercase Cursive w


Use the following verbal prompts to teach lowercase cursive letter w:


Start at the baseline. Curve up to the middle line. Pause. Trace back down the tree trunk. Then swing away to create a second tree. Curve up to the middle line. Pause. Trace back down the tree trunk. Then swing away to create a third tree. Curve up to the middle line. Pause. Trace back down the tree trunk. Swing away to connect.


How to Teach Lowercase Cursive j


Use the following verbal prompts to teach lowercase cursive letter j:
 
Start at the baseline. Curve up to the middle line. Pause. Trace back down the tree trunk. pass the baseline and loop to the left. Swing up to the baseline and away to connect. 


A few tips for teaching tree letters


It would be very difficult to teach cursive handwriting only by verbal instruction. Carryover and accuracy would suffer!


A visual component and slow teaching strategies are very important. Try these tips to help with learning cursive bump letters.


Use large motor movements when starting out with cursive instruction. 
 
Teach each letter individually and for short periods of time each day.
 
Practice cursive letters in multiple sensory experiences, including shaving cream on desks, writing trays, in goop, with play dough or slime, etc.
 
Practice near copy work using a visual cue like these free cursive letter flashcards.
 
Practice each letter in a group focusing on one letter at a time. When a new letter is introduced, continue with previously learned letters. 
 
 
Want to teach other cursive letter families? 
Here is information on how to teach wave letters (c, a, d, g, q).
Try these ideas to teach bump letters (m, n, v, x, y, z).

Try this cursive handwriting activity to help kids learn to write in cursive, using an image of a tree for cursive letters i, j, t, u, and w.
 

More Cursive Handwriting Tools and Resources:

Affiliate links are included.


Try these cursive writing tools to help with forming letters:
Affiliate links are included.
 
Cursive Writing Wizard is a free app on Amazon that allows students to trace letters and words. The app has stickers and animations as well as games that promote learning of cursive letters and connecting lines.
Cursive Handwriting Workbook is a workbook for kids in elementary grades and focuses on  formation of cursive letters (upper and lower case) as well as words. 
 
Teachers can use a laser pointer in the classroom to help students see parts of cursive letters as they instruct each part of the formation. This is helpful when teaching letters in cursive letter families.


Modified Paper Christmas Handwriting Pack

It is hard to believe that Christmas is right around the corner.  It’s just about that time of year when we have Christmas lists, to-do lists, letters to Santa, and thank you notes to write out.  


But what happens when your child struggles with handwriting?  


Writing out that Christmas wish list is a difficult task that brings out tears instead of holiday excitement.  I’ve got a solution for your kiddo with handwriting difficulties: a packet of modified paper for all of the Christmas handwriting tasks that come up each year.  Use this handwriting pack to help kids who struggle with handwriting to participate in holiday traditions while even working on and developing their handwriting skills!

Christmas Worksheets for Kids

Try this modified paper Christmas handwriting pack for helping kids work on handwriting this year.

Modified Paper for Handwriting Needs with a Christmas Theme


This handwriting packet will be a solution to so many handwriting needs.  It’s a 35 page handwriting pack that contains 30 different modified handwriting sheets.  There is a section that explains the “why” behind each type of paper and how they should be used to promote legibility in written work.  There is a printable Christmas themed writing prompt sheet to help inspire handwriting. There are two different sized line pages for each Christmas theme.  


This is a huge printable pack that can be used over and over again!

Modified paper Christmas Handwriting pages are great for kids to work on written work this holiday season.


Consider the ways that kids can write and practice handwriting this season:

  • Letter to Santa (Use the “Dear Santa” prompt page and additional sheets for longer letters to the Big Guy in Red.)
  • Christmas Wish List
  • Holiday To-Do List
  • Shopping List
  • Recipe Sharing
  • Thank You Notes
  • And more (There are a bunch of ideas on the printable writing prompt sheet!)
Want the packet? Grab it now in time for Christmas planning and your Advent calendar.
 
 
Dear Santa Christmas letter pages are part of the modified paper Christmas handwriting pack for kids.

So, what’s in the Handwriting Pack?

  • THREE types of modified paper: Bold lined paper, Color-coded paper (with Christmas-y colors), and Highlighted Paper
  • FIVE different Christmas and Winter themed borders.
  • TWO different sized lined of each type of paper: Narrow Rule for older kids and Wide Rule for younger kids.  
  • That’s 30 different sheets of modified paper all with a Christmas theme.
  • There is a detailed explanation of reasoning behind each type of paper.  This will help explain how to use each modified paper and the reasons why each type might be the style of adapted paper to use for particular handwriting concerns.
  • PRINTABLE Christmas writing prompt sheet.  Use this to inspire handwriting practice all season long in fun and meaningful ways…on fun Christmas-themed paper, of course!
All of this is available for printing as many sheets as you need throughout the holiday season.  The 30 handwriting pages, instructional sheets, printable Christmas writing prompt page is available for $7.99.
 
Use highlighted paper to work on letter size and formation, part of the modified paper Christmas Handwriting Pack
 
This handwriting pack will meet the needs of kids of all ages-From Kindergarten on up through High School.


What writing needs can be met with this handwriting printable pack?

  • Poor Line Awareness
  • Inaccurate Letter Size
  • Poor Spatial Awareness
  • Poor Letter Formation
  • Inaccurate Spatial Organization
  • “Floating” Letters and Words
  • Inconsistent Written Work
JUST ADDED: 


For those of you who would like to try just ONE style of paper for a lower price, you can.  I have broken the packet down into three sections so that parents, teachers, and therapists can benefit from just one style of modified paper.  Each smaller packet comes with 10 pages each of modified paper with a Christmas theme. Read about each of the packets here:

 
Highlighted paper in the modified paper Christmas Handwriting pack for kids
 

Who would use this modified paper handwriting packet?  

As an Occupational Therapist, I would LOVE to have this packet available for use during the holiday season.  As we get nearer to Christmas and the holiday break, kids start to get a little antsy in the classroom. 
Modified lined paper is a useful tool for kids who struggle with visual perceptual needs or visual motor challenges in handwriting. Children who write with letters placed haphazardly on the lines or have trouble with spacing between letters and words will benefit from this paper. Kids who write with letters of mixed size or those who write with a mixture of upper and lowercase letters will like this modified paper. 
 
Teachers in grades Kindergarten on up will benefit from the different styles of paper in this packet. The packet comes with different sized lines and a variety of rules with each holiday-themed styles. 
 
Therapists who work with children on handwriting goals will love to use the motivation of the Christmas and holiday season to work on underlying skills needed for accuracy and function in handwriting. 
 
Parents who want their children to write out Christmas lists or Thank You notes will LOVE this modified paper that allows independence in written work.
 
Use modified paper Christmas handwriting pack to work on legibility in written work.
 
Making writing practice fun and meaningful can be beneficial for addressing handwriting goal areas. Print off the pages that you need for individual students. 


Try one type of paper and then another to see what works.  When you find a modified style of paper that works, print off the other themed pages using that same modification.  
 
Bold lined paper and a modified paper Christmas handwriting pack
 
There are so many ways to practice handwriting skills in the weeks leading up to Christmas.  THEN, print off a few pages to send home with students for the holiday break. Students can use the paper to work on a list of writing prompts as part of their OT homework.
 
Work on handwriting with modified paper Christmas handwriting pack for kids.
 
Having so many different types of paper and border styles in one pack makes this resource easy to use for many different students.  Teachers can use the pack to address the needs of the whole classroom.
 
Modified paper Christmas handwriting pack for kids.
 
Parents can print off the pages that they would like to try with their child.  Use the writing prompts to work on handwriting in a fun and relaxed way.
 
Use this modified paper Christmas Handwriting Pack to work on legibility and handwriting struggles with kids.

New Baby Sensory Play for Siblings

We’ve had a new baby in our house for six months now.  Those six months have gone by in a blur. 
Just last week, my three year old asked, “Mom, are we keeping (the baby) for ever?”  I think it finally hit her that baby is here to stay.  Sometimes it’s difficult for kids to understand a new baby coming into the house and family and staying (forever!)  with all of it’s stuff, and cries, and messy diapers.  Life sure does change when a new baby is introduced to a family!  

We love sensory play for it’s simple ways to teach concepts, exploration, language development, and ideas that are developed.  We did this new baby sensory play activity a few months back…but maybe it’s time to play again with the new baby sensory bin, just to help the older siblings understand the new family dynamic we’ve got going on!


Sensory play for siblings of new babies.  This is a great way to introduce new big brothers and big sisters to a new baby.


Sensory Play for Siblings of a New Baby

We needed to wash a bunch of baby supplies a few months ago, and anytime washing is involved, Little Sister (age 3) jumps at the chance to help out.  This sensory bin kind of just happened because of a job that needed done anyway, but it turned out to be a fun way to explore the new baby’s supplies and talk about things that a new baby needs.

This post contains affiliate links.

Using bottles and lids to develop fine motor skills

I pulled out a big box of bottles
and lids, bottle nipples
, and a few bottle brushes that all needed washing.  Instead of putting them in the sink, I put them in our baby bath tub right on the dining room floor.  Some warm soapy water and we were ready to clean and explore baby’s things.


Little Sister had fun matching up the lids to the bottles.  Twisting them on and off was a fun way to work on many fine motor skills: bilateral hand coordination, hand-eye coordination skills, motor planning, and translation in the palm.

 Time goes by at lightning speed when you’re a parent…but at the same time, the days draaaaaag.  How can my sweet little baby already be six months old?  But certain hours of the day can seem to last twice as long.  This baby sensory bin was perfect for spending time with my three year old while doing a job that needed done anyway.  She liked talking about all the supplies, the lids that cover bottles, and the bottle brushes that are used to clean bottles. 

Cleaning the bottles was a hit for her!  She loved cleaning the bottles with the bottle brush and the warm soapy water was a great sensory experience for her.

This little sweetie watched the fun from her infant seat.


It’s always a bonus when sensory play leads to cleaning rather than messes!  This one was a big hit and we’ll be pulling out all of the bottles again soon.  Let us know if you play and explore baby items with a big brother or big sister.  We would love to hear about it!


More New Baby ideas you may be interested in: