Colleen Beck, OTR/L is a pediatric occupational therapist and the owner and author of The OT Toolbox website. She manages all of The OT Toolbox social media accounts and runs the popular newsletter.
Read about Colleen's experience and career as an occupational therapist, including how The OT Toolbox began on our About The OT Toolbox page: https://www.theottoolbox.com/about-us/
Colleen created The OT Toolbox in 2011 and since then has written thousands of blog posts designed to support therapy providers, educators, parents, counselors, admin, and caregivers in promoting the healthy development of kids.
Check out Colleen's blog posts below:
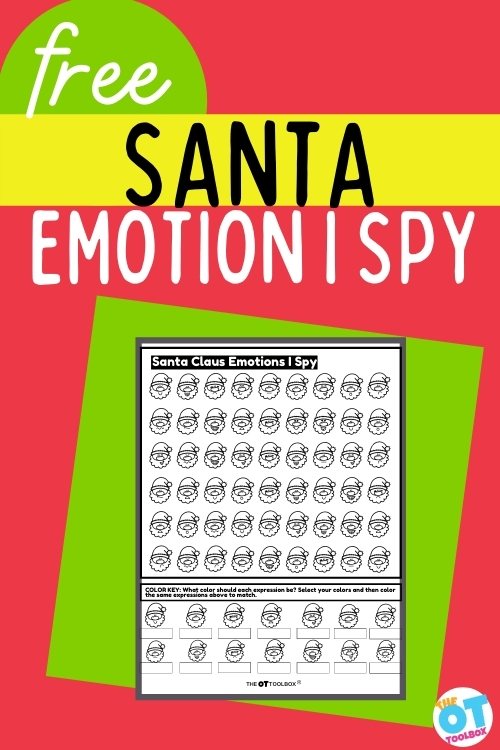
Want a printable Santa emotion worksheet designed to support facial expression identification? This Santa emotion PDF is just that! And even better yet, if you are looking for ways to address visual discrimination using visual scanning activities with your students, this Santa Claus Emotions I Spy will check all the boxes! Not only will you be able to address visual discrimination and visual scanning skills with this fun printable, but you can easily incorporate many other skills addressed in occupational therapy including fine motor control and emotional regulation. Not to mention, this feelings worksheet is an easy way to have some fun this Christmas season in your treatment sessions with your students!
Visual discrimination is one skill that makes up our visual perception. Visual discrimination is an essential skill for students to participate in school in both their roles as a student for tasks such as reading and writing, as well as their role as a friend. We use our visual discrimination skills to read others emotions or changes in the environment. As you can see, it is so important to address visual discrimination skills using scanning activities. This printable Santa Emotion worksheet I Spy activity will make it easy!
What is visual discrimination?
Visual discrimintation is the ability to recognize similarities and differences between visual images or objects. Visual discrimintation is an important skill for students in school because of its link to reading and writing. When looking at words on the page, readers need to be able to discriminate between subtle differences in letters like “b” and “d” or “5” and “S”. Providing opportunities to build visual perceptual skills helps students engage in their occupations as a student!
Why is visual scanning important?
Visual discrimination is a component of visual perception, but in order for students to use visual discrimination skills effectively, they also need to use their visual scanning skills. Visual scanning sends the visual information to the brain, visual discrimination tells us why that visual information is important. In order for the visual system to work, we need both! Visual scanning is an important component of visual perception and there are so many fun ways to address scanning in your treatment sessions. Try marble painting, using a flashlight, or looking at a Christmas I Spy book to address visual scanning.
As mentioned before, students also need to rely on visual discrimination skills when reading other’s emotions. When you begin this activity with your students, start by reviewing the pictures of Santa at the bottom of the page. Talk about the similarities in the pictures, then talk about the differences. Have the students select a color to match with each emotion. This would be a great place to include Zones of Regulation colors and terminology if you use that program. Emotional regulation is essential for social participation and this is a great way to hit on that skill with your students.
identifying emotions worksheet with a Santa Theme!
Once you have reviewed the visual information and the emotions and filled in the coordinating colors, now it’s time to start coding or coloring in the Santa faces! As the student scans and discriminates each Santa, watch to see that their visual system is working to support their performance. There are many ways you could adapt or modify this activity to meet the needs of your students.
Here are some ideas to support visual scanning:
Use another paper to cover some of the visual information
Teach a strategy to help scan by making a mark on the page to indicate which row they are working on
Use a ruler to help students keep their place as they are working
More ways to use this feelings worksheets pdf
Use bingo daubers for students who have not yet developed fine motor precision skills
Use tape or sticky tack to secure the printable Santa emotion worksheet to a vertical or inclined surface to address shoulder strength
Set up a container of markers on one side of the room and put the worksheet on the other side. Have the students use a scooter board back and forth to retrieve the markers they need.
Use tongs and pom poms or beads to work on fine motor skills at the same time
If your focus is on emotional regulation, you can easily extend this activity to target the student’s ability to identify their emotions. When discussing Santa’s emotions, ask your students to think of a time when they felt happy, sad, excited, or mad. It may also be fun for students to think about the self regulation tools Santa might use to help him regulate his emotions throughout the Christmas season!
Free Printable Santa Emotion Worksheet
Do you know a kiddo that would love this printable Santa emotion worksheet? You can download this emotions PDF and start working on skills like visual discrimination, scanning, coloring, feelings identification, and more!
Katherine Cook is an occupational therapist with 20 years experience primarily working in schools with students from preschool through Grade 12. Katherine graduated from Boston University in 2001 and completed her Master’s degree and Certificate of Advanced Graduate Study at Tufts University in 2010. Katherine’s school based experience includes working in integrated preschool programs, supporting students in the inclusion setting, as well as program development and providing consultation to students in substantially separate programs. Katherine has a passion for fostering the play skills of children and supporting their occupations in school.
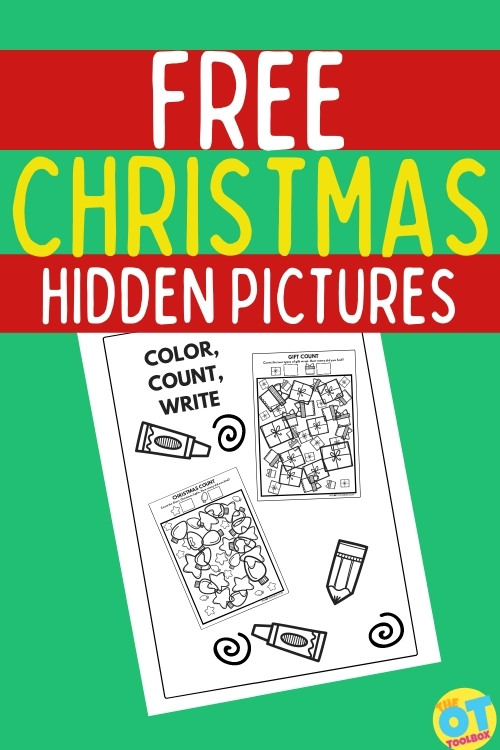
Are you looking for a Christmas hidden picture worksheet that doubles as a visual figure ground activity? This Christmas worksheet PDF can be used with students to also address fine motor skills and coloring? Christmas Color and Count is a printable hidden picture printable PDF 2 page resource that will help you address these skills with your students.
Christmas Worksheet PDF: Hidden Pictures
This Christmas hidden picture resource includes 2 printable PDF pages to use with your students during the holidays. The first page has Christmas lights and stars and the second page has 2 different types of gifts.
These printable hidden picture PDFs work on several areas over the holiday season…when kids might not want to work on difficult skill areas. A festive and fun themed activity can help address the underlying areas that impact handwriting, reading, and other visual processing tasks.
How do Hidden Picture Worksheets Help?
Hidden picture worksheets can address many areas that impact function. Let’s take look at all the ways to use this free hidden picture puzzle in therapy”
These worksheets target the visual perceptual skill of visual figure ground. You will also be able to use these worksheets to work on fine motor skills at the same time while finding and coloring the Christmas stars and holiday lights.
Visual Figure Ground Skills- First, let’s look at the visual perceptual skill of visual figure ground. Visual figure ground is the ability to differentiate or pick out an object from a busy background. This skill is essential for supporting the occupations of students in school, from reading text to finding an item in a cluttered desk.
Students use their visual figure ground skills to be able to differentiate words in a book, when copying information from the board, or when looking for something in their backpack.
You could easily use these Christmas Color and Count worksheets paired with other therapy activities to support visual figure ground skills. An important function of visual figure ground is the ability to scan the environment and find the important visual information.
More ideas using the Christmas Hidden Picture
There are more ways to use this Christmas Printable PDF in a variety of therapy activities to incorporate gross motor skills, fine motor skills, coordination, and more…
Use the Christmas Hidden Picture Printable PDF in an I Spy Game- It would be fun to extend this activity to include a scavenger hunt or I Spy Game in your therapy space, either as a warm up activity or as a game to end your session.
Hide stars or an image of Christmas lights around your space.
You could ask your students to collect the stars or play I Spy with the images of colored Christmas lights.
Other fun games to address visual figure ground include (Amazon affiliate links) Spot It or I Spy Board Game.
Visual Discrimination Activity- Once you have completed a scavenger hunt or other warm up activity and your students are ready to move on, you can begin by having them look at the pictures at the top of the page.
Ask them to identify and describe the key features of the objects they will count. For example, the star has angles and the Christmas lights are rounded.
Ask them to describe the differences between how the 2 gifts look on the second page.
Executive Function Activity- Next, ask your students how they plan to start this activity.
This helps with executive functioning and organization.
Will they find all of one item and then move to the next?
Will they start at the top and scan in a left to right manner?
Asking your students to verbalize their plan will help you understand their organizational strategies and how you may best support their executive functioning.
Visual Scanning Activity- Now, your students are ready to scan and color each shape.
Coloring is a great way to develop fine motor strength and endurance. Coloring is a skill that needs to be taught to support the fine motor development of students. Coloring is a skill that requires hand strength.
Often children with decreased hand strength dislike coloring because they do not have the endurance to complete the task. If you have students who struggle with coloring try offering alternatives to crayons, and then work your way up using crayons or colored pencils.
Often students who have difficulty with the fine motor components of coloring prefer using markers. Markers provide less resistance and for many students they provide more visual interest. Using markers to increase visual attention and motivation for coloring is a great tool for students struggling to build fine motor and visual skills.
For students who may struggle with coloring, think of ways to make it more fun and interesting for them. Here are some ideas:
Christmas Hidden Picture and Strengthening Activity- For students who need additional strengthening opportunities, think about how you can challenge their postural strength and upper body stability.
Other ways to incorporate strengthening into this activity:
Tape the worksheets to the wall at eye level which will address shoulder strength and stability
You could also tape the worksheets under the table and have your students work while lying on their back. This a fun and different way to work on fine motor strengthening!
Find some floor space and have the students lie prone, propped up on elbows while coloring. This position will help strengthen their postural muscles and increase shoulder stability.
Use a large therapy ball instead of a chair to challenge postural strength while coloring at the table.
For students who avoid or dislike coloring, incorporating different positions into your session may help them start and stay engaged, building not only their fine motor skills, but also strengthening their visual attention.
Free Christmas Hidden Picture Worksheet PDF
Christmas Color and Count is a great activity for building important visual figure ground skills and strengthening fine motor endurance at the same time!
Katherine Cook is an occupational therapist with 20 years experience primarily working in schools with students from preschool through Grade 12. Katherine graduated from Boston University in 2001 and completed her Master’s degree and Certificate of Advanced Graduate Study at Tufts University in 2010. Katherine’s school based experience includes working in integrated preschool programs, supporting students in the inclusion setting, as well as program development and providing consultation to students in substantially separate programs. Katherine has a passion for fostering the play skills of children and supporting their occupations in school.
In this article, we’re discussing p and q reversals. Writing letters backwards can mean a letter p is mistaken for letter q, and in functional reading and writing, letter reversals can mean errors and lower confidence in kids. Let’s take a look at some strategies occupational therapy professionals use to work on letter p and q confusion.
Letter P and Q Reversals
I’m going to start by saying there really is no magical cure for children who reverse or invert their letters. I wish there were as that would ease a lot of the frustration a child must endure and alleviate the extra effort a child must exert to get to the end game of reading and writing letters and numbers accurately.
However, there are a few tips and tricks that might help a child as they go through the learning process whether you are addressing this issue in the classroom, in therapy sessions, or during at-home learning.
We’ve talked about Results with Multi-Sensory Strategies for B and D Reversals, let’s now talk about other frequent letter reversals that are common for children – letters ‘p’ and ‘q’. These letters look just as similar to one another like ‘b’ and ‘d’, which really makes it confusing for kids.
Mind your P’s and Q’s
Take a look at this image that gives a nice visual perspective of what b, d, p, and q might look like to a kiddo as a chair is still a chair. Working through this confusion can be tricky, but there are a few good tips and strategies that might help lessen the frustration and thus build a simple learning avenue as children work through and master the formation of these two letters.
Understanding Left and Right Directionality
First of all, we must begin by ensuring the child understands left and right directionality on their own bodies and has progressed to analyzing objects, symbols, letters and numbers. You should also check to see if they can identify the left and right sides of the paper as a precursor to emphasizing letter directionality.
Teach Letters in groups
Next, teach letters in identified groups so as to make the teaching of the letter forms easier and more simplistic thus making it less difficult for a child to reverse or invert letters. Letter order and multi-sensory teaching of letter formations is focused on in the Learning without Tears™ curriculum and First Strokes™ curriculum, both of which were developed by an occupational therapist.
In the Learning without Tears curriculum, the letter ‘p’ is a diver letter and the letter ‘q’ is a “magic c” letter therefore they are taught at different times.
hand dominance and letter reversal
Next, look at the child’s hand dominance patterning. Hand dominance can play a part in letter reversals in written expression.
Do they have a solid left- or right-hand dominance? If not, here are a few hand dominance activities that might help.
Do they demonstrate a cross or mixed dominance? If so, this could serve as an issue when learning letter formation strokes. Check to see if this is the case with the children you see.
Cues for P & Q reversal
Lastly, look at how you are verbally and physically guiding that child to form letters based on their hand dominance. If you are right-handed and they are left-handed, you need to be keen to knowing how to describe the letter formation patterns that are relevant to their hand dominance.
Why? If a child is left-handed and forming the letter ‘p’, they will stroke downward from top to bottom (if they were taught correctly), frog jump to the top, and then push their pencil outward to the right followed by curving around and pulling back inward to the downward stroke.
If a child is right-handed and forming the same letter, they will stroke downward from top to bottom, frog jump to the top, and then push their pencil outward to the right and then curve around pushing their pencil inward to the downward stroke.
How to Fix P and Q Reversals
Now three quick reminders for teaching remediation:
Address only one letter at a time and ensure the child has a full understanding of that letter before moving to the next letter.
When using visual aids, consider the hand dominance of a child whether it be in actual hands-on learning or how you are verbally describing the formation. Also, consider this when you explain how to identify and recognize the letters.
Be understanding to the way a child might need to form a letter to recall the correct formation patterning as some left-handed children must form the letters more segmentally to keep on track, but they can still keep the same pace as their right-handed peers.
Multisensory Activities for P and Q reversals
Here is a list of fun tips for teaching the difference between targeted letters of ‘p’ and ‘q’ that might help some of the kiddos you know. If one tip or strategy doesn’t work, that’s o.k., try another. Multi-sensory strategies can always aid a child in learning letter and number formations and will further encourage the use of visual memory and kinesthetic or muscle memory.
Create glitter glue or pipe cleaner stick ‘p’ and ‘q’ letters on index cards to finger trace with eyes open and then upgrade to doing so with eyes closed.
Create ‘p’ and ‘q’ rubbing plates with the use of dried bottle glue letters on index cards.
Create large ‘p’ and ‘q’ letters on the floor using painter’s or masking tape and have the child walk or pull themselves on a scooter board to go over the lines. Bump up this skill to include walking or driving on the lines with their eyes closed thus working on kinesthetic memory.
Create sandpaper ‘p’ and ‘q’ letters on index cards to finger trace.
Have child draw the letters in the air with whole arm movements and a pointer finger while verbalizing the stroke patterning otherwise known as air writing. Do this with eyes open and closed. Shift to doing so with elbow resting on table-top and using their wrist and pointer finger to form the letters in the air.
Have child form letters on foam sheets in a repetitive fashion to further build motor memory.
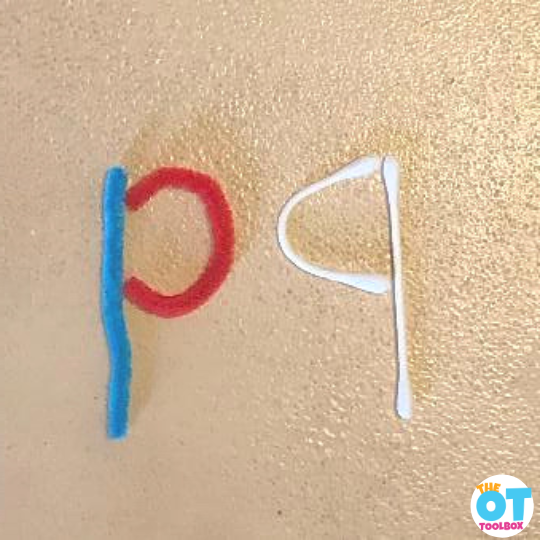
Have child form the letter ‘p’ with pipe cleaner pieces and the letter ‘q’ with q-tips as the name of these materials begin with ‘p’ and ‘q’.
Place letter models underneath screen or plastic canvas material for the child to trace over with their finger. Upgrade to have the child form letters on these materials with their eyes closed.
Use letter play dough mats to form the letters and then use a golf tee or small pieces of straw to make dots (holes) on the letter lines to correctly form the letters.
With the lights dimmed or turned off, have the child either trace over a large ‘p’ or ‘q’ wall letter using a flashlight or a laser light. An alternative would be to have the child roll a ball on the tape letter using correct formation. Try the use of a weighted ball to provide more muscle input while forming the letters.
Write the letters ‘p’ and ‘q’ on 8 ½” x 11” paper, then have the child use ink stamps to stamp trace over the lines.
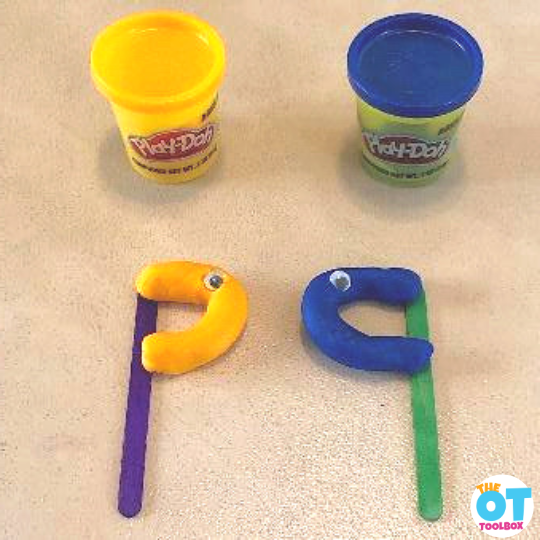
Make the letters using craft sticks and play dough curved lines to create the letters using different colors to represent to the different letter lines.
Form letters in a sand tray, shaving cream tray, sprinkles tray, finger paint tray, or rice tray.
Draw letters on the back of the child’s hand while their eyes are closed or on their backs and have the child guess the letter that was formed.
With straight lines drawn on paper, have the child place a circular dot sticker on the side of the line that represents the letter you call out such as b, d, p, or q. An alternative would be to have the child draw the curve on the side of the line for the letter being called out.
Play tic-tac-toe with the ‘p’ or ‘q’ letter that they are working on learning.
Create small straight lines on paper using pretzel sticks and have the child place a circular food item such as M & M’s, Skittles, Froot Loops, or Cheerios to create the letter they are working on or that you call out. To check their own work, they compare a correctly formed letter model and compare to the ones that they created. If they are right, they get to eat the food items they placed to form the letter accurately.
Visual Cues for Fixing P and Q Reversals
Visual strategies can assist a child with the learning process if using visual means is an avenue that provides a good outcome for the child. Some children learn best with this system, while others use it more as a supplement to support their learning.
In this list you will find a variety of ideas using the visual system and have access to a few free visuals that might trigger the ‘just right’ clue a child needs to identify and form the letter they need. They are created with the adult and the child in mind as they include wall posters and quick reference cards that are small enough to post on a desk-top or in a notebook.
These activities could be separated into letter p activities and Letter q activities as well. Use them in isolation when working on individual letter formation.
Thumbs-down images to self as a ‘p’ and ‘q’ visual depiction.
Palms to self with fingers pointing down and thumbs pointing outward with the space between the thumb and the fingers serving as ‘p’ and ‘q’ representation.
Form circles with the fingers (such as looking through binoculars) with forearms pointing down and inward toward torso providing a visual representation of ‘p’ and ‘q’.
Create a mask that looks like eyeglasses which is made using paper letters of ‘p’ and ‘q’.
A bed image with the letters ‘p’ and ‘q’ being the bed frame in two ways: 1) being legs of the bed and 2) use of the words ‘peace’ and ‘quiet’ because the story goes, “With sleep comes peace and quiet”.
Picture of a prince and queen facing each other with emphasis placed on the heads being the curved lines and the bodies serving as the straight lines and then the train of the queen’s dress could further represent a tail on the letter ‘q’, if desired.
Simple visual and verbalization that ‘p’ sees or looks at ‘q’.
Use different colors to form the letters such as a green straight line and a red curved line for ‘p’ and then different colors for ‘q’ such as a blue straight line and a yellow curved line. The different colors can be more easily recalled by some child rather than using the same colors for each letter. On the other hand, some children can do well with the same colors being used. It may take some exploration on your behalf as the instructor.
As you review and explore all of the multi-sensory strategies and visual supports in this post to give a child what they may need to master ‘p’ and ‘q’ letter formation, take the time to also consider the basic elements that might be impacting letter reversals as these are important foundational factors to fully understand and consider.
Regina Parsons-Allen is a school-based certified occupational therapy assistant. She has a pediatrics practice area of emphasis from the NBCOT. She graduated from the OTA program at Caldwell Community College and Technical Institute in Hudson, North Carolina with an A.A.S degree in occupational therapy assistant. She has been practicing occupational therapy in the same school district for 20 years. She loves her children, husband, OT, working with children and teaching Sunday school. She is passionate about engaging, empowering, and enabling children to reach their maximum potential in ALL of their occupations as well assuring them that God loves them!
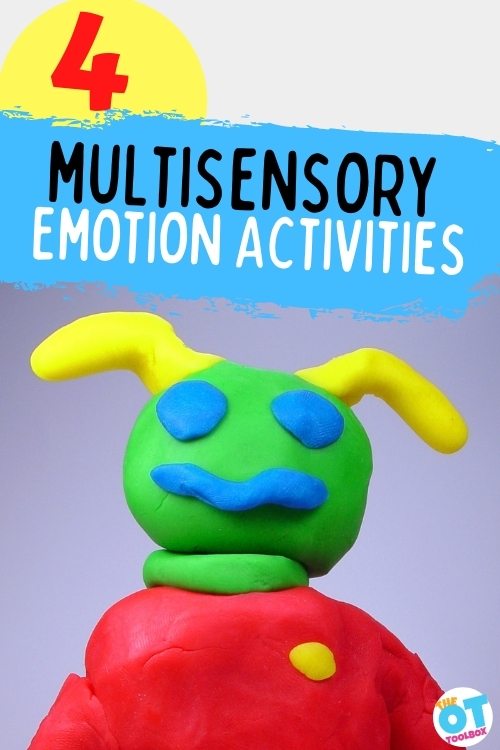
In this blog post, you’ll discover 4 Multisensory Emotion Activities for Preschoolers that utilize multisensory learning and exploration to promote emotional intelligence for kids in the preschool age. Let’s take a look at these social emotional activities for children ages 3-5. In this blog post, you’ll learn how to teach children about emotions through hands-on learning activities, designed to help children remember how to process their feelings even in times of stress. Simple activities like emotions playdough mats can support skill building in playful and fun ways.
Multisensory Learning: Emotion Activities
When children are overwhelmed, they don’t listen to reason. Learning new skills through play, using multi sensory forms, help children recall these skills at a moments notice.
What happens when you sit your child down to teach them a new skill? Do they remember what they learned 5 minutes later? Do they seem interested in listening to you talk to them or would they be more engaged in their learning if they actively solved a problem with you.
If we use at least two of the following 4 components to teach new emotion skills, children (even adults) will remember better.
Touch/Tactile
Sight/Visual
Sound/Auditory
Movement
Why do children learn how to manage their emotions better when they learn a new skill in multiple ways?
Multisensory Learning
Multisensory learning engages all the different parts of our brain and our body! An amazing article discusses Multisensory Learning is an Effective Strategy for Teaching Students How To Read.
As they dive deeper into the topic of reading, they describe the neuroscience behind multisensory learning as: “the human brain has evolved to learn and grow in a multisensory environment.
According to the whole brain learning theory, all brain functions are interconnected for this reason. We remember how to do things best when the directions we’re given engage multiple senses.
The definition of multisensory learning, then, is using the neuroscience behind how we learn to teach lessons that engage two or more senses.
Most educators add audio or visual multimedia into their assignments, but multisensory learning can also include tactile, smell, and taste-related materials. As long as the activity engages multiple areas of the brain, it can help students develop stronger memories around how to do it.”
The definition of multisensory learning is using the neuroscience behind how we learn to teach lessons that engage two or more senses.
Multisensory Learning for Emotions
As we teach children how to respond to their feelings and the feelings of others, we can use tactile, visual, movement and auditory cues to make these activities more meaningful and memorable.
Let’s take a look at some ways that using the senses as a tool supports development in these multisensory learning emotion activities based on sensory systems.
Tactile Experiences and Emotion Activities
When you hear the word “pumpkin goop” how do you feel? Do you instantly cringe? Do you think about the pumpkin seeds inside a pumpkin and feel hungry?
Touching something directly affects the touch receptors on our skin. This signal moves through our body to the thalamus, which relays information to our brain! This powerful sense helps our brain understand what we are doing and associates an emotion that goes along with that activity (such as “eww,” or “this is hot!”)
When we have a positive experience learning a new skill through touch, our brain remembers that feeling and makes it easier to recall the experience. If we use tactile activities within our teaching approach, children will be able to remember what they did and why, making recalling new skills easier.
Children engage longer with tactile experiences.
Visual Processing and Emotion Activities
When children are toddlers, they need lots of hand gestures to know what to do when given a direction. Seeing an action helps them understand. When children are learning how to name objects, showing them pictures of objects (or showing them the object) allows them to associate the name of the object. This is true for all learning activities. Looking at visuals that explain a new concept, such as emotion faces or letters in a book, help children remember.
Per this article, 65 percent of the population are visual learners. Hearing a direction or sound goes into our short term memory, while seeing something goes into our long term memory. Per this report,
“One of the easiest ways to ensure that learners store information in their long-term memory is to pair concepts with meaningful images. Visuals help students make sense out of the content and direct attention, increasing the possibilities that the learners will remember the material.”
Visuals help with faster recall.
Auditory System and Emotion Activities
Listening to music during activities keep us calm and alert. Sounds of nature, environmental sounds and communicative words help our brain remember specific things. Do you remember what song you danced to at your wedding? Or the top 10 hits of 1985? I bet if you hear just one word, phrase or instrumental bridge from any of those songs, you will be singing at the top of your lungs in minutes!
When children learn new skills, paired with a song, such as “Old MacDonald,” “Twinkle Twinkle Little Star” or “BINGO” they remember the sounds of animals, how to spell BINGO (even if they don’t know how to spell their own name yet) and that the stars are up in the sky! Pairing new skills with sayings or songs help us recall the lesson quickly. Are there any emotion songs that you know?
Auditory supports help children remember easier.
Kinesthetic System and Emotion Activities
According to this link, in an article by Marwa Abdelbary, physical therapist, children are able to remember more when movement is embedded in their day.
She reports that “studies show that children who are more active exhibit better focus, faster cognitive processing, and more successful memory retention than kids who spend the day sitting still. Keeping the body active promotes mental clarity by increasing blood flow to the brain, making activity vital to both learning and physical and neurological health.”
Learning while moving engages muscle memory and new areas of the brain.
Multisensory Learning for Emotional Awareness
When you teach a child a new skill using all of the components, they will remember the best!
This “Playful Alphabet Curriculum” is a great example on how to teach the name and sound every letter using visuals, tactile, movement and recall games.
It starts with reading an interactive ABC book, then introducing each letter with five different activities: sensory, art, movement and literacy. Each of these activities use a different part of the brain to learn the letter name and sound.
Teaching children emotion words and how to process their feelings is a very important skill. Let’s teach them using every sense so they can remember quicker.
We previously covered specific strategies to teach teach emotional vocabulary to preschoolers. Be sure to use those emotions words strategies.
4 Emotion Activities using multiple senses
These multisensory learning emotion activities use multiple senses to teach preschoolers and engage them in multisensory learning through play and hands-on activities.
Multisensory Emotion Activity #1: Calm down and remember how to problem solve with “Soothing Sammy”
“Soothing Sammy” creates a positive spin on calming down and talking about feelings. This three step program uses tactile, visual, auditory and movement components to teach preschoolers all about their emotions! First, read through the “Soothing Sammy” story, then practice all the different ways to calm down (sipping water, squeezing a ball, jumping, and more!) After, allow your child to build Sammy’s house out of an empty box, and place sensory calm down items in.
Encourage them to visit Sammy’s house and read his book when they become overwhelmed. Play the Sammy music, create the Sammy mask and complete the calming down activities (like the lavender bubble mix) to help children remember how to calm down when they feel overwhelmed.
Multisensory Emotion Activity #2: Use a fun theme!
This Frog Themed Slide Deck offers a fun frog theme way to work on identifying facial expressions and practicing visual memory skills.
Movement and auditory components can be added to any game, including this amazing frog themed slide deck. After having your kids match the emotions to the pictures, recreate the scene by asking your kids to jump like a frog! Add some music to initiate a freeze dance! When you pause the music, have the child jump like a frog and make an emotion face! What face are they making!
Multisensory Emotion Activity #3: Get clear on facial expressions and emotion names.
This freebie is a great way to prompt preschoolers to think about their emotions. Although they will be too young to write, let’s bring in a visual instead, a mirror! Ask your child what makes them sad, then make a sad face in the mirror. If available, take a picture of your child making the face, print it out, and allow your child to make their own facial expression book.
Multisensory Emotion Activity #4: Move with heavy work.
Heavy work activates the proprioceptive system and adds kinesthetic value to learning. Using play dough as a heavy work activity helps learning “stick” and makes activities fun and engaging.
These adorable bugs are experiencing lots of different feelings! Have your child make the same face the bug is, then imitate how the bug moves. Does it slither along the ground? Does it crawl or does it fly by flapping its wings. Next, using playdough and a hard surface, have your child make the bug and create its emotion face with a toothpick!
A final note on multisensory learning and emotions…
These multisensory learning emotion activities are designed to help preschoolers develop social emotional skills in fun ways!
Learning new skills through multi sensory activities help children recall their lessons faster. Through visual, tactile, movement and auditory enhancements, any activity can be effective. Teaching new skills through play, using more than two sensory components will help children remember how to respond to their feelings quickly and appropriately in a variety of situations.
Generalizing this skill through multisensory learning experiences will help preschoolers at home, at school and out in the community.
How can you incorporate these multisensory learning emotion activities into your home or classroom?
Jeana Kinne is a veteran preschool teacher and director. She has over 20 years of experience in the Early Childhood Education field. Her Bachelors Degree is in Child Development and her Masters Degree is in Early Childhood Education. She has spent over 10 years as a coach, working with Parents and Preschool Teachers, and another 10 years working with infants and toddlers with special needs. She is also the author of the “Sammy the Golden Dog” series, teaching children important skills through play.
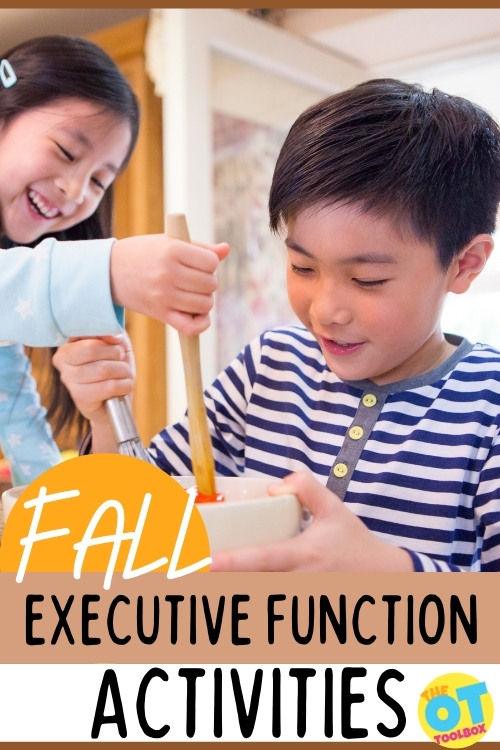
In this blog post, you’ll find executive functioning activities for Fall. This time of year is a great time to support executive functioning development. We’ve shared a lot of executive functioning tips and tricks here on the website, so why not use all of the wonder of Fall and work on skills like impulse control, attention, problem solving, task initiation, and more?
Fall is such a great time of the year! If you live in a climate like mine, from apple picking to visiting a pumpkin patch to going on a day trip to see the beautiful leaves, it’s a great time of the year to get outdoors! Fall is also a great time of year to work on executive functioning skills.
Fall Executive Functioning Activities
Fall can be an exceptionally busy time of the year. Between kids and teens settling into their school routines to fall sports, there is a lot going on. However, there are also many opportunities to work on executive functioning skills during these fun moments! Enjoy these fun, family-friendly opportunities to enjoy the fall weather!
Apple Picking Executive Function Activity
Apple picking is a fantastic family activity. Does your local orchard have a map? Have your child or teen read the map and direct the family where to go in order to get to the apples you want to pick. But how does picking apples help with skills like time management, impulse control, problem solving, etc.?
This helps develop their ability to develop a plan and execute their plan, as well as manage emotional demands, especially if younger family members become frustrated!
It can take great problem solving to find an apple that is not over-ripe, or under-ripe, that is in reach, and will fit into the bag or basket. How can you break own the task of navigating a busy row to find a tree to pick from? Then, how can you determine which tree to select? Then, can you fill your bag with apples before becoming distracted or giving up? All of these mini-decisions and repetitions in cognitive skills are practice for other tasks requiring executive functioning!
When you get home, decide on an apple recipe to make as a family! Divide roles among family members based on skill set. Have someone gather the materials (planning and organizing, working memory), read the instructions (initiation, inhibition, working memory), measure (monitoring), and so on!
Cooking is an engaging executive functioning task that supports development in many areas. To support and promote development of EF skills, try these tips:
Write down steps and cross them off as each one is completed
Talk it out as a group (including problem solving, what’s next, what I’m doing right now, etc.)
Clean up as you complete each step
Support Executive Functioning Skills at the Pumpkin Patch
A visit to a local pumpkin patch is bound to be a great day. Have your child or teen make predictions on how much specific pumpkins weigh, plan out the activities you will do (since many pumpkin patches have additional activities), and navigate the narrow rows with those cumbersome wagons! This is certainly an activity that will work up an appetite—check out these pumpkin cupcakes!
After your trip, plan out how each family member will decorate their jack-o-lantern. Whether with paint or carving, this is a favorite activity for many children that involves skills like planning, inhibition, and initiation.
Use these tips to support executive functioning skills when pumpkin carving:
Draw a picture of your jack-o-lantern before beginning
Make a list of the supplies needed
Cross off each supply as they are used
Use kid-friendly pumpkin carving tools
Use gloves if tactile sensory input is an issue
Talk it out: talk through problems as you go
Use a task tracker to complete each step of the process
Discuss possible problems that may arise while carving
Break the steps down
Take breaks between each step
Executive Functioning Activities at the Corn Maze
Another popular fall activity is a trip to a local corn maze. This can be modified based on the corn maze’s difficulty level, as well as whether the location offers a map.
You could work on things like emotional regulation (because the maze is bound to be frustrating!), planning, time management, initiation, inhibition, and so on! For younger children who might not be quite ready for a corn maze, purchase some corn and create a cool stamp art project!
Some tips to support EF challenges at the maze:
Be sure the maze is age-appropriate
Lay out ground rules
Go with a partner
Use a map if available
Use a marker to draw where you’ve gone on the map
Be ready with coping strategies for emotional needs
A final note on Fall Executive Functioning Activities
These activities show how fun and engaging it can be to work on executive functioning skills! Many of these activities also show how activities can be upgraded and downgraded based on a child’s abilities and needs.
Studies show that executive functioning skills can be a key predictor of a child’s success, especially at the middle school level. While fall is full of opportunities for fun, perhaps integrating some of these activities will encourage your child to develop their executive functioning skills so that they can be successful in all areas of their life!
The Impulse Control Journal…a printable resource for helping kids strategize executive functioning skill development. When saying “calm down” just isn’t enough…
When a child is easily “triggered” and seems to melt down at any sign of loud noises or excitement…
When you need help or a starting point to teach kids self-regulation strategies…
When you are struggling to motivate or redirect a child without causing a meltdown…
When you’re struggling to help kids explore their emotions, develop self-regulation and coping skills, manage and reflect on their emotions, identify their emotions, and more as they grow…
Grab the Impulse Control Journal to build organizational strategies, planning, prioritization, habits, and mindset in kids.
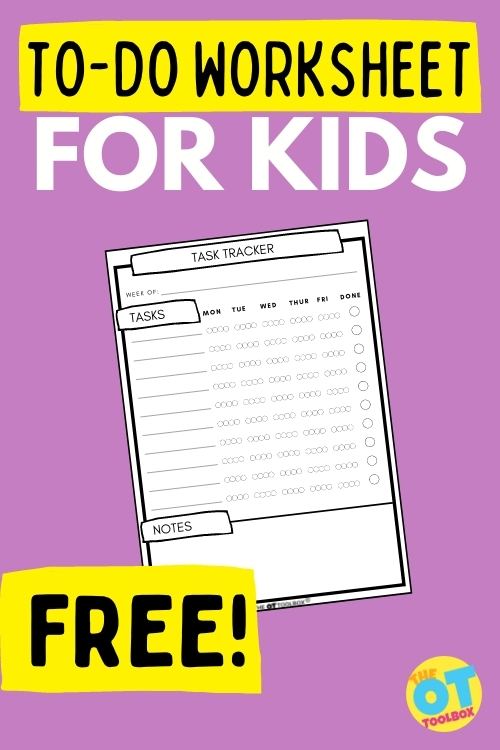
In this blog post you’ll discover Strategies to Help Combat Executive Function Disorder including a task completion worksheet, designed as a to-do list for kids. This task tracker worksheet allows kids to keep track of their daily tasks, through development of executive functioning skills like task initiation and task completion.
To-Do Lists for Kids and Executive Function
First, let’s cover executive functioning. Does it have to do with how high powered executives function? Not, really, but there may be some meaning behind their title, “executive.”
According to the reviewers at Psychology Today, executive function is a mental process to help people, plan and execute their goals. They include attention, working memory, problem solving, task initiation and impulse control.
Development of Executive Functioning skills
About development of executive functioning skills: These functions are believed to be housed in the prefrontal cortex. Because it is right at the front, we know it has to be important, right? Correct. These are the important life skills that one needs to succeed in life. These skills start in infancy but do not fully develop until the 20’s or 30’s! This is the reason your college student is so scattered, impulsive, and needy.
My own observations lead me to believe the prefrontal cortex is becoming developed later and later in a person’s life. Thirty years ago, these processes were well developed by 18. Now “children” well into their twenties are relying on their parents and teachers for advice, or using maladaptive coping strategies for assistance.
How does this relate to the high powered executive?
In order to become and thrive as an executive, often at the top of their field, people need to have excellent task management skills, emotional regulation, organization, leadership, and the ability to multitask. Interestingly enough, these are all of the buzzwords included in job descriptions and resumes, because they are the measure of success in a job.
Children and adults who struggle with these executive function skills are likely to have difficulty managing their time, starting and finishing tasks, following mult-step directions, and staying organized. The coworker with the messiest office, who is always losing things, is often struggling with executive function.
Does this mean people with executive function disorder (EFD) are less intelligent than their counterparts?
Not necessarily. While high executive function skills can often be paired with a higher IQ, people with a lower EF learn to cope with their inability to perform these tasks. They use strategies to compensate, and often succeed.
This sounds a lot like Attention Deficit Disorder (ADD)! It does. Often those diagnosed with ADD have executive function disorder as part of their set of symptoms. They also exhibit additional symptoms such as impulsive behavior, difficulty with emotional regulation, inability to maintain attention even in an optimal environment or with a preferred task.
For more information on executive functions and the disorders associated with them, this article in psychology today is informative and thorough in describing EF skills and related challenges.
How to support Task Completion
Now that I have identified that half of my caseload has executive function disorder, what strategies can I use to combat this and help develop these skills?
Once you identify which of the executive functions are not well developed, each can be worked on individually, or a program of strategies to assist your student with overall executive function is useful.
The OT Toolbox has some great free printables to assist with strategies for executive function disorder.
Kids To-Do List
Below, you can access our free Task Completion Checklist. This to-do list for kids breaks down tasks into a list with check boxes. Kids, and the support system they are utilizing (teachers, parents, therapists, caregivers, etc.) can identify and itemize the tasks that the student needs to achieve on a daily or weekly basis.
The kids to-do list is broken down into a list so that the user can see each step. The printable daily task list is open-ended so that steps can be listed out on each line, or multiple steps can be indicated in a single task.
For example, when a student needs to gather their backpack to go to school in the morning, there are several steps to that daily chore. The individual steps can be indicated on the to-do list.
Use the to-do list in a few different ways
Add daily tasks
Break down complex tasks like getting ready to leave the house in the morning
Add tasks that include several steps
Include tasks that need to be done several times/day such as turn off the lights when you leave a room
These can be used as stand alone activities, or part of your student’s strategy notebook. In this notebook several activities and strategies can be collected and placed in plastic sleeves for easy access and reference.
This printable to-do list can be used with older individuals as well, from teens on through adults.
If your prefrontal cortex is developed, or you have good executive function, you probably already use strategies to stay on top of your game. I can think of ten strategies I use to make sure I don’t forget anything.
Lists on my phone
Calendars
Reminder messages on my phone
Written schedule
Routines
Alarms
Sticky notes
Asking other people to be accountable to remember their own appointments
Putting things away in the same place each time
Staying organized and clean
Even though my executive function skills are well developed, stressful situations can destroy even the best skills. Therefore I have many strategies in place so I do not forget important events, where I put things, which students I am seeing, what is on the grocery list, and so forth.
This comes naturally to me as I am an organized person. For others, this will be challenging, and needs to be taught. Start to develop these strategies and coping mechanisms while your students are young.
There are other resources available on the OT Toolbox, such as the impulse control journal by Colleen Beck. Details about The Impulse Control Journal:
“This 80 page impulse control journal for kids to keep track of their day
30 Drawing Journal Pages to reflect and pinpoint individual strategies
28 Journal Lists so kids can write quick checklists regarding strengths, qualities, supports, areas of need, and insights
8 Journaling worksheets to pinpoint coping skills, feelings, emotions, and strategies that work for the individual
Daily and Weekly tracking sheets for keeping track of tasks and goals
Mindset,Vision, and Habit pages for helping kids make an impact
Self-evaluation sheets to self-reflect and identify when inhibition is hard and what choices look like
Daily tracker pages so your child can keep track of their day
Task lists to monitor chores and daily tasks so it gets done everyday
Journal pages to help improve new habits
Charts and guides for monitoring impulse control so your child can improve their self-confidence
Strategy journal pages to help kids use self-reflection and self-regulation so they can succeed at home and in the classroom
Goal sheets for setting goals and working to meet those goals while improving persistence
Tools for improving mindset to help kids create a set of coping strategies that work for their needs
Do not despair! Most children grow up to be functioning adults. They leave the nest (or basement) eventually, and find their way. We can however do our part in teaching these strategies early and consistently, so they fly out of the nest instead of falling head first.
Free To Do List for Kids
Want a copy of this task completion worksheet? Print off this to-do list for kids and support development of executive functioning skills, for any age!
Victoria Wood, OTR/L is a contributor to The OT Toolbox and has been providing Occupational Therapy treatment in pediatrics for more than 25 years. She has practiced in hospital settings (inpatient, outpatient, NICU, PICU), school systems, and outpatient clinics in several states. She has treated hundreds of children with various sensory processing dysfunction in the areas of behavior, gross/fine motor skills, social skills and self-care. Ms. Wood has also been a featured speaker at seminars, webinars, and school staff development training. She is the author of Seeing your Home and Community with Sensory Eyes.
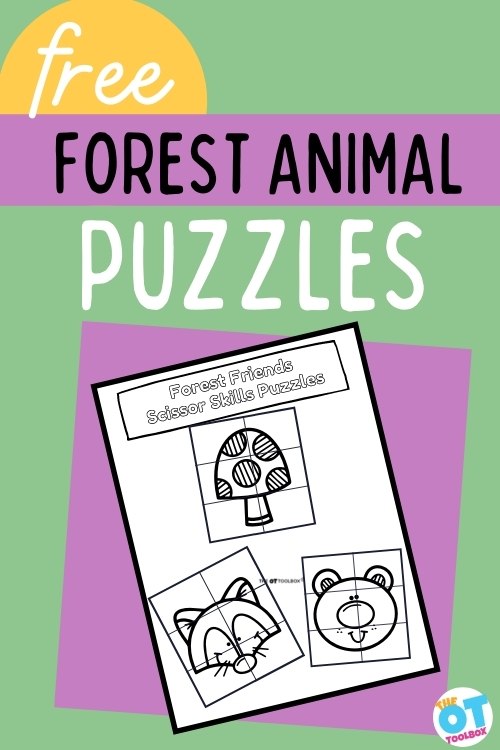
In this blog post, you can grab a fee set of forest animals worksheets for building skills in several fine motor and visual motor areas. Develop cutting, coloring, and visual perceptual skills all in one task! The forest animal activities include bear, fox, and even a forest mushroom to work on scissor skills, coloring, and visual perception.
Forest Animals Worksheets for Therapy
Children have the attention span roughly equal to their age x 3-4 minutes. According to this site, a five year old can hold his/her attention for about 15 minutes before wanting to change tasks.
As a practicing therapist, working with non-typical students, I find this is a stretch. In my experience, children can attend for about ONE minute for every year they age. This being said, finding activities that build multiple skills at once, such as cutting and coloring in one task is key.
The free download below, is just such an activity. When kids complete the forest animals coloring and cutting pages, they develop many skill areas:
Hand strength (coloring and cutting)
Scissor skills
Bilateral coordination
Pencil control
Line awareness
Spatial awareness
Visual perceptual skills
Attention
Visual memory
With electronics taking over classrooms, it is especially important to take time to work on building foundation skills such as cutting, coloring, pasting, and visual perception using hands-on activities such as these Scissor Skills Puzzles.
Too many young children do not have the right fine motor skill development, creating maladaptive pencil grasp, poor handwriting, or inability to manipulate fasteners.
It is often difficult to motivate children to work on cutting and coloring. Because it is a challenging task with many opportunities for failure, it is often avoided by children. Math, while presenting many challenges itself, is predictable and steady, thus a more preferred task for those who struggle with visual motor development.
Free Forest Animals Worksheets
The Forest Friends Scissor Skills Puzzles are great worksheets to build fine motor skills such as cutting and coloring, while also developing visual perceptual skills.
You will find ways to make tasks such as Forest Friends Scissor Skills Puzzles engaging, interesting, and motivating to each individual learner. A few colored markers, some glitter, and a theme your child enjoys, can make the difference between a positive and negative task.
These worksheets can be adapted and modified to meet the needs of several types of learners. Consider these ideas to grade this activity:
Change the Scissors to address various skill areas:
● Change the scissor size or tool: small toddler scissors are just right for tiny hands.
● Self opening or loop scissors are another way to make cutting easier for those learning to cut, or lacking the intrinsic hand muscles to open and close scissors.
● Did you know left handed people cut in a clockwise direction while their right handed friends cut counter-clockwise? This allows the helper hand to support the paper adequately while cutting.
● See this article on developing scissor skills for more ways to develop cutting skills using this free download.
Change the Paper to address various skill areas:
● lightweight paper is much more difficult to stabilize than heavy weight construction or cardstock paper.
● Colored paper may be easier or more difficult for children to work with because of color contrasts.
● The page can be laminated first, using wipe off markers to color in the design. This is a great way to make this page reusable. Cutting the pieces before coloring it may be necessary. Although this takes away the cutting task, it may be a great adaptation for children who are not able to cut yet.
Use various Writing utensils with these forest animal worksheets:
● There are endless possibilities for coloring. Markers, crayons, colored pencils, paints, watercolor, chalk, or dry erase pens all provide different input, and require different levels of fine motor skill to manipulate.
● Small one inch crayons are excellent for developing those tiny hand muscles.
● Chalk, with its grainy texture, provides sensory feedback and can be a positive (or negative) experience
● Markers glide easily, requiring less precision and grip strength ● Change writing utensils to appeal to different students and improve their level of motivation.
Use the Forest animal worksheets to address Visual perception:
● Puzzles are a great way to work on visual perception.
● Figure ground, parts to whole, and visual closure are important to academic development.
● Many adults are unable to complete puzzles or find missing objects because they can not perceive parts to a whole. They only see the forest, not the individual trees.
With children’s limited attention span, and increasing demands on therapy time, an all in one activity that develops cutting, coloring and visual perceptual skills at the same time is an efficient and fun way to build the fine motor foundation.
Download the free forest animals worksheets
To use these forest animal color and cut puzzles, enter your email address into the form below. Start working on fine motor and visual perceptual skills in man different ways!
Victoria Wood, OTR/L is a contributor to The OT Toolbox and has been providing Occupational Therapy treatment in pediatrics for more than 25 years. She has practiced in hospital settings (inpatient, outpatient, NICU, PICU), school systems, and outpatient clinics in several states. She has treated hundreds of children with various sensory processing dysfunction in the areas of behavior, gross/fine motor skills, social skills and self-care. Ms. Wood has also been a featured speaker at seminars, webinars, and school staff development training. She is the author of Seeing your Home and Community with Sensory Eyes.
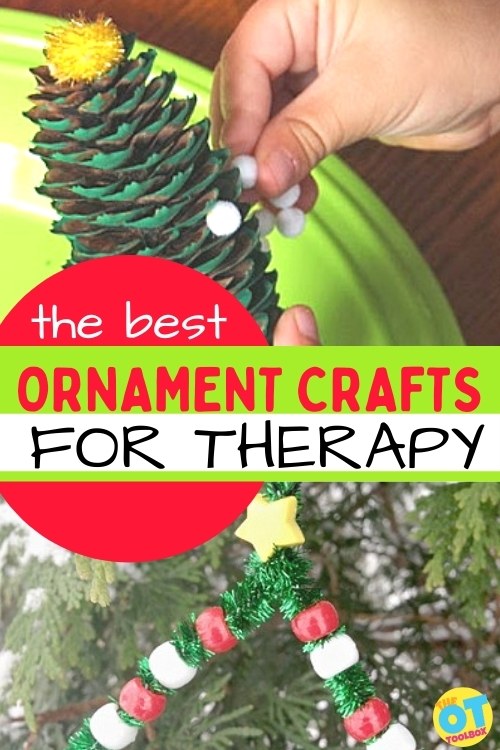
If you are looking for the perfect Christmas ornaments for kids to make, then you are in the right place! Crafting ornaments with kids is a holiday tradition, but when you use these inspiring ornament ideas, kids will also develop skills in a big way. Incorporate these ornament activities into your therapy.
‘Tis the season for ornament creation! That’s right, the Christmas tree is either up or on its way and with that comes the family decorating event. Who doesn’t like adorning their family tree with your children’s wonderful ornament creations! Occupational therapy practitioners absolutely LOVE a good Christmas ornament that is chocked-full of therapeutic benefits!
Ornament Ideas that Build Fine Motor Skills
An ornament creation that addresses important skills like finger and hand strength, manipulation, finger isolation, force control, bilateral coordination, planning and sequencing, grasp, body awareness, tactile tolerance, and well, social engagement is the right therapeutic activity for the season.
In this post, these fun and creative ornament activities will engage any child and help therapists to address important skills while also utilizing simple materials that can be found either at home, lying around the therapy room, or in the classroom.
If you simply cannot find the materials, most can be found in nature, at a dollar or craft store, in a recycle bin, or simply by asking a friend or neighbor! Most activities just need a few materials or supplies and will make great memories for years and years to come.
Below is a list of varied ornament creations, which utilize a variety of crafting materials. You’ll find ornament creations ranging from easy to more difficult making some easily completable by younger kids to those that involve more skill and more time for older kids. So read on and get festive this holiday season!
These are some of the best Christmas ornaments for kids to make because they build fine motor skills in a big way!
Bead Ornaments
Using beads promotes a precision grasp, in-hand manipulation, separation of the sides of the hand, a tripod grasp, and arch development. Use these bead ornament ideas as a new favorite thing on the Christmas tree!
Cardboard is a material that develops hand strength when tearing, ripping, folding, and cutting. Use cardboard to make ornaments that will look stunning on a holiday tree.
Craft sticks are a crafting material that can be found at the dollar store and builds motor skills in a big way: bilateral coordination, eye-hand coordination, and more. Stick them together to make a snowflake ornament or a triangle shaped reindeer face. Add a bit of hot glue to make those craft stick ornaments last for years and years!
Kids can make ornament crafts using paper and create a great gift that will delight grandparents or parents, and use simple materials. Plus, manipulating paper offers opportunities to tear, rip, fold, glue, and paint. All of these build sensory motor skills and hand strength in kids.
Pine cone ornaments are an easy ornament for kids to make. Paint them to make a tree or a snowman, or add craft pom pom or sequin as decorations, and this DIY ornament will bring a smile for years.
Pipe cleaners are a fun Christmas ornament for kids to make because they encourage use of bilateral coordination, motor planning, and precision in the hands. Bend them into Christmas trees, Santa, or a bell shape for an easy DIY ornament. Add buttons, beads, or bling for a sparkly fine motor activity that will look great on the tree.
Craft pom poms are found at the dollar store, making these ideas frugal and fun Christmas ornaments for kids to make. Add a bit of embroidery floss to create a pom pom banner or a dangling loop of pom poms!
Kids can make Christmas ornament crafts with ribbon to work on fine motor precision, coordination, and in-hand manipulation skills. Managing and placing a ribbon with glue or sequins adds so many fine motor experiences.
Mixing, stirring, kneading, and rolling salt dough is a great way to build hand strength while crafting during the holidays. Try these fun, sensory holiday crafts:
There is fine motor power in using tape! By peeling and sticking pieces of tape, children develop hand strength, separation of the sides of the hand, bilateral coordination, wrist stabilization, and much more.
Cutting and managing yarn, twine, and thread materials builds precision, dexterity, in-hand manipulation, eye-hand coordination, bilateral coordination, and many more fine motor skills. Try these string ornaments with kids:
Using materials such as acrylic paint, wood slices, clay, or even puzzle pieces make lovely Christmas crafts that develop big fine motor skills. These are great ornament crafts for school parties, classroom fun, the therapy caseload (when attention spans are running low this time of year!) or even with preschoolers!
Also, would you like some bonus activities that include the use of ornaments? I’ve included a fun list of activities that children can perform at home, during therapy, and even in the classroom. They work on a variety of skills that children either need to build or develop while engaging them with some festive motivational fun! Take a look:
Regina Parsons-Allen is a school-based certified occupational therapy assistant. She has a pediatrics practice area of emphasis from the NBCOT. She graduated from the OTA program at Caldwell Community College and Technical Institute in Hudson, North Carolina with an A.A.S degree in occupational therapy assistant. She has been practicing occupational therapy in the same school district for 20 years. She loves her children, husband, OT, working with children and teaching Sunday school. She is passionate about engaging, empowering, and enabling children to reach their maximum potential in ALL of their occupations as well assuring them that God loves them!
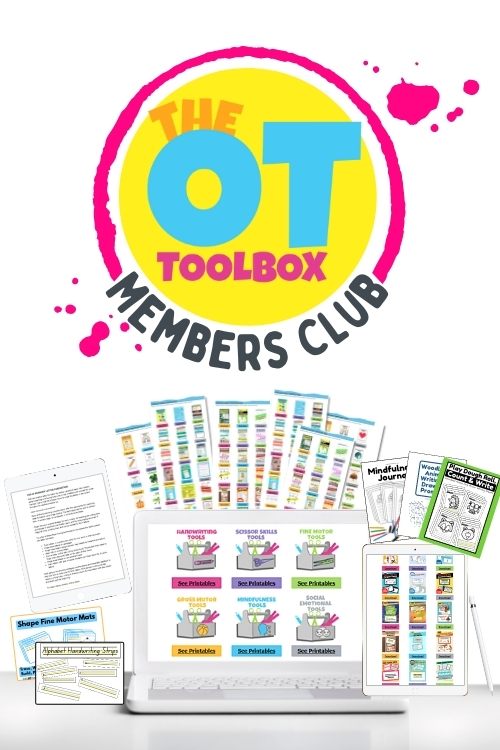
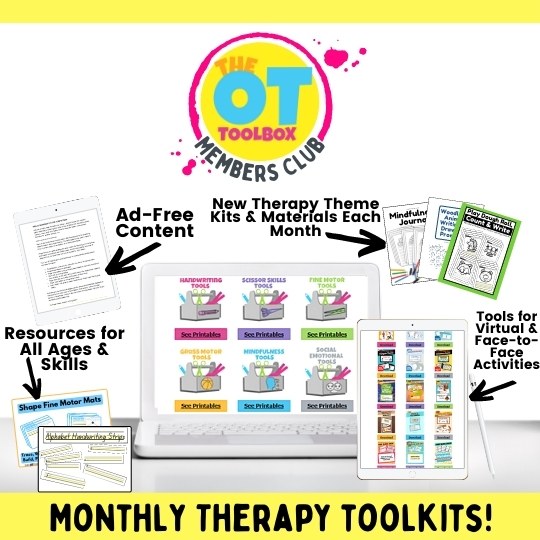
Many readers of The OT Toolbox have asked for a place to access all of our downloads in one place. They’ve requested a subscription to our most popular products. Readers have requested a way to access our blog posts without the distraction of ads. And now, that resource is here! Already, many occupational therapy professionals are now grabbing the variety of benefits inside the club. Although helping others is the most significant benefit, many other amazing privileges are derived when joining this long-awaited membership club. Let’s take a look at the new resource here on the website: the brand new occupational therapy toolbox membership!
Today, I wanted to share with you, as the creator of The OT Toolbox, more about one of my biggest goals for this website.
Since it’s creation, the mission of The OT Toolbox has been to help therapy professionals, parents, educators, (and anyone working with children) to help the kids they love and serve, to thrive and develop skills. My goal has always been to provide therapists, educators, and parents with the resources they need to help kids thrive…at a free or low cost while saving you time so you can help those children.
Occupational Therapy professionals go through years of schooling, and then fieldwork placements. However, once they are out in the field, that education and learning as a professional doesn’t end. OT professionals attend continuing education courses, attend professional affiliation meetings, and are constantly learning and developing as a professional. Many go on to gain additional certifications or degrees. And there are fabulous communities of OT professionals to be found on Facebook and other social media outlets.
These are face-to-face and virtual spaces where you can find resources, ask other OTs questions, and grow as a professional through a community environment. But many times, therapy professionals struggle to find the precise tools to serve their clients.
We spend hours outside of the job looking for activity ideas.
We purchase treatment materials with our own money.
We spend evenings and weekends surfing blogs to access downloads and find the information that we need.
My goal for this website has always been to provide therapists, educators, and parents with the resources they need to help kids thrive…at a free or low cost while saving you time so you can help those children.
And, The OT Toolbox has provided that resource. But now it’s even better.
New Therapy Resources Each Month
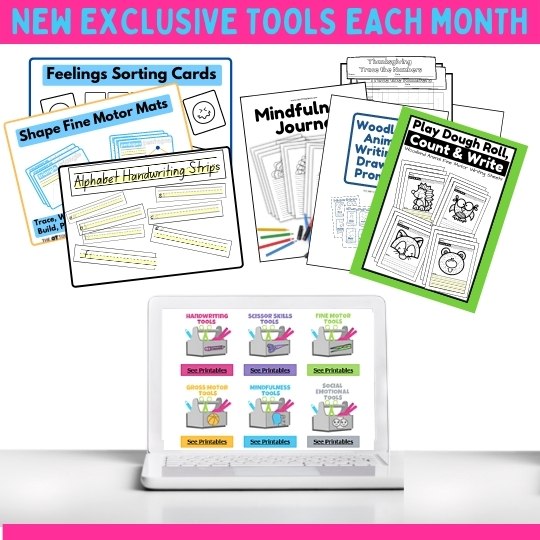
Therapy professionals, educators, parents, and anyone helping kids develop skills pay for materials and resources out of their own pocket. I wanted to over-deliver valuable tools that can be added to their “toolbox” without spending an arm and a leg each month. With the Member’s Club, members will get new materials each month. They can click right on a button and download what they need.
New resources cover all areas: handwriting, cursive writing, letter formation, pencil control, executive functioning skills, visual perceptual skills, fine motor skills, life skills, scissor skills, gross motor skills, self-regulation, social emotional skills, functional tasks like self-care, keyboarding, and more.
New resources are a benefit of both Level 1 membership and Level 2 (premium) membership.
Therapy Downloads all in one place
>>>I wanted to take all of the free downloads on the site and make it faster to access. Therapy professionals are looking for materials in their precious down time. That time after working long days should go to family time, self-care, and rest…so you CAN serve your clients at the level they need. I wanted to offer an option to get those materials like handouts, printable materials, worksheets, slide decks, and e-books right away. Without entering your email for each one, having to go to your inbox to get it, and then spending time surfing the site to find another complementary resource.
This is a benefit of both Level 1 membership and Level 2 (premium) membership.
Monthly Therapy Kits
>>>I wanted to take our most popular products, our Fine Motor Kits, and offer them on a subscription level…so you pay one price and get a year’s worth of materials and themes. So the kids that love these activities can complete fine motor, handwriting, cutting, executive function, self-regulation, social emotional TASKS again and again and not realize that the fun, themed activity they are doing is actually helping them grow and develop as an individual.
Monthly Therapy Kits are a benefit of our premium, Level 2 membership.
Exclusive Coupon Codes
>>>I wanted to offer VIP readers (the ones that love this site and keep coming back), our best discounts.
Both levels of membership receive a coupon code for 20% items in our shop. This coupon code can be used over and over again. (Exclusions apply: The code does not apply to Vendor Products, resources created by outside therapy businesses and hosted on The OT Toolbox shop.)
AD-Free Blog Content
>>>I wanted to take all of the information found on The OT Toolbox and make it easier to read. Easier to access. And easier to consume. I wanted to offer an ad-free environment for readers to access the information on this website.
Ads are a necessary part of the internet. It’s what keeps this site running so we can pay the hosting bills and email service providers. It’s what allows us to pay contributor writers, who offer their expertise and experiences in blog posts. Ads are what pay for the systems and technology so we can create and deliver free downloads. So they are a must for delivering great materials…but I wanted to make the content so easy to digest that you can implement it right away and help your kids’ thrive.
Ad-free content is a benefit of Level 2, premium membership.
And when I say a “club for occupational therapists”, I really mean ALL OTs: OTs, OTAs, OT students, and OT faculty.
But, in reality, this therapy club benefits the child. It has materials and resources for anyone that works with kids on accomplishing skills: professionals that work with therapists, parents whose children receive or potentially receive OT, educators, counselors, advisors, speech therapy professionals, physical therapists, physical therapy students, and others in the speech language or physical therapy profession.
As “helpers”, much of our time is spent managing full schedules, offering consultation, and dealing with payor sources. The time to create resources and find fresh intervention material is just not always available.
…if you serve a child who is developing skills, or you have a passion for helping kids with or without disabilities, this therapy club is for you.
Introducing: The OT Toolbox Member’s Club
The Member’s Club is a membership program that is designed to help you simplify your life while helping the kids you serve, every day.
Inside The Member’s Club we deliver activities that are designed for kids from toddlers-teens. AND we design handouts for educational purposes. AND we create tools to make service providers lives’ easier.
All of our downloads are in one place, broken down by skill area so you don’t have to enter your email address every time.
You can read the entire website without the distraction of ads.
You get tons of exclusive & new resources to use each month.
AND you get access to a monthly Therapy Toolkit.
Helping To Teach Others
Included in the Club are materials to educate others. You’ll find educational handouts and resources that explain why a child might struggle in the way they do. You’ll find “red flag” resources to help determine if your child needs to be seen by an occupational therapist.
You’ll find a variety of resources and tools to help teach others so that the kids you serve thrive.
You’ll find educational handouts such as:
Handwriting Tips
Impulse Control Strategies
Sensory Processing Red Flags
Visual Processing Red Flags
Self-Monitoring Handouts
MORE
Leadership Skills
Also in the Club, you’ll find therapist resources and tools to help therapists develop professionally. These are the materials needed to develop leadership skills. When we make a targeted attempt to better ourselves professionally, we learn and accomplish goals. This personal growth as a professional better serves those we treat.
Some of the therapy professional tools include materials such as:
Evidence appraisal forms
Meet the therapist forms
Therapy planning tools
Strategies to advance as a clinician (Coming in December!)
How to advance clinical reasoning (Coming in December!)
Professional Collaboration Strategies (Coming in December!)
MORE
Helping You Be a Better OT
Inside The Member’s Club we deliver activities that are designed for kids from toddlers-teens! AND we design handouts for educational purposes. AND we create tools to make service providers lives’ easier.
The therapy Club is designed to support you at any point in the journey – whether you’re just starting out or a seasoned expert at getting kids the “just right” challenge when building skills.
Kids need fun & engaging activities more than ever. And you need a way to track data each progress period. You need carryover at home. And you need low-prep/no-prep materials. Kids need -more than ever- to address regulation, strengthen fine motor skills, support executive functioning, and more.
And if you know anything about The OT Toolbox, it’s that we love to over-deliver when it comes to resources.
I love to support the parents, teachers, therapy professionals, caregivers…everyone working with kids that need engaging tasks that build skills. Take a look…
As a club member, there are two levels of options:
Level 1 Membership–
Access to all of our downloads with one click
New resources and tools each month
An exclusive coupon in The OT Toolbox shop, to use whenever you want
Level 2 Membership–
Access to all of our downloads with one click
New resources and tools each month
An exclusive coupon in The OT Toolbox shop, to use whenever you want
ADS-Free experience on the entire website
12 Themed Therapy Kits (one each month)
One click access to our newsletter subscriber library without entering your password
There are 2 levels of membership in The Member’s Club. Select the one that works best for you.
Reasons to Become a Member
Here’s what I know for sure…
Therapists spend a TON of their own personal time on planning therapy sessions, purchasing toys and resources to use in therapy sessions. This membership saves you time, effort, and gives you back your weekends.
Parents, educators, and caregivers, counselors…anyone serving children needs a structured and focused set of strategies to solve developmental needs in kids.
Whether you’re serving kids with regulation needs, sensory challenges, handwriting & pencil grasp issues, or other specific need areas, we’ve got you covered on easy, structured, and FUN therapy ideas.
I would love to officially welcome you to the OT Toolbox Therapy Club!
Occupational Therapy Club Tools & Training
Take a look inside the Club
Here’s a sneak peek of what your member dashboard looks like and how you’ll access your activity plans:
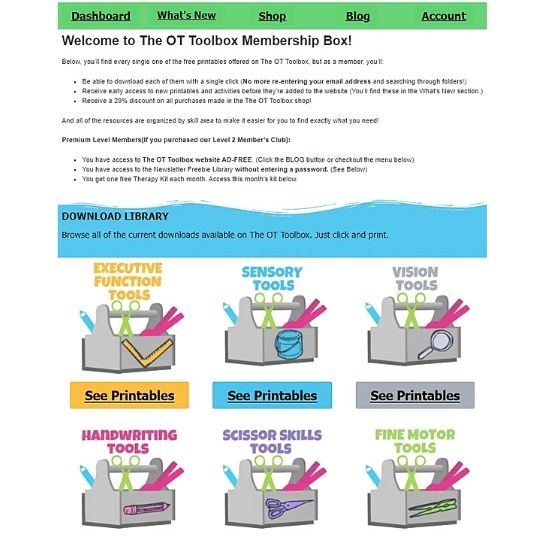
DASHBOARD AREA- When you go to the main dashboard, you’ll see toolboxes for each skill area. Click on the button and you’ll get all of the downloads available on the site for that area. Just click download and you are good to go with the tools you need. There are hundreds of downloads here…
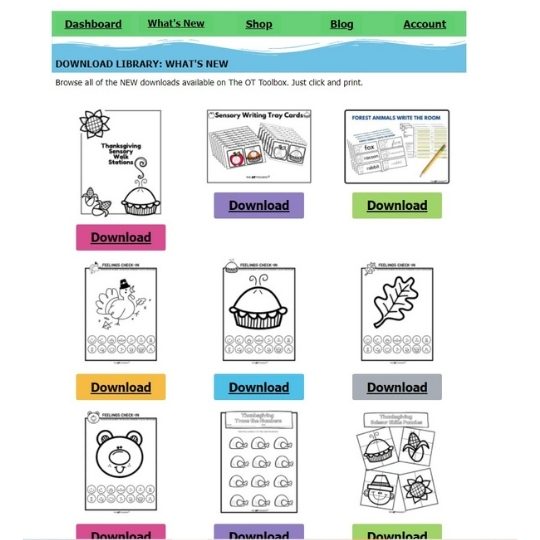
WHAT’S NEW SECTION- These materials will be new each month, so you get themed tools to use based on the season, holiday, or topic. This month, we’ve got Thanksgiving and Forest Animals activities. But, you’ll also find resources you can use year-round for handwriting, executive functioning, cursive, etc. Each month, those “evergreen” materials will be moved to their corresponding “download library” so you can get them when you need them. And the next month, you’ll find more seasonal materials added to the “what’s new” page.
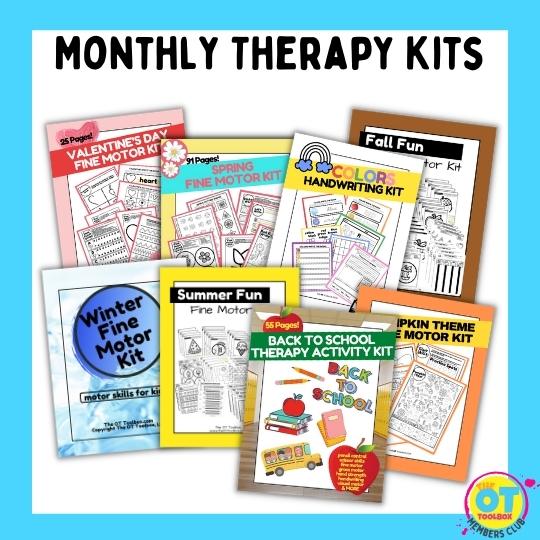
THERAPY KITS EACH MONTH- Then, if you are a premium subscriber (Level 2), you get a Therapy Toolkit each month. This month’s kit is our Thanksgiving Kit. Each month will be a new kit…along with some surprise bonuses..:)
OTHER BENEFITS:
Plus, when you join the premium level, you get no ads on the entire OT Toolbox website. Readers have asked begged for this feature!
Exclusive coupon code that never expires…use it as long as you are a member!
If you still have questions about the Member’s therapy Club, just reach out to me and let me know.
These are frequently asked questions that have been asked about The OT Toolbox therapy club for Members:
Is The OT Toolbox website and newsletter going away?
NOPE! This is a great question. The website and email newsletter is not changing. I’m still planning on all of the blog content, freebies you can download by entering your email address, and everything you’re used to seeing! It will be the same old The OT Toolbox, just with a membership option as well. I’ve had SO many requests for a membership over the years that this is just another option to access and use the materials!
Are there group membership options?
YES! There are discounted group options for groups of 5, 10, 20, 50, 80, and larger groups. Just reach out and I can get your clinic, faculty, or small group of friends set up!
What is the difference between Level 1 and Level 2?
Level 1 gets:
All of the downloads on our site, instantly. Browse for what you need and just hit the “download” button.
NEW resources each month. These are seasonal and evergreen materials: handouts, activities, worksheets, and so much more.
A coupon code to use any time, as often as you like. Save 20% on products in the shop (exclusions apply: it won’t work on our Vendor Products- the items created by other therapists & hosted on our shop)
Level 2 gets:
Everything listed above AND
Monthly Therapy Kits (a $140+ value)
Easy access to your subscriber library: just click & you’re in. No password needed
Will you ever offer discount codes?
This is something that we have considered, but felt it would be better to offer an occasional bonus incentive to join the membership. For example, when you join before Tuesday the 9th, you will get our Sensory Diet Book & Sensory Diet Workbook ($25 value). This is yours to keep. We will run another incentive in mid-2022 with a big incentive to join. Current members (that’s those of you who join now) will get access to that bonus too. We felt a larger value bonus is more useful than saving $5.
What are the Therapy Kits in Level 2? What do they include?
Our therapy kits are the most popular products on The OT Toolbox. They include fine motor activities like clip cards, crafts, toothpick art, glue dot art, lacing cards, scissor puzzles, cutting activities, handwriting tasks, gross motor activities, brain breaks, and so much more. Each kit is a bit different but engaging and fun. Kids love them! Currently we have about 8 seasonal kits.
The ones that Level 2 Members will get will be all new. This month’s kit is our Thanksgiving Kit, but only because that wasn’t purchased by many folks, so I knew it would be a new resource to so many. In upcoming months there will be new kits, plus occasional bonus kits. For example, there will be a Christmas kit plus a snowman kit because not everyone can use Christmas materials.
What ages/levels can use the materials?
The Member’s Club covers all ages. Those working in early intervention will find activities designed to build skills. Those serving kids in K-6 will find materials for fine motor, self-regulation, social emotional skills, gross motor skills, executive functioning, handwriting, and cursive writing.
Those serving kids in Middle School or High School will find handwriting, executive functioning materials, and life skills activities. Upcoming months will even find hand therapy materials for those working in pediatric hand rehabilitation! (These materials are FANTASTIC for building fine motor strength and dexterity!)
I hope this answers some of your questions! If you have any other questions, please reach out!
Do you subscribe to Netflix? A bulk grocery store like Costco? Do you get a monthly delivery of curated clothing, or a kids’ craft kit (like Kiwi Crate)? Do you order a monthly delivery of dog food, diapers, or organic chicken eggs? So many of us have monthly subscriptions that fill needs. They make our lives easier. The same is true with The Member’s Club.
Club Members are saying this:
“I’ve been looking for exactly this: ideas to help with treatment planning.. they even have a monthly theme ideas.“
“I’m a busy therapist and I need materials all in one place: Somewhere I don’t have to spend hours searching for materials…or entering my email for each resource.”
Professionals like you need The OT Toolbox Member’s Club to make lives easier.
The Member’s Club takes care of resource creation.
We hold onto a year’s worth of themed materials so you don’t need to search Pinterest or Instagram on your time off.
We cover the most important topics and research and deliver it in digestible blog posts.
We offer monthly kits that save you money and time.
One thing is for sure. We all have a common goal to help kids develop and thrive as individuals. We have a passion to help children. That’s where this therapy club comes in.
If you need additional information, please reach out to contact@theottoolbox-com
See you inside the club!
Colleen Beck, OTR/L has been an occupational therapist since 2000, working in school-based, hand therapy, outpatient peds, EI, and SNF. Colleen created The OT Toolbox to inspire therapists, teachers, and parents with easy and fun tools to help children thrive. Read her story about going from an OT making $3/hour (after paying for kids’ childcare) to a full-time OT resource creator for millions of readers. Want to collaborate? Send an email to contact@theottoolbox.com.