Colleen Beck, OTR/L is a pediatric occupational therapist and the owner and author of The OT Toolbox website. She manages all of The OT Toolbox social media accounts and runs the popular newsletter.
Read about Colleen's experience and career as an occupational therapist, including how The OT Toolbox began on our About The OT Toolbox page: https://www.theottoolbox.com/about-us/
Colleen created The OT Toolbox in 2011 and since then has written thousands of blog posts designed to support therapy providers, educators, parents, counselors, admin, and caregivers in promoting the healthy development of kids.
Check out Colleen's blog posts below:
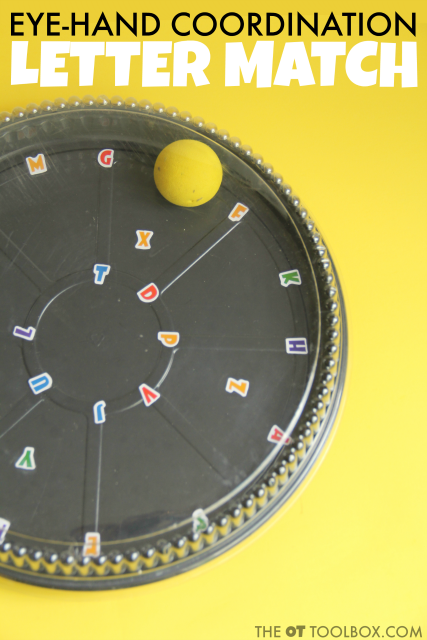
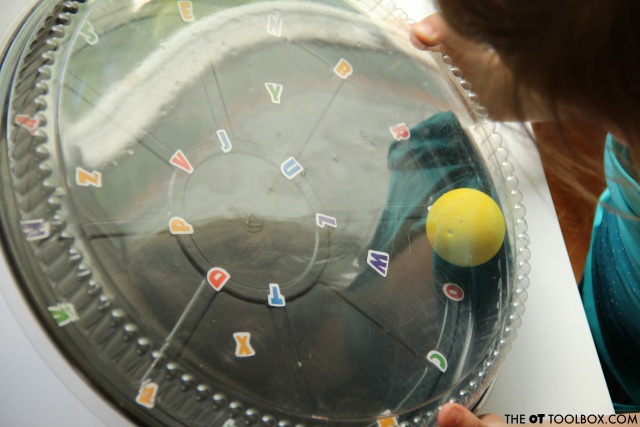
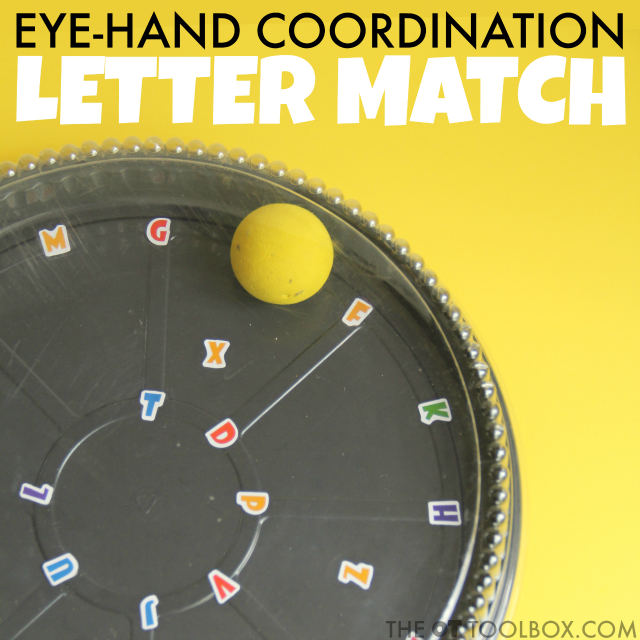
This hand-eye coordination activity is one that uses an item we had in the house (and you may too!) We love to use recycled and upcycled materials in occupational therapy activities and this eye hand coordination activity is no different! Working on the coordination skills needed for tasks like handwriting, self-dressing, managing clothing fasteners, and other skills.
This hand-eye coordination activity doubles as a learning activity while matching letters and working on visual motor skills needed for tasks like handwriting, management of fasteners, coordination, and many functional tasks. Looking for more eye-hand coordination activities?
For younger kids, this hand eye coordination activities for toddlers is a great resource, because skills like coloring or picking out a crayon from the crayon box is just one way to help them with color recognition and functional eye hand coordination skills.
Hand-Eye Coordination
First, let’s define hand-eye coordination. Coordination between the visual input our eyes perceive and process and the coordinated motor movements are an integration of the visual and motor systems. This is eye-hand coordination as it is used in functional tasks. Eye hand coordination is necessary for every functional skill.
Hand-eye coordination activity
Amazon affiliate links are included below.
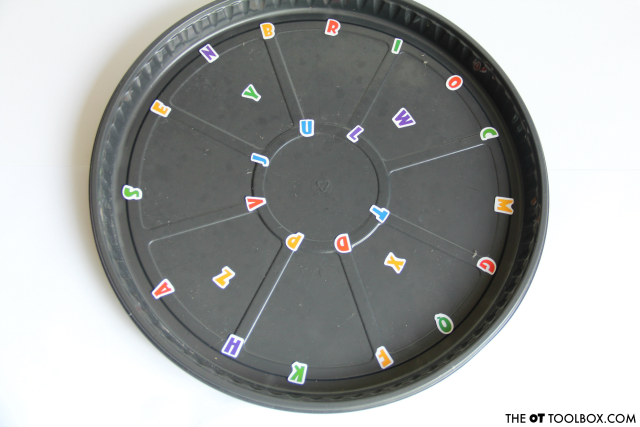
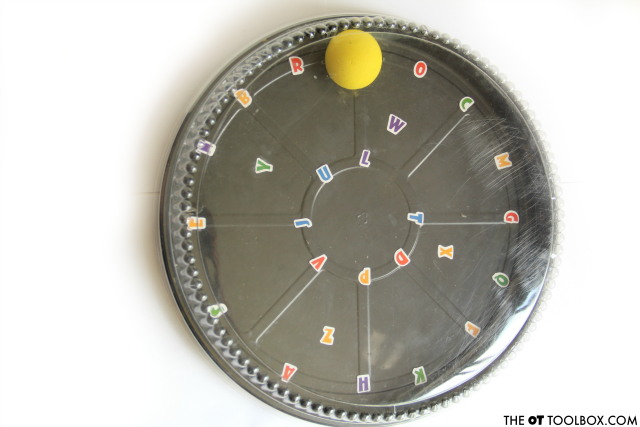
This activity used a recycled cookie cake pan that we washed out and used in a bilateral coordination eye-hand coordination activity. Besides the cake pan (save that lid, too!), we used just two other items:
1. Peel the stickers from the sticker sheet and randomly place them around the cake pan.
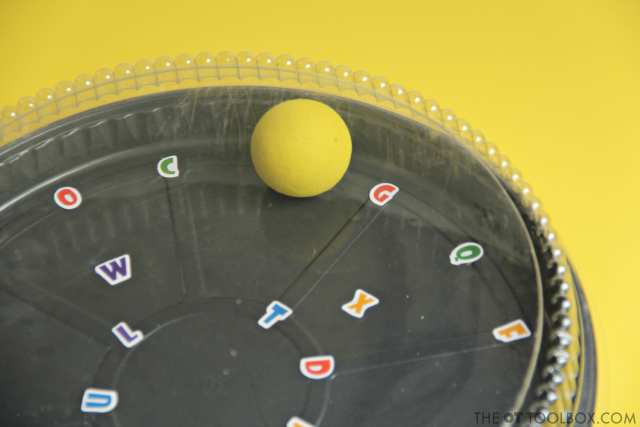
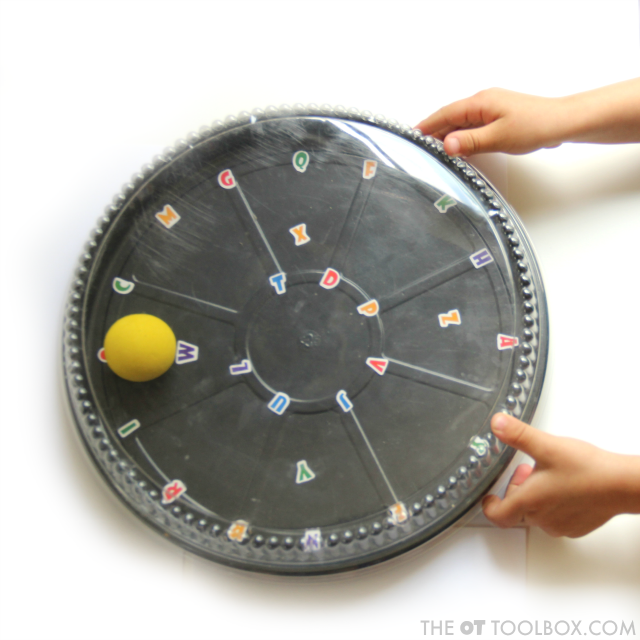
2. Place the foam ball in the cake pan and pop the lid into place.
That’s it! This is a super quick set-up and an activity that can be used by so many clients or students to work on a variety of areas.
Hand-Eye Coordination Activity with Letters
Ask students to roll the ball from letter to letter as they look for specific letters.
Roll the ball to letters in alphabetical order or ask he child to spell out spelling words.
Older students can spell words in sentences.
Call out random letters as students roll the ball as they visually can for each letter.
Roll the ball from one letter to another to match letters.
Incorporate handwriting by asking the child to roll the ball for 4 seconds. When a timer goes off, they child can write a list of words starting with that letter.
Hand-Eye Coordination Activity for Kids
This eye hand coordination activity addresses so many other areas as well:
Looking to work on the visual skills that play into motor output, motor planning, and eye-hand coordination activities? Our Visual Screening Tool may help.
More on eye-hand coordination skills:
For even MORE information on eye-hand coordination and the visual skills needed to complete visual motor and eye-hand coordination, or to better understand visual processing, you will want to join our free visual processing lab email series. It’s a 3-day series of emails that covers EVERYthing about visual processing. We take a closer look at visual skills and break things down, as well as covering the big picture of visual needs.
In the visual processing lab, you will discover how oculomotor skills like smooth pursuits make a big difference in higher level skills like learning and executive function. The best thing about this lab (besides all of the awesome info) is that it has a fun “lab” theme. I might have had too much fun with this one 🙂
Join us in visual processing Lab! Where you won’t need Bunsen burners or safety goggles!
If you are unsure when to refer or having a hard time getting a parent on board, check out my OT Vision Screening Packet for more information. It contains a screener for therapists and useful handouts for parents on why addressing vision is important to their child’s success.
This is a digital file. Upon purchase, you will be able to access the 10 page file and print off to use over and over again in vision screenings and in educating therapists, teachers, parents, and other child advocates or caregivers.
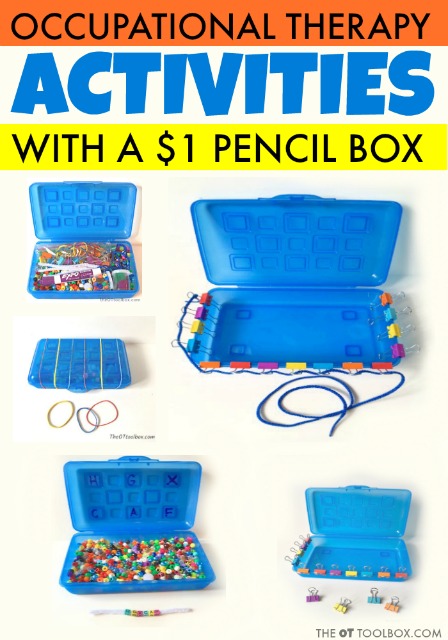
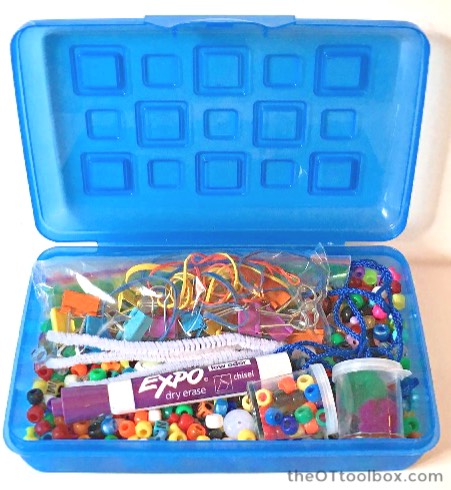
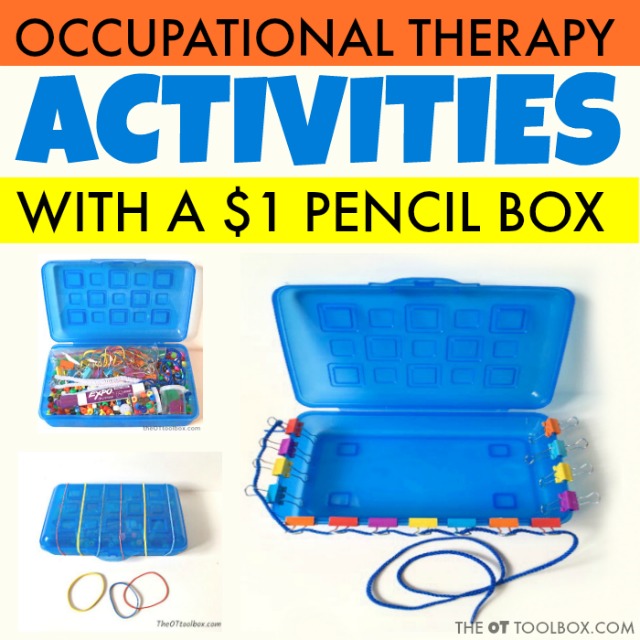
This pediatric occupational therapy activity box is a fun way to store and sort occupational therapy supplies for kids in schools, in home occupational therapy services, or for the school-based OT who travels from building to building. Pediatric occupational therapy activities and tools can be be used as an occupational therapy activity tool too! Read how to turn a dollar store pencil box into an occupational therapy tool for kids.
Pediatric Occupational Therapy Activity Tool
How to turn a $1 pencil box into a therapy tool!
A pencil box is a simple school supply. It serves the purpose of storing a child’s pencils, pens, crayons, erasers, scissors, pencil sharpener, and more. Therapists use a pencil box in occupational therapy to store similar materials with the addition of some OT gadgets such as adaptive scissors and pencils, fidget tools, pencil grips and more.
Pencil boxes come in a variety of styles, colors, sizes, and designs and kids love going to the store right before school begins and picking out just the right one. But have you ever tried using one AS a therapy tool?
Although storage is their purpose, you can turn a simple pencil box into a occupational therapy activity toolkit to address a variety of fine motor skills. It just takes a little imagination.
Below are 6 ways you can turn this Sterilite pencil box into many fun and unique occupational therapy activities to address fine motor hand skills. This pencil box was purchased at Target for a $1.
DIY Pediatric Occupational Therapy Activities
Amazon Affiliate Links are included in this post. You can purchase the items described below in this list or through the links below.
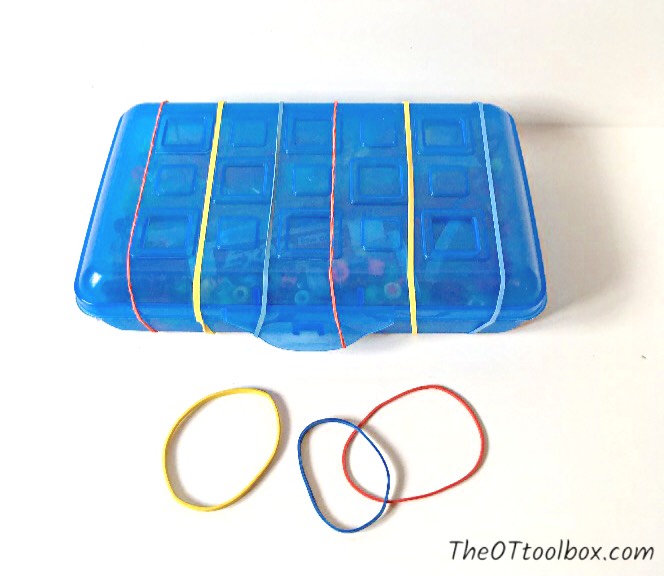
1. Prior to giving the pencil box to the child, wrap the box with multiple rubber bands to work on hand strength, bilateral coordination, and upper extremity control. Have the child use two hands to remove the rubber bands in order to open the box. When all activities are completed, have the child replace the rubber bands around the box. The rubber bands will also ensure the lid doesn’t accidently pop open during transport spilling all of your therapy fun.
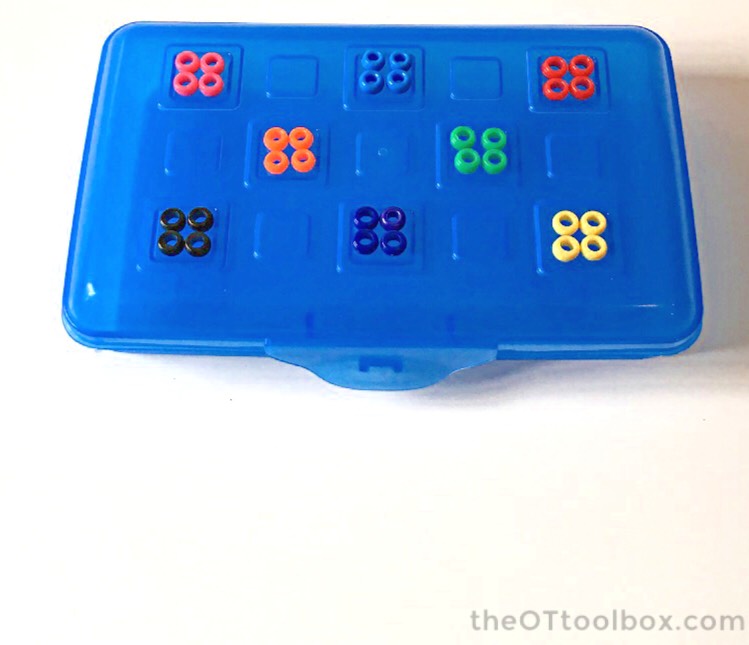
2. You can use the squares on the lid to work on pinch and precision skills with the use of pony beads. Have the child pinch specific colored pony beads and directly place them into the indented squares on the pencil box with up to four pony beads each square.
3. You can use the squares on the lid to work on tool grasp, distal control, prewriting and writing skills with the use of a dry erase tool. Have the child trace inside of the squares to draw a square or have the child color inside of the squares to work on coloring skills. Letter writing is another option and it is a unique approach to practice! Erase with a pom-pom to address pinch pattern and strength.
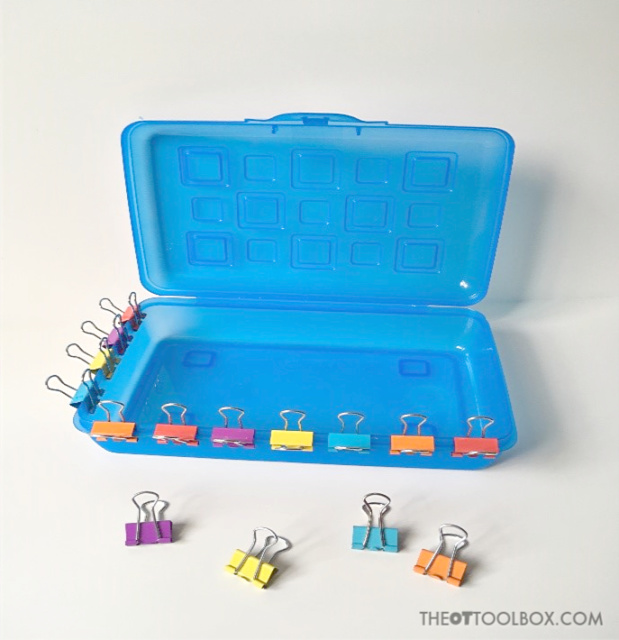
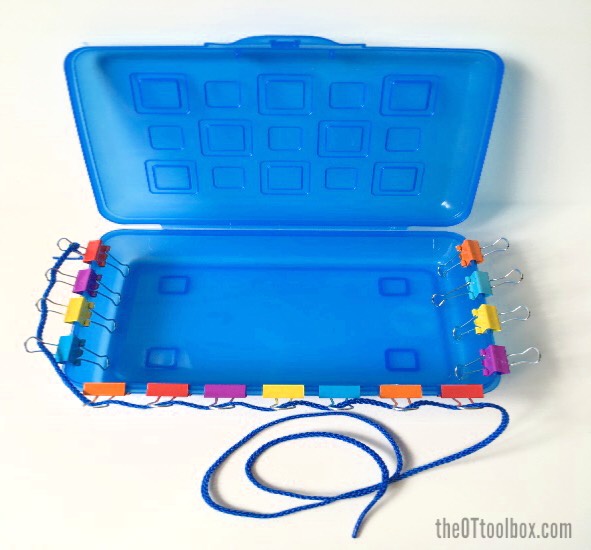
4. You can use the edge of the pencil box to work on pinch, finger strength, bilateral coordination, and visual motor skills. Have child squeeze open binder clips and place them around the edges of the box either at random or in a color pattern.
5. After binder clips are assembled onto the edge of the box, push one side of the clips down and have child work on threading a lacing cord through the loops of the clips using a weaving or looping pattern.
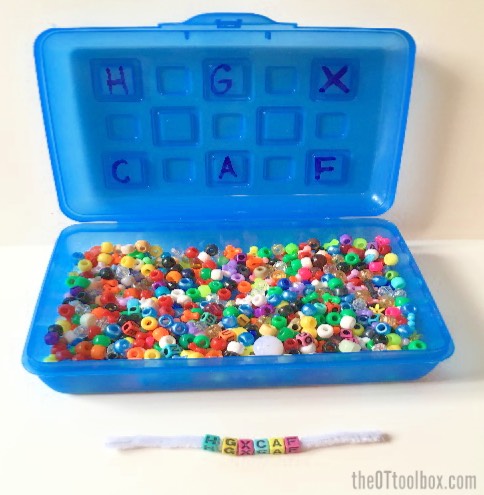
6. With the pencil box filled with an assortment of beads, write letters on the inside of the lid with a dry erase tool and then have child locate those targeted beads to string on a pipe cleaner. Take turns and have the child write letters for you to find and string onto a pipe cleaner.
Think Out of the Box with Occupational Therapy Activities for Kids!
Although some of the occupational therapy activities are designed specifically for this type of pencil box, I hope you can now look at pencil boxes differently and begin thinking “out of the box” for activities you can do with kiddos during your therapy sessions.
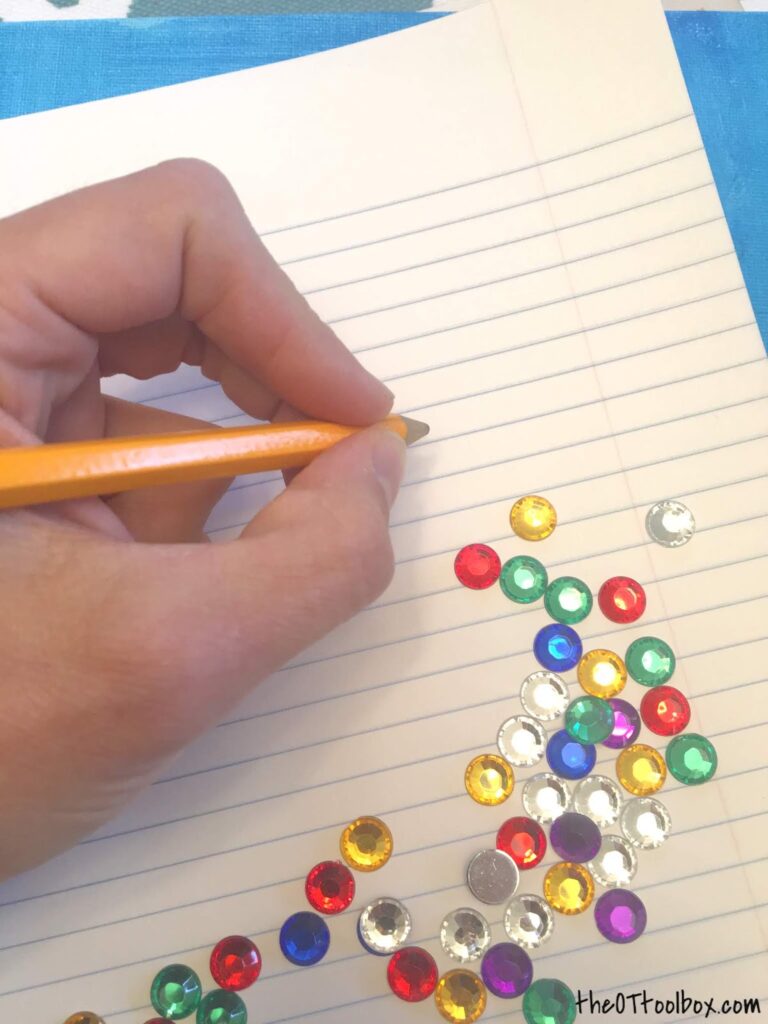
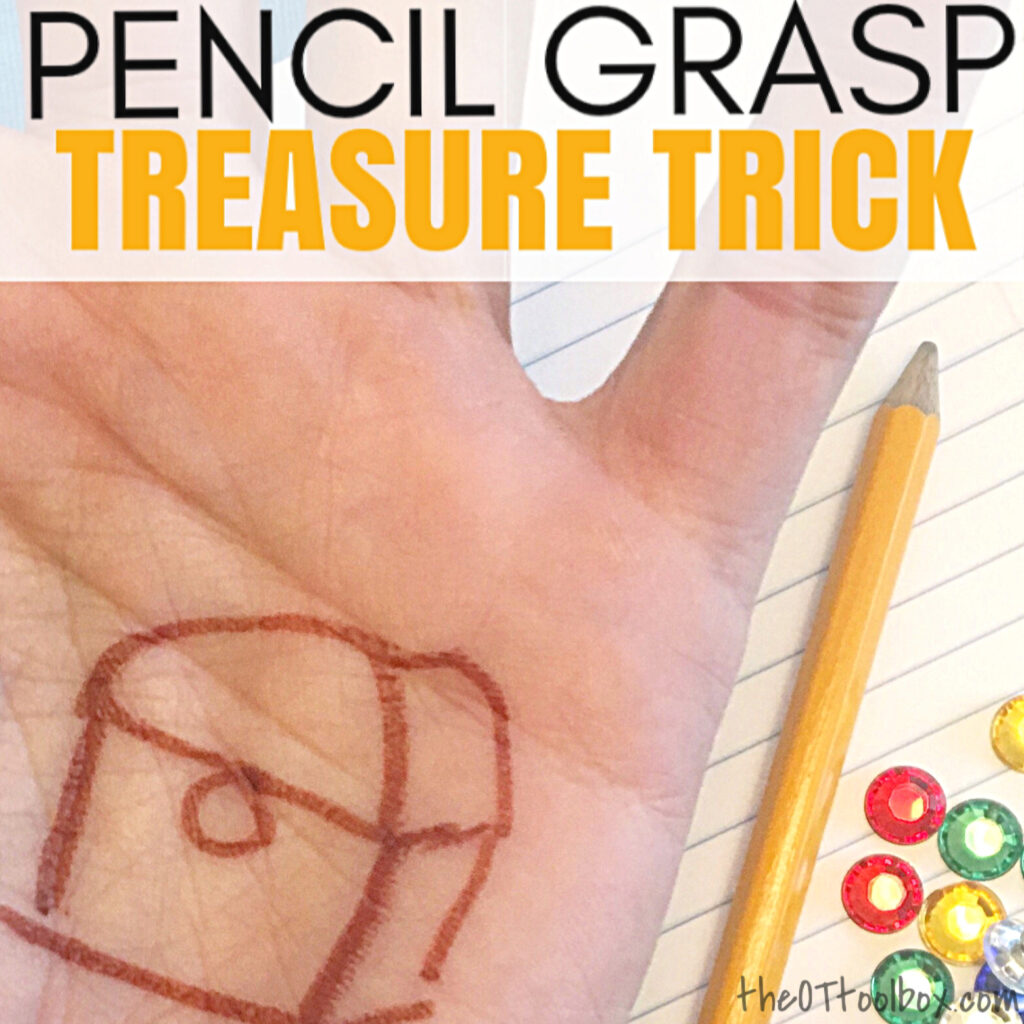
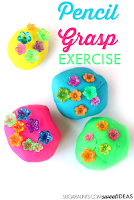
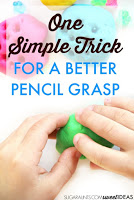
Over on Instagram this week, we shared our pencil grasp trick with a treasure chest theme. This pencil grasp trick is one that helps so many kids because there is a common reason for poor pencil grasp, that can be easily remedied. In fact, for kids struggling with pencil grasp and teachers or parents who are looking for how to teach pencil grasp or where to get started with teaching pencil grasp, this is a creative way to begin.
Teaching pencil grasp begins with fine motor skills. If you are looking for fun ways to work on the fine motor skills needed for a functional pencil grasp, start on our fine motor page.
Pencil Grasp Trick
In this pencil grasp activity, we are promoting separation of the sides of the hand. This skill is an area that can make a huge difference when it comes to encouraging a functional grasp when writing.
Read more about separation of the sides of the hand and why this is an essential skill to master for pencil grasp.
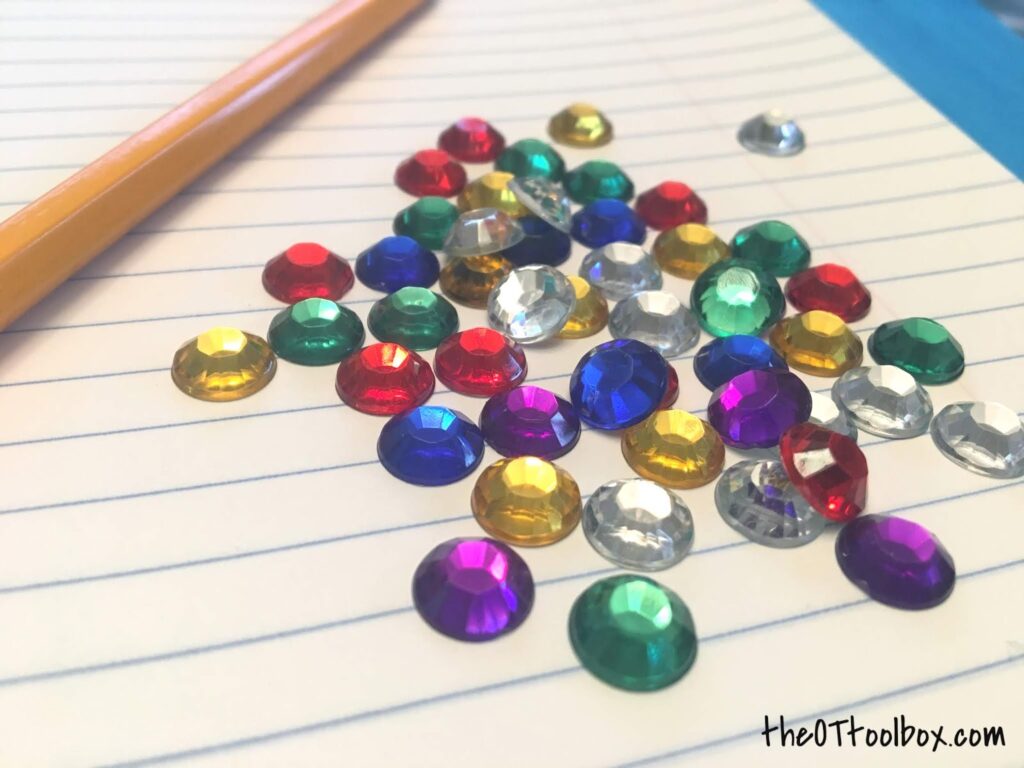
To encourage separation of the sides of the hand, we used a treasure chest themed activity and some gems that we received from www.craftprojectideas.com.
How to teach pencil grasp with a fun treasure chest pencil grasp trick:
This pencil grasp trick was easy to prep. You’ll need just a few materials:
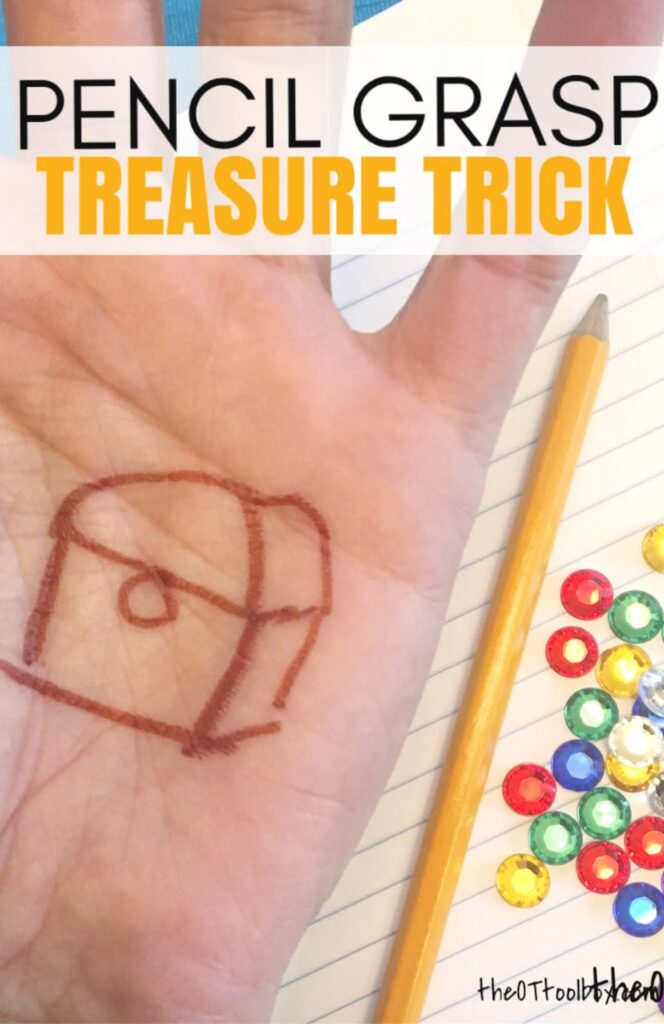
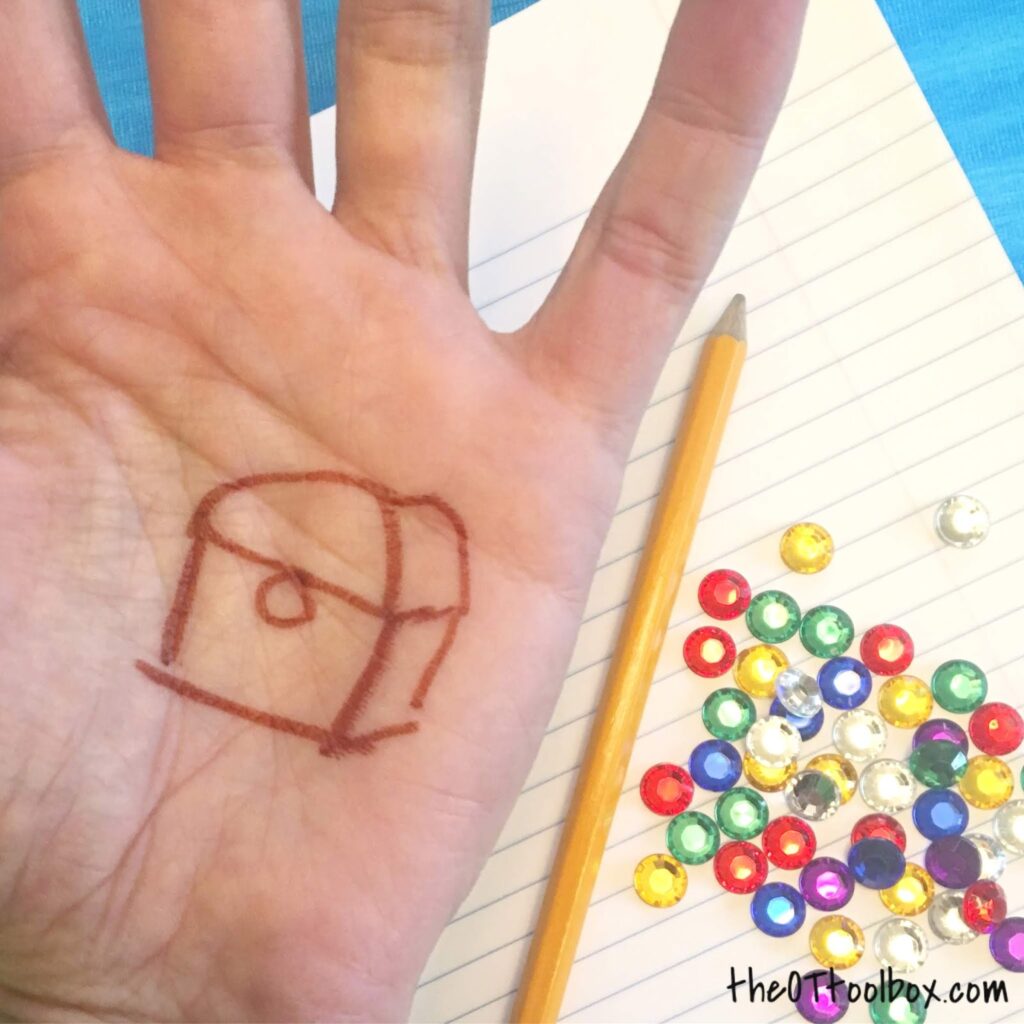
To create this activity, simply draw a simple treasure chest on the ulnar side of the child’s palm with the washable marker.
This act alone is often times one that sparks interest in a child who struggles with motivation and self-confidence in handwriting.
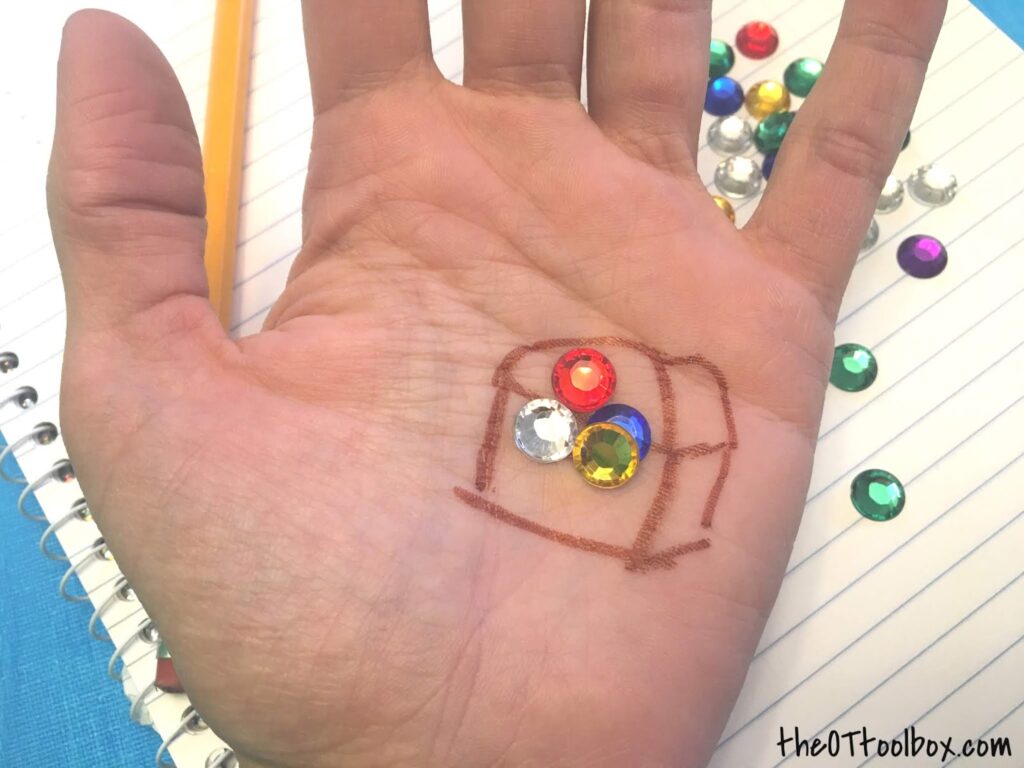
Then, show the child that you are going to put some gems or “jewels” into their treasure chest.
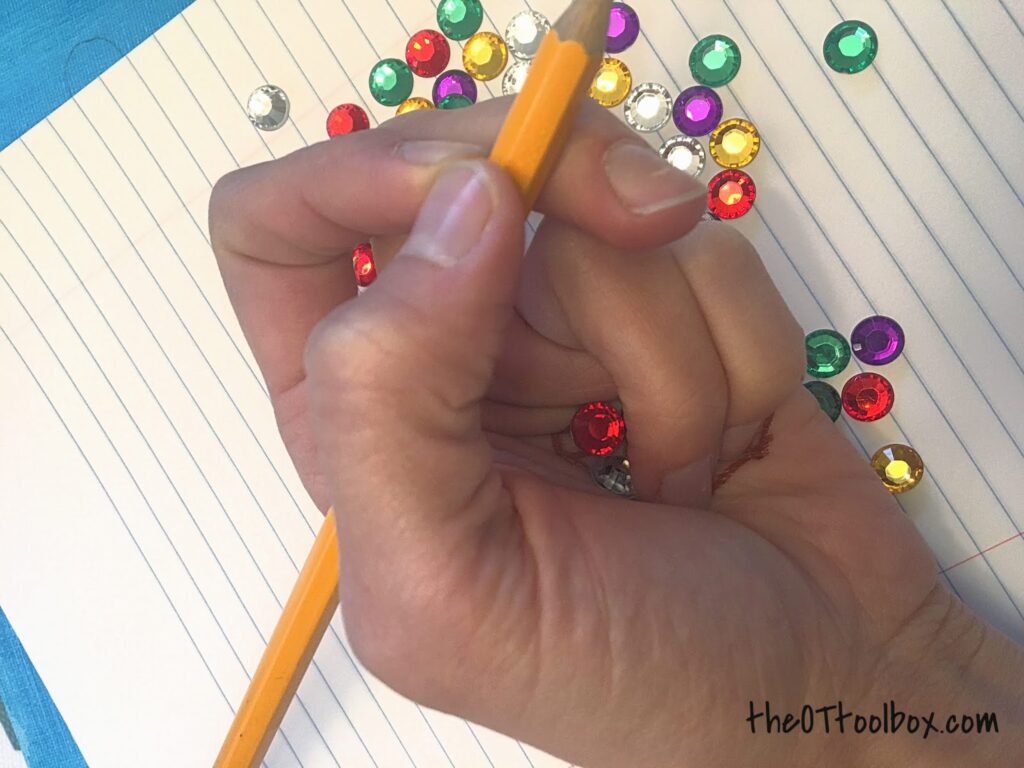
Ask them to keep the treasure safe and show them how you can fold their fingers down onto the treasure chest. They should cover the gems with just the ulnar digits, or the pinkie finger and ring finger.
Separation of the sides of the hand
Now ask them to pick up cgems with just their thumb and pointer finger while they keep the gems squirreled away in their palm. This is effectively separating the sides of the hand!
Next, ask the child to keep those gems hidden away in their palm while they write with a pencil. This separates the sides of the hand while holding the pencil and writing, allowing for a functional pencil grasp.
Like this idea? Watch our Instagram page for more creative pencil grasp activities coming your way soon, all part of our #pencilgraspchallenge!
If you didn’t see this activity over on Instagram, then be sure to head on over to our IG page and follow along. We would love to connect with you over there!
These following direction activities are directionality activities that can help kids learn directions or spatial concepts such as left, right, up, down, and compass directions (north, south, east, and west) with a motor component. This hands-on learning activity really gets the kiddos moving and learning!
Teaching kids to follow the directions they need to physically move right, left, up, down requires development of spatial concepts such as spatial reasoning. This can be a real challenge for some kids!
Following directions and understanding of spatial concepts is a foundation for understanding and utilizing compass directions or the cardinal directions of north, south, east, and west, and the use of maps.
Left Right Confusion Direction Challenges
It can be a real challenge for some kids who struggle with the spatial understanding of following directions, or understanding their left from right in a subconscious manner.
Have you come across the child who is told to raise their right and and they take a five second count to stop, think, and then raise their hand? They might hesitate when raising one hand or the other and still be uncertain whether or not they have held up the correct hand. Then, when the teacher, parent, or anyone else really, says the inevitable, “Your other right hand…”, the child feels a sense of discouragement and self-consciousness that doesn’t drive in the underlying need to really know the right from left!
That’s where a directionality activity or following direction activity can come into play. Adding a physical component to learning directions and the difference between right, left, up, and down and what that looks like in relation to the child’s body can be such a helpful force in driving home this concept.
Why work on directions with kids?
Working on the ability for kids to follow directions and spatial concepts is so important for kids. The direction/spatial relationship/preposition words that tell you where something is related to something else (beside, in front of, behind, over, under, around, through, last, etc.) are very important when teaching math and handwriting concepts. Directionality and the ability for kids to follow physical directions is important for discovering where their bodies are in relationship to objects. This translates to following directions when getting from place to place by following a map or the cardinal directions.
When kids picture a scene in their mind’s eye and use that image to draw a map on paper, they are using higher thinking skills and spatial reasoning.
Directionality Activities
Amazon affiliate links are included below.
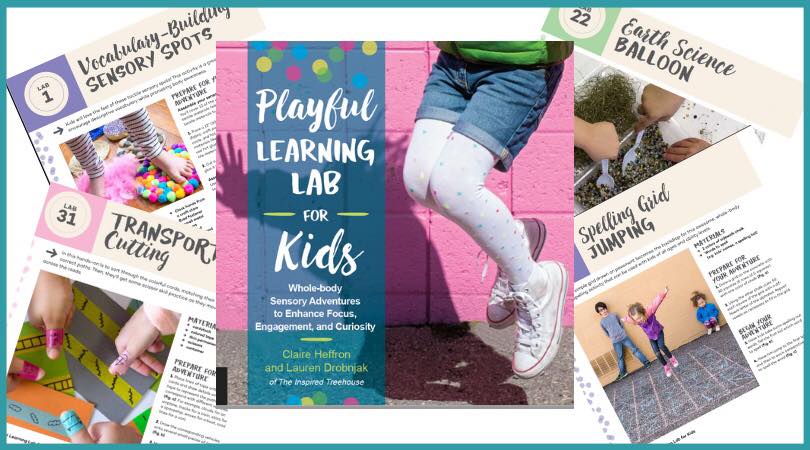
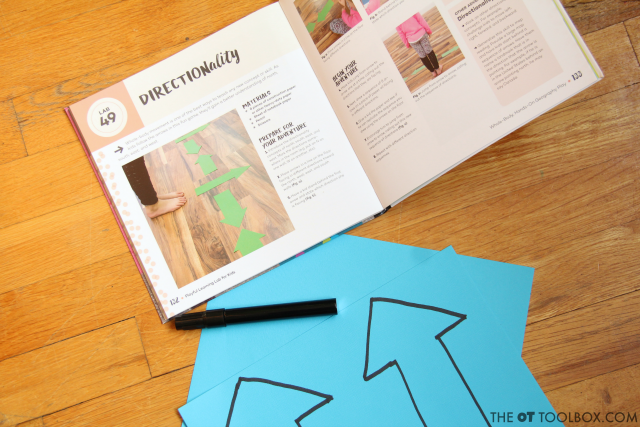
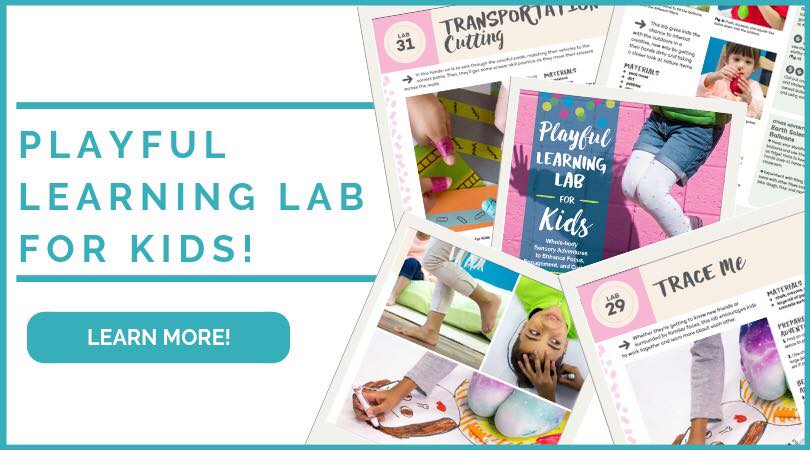
The fun idea below comes from a new kids’ activity book that we’re devouring. It’s the new Playful Learning Lab for Kids, by the occupational therapist and physical therapist team at The Inspired Treehouse. It’s a book full of whole-body and sensory activities that enhance focus, engagement, and learning through movement and interaction.
We used just a few materials to create this following directions activity:
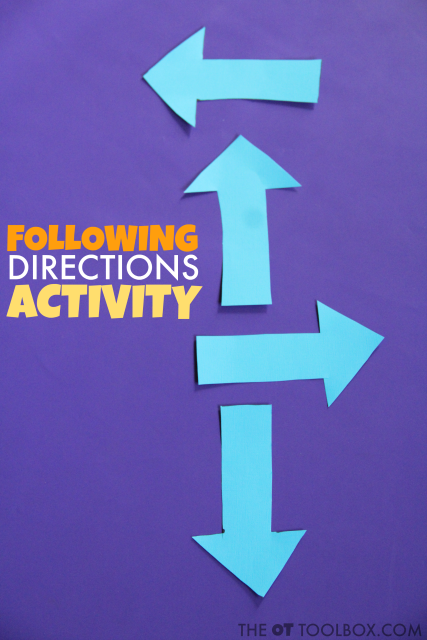
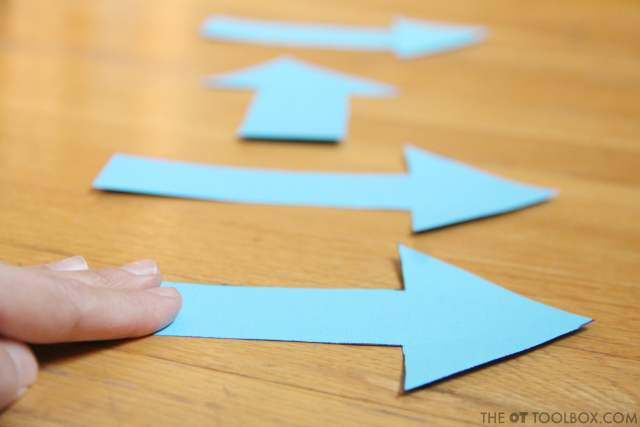
This is a simple activity (perfect for the classroom or homeschool when teaching directions!). First, draw and cut out large arrows from the cardstock.
Next, place them along the floor in a path and start playing!
There are so many ways to use these arrows to work on following directions and directionality:
1. Place the arrows on the floor for a fun brain break or sensory walk that uses directions as the kids work on following directions to stand in the direction the arrows are pointing.
2. Name a cardinal direction or spatial direction and ask the child to point to the corresponding arrow.
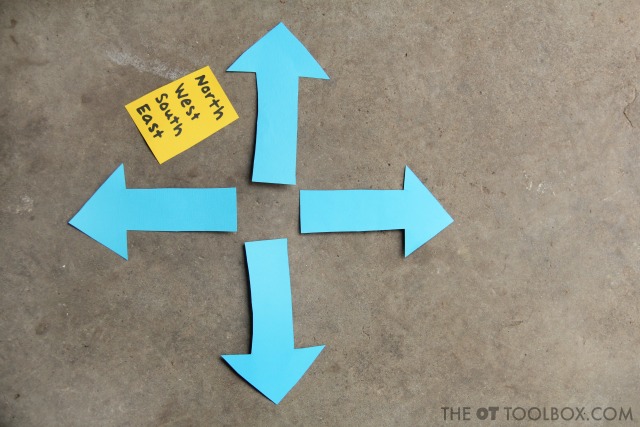
3. Place the arrows in a compass rose on the floor and ask kids to “step into a map” on the floor as they move north, south, east, and west.
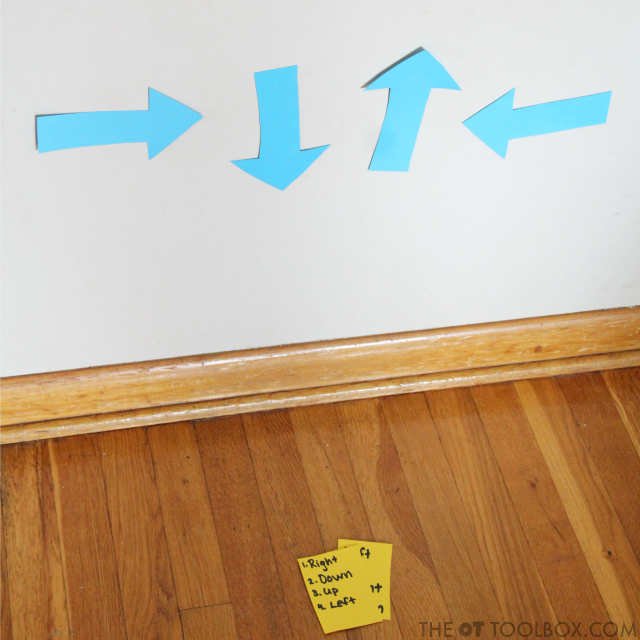
4. Stick the arrows to a wall using tape. Ask the students to write out a list of words that describe the directions the arrows are pointing (left, right, up, and down).
5. Hold up a sequence of arrows pointing in different directions. As the child to remember the pattern or order as they complete a series of side steps, front steps, or backward steps to follow the directions they see.
6. Work on left/right directionality by holding up an arrow pointing in either the left or right directions. Kids should call out “Left!” or “Right!” when they see the direction the arrow is pointing.
All of these following direction activities are ones that can be completed as on an individual basis or with a whole group. It’s a great mini brain break for the classroom and can be incorporated into the classroom curriculum by working on cardinal directions.
Want to grab more movement-based learning ideas that you can start on today? You will love the bright pictures, sensory-based activities, and whole-body activities in Playful Learning Lab for Kids!
It’s available now and is the perfect way to add movement to learning to improve attention, focus, brain function, remembering and learning!
This book will shift your entire mindset so you can begin to replace sedentary, one-dimensional lessons and worksheets with whole-body, multi-sensory activities that can instantly create a classroom or house full of active, engaged learners.
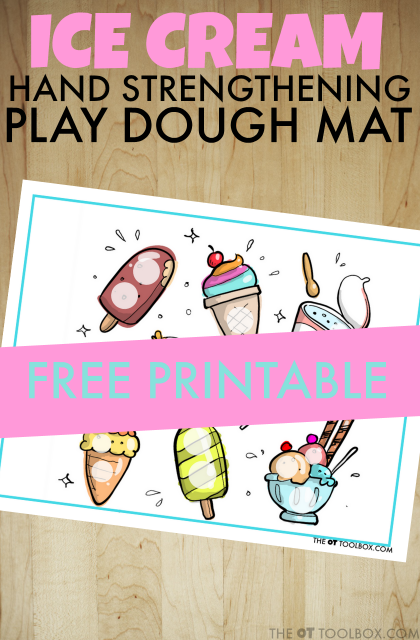
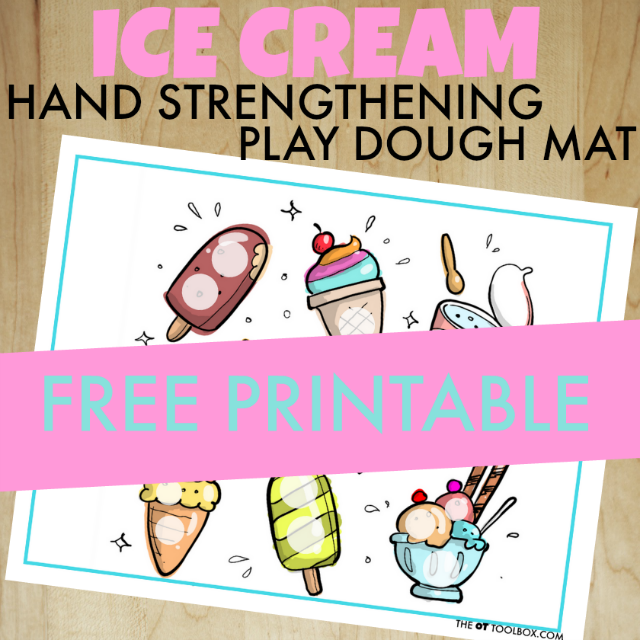
This Ice Cream Play Dough Mat is a free printable playdough mat that helps kids build hand strength and fine motor skills, all with an ice cream theme. This is such a fun play dough activity for fine motor skills that kids will love!
When kids show weakness in their hands, it can be hard to know where to begin. Luckily, there are benefits to using play dough as a fun tool to support hand weakness. Typically the child is frustrated by the very activities or tasks that strengthen hands. There’s a reason why: it hurts! Their hand is fatigued and tasks like coloring are HARD! What if I told you a fun activity that involved an ice cream theme and play dough could take care of the fine motor struggles? When kids use this ice cream play dough mat, hand strengthening is sure to follow!
Ice Cream Play Dough Mat
If you’ve been following The OT Toolbox over the past few weeks, you’ve probably seen a few play dough mats on the site. We’ve shared a couple of fun play dough mats that encourage intrinsic hand strength for a reason: Hand strengthening is SO important for our kids!
This free printable play dough mat is a fun one. Kids can create small balls of play dough that fit the various sizes on the ice cream images. all while working on the intrinsic hand strength and the fine motor skills that they need for tasks like pencil grasp, endurance in coloring or writing, accuracy with scissors, dexterity to manipulate very small items like coins, and coordination for tasks like buttoning or zippering.
Using a play dough mat like this one creates a fun opportunity for strengthening the intrinsic muscles of the hands.
When kids use play dough in the tips of their fingers and thumb, they are really working the small muscles of the hand, or the intrinsic muscles. These are the ones that ensure arch development and contribute to separation of the sides of the hand, both which are SO important when it comes to fine motor skills and use in small motor tasks.
Get the kiddos busy with this ice cream play dough mat to work on that intrinsic hand strength with this free printable playdough mat. You’ll want to cover it with a durable surface so you can print it off once and use it over and over again. Remember to ask the child to use just one hand and only the tips of the fingers and the thumb to roll the play dough balls of various sizes to fit the circle forms on the ice cream playdough mat.
Free Ice Cream PlayDough Mat:
Looking for more play dough mats or play dough activities? Be sure to grab your Astronaut Play Dough Mat and your free Outer Space Play Dough Mat.
Here are more free play dough mats that you can print off and use to work on hand strength endurance, and fine motor skills:
Grab your free printable ice cream theme play dough mat here and start working on that intrinsic hand strength!
Colleen Beck, OTR/L has been an occupational therapist since 2000, working in school-based, hand therapy, outpatient peds, EI, and SNF. Colleen created The OT Toolbox to inspire therapists, teachers, and parents with easy and fun tools to help children thrive. Read her story about going from an OT making $3/hour (after paying for kids’ childcare) to a full-time OT resource creator for millions of readers. Want to collaborate? Send an email to contact@theottoolbox.com.
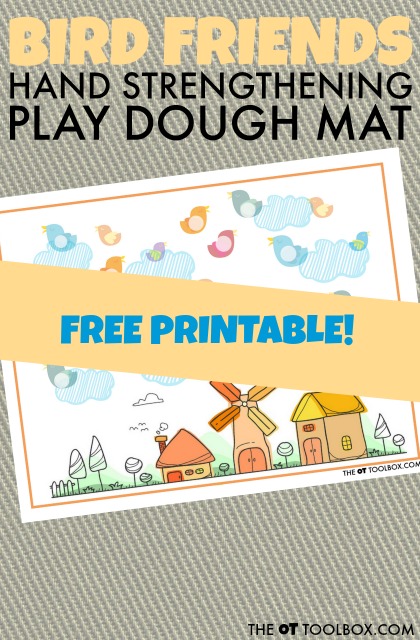
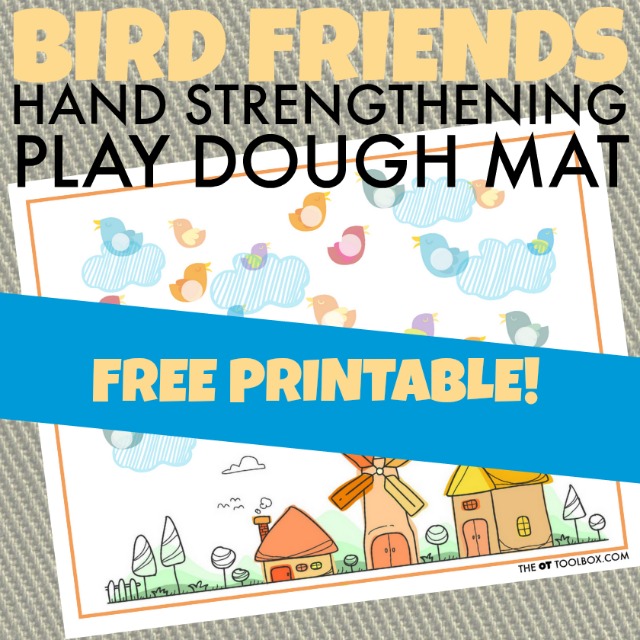
If you are doing bird activities with kids, then this play dough bird activity is going to be a hit. It’s a free printable play dough mat that helps kids strengthen their hands for fine motor tasks. Grab this bird play dough mat to work on hand strength and improve fine motor skills with a bird theme! This would be a fun activity to use with colorful crayon play dough.
Sometimes, adding a motor component to a leaning theme can be a strategy to help kids learn through play while boosting the fine motor skills they need for tasks like holding a pencil grasp, having endurance in coloring and writing, and improved dexterity in pencil control, which plays a big part in fluid and legible letter formation. We’ve previously covered the specific fine motor skills play dough activity can support.
You may have seen some of the other play dough mats we’ve shared recently. Our free printable play mats included (so far): an Astronaut Play Dough Mat, Outer Space Play Dough Mat, and an Ice Cream Play Dough Mat. (Links to these free play dough mats are at the bottom of this blog post.)
You may want to grab the original intrinsic muscle hand strengthening play dough mat that we’ve had on the site for some time. It’s a basic sheet of circles in various sizes, but the exercise is perfect for really working those intrinsic muscles!
The play dough bird mat shown here is a fun and easy way to help kids develop hand strength and endurance. Kids can roll small balls of play dough using the tips of their fingers and match the different size play dough balls to the different birds on the printable playdough mat.
Scroll to the bottom of this post to access this freebie.
Why Use a Play Dough Mat for Hand Strengthening?
Play dough mats are a powerful tool in strengthening fine motor skills and hand strength. However, the ones that we’ve created so far really boost those intrinsic muscles of the hand.
The intrinsic muscles are those muscles whose origin and insertion are within the hand. That is, they are anchored to the bones in the hand and move the joints of the hand in delicate and precise ways.
These include the thenar muscles, the hypothenar muscles, the interossei, and the lumbricals.
Using play dough to strengthen the hand muscles is as simple as rolling small balls of various sizes with just the tips of the fingers and the thumb. It’s important to use just one hand when doing this activity to really work those intrinsics.
Play Dough Bird Activity for Kids
Enter your email below to grab your printable play dough mat and play along with a bird theme while getting in a hand workout! Kids can count the birds on the mat, use a specific color of playdough that matches the colors of the birds, or many other activities. They should fill each circle with a small ball of play dough that they’ve rolled with their fingers. There are various sizes on the playdough mat to challenge precision and dexterity.
Try some of these ideas with your bird play dough mat:
Match a different color play dough to the different colored birds
Fill all of the blue birds, then all of the yellow birds…
Write numbers in the circles in random order. They can then scan across the play dough mat to challenge visual perceptual skills.
Use the right hand to roll play dough balls for the circles on the left side of the playdough mat and use the left hand to roll play dough balls for the circles on the right side of the playdough mat.
There are so many ways to play and use this play dough mat for learning and play WHILE strengthening fine motor skills!
Want to strengthen the muscles in the hand to improve pencil grasp, scissor use, coloring, or fine motor coordination and endurance?
Grab this FREE printable Bird themed play dough mat to help kids strengthen the intrinsic muscles of the hands! You’ll also receive weekly emails that are loaded with resources and tools promoting the healthy development of kids.
Enter your email address and click the button below to get your free printable play dough mat to improve hand strengthening:
Looking for more play dough activities that kids can use to boost the fine motor skills they need for all sorts of tasks?
Working on a functional pencil grasp with your child or occupational therapy caseload? Need activities to improve pencil grasp that kids WANT to do? These games that improve pencil grasp through fine motor activities are activities that boost the skills kids need for pencil grasp and games that strengthen the hands. Working on pencil grip to make and efficient and functional pencil grasp can be as easy as adding a few fine motor games to your therapy toolbox!
Games that improve pencil grasp
Every child loves playing games, but did you know that games also help children improve their pencil grasp? There are many components to working on pencil grasp including core strength and stability, shoulder strength and stability, coordinated movements, hand/finger strength and visual motor skills.
Functions of the hand that help to improve pencil grasp
Arches of the hand start to develop very early on in children. They can develop these skills by crawling and doing weight bearing activities. The arches of the hands help to direct the skilled movement of the hands, how to pick up different size blocks for example.
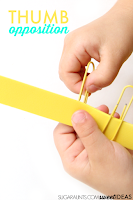
Around 2-3 years of age children will start experimenting with a tripod grasp (first three digits hold pencil while the ring and pinky are tucked in). In order to do this the child has to have a separation of function of the two sides of the hand.
The precision side of the hand (thumb, pointer, middle finger) does the work and the power side of the hand the last two fingers (ring and picky) are used as the stabilizer.
An example of this is when you hold a pencil. Typically your ulnar side of the hand (pinky) will rest of the paper and the thumb, pointer and middle finger will hold the writing utensil and move.
Another important skill needed for pencil grasp is palm to finger translation skills. This is when you use only one hand and move items from you palm to your fingertips. Try holding a few marbles or coins and using your fingers to “take” the coins/marbles out of our palm and bring them to your fingertips.
There are lots of components to developing pencil grasp, listed below are games that work on these skills.
Tong games to Improve Pencil Grasp
You can buy the following games that use tongs (Amazon Affiliate links included below):
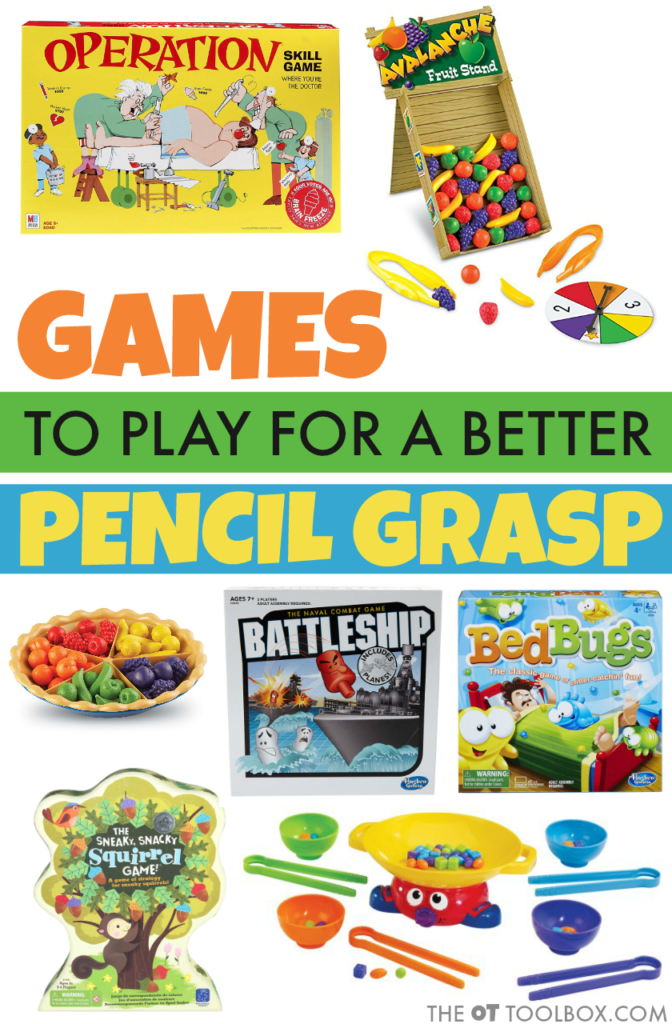
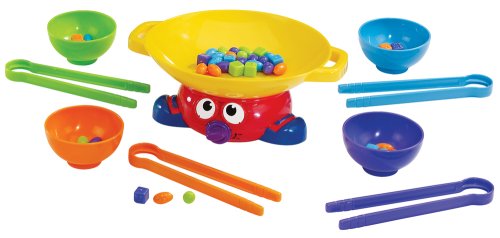
Wok and Roll– This game uses long tongs that can be used to pick up and manipulate small pieces, perfect for strengthening and improving precision, arch strength and development, separation of the sides of the hand, coordination, and open thumb web space necessary for pencil grasp.
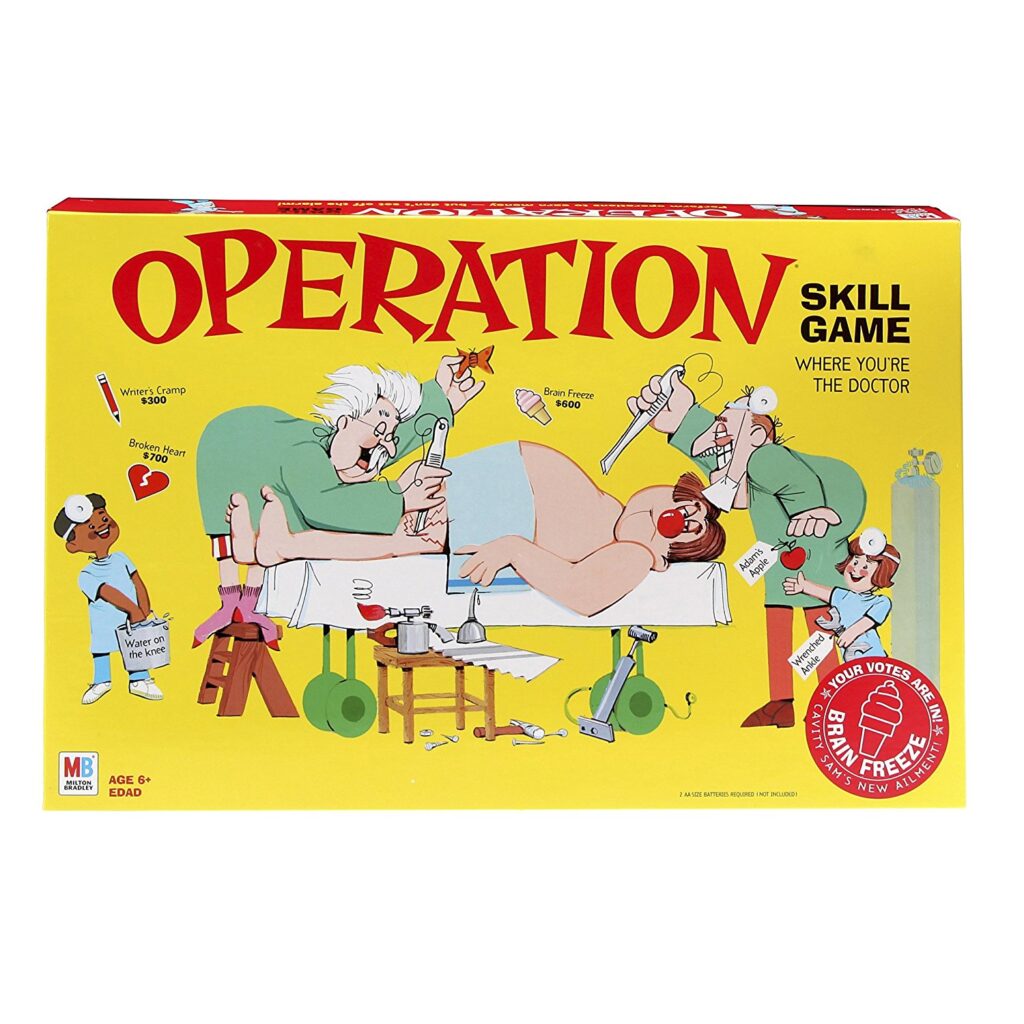
Operation– This fine motor game requires visual motor skills and precision along with open thumb web space, arch development, and separation of the sides of the hand to manipulate and remove small pieces. Operation comes in a variety of themes that kids will love.
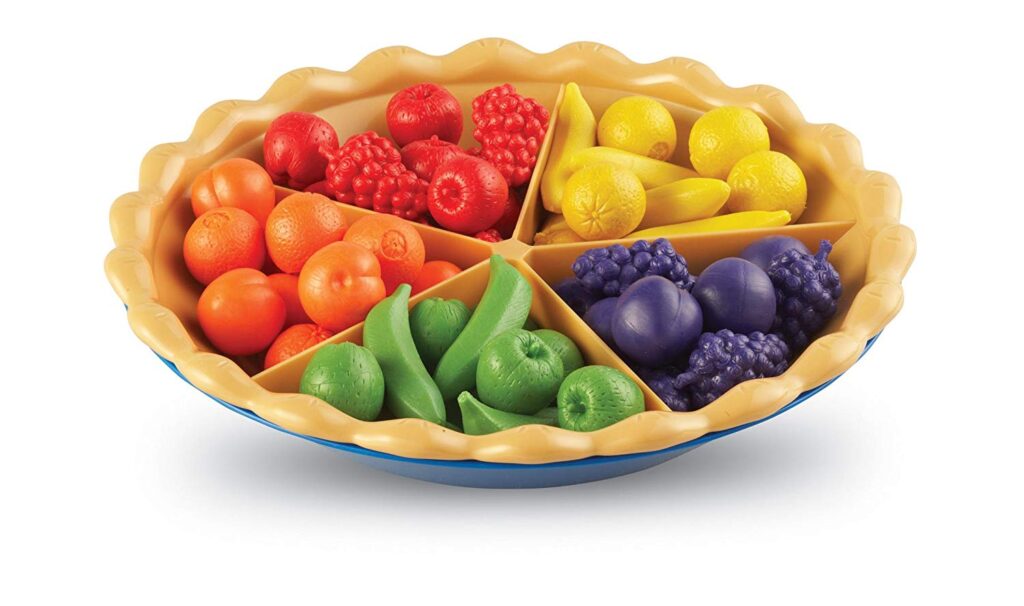
Super Sorting Pie– This game is a fantastic way to work on hand strength, grasp, and even in-hand manipulation such as translation from the palm to the fingertips. It’s a game that can be played in a variety of ways, making it a great addition to the therapy clinic.
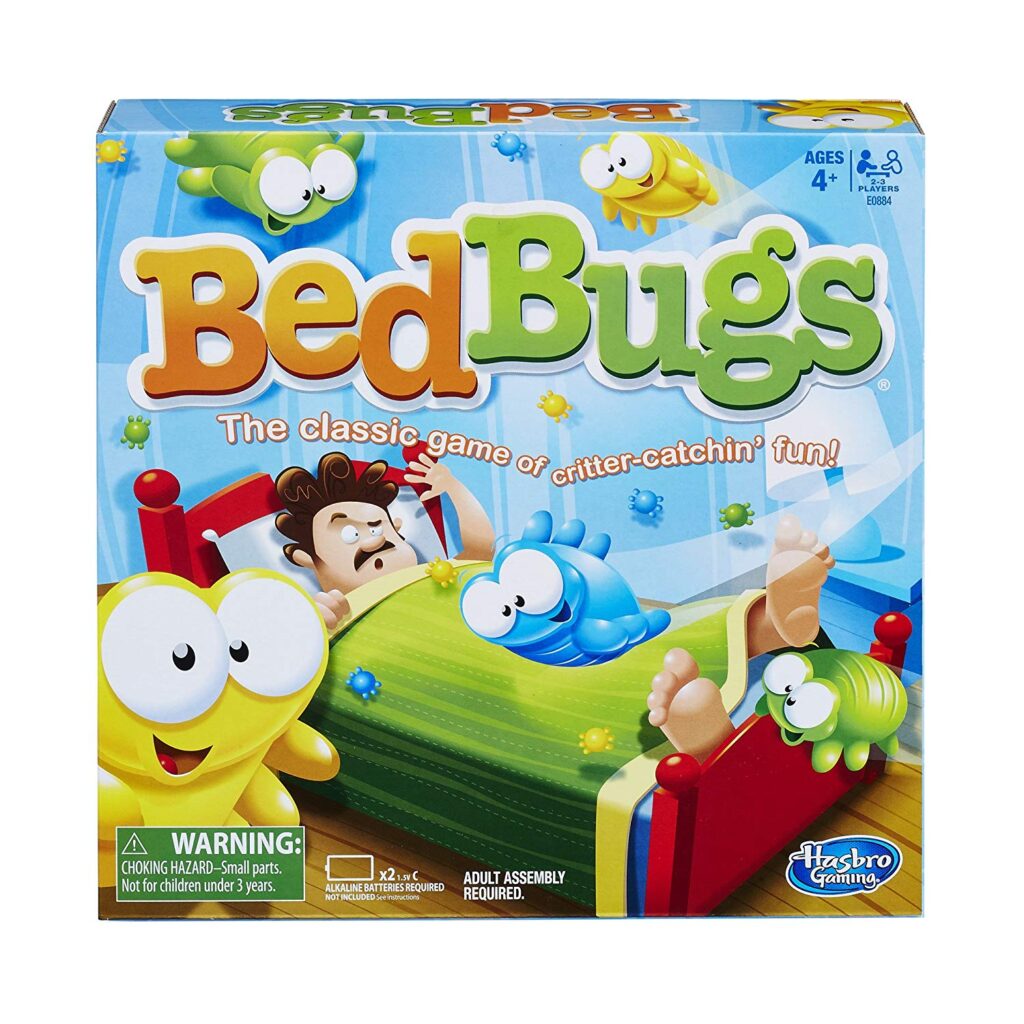
Bed Bugs Game– This tong game has different colored tongs and matching bugs that promotes not only fine motor skills needed for pencil grasp, by eye-hand coordination and visual perceptual work, too. This game is geared toward preschool-aged kids, but can be easily graded up or down to suit older or lower developmental aged kids.
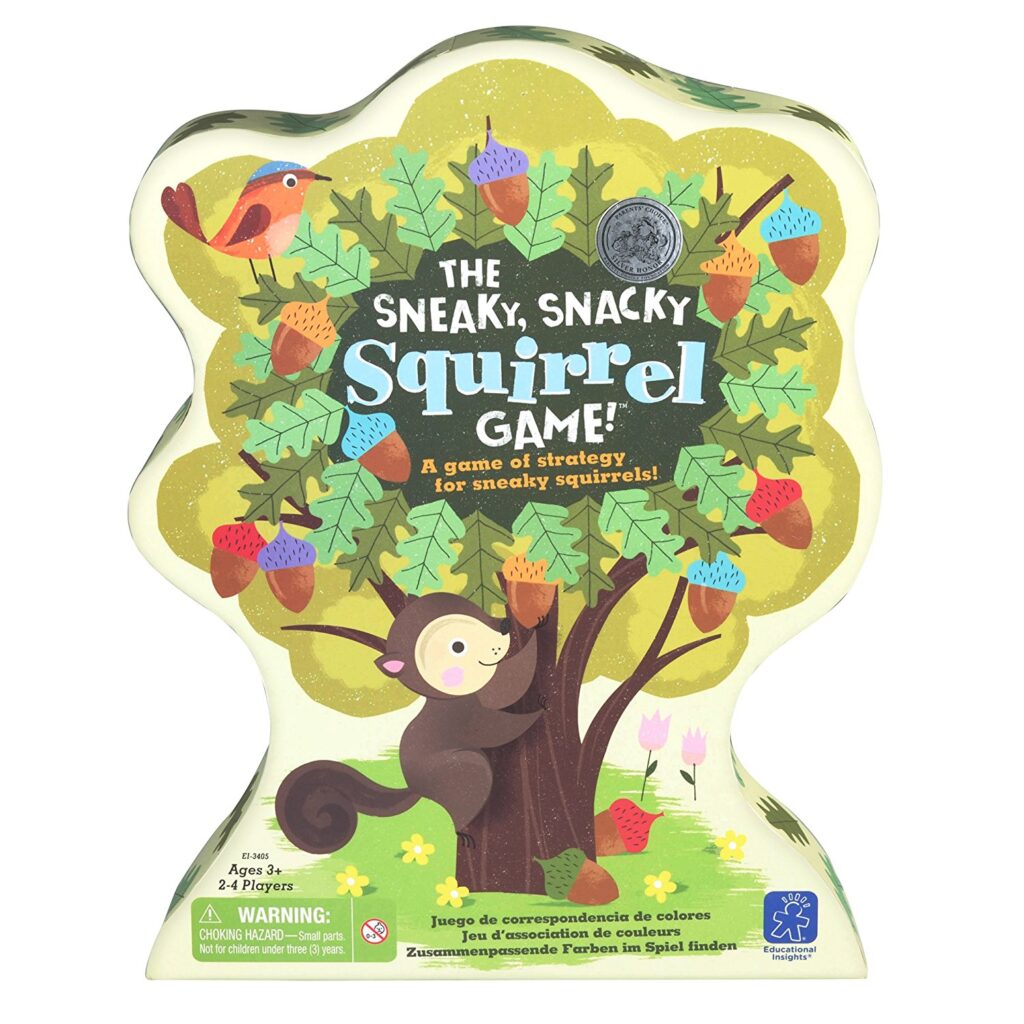
The Sneaky, Snacky, Squirrel Game– Great for younger kids or non-readers, this game promotes hand strength and eye-hand coordination. Players use squirrel shaped tongs to pick up and manipulate small acorn pieces. It’s a fun game to promote separation of the sides of the hands and arch strength needed for pencil grasp!
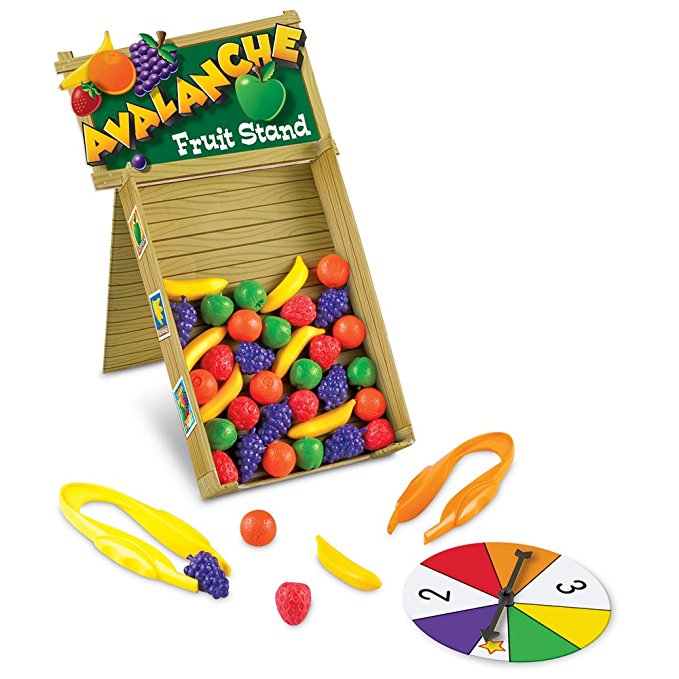
Avalanche Fruit Stand– This game is a powerful tool to promote pencil grasp! Kids use the tweezers to remove different shaped fruits from a stand that is on a slanted surface, promoting extension of the wrist. The slanted surface encourages separation of the sides of the hand and use of the precision side of the hand, while strengthening the arches for improved functional pencil grasp.
Make Your Own Games to Improve Pencil Grasp
Feed the dog- Take a box, put a picture of a dog on it. Cut out a hole for the mouth and uses tongs to pick up cheerios to place in the dog’s mouth.
Wind up toys are another great way to work on developing the precision side of the hand. Holding the wind up part with the thumb, pointer and middle finger works on the precision side of the hand and grasp.
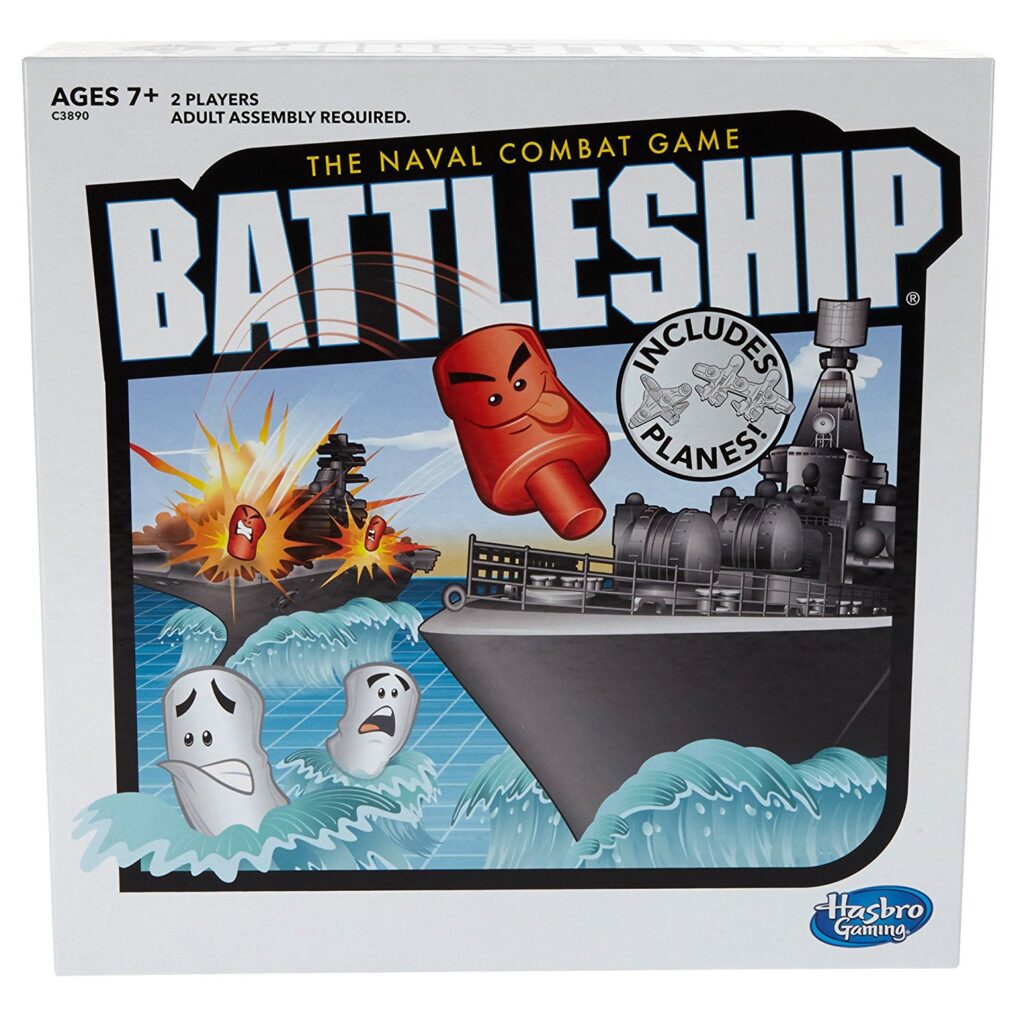
Battleship is a great game to work on using the precision side of the hand. Every time your opponent says the coordinates of the strike you have to grab a tiny peg, red or white and place it on the ocean grid. This gives the child lots of practice with fine motor skills!
Looking for more ways to improve the skills needed for pencil grasp by using games, toys, and tools in the therapy clinic or at home?
Use these wind-up toys to help with fine motor skills.
This gift guide has lots of toys that promote a better pencil grasp.
These are must-have toys for stabile wrist extension needed for pencil grasp.
About Christina:
Christina Komaniecki is a school based Occupational Therapist. I graduated from Governors State University with a master’s in occupational therapy. I have been working in the pediatric setting for almost 6 years and have worked in early intervention, outpatient pediatrics, inpatient pediatrics, day rehab, private clinic and schools. My passion is working with children and I love to see them learn new things and grow. I love my two little girls, family, yoga and going on long walks.
MORE activities to improve the skills needed for a functional pencil grasp:
Want to know how to fix a problem with pencil grasps? Need help knowing where to start when it comes to immature pencil grasps or a child hating to write because their hand hurts? The Pencil Grasp Challenge in open for you! In this free, 5 day email series, you’ll gain information, resources, specific activities designed to promote a functional, efficient pencil grasp.
The pencil grasp challenge is a free, 5 day mini course and challenge. During the course of five days, I’ll be teaching everything you need to know about the skills that make up a functional pencil grasp. You’ll learn what’s going on behind the inefficient and just plain terrible pencil grasps you see everyday in the classroom, clinic, or home. Along with loads of information, you’ll gain quick, daily activities that you can do today with a kiddo you know and love. These are easy activities that use items you probably already have in your home right now.
Besides learning and gaining a handful (pun intended) of fun ideas to make quick wins in pencil grasp work, you’ll gain:
5 days of information related to pencil grasp, so you know how to help kids fix an immature pencil grasp.
Specific activities designed to build a functional pencil grasp.
Free printable handouts that you can use to share with your team or with a parent/fellow teachers.
You’ll get access to printable challenge sheets, and a few other fun surprises.
And, possibly the best of all, you’ll get access to a secret challengers Facebook group, where you can share wins, chat about all things pencil grasp, and join a community of other therapists, parents and teachers working on pencil grasp issues.
Lite Brite Position this old school toy on a slightly elevated surface to promote an extended wrist while managing the small pegs within the hand and with a tripod grasp.
Ker Plunk: The Ker Plunk Game from Mattel encourages an extended wrist as the child pushes the sticks into the holes of the game. They are encouraged to use a tripod grasp to hold the sticks as well. Rotating the sticks encourages two types of in-hand manipulation. Take this game a step further in handwriting exercise for strengthening and play laying down on the floor, propped up on your elbows. Getting down on the floor to play will activate the large muscles of the back and the shoulder girdle to improve precision in pencil grasp.
Lacing Cards: Lacing cards are a great way to encourage a tripod grasp. This set of Lacing Shapes from Patch Products come in simple shapes with bold colors. The child must hold the tip of the string in a dynamic tripod grasp to push through the holes of the card. If your child has their thumb squashed up against their index finger while threading the cards, be sure to show them how to make a nice round circle for an easier time.
Squeeze Toys: a gross grasp is using the whole hand to squeeze and flex into a grip. What a great way to strengthen the muscles of the hands! This Melissa & Doug Louie Lobster Claw Catcher from Melissa and Doug is a fun way to encourage hand strength and endurance for coloring and writing.
Easel: An easel can be used in so many ways while encouraging an extended wrist. Paint, draw, color, or write on the elevated surface. We love taping contact paper to our easel and sticking all kinds of craft supplies. This really encourages an extended wrist while using a tripod grasp or tip to tip grasp to manipulate little items (think tissue paper, sequins, foil squares…the possibilities are endless!) This Easel is great for extended wrist activities. And, it even folds down to reveal a desk surface. It’s the perfect gift to promote improved handwriting!
Etch-A Sketch– Another classic toy, the Etch-A Sketch is perfect for building an extended wrist. Prop it up on a slanted position and be sure to place it upside down so the knobs are at the top.
Tissue Paper Art: There is possible no better art project for hand strengthening than tissue paper art! Crumbling little bits of tissue paper is perfect for strengthening the small muscles of the hand. Encourage your child to use just their finger tips to crumble the bits of tissue paper rather than two hands to crumble. This ALEX® Toys – Early Learning Tissue Paper Art -Little Hands 521W from Alex Toys is bold, colorful and just plain fun art! Even better for the intrinsic muscles of the hands is tearing bits of paper before crumbling.
Stamps– Grab a set of small rubber stamps or any stamp that has a small handle. Tape a piece of paper to the wall or clip it to an easel. Holding the handle while stamping on a vertical surface promotes a functional wrist position.
Twister game– Any game or activity that is done with the child extending their wrist as the press their upper body weight through the arm is a great strengthening exercise for wrist stability.
Beads– Threading beads with a string or plastic cord encourages and extended wrist with fine motor dexterity. Beads can be found in various sizes to meet the needs of the child.
Table Top Easel– This one is double sided to allow for chalk, dry erase markers, and has a clip for attaching paper. Use the easel for writing, drawing, painting, coloring, chalking, and games like Hand Man to make strengthening fun.
Dartboard– Tossing darts encourages an extended wrist while holding the darts. This set comes with magnetic darts, which is great for kids.
Pop Beads– The small size of pop beads promotes dexterity of the fingers as well as resistance to push the beads together. Encouraging the child to do this task with both elbows on a table surface encourages an extended wrist.
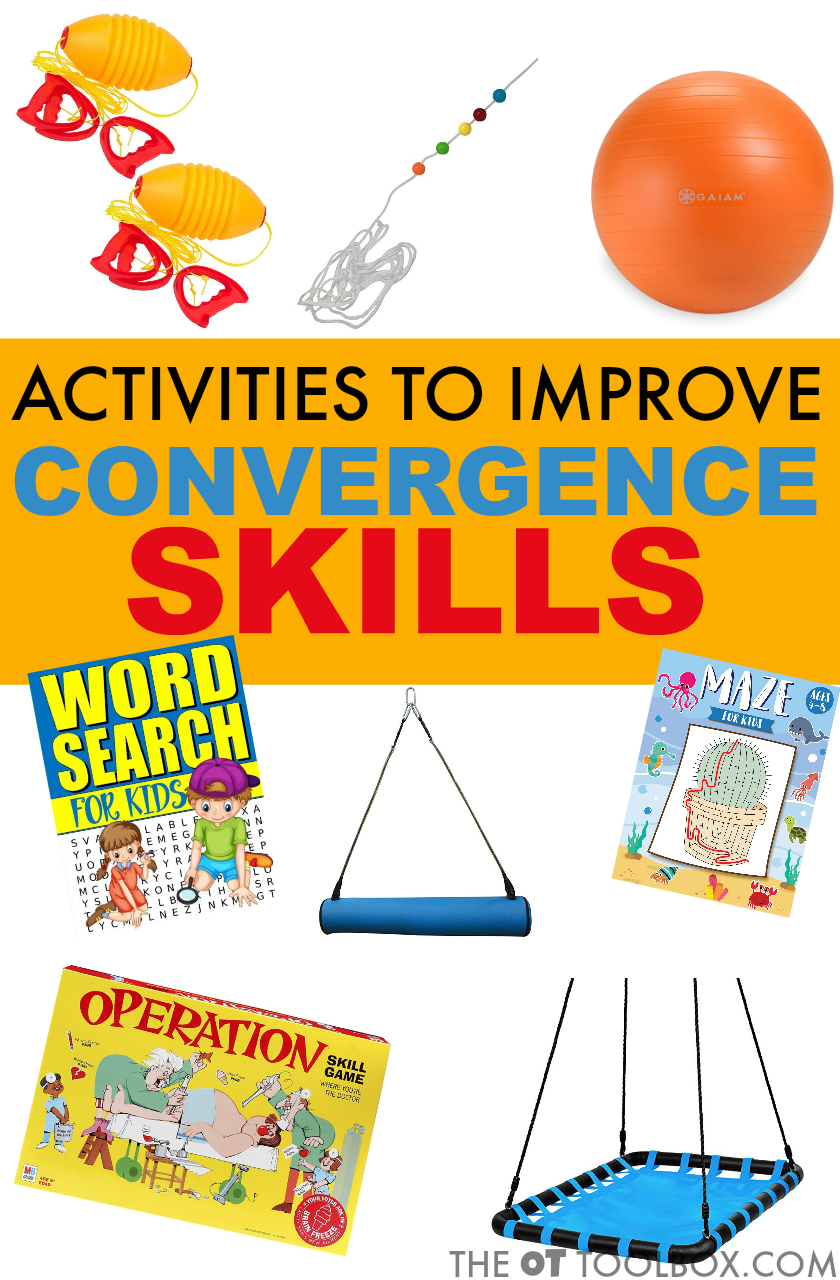
Below you will find information about convergence, including convergence insufficiency, and activities to improve convergence skills. These activities can be used by occupational therapists in treatment as indicated by vision screening and based on the individual needs of the child as determined by assessment. The fact is that visual convergence skills impact reading, writing, and so many aspects of functioning. We have more information on this in our resource, how convergence insufficiency impacts reading skills. Having a few visual convergence activities on hand to support these needs is key.
Activities to Improve Convergence Skills
**DISCLAIMER** I am not a developmental optometrist, ophthalmologist or vision therapist. Activities presented in this post are within the OT Scope of Practice. A developmental optometrist, or behavioral optometrist, or vision therapist should be consulted prior to completing any activities in this post to rule out the need for corrective lenses and vision therapy. These types of vision specialists can support specific needs.
Disclosure: Amazon affiliate links are included in this post.
Oculomotor control is a fine motor skill, that without the correct supports, is unable to function as it is intended. Like any other fine motor skill, a strong core foundation is imperative to the development of skills. As visual deficits are particularly hard to identify by themselves, this is an important piece of the puzzle.
Foundations of Convergence Skills
Getting a better handle on what causes things like skipping letters when reading, trouble with depth perception, trouble tracking objects, and other convergence red flags, is tackling the foundations of visual convergence.
Let’s first discuss what causes convergence insufficiency. Then, we’ll cover convergence activities to support these needs.
What causes convergence insufficiency?
Convergence insufficiencies in young children is most commonly caused by an eye muscle imbalance. This eye muscle imbalance can be made more pronounced if the child does not have adequate core and neck strength.
When a child lacks core and neck strength, they may adjust their head position, or cover one eye to compensate to provide increased support and stability to their eye muscles.
This pattern of compensation is similar to the one we see when a child has a fine motor delay, and utilizes their scapula, elbow and wrist for support for increased dexterity.
Activities to Improve Convergence Skills
The following activities Address Foundational Areas Related to Convergence Skills:
Gross Motor Skills:Gross motor activities to support convergence skills should focus on balancing core muscles and strengthening of the neck, in particular, neck extension. Below are a few of my favorite activities to address core and neck strength with a focus on convergence skills.
Supine Flexion and Prone Extension Activities While Supine Flexion and Prone Extension are not fun activities to complete on their own, it provides the therapist with an understanding of where the child’s muscle imbalances lie. These are also very easy activities for parents to build into their daily routines and in which progress is easily monitored. Add interest to these exercises by incorporating ball kicks or hit in prone or vertical ball toss in supine.
Play in Prone on a Platform Swing Complete games such as Operation, simple interlocking puzzles and tangrams in prone on a platform swing to help develop sustained convergence skills.
Adjust the swing so that the child’s elbows are at 90 degrees to allow maximum levels of movement, and appropriate distance to encourage use of convergence skills. Place game pieces in 180 degree arc and call pieces out for them to find moving back and forth from the game board. Looking for pieces within the arc give the child’s eyes an opportunity to go into divergence for a short period of rest, and then back into convergence.
Therapy Ball- As the child’s skills increase, have them complete the activities in prone over a therapy ball. This requires increased core, neck and eye muscle control to complete the task at hand.
Upright Bolster Swing Play For many kids, the upright bolster swing is a true challenge. It requires core engagement, along with vestibular and visual integration. These activities also challenge the child’s active abilities to converge and motor plan simultaneously.
The first activity is to have the child attempt to grab items off the wall or structure within the gym space. The goal is for the child to watch his/her hand all the way to the item and grab it during “free” swing. “Free” swing refers to the child just being pushed and allowing the bolster to swing freely without direction from the therapist.
This activity can be graded as necessary for each child to provide the just right challenge.
The second activity builds upon to the first activity. The activity is completed in the same fashion on the bolster swing, but adding having the child throw the item (I like bean bags), into a bucket or barrel. As the child’s ability to converge in motion increases, so will their aim and timing.
Convergence Activities
Many OT activities for visual motor overlap with convergence strengthening activities. It is important to ensure that breaks are built into convergence activities to prevent eye strain.
If a child reports eye fatigue or is rubbing their eyes, have them sit up and look at a point in the distance for a few minutes.
Related Read: Looking for information related to Visual Saccades? Here is information on Saccades and Learning.
More Activities to Address Visual Insufficiency
Below is a list of activities that OT’s can utilize in therapy to support convergence skills if the child is not already receiving vision therapy.
Maze Activities to Improve Convergence Skills
Maze activities are great for working on sustained convergence and teaming skills.
Complete them in a vertical plane or surface to encourage the neck and eye muscles to work correctly as a team, and to prevent the child from compensating with postural corrections.
Start small and large, moving into more complex mazes that are smaller in nature.
Use a Zoom Ball to Improve Convergence Skills
The Zoom Ball is great for active convergence/divergence. The child has to watch the ball all the way to their hands prior to opening them.
As they develop convergence skills, their timing and speed at which they can play with the Zoom Ball will increases.
Watch for decreasing abilities as the activity continues. This may indicate fatigue of the eye muscles and need for a break with the activity.
Word Searches and Letter Searches to Improve Convergence Skills
Similar to the maze activities, word searches and letter searches work on sustained convergence and teaming skills. Without good teaming skills, convergence tasks are hard to complete.
Utilize simple word/letter searches to begin and advancing the level of difficulty as the child’s endurance skills increase.
Have the child look for words OR letters in isolation. Make sure that they are using left to right, and top to bottom patterns when completing the activity. Utilizing this pattern helps prevent random eye movement around the page that does not encourage convergence and teaming skills.
These are simple activities for parents to complete everyday at home, and chances are you are probably working on letter recognition in therapy. Two skills with one activity!
Pencil Push Ups Activity to Improve Convergence Skills
Pencil Push Ups address sustained and active convergence skills. Much like the convergence portion of a screening assessment, have the child watch the end of a pen or pencil with a topper, from 18 inches away, into their nose and back out again.
Be sure to have the child stop before their nose if they are seeing double. They may not realize that they are seeing double, so be sure to ask along the way.
They may begin to see double as fatigue increases with the activity. Seeing double defeats the purpose of the activity, as the goal is to help the eyes work together to see ONE image.
Complete this activity for several repetitions before taking a break and having the child look at a point in the distance. This can be used as a warm up activity to sustained convergence activities.
Popsicle Stare Activity to Improve Convergence Skills
This visual convergence activity addresses sustained and active convergence, and can be done in a bunch of different ways!
The idea is to hold something small, like a popsicle stick with a sticker or funny face at the end, approximately 10-12 inches from the child’s face. The goal is to have them stare at it maintaining clear focus, and then look away. These farm animal popsicle sticks are a fun DIY tool you can make.
This cycle is completed several times to help the child’s eye muscles become stronger as a team.
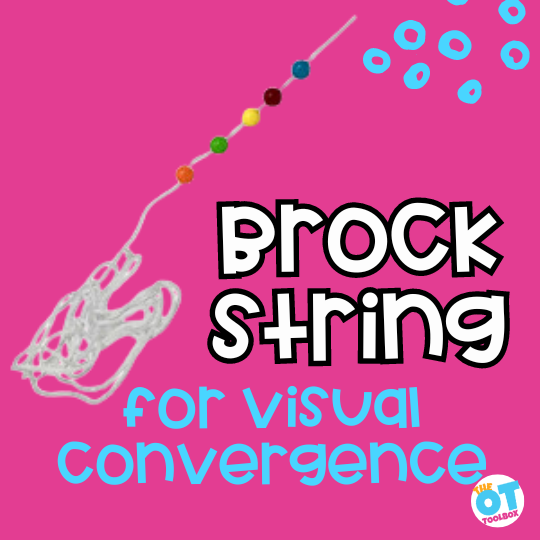
Brock String Convergence Insufficiency Activity
The Brock String is something that you may be familiar with from school if you had a unit on vision. This activity has the child looking at various points along a fixed route.
The purpose of a Brock String is to help and enhance the coordination between the eyes and the ability to shift vision to different distances quickly, accurately, and effortlessly.
Points should be stabilized starting at approximately 4 feet, 18 inches and 12 inches. Tie a string to the end of the door knob or chair with beads placed at the above mentioned point. Have the child hold the string to their nose, and look at the beads from the farthest point, to the nearest point, focusing on each point as they go.
The goal is to see only ONE bead as you move up and down the string. This activity is difficult for younger children, and should be utilized only if they are able to follow directions and verbalize what they are seeing or any discomfort to you. Limit the number of repetitions of this activity and utilize breaks as needed.
This is also a good warm up activity for sustained convergence activities.
For a fun twist on the Brock String, try asking the child to thread beads on a string when it is taped to a wall. Upside down beads are an even bigger twist!
A final note on Addressing Convergence Skills
OT and Vision Therapy overlap in many ways. It is important to note that an OT who has received specialized training for vision therapy, has many more tools and equipment available to them. They may utilize high tech computers, and lenses to address convergence insufficiencies more directly.
The activities in this post are to be utilized to support the development of convergence insufficiencies, but should not be utilized in place of vision therapy or referral to a developmental optometrist.
If you are unsure when to refer or having a hard time getting a parent on board, check out my OT Vision Screening Packet for more information. It contains a screener for therapists and useful handouts for parents on why addressing vision is important to their child’s success.
This is a digital file. Upon purchase, you will be able to access the 10 page file and print off to use over and over again in vision screenings and in educating therapists, teachers, parents, and other child advocates or caregivers.
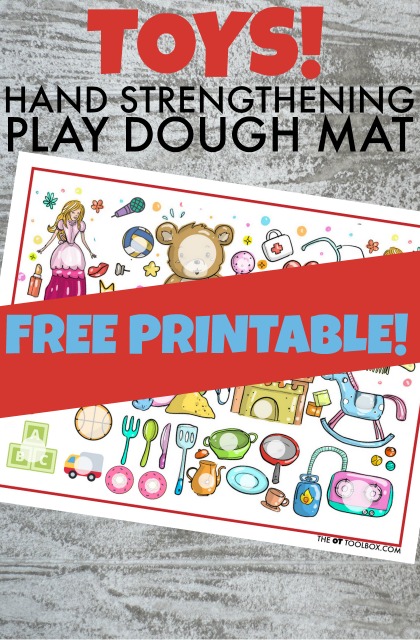
This toy theme play dough mat may be just the incentive kids need to build hand strength! Kids can improve hand strength in fun ways when play dough is added to the mix. We’ve been sharing a variety of free play dough mats based on several different themes. These are free printable playdough mats that kids can use to increase hand strength, specially strength of the intrinsic muscles of the hands.
Kids love toys, right? I haven’t met a child who isn’t captivated by a new toy. This toy theme play dough mat builds on the fundamental “job” that kids have…play!
You can print off this printable play dough mat that focuses on toys and an toy theme and use it to work on fine motor skills and the intrinsic muscle strengthening that kids need to complete many functional tasks…and even play!
Toy Themed Play Dough Mat for Fine Motor Skills
Show your child how to use the finger tips and thumb of one hand to roll a small ball of play dough. By using just one hand, they can develop and define the arches of the hand, while strengthening the other muscles of the intrinsic muscle groups at the same time.
Then, ask the child to place and press the play dough on the circles on the toy play dough mat. They may need to pull off a bit of dough to make the play dough ball fit into the circles. This is a great activity for boosting visual perceptual skills too!
Enter your email in the form below and access your free printable play dough mat. Then, pull out the play dough!
Colleen Beck, OTR/L has been an occupational therapist since 2000, working in school-based, hand therapy, outpatient peds, EI, and SNF. Colleen created The OT Toolbox to inspire therapists, teachers, and parents with easy and fun tools to help children thrive. Read her story about going from an OT making $3/hour (after paying for kids’ childcare) to a full-time OT resource creator for millions of readers. Want to collaborate? Send an email to contact@theottoolbox.com.












 from Lauri is great for building peg towers while learning colors and shapes. Older kids might love Fusion Beads like the
  from Perler.