Colleen Beck, OTR/L is a pediatric occupational therapist and the owner and author of The OT Toolbox website. She manages all of The OT Toolbox social media accounts and runs the popular newsletter.
Read about Colleen's experience and career as an occupational therapist, including how The OT Toolbox began on our About The OT Toolbox page: https://www.theottoolbox.com/about-us/
Colleen created The OT Toolbox in 2011 and since then has written thousands of blog posts designed to support therapy providers, educators, parents, counselors, admin, and caregivers in promoting the healthy development of kids.
Check out Colleen's blog posts below:
Winter weather means cold temps. We try to get outside to play every day, but sometimes the thermometer is just too low for us to go outside for very long. Other days, we are out there for hours! (Yesterday, my daughter and I were outside for FOUR hours strait. In the mud, melting snow, and more mud. It was a day of fun, but I was ready to bundle up in a blanket with my wiggly babies and hot cocoa after that!
When you are looking for an indoor play idea, you want easy prep, minimal materials, and easy clean-up. This indoor teepee is perfect for creative play, a cozy book nook, or imaginative teepee play, all indoors! I love that it can be used for a sensory calm-down hideaway, too.
How to make an indoor TeePee
Full disclosure: This post contains affiliate links.
To make this indoor tee pee, you’ll need only a few items:
3-4 Hair bands (THIS brand
worked best because they had a rubber grip to them.)
Cotton Scarf (for added stability)
Large sheet
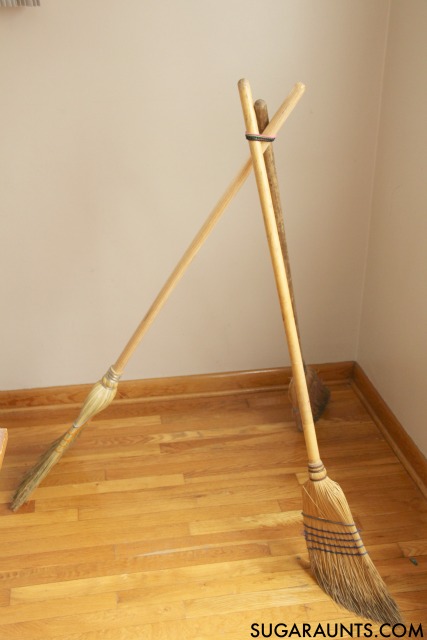
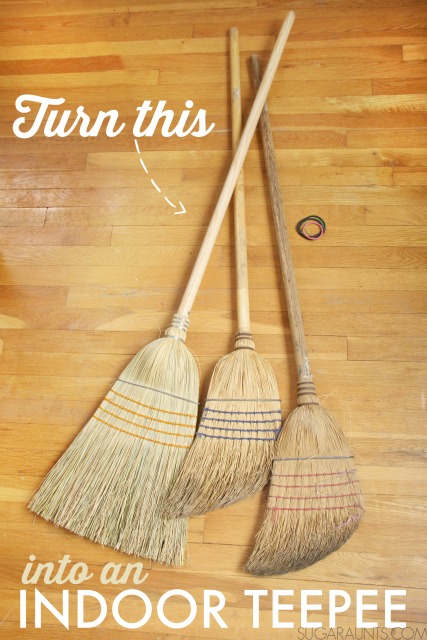
Start by leaning all of the Corn Brooms
together in a tripod position. Stretch the hair bands over the top to keep the broom sticks together, like in the picture above.
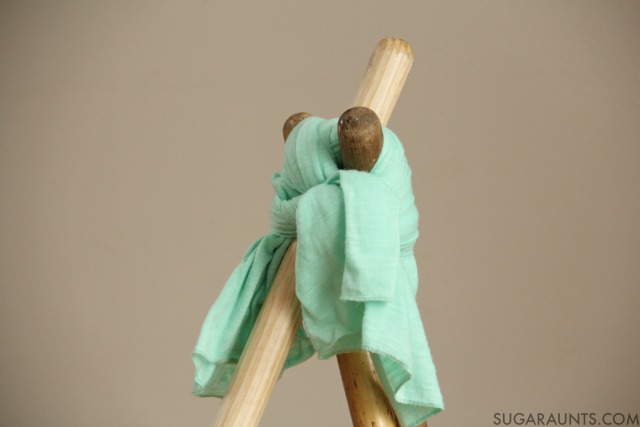
If you like, you can wrap and tie a cotton scarf around the end of the brooms for more stability.
You’re done! Drape a large sheet over the teepee and start playing!
Quick Tip: Place the teepee on a carpeted surface. The Corn Brooms
ends will be more stable than if you place it on a hardwood floor.
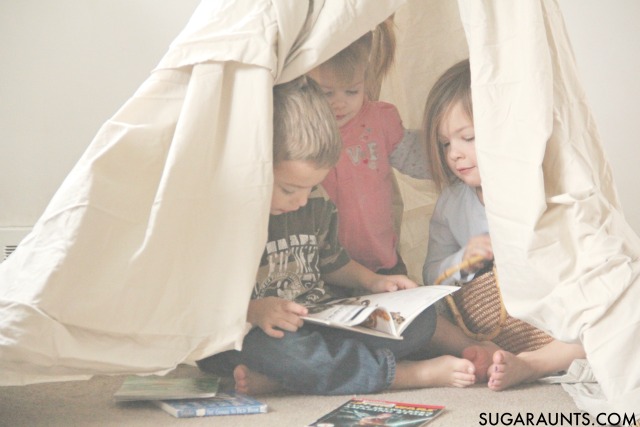
Use the teepee for a quiet reading nook, sensory calm-down space, or pretend play area.
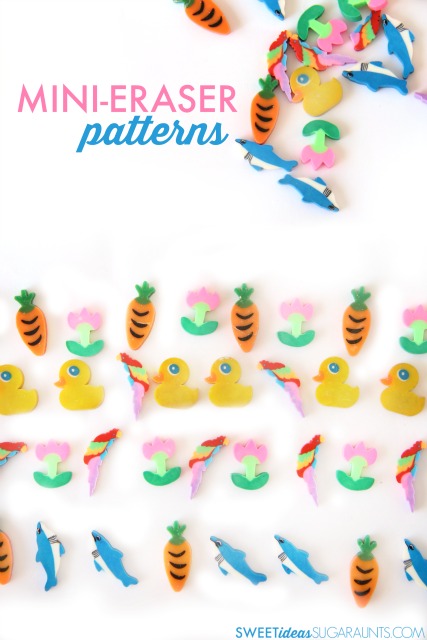
Miniature erasers are one of my Occupational Therapy toolbox power tools. These little bits of rubber are the perfect manipulative for working on so many fine motor and developmental skills. Today, I’m sharing how we use them in learning and reviewing skills learned at school, like patterns with my Kindergarten -aged son.
Be sure to check out our resource on name practice in kindergarten for more hands-on activities for 5 and 6 year olds.
We’ve been sharing a few other of my favorite fine motor manipulatives recently, like chain links and LEGOS. It’s so much fun to use toys and OT tools in learning activities and I’m excited to continue this series as my kids learn!
Fine Motor Pattern Activity
Full Disclosure: This post contains affiliate links.
These mini erasersmhave been in my therapy bag for years. I’ve got a collection of mini erasers that I’ve found at Dollar Stores, Target, and teacher stores. But, my favorite place to get a variety of miniature erasers is here for the variety of animals and items.
We worked on a few fine motor skills with our mini erasers .
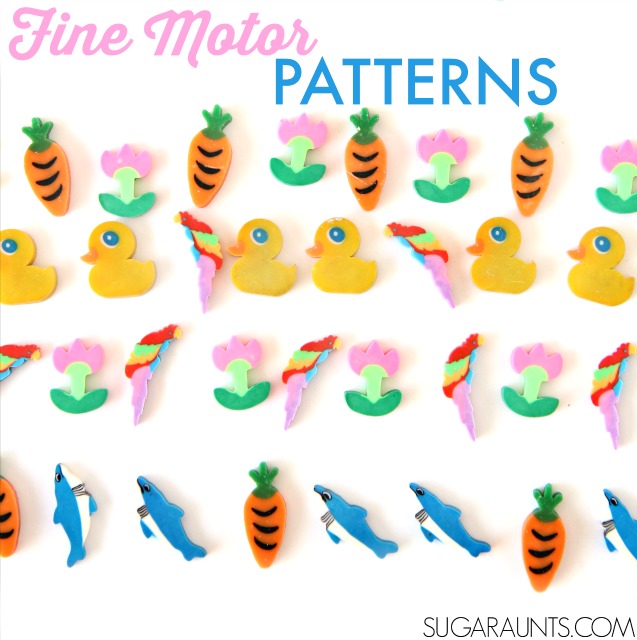
This math activity was so simple. I piled up a bunch of mini erasers and asked my Kindergarten son to create an “ABB” pattern. He had to pick up the erasers using in-hand manipulation to squirrel away the eraser into his palm. Picking up the erasers works on translation from fingers to palm as well as separation of the two sides of the hand. Then, he had to hold on to the erasers in his palm as he placed the erasers one at a time onto the paper in a pattern order.
After he made the “ABB” pattern, I had him do a few other patterns like “AAB”, “ABA”, “BBA”, BAB”, and “AABB”.
Want to know more ways to work on fine motor skills with these mini-erasers? I’ve got ideas to share, and they will be up on the blog soon!
Teaching kids functional skills like how to button their coat happens naturally during a day’s progression. You help your Toddler or Preschooler into their coat before an outing and sneak in a few verbal cues while you show them how to slip the button through the button hole. Then, before you blink your eyes, they are saying “I do it, Mommy!” and your little one is on their way to independence. This would be a great addition to a Valentine’s Day theme in occupational therapy.
NOW, I am a huge supporter of teaching kids to do things like buttoning and shoe tying in a natural setting, with real buttons and shoe laces and on their body. BUT, sometimes a child just needs a fun way to practice the skills that make up the task of buttoning a button. Other times, it’s just fun to practice buttoning so that kids can show off what they can do and get a little boost of self confidence.
This Buttoning Skills Activity is easy to put together, fun to do, and a creative way to practice buttoning. Before you know it, your little “do it myself”-er will be buttoning their pajamas up in a flash. For now, we play our way to independence!
Teach Kids Buttoning Skills with a DIY dressing board
This post contains affiliate links.
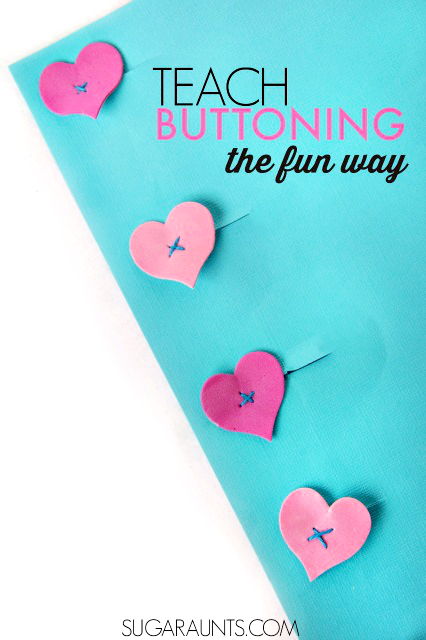
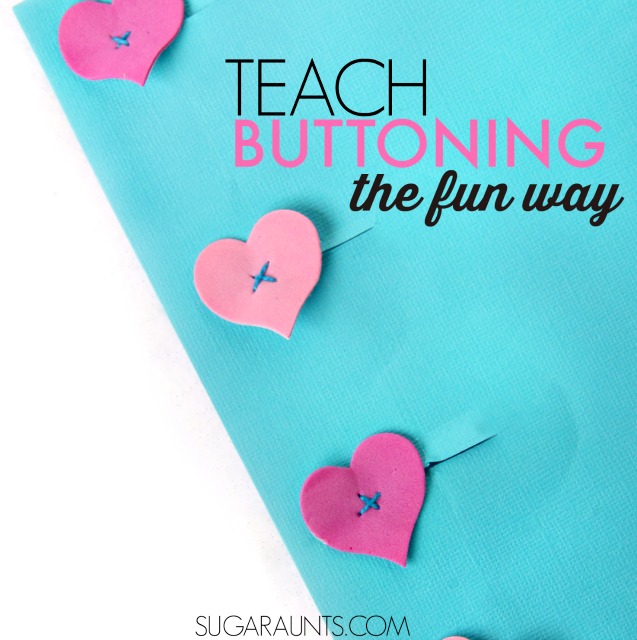
So, we’ve practiced buttoning with egg cartons and tissue paper. Today, I’ve got a new idea for you. We used Foam Hearts to practice precision in fine motor skills while working on the motor control and dexterity needed for buttoning. This was such a fun activity for my preschooler to do. She can button large buttons on her body at this point, so it wasn’t hard for her to practice these motor skills. BUT, adding the novel component of flimsy fabric and fragile paper made her practice the fine motor control that she needs for buttoning small buttons and many fine motor tasks.
To make a DIY heart button activity, you’ll need just a few items.
This is an easy project to throw together, and equally adaptable to your child’s age and fine motor needs. We made out Buttons with Foam Hearts, but for a child who needs more help with buttoning skills or has weaker fine motor control, use cardboard or plastic buttons.
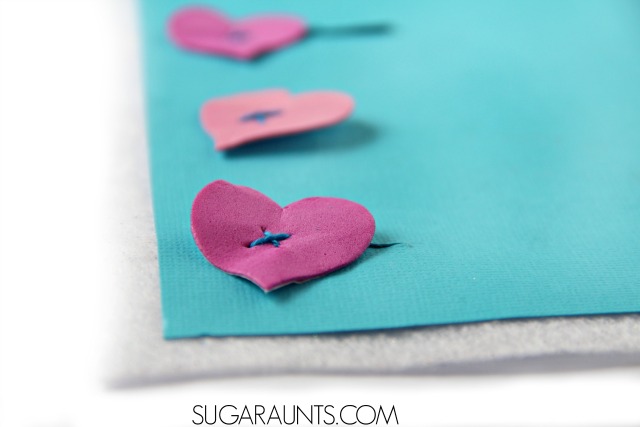
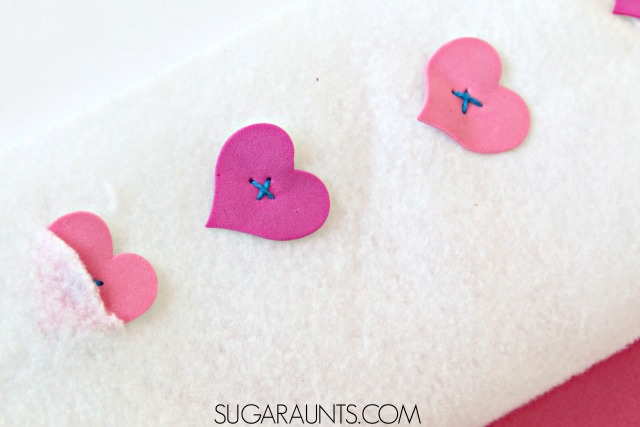
Sew the foam hearts/buttons along the edge of a piece of felt. We used a thicker felt sheet for more control. A thinner piece of felt would be more like fabric of clothing, so if you are working on certain aspects of buttoning, like controlling the material with two hands in a coordinated manner, you can make your buttoning project with fabric or thinner felt.
Use a cross-stitch pattern to simply sew the Foam Hearts in an “x”. This is a great real-life skill activity for older kids. Threading a the large needle is a nice fine motor task and the project is so simple that it’s a great beginner sewing activity for kids.
Fold the felt over and add snips for button holes and you have a nice portable practice activity!
We practiced buttoning with the felt a few times and then added another way to practice. I marked button holes on a sheet of thick Cardstock . After cutting the holes with scissors, my preschooler practiced pulling the foam buttons through the holes. Using paper to practice is a real workout for little fingers as the paper will tear with too much force. The point for this part of the activity is to practice pushing the button through the hole and pulling it out. The paper is a great reminder that the button slides through the button hole easily when both hands are working together in a coordinated manner.
TIP: Snip the cardstock or Stiff Felt Sheet button holes just a bit longer than you think you need to for kids who are working on buttoning skills. You can also cut the hole wider for easier buttoning. This is one way to grade the activity for kids who need help learning how to button their clothes.
More ways to teach kids buttoning skills using this DIY button project:
Lay the fabric on the child’s lap as a beginner task. This is a good way for the child to see what they are doing as their hands are working together on the buttons.
NEXT, lay the fabric on the child’s lap, BUT position it so that it would be if the child were buttoning a coat on their body. Make sure the buttons are on the child’s lap and not on their truck for easier accessibility and success.
THEN, position the buttoning activity up higher on the child’s trunk to simulate buttoning a shirt or coat on the child.
Finally, move on to teaching buttoning with real-life articles of clothing.
Be sure to provide real clothing items along the way of teaching buttoning skills, while adding in fun motor planning activities like this DIY Button activity or our egg carton buttoning activity. Learning through play in creative ways is fun!
This post is part of the Activities for Kids blog hop. This month, each blogger is posting about hearts. Stop by to see what our friends have come up with:
MORE fine motor activities that we love and you will too:
Colleen Beck, OTR/L has been an occupational therapist since 2000, working in school-based, hand therapy, outpatient peds, EI, and SNF. Colleen created The OT Toolbox to inspire therapists, teachers, and parents with easy and fun tools to help children thrive. Read her story about going from an OT making $3/hour (after paying for kids’ childcare) to a full-time OT resource creator for millions of readers. Want to collaborate? Send an email to contact@theottoolbox.com.
This is a small series I’m sharing this month, called Get Your Sensory Child Organized. These are tips and ideas for helping your child with sensory processing concerns and other underlying problem areas get organized and start planning and prioritizing tasks.
How to Help Sensory Kids Get Organized
These are the kids that look sloppy or lazy, but really have problems with fine motor, visual motor, gross motor, attention, executive functioning, and many other areas. All of these problem areas will interfere with task completion and will lead to sloppy closets, messy desks, and homework that is not completed.
If you know a child who is having trouble getting organized, then this series is for you! Be sure to stop back to get all of the tips!
How to Help Sensory Kids Get Organized
These are the posts you will be seeing from us, soon! Be sure to stop back and see them all.
Our first post in the series is live! If you know a child or student who has a sloppy desk, crammed locker, misplaced materials, and forgotten homework, then this post is for you!
Help Your Sensory Kids Get Your Kids Organized AT HOME: After-school routines, homework struggles, afternoon free-time, extra-curricular activities, organizing the home and prepping for the next day, cooperative family work, fun family time, and more.
Sensory Considerations in Organization and Attention: Sometimes, attention and sensory processing issues have a huge factor in organizing a child.
There are many handwriting and sensory considerations, from paper sensory issues, to pressing too hard when writing, to sensory issues that impact handwriting posture, handwriting is connected to sensory processing. When teaching a child to write, there are many sensory processing to consider. Today, I’m sharing sensory considerations and strategies to help children in handwriting tasks.
Handwriting and Sensory Issues
This post is part of my new year-long series with 9 other Occupational Therapy and Physical Therapy bloggers as we discuss Functional Skills of Childhood.
Pick up a pencil. Hold it correctly. Write a letter. Copy a word. Fill in a worksheet. Write down the day’s homework assignment in the correct space with a noisy classroom full of talking kids while the teacher chats to someone at the door. The open windows alert you of another class playing on a playground. Bouncing balls, laughing students, buzzing pencil sharpener, bright sunshine, and that homework assignment that needs to be written legibly so you and your parents can read it an hour from now.
One of a child’s occupations are to perform educational activities like handwriting. Holding a pencil, forming letters, writing on lines, and copying from a chalkboard is a multi-sensorial function of childhood.
Handwriting depends on accuracy and legibility. Letters must be formed correctly and with appropriate pencil pressure, on the lines, and with attention to details.
To complete these skills, handwriting and sensory processing are naturally associated. All components of handwriting require integration of our senses for accuracy, legibility, and performance.
In a classroom environment, we are constantly bombarded with an input of sensory information. We receive sensory information from our eyes, ears, skin, muscles, and joints and our brain has the job of organizing the information, selecting the important parts, and disregarding the rest.
When our body’s sensory systems are functioning appropriately, we are able to manage tasks like writing with a pencil. When there is a deficit in one of these areas, there are sensory integration problems and activities that we are required to perform are affected.
Full Disclosure: This post contains affiliate links.
Sensory Processing and Handwriting
What is sensory processing?
Sensory processing, or sensory integration requires the body’s central nervous system to effectively register sensory information, filter the parts that are not necessary, organize and interpret what to do with that information, and modulate the attention level of our nervous system.
Ineffective accommodation to this process leads to distractibility and disorganization. There are seven sensory systems in our bodies:
Tactile System (touch)
Vestibular System
Proprioceptive System
Olfactory System
Visual System
Auditory System
Gustatory System
Sensory integration is what turns sensations from these systems into perception. We perceive our bodies, and our interactions in our environment because our brain has integrated the sensory information into something meaningful, organized, and useful (Ayres, 1979).
An Explanation of the Sensory Systems related to Handwriting
The proprioceptive, vestibular, and touch senses are primary influences on the integration of our senses. This happens from infancy as we are swaddled, carried in a flexed position, and swung in a baby swing or our mother’s arms.
If these sensory systems are poorly functioning, a child will have trouble developing in all areas. Integration of the vestibular and proprioceptive systems gives the child control over eye movements at infancy. Without integration of these two systems, the baby will be slow to develop postural reactions and have a poor foundation of movement.
If the proprioceptive, vestibular, and touch sensory systems are not functioning adequately, the child will have a poor reaction to his environment. He may withdraw or over-respond to auditory and visual stimuli. The child can not focus on tasks and may feel insecure in his environment. These problems can lead to a poor body perception.
A child with proprioception dysfunction may seek out sensory feedback from his environment. You might see these children bumping into their desks, stomping their feet on the ground, kicking their chair or their neighbors chair.
They might rub their hands on the desk, bight their hands, shirt, or pencils, or write with heavy pencil pressure. Students seeking proprioceptive input often crack their knuckles and chew on shirt cuffs or collars.
An inefficient grading of movement might result in students holding their pencils too tightly, writing so heavily that the pencil point breaks, or producing messy work with large erasure holes.
A child with vestibular dysfunction may present as a hyperactive child or a hypersensitive child. Some students might have an intolerance for movement and will seem willful and uncooperative, while demanding physical support.
A problem with the vestibular system sometimes presents with gravitational insecurity. These kids might be fearful when moved such as when a teacher pushes in their chair.
The hypo-sensitive student will have an increased tolerance for movement. These kids need to keep moving in order to function. They might fidget, wiggle, and bounce in their seat. You will see these students jumping up and down in their chair, sitting on their feet and swaying, hanging upside down at their desk, and falling out of their seat.
Children with vestibular, tactile, and proprioception difficulties will have trouble with eye-hand coordination. Writing on lines and coloring between lines is difficult. There will also usually be difficulties with depth perception. In order for a child to develop visual perception, they need adequately integrated vestibular and proprioception systems.
Many times, children have auditory and tactile dysfunctions that interfere with handwriting:
The child with auditory processing concerns will seem unaware of where sounds are coming from. When a teacher directs the class to write down items or copy specific information, these directions are lost. They are unable to pay attention to one voice or sound without being distracted by other sounds in the classroom.
They may even be distressed by the sounds of pencils making marks as they or other students write.
They have trouble attending to and understanding and remembering directions related to letter formation in words and sentences. These kids might have difficulty putting their thoughts onto paper and trouble revising or correcting what they have written.
Additionally, students with poor auditory processing often times have a weak vocabulary so when they are writing words and sentences, they struggle with words and sentence structure and therefore lose focus on the letter formation and line placement that they need to attend to.
Sensory Issues with paper
The child with tactile dysfunction may be either hypersensitive or hypo-sensitive to touch.
A student who has tactile defensiveness (hypersensitivity) may overly react to light touch.
When teachers are up close as in handwriting instruction, the student might become fearful or irritable. These kids can become overly focused on neatness in handwriting and their desk space. They might need to brush off every eraser bit or clear their paper and desk of every stray mark.
Touching paper can cause anxiety. There can be over sensitivities to the texture of paper, the lines on the paper, or the “feel” of paper.
Others may find the sound of ripping paper abrasive or anxiety causing.
Still others may struggle with crumbled paper and find the creases of paper are too rough on the hands.
The child with under-responsiveness to touch (hypo-sensitivity) might seem unaware of pencil pressure and write with very heavy or very dark pressure on his pencil.
These children fail to realize that they’ve dropped their pencil or that they’ve got pencil smears all over their palms.
Sensory Processing and Motor Planning needed for Handwriting
When our body understands sensations from our skin, muscles, and joints, we are able to feel and know what our body is doing without looking at it.
This poor perception can lead to difficulty coordinating the two sides of the body as they perform different tasks. The child might have trouble holding his paper with one hand while writing with his dominant hand.
The child will need to think through his actions without them happening automatically.
Most students learn to form letters and numbers automatically given practice. Children with a poor motor plan must think out the way a letter is made.
Motor planning is the sensory process that allows us to complete and adapt to an unfamiliar task (like a worksheet), using what we already know. The key to motor planning is a body perception that can accommodate to tactile, proprioceptive, and vestibular information.
Also related to the sensory system is a child’s attention span. If the sensory information is not registered, filtered, organized, selected, and discarded appropriately, the child will not be able to focus his attention on an activity like handwriting.
Handwriting Difficulties due to poor Sensory Processing
Children with difficulties modulating sensory input face a big challenge in the classroom. The school environment is overstimulating and asking a child with sensory integration difficulties to filter out irrelevant sensory input while attending to academic work is very difficult.
Problems in handwriting might include (but not be limited to):
Handwriting Issues Related to Poor registration of sensory input with an Under-reactive response
The child may be unaware that he drops his pencil.
Shows a weak grasp.
Difficulty maintaining an effective writing posture.
Tires easily in writing tasks.
Does not notice details (Misses letters when copying words or sentences)
Desk and writing area are disorganized and sloppy.
Handwriting Issues Related to Poor registration of sensory input with a Hyperactive or Over-reactive Response
Avoids smells (pencil or paper) in the classroom.
Easily distracted during writing tasks.
Difficulty paying attention to a writing task.
Cannot work silently.
Visually distracted by others, including noises, scents.
Difficulty focusing on one section of a chalkboard or one part of a worksheet.
Handwriting Issues Related to Sensory Seeking
Seeks movements by moving the chair, wiggling in the seat, bouncing legs and arms and distracts other students with the movements.
Overly excited after recess and is difficult to settle down.
Always touching the desk or parts of the chair during writing tasks.
Craves scents or tastes: chews the pencil for it’s task, smells the paper or pencil shavings.
Chews the pencil or eraser and clothing.
Bites hair/shirt/nails when writing.
Writes with heavy pencil pressure.
Handwriting Issues Related to Sensory Avoiding
Difficulty with changes in the routine of writing: new paper or type of worksheets
Low frustration level with errors in letter formation
Anxiety: wants to make letters and numbers correctly the first time
Stubborn in handwriting concerns
Avoids touching pencil shavings, the wooden part of the pencil tip, or the eraser.
Avoids erasing mistakes
How to Help: Sensory Handwriting Strategies
Many times, sensory integration can help with handwriting problems related to handwriting. Children who demonstrate proprioceptive issues may benefit from heavy work activities in the classroom.
Heavy Work Sensory Activities to Help with Handwriting
At the beginning of the day, take down chairs from desks and push them to correct places in the room
Tilt the child’s writing surface to a slightly included position using a 3 ring binder. This positioning provides improved wrist positioning and will decrease the force the child presses through his wrist.
Try writing with carbon paper under the paper to show the child that he needs to press harder or lighter through the pencil.
Copy written work from a his desk instead of from the chalkboard or overhead.
Write with a grease pencil to provide more resistance and feedback.
Remove distractions from the classroom and seat the child away from windows and doors.
Provide the child with written and verbal instructions.
Provide a quiet space in the classroom.
Provide movement breaks.
Typically, the sensory systems and sensory integration is developed by the time a child enters school.
The ability to concentrate while managing sensory input is very much needed for the classroom that is multi-sensorial, like described above.
Problems seen with handwriting, like heavy pencil pressure, sloppy letter formation, difficulty with letter size and form, fast or very slow speed of writing, and inattention to writing tasks are often times an end product of an inefficient and irregular sensory processing system.
A sensory integrative approach to teaching handwriting can be successful for the child with sensory processing concerns. Occupational Therapists can analyze sensory processing skills during the performance of handwriting (and other school-day tasks).
An OT uses formal evaluations, screening tools, standardized tests, observation of classroom behaviors, parent/teacher checklists, and observation of classroom behaviors and play activities to identify handwriting issues related to sensory processing.
This post is part of the Functional Skills for Kids. See all of the bloggers who are participating and more about the series here. Looking for more information on the components and considerations related to Handwriting?
Resources: Ayres, A.J. (1979). Sensory integration and the child. Los Angeles: Western Psychological Services. Bundy, A., Lane, S., & Murray, E. (2002). Sensory Integration Theory and Practice. F. A. Davis Company.
Looking for more Handwriting ideas? These are some of our favorites:
The Sensory Lifestyle Handbook walks you through sensory processing information, each step of creating a meaningful and motivating sensory diet, that is guided by the individual’s personal interests and preferences.
The Sensory Lifestyle Handbook is not just about creating a sensory diet to meet sensory processing needs. This handbook is your key to creating an active and thriving lifestyle based on a deep understanding of sensory processing.
Colleen Beck, OTR/L has been an occupational therapist since 2000, working in school-based, hand therapy, outpatient peds, EI, and SNF. Colleen created The OT Toolbox to inspire therapists, teachers, and parents with easy and fun tools to help children thrive. Read her story about going from an OT making $3/hour (after paying for kids’ childcare) to a full-time OT resource creator for millions of readers. Want to collaborate? Send an email to contact@theottoolbox.com.
Have you tried making a sensory bottle yet? These a super easy and creative ways to encourage learning through a calming visual sensory tool. We’ve shared awesome ways to make them and have a great new idea to bring you today, and just in time for Valentine’s Day: this heart waterbead sensory bottle! It’s a great Valentine’s Day activity to add to your therapy toolbox.
I love sensory bottles to use as a calming and quieting sensory tool. My kids love making them and the fun of discovering items in the bottle. When you add a learning component like math or literacy it’s even better!
Valentine’s Day Sensory Bottle
Full disclosure: This post contains affiliate links.
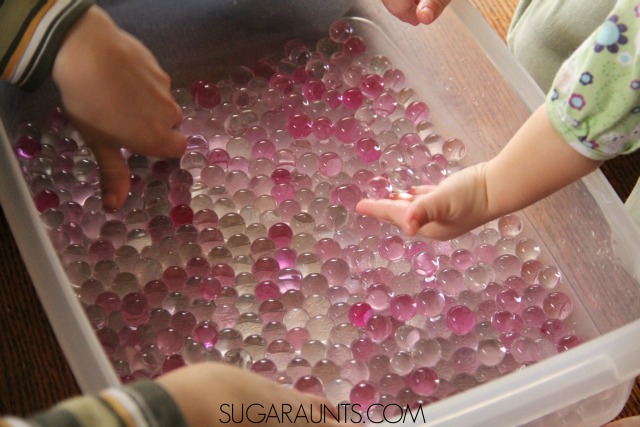
We made this discovery bottle very quickly one day. I had a bunch of pink and rose colored Waterbeads ready to go. I poured them into a big bin and had my kids help me fill the bottle.
Depending on the age of your child, you may want to prepare the sensory bottle yourself and just present the finished tool to your child. My kids had a blast playing in the water beads and placing them into the bottle, though. It was a sensory experience in itself!
We used a regular peanut butter plastic jar that had been cleaned out. (Get the kids in on the cleaning job too!)
Use any combination of Water beads. You can find them in the dollar store in the craft section or many large stores in the floral section. I love grabbing a bunch of different colors at once, though and get them online here. It’s hard to find a lot of different colors in the stores, so online is easier for me.
Have the kids fill the bottle with water beads for a fine motor activity. Manipulating the Water beads and dropping them into the bottle is a nice way to encourage in-hand manipulation and tripod grasp.
Once the bottle is 3/4 full with water beads, add a handful of foam hearts. Kids can slide these into the sensory bottle.
You can add superglue to the lid of the plastic bottle if you are worried about little ones opening the bottle and dumping the contents. We just used ours as is and did not glue the lid shut. This way, we could have a nice storage container for the water beads and play with them again.
Now play! Shake the jar and count the hearts. Ask your child to find all red hearts or all pink hearts. Use this sensory bottle as a calming tool when kids need to focus or attend.
Colleen Beck, OTR/L has been an occupational therapist since 2000, working in school-based, hand therapy, outpatient peds, EI, and SNF. Colleen created The OT Toolbox to inspire therapists, teachers, and parents with easy and fun tools to help children thrive. Read her story about going from an OT making $3/hour (after paying for kids’ childcare) to a full-time OT resource creator for millions of readers. Want to collaborate? Send an email to contact@theottoolbox.com.
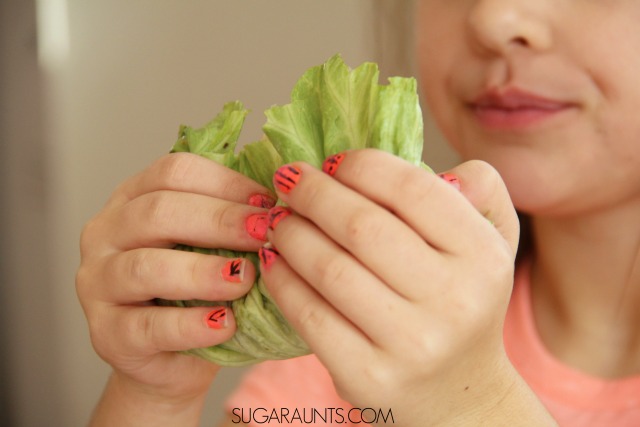
My kids are hungry all the time. So, when we made this Avocado Black Bean and Orange Zest Lettuce wrap, and they were actually full for more than an hour, I was a happy mama. We made this easy lunch recipe using a fun ingredient: Orange zest. It is part of our Cooking with Kids A-Z series and Z is for Zest!
It’s hard to believe that we’ve cooked our way through the alphabet while cooking with new ingredients and exposing my kids to new foods. We’ve come up with new favorites, like our Carrot Veggie Puffs and have tasted and shared some old family recipes, like our Apple Dumpling recipe. We’ve made bread dough, snacks, and main meals. It has been a fun year of cooking and I’m excited for the next phase of this project. For now, try cooking your way through the alphabet with great recipes from A-Z!
Avocado Black Bean Lettuce Wrap with Orange Zest
This post contains affiliate links.
This recipe is so easy to through together. It’s one that we’ve made before, with different versions. Today, we added orange zest, and the result was crisp and tasty. My kids called the zest our secret ingredient!
For this recipe you’ll need a few ingredients: Iceburg Lettuce (or any large-leaf lettuce) Black Beans Cherry tomatoes, quartered Avocado, diced Zest of 1/2 orange
Pull apart a few large leaves from the outside of the head of lettuce. Place the lettuce leaf on a plate until ready to build your wraps.
Prepare the black beans, and place them in a dish. Chop the tomatoes. Kids can do this with a child safety knife. Peel and slice the avocado. Once sliced, avocados are a great food for young chefs. It’s soft enough for easily slicing. Add the tomatoes and avocados to the bowl. Zest the rind of 1/2 orange. My preschooler loves zesting oranges and remembered the last time we did this task (and we don’t often zest oranges!) We used our standing box grater
to zest the orange, and this worked well for my 4 year old. She could stabilize the grater with her non-dominant hand while zesting the orange with her dominant hand. Older kids could use a classic zester.
Now it’s time to build your lettuce wraps. Load up the lettuce leaves with as much or any combination of the avocado, black beans, and tomatoes. Sprinkle the orange zest on top. We found that with the citrus-y touch of the zest, we didn’t need any dressing at all in our wraps. What a filling and low calorie dish this is!
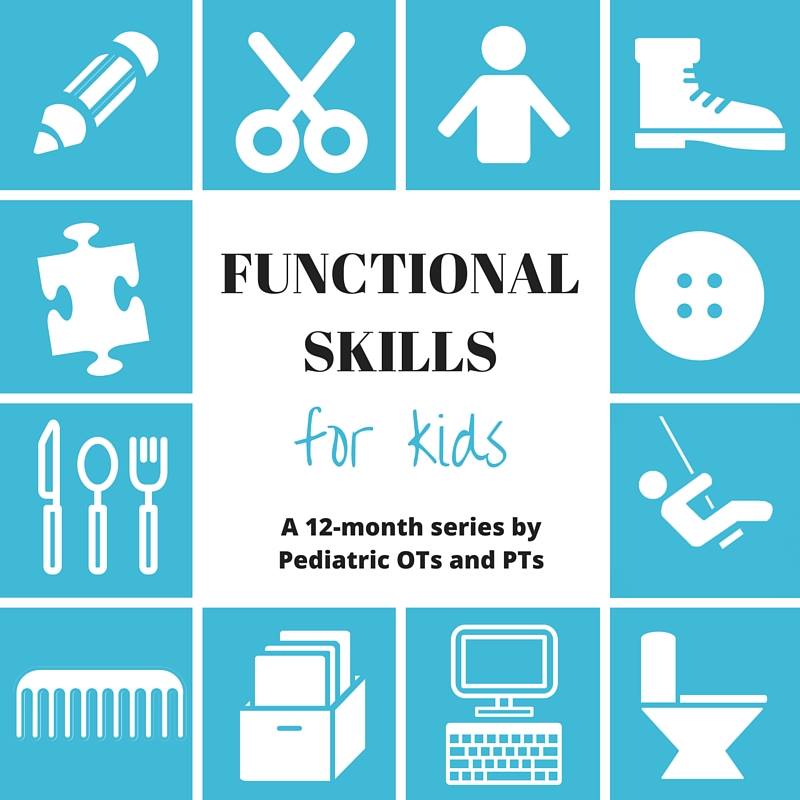
Welcome to the Functional Skills for Kids series! The Functional Skills for Kids series is a year-long project by top Occupational and Physical Therapist bloggers where we’ll be creating blog posts based on 12 functions of childhood. From Play to Toileting and School Functions to Mealtime, this is a comprehensive compilation of posts that will become a powerful resource. Each month the OT and PT blogging team will cover everything you need to know about one of the daily functions of a child.
Childhood Functional Skills & Occupational Therapy and Physical Therapy
Have you ever wondered when your baby should begin to interact in play? Have you ever thought, “How can I help my child learn to dress themselves?” Are you looking for creative ways to work on scissor skills so your child can complete their homework? This series is for you!
This year-long series is for parents, teachers, therapists, and anyone who is looking for information about all the tasks a child routinely completes. You’ll see each childhood function broken down into development, fine motor considerations, gross motor considerations, sensory considerations, visual perceptual considerations, accommodations and modifications, creative ways to work on problem areas, and more.
Meet the Occupational Therapists and Physical Therapists on the Functional Skills for Kids Team:
(Follow each therapist on social media for developmental information, great ideas, and creative community!)
Functional Skills of Childhood series begins January 2016!
Our first post where we dissect a function of childhood goes live in January and is Handwriting. Throughout the year, this page will be updated with all of the functions and you’ll be able to easily access the links from here.
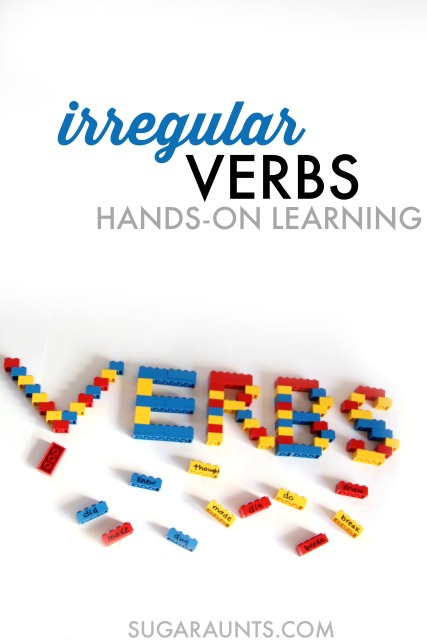
“MOM! I BUILT an Irregular Verb! Get it?? BUILT??”
Yep, hands-on learning is a good thing.
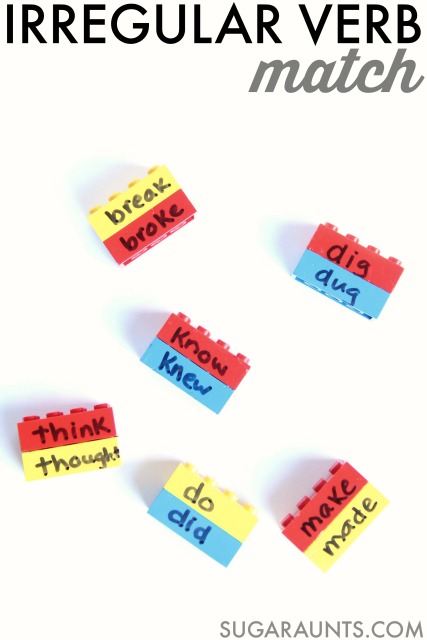
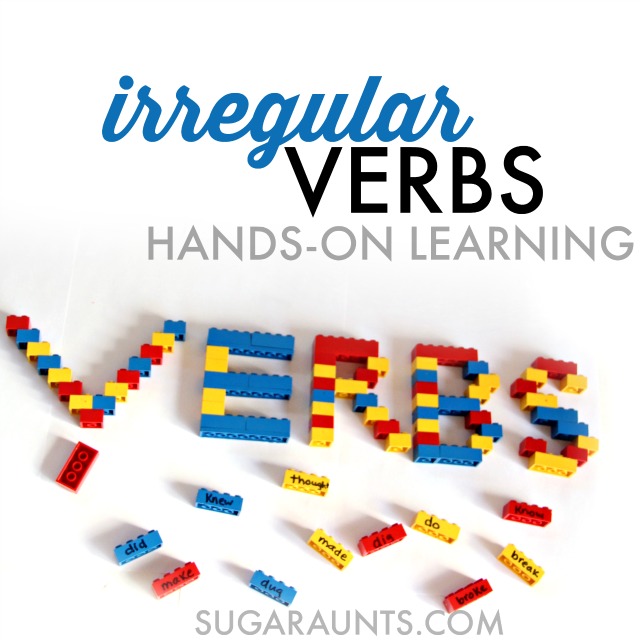
This LEGO activity is on the tails of our LEGO manipulatives post we shared the other day where we built words. Today, we matched up past and present tense irregular verbs. This was an activity that my second grader used to practice verbs, and it was an easy way to talk about what is an irregular verb.
Irregular Verb Hands-On Activity
Full disclosure: This post contains affiliate links.
We used LEGOS
to practice irregular verbs. This is such an easy activity to set up. Grab a dry erase marker
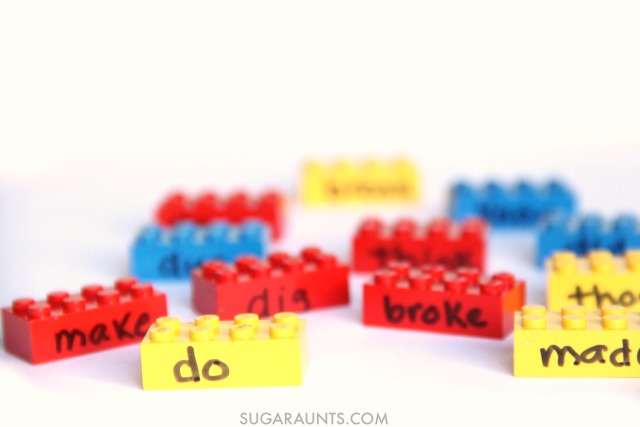
and write verbs on one side. On another block write the past tense of the irregular verb. Have your child identify the past tense of the verb and match them up. So easy and so much fun!
What is an Irregular Verb?
We talked about irregular verbs being verbs that don’t add on -d, -ed, or -ied when the word is used in the past tense form. Words like made, dug, broke, thought, and built are irregular verbs.
We practiced a few times and then wiped the dry erase marker
away so that we could use the LEGOS
in play, like we always do.
My second grader loved this activity for it’s unique practice of a typically boring (ummmm, yes. Practicing verbs is boring!) and I loved it because of the fine motor work that LEGOS bring. LEGOS
are small enough blocks to promote a great tripod grasp and resistive enough to provide proprioceptive feedback along with arch development, open web space, thumb stability, and hand-eye coordination.
We had fun with this activity, especially since we BUILT our irregular verbs!
Let us know if you try this activity. We would love to see your version.
Looking for more ways for early childhood learning with LEGOS? Try these ideas:







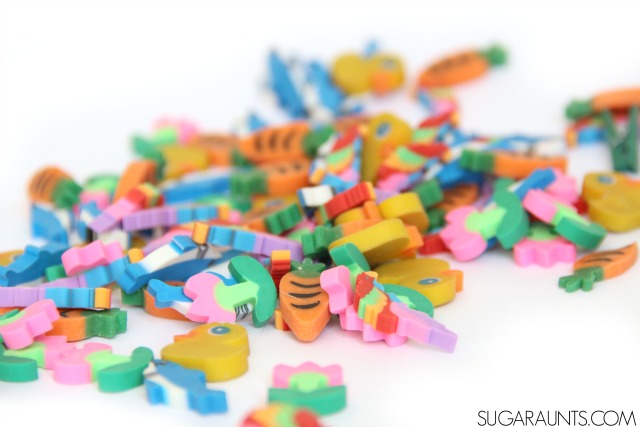
 mhave been in my therapy bag for years. I’ve got a collection of mini erasers that I’ve found at Dollar Stores, Target, and teacher stores. But, my favorite place to get a variety of miniature erasers is
  for the variety of animals and items.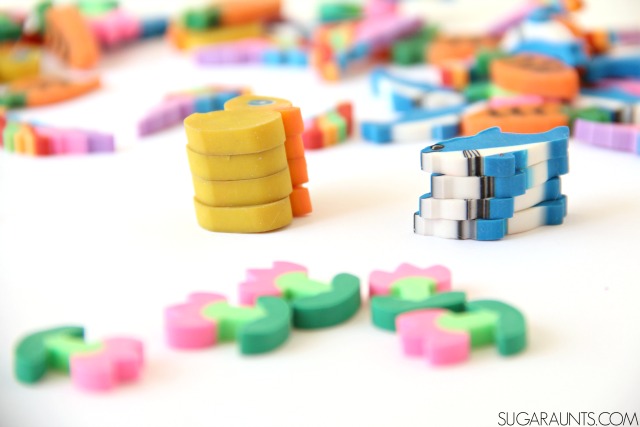











 . Kids can slide these into the sensory bottle.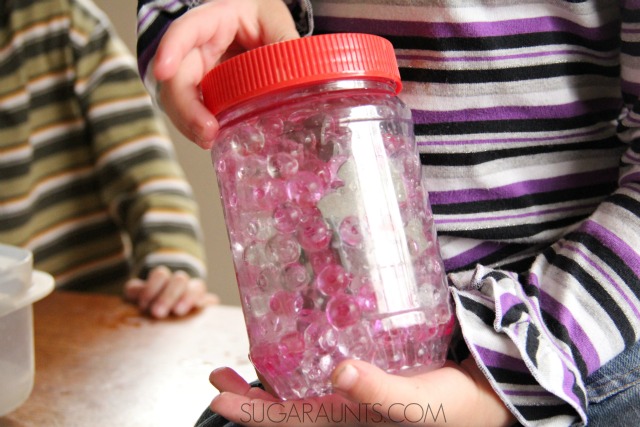




 . Peel and slice the avocado. Once sliced, avocados are a great food for young chefs. It’s soft enough for easily slicing. Add the tomatoes and avocados to the bowl. Zest the rind of 1/2 orange. My preschooler loves zesting oranges and remembered the last time we did this task (and we don’t often zest oranges!) We used our standing
 .
.