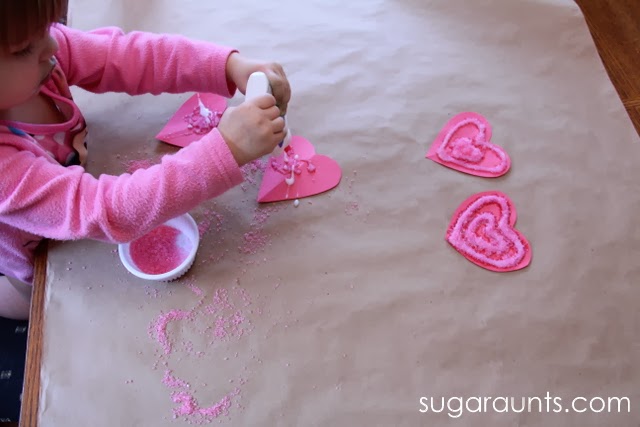
Let’s face it, the heart candy and chocolates are already in the stores and children are already anticipating the consumption of all the sweet treats they are going get. Some children have even begun to plan their Valentine’s gifts and handouts for their friends and family. Add these heart crafts to your Valentine’s Day occupational therapy activities!
One of our newest heart crafts is this free Valentine’s Day Hat Template. Kids can color, cut, and assemble the heart hat in OT sessions, in the classroom, or at home. This printable heart hat makes a great craft during February, but it doubles as a skill-builder: Use it to work on fine motor skills, hand strength, scissor skills, eye-hand coordination, executive functioning skills, and more.
Heart Crafts for Occupational Therapy
Whether it is a pink, red, or purple heart, OT practitioners simply love crafts that incorporate a variety of skills and give the flexibility for each step to be modified, so as to upgrade or downgrade as needed, to allow all children to engage in the craft making process while achieving some level of success.
You’ll find heart craft creations that range from easy to more complex, making them accessible by younger or novice learners that have fewer hand skills, or more advanced learners that need more skill advancement and require increased time to complete.
There are numerous enjoyable heart craft ideas in this post. If you need something sweet to jazz up your therapy session, classroom, or at-home theme, this post is right where you need to be. Read on and get ideas that don’t include tasty sweets, but do include all the sweetness of the Valentines holiday!
Wearable Heart Crafts:
These fun, festive heart crafts can include wearable jewelry, ornaments, or provide a source of Valentine’s Day gifts. They will encourage separation of the two sides of the hand, in-hand manipulation, precision grasp, and arch development, making them purposeful and productive.
Heart Keychain Craft– Make a batch of salt dough and create a heart keychain. This is a great multi-step activity for learners to develop executive functioning skills.
These paper crafts include folding, painting, cutting, pasting, weaving, and writing.
All of these actions will help your learner of most any age and skill level to work on bilateral hand use, eye-hand coordination, scissor grasp, hand dominance, delicate touch, grasp patterns, and visual motor skills.
Another easy heart craft for preschoolers is to simply cut out paper hearts and then fold the paper in half. You can also reverse the steps and first fold paper in half and then cut along lines to make a heart. Then unfold the paper.
Foam Crafts:
These foam crafts are not only cute, but they help learners develop skills such as proper scissor grasp, cutting skills, rotational manipulation, sequencing, and precision skills.
Once complete, some provide a functional use in the end – a bookmark!
Cardboard is a material that develops hand strength, pincer grasp, bilateral coordination, hand dominance, stability, and eye-hand coordination. Some of the crafts listed will provide opportunity for lacing, wrapping, poking, cutting, and tearing, all of which give hand skill development a real challenge.
These fun cardboard crafts will allow focus on a variety of skills while being highly engaging and rewarding.
While these food inspired heart crafts, do use food as a medium, these festive food crafts will include only decorations and a few ideas for a way to feed the birds.
Learners will work on building precision grasp, gross grasp, bilateral coordination, and eye hand coordination skills.
These tin foil crafts are unique in appearance, but also help build maker grasp, fine motor control, and tool pressure. If the child tears off their own piece of foil from the roll and wraps the foil themselves, they will also be working on bilateral coordination and touch pressure.
Older or more advanced learners can be presented with the opportunity to use a glue gun (always use caution with these as even the cold glue guns get hot at the tip). Learners can display their own creativity with these crafts.
In The Valentine’s Day Kit offered by the OT Toolbox, you will find printable heart activities and craft materials. Just download, print, and start building skills. This pack is a great tool for developing a variety of fine motor skills for Valentine’s day or all year round!
We hope you enjoyed all of the crafts included in this round-up of ideas and that you have found exactly what you are looking for to help the learners in your life enjoy Valentines day and celebrate the LOVE of this season!
Regina Parsons-Allen is a school-based certified occupational therapy assistant. She has a pediatrics practice area of emphasis from the NBCOT. She graduated from the OTA program at Caldwell Community College and Technical Institute in Hudson, North Carolina with an A.A.S degree in occupational therapy assistant. She has been practicing occupational therapy in the same school district for 20 years. She loves her children, husband, OT, working with children and teaching Sunday school. She is passionate about engaging, empowering, and enabling children to reach their maximum potential in ALL of their occupations as well assuring them that God loves them!
Grab a copy of the Valentine’s Day Fine Motor Kit for fine motor and visual motor activities with a heart and Valentine theme.
If you are a school-based OT or on a team along with school based occupational therapy professionals, you’ve probably heard this conversation before. We’re talking about what to do to support students that have tried everything when it comes to handwriting interventions. At a certain point, after we’ve exhausted all attempts with handwriting modifications and accommodations and the student STILL can not functionally and efficiently write in a legible manner, we need to move to technology as a mode of communication.
This topic comes up a lot! First and foremost, therapists aim to teach skills using least restrictive or adaptive methods. We only add tools, adaptations, or modifications when traditional methods of writing do not work.
Moving from Handwriting to Technology as a Modification
After 25+ years as a school based OT, I’ve seen a lot of students that have “tried it all” when it comes to handwriting. At the end of the day, function is priority. We need the students to participate in their learning environment. There have been many cases where the OT recommendation is to move to assistive technology as a form of communication.
There are times when our adaptations and modifications do not work to create written work. At this point, we can explore some assistive technology to use when handwriting is not an option.
In this post we will explore what tools, programs and assistive technology to try when handwriting interventions have been exhausted.
This can be a huge transition for some students but also one that is exactly the type of support that helps them efficiently and effectively learn in the classroom setting.
Taking pen to paper is a form of written expression that has been around for thousands of years. The first language is believed to have been in 3200 BC in Mesopotamia. People made impressions in clay tablets to communicate, using a stylus. Fast forward to modern day, and we are still using some sort of stylus or tool to communicate.
Not everyone is fortunate enough to be able to communicate via handwriting. Whether they have a physical or cognitive disability, something is preventing them from being able to effectively use handwriting. This is when we start to explore assistive technology to use when handwriting is not an option.
It’s part of the occupational therapy scope of practice for school based OT in many cases because getting the student set up with effective technology helps them participate in the school day. We can then move to a consultative basis.
How to Use Oral Communication as Assistive technology
Fortunately, there are many other ways to communicate when handwriting is not an option. More and more assistive technology is being invented to aide in augmentative communication. Check out this post on Types of Communication.
When looking at spoken language, there are many ways to express ourselves other than verbal words:
Verbal communication can be used to dictate words and thoughts
Nonverbal communication may include gestures, body language, eye gaze, proximity, or appearance
Sign language is another form of nonverbal communication
Non-verbal communication in a digital world is becoming more important than ever. Electronic devices combine written communication, pictures, and symbols. There are several types of assistive technology devices that are used for non-verbal communication. These range from low tech output such as a read aloud book or choice board, to a dynamic machine with layers of words and phrases. These can be accessed by tapping on the screen/board, or through eye gaze technology.
Remember that OT has a role in using AAC in therapy and in the functional settings.
ACC (augmentative and alternative communication) devices in therapy can be simple or complex. They might include cut out pictures or symbols that are laminated and velcro’d to a strip. Or they might include higher technology.
There is no-tech AAC which is using hands or gestures in sign language or by indicating or gesturing needs and wants. In these instances, OT might not be involved as much in the communication aspect, other than knowing how the student communicates so we can support them in our OT sessions (if occurring).
Then there is low-tech AAC which would include a picture exchange board (PECS). When this is the case, OT could very well be utilized. I’ve worked with students who are new to PECS and who are very familiar with the system. I’ve supported students who have changing tone and need adaptations to use their PECS board, both a non-digital style with just laminated cards, and a speech-generating tablet type of device.
Then, there is a level above that. You might also see speech generating devices. These can include pictures, keyboards, word prediction, etc.
For all of these levels of AAC, we as OT professionals might help the student with visual scanning, visual tracking, visual attention, focusing skills, and other visual motor skills. We could also work on the physical components: finger isolation, tone, wrist extension and stability so they can point to and touch the picture, touch pressure, graded resistance so they can pull their hand or finger away from the picture after pressing it, and so many other aspects of using the device.
How to Use Written Communication as Assistive technology
You’ve probably seen this situation before: A student comes onto the OT caseload as a kindergartener. They struggle with letter formation, line use, letter size, and spacing. Then in first and second grade, they continue to struggle with these areas. They may make some small improvements, but requirements increase, paper line size decreases, and handwriting speed expectations increase. Then in second or third grade, cursive is introduced. There are now more motor plans in mind. The challenges with writing requirements, length of written work, speed, etc. continue in fourth and fifth grade. Then middle school arrives. Suddenly, we have this student that has tried everything in the therapy toolbox and they still struggle with illegible work. What do we do now?
This situation happens more often than you might think. There’s the carryover piece, which is a HUGE part of legible writing success. We need these kiddos to practice the skills they are learning in an OT session at home.
So when we have this situation, the occupational therapy provider on the IEP team might suggest that for functional participation sake, it’s time to move onto technology as a means of written communication.
Now, that doesn’t mean that this student will no longer use a pencil or pen, ever again. That’s not the case at all! What we usually mean is that for classwork, we’ll suggest supports like Word documents or Google docs over writing a paragraph on paper. We might screenshot a worksheet onto a tablet and use a stylus to write on the digital version of the worksheet. (There are apps for that!)
When traditional forms of writing have been exhausted, assistive technology can be used. This can range from low to high tech options:
A name stamp (Amazon affiliate link)- This simple self-inking stamp can generate a name or other pieces of information, if your learner is able to push down on the stamp. Just being able to sign one’s name opens doors for communication.
Dictation- This is one of the easiest ways to facilitate functional communication. Many tests and other assignments can be dictated orally to a scribe. Teachers or other caregivers can write down what the learner communicates verbally. The transcriber needs to make sure they write exactly what is dictated without interjecting their edit or opinion. To take it a step further, you can use the dictation tool on Word or Google docs as a way to have the student use modification independently. Read on for more information on software for this skill…
Software for dictation – there is software built into many computer systems that can transcribe dictated information into written communication. The learner needs to be able to read what is written and correct it for errors. Amazon has a speech to text program. Some others include Apple Dictation, Dragon by Nuance, or Google Docs voice typing.
Predictive text is an input technology that facilitates typing on a device by suggesting words the user may wish to insert in a text field. Predictions are based on the context of other words in the message and the first letters typed. A lot of devices can have this set up right in the settings. The user simply taps on a word instead of typing it out on a computer keyboard or mobile device’s keyboard. Predictive text can significantly speed up the input process. This can be used on Apple or Android phones, as well as Google G Board, Apple QuickType, or Typewise. Again the user needs to be able to read in order to select the predictive text option or correct errors.
Text to speech is like a read aloud book or screen reader. This is useful in written communication as the text to speech can read what is written so the user can check for errors.
Traditional typing is a quick and effective tool for written communication. This can be done via a traditional keyboard and screen, or with adaptive features. There are endless combinations of assistive technology, using different types of keyboards and mice.
Assistive technology paired with typing or computer work is another means of communication. There is such a diverse amount of assistive technology to use when handwriting is not an option. People with physical difficulties can use a head movement or eye gaze tracking device for output. While this can be labor intensive, it is satisfying to be independent.
Adaptive Computer Mouse – Users with limited finger dexterity can use a special joystick controller to navigate the computer screen. There is a large trackball mouse, a graphic stylus, a foot mouse, different sized mouse, or a touchscreen option.
Users with vision/hearing loss, motor, or cognitive impairment can use assistive technology also. Computers can read aloud for those with visual impairment and add closed captions for users with hearing loss.
NOT ALL ASSISTIVE TECHNOLOGY NEEDS TO BE ADVANCED
Many of the adaptations involve computers. This is the most straightforward option. A computer does not have to be the only option. Some people do not have the resources or desire to use advanced technology. Picture symbols can serve as a simple way to communicate. Students tap on the picture to represent a word. You can create a binder with words and pictures, a Velcro board, or picture exchange system. These can be single words or common phrases.
Types of Keyboards that can help with typing
There are different types of keyboards we can consider, too.
These are found on Amazon, so it’s not too difficult of a set-up or hard to access them…
small keyboards– these can be used for just one handed typing or range of motion challenges.
ergonomic keyboards– We use these for a variety of needs including tone or range of motion needs.
separate numeric keypads– This is something we might use for students that struggle with visual overwhelm or have attention needs.
early learning keyboards– This one is nice because the letters are color-coded by vowels and consonants. It also uses lower case letters which is helpful for younger leaners.
HOW TO GET HELP FOR finding ASSISTIVE TECHNOLOGY
Much of what therapists and other professionals do for people with special needs is trial and error. Because we are all human, there is not one answer or solution that fits everyone’s needs. I have used a lot of trial and error during my career.
There are times when something seemed like such a great adaptation, but the kid would not use it. Often, one solution was not good enough, I needed multiple layers of adaptations.
Some school districts have specialized therapists for assistive technology. Our district has an OT who is a certified AT specialist. She knows all the new software, products, and different options available. Because this is all she does, she is able to spend a considerable amount of time with our students, problem solving their needs.
In the community there are different organizations to help people with different needs. There are organizations for the blind, deaf, physically disabled, autistic, and more. Also, there are companies specializing in assistive technology that you can contact to do an evaluation.
What I love about being an OT is not having to say, “I can’t fix that.” There is usually some work around, or adaptation I can figure out if I keep trying. My advices is to keep looking, experimenting, asking, and trying to find solutions.
Victoria Wood, OTR/L is a contributor to The OT Toolbox and has been providing Occupational Therapy treatment in pediatrics for more than 25 years. She has practiced in hospital settings (inpatient, outpatient, NICU, PICU), school systems, and outpatient clinics in several states. She has treated hundreds of children with various sensory processing dysfunction in the areas of behavior, gross/fine motor skills, social skills and self-care. Ms. Wood has also been a featured speaker at seminars, webinars, and school staff development training. She is the author of Seeing your Home and Community with Sensory Eyes.
Here at the OT Toolbox we write about many topics that include “how to” suggestions. One of the suggestions we often recommend is Backward Chaining. There have been several people asking recently about Backward Chaining. In this post, we will review or highlight what “chaining” is, the difference between backward and forward chaining, and explore some usable examples to include in your treatment. As seasoned therapists, we may forget that terms like “backward chaining” were once foreign to us also.
The good news, you are most likely doing some sort of chaining with your learners, but do not realize that is what it is called, or have not given it specific thought. For clinical documentation, as well as treatment, it is effective to understand what techniques you are using.
WHAT IS BACKWARD CHAINING?
Let us start with chaining. What is chaining? When teaching/learning a task that involves a series of steps, it is useful for them to be performed in a certain order. Chaining can help break a complex task into a sequence of simpler steps which are learned one step at a time. When using the chaining method, you can teach each step in sequence, or in isolation.
In occupational therapy, we’re working with kids in therapy on functional tasks…and that might be ADLs or IADLs. Chaining strategies can be used in every one of these tasks.
We use task analysis to break down and define the series of steps needed to finish a task. For the task to get started, or continue, we use stimuli such as a gesture, or a spoken word. Check out this post on Prompting to better understand all the types of physical and verbal gestures we use to elicit a response.
There are three types of chaining:
Backward chaining
Forward chaining
Total task chaining
Each achieves the same result, task completion, but are taught differently. Read on to find out possible reasons to use backward versus forward chaining.
Let’s go over backward chaining in OT sessions to start:
BACKWARD CHAINING in Learning New Tasks
Backward chaining involves learning/mastering the steps in a task chain from the end to the beginning. The instructor (parent, therapist, caregiver, teacher) guides and works with the learner through all the steps of the sequence, leaving the last step for the learner to do on their own. They are praised for their efforts and accomplishments. Once this last step has been mastered. The instructor helps with all the steps except the final two, which the learner does on their own.
The learner continues mastering the steps from the final to beginning steps. They are not learning the task backward, as they continue to work with their therapist from the beginning of the task. In backward chaining, they are showing mastery of the last steps first.
An example of this might be shoe tying. You guide your learner through all the steps of shoe tying, having them pull the two bunny ears tight at the end to complete the task. After they have mastered this step, you can back up to the step right before this, and emphasize this in your teaching. They are still watching and participating with the beginning steps to understand the process, but are performing the end steps independently first.
WHAT IS FORWARD CHAINING?
Forward chaining involves the same task analysis as backward chaining. Whether forward or backward chaining, it is important to break the task down into chunks to better understand the steps to teaching it.
With forward chaining, the instructor (parent, therapist, caregiver, teacher) begins with the first step in the task, prompting the learner to initiate the task themselves. The instructor then helps the learner through all the following steps until completion. Once the learner is proficient at step number one, the instructor will leave steps one and two for them to perform on their own.
You might see forward chaining when brushing teeth. Perhaps your learner starts by getting the toothpaste out of the drawer.
Another task you see this is in baking cookies. We tend to teach our children to measure and pour the ingredients before mixing, pouring onto the tray, or putting them into the oven. After they can measure and pour the ingredients, they can learn to mix them with a spoon or their hands. This progresses until the learner is able to fully bake cookies on their own.
What About TOTAL TASK CHAINING?
Total task chaining is teaching a task step by step, having your learner do the whole task with you, or learn it all at the same time. For some children, this is too complex of a learning style. They often get overwhelmed and shut down halfway through. Teachers and parents often use this style.
Examples of total task chaining to teach a skill:
One example of total task chaining that comes to mind is doing laundry. We teach about using the washing machine as a step of the task, but usually, we walk through the whole process. It can be hard for kids with attention or working memory challenges to remember what to do first when putting their clothes into the washing machine!
Another example of total task chaining in teaching a skill is in handwashing. The whole task is usually taught at once in sequence. With forward chaining your learner would turn on the water as the first part of their task. In backward chaining they can turn off the water or dry their hands, however you do your task analysis.
WHEN TO USE FORWARD VERSUS BACKWARD CHAINING
When we work with students, how do we know which strategy is best: forward chaining, backward chaining, or total task chaining?
Think about how you teach tasks. My guess is that you vary your method based on the learner, the complexity of the task, and learning style. We often do this reflexively without giving it too much forethought. The issue caregivers usually have is, offering too much support, jumping in too soon to help, or helping well beyond mastery.
Backward chaining works well when you want your learner to experience that sense of accomplishment. We have all seen their excitement when they pull the final loops on their shoe laces, or take a bite of something they created. Even though they did not do the task independently, it felt like it, as they finished it.
Forward chaining, on the other hand, is effective when your learner can benefit from mastering all the steps in sequential order. This type of chaining also works to help grab your learner’s attention at the beginning of the task when they are most engaged. Forward chaining is recommended if the child can successfully complete more steps at the start of the behavior chain. It has the advantage of using behavior momentum, as the 1st step is often the simplest, easiest step. Think again about shoe tying. Learners are usually engaged in the first task, then lose interest or sight of the task after the first couple of steps.
Whichever method you choose, the outcome can still be the same. Independence and mastery. This is going to vary with each task and learner. It may be trial and error also, to determine what method works best.
WHAT ABOUT CHAINING WHEN MASTERY IS NOT THE GOAL?
When we imagine that a learner might never have the capability of doing a task independently, it is still important to teach the task to their ability. Many successful adults can not cook independently, but can gather ingredients, mix them together, and help in the kitchen.
This concept is difficult for many caregivers to accept. Why should they spend time and energy working on bathing if their child is never going to be independent? One of the key components of development is autonomy. Learners can take pride in what they are able to do for themselves. While this takes more effort on the caregiver’s part, it is part of being an effective and responsible instructor.
The second reason for continuing to strive for mastery is, that you can never be one hundred percent certain your learner is not going to exceed your expectations. Many parents can tell you they never thought their child could learn to read, get dressed, or feed themselves.
BACKWARD CHAINING EXAMPLES
The best ways to use backward chaining in teaching skills is to take a task and break it down into steps. Then, work through the steps in reverse. The more times you go through the steps, the more trials the child gets of the first steps of the task.
So, if we were teaching a child to put on a shirt, we would first break down it down into steps, with the finals step being emphasized first. Example of steps for putting on a t-shirt.
Break the tasks down into steps:
Lay the shirt front side down on the bed/table with the bottom edge facing your body
Pick up the shirt and place it over your head
Push one arm through the sleeve
Push the other arm through the sleeve
Pull the shirt down.
During the backward chain, you would do all the steps for your learner up until “pull the shirt down.” Teach/instruct your learner to pull their shirt down. After this has been mastered, you can teach your learner to push their arm through the sleeve.
When analyzing your task, you can add or subtract details that encompass the task. Does the task include getting the shirt? How about turning it right side out, or smoothing it out?
It is difficult to know when a task begins and ends. Make this part of your task analysis. You can always teach the basics of a task, then add more details once it is mastered.
Then, you can do this process over and over again for any skill you are teaching the child to do!
OTHER RESOURCES FOR CHAINING
Activity Analysis – an activity analysis is a process of breaking an activity down into its individual steps and its detailed subparts while examining all its components with each activity being evaluated skillfully to determine its therapeutic value.
Hopefully after reading this post, you did a sigh of relief that you have been using these techniques all along! We often teach by trial and error or instinct. This is a good start, but you can be more efficient and effective with a little forethought and planning. Trying anything new is difficult, but once you try it a few times, it will get easier and more efficient.
Be sure to stop over to The OT Toolbox Membership in January, because we’ll have chaining tools and activities to support life skills coming soon!
Victoria Wood, OTR/L is a contributor to The OT Toolbox and has been providing Occupational Therapy treatment in pediatrics for more than 25 years. She has practiced in hospital settings (inpatient, outpatient, NICU, PICU), school systems, and outpatient clinics in several states. She has treated hundreds of children with various sensory processing dysfunction in the areas of behavior, gross/fine motor skills, social skills and self-care. Ms. Wood has also been a featured speaker at seminars, webinars, and school staff development training. She is the author of Seeing your Home and Community with Sensory Eyes.
Time management is an executive functioning skill that we address all the time in occupational therapy sessions. Even when we aren’t specifically addressing “time management goals”, I find myself working on this essential organization and attention skill! Oh, and by the way, time management doesn’t just mean doing multiple tasks at once. Although that’s something we need to address below…but what we mean when we say time management is actually managing your time effectively, even for one task at a time. This is huge when it comes to completing life skills tasks, planning and prioritization skills, and basically just doing things throughout the day.
Let’s go deeper into this cognitive skill!
Understanding Time Management Challenges in Executive Functioning
“Time is what we want most, but use the worst. ”William Penn. Effective time management is the executive function skill that we strive for, but eludes many of us. I read that no one cleans a house faster than someone having unexpected company!
Is there a “right way” to manage time? Is the goal to get the task finished on time, whether you procrastinate until the last moment, or evenly space out the job? There is a case for both sides.
In this article we will explore what time management means, and develop some effective strategies to better manage your time. You’ll find some ideas and strategies to use with occupational therapy clients that struggle with executive functioning skills.
Below, you’ll find a section titled, Six Key Elements of Effective Time Management. You’ll notice that each of these elements is an executive functioning skill. That’s because these skills and elements are all related. When we work on executive functioning skills in occupational therapy sessions, we definitely address the time management piece in order to help our therapy clients get things done, stay on task, keep track of time, and manage the time they have to do the thing that they are working on. This is a huge life skill!
Part of it is that we need to stop and think throughout our tasks. It requires impulse control to use this ability during daily tasks.
Time management is the process of organizing and planning how to divide your time to complete a task.
Traditionally, I think we referred to time management and multi-tasking as kind of the same thing. In this way, it’s more of juggling two or more tasks and managing that time. I think that since my college days, the ability to multi-task effectively complete more than one task at the same time, and to complete it well has been debunked. I remember when it was recommended to write your ability to multi-task on your resume. We all know we have to juggle more than one client, their needs (follow up with family, write a letter of recommendation for AT, print off that home program…) at the same time? Not easy!
Or have you ever tried listening to a podcast and texting at the same time? You end up blocking out the auditory input while thinking out the text that you are writing. Doing two things at once typically doesn’t work out the way that you home, which is to get things done faster.
We need to manage our time all day long. We use this skill to get up in the morning and get ready for our day in the time we have before we need to leave the house. We need time management in our routines and to follow schedules. We use time management to complete projects or homework assignments. Basically, this life skill is a cognitive skill we use under the surface all day long!
Our resource, the Time Management Cards help to work on this skill in actionable ways. It makes practicing this skill into a game that carries over to daily life.
Get time management right, and you’ll end up working smarter, not harder, to get more done in less time, even when time is tight and pressures are high. The highest achievers manage their time exceptionally well. The website Mind Tools has some resources available to work on learning effective time management.
“Only 12% of people have a dedicated time management system, a recent Timewatch survey shows. Despite the alarmingly low numbers, many people believe that proper time management reduces stress, increases productivity, and brings more focus and confidence at work. Still we tend to lose a lot of time on unnecessary things, a minute here, ten minutes there, and we end up with an entire wasted day on meaningless tasks. Learning how to manage our time is a skill that requires constant work. So, to use time in the best way possible, it’s important to come up with a system and schedule that makes us use our time more efficiently” Milojevek, 2023.
“Better three hours too soon, than a minute too late” – William Shakespeare.
Is this your philosophy? Many people believe it is far better to be early than late. But three hours? That does not seem like effective time management. Better to be productive than show up three hours early and just sit around.
Effective time management is about managing time. It is neither showing up three hours early or one minute late. It is about knowing the skills to show up on time, or to get things done in a given time frame.
Developing Routine and Structure: Time Management Tips for OTs
One of the first stumbling blocks to time management is task initiation. Sometimes getting started is the hardest part. “You may delay, but time will not.” — Benjamin Franklin.
Some people are great at time management, while others struggle to be productive. Here is a great example. I love writing these blog posts, but I often do not manage my time effectively to get them done right away. I sit in front of the computer, check Facebook, shop a little on Amazon, take a brief nap, take the dog out, get a snack and twelve other things before finally settling down. They get done on time, but I would be much more efficient if I sat down and concentrated right away.
This scenario reminds me of the book (Amazon affiliate link), If you Give a Mouse a Cookieby Laura Numeroff. In this cute series, the little mouse starts a task, then gets distracted by ten more activities before circling back around to get that cookie. (I think we need a version of “If you Give a Mouse a Cookie” for therapy providers…!)
Again, this begs the question, as long as you finish the task on time, does it matter how you get there?
“Give me six hours to chop down a tree and I will spend the first four sharpening the axe.” — Abraham Lincoln. I feel this. I know my deadline, but often spend the first ¾ of it fooling around.
Occupational therapy practitioners (and Speech Therapy and Physical Therapy professionals as well), know the need of time management. When you have 6 evals to write up, 30 notes, and you have 30 minutes to do it, the math just does not add up. This is where therapy burnout comes in, big time.
Caregiver burnout is the same way. It’s hard to do the day to day thing (work, caring for children, cooking, cleaning, activities) AND caring for an older parent or another individual that requires hands-on care. There’s just not enough time in the day to get it all done and that’s where we feel the burnout.
“TIME WILL NOT SLOW DOWN WHEN SOMETHING UNPLEASANT LIES AHEAD” - HARRY POTTER
SIX KEY ELEMENTS OF EFFECTIVE TIME MANAGEMENT
As mentioned above, executive functioning skills is time management and time management is executive functioning skills. Look at the elements of time management listed below and you’ll see what I mean by this.
“You’ve got to know what you want. This is central to acting on your intentions. When you know what you want, you realize that all there is left then is time management. You’ll manage your time to achieve your goals because you clearly know what you’re trying to achieve in your life.” — Patch Adams
Prioritization – identify which tasks are most important and give them more focus
Planning – think ahead to what needs to be done so you can be more efficient and not waste time.
Goal setting – set SMART goals to create a sense of accountability. Breaking down goals into actionable steps is a big part of this.
Focus, aka Attention – Attention to the task at hand is a huge part of this. Basically, avoid multitasking and distractions (like scrolling TikTok, Facebook, and Amazon) “The irony of multitasking is that it’s exhausting: when you’re doing two or three things simultaneously, you use more energy than the sum of energy required to do each task independently. You’re also cheating yourself because you’re not doing anything excellently.” — Twyla Tharp
Organization – Organization of time and activity means we might group similar tasks together to avoid overlapping. Think of it as body mechanics for your brain! When we talk about time management, organization also refers to keeping items in their designated place, like a student keeping all of the school materials in the backpack so they don’t have to gather up books, pencils, tablet, and other materials in the morning. It also means the backpack is kept in a spot where they know where it will be in the morning.
Self-Control (impulse control)- teaching kids impulse control is a big part of this. “Time management requires self-discipline, self-mastery, and self-control more than anything else.” — Brian Tracy
Each of these factors help us to use the time we have effectively. For our students, this means they use the 10 minutes they have to get out the door in the morning to catch the school bus and still manage to put on their shoes, find their backpack, fill their water bottle, and walk out the door.
Next, let’s cover exactly how to work on time management skills in occupational therapy, during activities that also target other OT goals like problem solving skills.
Helping Clients with Executive Functioning Issues Develop Time Management Skills
There are practical tips for Occupational Therapy providers to use to help clients with teaching time awareness and time management skills.
There are great resources out there to learn to manage time effectively:
Time Management Task Cards – These Time Management Task Cards are an effective way to talk about tasks, break them down into measurable chunks, and understand the pitfalls that prevent them from getting finished on time.
Executive Functioning Skills – teaching planning and prioritization. Planning and prioritizing tasks is a big concern for many kids (and adults) who struggle. These skill areas are essential for initiating tasks and following through with projects.
WHY SHOULD YOU PRACTICE TIME MANAGEMENT?
With better-managed time, we can satisfy all our responsibilities, work demands, and goals. Most importantly, we reduce the risk of feeling overwhelmed by stress, feeling like a failure, and other poor psychological wellbeing issues (Aeon & Aguinis, 2017).
“You’ve got to know what you want. This is central to acting on your intentions. When you know what you want, you realize that all there is left then is time management. You’ll manage your time to achieve your goals because you clearly know what you’re trying to achieve in your life.” — Patch Adams
Helping Students with Executive Functioning Issues Improve Time Use
Everyone has to start somewhere when learning to manage their time. This includes our students and young people. The fact is that executive functioning development is a long progression that isn’t completed until adulthood. But, development starts from a young age. Rather than nagging and reminding, empower people to manage their own time.
Preschoolers can learn about time in days, weeks, months of the year. They can practice waiting and taking turns. Teach Time to Kids is a great article to get started.
Young children need to learn the consequences of wasting time or poor time management.
Teach organization skills. If you know where all your stuff is, you will find less time looking for it, and more time getting to work.
Use a timer – sometimes people lose track of time. A timer can remind them how much time is left.
Setting alarms can also help keep people on track.
Write reminders. Using the timer app on a phone or tablet is good for this.
Make visual schedules and to do lists. Kids can move one item from the “to do” pile to the “done” pile.
Make a checklist for morning, after school, and nighttime. Include things like feeding the pet, making lunch, etc.
Teach kids to set priorities. What are the “must do activities” versus the “want to tasks”? This does not mean always focusing on the must do tasks, but mixing it up to get things done.
Work on estimating time – teach kids to guesstimate how long they think it will take to finish something. You can check back to see if they were accurate.
Plan for long term assignments. My husband teaches college students. I can’t tell you the number of times a student asks for an extension because they are sick, or something happens the day before an assignment is due. He constantly has to remind them they have known about the assignment for at least a week. A (Amazon affiliate link) large desk calendar is a great way to map out the month.
Make a list and cross things off as they are completed.
Try a brain dump.
Pick the top three most important things that need to get done in a day and work on those things first.
Reward yourself and take breaks. Do small parts of the task and then take a short break. Remember to set a timer for the break so you know when to get back to the task.
One of my new favorite go to sites is Teachers Pay Teachers. This site is full of inexpensive or free activities made by regular people like you and I. I find that the people who create these activities are in the trenches, so they know what works. This site did not disappoint in the search for time management activities.
Doing chores is a great way to get kids started on managing their time.
Strategies for Teaching Kids to Manage Time and Stay on Task in Therapy
Occupational therapy sessions are great place to work on the time management strategies in a low-pressure environment. We can help our students and clients to carryover these skills to the real world. They can then self-assess how they did and keep building the skills!
Some of the best strategies for teaching kids to manage time in occupational therapy is to use the strategies we listed above in a small task like a craft or another meaningful functional task. After all, that’s what OT is!
So, working on time management skills when doing a craft in a 30 minute OT session might look like this:
Make a checklist- As an OT, I LOVE using checklists in therapy! You can write down the steps of doing the craft and have the child check off each item. Basically, this creates a clear sequence for the craft (e.g., gather supplies, cut, color, assemble). Then, you’ll want to repeat this checklist routine in future sessions to help kids anticipate each step and stay organized. The benefit is that the checklist offers familiarity and helps with the transition between tasks, making it easier to stay on task throughout the activity.
Use a visual timer- Set up a visual timer to show the entire time allotted for the craft and consider segmenting it by steps (e.g., 5 minutes for cutting, 5 minutes for gluing). Explain that each step has a time frame and let the child check the timer to see how much time remains. This provides a visual cue to keep pace and helps prevent lingering too long on any one part.
Use a time estimation games– This is a good strategy, because it really carries over to functional tasks like getting ready for the day. Ask the child how long they think each part of the craft (e.g., cutting shapes or coloring) will take. Have them write down their guess. Then, after they complete each step of the craft, compare their estimate with the actual time spent. This teaches them to realistically gauge time while adding a fun, game-like element to the session. Kids love this!
Practice self-monitoring skills– I like to use a self-assessment checklist that has bullet points like, I’m on track with time. Encourage the child to pause every few minutes to evaluate their progress with questions like, “Are we on track?” or “Do we need to speed up to finish in time?” You can also set a timer to go off to pause and self-assess. Practicing these self-checks helps build self-awareness and accountability during the activity. It’s another skill that really carries over to functional tasks, especially ones that might have big distraction opportunities, like that phone that is asking for you to open up TikTok. Some kids have a lot of trouble with self awareness, so if that’s a problem, it can help to play some self awareness games to build that skill.
Teach prioritization for multi-step crafts– This is another great skill to develop. You’ll want to help the child so they can explain which parts are essential to complete first (e.g., cutting before gluing). By guiding them through this prioritization, you help them see the importance of task order and staying focused on key elements, especially for crafts with multiple steps.
Reward on-time completion– One of the best parts of completing an OT checklist in a therapy session is the reward activity! Kids love to reach the end of a visual schedule that has their favorite regulating activity (great for heading back to the classroom). This might be something like using the therapy swing or other sensory activity. Basically, you want to help them to celebrate finishing each step within the allotted time. If you don’t want to do an actual activity as the reward, you can offer verbal praise, or add a star to a progress chart. The therapeutic benefit is that you are helping them to reinforce the benefits of staying on task and how completing steps on time lets them enjoy their final product. This strategy helps to boost their confidence in time management!
“Nothing is so fatiguing as the eternal hanging on of an uncompleted task.” — William James
I hope these ideas helped to support time management skills in building the executive functioning skills needed for completing daily tasks. Whether you are using these time management strategies in therapy sessions or in the classroom or home, they should really help!
Victoria Wood, OTR/L is a contributor to The OT Toolbox and has been providing Occupational Therapy treatment in pediatrics for more than 25 years. She has practiced in hospital settings (inpatient, outpatient, NICU, PICU), school systems, and outpatient clinics in several states. She has treated hundreds of children with various sensory processing dysfunction in the areas of behavior, gross/fine motor skills, social skills and self-care. Ms. Wood has also been a featured speaker at seminars, webinars, and school staff development training. She is the author of Seeing your Home and Community with Sensory Eyes.
The Impulse Control Journal…a printable resource for helping kids strategize executive functioning skill development. When saying “calm down” just isn’t enough…
When a child is easily “triggered” and seems to melt down at any sign of loud noises or excitement…
When you need help or a starting point to teach kids self-regulation strategies…
When you are struggling to motivate or redirect a child without causing a meltdown…
When you’re struggling to help kids explore their emotions, develop self-regulation and coping skills, manage and reflect on their emotions, identify their emotions, and more as they grow…
Grab the Impulse Control Journal to build organizational strategies, planning, prioritization, habits, and mindset in kids.
Every fall when I am unpacking my supplies for the school year, I find the hole punches and smile. Teachers detest hole punchers used by children because of all the snowflakes that end up all over their classroom. As an OT I see the fine motor value of making, picking up, and using all the little punches. Talk about dexterity! If you have some rusty hole punchers, dust them off and revitalize this awesome tool. Today’s post focuses on hole punch activities.
The nice thing about using a simple fine motor task like hole punch tasks is that you can make it as easy or as complicated as needed. The picture has folded paper and hole punched along each fold. This is a great fine motor task!
HOLE PUNCHer TOOLS for Crafts
Before diving into hole punch activities, let’s take a look at the tool first. Hole punchers have evolved over the years, and include some great options! Of course, you have the standard tried and true (Amazon affiliate link) metal puncher. If you have a varied caseload like me, not all of your learners have the hand size or strength to manage this large puncher. For those kiddos, there are many different options (Amazon affiliate links):
Soft Handled Puncher – this puncher is very similar to the standard metal puncher, but comes with a padded grip for easier use
EZ Squeeze Punch – requires 50% less force than traditional hole punch. Can easily punch through 10 sheets of paper. This is a great punch for those learners with poor grip strength or weak hands. It is not great for small hands. This puncher is quite large to get small hands around.
Mini Hole Punch – I love this little gadget. It not only requires less force, but is smaller to get tiny hands around.
Single hole puncher – this guy claims to be able to punch through 20 sheets of paper at once with minimal force. I have not tried this one, but it is next on my list
Swingline Easy Hole Punch – the Swingline puncher boasts a 15 sheet capacity and less pressure needed. This works but is very heavy and large
2 Inch Reach Puncher – this puncher has a longer reach than traditional punchers, for getting further into the paper. May cause less frustration?
I love to use them in crafts and activities where kids can tally off items on a list, use to match letters or numbers, or create small holes as part of a craft. Using the right sized hole puncher is key to success for our little ones who may have hand weakness.
decorative hole punchers for Therapy
Decorative Punch – the style of this punch is different from the others. This style requires you to put the punch down on a stable surface and push the button with fingers or the palm of the hand. It works on different muscle groups than traditional punchers, but still has great usefulness. This hole punch is a great way to target finger isolation.
Not a fan of Amazon? The above are just examples of the types of hole punchers available for purchase. You can find tons of other styles on websites such as Temu, Shein, Target, Michaels, Hobby Lobby, Office Depot and more.
There are many benefits of using hole punch activities in occupational therapy.
THE BENEFITS OF HOLE PUNCH ACTIVITIES
I know you are ready to get to the activities, but it is very important to understand the “why” when selecting activities. This helps you select appropriate activities and streamline your therapy sessions to best meet the needs of your learners.
Children have notoriously developed poor hand strength during the past decade. We blame the pandemic, but it started well before we were hit by COVID-19. Electronics play a big role in decreased hand strength. Not only this, but lack of exercise, playground time, heavy work, chores, arts and crafts, and hands on activities have contributed to weak hands.
Check out this post on Grip Strength activities to get you started. From there, click on Finger Strength Exercises. What did you notice in the picture for “Grip Strength Activities”? That little grip strength trainer was highlighted. What does it remind you of? The hole puncher!! I bet your students would be more motivated by making tons of little hole punches, than using a traditional grip strength trainer. I know mine do. We actually have a hand gripper workout post that you can apply to a hole puncher. It’s basically the same muscle set and has a fun and functional component when you use the hole punchers in place of a hand gripper.
The number one thing to remember is that a hole puncher is great for building grip strength. It also works on:
Bilateral coordination – two hands are generally needed for hole punching activities. What better way to work on coordinating both sides of the body
Eye hand coordination – it takes a lot of coordination to line the little punch tool on the exact item to be punched
Arch development – using a hole punch helps develop these important muscles that are used for handwriting, cutting with scissors, and fine motor precision
Graded movements– You need to know how hard to squeeze a hole punch to puncture the paper.
Neat pincer grasp (or fine motor precision) – once you create all the little paper shapes, picking them up requires fine motor precision and builds pinch strength
HOLE PUNCHERS ACTIVITIES
There are endless possibilities for using hole punchers. Every time I look, I find more cute things. Not only can you use the punchers for hand strengthening fun, you can use the little circles of paper to create fun things.
Punch holes in leaves – how cute is this? All ou need are leaves from outside. You can even make a caterpillar with a leaf. Have students punch holes or bites through the leaf. Doing a lesson on the Very Hungry Caterpillar? This cute punch card lets students punch through all the foods the caterpillar munched. Here is another activity to cut the shapes, punch holes, and string them on a green chenille stem
Letters, numbers, shapes – work on selecting and identifying items by using the hole puncher. Learners can punch holes that match the letter they are looking for.
Lacing cards – use hole punchers to create lacing cards. Punch through cardstock or laminated cards to make them more durable. Here are more DIY lacing cards that you can make with a hole punch.
Hole punch strips – This one is easy to make- Just cut a strip of paper and punch holes along the paper. We have a lot of printables that are themed hole punch strips inside The OT Toolbox. They are great to add to a busy box or to create task boxes for independent work.
Hole punch cards- We have a few different types of hole punch cards. I love this seasonal hole punch bundle.
Alphabet punch game – Inside The OT Toolbox Membership Club, we also have hole punch worksheets that are basically cards with all the letters of the alphabet. Call out letters Bingo style, and have students find and punch the correct letter. Here’s one example with a back-to-school themed hole punch card activity.
Another type of activity with a hole punch is our Life Skills hole punch cards. Users can punch off activities as they do them.
Stick hole punch dots on contact paper – substitute hole punches for the stickers you would place on a paper. There are a ton of sticker dot and dot marker pages that are super fun. Use these pages with a hole puncher to create a multi-sensory activity. Punch circles out of colored paper. Glue the little circles to your dot art pages instead of stickers and dot markers. You can shrink the pages to match the size of your hole punches.
Fish bubbles – use a preprinted fish page. The hole punches can be bubbles around the fish
Christmas tree or string of lights – punch out lots of colored circles. Glue them onto a pre made or drawn tree. Use the same colored punches for making a string of lights
Sprinkles – I love ice cream! Use your colored punches to make ice cream sprinkles on your pictures.
Medical pictures – do a health lesson plan on germs. Use your punches to make measles, chicken pox, or a rash. Read books on germs, do writing assignments, and count chicken pox
Vacuum/sweeping skills – practice these important household chores by sprinkling paper punches all over the floor. This is a great way to learn
Create stickers – use the shaped punchers and sticker paper to make fun shaped stickers
Make a sensory bin – create tons of hole punches and fill a sensory bin with them. This is a great use for scrap paper.
Every activity we do can be adapted somehow to meet the different needs of each learner. Not only physically, but mentally and emotionally. I mentioned the different types of punchers above to meet the needs of physically different learners. What about meeting the emotional or mental needs of your learners? Try and find ways to motivate your learners by enticing them with their unique desires.
Vary the type of paper you use – glitter, sand paper, cardstock, tissue paper, crepe paper, cardboard, magazines and more
Change the theme – got a kid who loves trains? Use the puncher to make a train track. Make a lacing card to connect trains together.
Use a hole punch activity to match the lesson plan for the week. You can vary the hole punch tasks to match each lesson plan. Add one for each letter, color, number, season, holiday, shape, or other theme
Multiple levels of students – have one set of students make hole punches for another group to stick them onto paper
WHAT I LOVE ABOUT THESE POSTS
I love these posts because not only do they give you ideas, they give ME ideas as I write. I am super excited about these new ideas I discovered or created while researching this topic. Fall is in full swing here in the southern US. What better time to make apple trees, fall leaves, and maybe a hungry caterpillar or two.
Here are more activities using just one item…do you have these materials in your therapy toolbox?
Happy punching, and don’t forget to thank your teachers for allowing you to make messes in their classrooms.
Victoria Wood, OTR/L is a contributor to The OT Toolbox and has been providing Occupational Therapy treatment in pediatrics for more than 25 years. She has practiced in hospital settings (inpatient, outpatient, NICU, PICU), school systems, and outpatient clinics in several states. She has treated hundreds of children with various sensory processing dysfunction in the areas of behavior, gross/fine motor skills, social skills and self-care. Ms. Wood has also been a featured speaker at seminars, webinars, and school staff development training. She is the author of Seeing your Home and Community with Sensory Eyes.
Following directions can mean a lot of things. Following commands, making something, or getting somewhere. Today we are going to focus on directional concepts. Directionality is the ability to understand and use information related to direction and space. This includes understanding concepts like left/right, up/down, in front of/behind, above/below, inside/outside, etc. Thankfully, we are not going to cover things like, “turn west out of the parking lot,” because no one understands that anyway. There is a relationship to body awareness and proprioception at stake here, too.
The reason we need to worry about this in therapy sessions is that the a spatial relations concepts are very important to functional tasks.
We will take a look at following directions, direction signs and words, body in space to find your way and activities to help enhance directional concepts.
What are DIRECTIONAL CONCEPTS
You may have recently seen our post on left right discrimination. Directional concepts take it one step further.
Not only do you need to know left from right, but behind, in front, before, after, beside, inside, and dozens more. Coincidentally, many of the directional words are prepositions (or many prepositions are directional words). These are spatial relations words like:
over/under
left/right
above/below
east/west
in front/behind
near/far
These words are important to direction following.
Popular singer Jack Hartman has a catchy preposition song. There are lots of songs about directional concepts on youtube if that is your preferred method of teaching.
In occupational therapy, we use play to support development of skills. It’s an easy tool to help kids understand spatial relations concepts.
How to Work on Directional Concepts Through Play
Occupational therapy and play go hand in hand. It is the primary role of the child, after all. Luckily, we can use play as a tool to support development of skills like directional concepts at any age.
The best way to learn is by doing. Getting kids up and moving is a great way to teach directional concepts. Kids can memorize prepositions and direction words all day long, but they will learn faster by engaging in movement activities.
Use a stuffed animal or toys for following directions – ask students to put their bear on the table, behind the plant, below a chair, etc.
Body movement – kids can work on directionality by following commands. Say things like jump on the bed, jump off the bed, go around the trash can, crawl under the table. As they move their body, your learners will make a connection with the word and action
Obstacle course – create a course in your clinic/class/home for learners to follow. Give verbal, picture, or demonstration instructions. They can be: go around the table, then under the chair, then over the yellow mat, through the tunnel, up the slide, etc.
Simon Says – this classic game is all about giving and following directions. Simon says touch your left hand to your right ear. Travel west across the room (just kidding). Put your left leg in front of you. Directions can be as simple or complex as your learners can handle
Relay races – these can combine obstacle courses and Simon Says commands all in one
Hula hoop games – use a hula hoop as a prop for following directions. Put one foot in the hoop. Put the hoop over your head. Stand behind the hoop
Hokey Pokey – this classic song is a great practice for in/out, left/right, and body parts
Line dance songs – the Cha Cha Slide, Cupid Shuffle, and several other line dance songs combine several different directions in the song. These fast paced songs not only get kids moving, but they learn to follow directions while having fun
Teaching directional concepts is important for kids.
MORE WAYS TO TEACH DIRECTIONAL CONCEPTS
Beyond getting up and moving, here are some tricks to teaching directional concepts:
Teach in opposites – we already reviewed left and right, but how about up/down, on/off, in front/behind, before/after
Use visual cues – pictures help learners associate an action with words. Look at books, picture cards, signs, or videos.
Positional songs – singing helps language development, increase memory, and understand concepts. Help your young learners master positional/directional words with these circle time songs that your students will love! This resource is packed with simple, memorable songs (set to childhood tunes you probably already know) that will capture the attention of your students and keep them engaged and learning. You’ll find headers, posters, and printables, too, to help you teach the important early childhood topic of spatial relations!
Task boxes – simple task boxes are a great visual hands-on method of teaching concepts. Make laminated cards and use clothespins or clips to match the concept with the word.
Interactive books are another great way to teach directional concepts.
Chunking – teach in small chunks instead of lots of concepts all at once. For example, maybe one week you work on up and down, incorporating many activities for these two words in isolation.
Barrier games – this is a great concept for learning directional concepts. Students can work in pairs, or you can have an adult work with each learner. Students sit across from each other with a barrier between them. Each player has the same items. The students take turns giving the other player very specific directions (per ability level) on how to arrange the materials in front of them. The goal of the game is to have all the players’ materials look the same at the end of the activity.
Mental Blox (Amazon affiliate link)- this is a great game. One of the sub games in it is giving and following directions. Instead of students copying the card, give them directions to make their design without seeing the card. Then they can try and teach the concepts to you or another student.
Writing on a vertical surface or slant board – I recently wrote a post on the benefits of writing on a vertical surface. One of them was understanding concepts of up and down better. If you think about it, “up” makes more sense on a wall than a flat piece of paper
Another tool to have in your therapy toolbox is a variety of movement and spatial relations worksheets like we have inside The OT Toolbox membership club.
WORKSHEETS AND PAPER PENCIL GAME FOR DIRECTIONAL CONCEPTS
A great way to round off your lessons on directional concepts and following directions, is to put pencil to paper. Writing things down can help with muscle memory and understanding.
After all this research, I am inspired into adding new activities to my toolbox. I have a better understanding of what directional concepts mean, and how to facilitate learning. I still need someone to explain what “turn west out of the parking lot means.”
It’s important to recognize that when we tell our students a direction, there might be directional challenges at play that impact functioning skills.
Victoria Wood, OTR/L is a contributor to The OT Toolbox and has been providing Occupational Therapy treatment in pediatrics for more than 25 years. She has practiced in hospital settings (inpatient, outpatient, NICU, PICU), school systems, and outpatient clinics in several states. She has treated hundreds of children with various sensory processing dysfunction in the areas of behavior, gross/fine motor skills, social skills and self-care. Ms. Wood has also been a featured speaker at seminars, webinars, and school staff development training. She is the author of Seeing your Home and Community with Sensory Eyes.
One way to develop executive functioning skills that is very practical is by combining chores and executive functioning skills. Engaging in chores can be an effective learning tool for young people. In a recent post we highlighted Age-Appropriate Chores, demonstrating which chores are appropriate for certain aged children. Today we are going to focus on chores and executive functioning skills. Engaging in chores can be a great way for teens to work on their executive functioning skills. We wanted to highlight how chores foster executive functioning skills in teens. Insert your email address in the field below to receive your free handout.
Check out our resource on IADLs because this is a good place to start when it comes to doing those “chore” tasks that we all need to do to live functioning lives.
What are executive functioning skills?
Executive function refers to a cognitive process that helps with planning, initiation of tasks, organizing, managing time, problem solving, and self-regulation. Many adults and teens with ADHD have difficulty with executive dysfunction. This translates into weak prioritization skills, time blindness, and an inability to orchestrate concurrent tasks.
This is all critical for managing daily life, and even the simplest of tasks. Check out this post on Executive Function Disorder.
CHORES AND EXECUTIVE FUNCTIONING SKILLS
To make it easier to understand the role of chores and executive functioning skills, we can break EF down into the components, and analyze how chores can foster these skills.
When working on chores and executive functioning skills, think about how difficult task initiation can be.
Many people, not just teens have difficulty with task initiation and follow-through. Here is one of my previous posts on Task Initiation Strategies. This information can easily carry over to teens. In this article on how to teach task initiation, you can explore how to teach task initiation to children and teens who need their strategies a little more play based.
Procrastinators in particular struggle with task initiation. Sometimes getting started is the hardest part. Having a list of chores and responsibilities helps foster task-initiation when there are deadlines and expectations involved. You can help your teen by setting realistic goals, helping them break the task down into chunks if needed, create visuals or lists, and do specific task teaching. Our resource on breaking down goals is a great place to start with this strategy.
For an example, you can look at the task of sweeping a floor. To help with task initiation, you might:
First remove things from the floor like furniture or other items.
Next, get the broom and dustpan.
Then, you can divide the room into smaller sections to do one section at a time.
Just getting started is the biggest hurdle for many people. So, having some planning and organization processes in place can help to get this chore done.
PLANNING in Chores
Planning for chores is another executive functioning skill necessary for success. Sometimes planning for a chore can be the hardest part. People do not know where to begin. Help them by providing, or encouraging them to make checklists of supplies, steps involved, and the standards they need to meet. For example, when it comes to sweeping a floor, you can break down the task and make sure that there are certain steps that are met before you move onto the next step…
Going back to our sweeping the floor example, you can plan to sweep every Monday, Wednesday, Friday, and Saturday.
Part of planning and executive functioning may be preparing for “what ifs” and obstacles. A sudden obstacle can derail any task, making it difficult for you to complete the task. When planning, try and talk through any obstacles that might come about when completing a certain chore.
Example: Vacuuming – what if you go into a room and there is stuff all over the floor? What if you get so far and the cord will not reach? Do you know how to empty the vacuum if it gets full? How are you going to manage your time if you want to vacuum and someone does not want to be disturbed?
With our sweeping the floor example, another part of problem solving is remembering which areas of the floor have already been swept and which areas still need attention.
TIME MANAGEMENT and Chores
My article on procrastination highlighted the reasons people procrastinate and the downfall of putting off tasks. Some people suffer from time blindness. They have no sense of how much time has elapsed. People who tend to procrastinate or be time blind, can benefit from timers, setting enough time aside for the task, and limiting multi-tasking.
Chores are a great way to practice time management. Help your teen determine how much time the task should take, and when they should get started/finished. Practicing chores has more leeway than your boss might, in terms of timelines and workload.
With our sweeping a floor example, we might want to set a timer. We can also determine what is an appropriate amount of time to thoroughly sweep the floor without taking too long or rushing. You might want to use an app like a Pomodoro app that counts down time.
ATTENTION TO DETAIL in chores
Above, I mentioned quality control standards. If you live with a teenager, you know this is a big one. People tend to rush through tasks just to get done. They miss a lot of the key details when completing tasks. Doing chores requires attention skills!
Attention to detail is an executive functioning task not to be missed. This may take some demonstration as your teen’s “good enough” might not meet your standards. These can be part of your planning checklist as they go through the steps to complete the task.
Example: Cleaning the bathroom: highlight all the areas that need to be cleaned. Demonstrate what “clean” means, and how they will know something is clean. Point out things like spittle around the sink, dirt around the toilet bowl, and dust bunnies in the corners.
You can play quality inspector when rewarding for a completed chore. At first, expect some mistakes, and some things you will have to go over after they have finished. What grade did they get, and how does the pay out work? $1.00 for a grade A job, $.80 for B work, $.60 for a C, etc. Be sure to give the reasons for your grade so your learner can make adjustments the next time.
With our floor sweeping example, this might look like staying focused on the task, avoiding distractions like phones or interruptions. We might want to set a short term goal to continue to sweep even if the task is repetitive or tedious, and aim for a clean floor.
SELF REGULATION and chores
Being responsible for chores can help build the executive functioning skill of self-regulation. Learners need to manage their emotions, deal with distractions, and ignore the impulse to cut corners. Help your teen identify their emotions such as fear of failure, perfectionism, or overwhelm, and talk though them. Imagine what advice you would give a friend instead of your child. Recognize their emotional barriers.
Some other self-regulation skills that chores can build are:
work tolerance
frustration tolerance
taking turns
sharing (responsibilities and jobs)
working together
working independently
emotional regulation
Another way to build executive function through self-regulation is to help your child practice autonomy. Teach them to advocate for themselves when they reach a road block they can not solve. Better yet, encourage them to work hard to problem solve by themselves. Try giving limited instructions after the initial trials to build independent thinking and follow through.
For our sweeping the floor example, self-regulation might look like; Managing frustration if floor debris or dirt is difficult to gather or if the debris scatters when sweeping it into the dust pan. The goal is to stay calm to complete the task efficiently.
FLEXIBILITY AND ADAPTABILITY in chores
Some people are more mentally flexible than others. Routine has its place, however, mixing things up helps build adaptability. Once your teen has mastered one chore, start them on something new. Throw in some obstacles that will need to be problem solved (like encountering a messy room, or running out of cleaning supplies).
Doing chores allows great opportunities for flexibility. What might happen if you run out of toilet cleaner? Is there something else you can use, or does the task have to be put on hold? Chores offer chances to adapt without significant consequences – the dishwasher will not explode if the dishes are delayed by 15 minutes.
SELF REFLECTION AND self ASSESSMENT in chores
After the chore is finished (and maybe before you give your grade on how completely the chore was done), ask your teenager to assess their work. There is going to be a tricky balance between praising them for a job well done and pointing out flaws.
Direct them back to the checklist to review if all the steps were completed. Ask about their time management, attention to detail, planning, level of independence, problem solving and self-regulation to help them reflect.
For our sweeping the floor example, this means the individual has to continuously checking the cleanliness of the floor and ensuring no spots are missed. It helps to teach them to evaluate the thoroughness of the task…and this skill carries over to every chore, too!
How to Work on Executive Functioning Skills with Chores
Chores are a life skill that needs to be done. It’s a tool and a means for supporting executive functioning skills.
Here are some tips to help with doing chores even when executive functioning skills are a challenge…because doing the chores is a great way to actually work on those cognitive skills that then carry over to so many other areas of life.
Make a to-do list of chores that need to be done each day.
Use an app to help with chore lists
Make a routine that has you doing certain chores on certain days of the week. For example, clean your room on Saturday. Take out the trash on Tuesday night. Sweep Monday, Wednesday, Friday. Do laundry on Sunday. Then, you have one chore to do on certain days. This can really help to get those tasks done.
Have a plan. Include chores in your weekly routine and weekly lists, included with other tasks like schoolwork, jobs, activities, etc. You can even set a timer in your phone for the day of the week and the time that you will do certain chores.
Stack chores- This basically means you do two related things at one time and then try to make that part of your routine. Maybe you run the water in the kitchen sink to do the dishes and you wipe off the counters while the sink is filling up.
Try a visual reward chart. There are many different types and you can adjust this to meet the needs and the level (age) of the individual. Even adults can see progress on a reward chart that is as simple as crossing tasks off a list.
Set a timer. Pick the amount of time you want to spend on a task and then set a timer. See if you can get it done by the time the timer goes off. This helps with task completion and sustained attention.
Put the phone away. This one is huge! When you have a certain task to do like folding laundry, it can be easy to have your phone on with a video playing as you fold. However, before you know it, you’re sucked into a video and the folding isn’t happening. Put the phone away until the task is done and then maybe use the video watching as a reward once the task is completed.
Focus on accomplishments. I love this strategy for doing chores even when executive functioning skills are a struggle. This just means that you try to identify the benefits of actually having the chore done and accomplished. Maybe you really dread cleaning out the dishwasher. It’s a terrible task, right? So boring and monotonous. But if the dishwasher is cleared out, what does that mean? You will have a clean counter because you can put dirty dishes into the dishwasher. You can have clean utensils and plates to eat from. Basically, you want to list out as many positive benefits of actually doing the task that you can think of. It will feel so good to actually get this job done! This strategy can help you to push past the resistance. Especially when you do this automatically. The more you focus on the benefits, the more natural this process becomes.
Another tactic for doing chores even when executive functioning skills are a struggle is to take a look at how you spend your time. Use a calendar or an app and track how you spending time. How much time to you actually spend doing daily chores and how much time is spent on social media or on your phone? Seeing those actual numbers or actual blocks of time marked off can help you to see the chunks of time that ar available or are wasted.
These are chores you can use to improve executive functioning skills.
Chores that Develop Executive Functioning Skills
Here’s a list of chores that can help develop executive functioning skills, with an emphasis on different cognitive skills that make up executive functioning:
Sorting Laundry
Executive Functioning Skills: Planning, organization, working memory
Kids must sort clothes by color, size, or type and plan out washing cycles (e.g., whites, colors).
There are several steps to the task of laundry, so this can be a challenge for some to do the whole process. Start with just one piece, like sorting laundry. Then add washing. Then drying. Then folding. Then putting away clean laundry.
Completing multiple steps in a sequence (pulling sheets, arranging pillows) helps build initiation and persistence. I don’t know about you but making a bed is a good chore for self-regulation skills, too. It’s frustrating to get those sheets just right!
Setting the Table
Executive Functioning Skills: Planning, organization, working memory
Remembering which utensils and items go where, organizing the table, and making sure all of the settings are complete.
Deciding where to start, organizing items, and maintaining focus until the room is tidy.
Washing Dishes
Executive Functioning Skills: Task initiation, time management, sustained attention
Beginning the task promptly, maintaining focus until all dishes are washed, and managing time effectively. Then there is the drying of dishes and then putting away clean dishes.
Taking Out the Trash
Executive Functioning Skills: Task initiation, working memory, time management
Remembering to do this regularly and making sure the trash is disposed of in the correct location. This one is important because if trash isn’t taken out in time for the trash pick up, you’ll have trash building up around the home.
Managing time to ensure thoroughness and checking to ensure all smudges are gone.
Organizing a Backpack or School Supplies
Executive Functioning Skills: Planning, organization, working memory
Making sure all of the needed materials are included, packed in an organized way, and nothing is forgotten.
Emptying the Dishwasher
Executive Functioning Skills: Task initiation, sustained attention, working memory
Remembering where each item goes and staying focused until all dishes are put away properly.
In The OT Toolbox membership, we have a bunch of executive functioning resources for doing chores.
Want to add this resource to your therapy toolbox so you can help kids thrive? Enter your email into the form below to access this printable tool.
This resource is just one of the many tools available in The OT Toolbox Member’s Club. Each month, members get instant access to downloadable activities, handouts, worksheets, and printable tools to support development. Members can log into their dashboard and access all of our free downloads in one place. Plus, you’ll find exclusive materials and premium level materials.
Level 1 members gain instant access to all of the downloads available on the site, without enter your email each time PLUS exclusive new resources each month.
Level 2 members get access to all of our downloads, exclusive new resources each month, PLUS additional, premium content each month: therapy kits, screening tools, games, therapy packets, and much more. AND, level 2 members get ad-free content across the entire OT Toolbox website.
Teachers Pay Teachers has some great resources on teaching chores, creating a lesson plan, and documenting progress.
Life skills cards – This set of 10 pages of Life Skills Cards help break down functional skills and measure them. Some goals such as “improve self help skills” are broad, and often overwhelming. These life skills cards help break a large goal into functional tasks, giving learners a visual reminder of the tasks being practiced, and a way to track them. Learners use a punch, or other tool, to mark each time they have practiced the task.
A final note about chores and executive functioning skills…
The reason we highlight teens and executive functioning skills is; this is the age range where it really begins. While younger children can demonstrate attention to detail, some time management, and planning skills, it is not without much supervision and instruction. The prefrontal cortex that helps with decision making, is not fully functioning until our kids are in their late 20s!
The Impulse Control Journal…a printable resource for helping kids strategize executive functioning skill development. When saying “calm down” just isn’t enough…
When a child is easily “triggered” and seems to melt down at any sign of loud noises or excitement…
When you need help or a starting point to teach kids self-regulation strategies…
When you are struggling to motivate or redirect a child without causing a meltdown…
When you’re struggling to help kids explore their emotions, develop self-regulation and coping skills, manage and reflect on their emotions, identify their emotions, and more as they grow…
Grab the Impulse Control Journal to build organizational strategies, planning, prioritization, habits, and mindset in kids.
Victoria Wood, OTR/L is a contributor to The OT Toolbox and has been providing Occupational Therapy treatment in pediatrics for more than 25 years. She has practiced in hospital settings (inpatient, outpatient, NICU, PICU), school systems, and outpatient clinics in several states. She has treated hundreds of children with various sensory processing dysfunction in the areas of behavior, gross/fine motor skills, social skills and self-care. Ms. Wood has also been a featured speaker at seminars, webinars, and school staff development training. She is the author of Seeing your Home and Community with Sensory Eyes.
They say it takes a village to raise a child. Likewise, it takes a dozen different methods to teach one. Unfortunately, kids are not the same, nor do they learn like one another. Just when you have one figured out, along comes another child with a different set of ideas and learning methods. We have been featuring different methods and resources to teach chores and other tasks. We started by learning about appropriate ages for chores, moved on to task initiation strategies, continued to find ways to prevent the summer slide, and finally we are onto the task trackers.
As a pediatric OT, I use a form of a task tracker in most therapy sessions, in the way of a checklist or visual schedule of some type. This is another version that is great for specific needs.
Free Task Tracker Worksheet
Once you have established a set of chores/tasks that you would like your learner to complete, it is time to implement a few different task trackers and charts. In this post you can get access to our free Task Tracker worksheet.
Simply add your email below, and the OT Toolbox will send you the free PDF for downloading. Better yet, you can become a member of the OT Toolbox. This will save you from having to add your email address each time we post a fabulous new resource. Plus, the membership area has a lot of resources that are exclusive to members. I love that the posts and other information on in the membership area is grouped by different categories. One quick search will bring you dozens (or hundreds) of cool resources.
WHY DO WE NEED A TASK TRACKER?
In some ways, increased paperwork might seem like more work. In reality, paper charts cut down on your overall effort, by streamlining tasks and ideas. How many of you benefit from to do lists, calendars, and visual aids? I know I do. I have several checklists, charts, and worksheets to help me remember everything I need to do in a timely manner.
Without a visual aid, it is difficult not only to complete all the task but makes self-reflection more difficult. As a therapist, I am often data driven. We log what we see and do, not only to document it, but to reflect.
HOW DOES THE TASK TRACKER WORK?
Like many resources from the OT Toolbox, there are different ways to use this task tracker. By the time you have a task tracker, you have most likely modeled, taught, and reviewed the tasks several times. The task tracker comes in when your learner is working on doing their chores (or daily tasks) mostly independently.
Your task tracker can be as unique as your learner. You can use one tracker for each day or week. The list can include several trials of the same task, or a complete list to finish.
THIS OR THAT?
At the top is a column called “this or that”. You can use this column in several ways.
Prefill in this section with two choices in each box. Your learner can circle the one they choose for the day/week/hour, or whatever time frame they are allowed for each task.
Your learner can repeat the same two tasks (picking whichever one that day) for the allotted number of trials.
Example of This or That: I might put do the dishes and/or fold laundry in the “this or that” column. Scenario one allows for multiple trials of the two selected task. Scenario two would add two different variables in each row.
Another way to fill in this area is to have a separate list of chores, or tasks. Your learner can fill in each box with their choice from the list. Giving your learner some autonomy and choice will help them get motivated to complete the task (or get started if they are struggling in this area).
One way to complete this activity section is to make sure that all the tasks get done at some point. Therefore, your learner has a choice in the order they do things, but everything eventually gets done.
Maybe you think differently and truly want to give your learner autonomy in what help they provide. There are benefits and drawbacks to this approach.
HOW YOU ARE WORKING ON IT TODAY
This section of the task tracker has another great visual. Your learner can check to the right if they are doing it, or have it finished. The middle-dotted line can be left blank, or your learner can describe how it is getting done.
I see the “how are you working on it” section for tasks that have multiple parts, require practice or trials, or need to be problem solved.
Your learner can keep their to do list organized by visually documenting if they are in progress, must get started, or have already completed the tasks.
DATE ACTIVITY CHECK MARK
This section below in the task tracker is yet another visual reminder for logging tasks. This works great for accountability, but also if you are working on a reward system. Your learner can log the number of trials they have done, practices, or the list they have completed.
THE TOP WIN on a Task Tracker
As an exercise in executive functioning and task completion, this section lets your learner reflect on their progress. What was their top win for the week? Perhaps they have logged the same task eight times, and on the eighth time they did it without help. Maybe you got all your tasks done for the week. That is certainly a top win.
You might need to help your learner reflect at first. They may not have the sight to reflect on their accomplishments yet. Try not to give the answers, but maybe ask questions. Was there something you did by yourself? Did you get more than you thought you would done?
I FED MY ENERGY BY
This section on the task tracker is another exercise in self-reflection. How did your learner get through the tough times? What did they use for motivation to get started?
They might think literally like “I ate seven snacks a day” or “I drank lots of water”. These are indeed ways to feed ones’ energy. Other ways to feed energy might be working toward a reward, realizing some tasks build muscle and strength, or pleasing someone else. Hopefully they did not feed their energy by fearing what would happen if they did not finish the task, or refused to get started.
Fear of retribution is a good motivator, but not the best idea. Far better to work toward a positive reward, than fearing a negative one.
WAYS TO MODIFY AND PERSONALIZE YOUR TASK TRACKER
There are many ways to modify, personalize, and adapt your task tracker:
Laminate the task tracker to make it reusable.
Make it bigger. Blow up the task tracker to a larger sheet of paper to post somewhere prominent
Make it smaller. By shrinking the task tracker, you can make it pocket sized
Add picture symbols for non-readers
Prefill some of the areas and have your learner circle their choice. This can be done in all sections, especially if your learner has difficulty reflecting and writing answers
Print it onto colored paper – colored paper can be motivating
GLITTER! I love some glitter. The shinier the better. When I walk by a glittery list , it may help me get started.
Change the types of tasks. Tasks do not need to be chores. They can be school work, self care, activities of daily living, or daily tasks. Your list might have reading/writing/math for 20 minutes. My list might have brush your teeth/take a shower/get dressed as items to be completed.
This task tracker does not need to be exclusively for children. Young adults, or anyone who struggles with executive functioning can benefit from visual resources and reminders to get them through tasks. At first these types of activities take time, but with practice they tend to go quicker. Once your learner is adept at doing tasks and chores, they may not need this list, or be able to visualize it in their mind. Many learners get stalled at the idea of doing tasks, or their first roadblock. Use visual guides to help them succeed.
Free Task Tracker Sheet
We have a printable task tracker sheet that you can use starting today. We love to use this worksheet to support executive functioning skills by breaking down the steps of tasks. We love this as school based OTs for completing school assignments, homework, projects with multiple steps, chores, and daily functional tasks. Use it in a way that works for your needs!
Victoria Wood, OTR/L is a contributor to The OT Toolbox and has been providing Occupational Therapy treatment in pediatrics for more than 25 years. She has practiced in hospital settings (inpatient, outpatient, NICU, PICU), school systems, and outpatient clinics in several states. She has treated hundreds of children with various sensory processing dysfunction in the areas of behavior, gross/fine motor skills, social skills and self-care. Ms. Wood has also been a featured speaker at seminars, webinars, and school staff development training. She is the author of Seeing your Home and Community with Sensory Eyes.
Communication is a vital part of livelihood, so these types of expressive language are a huge part of everything we do. It starts at birth and continues until almost our final breath. Infants cry from the moment they are born, signaling some sort of need or distress. Their needs are met based on the type, volume, and intensity of their cry. This is why we as occupational therapy providers, and other readers of this site (parents, educators, other therapy providers, etc.) can use this information in supporting the kids we live with and work with. It’s the social skills aspect that helps to shape the foundation for other areas of development.
We wanted to include examples of how you can document when these different types of communication are used in therapy sessions, so be sure to look at the documentation examples below each communication type.
Having an understanding of communication types is important for occupational therapy and other therapy professionals for documentation purposes. We can use these types of communication with our clients, and it’s important to document that.
When we think about communication, we think about talking. Speech therapy is highly sought after due to the number of people who can not communicate. Talking is just one form of communication. Let’s take a look at all the different types of communication and what we can do to foster them.
TYPES OF COMMUNICATION
How many different types of communication can you think of beyond the spoken word? Since spoken language is one of the highest levels of communication, it is what we consider when thinking about types of communication. This is so important because when there are sensory needs, behaviors, or any type of challenge with daily functional tasks, we can see a lack of meeting specific needs. That’s where the self awareness piece comes in. You’ve seen the behavior iceberg imagery before, right? When we see behaviors, below the iceberg are underlying needs. Those needs are often not communicated and so what we do see is the behaviors or emotional outbursts. Self-awareness plays a major role in self-regulation skills and knowing when and how to implement self regulation strategies that support the individual’s needs.
However, there are many other ways to get our wants and needs met than just using our voice.
There is verbal and non-verbal communication as two broad categories.
Verbal communication is the way we talk to communicate needs.
Non-verbal communication is a huge category that needs to be broken down into different subcategories to do it justice. There are eight different types of non-verbal communication.
Nonverbal communication can be difficult for our therapy kids (and all of us) to understand and recognize. There are several types of nonverbal communication:
Body language
Gestures
Paralinguistics (loudness of voice)
Proxemics (personal space)
Eye gaze
Hepatics
Appearance
Artifacts
All of these types of nonverbal communication types require insight and awareness. Autistic individuals in particular and other neurodivergent can really struggle with this awareness. You can support this need with self awareness activities and self awareness games.
This information can help our kids that we work with by using the different types, depending on needs, when it comes to visual schedules and other tools.
Body language is a powerful type of communication. It can help us understand others. It helps us understand how people are feeling. You can use body language to express intention. Research suggests we make certain judgements about a persons’ intelligence based on facial expressions. Having body awareness is part of this. If you’re not sure where your body is in space, then it’s difficult to use it in communicating wants and needs.
Eye contact (or lack of it), crossing your arms, stepping closer or further away, facial expressions (smiling, frowning, surprise), stiffening your body, melting into the floor, and yawning are just some types of body language.
Some lesser-known types of body language signals are; pupil size, blinking, and biting the lips. The absence of body language or facial expressions can signal communication also.
Documentation Example for Body Language:
“During the session, (the student) was engaged in a group activity to encourage social interaction. She used body language and gestures to communicate with peers, such as nodding to show agreement and waving to greet others. She also used her hands to demonstrate actions like “come here” and “stop.”
Gestures
Gestures are like sign language but less precise or formal. Think about the kind of gestures you use daily. This may be intentional, or subconscious. Some gestures are universal, while others might be more cultural or geographic in nature (be careful about using certain gestures when travelling)
Waving hello or goodbye
Giving a high five
Pointing to something
Nodding or shaking your head
Stomping your feet
Clenching your fist to indicate anger
Thumbs up or down to indicate approval or disapproval
The “ok” sign to signal everything is alright. In some parts of Europe this signal means you are nothing, and in some South American countries it is a vulgar gesture
The “V” sign means peace or victory in some countries, but in the United Kingdom and Australia it is takes on an offensive meaning when turned backward (like showing the middle finger in America)
Showing the middle finger – in the US this is a powerful gesture. It shows clear meaning of unhappiness and is meant to be quite offensive
Documentation Example for Gestures as Communication
“The client was guided through an obstacle course designed to improve his balance and coordination. The therapist used gestures and visual cues to direct the client through the course. The client responded to these non-verbal cues effectively, following the therapist’s hand signals to climb, jump, and crawl. He also used gestures to communicate his needs, such as pointing to a water bottle when he was thirsty.”
Paralinguistics
This is the tone of voice or loudness. Not necessarily spoken word. Screaming, grunting, yelling, crying are forms of communication. With language, tone of voice can convey a message.
How to document paralinguistics in therapy sessions
“(The client) participated in a storytelling activity where he was encouraged to adjust the loudness of his voice based on the context. The therapist provided feedback on using a louder voice when calling for attention and a softer voice during one-on-one interactions.”
Proxemics
Proxemics means personal space. Personal space is another type of non-verbal communication. There are different factors that influence how much space we believe belongs to us. Social norms, cultural expectations, situational factors, personality characteristics, sensory perception, and level of familiarity are just some of the factors. COVID had a big effect on personal space. Some people loved the six-foot barrier between people, while others found this difficult to adjust to.
Documentation Example for Proxemics:
“(The student) engaged in role-playing scenarios to learn about personal space. The therapist used visual aids and physical demonstrations to show appropriate distances for different social interactions, such as standing closer for friends and farther for strangers.”
Eye Gaze
People’s eyes can indicate a range of emotions. Steady eye contact can mean someone is being honest. Shifty eyes and avoiding eye contact are of seen as a sign someone is lying or being deceptive.
This can be especially misleading when people who have a social disorder such as autism avoid eye contact. Gaze and eye contact doesn’t need to be a goal, but documenting this can have it’s role.
Documentation example for Eye Gaze:
“(The student) participated in interactive games designed to encourage eye contact, such as peek-a-boo and follow-the-leader. The therapist provided positive reinforcement whenever he made eye contact during interactions.”
Haptics
Haptics are touches. Julia Wood in her book Interpersonal Communication writes that touch is used to communicate status and power. Higher status individuals tend to invade personal space more than that of lower status. Women tend to use touch to convey care, concern, and nurturance. Men tend to use touch for power or control over others. A caregiver’s touch has a strong influence on behavior and social interaction in babies.
“(The student) was involved in activities that incorporated touch, such as high-fives, handshakes, and patting on the back. The therapist modeled appropriate touch and explained its use in different social situations.”
Appearance
Choice of clothing, hair style and other appearance factors are also a type of communication. Appearance can alter judgements, interpretations, and physiological reactions. We make first impressions about how someone looks.
Documenting for appearance as a communication form:
“During the session, (the student) was guided through activities related to personal hygiene and appearance, such as brushing hair and selecting weather-appropriate clothing. The therapist used visual schedules and modeling to teach these skills.”
Artifacts
With the rise of online presence objects and images are types of communication that can communicate without language. You might use an avatar, a meme, or emoji to convey a thought or impression. Wearing a particular uniform or badge says something about you.
Documentation example for artifacts:
“(The student) used various artifacts, such as picture cards and a communication board, to express his needs and preferences. The therapist guided the student in selecting and using these tools during activities.”
Forms of NON-VERBAL COMMUNICATION
There are various forms of communicating through nonverbal communication as well. This is how we relay our needs and wants without speaking. This includes sign language and use of electronic devices, written work, and other means like facial expressions.
SIGN LANGUAGE
Sign language is considered a form of non-verbal communication. It is based on visual cues through the hands, eyes, face, mouth, and body. Sign language combines body language and gestures. Some sign language gestures are universal, however just as there are different types of spoken languages, there are many types of signs.
NON-VERBAL COMMUNICATION THROUGH ELECTRONIC DEVICES
Non-verbal communication in a digital world is becoming more important than ever. Electronic devices combine written communication, pictures, and symbols. There are several types of assistive technology devices that are used for non-verbal communication. These range from low tech output such as a read aloud book or choice board, to a dynamic machine with layers of words and phrases. These can be accessed by tapping on the screen/board, or through eye gaze technology.
If your child could benefit from a speech generating device, there is a process to follow with a specialized therapist and assistive technologist. This includes trials on different types of devices and training. Occupational Therapy and Speech Generating Devices is a helpful article to understand the role of AAC in therapy.
Documentation Example when Using ACC
(“The client) was provided with an AAC device to assist in expressing her needs and choices during therapy. The therapist programmed the device with simple phrases and images relevant to the session activities. The client used the AAC device to indicate her preferences, such as selecting the “play with blocks” icon and saying “more” through the device when she wanted to continue an activity.”
Types of VERBAL COMMUNICATION
There are two types of verbal communication, written and oral. Both convey messages.
WRITTEN WORDS
The written word can be a powerful tool to convey a message. It can be used to write stories, emails, texts, messages, articles, and more. It can be helpful when communicating between people who cannot communicate with spoken language. Pointing to a written item on a choice board or menu is an effective method to get your wants and needs met.
Written words can also include pictures, symbols, picture exchange cards, and photos to convey a message.
With the invention of Google Translate and other language apps, it is now possible to communicate in different languages with each other. This has proved especially helpful in cities where there are many cultures in one area.
Written communication, like any other types of communication can cause misunderstanding. There may be a delay in getting an answer, or difficulty getting the message across. Over written communication there are often difficulties interpreting feelings and meanings behind the text. Without facial expression, gestures, and body language, it can be hard to figure out the meaning of a message.
Documentation example for written communication
“(The client) participated in activities aimed at improving his handwriting skills, such as tracing shapes and writing simple words. The therapist observed and documented client’s progress in forming letters and maintaining proper grip on the pencil. The student also used written communication to express his feelings about the activities, writing words like “fun” and “hard” to describe his experiences.”
ORAL COMMUNICATION
When we think of communication, verbal language is what we often think of. This is a high level of communication and takes years to master. It starts with cries, babbling, and putting words together. Once this is mastered; storytelling, vocabulary, semantics, grammar, and pragmatics are developed. Oral communication can be between two people, to a large group, in a speech or television program, discussion, on the telephone, video conferencing, or a meeting.
While the output is similar in different types of oral communication, non-verbal communication plays a big part in the setting. For example, a phone conversation might not convey much non-verbal language, where a video conference or meeting would. A teacher uses a different volume and tone of voice than a store clerk.
Documentation Example for Verbal Communication
Verbal communication will be used a lot during therapy sessions! Here is an example of how you can document this means of communicating that occurs in therapy sessions:
“During the session, the client was encouraged to verbalize her feelings and choices. She was asked to describe her favorite toys and the activities she wanted to do. The client responded verbally with single words and short phrases, indicating her preferences and emotions. For instance, she said, “I like the red car” and “I feel happy.”
LISTENING IS A FORM OF COMMUNICATION
Is listening a type of communication? Yes. It is often overlooked because we are so busy trying to get our message across. Listening is important for two-way conversation. Being able to listen can be a difficult skill. You may find yourself thinking about what you want to say rather than really listening to the sender. This is not active listening. You may hear what is being said, but are not processing it fully. A good conversationalist is not only a great speaker, but also able to listen. At the same time, the speaker needs to read cues and take breaks to let another person take a turn.
Take some time to look around you and process all the types of communication happening at once. Just because your child is not verbal, does not mean they are not trying to communicate in some way. Sometimes they are not using the most effective way to communicate like spitting, or hitting, but they are getting some message across. Take time to acknowledge what they are trying to convey and give them tools to make better choices in terms of communication. There are so many options out there, with a lot of trial and error you are bound to find some combination that allows your child to get their wants and needs met.
Victoria Wood, OTR/L is a contributor to The OT Toolbox and has been providing Occupational Therapy treatment in pediatrics for more than 25 years. She has practiced in hospital settings (inpatient, outpatient, NICU, PICU), school systems, and outpatient clinics in several states. She has treated hundreds of children with various sensory processing dysfunction in the areas of behavior, gross/fine motor skills, social skills and self-care. Ms. Wood has also been a featured speaker at seminars, webinars, and school staff development training. She is the author of Seeing your Home and Community with Sensory Eyes.