Types of Pencil Grips

pencil grips

Pencil grips, pencil grips, pencil grips, there are so many types of pencil grips! Do I try this grip or that one? Does this child really need a pencil grip? Will they use this pencil grip? Will it be used correctly if they use it in the classroom? Ugh! So much to decide and so many variables to consider when it comes to handwriting. It is overwhelming! Does this sound like you in your practice as an OT? I’ve been there, and I’ve said these things to myself, and sometimes even to others. This post is here to help you decide what pencil grips to try and why!
Pencil grips

Types of Pencil Grips

In this blog post, we’ll dive into pencil grips occupational therapy practitioners may offer as a tool to support handwriting needs.

We’ll address types of pencil grips (with links for purchase) and why each pencil grip is used.

Finally, we’ll cover a variety of related resources and activities to support the development of pencil grip use.

To further explore pencil grasp development, take a look at our blog post, Pencil Grasp Development and get this great Pencil Grasp Quick Visual Guide, which helps Occupational Therapists identify and explain grasp patterns, using pictures to educate, and explain how pencil grasps progress developmentally.

The visuals will help parents and teachers understand grasp development and the goals for an appropriate grasping pattern. My prediction is that these tools will help get buy-in from the educational team and the family. It helps them understand exactly where the child is developmentally and where you, as the OT, wants the learner to head, and why! 
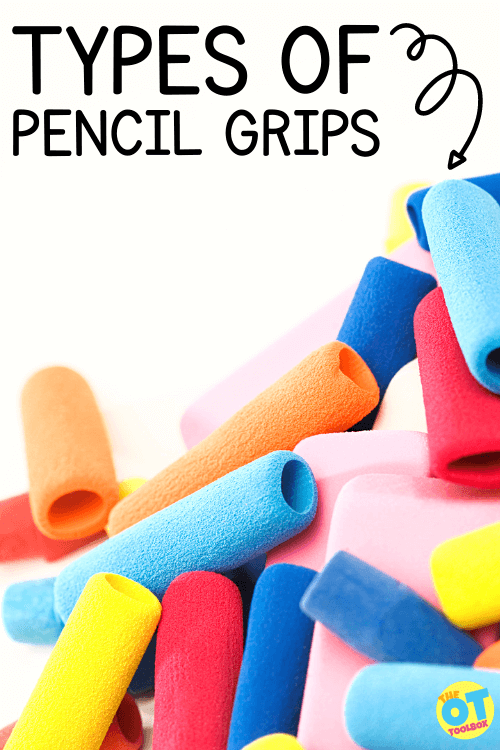
pencil grips and Occupational Therapy

First, let me begin by saying that pencil grips are NOT a miracle cure for pencil grasp. They can help in certain circumstances based on the child’s individual needs.

Different types of pencil grips do not help to overcome the root of the inefficient grasp, as these issues must be addressed simultaneously, while implementing the gripper. 

In occupational therapy sessions, the OT practitioner is striving to achieve the most effective and functional pencil grasp for each individual. A therapist may have 40, 50, or even 70 students on their school-based OT caseload…and each student will be completely different when it comes to grasp patterns, pencil pressure, positioning of the fingers, preferences, letter formation strokes, executive functioning skills, self-regulation, visual motor skills, sensory preferences, and handwriting considerations. All of these areas play into handwriting.

To meet the needs of the individual student, a pencil grip may be supplied as a tool to support those individual needs.

Before we get into the various types of pencil grips you may see an occupational therapy practitioner recommend, it’s important to cover functional pencil grip.

Pencil grips are designed to support the most functional and efficient pencil grasp a child can achieve.

This is based on many factors including; their current skill level, motivation, and understanding that the pencil grasp should be efficient and effective, but NOT perfect.

Functional grasps have a few basic components, which include; an open web space, skill fingers holding the pencil (thumb, first, and middle fingers), and stability (achieved with the ring and little fingers being curled securely into the palm). This results in an efficient and functional tripod grasp for the most success with handwriting, drawing, and coloring.

Inefficient grasps are used as a child attempts to compensate for lack of stability, skill finger strength, and endurance. With this inefficient grasp comes fatigue, pain, stress on the joints, decreased writing speed and overall legibility.

A pencil grip may be a tool provided to support a functional pencil grasp, depending on the needs of the individual student.

Think of pencil grips as a supplemental tool to aid a child as they continue to work on building the hand and finger skills needed to achieve an independent and efficient grasp.

The type of pencil grip can also serve to support the child as they focus on the writing process, therefore not exhausting their thought and energy, trying to remember to grasp the pencil properly for the best function. 

The OT Toolbox has a great Pencil Grasp Bundle available for purchase to support various needs related to pencil grasp.
types of pencil grips

Now, without further ado, let’s proceed to types of pencil grips that most OTs recommend, what their purpose is, and why they are recommended!

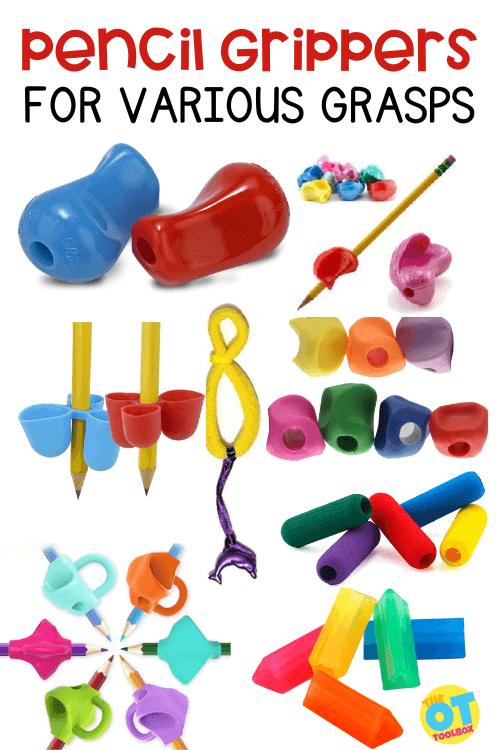
There are so many types of pencil grips out there on the market. Some of those listed out include:

  • Trigangle pencil grip
  • Grotto pencil grip
  • Soft foam pencil grip (Classic foam pencil grip)
  • The Pencil Grip
  • Crossover Gripper
  • The Writing C.L.A.W.
  • Firesara Grip
  • Twist n’ Write
  • Handiwriter
  • Write Right Stylus
  • Stetro Gripper
  • Weighted pencil grip

This is just a start of all of the types of pencil grips out there. We’ll go into greater detail on the benefits of each pencil grips, and why you would select one grip over another.

Let’s get started!

Amazon affiliate links are included below for purchase of various types of pencil grips.

Sometimes the easiest way to ensure a better grip on a pencil is by getting a smaller pencil into those hands. Golf pencils are some of the best tools for smaller hands, as they are the right size. The use of larger pencils and crayons leads to compensatory grasping patterns, as they are too long and too heavy for little hands to grasp and hold for long periods of time.  A typical sized pencil in the hands of a child, is the equivalent of an adult trying to use a 12 inch pencil!

The physical size of hands and biomechanics of the muscles and joints in a child’s hand can’t possibly hold a large writing instrument unless they grasp it with compensatory efforts. This generally results in inefficient and ineffective grasps.  Younger learners have far more maladaptive pencil grasp patterns than older adults, due to the young age at which learners are instructed to write. 40 years ago, writing did not begin until first grade. That gave the hands time to develop. Now writing starts in the two year old class, or in preschool many times. It’s because of the early push to trace, copy, and write letters in preschool that we see poor pencil grips established.
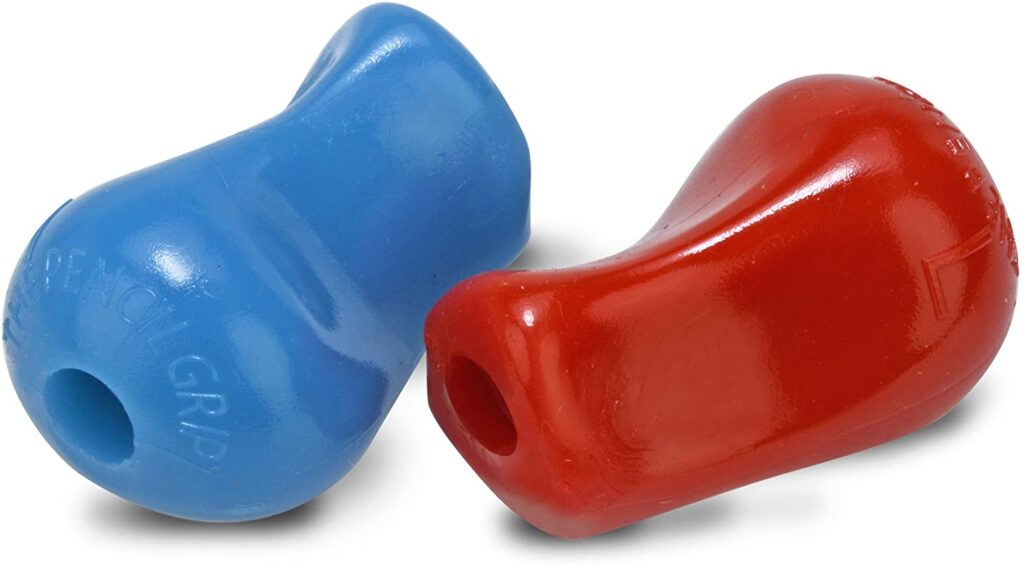
The Pencil Grip

This grip, simply called “the pencil grip”, is an oldie, but a goodie for some children. It is designed to provide cushiony comfort, with proper finger placement indicators for left AND right-handed writers. The Pencil Grip helps learners gain improved pencil control, while reducing fatigue. This type of pencil grip supports an open web space and tripod grasp. The pencil grip comes in mini, standard, and jumbo sizes, making it available for a variety of children and adults. Recently, I have been unable to find the mini-sizes. 
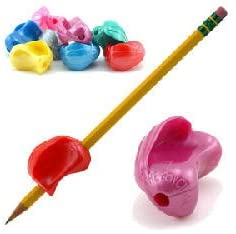
The crossover grip

Honestly, this grip is essentially “The Pencil Grip”, with a wing on the front to help prevent the fingers and thumb from wrapping over the pencil shaft. This helps keep the web space open. The crossover grip will aid some children who do not have a strong thumb overwrap pattern yet. If their thumb overwrap is significant, this grip may not be the one for them, as it allows a wrap grasp with little resistance. It is cushiony and does not prevent the learner from wrapping their thumb over the material.
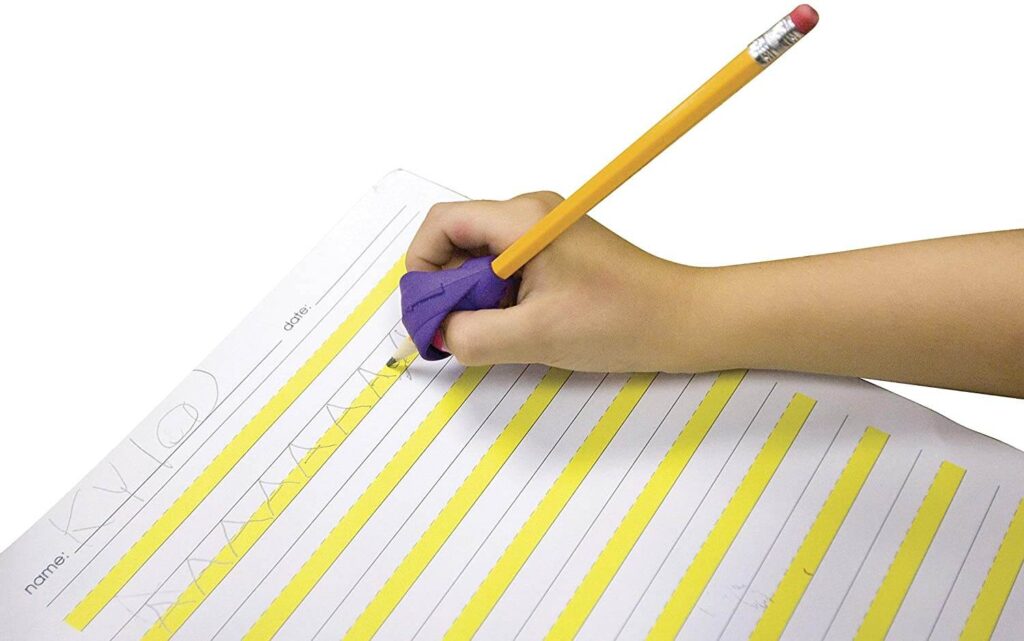
The Grotto Pencil grip

This type of grip is great for the children that have a thumb wrap grasp which closes up their web space. The Grotto Grip is not as cushiony as “The Pencil Grip”, but it is easier to use, as it has molded finger slots for the thumb and index fingers, and an indentation on the bottom for the grip to rest on the middle finger. It also has a wing on the front, and the material is stiffer in design, which can help aid in the prevention of any finger or thumb wrapping.

Left and right-handed writers can easily use the Grotto Grip, as the finger placement is exactly the same, making it less confusing for children to know where their fingers should be placed while using it. 
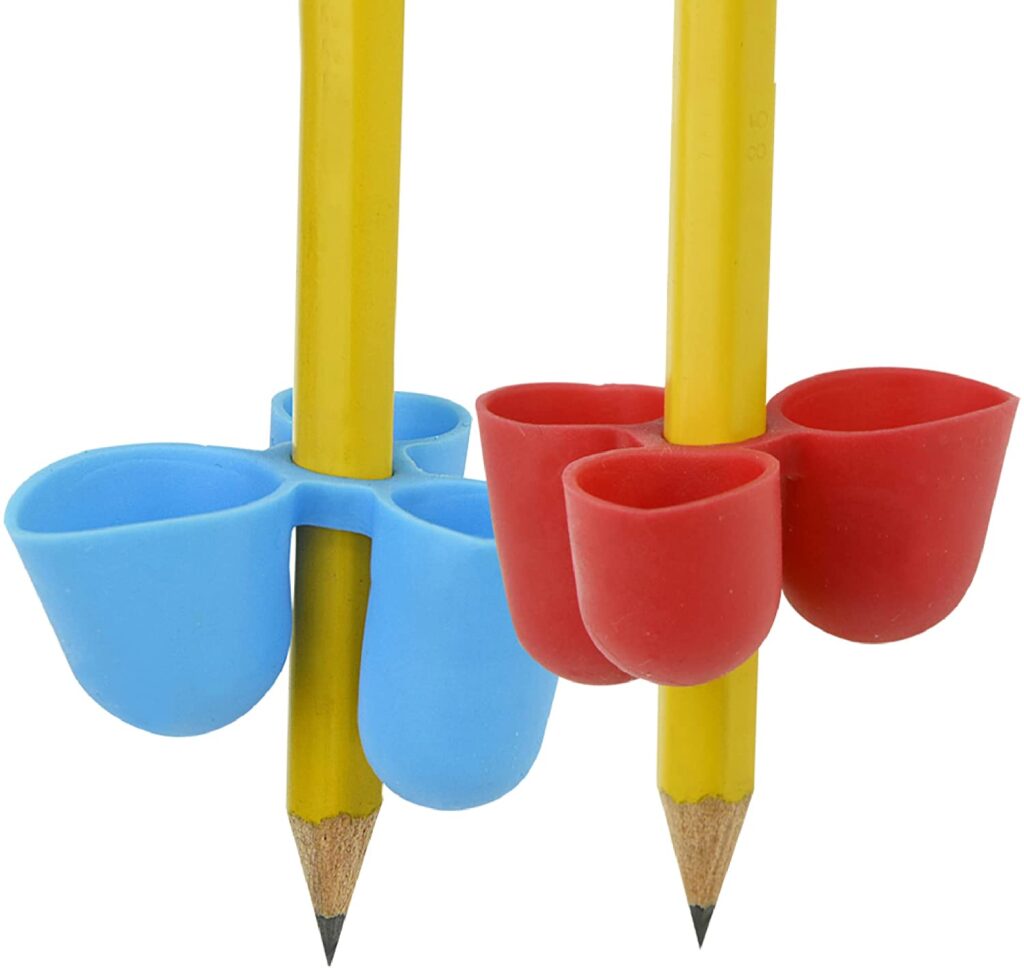
The Writing Claw pencil grip

This grip has three finger cups to support finger placement, and can be used by both left and right-handed writers with a simple change of finger placement within the cups. The finger placement indicators are on the bottom of each cup. The design leaves little room for error, and supports a variety of children, as it comes in three different sizes.

The Writing C.L.A.W. fits a wide variety of writing, drawing and coloring tools such as standard pencils, primary pencils, crayons, markers, and paint brushes!
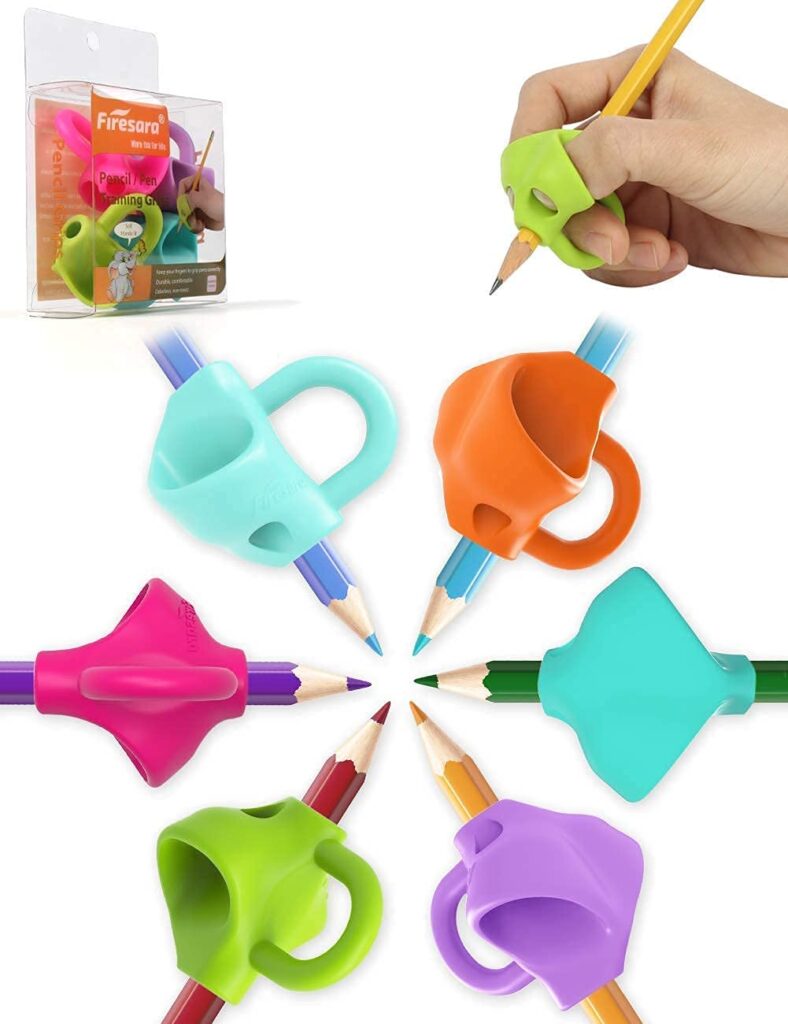
Firesara Pencil Grip

This grip is similar to the Writing C.L.A.W. as it has two cups for the thumb and index fingers, but it has a ring for the placement of the middle finger. The Firesara Grip can easily be used by left and right-handed writers. Learners place their thumb and index fingers into the cups, and the middle finger goes into the ring finger of either hand.

Using this grip, helps the three fingers to be fixed tightly to the pencil shaft. The Firesara type of grip is made of soft, durable silicone.
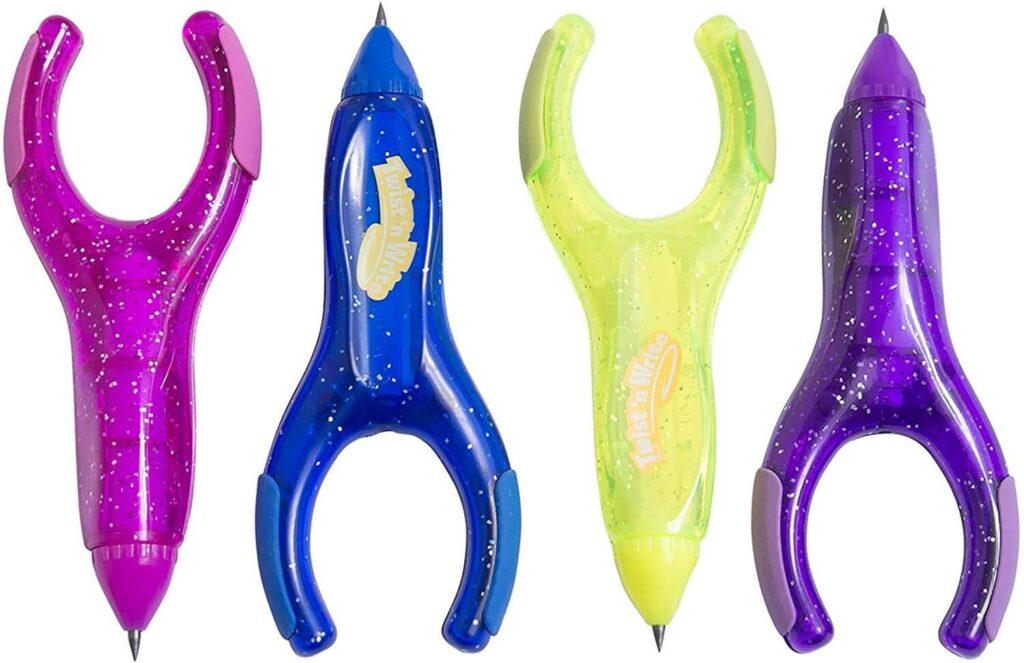
Twist and Write pencil grips

The Twist n’ Write, also called the Rocket Pencil, is not a pencil grip, but a pencil that has a wishbone-shaped design. This helps fingers to be placed into a tripod grasp with little guidance. It has rubbery sides that double as erasers! The pencil twists at the bottom to push forward more lead. It needs a special tool to add more lead, which makes it a little less efficient for use. It is often easier to buy multiple pencils rather than trying to replace the lead. The pencil design is for not for tiny hands, but is effective for finger placement without the use of a pencil grip, making it more motivating to use.

The Twist n’ Write pencil can easily be used by left and right-handed writers. Some learners or teachers might not like the rocket pencil, because it looks so different from traditional pencils.

Handiwriter Pencil Grip

This is not really a type of grip, but rather a position support for the pencil. There are some children who hold the pencil vertically instead of at an angle, or have a thumb overwrap grasp with a closed web space. The Handiwriter positions the pencil at the correct angle within the hand. This pencil positioner helps to reposition the pencil within the web space, by pulling the pencil back into the web space, while promoting improved finger placement on the pencil shaft.

The “charm” on the commercially purchased Handiwriter is grasped by the ring and pinky fingers, and curled into the palm, providing increased hand stability. These can purchased as pictured, but can also be made with or without the charm support, by using two terry cloth hair bands using these directions, or by following the visual sequence for creating one using elastic bands. 
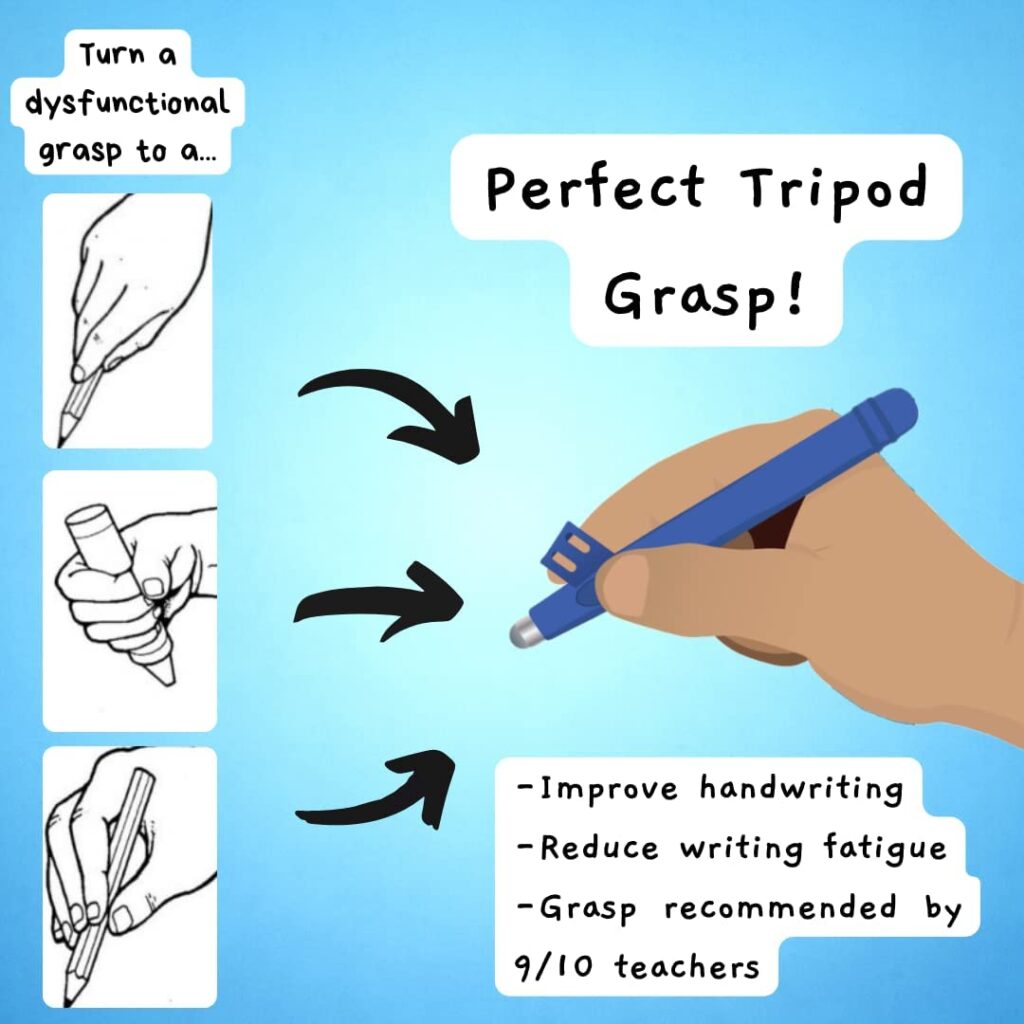
Stylus with pencil grip attached

You can put a grip on an existing tablet stylus, or buy get his great stylus that has a gripper on it! I tried this device with some of the kiddos I work with, and it worked well with the added index finger placement into the cup that is on the shaft of the stylus.

The Write Right Stylus will only work if the index finger is properly placed into the cup, and ensures proper positioning when using a tablet or screen for writing tasks. This placement helps to promote a tripod grasp. The symmetrical design allows it be used by left and right-handed writers. 
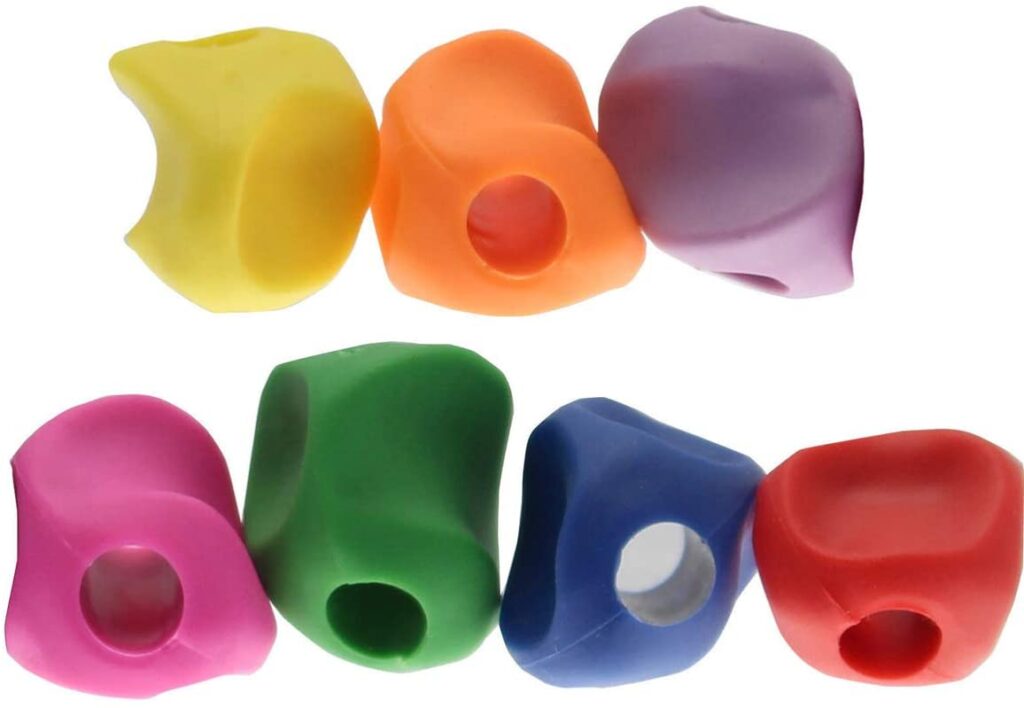
Stetro Pencil Grip
  • Stetro (affiliate link)- This pencil grip is efficient when The Pencil Grip is too large and the individual benefits from a smaller “target” to pinch the pencil.
Traditional triangle pencil grip
  • Traditional Triangle (affiliate link)- the Traditional triangle grip is a common pencil grip that is offered to the whole classroom from teachers, parent teacher groups, or in back-to-school kits. The triangular sides offer a flat placement for the fingers, but this grip may not work for all individuals. One therapy tip is to cut the triangle grip in half or in thirds and use the triangular ridges as bumps on the pencil to stop the fingers from moving too close to the pencil point. This way the ridges bring awareness for placement.

  • Weighted pencil (affiliate link) grips- Pencils with weighted added on are typically an adaptation to support specific needs related to tone, proprioceptive sensory input, tremors. Read about pencil pressure and the benefit of adding a weighted pencil grip for more information.
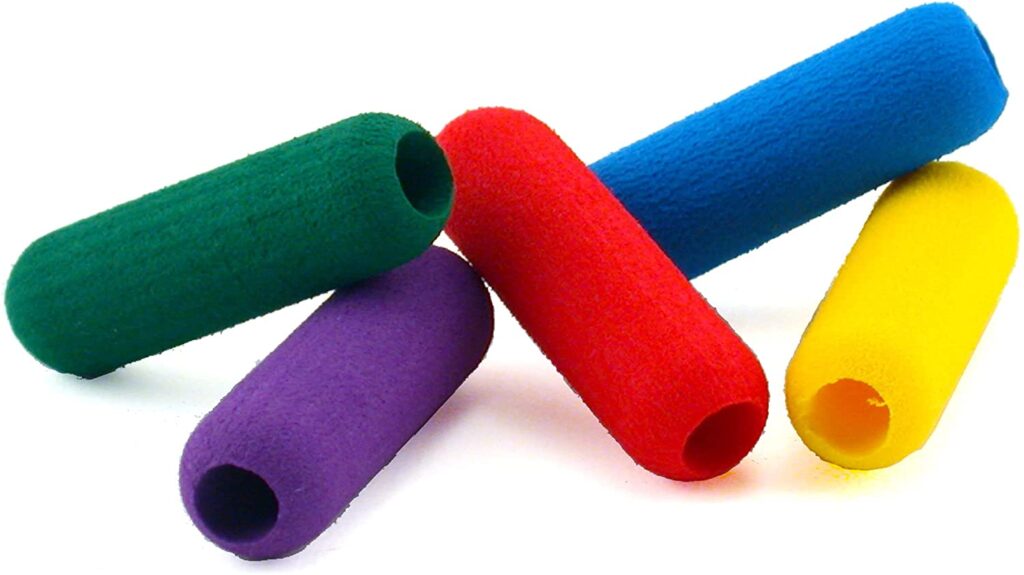
Classic foam pencil grip

Adaptive Pencil Grips

The alternative pencil grasp pattern that is successful for many kiddos who simply cannot achieve an efficient grasp is use of an adaptive tripod grasp, or any grasp which enables a functional grip on the pencil. There are adaptive pencil grips that support various needs.

For those struggling to manipulate, use, position, and write with a pencil grip during written output, sometimes an alternative grip is the answer.

There are several alternative grasps for pencil manipulation.

The Adaptive Tripod Grip is appropriate to use when low muscle tone or hyper mobility of the finger joints limits pinching and manipulating the pencil.

It is easy to achieve, and I often use it if I am writing a lot. My husband uses it all of the time, and has since grade school.

In the adaptive tripod grasp, the child places the pencil between the index and middle fingers rather than within the traditional web space. They grasp the pencil shaft with the thumb, index, and middle fingers. The placement of the pencil between the index and middle fingers provides ample support and stability allowing for good pencil control, and less hand and finger fatigue. 

This grasp pattern is similar to the “Rocket Pencil” described above. This can be used with different types of pencil grips if needed. 

When pencil grips are uncomfortable

One final note on the use of pencil grips, they WILL be uncomfortable to use at first. Learners are having to utilize the correct finger and hand muscles.

They are not used to using them in this way, therefore they will be uncomfortable and met with resistance. With this discomfort comes less motivation and desire to use.

Rest assured, the use of the right pencil grip, when coupled with the activities you are using to get to the root of the problem, will help.

Be patient, encouraging, and rewarding to your learners, as they work on these skills. A good grasping pattern will be essential later in school, as handwriting tasks become longer and more complex. You are supporting their present AND future success! 

Pencil Grip Kit

Here is an OT tip just for you! Create a pencil grip kit as pictured below. This will serve you coordinate an approach to determining the best pencil grip for any learner. You will have children that the typical grip will not work for, and you’ll need that one rarely used grip just for them! Have it on hand!

Below is a picture of my own pencil grip kit, which I have used with kiddos to help determine which one is the best grip for them. You can buy pencil grip kits on Amazon that come with several different types of grips.
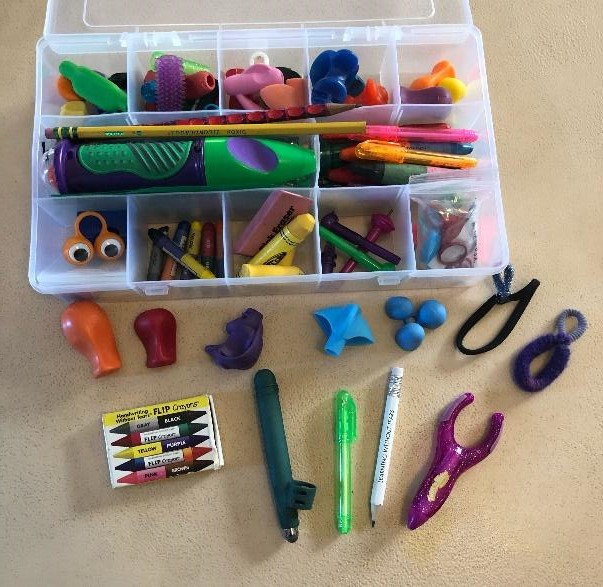
Make a pencil grip kit for occupational therapy sessions.

Pencil Grip Activities

Be sure to check out our FREE Pencil Grasp Challenge . This is a 5-day email series that will provide you with loads of information about everything you need to know about the skills that make a functional pencil grasp. You will gain quick, daily activities that you can do with learners to help them right now.

Explore the other blog posts we have here at The OT Toolbox regarding pencil grasps by reviewing the convenient list of these just for you:

Pencil Grips for Other writing utensils

It’s important to cover another aspect of using pencil grips on writing utensils like gel pens, golf pencils, or weighted pencils. For some students, a different type of writing tool is needed and you can incorporate a pencil grip that supports sensory motor needs.
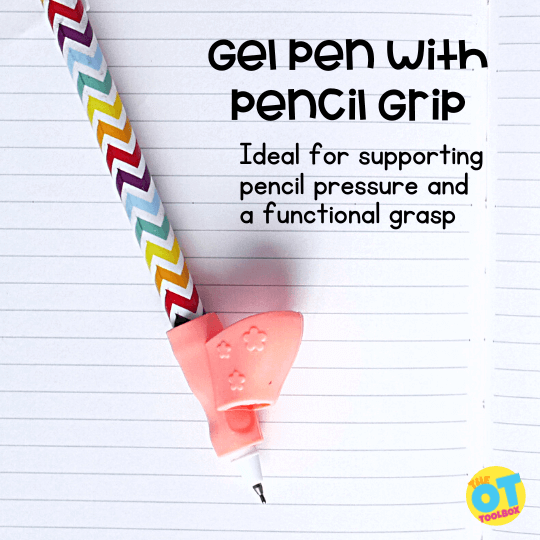
gel pen grip uses a pencil gripper on a pen

Gel Pen Pencil Grips

For example, a student that requires a gel pen over a pencil might have needs with proprioceptive awareness or trouble with pencil pressure. In this case, the gel pen offers lower resistance of the pen as it moves across the page. This can allow handwriting that was previously illegible because the pencil marks were too light on the page, to now show up. Other students might not have enough strength to move the pencil across a page given the force required to press through the lead of the pencil over the paper.

For these students, you might want to trial various gel pens that require less force to use.

Pencil grips that can be used with gel pens include any of the pencil grips listed above. Some of the ideal grippers include:

  • Classic foam grip
  • Grotto grip
  • Writing CLAW
  • Crossover grip

Depending on the needs of the individual, you can use other grips as well. Essentially, a gel pen grip supports a combination of handwriting needs, so combining these tools can target different needs.

Golf Pencil Grips

Pencil grips can also be used with golf pencils. You might want to use a small pencil like a golf pencil to support more precision and fine motor control with the mechanics of the finger grasp on the pencil.

Just like using an alternative writing tool like a gel pen, a golf pencil will fit with a variety of pencil grippers.

Elastic Band Pencil Grip

An elastic band pencil grip is a simple yet effective tool that is easy to make. The elastic band pencil grip is essentially a rubber band or a hair tie attached to the writing end of the pencil. The other end of the rubber band might be loose in a loop or it might have a charm attached.

Students that struggle with holding the pencil up and down might have a closed web space, tightly around the pencil. This means the pencil doesn’t have full motion and there is limited finger dexterity in the tips of the thumb, pointer finger, middle finger, and possibly the ring finger. In this case, using an elastic band that is attached to the pencil and loose (without a charm) can position the pencil into an upright position. You’ll want the student to put the loose end of the rubber band around their wrist. The elastic material then pulls the pencil into a vertical position.

Students that tend to put all four fingers in opposition with their thumb may not use a separated sides of the hand when writing. This means they might not move the pencil as efficiently as they could (and leads to lower letter legibility). In this case, the rubber band attaches to the tip of the pencil and the other end, which has the charm attached can be tucked into the palm of the hand.

In combination with these rubber band grippers or traditional pencil grips, incorporating a few manual dexterity goals can make all of the difference. A true tripod grasp might not be achieved, but a functional grasp is achievable.

The primary purpose of the elastic band pencil grip is to promote a functional and efficient grasp, thereby enhancing fine motor skills and handwriting abilities. Tools that support development of coordination and strength include:

  • Pencil Grasp Play Book– activities to support dexterity, fine motor strength, coordination, and more, all with an efficient pencil grip in mind.
  • 6 Month Fine Motor Plan– This plan outlines specific and easy fine motor exercises designed around play and sensory exploration that support fine motor skills needed for pencil grasp.
Regina Allen

Regina Parsons-Allen is a school-based certified occupational therapy assistant. She has a pediatrics practice area of emphasis from the NBCOT. She graduated from the OTA program at Caldwell Community College and Technical Institute in Hudson, North Carolina with an A.A.S degree in occupational therapy assistant. She has been practicing occupational therapy in the same school district for 20 years. She loves her children, husband, OT, working with children and teaching Sunday school. She is passionate about engaging, empowering, and enabling children to reach their maximum potential in ALL of their occupations as well assuring them that God loves them!

Calm Down Corner

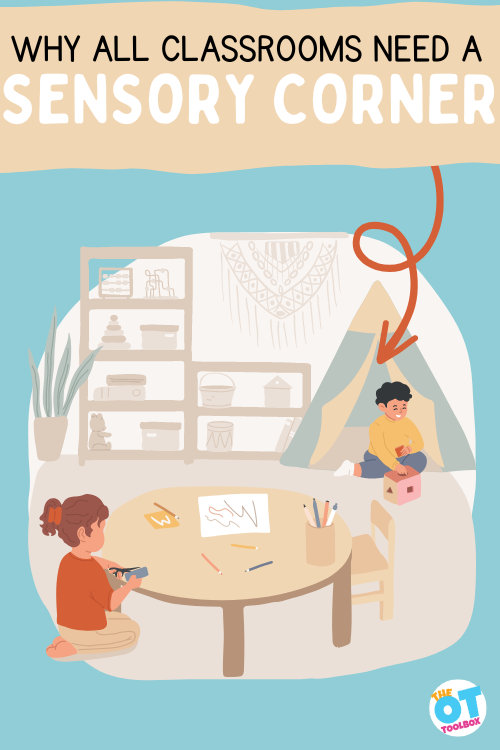
Child sitting in corner of a class room in a tent, other child sitting at a desk. Text reads "why all classrooms need a sensory corner"

For young (and old) children, a great calming classroom tool that supports learning, social participation, and school tasks is the calm down corner. A calming corner in the classroom can be a great sensory strategy to support emotional regulation needs in students. It’s a place to calm or re-organize in a personal bubble, meeting regulation needs so learning can happen. Let’s go over fun calm down corner ideas to support various regulation needs in the classroom.

Calm down corner ideas and tips

As an Amazon Influencer, I earn from qualifying purchases.

Calm Down Corner

A classroom calming area can include a variety of movement and sensory based activities or tools. 

  • A place to sit: A visual space for a child to sit in their calming area, that is large enough for one child only. This could be a bean bag chair, a cushion or a pillow. These soft spots will help make the cozy corner comfortable so children feel they can stay as long as they would like. There are so many options when it comes to Flexible Seating tools – bean bag chair, movement seat, deflated beach ball seat, couch, soft chair, floor mats, large pillows
  • Soft surfaces – yoga mat, gymnastics mat, or soft rug
  • Headphones – with or without music, sound machine
  • Visual schedule of sensory strategies
  • Emotions Playdough mats can be a great tool for a calm down corner.
  • Things to look at – books, magazines, pictures, lava lamp (refrain from electronics that have a screen, as they are alerting)
  • Calming corner printables and other visual calming strategies – Check out these calming sensory stations for Spring
  • Timer – visual timers with countdown options are great
  • Preferred sensory items such as tactile toys, chewing items, plushies, fidgets, etc.
  • Books: Looking through picture books of all kinds, helps to give children something to do, while keeping their minds calm. Most of the time that children are interested in using a cozy corner, is when they are feeling overwhelmed. These Zones of Regulation books that talk about different feelings and support regulation and processing through feelings such as sad, scared, angry and more. These empathy and friendship books are another tool to consider. Place the books in a basket or a shelf for easy access. 
  • Emotional Supports: Visual and tactile supports help people of all ages, but it is essential to have a visual space in the classroom for preschoolers to retreat to when they need time to calm down. Soothing Sammy makes creating this area simple and makes it a positive experience for children. This adorable golden retriever has his calm down house which can be placed in the cozy corner, with items that help children calm down using their sensory system. As they calm down, they can use the visuals included in the kit to explain to other children and adults how they are feeling and what they need support with.
  • Stuffed Animals or Baby Dolls: When feeling lonely, sad, scared or overwhelmed, having access to baby dolls or adorable stuffed animals makes the space less lonely. Additions such as baby doll blankets, bottles and other caretaking tools, allow children to comfort others as they work on comforting themselves. 
  • Personal space: Adding a privacy cover or even simply a boundary to the cozy corner space helps children not to be distracted by other aspects of the environment. Placing fabric, cloth or other child-safe covers over the cozy space allows children to feel like they are in charge of their own space. Some child care centers place the cozy areas in small tents, (Amazon affiliate links) canopies (affiliate link) or wooden privacy cube like this one. (affiliate link)
  • A feelings check in could be a great addition to this space. The child could enter the calm down area and identify how they are feeling and then use strategies to support those needs.

This list is just the beginning! A calm down corner can include any item from the list above or classroom sensory diet strategies, based on the needs of the individual student.

This article on supporting self regulation in preschoolers offers valuable information on this topic.

Calm down corners can be quiet soothing areas to decompress for certain learners, while others need a more active calm down area in classrooms.

How to Add movement to a calm down corner

There are many different ways that children can calm down. Movement is one of the most beneficial and complicated ways to manage feelings and emotions.

There are two different types of movement patterns that support the sensory system.

Both of these types of movement activities increase awareness of where a body is in space, calms the central nervous system and regulates emotions in an amazing way. Movement is complicated as it can be alerting and calming. Picking the right activity for the desired outcome is tricky, but effective.

Help your learner understand what they need for self regulation, rather than bouncing all over the calm down corner.

How is movement calming?

Have you noticed that children seem to pay attention longer after moving around for a while? This isn’t just because they are tired after completing an active task. Children and adults are able to attend for longer periods of time when movement breaks are embedded into their daily schedules due to the sensory benefits it provides.

For adults that have desk jobs, it is widely known that every 20 minutes, they should stand up. This not only helps blood flow, but also awakens the body. When children are engaged in circle time, implementing movement based activities within circle (like freeze dancing, jumping and marching) is beneficial to improving attention.

Movement has many benefits, including helping calm down when feeling overwhelmed with emotions. 

When the sensory system becomes overstimulated due to internal feelings and frustrations, some people are quick to seek out movement activities to calm down. Adults may go for a walk or run, chew gum, lift weights or kick a ball. This strategy directly affects proprioceptive input.

There are many ways the body processes movement. This impacts the central nervous system in different ways.

  • Proprioceptive inputs is one of the ways the body processes movement. It tells the brain where the body is in space. Proprioception is guided by skin, muscle, and joint receptors in the body, to connect to the brain through the nervous system. In this way, a person knows where their body is in space, and what the body is doing, without needing to watch the body parts move. A great example of proprioception, is being able to walk down the stairs without looking at ones legs or feet
  • Heavy work, or tasks that involve heavy resistance, offers input to the muscles, joints, and connective tissue, and is essential to regulating the sensory system
  • In this article on neuroplasticity, evidence suggests the sensorimotor cortex that governs proprioception is not fixed, and can be changed through external manipulation.
  • Vestibular movement, like proprioception, also helps alert us where our body is in space. This system operates through the inner ear, passing information to the brainstem, affecting many areas of the body. If a person starts jumping, rocking to music, or dancing to calm the body, it activates the vestibular system. This article on vestibular activities does a great job explaining this system.

more about the vestibular system

Receptors in the inner ear, found in two structures (the otolith organs and the semicircular canals), respond to linear/angular/rotational movement, gravity, head tilt, and quick movement changes. 

The receptors in the ear, provide information to the central nervous system about the body’s position in space. Information is used to:

  • control posture, eye, and head movements
  • correct the eyes with head and body movements
  • muscle tone and postural adjustments
  • perceive motion and spatial orientation, and integrates somatosensory information

Through the vestibular and proprioceptive systems, the body processes information about where it is space, interprets movement patterns, and recognizes touch and joint pressure. These senses greatly impact the ability to calm down by triggering pressure points through movement (such as rocking or swinging). 

When a child (or adult) becomes upset or overwhelmed, it is helpful to utilize the vestibular and proprioceptive systems as intervention tools. This helps a person calm and self regulate, in order to process their feelings and problem solve. 

Because children often need sensory strategies to self regulate, having a designated calm down area set up in the home/classroom makes redirecting children to the appropriate calming activities much easier.

The Soothing Sammy program is a great way to encourage children to take part in creating their own calm down corner through a story about a dog, Sammy, a golden retriever. As children help build Sammy’s calm down area to use when overwhelmed, they are gently taught that it is okay to have a variety of feelings. As children look through the book, they learn how to use objects in their calm down corner when needed, including drinking water, wiping their face with a cloth, jumping on a small mat (proprioceptive and vestibular input) and much more. 

There are so many items that we can add to a calm down corner and every calm down corner will be different based on individual children’s needs. In the Soothing Sammy curriculum, there are recipes for lavender bubbles, slime, tactile fidgets, paint, and others.

Proprioception Calm Down Corner Ideas

Here are some great proprioceptive strategies to include in a calm down corner:

  • Calming Corner Printables- Print off the sensory stations listed below. These support heavy work needs (and vestibular input)
  • Jumping mat or small trampoline. When children jump, they put pressure on their joints 
  • Weighted blanket. Weighted blankets provide deep pressure over the entire body, making this activity one of the an effective whole-body proprioceptive strategies to help children calm down
  • Watering plants. Lifting a watering can, can impact joints all over the body. As children stoop down to pick up the watering can, moving it over plants of different heights, they are getting great input
  • Weighted ball. Lifting and rolling over a weighted ball increases proprioceptive input in the hands, arms, shoulders, and core. 
  • Play Dough. Squishing, squeezing and pulling apart playdough or clay, increases proprioceptive input in hands and small joints. 

Some of these activities can be alerting or calming, therefore some trial and error may be needed.

Vestibular Calm Down Corner Ideas

Movement with changes in positioning can be calming as well. Think slow, rocking movements. Here are some Vestibular strategies to include in a calm down area:

  • Farm Brain Breaks These simple, yet fun activities, provide visual ways to complete vestibular activities
  • Calming Corner Printables- Movement like yoga poses or those offering brain breaks can be just the calming input needed.
  • Swinging – Help your child move and sway in different directions with an indoor or outdoor swing. A Sensory Swing for modulation is an amazing way to provide an option to swing in a home or preschool setting
  • Trampoline – Provide a small trampoline for your child to jump on. (Amazon affiliate link:) This toddler trampoline with handle is perfect for indoors spaces
  • Dancing – Any type of movement to music, including freeze dancing or shaking instruments (such as a tambourine, bells, maracas) or using scarves, are wonderful additions to a calm down corner
  • Yoga Poses – There are several themed yoga poses perfect for children. Add a yoga book or cards like these Unicorn Yoga Poses to any calm down area

calming corner printables

One tool to add to a calming corner or calming space is a printable that offers a visual designed to promote calming and organizing self-regulation. These calming corner printables are easy to print off and start using right away.

Over the years, we’ve created seasonal sensory paths, or sensory stations that support regulation needs. We’ve received wonderful words of thanks and feedback letting us know how loved these sensory stations have been.

Check out each of these seasonal calming corner printable packets. Pick and choose the ones that support your needs in the classroom, therapy clinic, or home:

  1. Summer Sensory Stations
  2. Fall Sensory Stations
  3. Winter Sensory Stations
  4. Christmas Sensory Stations
  5. Spring Sensory Stations

Additionally, other calming corner printables might include deep breathing posters. We have many free deep breathing exercises on the website, including:

Finally, a brain beak printable like our popular alphabet exercises makes a great wall poster for a calming corner of the classroom.

Keep in mInd about setting up a calming corner in classroom

Calm down areas should incorporate all the senses, as every mood, trigger, situation and response is different. Equally important is the co-regulation aspect, which relates to responding to the mood and behavior of those around us, or the peers that may be present in a classroom or home setting.

By utilizing a variety of calming tools in a calming corner, or calm down space within the classroom, children will be able to identify what they need, the moment they need it, while still engaging in active learning.

It can be daunting and complicated providing for the needs of all of your different learners, however, by incorporating vestibular and proprioceptive materials in a calm down corner, children are able to use these powerful movement strategies when they need them the most, all while taking a multisensory approach to academics.

Sensory Corner

We’ve covered ways to set up a calming area, but what if you really want to feature the cozy aspect of a sensory space in a classroom or home? A sensory corner is very much the same concept, with different terminology. The key to a calm down space is incorporating sensory components within these areas.

Research shows that having a designated space for children to have alone time in, during their school day, is a way to support emotional development and independence, while also teaching children that it is okay for their friends to take a break.

When combining visual, tactile and other sensory components into the design of a cozy area, children will independently seek it out when they need a break from their peers. 

in the classroom is a cozy or quiet space for one child to spend time independently when they feel like they need a break from the regular commotion of a preschool day. This area can be used to take a sensory break, to calm down when they are feeling upset or overwhelmed, or to just take a break. 

This area should be accessible for all children at any time of the school day. This area is best used when it is at the child’s level, is situated in an area of the classroom that is far away from the busier/louder areas of the classroom, and includes sensory supports to encourage calming and peaceful experiences. 

Whatever you call your safe space, and however you set it up, what matters most is your intention.

Sensory corners

Why Use a Sensory Corner?

A calming corner or a sensory corner may be used for many various reasons.

There are hundreds of reasons why children might need to take a break from other children in the classroom. They may feel sad, overstimulated or just need time to recharge.

This may include:

  • Feeling overstimulated in the classroom
  • Overwhelming feelings
  • Needing to recharge or refocus
  • Having a bad day
  • Changes in routines
  • Feeling “out of sorts”
  • Worried about a home situation
  • Worried about a friend situation or social situation
  • Worried about a test or project in the classroom
  • Sadness about home situations
  • Missing family or pets
  • Not sure what to expect or what is expected of them

Remember that the goal of the sensory corner is to offer a safe space, or to give children a place to calm down, feel safe, and regroup when they are overcome with big emotions at school.

One thing to consider is that a calm down area of the classroom can be effective at the start of the school year due to transitions in the classroom when a new classroom may mean a lot of unexpected sensory input. This is a great addition to back-to-school sensory activities that support students of all abilities.

Where to put a cozy area:

When looking at an indoor preschool classroom set up, there are many centers that are utilized by children throughout the day. The key is to avoid adding visual noise, or visual clutter when adding a cozy area to the classroom.

Some of the busiest areas include the circle time/gross motor area, the block area and the art areas. These areas tend to attract groups of children at once and aren’t the best spaces to put next to a calming area. 

The library, dramatic play and animal/science areas, tend to be more quiet spaces in the classroom. Each of these spaces will support a calmer environment to build a calm down area. When deciding what wall or area to place the calm down spot, keep in mind the following environmental components:

  • Is there a window nearby that will give off too much light?
  • Are there large gross motor/sensory spots that are noisy?
  • How many pictures are on the wall, and are they soothing?
  • What are the colors of the walls by the calming area, and are they overstimulating? 
  • Is the space adequate for one child, or will more children try to encroach on their alone time? 
  • Can this space be easily visible by a teacher doing active supervision?
  • Is this space near high traffic areas, like the entry door or bathroom?

Many spaces may feel like the perfect spot for a calm down space inside the classroom. You know your kids the best and where they spend most of their time. As the school year progresses, there may be times where you want to move your calm down area to a better spot, and that’s okay! 

Outdoor sensory corner ideas

Outdoor Sensory corner Ideas

Don’t forget about the outside as an option for a calm down space! We know the many benefits of outdoors as a calming area, so simply going outside is a great option for calming the mind and body while organizing (or regulating) the sensory motor systems. The outdoors is one way to add free sensory motor options to the classroom.

We’ve covered outdoor sensory diets before, and this is a great article to start with when considering an outdoor sensory space for home or classroom use. In fact, we love to select specifics for the home too, when it comes to sensory diets in the backyard. Even the playground or recess is a sensory calm down space for some kids.

Kids need quiet spaces while they are playing outdoors also. When setting up an outdoor learning environment, make sure to incorporate some independent areas in a shady area of the playground. These spaces could be near the garden, near a book reading area, under a nice shade tree or near a swing. You can even add an outdoor sensory swing as a calming option.

When setting up an outdoor area as a sensory corner for classroom breaks, consider what science says: Research on outdoor sensory play tells us that playing outdoors supports development, but there are emotional benefits as well as benefits to learning.

Some components to think about when setting up your outdoor calm down area include:

  • Is it sunny or shady?
  • Is it near an area where children will be running quickly?
  • Is it near a highly trafficked area, like a parking lot, walkway or door?

Quiet cozy areas should be available for children at all times. It isn’t a punishment corner, rather a space that children can “take a break” when they need it.

Here are 5 simple ways to incorporate cozy spaces outdoors so children have the opportunity to play on their own when needed. 

1.Place to Sit: The first step to creating a safe space is for children to have a space to be on their own. You can create this in a similar way with an area rug or cushion like the indoors, or you can create something with more of a visual “splash” like these calming spaces in children’s swimming pools. 

2. Gardens: Nature is a great accessory to a cozy nook area outside. Consider creating a cozy nook with a variety of plants. Adding trellis’s and arches where different vegetables and flowers and grow over a child’s safe space, incorporates natural colors and healthy foods into the safe space that children will spend their time. Sensory gardening is also a great option for a sensory break from the classroom that fosters learning!

3. Swings: Attaching a child safe swing to a tree provides a sensory rich safe space where children have the opportunity to have quiet time and self soothe. There are so many sensory swing options including a hammock swing and a platform swing

4. Individual Art Space: Child initiated process art in nature can be a calming and essential experience that supports children when they are overwhelmed or overstimulated. A simple way to create this individualized space is by attaching an easel to a fence and offering different mediums to use with the easel (markers, paint, chalk.) Some of these creative painting ideas are fun to try in a sensory calm down space.

5. Sensory Table: A small sensory table or a sensory bucket is a wonderful way to encourage individual calming time while outside. You can add a variety of different materials to the sensory tub, or offer options of 5 or six sensory buckets. This could include bubbles and wands, sand, goop or some more of these sensory bin ideas. Another idea is to set up a nature table. You could even use a picnic table with a sand writing tray on top where users draw in the sand on the table surface.

Best Practice for Calm Down Corners

No matter what you call them: calm down corners, cozy corners, or sensory corners…and no matter where they are located: indoors or outdoors, in the home, or in the classroom, these sensory spaces are a valuable tool for promoting self-regulation and emotional well-being.

They provide a dedicated space for students to practice calming techniques and engage in activities that help them manage their emotions. Calming corners may include tools such as breathing exercises, visual aids with coping strategies, mindfulness activities, and calming sensory items like stress balls or visual timers…or any item that offers a sense of peace.

The key is to create an environment that is quiet, comfortable, and free from distractions, allowing students to recharge and regain focus when needed!

If you are setting up a calm down corner for your classroom as you gear up for a new school year, be sure to check out our resource on back-to-school sensory activities as an addition to your classroom calming area.

Jeana Kinne is a veteran preschool teacher and director. She has over 20 years of experience in the Early Childhood Education field. Her Bachelors Degree is in Child Development and her Masters Degree is in Early Childhood Education. She has spent over 10 years as a coach, working with Parents and Preschool Teachers, and another 10 years working with infants and toddlers with special needs. She is also the author of the “Sammy the Golden Dog” series, teaching children important skills through play.

Winter Crossword Puzzle

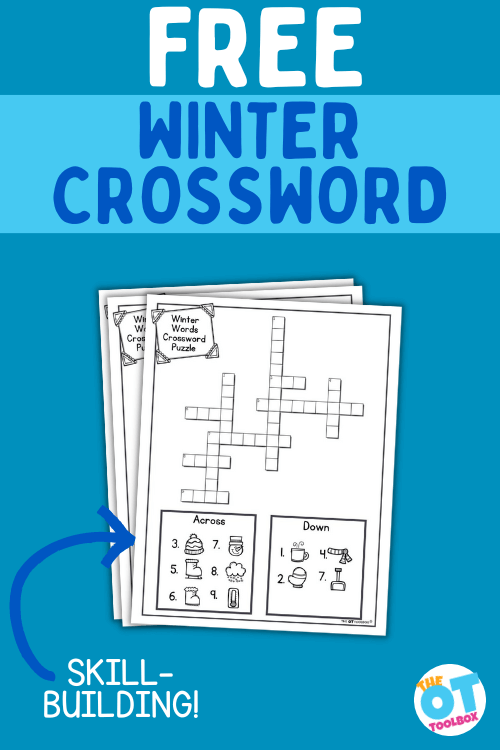
Winter crossword puzzle

This winter crossword puzzle is a therapy tool designed to work on visual perception, handwriting, visual attention, and so much more! Just print off the winter crossword and use it to develop so many skills all season long. Today’s post is all about winter words.  

This free Winter Crossword Puzzle is a great addition to the blustery winter season. Upon first glance at the title; “Winter Crossword”, you might be thinking this is too difficult for your young learners, or too narrow a focus for a treatment session.  Wait until you see THIS Winter Crossword packet!

Also be sure to grab our new tall and short worksheet which not only supports visual motor skills, but incorporates the cold thermometers of winter!

Winter crossword puzzle

As a related resource for the wintery season is our Winter Fine Motor Kit for winter coloring, cut and paste, sensory boxes, and fine motor fun to get through this blustery season.

winter crossword puzzle

We love creating resources that expand on many areas of skill development, and this winter worksheet is no different. What starts out looking like a regular winter crossword puzzle, is full of writing, coloring, visual perception, motor planning, bilateral coordination, strength, executive function, and more.

This Winter Crossword Puzzle is not just for occupational therapists, parents, or teachers to use. Parents, educators, and speech pathologists will love teaching their learners the words that match these winter pictures, talking about what they mean, as well as practicing writing skills.

I posted the other day in one of the winter blogs, about the narrow focus of children who have been raised in warmer temperatures. My learners did not know anything about ice skating, igloos, eating icicles, maple syrup snow, sledding, or snowshoes. Thanks to the movie Frozen, they knew about snowballs and snowmen!

You can add this winter crossword to a collection of winter themed therapy tools:

This Winter Crossword is a great jumping off point, leading to much discussion and learning about winter.  It is also a multidimensional task that can be adapted and modified to meet the needs of each of your learners.

How can I modify this winter crossword puzzle?

The possibilities are endless, however, here are a few ideas:

  • Laminate the Winter Themed Crossword Puzzle page to make it reusable.  This is efficient, environmentally friendly, and motivating for learners who love to write with markers. NOTE: Not all learners love reusable pages. Some learners feel it is important to be able to save their work and take it home.
  • Project it onto a smart board to make it a group task or work on large letters and shoulder stability.
  • Enlarge the task for beginning writers who need more writing space.
  • Shrink the task for older learners who need to learn to write smaller.
  • Try different writing utensils. This is not only motivating, but some learners work better with markers as they glide easier on paper. Did you know that golf sized pencils promote more of a tripod grasp than traditional long pencils?
  • Use different colored paper for more or less visual contrast.
  • Have learners write a sentence using each word clue.
  • Draw pictures of these items.
  • Use all or part of this task.  It can be simply a winter crossword, a writing page, a coloring worksheet, or a design copy task.

Use a Crossword to develop skills

Check out the skill set developed by implementing this Winter Crossword Free printable:

  • Fine motor skills: manual dexterity to hold and used a writing tool, coloring and drawing, pencil grasp, writing and copying from a model. You’ll find more winter fine motor activities here.
  • Strength: core strength, hand and wrist stability, finger control
  • Bilateral coordination: using one hand for writing and coloring, while the “helper hand” supports the paper. Keep an eye one which hand is primarily used as the dominant side.  The OT Toolbox has a great post highlighting several winter bilateral coordination activities.
  • Visual perception: Scanning to correctly fit all of the letters in their designated boxes. Visual memory is needed to remember what letters need to go in each box. Figure ground is used to determine where the letters belong in the boxes, or how to copy the shapes.
  • Executive function/behavior/social skills: Following directions, attention to detail, turn taking, waiting, social skills, compliance, behavior, and work tolerance
  • Sustained attention: Work on focus for a short period of time by setting a target to find the answer to one crossword question by setting a timer or working until the question is filled in. This is one way to work on mindful thought, or paying attention to what you’re thinking about while working on tasks. More winter mindfulness activities can be found here.
  • Dexterity: Coloring inside the lines within the small shapes
  • Handwriting: letter formation, sizing, spacing, directionality, line placement, and proportion of letters are all important factors. Check out this number tracing worksheet in case you missed it.

handwriting and crosswords

Each teacher, therapist, and school system seem to have a different method of teaching and working on handwriting. Some systems focus on getting the words on the paper no matter how the letters are formed. 

They emphasize free writing to embrace the written expression. Other systems focus on spelling, with little regard to letter formation.  Some teachers do so much copying of words, their learners don’t rely on memory and kinesthetic awareness to write the letters. 

Each system has its drawbacks and merits.  NOTE: Once a grasping or letter formation pattern has been used for a long time, it is VERY DIFFICULT to get these patterns changed. 

My theory is to start correct letter formation and good habits while the learners are first learning to write, rather than trying to remediate later.

Using a crossword activity like this winter crossword worksheet is a great tool for addressing letter formation because the letters can be formed inside a small area.

If you just need a breather, the OT Toolbox has a great post on Winter Brain Breaks.  

Free Winter Crossword Puzzle

Want to add a copy of this winter crossword worksheet to your therapy toolbox? Enter your email address into the form below. Or, if you are a Member’s Club member, you can access this resource in our Winter Therapy Theme (Level 2) or our freebie dashboard under Handwriting Tools (Level 1 & 2).

Free Winter Crossword Puzzle

    We respect your privacy. Unsubscribe at anytime.

    Victoria Wood, OTR/L is a contributor to The OT Toolbox and has been providing Occupational Therapy treatment in pediatrics for more than 25 years. She has practiced in hospital settings (inpatient, outpatient, NICU, PICU), school systems, and outpatient clinics in several states. She has treated hundreds of children with various sensory processing dysfunction in the areas of behavior, gross/fine motor skills, social skills and self-care. Ms. Wood has also been a featured speaker at seminars, webinars, and school staff development training. She is the author of Seeing your Home and Community with Sensory Eyes.

    NOTE*The term, “learner” is used throughout this post for inclusivity. This information is relevant for students, patients, clients, preschoolers, kids/children of all ages and stages or whomever could benefit from these resources. The term “they” is used instead of he/she to be inclusive.

    Life Skills – Cooking Activities

    Life skills cooking

    Life skills-cooking does not mean learning to make gourmet meals.  It means meal preparation to survive. No teenager should go off to college without the means to cook Ramen, macaroni and cheese, cereal, and a peanut butter and jelly sandwich.  Add pizza and Taco Bell to their meal plan, and voila, a complete teenage diet! Life skills tasks like cooking is an essential Instrumental Activity of Daily Living that occupational therapy professionals address.

    The goal for any caregiver should be to help their child be independent enough to live alone, or at least care for themselves. 

    Learning independence and life skills, starts at a very young age.  Toddlers learn how to dress themselves, basic hygiene, and where to put their belongings. As they become school aged, children need to learn higher level life skills such as laundry, cleaning, grooming, and cooking. 

    For some kids that struggle with manipulating utensils as a result of fine motor, visual motor, or cognitive skills, these cooking activities can support development. This is especially true with learning to hold a fork and spoon as well as using utensils to self-feed and cut with a knife and fork, safely.

    Life skills cooking checklist, recipes, and tips

    Life skills Cooking activities

    Life Skills Cooking activities not only teach important meal preparation, they address a wide variety of areas.

    We’ve covered a bit about the benefits of cooking in previous blog posts:

    1. Develop motor skills through cooking
    2. Executive function skills through cooking
    3. Learn math skill through cooking

    And, these areas are just the beginning. Some other important areas of development that occurs through cooking tasks include:

    • Measuring items involves math, computation, dexterity
    • Reading a recipe – scanning, reading, decoding, processing language
    • Following directions including sequencing, working memory, problem solving  
    • Fine motor skills are needed to use utensils, cut with a knife, stir, scrape with a spatula, use tongs, crack eggs, spread an item, or scoop food
    • Bilateral coordination – pouring from a container, holding an item while cutting with the other hand, holding a pan steady while stirring or flipping objects, opening containers, putting items together
    • Attention to details, timing, frustration tolerance, organization

    The thing about cooking and baking tasks is that these are daily life skills that need to be done to survive. Then there is the cleaning aspect of cooking tasks. These chores can be complicated by executive functioning skill deficits. Check out our resource on chores and executive functioning skills for support.

    The OT Toolbox has an informative post on teaching Following Directions using Cooking

    The amount of skills addressed during cooking activities is a great incentive to use them in your treatment sessions, while working with learners of all levels.  While it is not essential for all of your learners to be able to bake a cake, look at all the skills it addresses!

    Sometimes I ask myself why I am teaching a learner to bake a cake, when it is not a basic necessity.  Then I am reminded of the core skills it teaches to be able to move onto higher level cooking activities. 

    A learner who can not follow a basic recipe on a box, will struggle to read from a cookbook.  Someone who can not mix two to three ingredients, will struggle to work with seven in a salad.

    The OT Toolbox has a great collection of resources called, Cooking with Kids.  It is full of recipes and cooking ideas.

    It’s great when you find recipes that have different steps that can be offered to kids when helping in the kitchen. For example, our Greek turkey burger recipe has different steps that can be offered to target specific skills: chopping, slicing, stirring, mixing, scooping, grilling.

    Life Skills Cooking ideas

    Use these ideas as cooking tasks for learners to start off with. The cooking tasks listed below are great beginner cooking tasks to support development.

    • Cake from a mix- easy to follow directions with minimal ingredients. Tasty results!
    • Muffin mix- Martha White and Jiffy Mix often just call for milk and possibly an egg
    • Macaroni and cheese- this works on a plethora of skills as mentioned above, it is yummy, and a staple for children and young adults. Add some meat and a vegetable, and your learner can have an entire meal
    • Cookies- start with the ones that are pre formed, or slice and bake
    • Ramen Soup- what could be simpler than heating noodles and water on the stove or microwave?  Again, easy to learn, low cost, filling, delicious, and can be served plain, or with add-ins such as meat or veggies
    • Pancakes and waffles are a great staple that work on many skills, using limited ingredients. You can use a mix to grade down the activity or use a homemade pancake recipe to offer more opportunities for measurement and pouring.
    • Sandwich preparation– Sandwiches are a great basic item that involves problem solving, sequencing, following directions, and fine motor skills.  This is a safe option for learners to make on their own, as they do not have to use a heating element, and can spread items with the back of a spoon instead of a knife for added safety.
    • Frozen dinners- early or lower level learners may need to spend time working on making frozen dinners using the microwave.  While this seems like a simple task, it still involves several steps, including problem solving and judgment. 
    • Rainbow Smoothie- This is a great way to add different fruits as nutrition but also a way to practice slicing bananas, chopping different textures, pouring liquid, managing buttons on a blender, and using safety strategies: blender buttons, placing the lid, using a knife, reaching into a blender, plugging in a kitchen utensil, washing dishes, etc.

    Beyond the Basic Cooking Activities

    Once your learner has mastered a few basic skills, it might be important or relevant to teach these next level skills.  If your learner is not likely to ever need these skills, you can continue to work on mastery of basic food items.

    • Cooking vegetables like potatoes, carrots, broccoli
    • Grilling meat, either on an actual grill or countertop grill.  The George Foreman grill is relatively easy to use
    • Using a crock pot to make a soup or stew
    • Baked goods: making cookies or muffins from scratch
    • Cooking meals that involve more than one pan. Learning to time spaghetti and sauce, or meat and vegetables

    Sensory Based life skills Cooking Activities

    Cooking is a great way to engage sensory seekers and avoiders.  It is helpful to work with picky eaters on cooking, as well as those with tactile sensitivity. Making food can be motivating. as your learner may be more excited to try something they have created.

    • Pizza – mixing, kneading, rolling, pounding, stretching the dough. Touching the toppings adds different sensory components
    • Pretzels – similar to pizza, learners have fun creating pretzel shapes
    • Cut out cookies – rolling, cutting, sprinkling, and tasting
    • Meatballs – mixing, rolling the meat into balls
    • Salad – handling different items, cutting, sorting, and preparing
    • Lasagna – while this might not be a young learner’s favorite, it is a messy task that involves several textures

    Tips and Strategies for teaching Life Skills cooking

    These tips are helpful for all learning, not just cooking.

    • Break the tasks down into smaller chunks to make them more manageable. The learner may not be able to do all the cooking, but can probably stir items in a bowl or pour ingredients
    • Choose times for learning when there is not a rush.  Learners cannot work under pressure
    • Set realistic expectations.  Your two year old might not be able to make a sandwich independently.  That’s ok, they can help find the ingredients
    • Accept mediocracy.  Learn to accept food might not look or taste the best.
    • Before starting, think about any sensory/motor/logistical components of the task and problem solve through them
    • Backward or forward chain. Backward chain would be to do all of the work for your learner, then have them come in and finish the final step. This offers a sense of accomplishment.  Forward chaining is having your learner do the first step, just before they become overwhelmed, you finish for them.  This gives confidence that they can do some of the tasks, if not all
    • There are many steps for a learner to remember during any life skills task
    • Minimize distractions and sensory input prior to starting
    • Stay calm and do not add more pressure
    • Let your learner do for themselves, only intervene when they start to get upset. Do not rush to fix everything so quickly. They will not learn that there is a problem if you constantly fix the errors before they notice the problem
    • Give the learner opportunities to be independent, even at a small task

    If your learner has sensory related concerns, the OT Toolbox has a great resource called the Sensory Lifestyle Handbook, with checklists and strategies to weave sensory activities into your learner’s day

    Life skills checklist

    Cooking skills can be developed from a very young age. These cooking tasks listed below promote cognitive development, direction-following, decision making, motor skill work, and many other areas.

    Important things to note:

    We’ve separated these tasks into ages, but this is a generalized list of ages. Some kids will not accomplish the tasks listed below, and that’s ok! It’s a way to know where and when to work on age-appropriate cooking activities with kids.

    This list is also not necessarily guided by age. While ages are listed below, the cooking tasks can be viewed as a sequential progression based on cognitive skills needed, safety considerations, executive functioning development, etc. Look at the list as a guide to progress toward life skills achievement in the area of cooking skills.

    When you view the cooking life skills checklist below in that way, it can be used to support life skills development for any age, including teens, adults working toward more independence with cooking abilities.

    Toddler Cooking Skills

    Generally these tasks can be accomplished from 1-2 years of age, during the toddler years.

    • Help rinse fruit and veggies
    • Pour with assistance
    • Tear lettuce and other leafy foods
    • Stir with assistance
    • Brush butter or olive oil on foods
    • Retrieve and sort ingredients in the kitchen
    • Sort ingredients
    • Turn pages in recipe book
    • Obtain utensils when setting the table
    • Help identify items in the grocery store
    • Help wipe up safe spills
    • Drain small canned foods with drainer
    • Sprinkle seasonings or cheeses
    • Dipping food items into sauces, oils, etc.
    • Learn essential safety rules in kitchen
    • Open/close cabinet doors and drawers

    More specifically, some cooking skills broken down by age include:

    2 Years

    • Stack cups
    • Place utensils into a basket or caddy (not sorted)
    • Wipe up spills with direction and support
    • Bring dinner plate to sink
    • Passive participation in cooking (playing in the kitchen while an adult is cooking)
    • Pretend play cooking with toys, kitchen toy set, etc.

    Preschool Cooking Skills

    During the preschool years, young children are developing more motor skills, behavioral and emotional regulation, and cognitive processes. These relate to less support with some of the previous tasks, as well as more independence with others.

    Some ways your preschooler can help in the kitchen:

    • Rinse fruit and veggies
    • Pour liquids and dry ingredients with assistance
    • Tear lettuce and other leafy foods
    • Stir with assistance
    • Brush butter or olive oil on foods
    • Retrieve and sort ingredients in the kitchen
    • Sort ingredients
    • Obtain utensils when setting the table
    • Help identify items in the grocery store
    • Find recipe in recipe book
    • Help wipe up safe spills
    • Drain small canned foods with drainer
    • Sprinkle seasonings or cheeses
    • Dipping food items into sauces, oils, etc.
    • Learn essential safety rules in kitchen

    Broken down into age group, try using these cooking tasks to develop skills:

    3 YEars

    • Sort utensils into a caddy
    • Help set the table, using support and visual/verbal cues
    • Wash hands before a meal
    • Help clear the table
    • Pretend play to feed and cook for baby dolls or toys

    4 Years

    • Set the table
    • Dry dishes (non-breakable)
    • Pour water from a pitcher into cups (not filled completely) with spilling
    • Help with cooking with one step directions: gathering ingredients, pouring, mixing, kneading, stirring at a counter
    • Cut dough with cookie cutters

    5 Years

    • Help to make snacks
    • Scoop dry ingredients
    • Open containers with assistance
    • Slice bananas or other soft fruits

    Elementary Cooking Skills

    As children gain more precision and dexterity, as well as ability to read and write, they gain more independence in cooking tasks. These activities can be a great help around the home as the child aged 6-8 helps out in the kitchen.

    • Cut and dice fruits and vegetables
    • Use the toaster
    • Crack eggs with some shells
    • Preheat the oven
    • Use a can opener
    • Use a peeler and corer for potatoes and apples
    • Spoon and place food items into pans or trays
    • Begin to stir food on stovetop with supervision
    • Help make the grocery list
    • Clean up simple to moderate spills
    • Transfer food bowls and plates to table
    • Help make a grocery list and identify food items at the store recognizing cost 
    • Begin to read recipes and follow the steps with guidance
    • Whisk and if older, use a mixer with guidance
    • Use the microwave with support
    • Help load and unload the dishwasher

    Broken down by age, these cooking tasks can look like:

    6 Years

    • Empty dishwasher and put away dishes
    • Pour water, milk, or juice without spilling
    • Put away groceries
    • Make a simple snack
    • Pack a basic lunch
    • Make sensory play recipes like slime, goop, oobleck, etc.

    7 Years

    • Mix, stir and cut with a dull knife
    • Pour cereal and milk into a bowl

    8 Years

    • Load the dishwasher
    • Spread peanut butter on bread
    • Read and follow a basic recipe
    • Make a grocery list
    • Crack an egg

    Older Kids Cooking Life Skills

    The cooking tasks listed below can be started with older kids. This list is a great place to start for the teen or young adult who hasn’t had much experience in the kitchen. For graduates heading off to college, or the young adult going out on their own, go through this list to ensure life skill development in the kitchen:

    9- 12 Years

    • Make scrambled eggs
    • Cook hot dogs
    • Read and understand nutrition labels
    • Plan a balanced, healthy meal for the family
    • Write down a recipe
    • Complete cooking tasks in a certain amount of time
    • Use a microwave with assistance
    • Cut, slice, and dice fruits and veggies
    • Crack eggs without shells
    • Use a can opener, peeler, grater, whisk, and corer
    • Drain larger food items
    • Follow basic recipes
    • Complete baked good recipes with guidance
    • Make sandwiches and salads
    • Use stove top to complete simple frying such as grilled cheese and eggs
    • Stir and sauté foods on stovetop with supervision
    • Help plan and develop a grocery list
    • Clean up advanced spills
    • Transfer some hot food bowls and plates to table
    • Help to identify food items at the store recognize cost 
    • Begin to read recipes and follow the steps with guidance
    • If older, use a mixer with guidance
    • Use the microwave with guidance
    • Load and unload the dishwasher

    13 Years and older

    • Slicing raw meats with various knives and utilizing hygiene safety
    • Chopping ingredients using various knives
    • Using stove top and oven
    • More independence with making recipes
    • Using various kitchen appliances such as mixers, blenders, grills, wok, grater, etc.
    • Complete operation of dishwasher
    • Frying foods on stove top
    • Use a peeler, chopper and corer
    • Retrieving hot items from stove top and oven with oven mitts
    • Planning a meal, building a grocery list, and shop with guidance in budget awareness
    • Clean up significant spills utilizing proper sanitation
    • Transfer got food bowls to table
    • Reading and completing multi-step recipes

    Here is another great checklist from the Focus on the Family website. 

    Common Pitfalls with Cooking tasks

    There will be roadblocks with unexpected twists and turns along the way.  Expect these, and learn to adapt quickly as needed. Here are a few:

    • What if the timer goes off but the item is not yet ready?
    • The timer has not gone off yet but the item is clearly burning
    • Your learner adds too much or little of an ingredient (hopefully they will learn from mistakes or the item will still taste ok)
    • There are multiple items to attend to at once, and your learner forgets something
    • The item ends up a complete disaster
    • You realize there are some serious safety concerns (learner does not understand how hot something is, or how to handle hot objects)

    These examples come from my personal experience.  I did not think of these variables that ended up happening in my sessions. I had to learn to let go of some control, as long as my learner was safe. There were definitely some mistakes and disasters.  

    True story: I worked with a sixteen year old for several months.  One of her main goals was life skills cooking.  She had difficulty with problem solving.  I decided to let her make mistakes, so she could learn from them.  I figured that a cup of salt instead of sugar, or a cup of oil instead of a quarter cup, would ruin an item enough to teach her to be more careful.  It turned out by some miracle, each of these items turned out ok!  They tasted fine to her, and she could not tell there was a mistake.  That was one of those life lessons for me, to learn to back up and let go of some control.

    Cooking Tips

    • Start early
    • Practice
    • Be realistic (your learner may never want to learn to cook more than Ramen, PBJ and Mac&Cheese)
    • Create room for error and problem solving
    • Mix things up so your learner can learn to be flexible
    • Do not be that parent who sends their teenager off to college with zero life skills
    • Even the lowest level or smallest learner can often help with some part of the task if they can not do it themselves (I work with a boy whose job is to watch the baby and yell when she wakes up)
    • Cooking with learners can be a fun AND yummy treatment session!
    • Use a picture story sequence to work on individual tasks of cooking. This is a great strategy for all aspects of cooking life skills!

    For the record, my daughters went to college well prepared in the life skills department. The common sense department was clearly lacking (the prefrontal cortex does not develop until mid 20’s).  My stepson, on the other hand, has neither life skills, nor common sense.  Bless his heart!

    Victoria Wood, OTR/L is a contributor to The OT Toolbox and has been providing Occupational Therapy treatment in pediatrics for more than 25 years. She has practiced in hospital settings (inpatient, outpatient, NICU, PICU), school systems, and outpatient clinics in several states. She has treated hundreds of children with various sensory processing dysfunction in the areas of behavior, gross/fine motor skills, social skills and self-care. Ms. Wood has also been a featured speaker at seminars, webinars, and school staff development training. She is the author of Seeing your Home and Community with Sensory Eyes.

    NOTE*The term, “learner” is used throughout this post for readability.  This information is relevant for students, patients, clients, preschoolers, kids/children of all ages and stages, or whomever could benefit from these resources. The term “they” is used instead of he/she to be inclusive.

    Vision Books for Developing Skills

    Vision books to develop visual processing skills

    In this post, I have highlighted references to vision books that can specifically be used in therapy interventions to support the development of visual processing skills. These are the Top 9 Books for addressing vision concerns, that might be incorporated into visual therapy, or occupational therapy activities.  Each of these visual skill building books covers aspects of visual perception, visual processing, and visual motor skills. 

    Start by reading, “Visual Problems or Attention” to help decipher the cause of visual processing difficulties.

    After reading Visual Problems or Attention, check out the Visual Screening Packet available on the OT Toolbox to further assist in diagnoses and treatment.

    For more information on vision skills, check out this post from the OT Toolbox archives.

    Vision books to support visual processing development

    Vision Books

    Looking for books on vision, visual motor integration and visual perceptual skills? Check out the list of books below that are chock full of information and treatment ideas! 

    Many of these books have reproducible pages, or can be laminated/placed into plastic sleeves to be reused.

    Vision Book: Eyegames

    The list of vision books below are linked to Amazon affiliate links for ease of searching, however they can be also found by googling the titles.

    An OT and Optometrist Offer Activities to Enhance Vision! (affiliate link) By Lois Hickman and Rebecca Hutchins is an easy and fun vison book with games and exercises for developing visual skills.

    This vision book is an easy read about vision deficits, and how they impact function. It has a checklist of red flags to be on the lookout for. There are also loads of great therapy activities to target each skill deficit. Activities are geared for a variety of function levels, along with easy task gradation. Activities are designed to be completed in the home, clinic, or school settings. 

    Vision Book for Visual Tracking Exercises

    Visual Perception, Visual Discrimination & Visual Tracking Exercises for Better Reading, Writing and Focus (affiliate link)

    The next set of vision books are created by Bridgette Sharp, and Bridgette O’Neil. These books make for a great set of tools to have in your bag. 

    The Visual Tracking Exercises Book is a beginner book for developing tracking skills. As a bonus, you can use this with learners who are working on left/right awareness as well. Worksheets are varied with numbers, shapes, patterns, color, and black and white fonts, to help keep things interesting. 

    Vision Book for Scanning Skills

    Advanced Visual Scanning Exercises (affiliate link)

    As it says in the title, this visual perception book is for your advanced learners who are continuing to work on strengthening their eye muscles, gearing up for chapter book reading, and increased desk work. Patterns become more complex, and are in black and white only. 

    It can be helpful to read more on what is visual scanning and check out the red flags section and then use this vision book if needed.

    Visual Scanning Exercises for Young Students (affiliate link)

    This visual scanning beginner book has a variety of simple grid patterns with large colorful pictures for younger children, beginning learners, pre-readers, and children who are behind in reading readiness due to tracking and scanning issues. The images are large, colorful, and have plenty of variety to keep them engaged in therapy.

    Vision Books, Visual Scanning for Students  (affiliate link)

    This Ready to Scan vision book is for more advanced scanners, or for kids/learners who are skipping lines when reading or copying. It’s a great resource for building endurance and eye muscle strength. As a bonus, use the patterns for reversal training and directionality! 

    BIG BOOK: Beginners, Intermediate & Advanced Visual Scanning Exercises (affiliate link)

    Like it’s title says, this book has something for everyone. This is a great place to start your toolbox for visual skills. Patterns work through a progression, starting with large images, moving onto smaller images. They present a variety of pictures and geometric shapes, both in color and black/white. This book is a great place to create home programs with and homework from each session. 

    Vision Book for Visual Tracking

    Vision books, Visual Tracking Exercises with 100 High Frequency Sight Words (affiliate link)

    If you’re looking to change it up from geometric patterns and pictures, this book is a great option. The book consists of a variety of exercises using sight words. Use the pages to work on discrimination and word shape training as well. 

    Start by reading up on what visual tracking is and then go from there with this vision workbook.

    Visual Skills Book for Reversals

    Letter reversals are related to vision skills. You’ll want to start by reading more on p and q reversals or b and d reversals. Others who write letters backwards can benefit as well.

    The visual skills book, Brain Training for Reversals, is a brain training vision book consists of exercises specifically for reversals of b-d-p-q. Exercises range in complexity to address all skill levels. These brain training worksheets can also be used for scanning, to practice reading, and directionality. You can also use these worksheets similar to an eye spy game, by having the child look for all of one letter. 

    Visual Discrimination Book

    Visual discrimination is a visual skill that impacts reading, writing, math, comprehension, and learning.

    The Visual Discrimination book is great for grades 2-8 and focuses on finding patterns and solving problems through the use of colorful geometric patterns and images. This is great for critical thinking skills, along with working on spot the difference (visual disclination) tasks.

    Book 9 is a higher level book, so save it for your older, more high functioning learners, or adult learners who are working at this reading level.

    Spot the Difference Vision Books

    Another great resource are “spot the difference” books! (affiliate link) There are hundreds of spot the difference books to choose from. These books not only address visual discrimination, but can also be used to work on following directions, scanning, item location in a busy environment, and general visual processing skills.

    The OT Toolbox is offering a FREE visual perception packet to download and use with your learners.

    Visual Closure Book

    The Visual Closure Workbook is a 65 page digital file designed to impact visual perceptual skills for reading comprehension and efficiency, and the ability to visualize a complete image or feature when given incomplete or partial information.

    Visual closure skills are essential for reading with fluency.  It’s necessary for written work to happen without concentrating on each letter’s lines and curves. Visual Closure allows us to comprehend words and letters without actively assessing each line.

    Challenges with puzzles, identifying sight words, copying in handwriting, math tasks, and other reading or writing activities require visual closure skills.

    This workbook includes:

    • Information on visual closure and visual processing
    • Red Flags Indicating a Visual Closure Problem
    • 15 ways to use the workbook and strategies
    • More Visual Closure Activities (use these tactics to grade the visual closure activities to meet individual needs, challenge, users, and support the development of skills)
    • Workbook – Level 1
    • Workbook – Level 2
    • Workbook – Level 3

    This workbook is designed to provide background information on visual closure as a tool for understanding this visual perceptual skill. It’s a guide for advocating for common visual closure difficulties through the included screening tool broken down as “red flags”.

    NOTE* The term, “learner” is used throughout this post for readability and inclusion. The previous information is relevant for students, patients, clients, preschoolers, kids/children of all ages and stages, or whomever could benefit from these resources.

    Contributor: Kaylee is a pediatric occupational therapist with a bachelors in Health Science from Syracuse University at Utica College, and a Masters in Occupational Therapy from Utica College. Kaylee has been working with children with special needs for 8 years, and practicing occupational therapy for 4 years, primarily in a private clinic, but has home health experience as well. Kaylee has a passion for working with the areas of feeding, visual development, and motor integration.

    The Development of Balance

    Development of balance

    Balance development is a pivotal part of child development. Gross motor coordination, balance and motor planning are all part of the processes of acquiring these skills. Here, we cover balance development, strategies to support this skill, and specific balance activities.

    Development of balance from infancy through preschoolers.

    Balance Development

    Acquiring or practicing balance can be seen in a toddler swaying step by step, a child pretending the sidewalk curb is an Olympic balance beam, or a teenager managing their new crutches.

    Strong standing and walking balance equal safe mobility, which opens the door to so many wonderful new things; running, jumping, cartwheels, backflips…you get the picture.

    Achieving physical balance plays an important role in the development of many different skills, some of which may surprise you!

    WHAT IS BALANCE?

    Before officially diving into the development of balance, we first need to define and understand it. 

    • Balance – According to the Harvard Medical School, balance is the ability to distribute your weight in a way that lets you stand or move without falling, or recover if you trip. Good balance requires the coordination of several parts of the body: the central nervous system, inner ear, eyes, muscles, bones (Check out this list of bone names), and joints
    • Static Balance – maintaining body position during an unmoving task, such as sitting or standing
    • Dynamic Balance – the ability to remain standing and stable while performing movements or actions that require displacing or moving oneself

    The various muscles of the body contract or relax in order to maintain the proper balance for our daily activities, as controlled by our balance center in the brain; the cerebellum

    In addition to the cerebellum, the inner ear also sends signals to the brain, to give a status report on the environmental changes that affect balance. The inner ear is where the vestibular system is located.

    Its’ fluid picks up on the motion and position of the head, constantly sending information back to the brain via the eighth cranial nerve. When there is a medical issue within the ear, such as an ear infection or torticollis, it may affect balance. This is generally in the form of dizziness or unsteadiness. 

    The primary source of information for the following list of balance developmental milestones was primarily sourced here.

    Information from different sources may vary slightly, largely due to the fact that developmental patterns fall into different ranges. For a general list of developmental milestones, refer to the CDC resource here.

    For balance to occur, we need lower extremity strength integrated with other areas of development, including vision and processing of vestibular input.

    Balance Development in the first year

    Prenatally

    • The vestibular system is developed at five months pregnancy

    0-3 MONTHS

    • Primitive reflexes (uncontrolled movement) lay the groundwork for future motor development
    • Tummy time develops vision and postural control required for optimal balance later on 

    4-6 MONTHS

    • Rolling prone to supine (front to back), then supine to prone (back to front)
    • Supported sitting, then unsupported sitting

    7-9 MONTHS

    • Picks up a dropped toy, may fall while reaching
    • Begins to army crawl, cruise crawl, or scoot
    • Holds majority of their own weight while standing supported
    • May squat up and down while standing 

    10-12 MONTHS 

    • Pulls self up to stand, then stands unsupported
    • Manipulation of toys/ movement of arms while sitting unsupported 
    • Moves in and out of laying and seated positions with control
    • Cruises along furniture or walks supported

    Development of Balance in Toddlers 

    13-16 MONTHS

    • Walking unsupported, but may tumble easily
    • Crawls up and down furniture and stairs with support for safety
    • Begins to learn how to walk faster/run 

    17-19 MONTHS

    • Is able to get onto small chairs without help
    • Walks up stairs while holding on with one hand
    • Runs stiffly and falls often
    • Can pick up objects while standing, without losing balance

    2 YEARS

    • Pulls off socks without losing balance
    • Runs with improved coordination
    • Can kick a ball without losing balance

    Development of Balance in PReschoolers

    3 YEARS

    • Can briefly balance and hop on one foot
    • May walk upstairs with alternating feet (without holding the rail)
    • Able to pedal a tricycle

    4 YEARS 

    • Hops on one foot without losing balance
    • Throws a ball overhand with coordination

    5 YEARS:

    • Skips, jumps, gallops, and hops with good balance 
    • Stays balanced while standing on one foot with eyes closed 

    The majority of our balance skills have developed by age 5, but will continue to fine-tune up until around age 12. Remember to keep in mind, these are averages for the typically developing child. 

    Balance is required to do just about anything in daily life. 

    Balance is needed to stand at the mirror while brushing teeth, get out of the car, and put on socks, to name just a few. Without the development of this balance skill, support aids (walkers, crutches, braces) may be necessary for safety and function.

    Static Balance

    Did you know that balance is also related to non-physical, or static tasks?

    Research suggests that when balance is improved, so are attention and learning skills. Good balance helps children develop better reading, writing, and language skills, as well as improved concentration. 

    One way balance is theorized to improve academic skills, is through increased body control, and knowing where the body is in space (proprioception). Having better body control and knowing how to coordinate movement in various environments is important.

    Correct body awareness makes it easier to have a comfortable seated posture. Good balance also makes activities such as sitting still while moving the head to look up at the chalkboard, and then back down to write easier. 

    Check out these Body Awareness Activities from the OT Toolbox.

    Without proper body control, it is just that much more difficult to perform the tasks of a student: copying from the board, holding and reading long textbooks, carrying materials from space to space, and supporting an upright seated posture for many hours a day.  

    How to Support Balance Development

    Knowing the huge impact that balance has on the body, what can you do to improve it?

    Check out this blog post on balance activities.

    The OT Toolbox has great articles on gross motor skills, that will suit the needs of your children. Check these out and let us know your favorites!

    If you love all of the great resources found above, consider becoming a member.

    Want to add this resource to your therapy toolbox so you can help kids thrive? Enter your email into the form below to access this printable tool.

    This resource is just one of the many tools available in The OT Toolbox Member’s Club. Each month, members get instant access to downloadable activities, handouts, worksheets, and printable tools to support development. Members can log into their dashboard and access all of our free downloads in one place. Plus, you’ll find exclusive materials and premium level materials.

    Level 1 members gain instant access to all of the downloads available on the site, without enter your email each time PLUS exclusive new resources each month.

    Level 2 members get access to all of our downloads, exclusive new resources each month, PLUS additional, premium content each month: therapy kits, screening tools, games, therapy packets, and much more. AND, level 2 members get ad-free content across the entire OT Toolbox website.

    Join the Member’s Club today!

    Sydney Thorson, OTR/L, is a new occupational therapist working in school-based therapy. Her
    background is in Human Development and Family Studies, and she is passionate about
    providing individualized and meaningful treatment for each child and their family. Sydney is also
    a children’s author and illustrator and is always working on new and exciting projects.

    ADHD Tools for Parents of Children with Attention Difficulties

    ADHD tools

    Here you will find a number of ADHD tools and supports for individuals with ADHD, including ADHD resources for parents. The statistics of the number of people with Attention Deficit Disorders (ADD) is staggering.  These numbers are compounded by the fact that attention deficit is difficult to diagnose.  The market is flooded with ADHD resources, and strategies to support attention needs, but what are the right ones? Doctors and other professionals could be over or under diagnosing due to this difficulty in gathering accurate data.

    ADHD tools for kids and parents of children with ADHD

    Yes there are ADHD checklists, surveys, and questionnaires, but they are not scientific or 100% accurate.  They are often based on opinion and observation versus data.  This is a stark contrast to diagnosing down syndrome or hearing loss, that is tracked by concrete data or genetic testing. 

    ADHD TOOLS

    When it comes to specifically ADHD tools, my advice is to take these diagnoses with a grain of salt.  Look more for symptoms, behaviors, skills, and difficulties rather than relying on a label.  It does not matter as much that this is called ADD, ADHD, or ABCD, but what are the struggles the learner is having? 

    To best support any diagnosis (attention diagnoses being one), focus on the struggles, creating measurable and relevant goals, instead of focusing on the label.

    To best support a child with attention challenges, find ADHD resources you can trust to provide useful information and strategies.

    Having any label, diagnosis, or list of symptoms can feel overwhelming. The number of attention related resources available on the internet are astounding.  But which are accurate?  Who can you believe?  There are no easy answers unfortunately.  

    Which way to turn for ADHD TOOLS?

    When there is an overwhelming amount of data presented at one time, the best jumping off point is to rely on the feedback of others.  Sometimes it is a trusted doctor or friend, but more often than not, it can be a large crowd of strangers. 

    When looking for the perfect resource to share with parents, I usually turn to Amazon and start reading the reviews.  I read a ton of reviews before making my selections.  This is time consuming, however I do not have time to read something that is not a good resource, has incorrect information, or written in a terrible format.

    Attention Resources from Amazon

    There are some solid attention resources from Amazon available, including ADHD audiobooks, and other formats that have good reviews. I have not personally read them, but have taken the time to research them and read the long reviews.

    Amazon affiliate links are included below.

    Amazon has some great ADHD audiobook resources for parents and professionals available on Audible and other formats. Audiobooks are a great alternative to paper books, as they can be listened to almost anywhere.

    There are tons of resources on attention and ADHD in audiobooks. I tried to find ones that had good reviews, were accurate and easy to read/listen to, and provided useful strategies.

    If you are an Amazon Prime member, You’re eligible to claim 2 free titles from our entire selection (one title per month thereafter) with a free Audible 30 day trial. A standard trial includes 1 credit for an audiobook download. After the Audible trial period, all members receive 1 credit per month.

    Click here start your free Audible Trial Period.

    Delivered From Distraction: Getting the most of out Life with Attention Deficit Disorder.  This book is written for teens or adults with ADD.  This may be helpful for parents as well, as attention deficits tend to run in families.  It can be read cover to cover or in sections.  The author says, feel free to skip around.

    You Mean I’m Not Lazy, Stupid or Crazy?: A Self-help Audio Program for Adults with Attention Deficit Disorder  As with most books I have found, there are going to be people who do not like the book.  This is to be expected.  However, more people say they liked it than the few who did not. I like that this is available in audio, as some people are more auditory learners than visual. Finding an hour in the car to listen seems much easier than trying to carve out that same hour reading on the couch.

    Taking Charge of ADHD, Third Edition: The Complete, Authoritative Guide for Parents This book is available in several formats. Audible is one that may be easier for parents to listen to, as their couch time is limited. This book takes a real look at ADHD.  Most people found this book helpful. The few that did not, found this book too straight forward or maybe “depressing.”

    The ADHD Advantage: What You Thought Was a Diagnosis May Be Your Greatest Strength. This book came as a recommendation from a reviewer who needed a positive spin on ADHD after reading all of the devastating facts and figures about ADHD. 

    Organizing Solutions for People with ADHD, 2nd Edition – Revised and Updated: Tips and Tools to Help You Take Charge of Your Life and Get Organized  This book points people in the direction of real life solutions. It is fine to spend time researching the “what” and “why” of a diagnosis, but without real solutions, the research just leaves people frustrated. It can be used for adults and adapted for children. 

    The OT Toolbox has a great post on Organization and Attention Challenges.

    Smart but Scattered Teens: The “Executive Skills” Program for Helping Teens Reach Their Potential Positive reviews praise this book for its information about working with teens with attention issues or decreased executive function.  It gives doable strategies that work for teens.  The strategies are motivating for modern teens. Critical reviews cite that this book is more about the “what and why” rather than the “what to do about it” side of this diagnosis. Much of the advice centers around driving, and using technology to help teens.  On a positive note, this is what motivates teens to perform.  On the flip side, not everyone has a driving teen or wants to encourage use of electronics.

    Books for younger learners:

    Marvin’s Monster Diary: ADHD Attacks! (And I Rock, Big Time): St4 Mindfulness Book for Kids Written in the Wimpy Kid book series, this is a cute motivating book series for children who struggle with attention issues to relate to.  It is available in several formats including Audible.  This might be a good book to buy in print and listen to Audible at the same time.

    Marvin’s Monster Diary 2 + Lyssa!: ADHD Emotion Explosion (But I Triumph, Big Time!)  This second book in the Monster Diary series proves to be a winner as well.  It has several positive reviews about it’s entertainment value, readability, and writing style. Again because it is a graphic novel type of read, it would be excellent paired with the written version as well as Audible.

    A Dragon With ADHD: A Children’s Story About ADHD. A Cute Book to Help Kids Get Organized, Focus, and Succeed. (My Dragon Books 41) This is another great series to keep children interested while learning about ADHD.  This series covers a multitude of topics.  The nice thing about series is if you buy into one, it sets the reader on a whole journey of discovery. This is written for children, however reviewers say that adults, therapists, and parents will enjoy this book as well.

    Focused Ninja: A Children’s Book About Increasing Focus and Concentration at Home and School (Ninja Life Hacks)   This book is part of a Ninja series teaching children valuable lessons in an entertaining method. If you were a fan of the Mr. Men book series, you will like this one.  Each ninja is named after the skill he lacks or is trying to gain.

    The OT Toolbox ADHD and attention resources

    The OT Toolbox has become a trusted resource for many of you reading these posts and subscribing to the website. The OT Toolbox does not disappoint and has wonderful articles, activities, and resources to fill your “toolbox”, not only on topics such as ADHD and attention, but fine motor, sensory, gross motor, executive function and so much more.

    Type ADD, Attention resources for parents, or ADHD activities into the search bar for a great list of archived posts. Just when you are overwhelmed with information and resources, try wrapping your head around the sensory connection between attention and organization challenges.

    It is no wonder there is such misdiagnosis, confusion, and misinformation out there. Autism, ADD, ADHD, Sensory Processing Disorder, Anxiety, and about a dozen other diagnoses have overlapping and similar symptoms. Keep your focus on how to help and move forward rather than where did this come from, or what is this called?

    Happy reading, take a deep breath, one moment at a time!

    Victoria Wood, OTR/L is a contributor to The OT Toolbox and has been providing Occupational Therapy treatment in pediatrics for more than 25 years. She has practiced in hospital settings (inpatient, outpatient, NICU, PICU), school systems, and outpatient clinics in several states. She has treated hundreds of children with various sensory processing dysfunction in the areas of behavior, gross/fine motor skills, social skills and self-care. Ms. Wood has also been a featured speaker at seminars, webinars, and school staff development training. She is the author of Seeing your Home and Community with Sensory Eyes.

    RAINBOW TEMPLATE PRINTABLE

    Rainbow template printable

    Coming up is the Rainbow Template Printable! This March activity is perfect for a St. Patrick’s Day theme or a rainbow theme in occupational therapy sessions. Whether you are working on pencil control, scissor skills, eye-hand coordination, or direction-following, this rainbow template can be used to address any skill area.

    You can even use this printable to make a fruit loop rainbow craft.

    This free rainbow template printable is a resource that can be used to work on pencil control, eye-hand coordination, letter formation, scissor skills, and more.

    free rainbow template printable

    What is so enticing about rainbows?  Could it be the pot of gold at the end?  Or the promise of sunshine? I think rainbows don’t make you choose.  You can have all of the colors at once.  For a lot of people, especially those with anxiety, choosing one or two of anything is difficult.  It seems so final and limiting.  Not so with rainbows, you can have it all!

    When I was a child we sang The Rainbow Song, “red and yellow and pink and green, orange and purple and blue. I can sing a rainbow, sing a rainbow, sing a rainbow too.”  Is indigo the new pink?  Maybe it is because we learned this in Australia.  Do rainbows look different there?

    Do you remember the mnemonic for the colors of the rainbow? ROY.G.BIV (red, orange, yellow, green, blue, indigo, and violet). 

    However your learner decides to design their rainbow in this Rainbow Template Printable activity, there are a dozen ways to make this activity fun and functional. 

    Add the printable rainbow activity to our rainbow breathing exercise for more rainbow fun in therapy sessions (or the classroom or home!)

    What ways can you think of to design this rainbow  printable? 

    • Draw vertical lines in each section with the desired color, making sure the lines stay between the top and bottom borders
    • Make small circles in each section, controlling the pencil to stay between the lines
    • Write the first letter of the color,like RRRRRR, across each section
    • If your learner is more of a beginner, simply coloring each section will help develop fine motor skills in this pencil control activity
    • Copy a pattern like wavy, zigzag, or swirl lines in each section
    • Add glitter!  There is never a wrong time to add glitter

    All of the OT Toolbox resources, including this rainbow printable template, can be modified to meet the needs of all of your learners.  There are several posts related to Pencil Control and Rainbows on the OT Toolbox. Here is a post on Rainbow Activities to make lesson planning easier.

    Ways to adapt and modify this rainbow template printable task:

    • Laminate the page for using markers and wipes. This can be useful for reusability, as well as the enjoyment learners have using dry erase markers. Note: not all learners like reusable items, some prefer to take their work home.
    • Printing this rainbow template or some of our other great pencil control worksheets on different colored paper may make it more or less challenging for your learner
    • Enlarging the font may be necessary for beginning learners who need bigger space to write.
    • Have students cut out each section of the rainbow and paste in order on another page – this adds a cutting and gluing element
    • Make changes to the type of writing utensil, paper used, or level of difficulty
    • Have students write on a slant board, lying prone on the floor with the page in front to build shoulder stability, or supine with the page taped under the table
    • Project this page onto a smart board for students to come to the board and write in larger form.
    • Grade the level of prompting depending on the level of the task and that of your learners
    • Make this part of a larger lesson plan including gross motor, sensory, social, executive function, or other fine motor skills
    • The OT Toolbox has a great Color Handwriting Kit incorporating fine motor skills, colors, and handwriting
    • A classic book, (Amazon affiliate link) the Rainbow Fish, would be a great addition to this rainbow fine motor worksheet, or lesson plan.  Plus it has GLITTER!  

    What skills are you addressing when using this rainbow template printable

    There are no wrong or right answers to this question.  Your focus can vary from learner to learner, or follow a common theme. 

    • Pencil control
    • Fine motor skills
    • Pre-writing skills

    The three above are the obvious, and more common skills to be measured during this task.  In addition, it is possible to shift the focus and attend to different aspects of the task:

    • Following directions
    • Task avoidance/compliance
    • Frustration tolerance
    • Behavioral reactions
    • Attention, focus, impulse control
    • Ability to complete a task
    • Level of independence
    • Social skills – sharing, turn taking, waiting

    there are no right or wrong answers

    Again there are no right or wrong answers.  The focus might be entirely on developing fine motor pencil control without regard to behaviors, social function, or executive function. 

    Conversely, the data you gather might not include how their fine motor skills look at all.  Of course you can combine all of the above.

    document, document, document

    Be sure to clearly document what you are observing and measuring.  Data collection is what’s required now.  Use percentages, number of trials, number of verbal or physical prompts, or minutes of focus.

    Gone are the days of writing, “learner completed task with min assist.” Min assist can look different to five different observers.  The only clinical phrases that are somewhat accurate are “independent” and “dependent”, meaning 100% or 0%.

    After all of this activity, maybe your learners need to slow down and take a breather with Rainbow Breathing Exercises. However you choose to create your treatment plan, find ways for it to be motivating and meaningful.

    Free Rainbow Template

    Want to add this resource to your therapy toolbox so you can help kids thrive? Enter your email into the form below to access this printable tool.

    This resource is just one of the many tools available in The OT Toolbox Member’s Club. Each month, members get instant access to downloadable activities, handouts, worksheets, and printable tools to support development. Members can log into their dashboard and access all of our free downloads in one place. Plus, you’ll find exclusive materials and premium level materials.

    Level 1 members gain instant access to all of the downloads available on the site, without enter your email each time PLUS exclusive new resources each month.

    Level 2 members get access to all of our downloads, exclusive new resources each month, PLUS additional, premium content each month: therapy kits, screening tools, games, therapy packets, and much more. AND, level 2 members get ad-free content across the entire OT Toolbox website.

    Join the Member’s Club today!

    Free Rainbow Template Printable

      We respect your privacy. Unsubscribe at anytime.
      • Note: the term, “learner” is used throughout this post for consistency, however this information is relevant for students, patients, clients, school aged kids/children of all ages and stages, or whomever could benefit from these resources. The term “they” is used instead of he/she to be inclusive.

      Victoria Wood, OTR/L is a contributor to The OT Toolbox and has been providing Occupational Therapy treatment in pediatrics for more than 25 years. She has practiced in hospital settings (inpatient, outpatient, NICU, PICU), school systems, and outpatient clinics in several states. She has treated hundreds of children with various sensory processing dysfunction in the areas of behavior, gross/fine motor skills, social skills and self-care. Ms. Wood has also been a featured speaker at seminars, webinars, and school staff development training. She is the author of Seeing your Home and Community with Sensory Eyes.

      Occupational Therapy for Down Syndrome

      Occupational therapy interventions for down syndrome

      Occupational therapists (OT practitioners) provide skilled services to help many different people, with or without a diagnosis. In this article, we will talk about Down syndrome, more specifically common interventions and strategies when providing occupational therapy for Down syndrome.

      Occupational therapy interventions for children with Down syndrome.

      Occupational Therapy For Down Syndrome

      Occupational therapy practitioners work with many diagnoses. In pediatrics, the diagnosis of Down Syndrome may be seen in early intervention services, in school-based therapy, or in the outpatient setting.

      An occupational therapist will perform an evaluation and develop an individualized plan of action designed to meet specific needs. Occupational therapy interventions may be related to areas such as:

      • Oral motor concerns impacting feeding
      • Positioning and feeding techniques
      • Physical motor skills including gross and fine motor skills
      • Achievement of motor milestones including rolling, sitting, position changes, and use of the arms and legs, etc.
      • Facilitation of self-care skills
      • Refinement of fine motor skills
      • Sensory needs
      • Social or emotional needs
      • Self-regulation needs

      This list may not include every area addressed in occupational therapy. Let’s go into more detail about OT and the individual with Down syndrome.

      First, let’s cover the diagnosis of Down syndrome.

      WHAT IS DOWN SYNDROME?

      Down syndrome is a genetic disorder caused by additional copy of chromosome 21. In regard to functional performance, the typical characteristics of Down syndrome include:

      • Low muscle tone
      • Relatively short limbs, including hands, fingers, and thumbs
      • Mild to moderate intellectual disability
      • Developmental delays

      People with Down syndrome are often active members in their communities, able to participate well in school and social events, and can raise a family. Each case is unique, and health professionals such as occupational therapists are available to help improve functional independence along the way. 

      what is Occupational therapy for Down syndrome?

      In order to fully understand the involvement between the occupational therapist and person with Down syndrome, it is critical to learn the role of the OT.

      During the initial evaluation of a person with Down syndrome, the occupational therapist will assess many different skills to determine the specific needs. They will try to answer broad questions like, “How independent is the person with activities like eating, dressing, and playing?”, and specific questions, such as, “What types of grasps do they use?”.

      Developmentally appropriate assessments will be used to measure fine and gross motor skills, cognition, and sensory regulation. 

      down syndrome: Fine Motor Skills

      The whole body is responsible for strong fine motor skills; starting with core then shoulder strength, moving down toward strength and mobility in the hands and fingers.

      The general decrease in muscle tone and joint stability that is common in those diagnosed with Down syndrome, makes the development of fine motor skills more challenging. 

      Physical features impacting fine motor skills

      The hands of a child with Down syndrome have a typical pattern of development, including shorter hands, fingers, and thumb than the average child, that can further decrease dexterity.

      The palms may also lack the curvature that is required for skills like thumb opposition. We call these the arches of the hand, and they are useful during any skill that requires the hand to move around an object, big such as a water glass, or small like buttons. 

      Because of these physical features, coupled with general muscle weakness and loose joints, occupational therapy for Down syndrome will likely offer activities to increase fine motor skills.

      Gympanzees has a great article on developing fine motor skills for children with Down Syndrome.

      Dexterity and Down Syndrome

      • Use small items, like beads/pompoms/Cheerios/buttons, to pinch, place, string, glue down, or count.
      • You can increase the challenge by encouraging holding onto multiple items in one hand, but only placing one at a time – much like we hold a set of coins and use a singular hand to find and place the correct coin. This is referred to as in-hand manipulation

      Joint Protection and down syndrome

      • Braces or splints may be used to help support the joints in a functional position, while the child continues to build strength. 

      Arm Strength and down syndrome

      • Weight bearing through the arms is a great way to build shoulder strength for fine motor development – try animal walks, wheelbarrow walking, or crawling through tunnels!

      Hand Strength and down syndrome

      • Get those fingers moving by shaping playdough or putty; roll, squeeze, poke, smash, and pinch it! Increase the challenge as the skills develop by selecting firmer putty or by adding additional steps to the activity. 
      • The OT Toolbox has great resources for overall fine motor hand development

      Gross Motor Skills for down syndrome diagnosis

      Just like fine motor skills, the base of gross motor skills is the core. A person needs that proximal stability first, before they can build movement skills.

      Increasing the core strength leads to improved balance, coordination and dynamic movement control. These areas are addressed as they impact functional participation in feeding, self-care, learning in the school setting, and participation in functional tasks.

      Individuals with Down syndrome tend to have a more challenging time with strength and motor planning to move from one posture to the next due to low tone.

      For example, moving from a seated position on the floor to standing. The sequence should be: seated on the bottom, to a 4-point crawl position, to kneeling, to a single leg kneels, then standing. This sequence and combination of movements may pose an extra challenge due to limited mobility, strength, and muscle tone.

      Below are some ways to improve occupational therapy for Down syndrome can improve gross motor skills. 

      Core Strength and down syndrome

      • There are so many play-based activities that strengthen the core. Almost any activity can be done in prone (on the tummy), which can improve core strength and offer some weight-bearing in the arms at the same time
      • When you think core strength, think balance. Use balance beams, one-foot stand, wobbly surfaces, etc. Just make sure to prioritize safety and comfort. 

      Positional Changes and down syndrome

      • The more change, the better. Set up a game or obstacle course that encourages movement up/down, side-to-side, rolling, or scooting.
      • The most important goal is to get that body moving!

      down syndrome and Sensory Regulation 

      Are children with Down syndrome more or less likely to experience sensory differences? Yes. This is the reason occupational therapy for Down syndrome and sensory regulation will be an important part of the treatment process.

      There is one clear reason why people with a diagnosis of Down syndrome may experience more sensory processing difficulties – low muscle tone again. Individuals with low muscle tone may have a harder time processing proprioceptive input. This is the sense that our muscles and joints pick up to tell the body where they are in space. 

      Because of this decreased proprioceptive input, people with Down syndrome frequently need more input in order to grade the force of their movements.

      For example, they may experience difficulties in choosing how hard or how soft their movements should be. They may knock something down by pushing too hard, or drop something by mistake by not holding tight enough. 

      This can also skew how an individual with Down syndrome eats food. They may not feel the food in their mouth very well until it is full, and start over-eating or pocketing food in their cheeks. People diagnosed with Down syndrome often grind their teeth as a way to get more input and stability through the jaw.

      • Increased proprioceptive input
        • Weighted items: vests, lap pads, blankets 
        • Exercise, weight bearing, jumping 

      In addition to low tone, another common comorbidity to Down syndrome is hearing loss. This is important to address as a sensory need because an individual may react strongly or under react to auditory stimuli. Sensory tools should be trialed for a few weeks to see what will work best to regulate the child’s sensory system. These tools should be used intermittently throughout the day, and never forced on a child. In order to be effective, they should be voluntary and not be used as a reward or punishment. 

      • Auditory Processing Strategies 
        • Noise reducing headphones
        • Auditory feedback tube (like this)
        • Assistive technology for hearing loss

      A Sensory Diet is a great treatment option for sensory processing and Down syndrome. The OT Toolbox also has a great resource called the Sensory Lifestyle Handbook to address and understand sensory processing needs.

      For more play-based ideas for early intervention for working with learners with Down syndrome, here is a fun article on outdoor sensory activities.

      If you are a fan of the OT Toolbox, you can access all of these resources much easier by becoming a member. As a member, you will:

      • Be able to download each of them with a single click (No more re-entering your email address and searching through folders!)
      • Receive early access to new printables and activities before they’re added to the website (You’ll find these in the What’s New section.)
      • Receive a 20% discount on all purchases made in the The OT Toolbox shop!

      For all of these skills, the most important part of occupationl therapy for Down Syndrome is to meet the child where they are. An Occupational therapist will make an assessment of their learner’s current level of functioning, providing a “just right” challenge, that is motivating for that particular learner. Because of potential delays in cognitive ability, and the physical difficulties associated with Down syndrome, these new skills may not develop quickly, and may not progress at all. Occupational therapy can help with adaptations to approach these tasks in a different way, or modifications to the environment to increase independence. 

      Sydney Thorson, OTR/L, is a new occupational therapist working in school-based therapy. Her
      background is in Human Development and Family Studies, and she is passionate about
      providing individualized and meaningful treatment for each child and their family. Sydney is also
      a children’s author and illustrator and is always working on new and exciting projects.