When you make crafts with kids, there is glue involved. We use glue sticks, glue in bottles, glitter glue, and a dried cereal/milk combination that turned glue on the surface of the dining room table. Just kidding about that part. Sometimes.
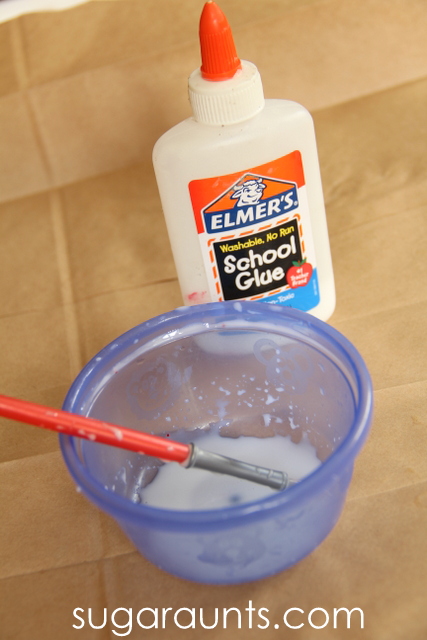
We wanted to share a decoupage glue that we use all the time in crafts and activities with the kids (And without the kids. A mamas gotta craft.) This DIY decoupage glue is easy and quick to mix up, and simple to use in all kinds of crafts with the kids. You’ll want to make up a bottle of this decoupage and keep on hand for all sorts of craftiness.
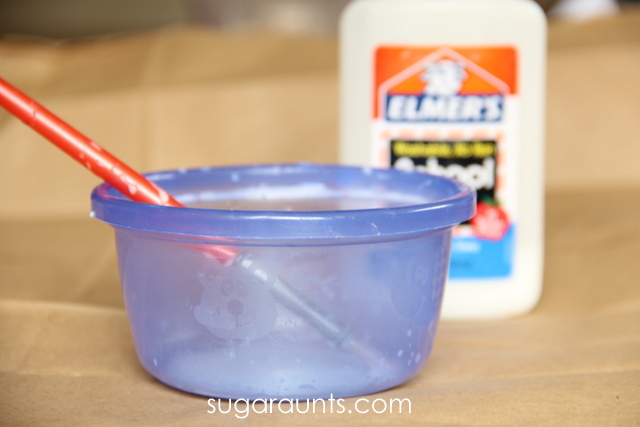
Start with regular glue. We used a bottle that was about half full. You’ll want to have enough room in the bottle or find a different container to store your decoupage. To make decoupage, add water to the glue at a ratio of 2:1. I just eyeballed the amount of glue in the bottle and added twice as much water.
Next, put the cap back on the bottle and shake it up. Use a paint brush to swipe the walls of the bottle clean and really get the glue mixed in with the water. Your decoupage is done!
How easy is that!?
When you want to use the decoupage on projects, simply pour a little into a bowl and paint the glue onto your project with a paintbrush. This is a great way to craft with the kids. They love painting glue onto things. Maybe they just like painting. Or glue. Or making messes. Whatever combination of those things it is about crafts…the kids love.
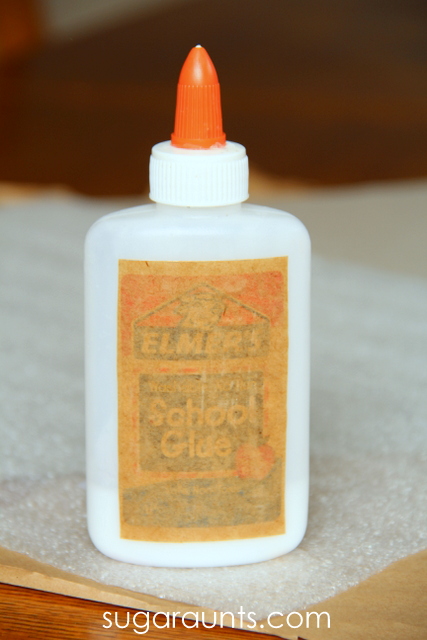
I used our decoupage to paint on the label on our decoupage. Simply paint a thin layer of decoupage onto the bottle, place the label on, and paint a thin layer of decoupage over the top and around the edges of the paper.
We’ll soon be sharing lots of crafts and activities where we used our decoupage. Stay tuned!
Looking for some Halloween learning, play, crafts, and activities? This ghost craft is a fun one to do with the kids and makes a spooky yet kid-friendly Halloween decoration! Halloween is such a fun time of year for crafts and activities with the kids. Spiders and ghosts can be cute for the kids and not scary at all.
This hanging ghost craft uses something we love to craft with: recycled materials. Make a few of these ghosts and keep them hanging around your house. You’ll love the cuteness of these guys!
Hanging ghost craft for Halloween
This post contains affiliate links.
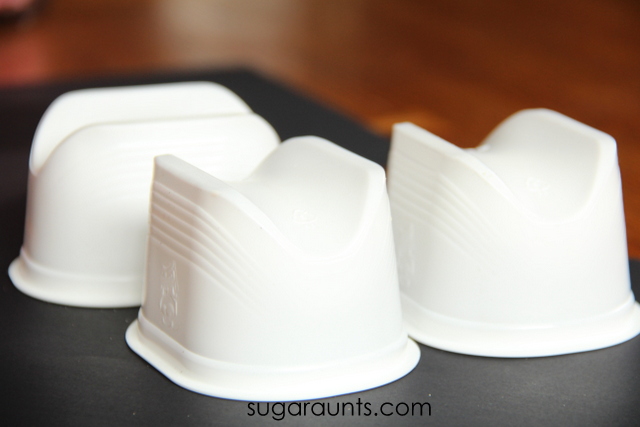
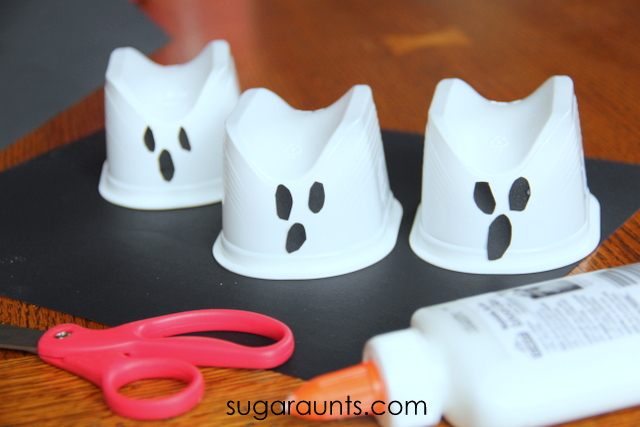
We started with some clean recycled containers. We used potato chip snack containers but you could use any smallish, white cups.
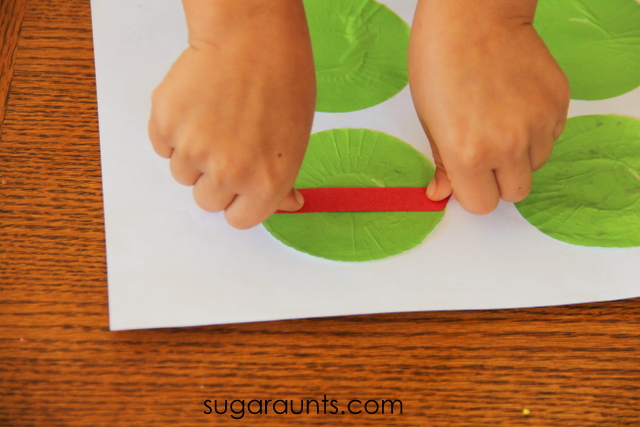
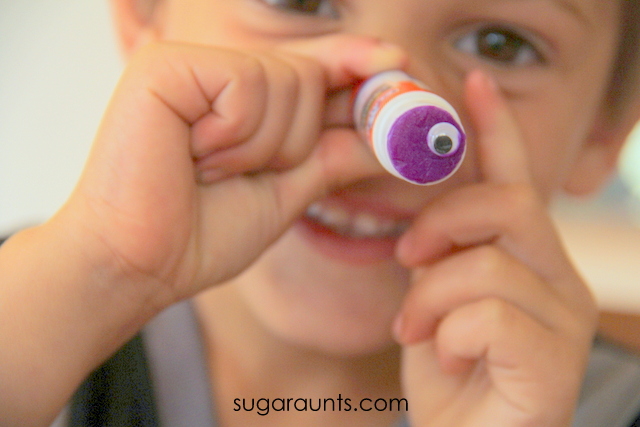
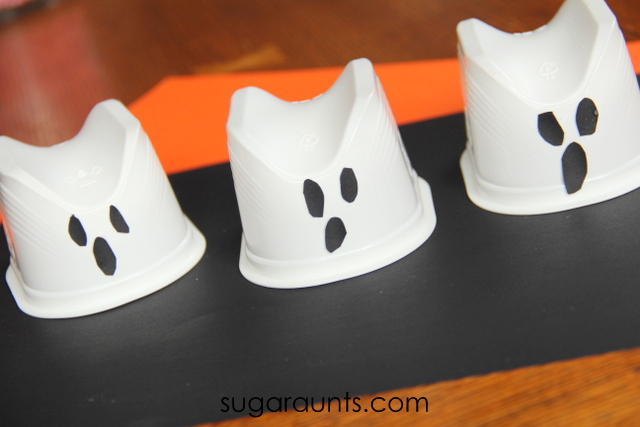
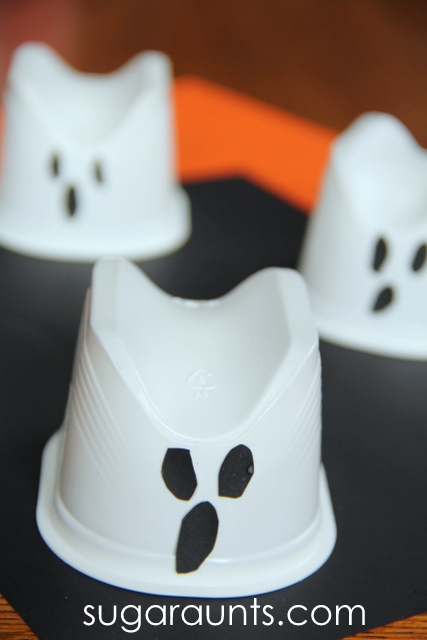
This craft is so easy to throw together. Cut oval shapes from black construction paper. Use a few dabs of glue to secure them in place for eyes and a mouth. These cute ghosts are done!
We used fishing line to hang the ghosts to the ceiling in our dining room. Just tape one end of the fishing line to the top of the ghost and the other to the ceiling. The kids loved seeing the ghosts hanging from our dining room each meal!
How cute are these friendly ghosts??
You’ll want to check out the other Halloween crafts and activities, perfect for kid-friendly Halloween party activities!
Many years ago (2014 was the original date of this pumpkin thumbprint craft!), we made a Halloween painting with thumbprint pumpkins. We actually included fingers too, and made the pumpkin patch painting with fingerprint pumpkins as well. This Halloween sensory activity was a fine motor powerhouse and one of our favorite Halloween occupational therapy activities. Let’s take a walk in the fingerprint pumpkin patch!
This pumpkin fingerprint craft can be modified for different goal areas.
Thumbprint Pumpkins
If you need a quick and easy Pumpkin activity or craft for the kids this Fall, then this thumbprint craft is a sure winner. We used a fine motor item from a previous post that you would never guess. Get ready for a blast from the past with this Halloween craft for the kids!
Our thumbprint pumpkins are a bit different than many of the thumbprint or fingerprint painting activities you might find this time of year.
While using your finger or thumb to press paint onto paper to make mini pumpkins is a great sensory activity, we wanted to offer pumpkin fingerprint options for the individual that may be tactile sensitive to fingerpaints. Read up on our blog post on tactile defensiveness for more information.
However, you could expand this activity to meet the needs of all individuals.
Let’s explain…
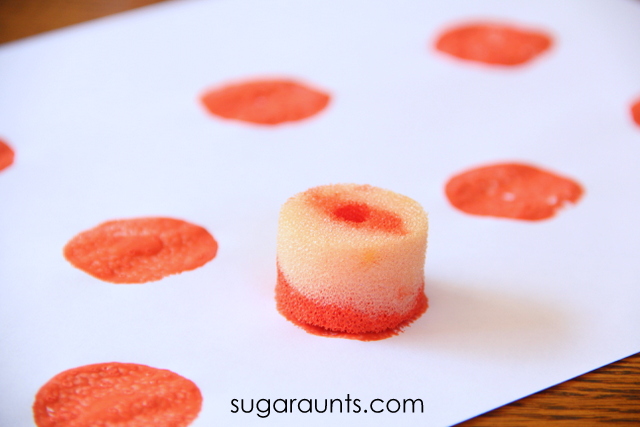
In the activity described below, we used a foam roller to press into paint and then onto the paper. This is a bit different than typical pumpkin fingerprint art. When you press the roller into paint and then onto the paper, you don’t get that messy sensory experience of finger print art.
Another benefit is cutting the foam material which is a scissor skills task, and working on force modulation by pressing down on the foam circle.
Pressing harder makes a bigger pumpkin stamp and pressing with less force makes a smaller pumpkin stamp.
However, there are SO many benefits to the way we used this activity…and you can definitely add the benefits of fingerprint art like we did to add details like the leaves of the pumpkins.
Why do a pumpkin fingerprint craft
Whether you use the modified version of this pumpkin thumbprint/pumpkin fingerprint art, or you press the fingers right into the paint and press them on the paper, there are so many benefits to using fingerprint art in building sensory motor skills.
Finger isolation– Pressing the fingers or thumb to make pumpkin fingerprint art supports finger isolation skills. You can target thumb isolation and mobility of the thumb joint or you can work toward individual finger isolation.
We cover this in more detail in our blog post on fingerprint art.
Separation of the sides of the hand– Separating the precision side of the hand from the power side of the hand supports fine motor work in using tools like scissors or writing with a pencil. With fingerprint art, pressing the fingers to the paper in isolation supports this skill by using the ulnar side of the hand in supporting the radial side of the hand. Fingerprint art where the pinkie and ring fingers are tucked into the palm while the pointer finger or thumb is used to press the paper, is when we see this in action.
Pumpkin Thumprint craft
This post contains affiliate links.
To make our pumpkin thumbprint craft, we needed just a few materials:
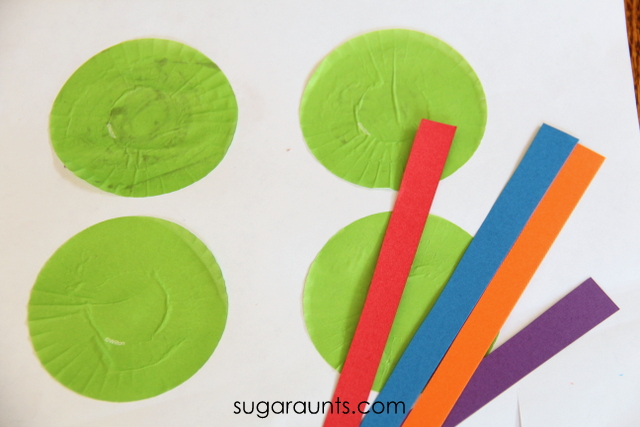
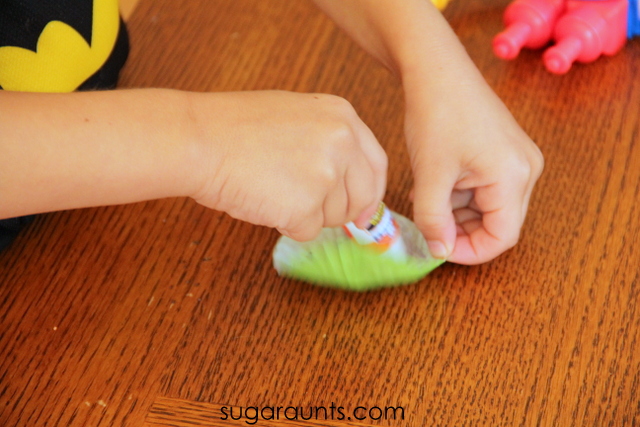
Did you use foam rollers back in the day? We practiced scissor skills with these and used them to make our pumpkin stamps this Fall. From curls to pumpkin prints…these rollers have come a long way!
I pulled out our orange paint and let Baby Girl stamp away.
She pressed the foam pieces down on the paper pretty hard. In fact, we weren’t even planning to make pumpkins, rather little circles. Buuuut, pressing pretty hard on these circles make the hole in the center of the roller fill in with paint. Perfect little pumpkins!
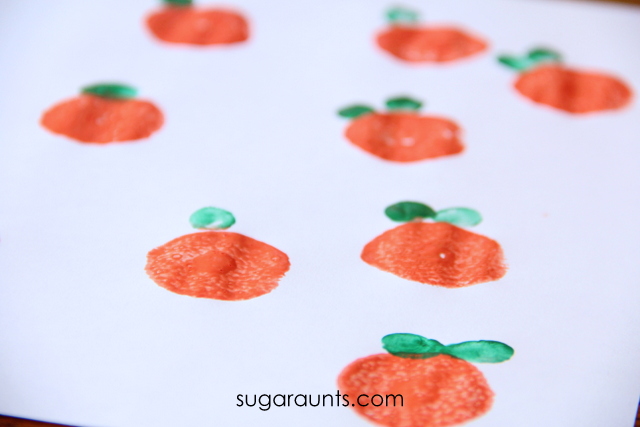
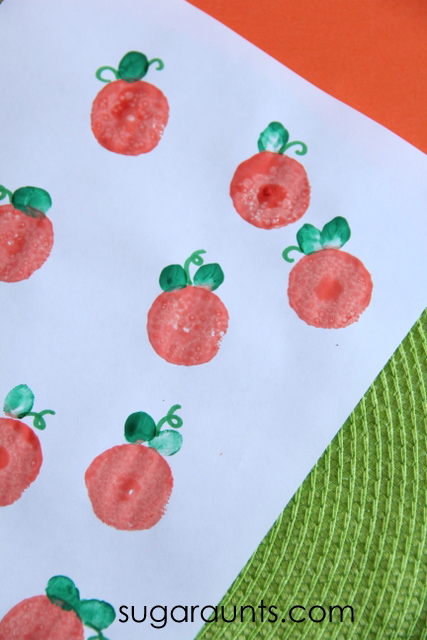
To make the leaves, we used green paint to stamp thumbprints. Baby Girl loved doing this part!
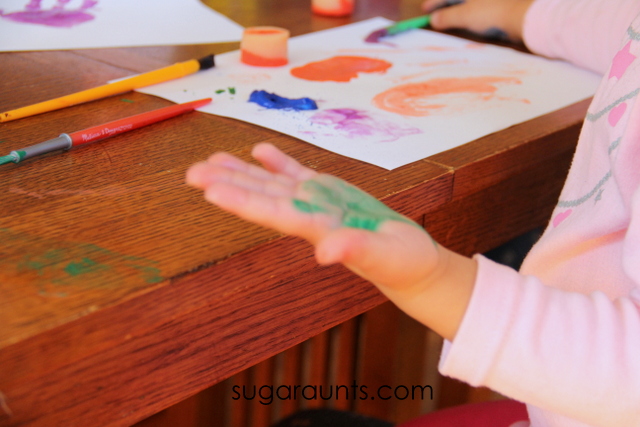
Every painting project evolves into hand painting. Of course.
Looking pretty cute!
I added a few curly ques to each of the pumpkins for vines.
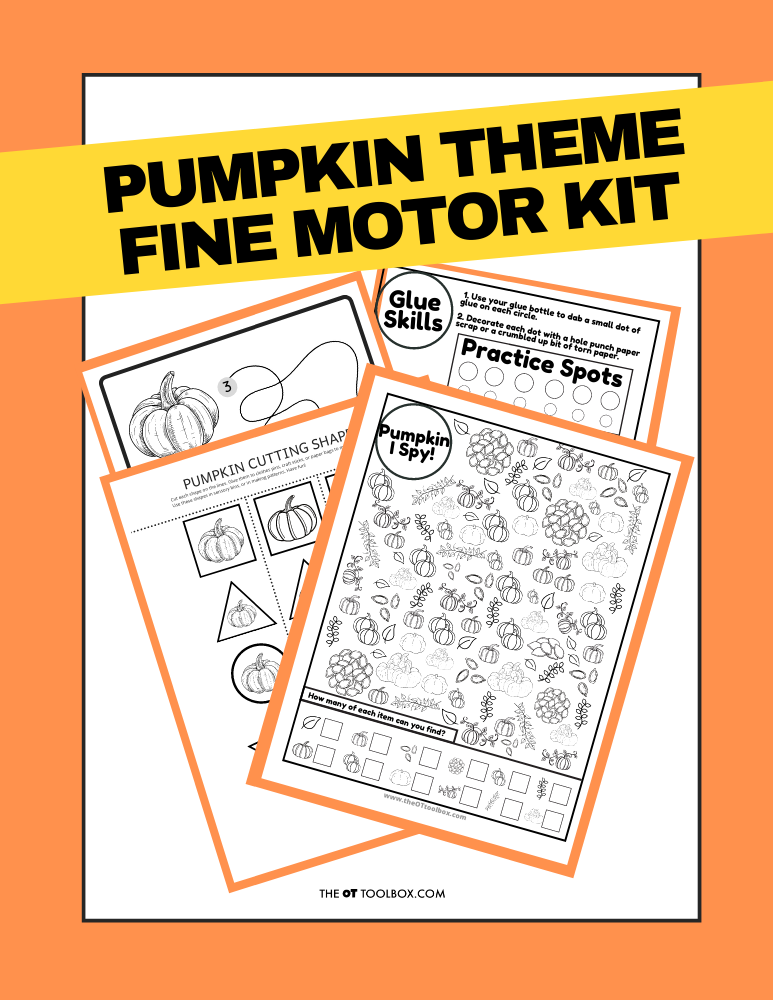
Grab the Pumpkin Fine Motor Kit for more coloring, cutting, and eye-hand coordination activities with a Pumpkin theme! It includes:
7 digital products that can be used any time of year- has a “pumpkins” theme
5 pumpkin scissor skills cutting strips
Pumpkin scissor skills shapes- use in sensory bins, math, sorting, pattern activities
2 pumpkin visual perception mazes with writing activity
Pumpkin “I Spy” sheet – color in the outline shapes to build pencil control and fine motor strength
Pumpkin Lacing cards – print, color, and hole punch to build bilateral coordination skills
2 Pumpkin theme handwriting pages – single and double rule bold lined paper for handwriting practice
Work on underlying fine motor and visual motor integration skills so you can help students excel in handwriting, learning, and motor skill development.
Colleen Beck, OTR/L has been an occupational therapist since 2000, working in school-based, hand therapy, outpatient peds, EI, and SNF. Colleen created The OT Toolbox to inspire therapists, teachers, and parents with easy and fun tools to help children thrive. Read her story about going from an OT making $3/hour (after paying for kids’ childcare) to a full-time OT resource creator for millions of readers. Want to collaborate? Send an email to contact@theottoolbox.com.
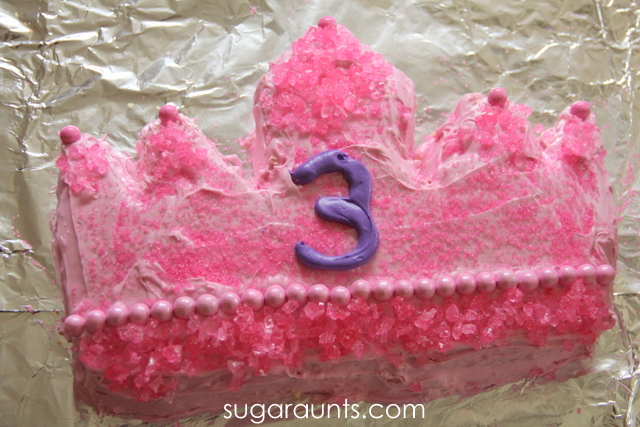
Oh, how we love to plan birthday parties with fun themes for the cousins. There is a special little lady turning three soon, who is all about Princesses, sparkles, and glitter. This Princess Party was perfect for Baby Girl. From tiaras to pink rock candy, this party is perfect for princesses of all ages!
This post is sponsored by Betty Crocker. All opinions are our own.
Pretty Pink Princess Party ideas:
We were thrilled when we were asked to try out Betty Crocker’s online birthday party resource. There are so many themes to choose from with all of the details set for you. From cake ingredients to decorations, invitations and thank you notes, everything is planned out.
Once we picked our Princess theme, it was time to start on the details. This is the part I love. Planning all of the cute little extras makes this mama happy. I love to plan out decorations, food, and favors that match up with our party theme. The Betty Crocker party planner makes it easy to keep yourself organized and on task.
Guest list, oh yes. That is an important part. Invites going out a week before the party? Yep, that happens 😉
Princess Party Decor:
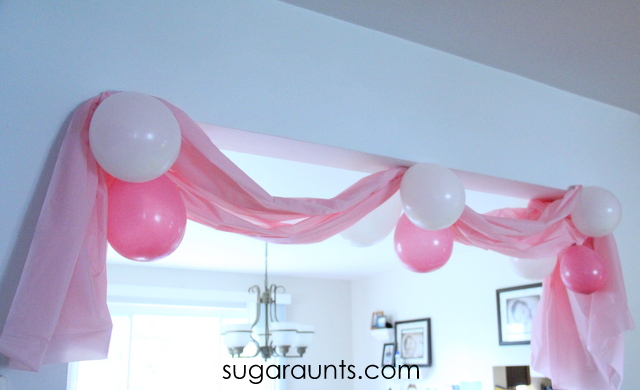
We decorated the house with banners and balloons. We used a dollar store table cloth to make big puffy decorations. Pink + Puffy= Princess. Obviously.
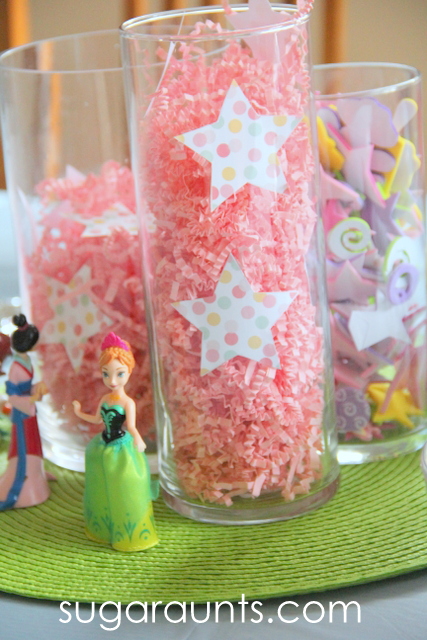
A few simple vases with pink shredded paper and princess party decor details to bring a little bit of enchantment to our centerpieces.
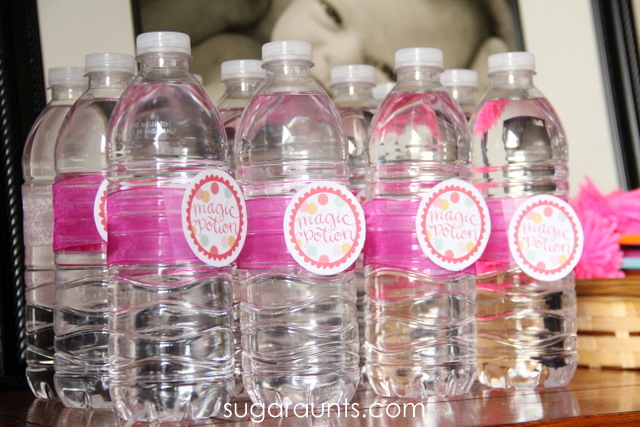
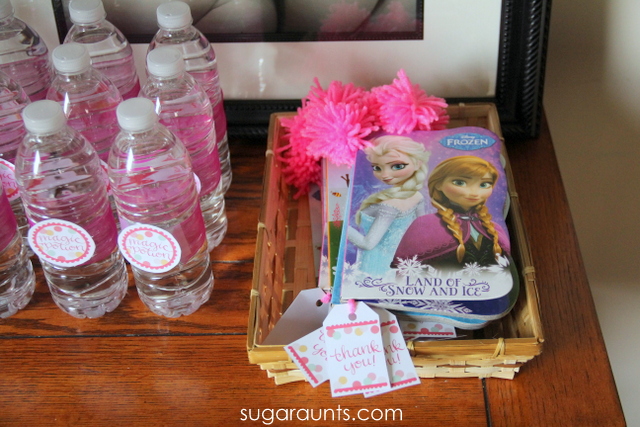
Every princess needs to quench her thirst with magic potion.
Princess Party Cake:
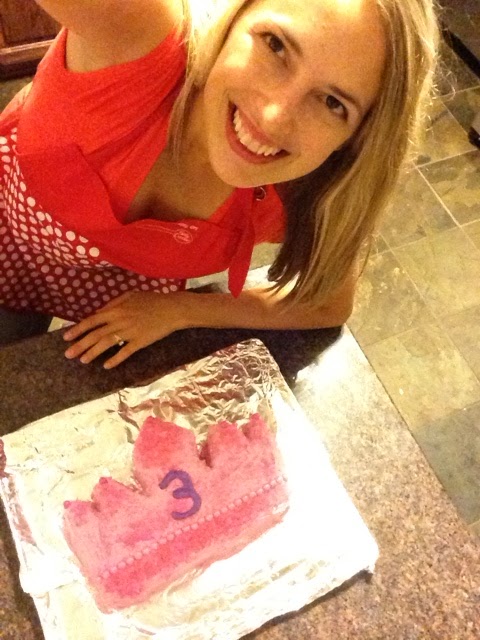
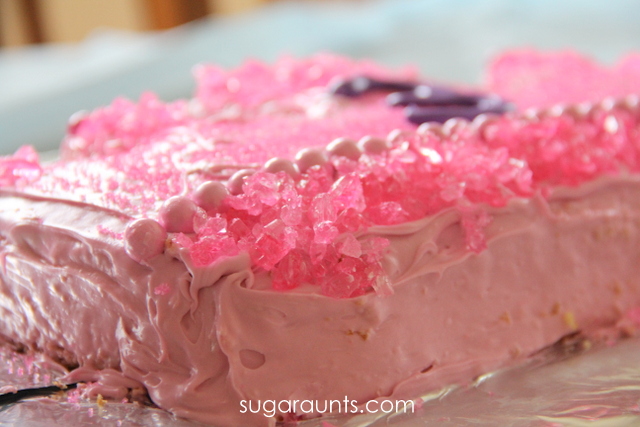
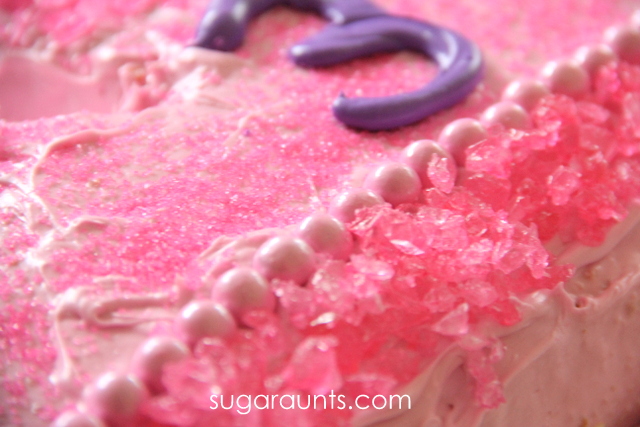
Oh, this cake was so much fun to make! Baby Girl loved all of the sparkle, and shine that we had going on here. I used the directions to make Betty Crocker’s easy crown cake to put this cake together.
Late night cake making antics can be found on our Instagram feed.
Pretty pink princess details.
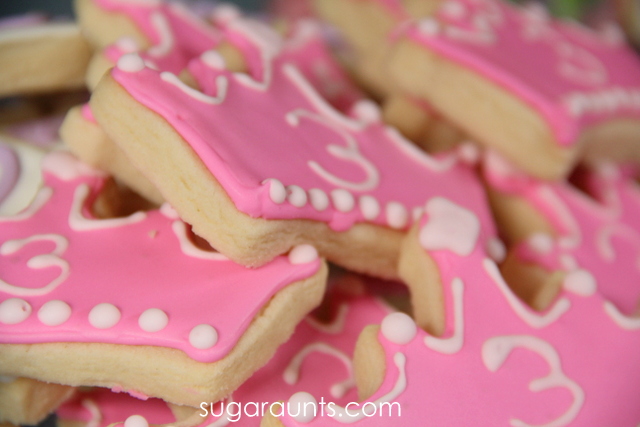
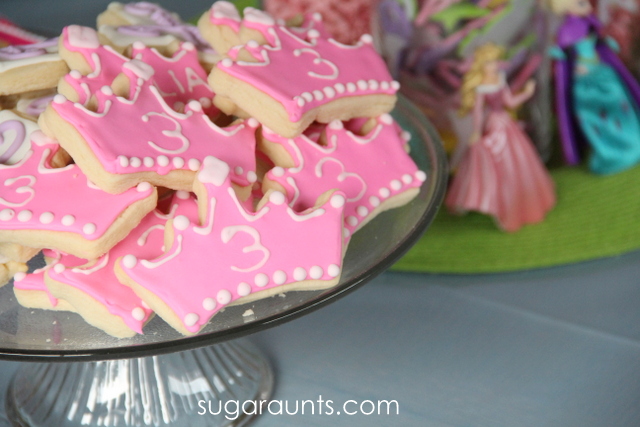
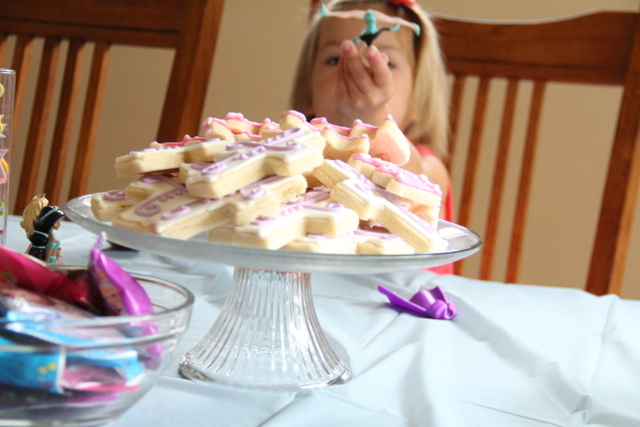
I used neon food colors to make perfectly pink princess sugar cookies.
Princess Party Favors:
When I saw these Princess Party favor tags I knew we would use them to make a great thank you favor. Our little Princess loves books so a bookmark for all of her guests was the perfect way to say “Thanks”.
To make our DIY bookmarks, I used pink yarn to make pom poms. Wind the yarn around your fingers and tie in the center. Snip the loops of the yarn into a puff. Tie to a long strand of yarn. Tie the other end to the favor tag. Easy DIY bookmarks for all guests are done!
A book from the dollar bin made great easy (and cheap) party favors for the guests. The moms and dads loved that this was a non-candy party favor, too.
Princess Party Activity:
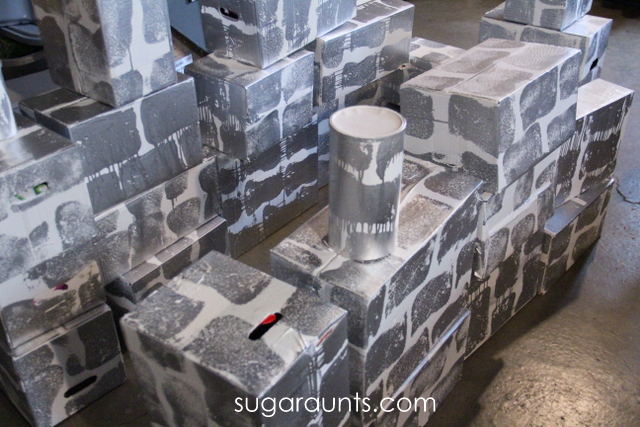
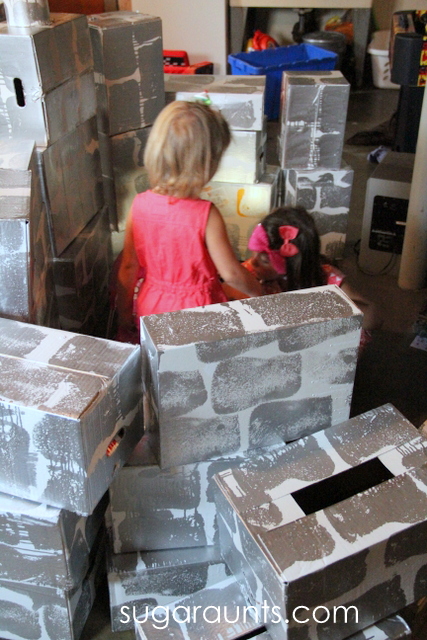
When our crew of family gets together, the cousins go wild playing together. I don’t like to plan a lot of games and activities at our parties, but there are lots of ideas if you need them. I created these open ended castle blocks for the cousins to build and imagine with.
There was lots of castle building and pretend play with these Princesses and Knights.
We had so much fun with our Princess party. Happy Birthday Baby Girl!
Fall is in the air! This time of year, the leaves are turning colors and there’s a crisp and crunchy-ness to everything. If you live in an area that has leaves turning and falling, you know. If you’re more south, you may have to create your own fall inspired leaf art. Either way, these fall tree crafts will entertain! The kids can stamp, print, and paint fall into your home with these four fun fall trees from the Share It Saturday features. Check them out, and be sure to share your creations with us on our Facebook page. We would love to see them!
These nursery rhyme crafts are preschool crafts and activities that support development of motor skills using engaging and fun craft ideas. You’ll want to check out these preschool resources and all of our kids crafts that support child development.
Nursery Rhyme Crafts
When young children create these nursery rhyme crafts, they’ll develop skills in many areas:
Nursery Rhymes are the classic stories to tell to kids. What a wonderful way to bring together generations through stories, rhymes, and classic tales we’ve all heard since childhood. These crafts are a great addition to these nursery rhyme actions that build motor skills.
There is something about the sing song rhythm of nursery rhymes that pull in a child, lull them to a calm before sleep, and bring a smile to their faces.
We joined up with a team of wonderful children’s activity bloggers to bring you nursery rhyme crafts and activities. These are the projects you will want to do with your toddlers and preschoolers after reading classic nursery rhymes. Each day this week, a new blogger will bring you a craft or activity that goes along with a nursery rhyme. Each day, us Aunts will update this page with the new crafts and activities. We’re excited to see all of the fun and can’t wait to share it with you!
Nursery Rhyme Crafts and Activities for Kids
We’ve got 10 days of 10 different nursery rhyme projects for you. This is going to be fun!
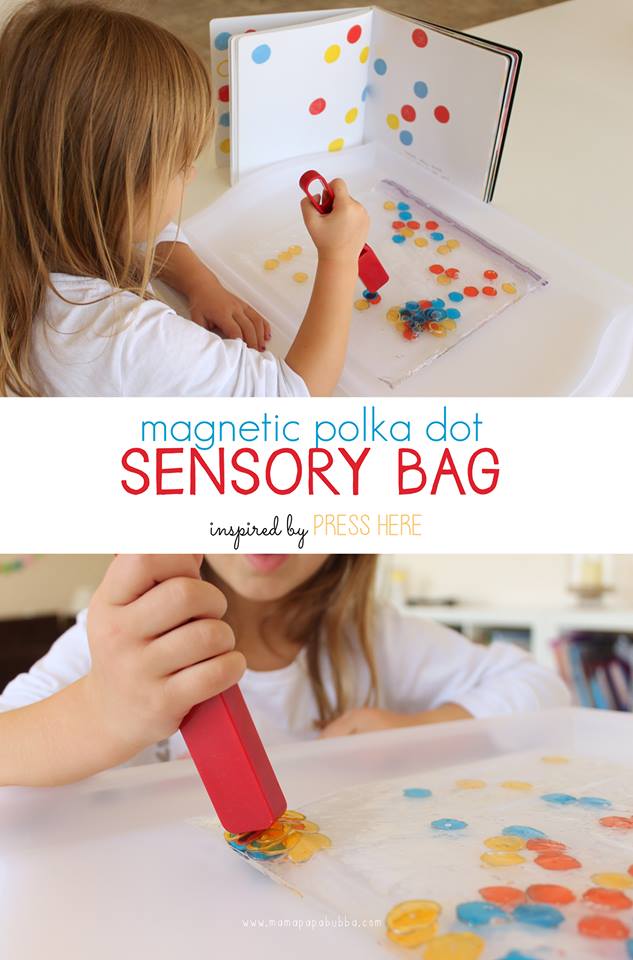
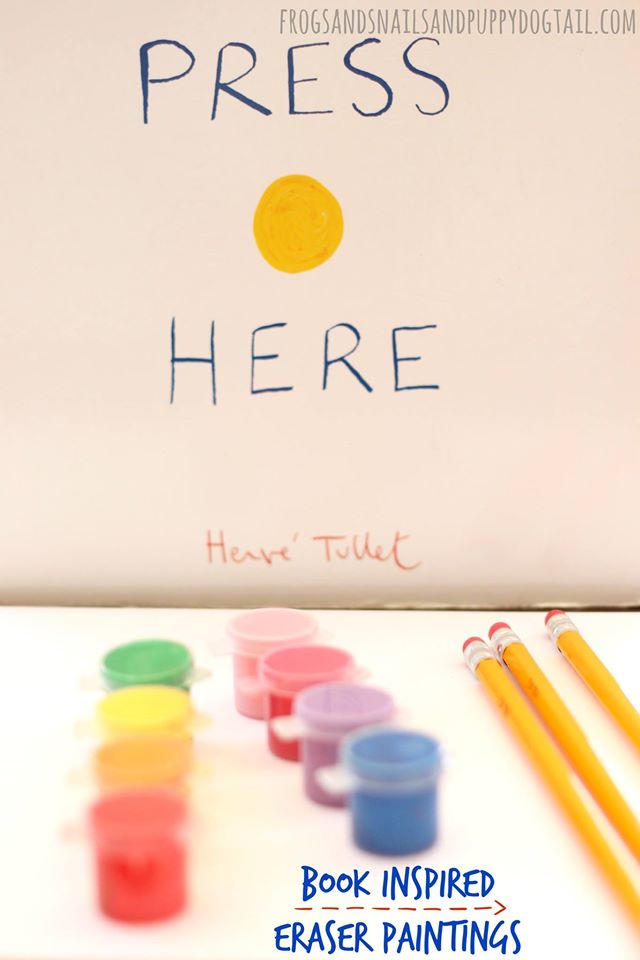
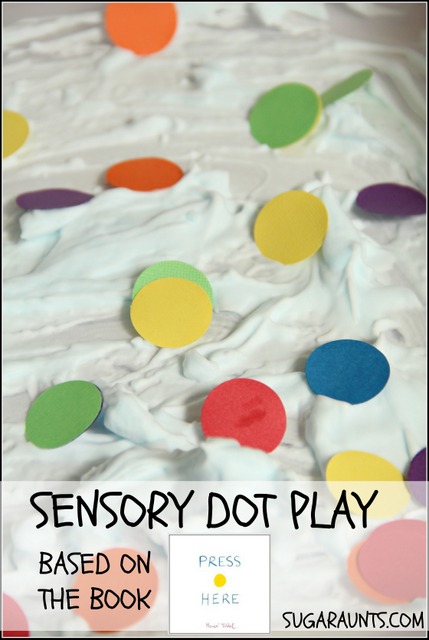
If you love sensory activities to pair with children’s books, you will LOVE this Press Here book activity! The book, “Press Here” is a memorable one that kids adore, but when you add a fun sensory play activity that goes with the book’s themes, you’ve got a winner. It has been so much fun coming up with play and learning ideas for Harold, Elmer, Pete, and more. This week, we’re reading and playing with the book, “Press Here” by Herve Tullet.
Press Here Book Activity
This post contains affiliate links.
Press Here is a new book to us. And what a fun book it is! The bright and bold pictures, the movement and direction following, and the fun instructions made this book a huge hit in our house.
Little Guy (age 5) is STILL talking about this book. He loved following the directions to shake, pull, push, and move the dots and even the whole book. We decided to put the movement into our play activity with a sensory based interpretation of this fun book.
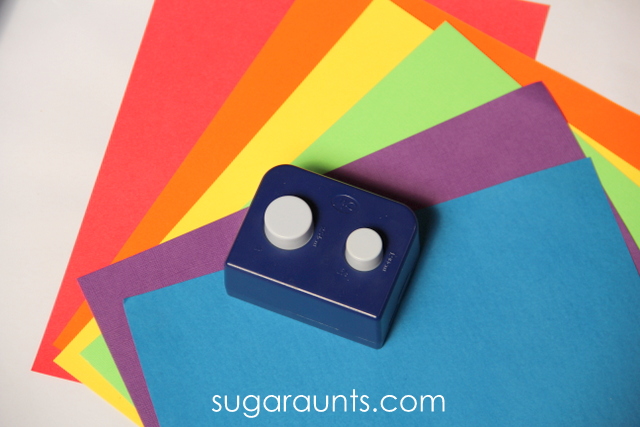
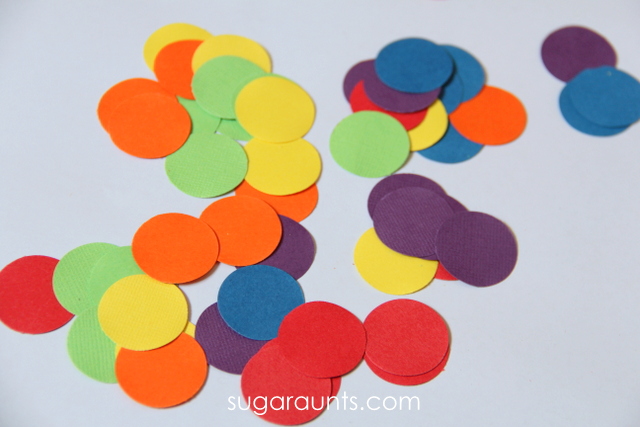
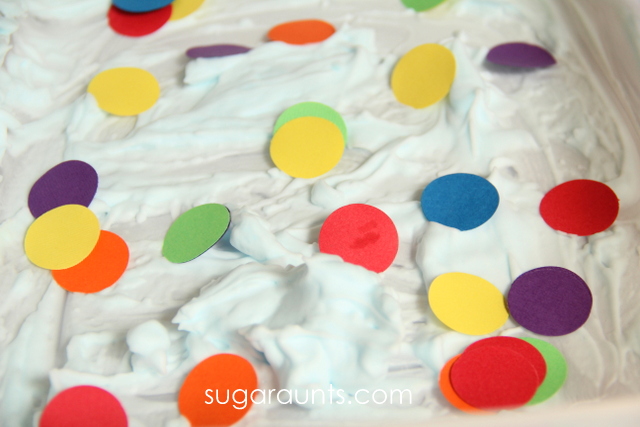
I started with rainbow cardstock and a circle hole punch. I punched a bunch of holes from all of the colors. Little Guy (age 5) LOVED helping me with the hold punching. Fun stuff!
How pretty are these colorful dots??
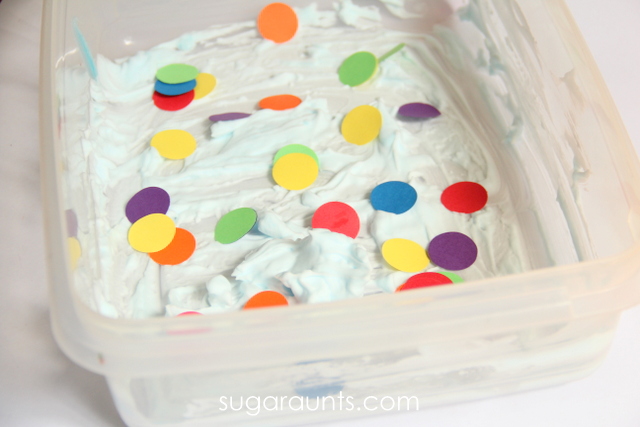
Add shaving cream to a container, and sprinkle in the colored dots. Sensory play is ready for little fingers!
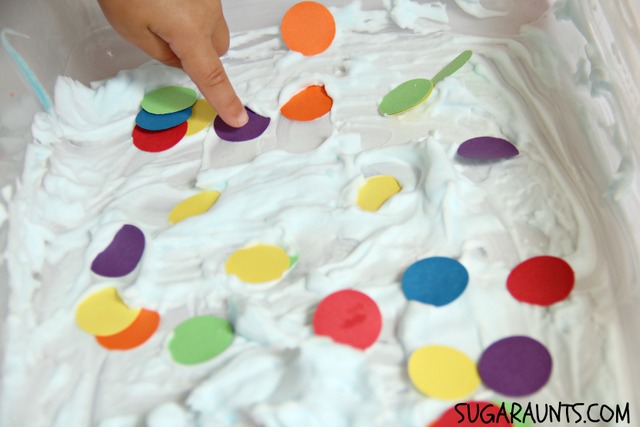
We pushed, pulled, and poked the dots just like in the book. Be sure to talk about the colors while playing. This is a great sensory bin to work on color identification. Sensory play and learning go hand in hand, and this is a great way to learn and play.
Press Here Activities
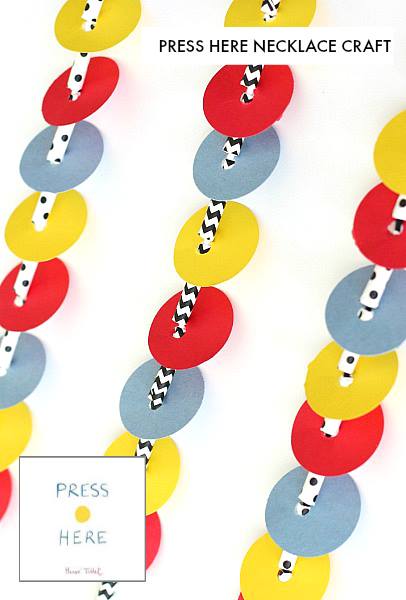
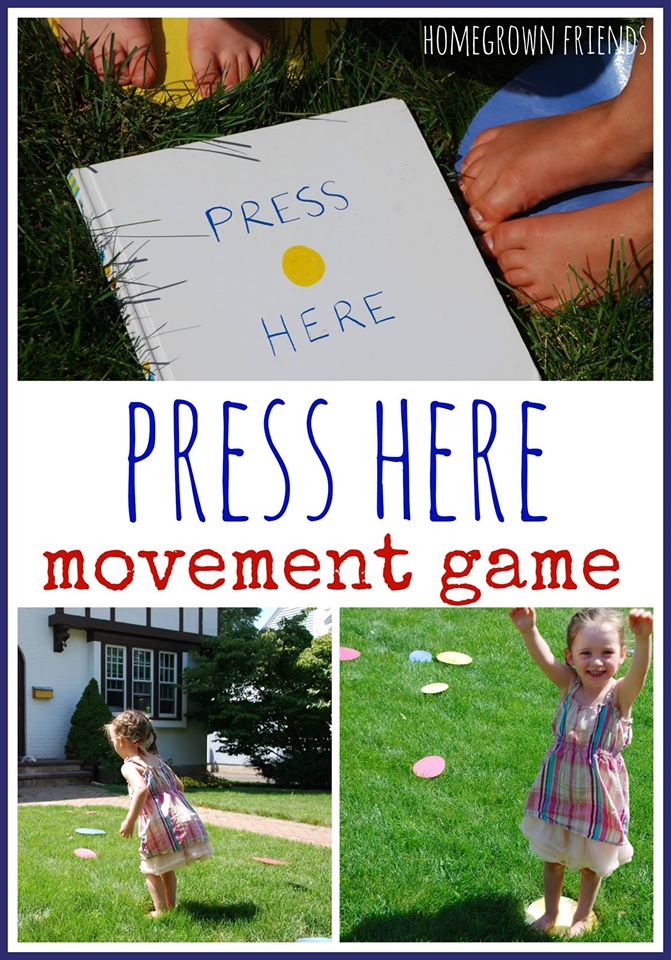
For more Press here activities, check out the ideas listed below. Each Press Here book activity uses the concepts in the book, the fun colors of the dots, and lots of pressing!
Check out the other Preschool Book Club bloggers for more Press Here ideas. And be sure to watch for our next book club activity. You won’t want to miss it!
Colleen Beck, OTR/L has been an occupational therapist since 2000, working in school-based, hand therapy, outpatient peds, EI, and SNF. Colleen created The OT Toolbox to inspire therapists, teachers, and parents with easy and fun tools to help children thrive. Read her story about going from an OT making $3/hour (after paying for kids’ childcare) to a full-time OT resource creator for millions of readers. Want to collaborate? Send an email to contact@theottoolbox.com.
Little Guy is a HUGE fan of Teenage Mutant Ninja Turtles. We play ninja turtles or ninjas or ninja skills practice daily. So, when we made this TMNT craft, he was beyond excited. We’ve done a ninja turtle craft before and this one was just as much of a hit. It would even be a great addition to a teenage mutant ninja turtle party. Little Guy hung the craft on our dining room wall and checks it out daily.
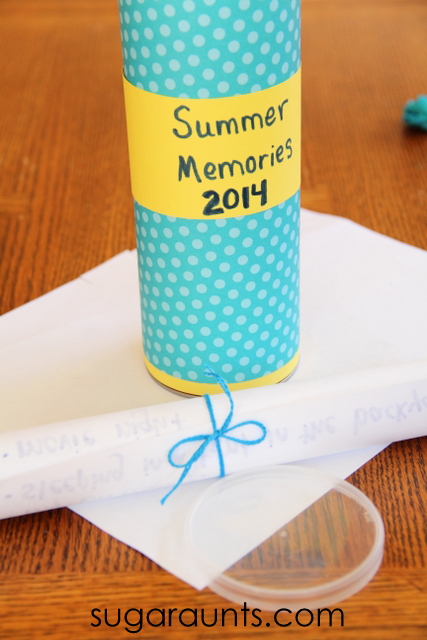
With the start of school and a new month, Summer is quickly winding down. The summer days seem to fly by when filled with vacations, play dates, park fun, and fun! How can you preserve those memories? We created a summer time capsule craft with the kids to hold all of our best summer memories. We’ll hold onto our time capsule until next summer and remember the fun that summer of 2014 held for us!
We love creating crafts and activities using recycled materials. This time capsule uses an item from the recycle bin.
You’ll also be interested in our new Summer Occupational Therapy Activities Packet. It’s a collection of 14 items that guide summer programming at home, at school, and in therapy sessions. The summer activities bundle covers handwriting, visual perceptual skills and visual motor skills, fine motor skills, gross motor skills, regulation, and more.
You’ll find ideas to use in virtual therapy sessions and to send home as home activities that build skills and power development with a fun, summer theme. Kids will love the Summer Spot It! game, the puzzles, handouts, and movement activities. Therapists will love the teletherapy slide deck and the easy, ready-to-go activities to slot into OT sessions. The packet is only $10.00 and can be used over and over again for every student/client!
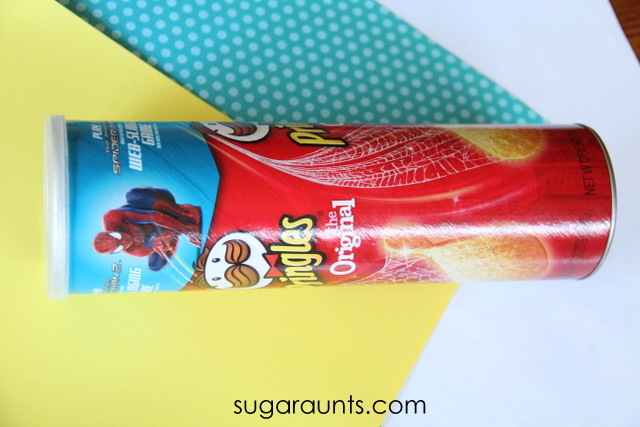
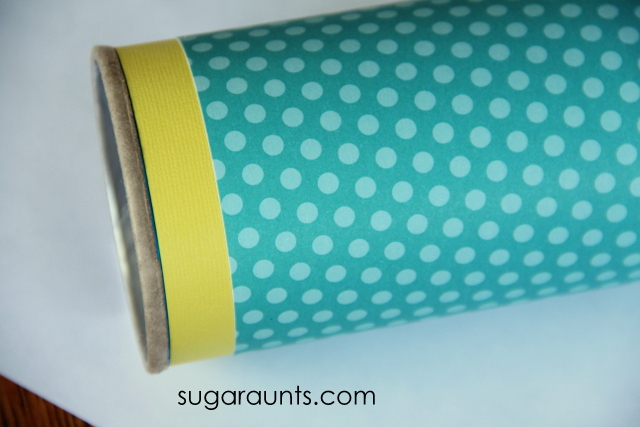
We started by picking out some bright colors of cardstock for our time capsule, and an empty chips tube.
Measure the cardstock to fit the tube.
Tape it into place. We went with an overlapping look to fit the cardboard tube. Label your time capsule with a marker.
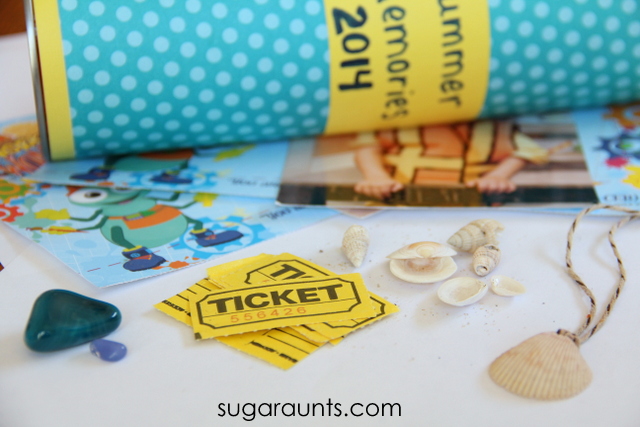
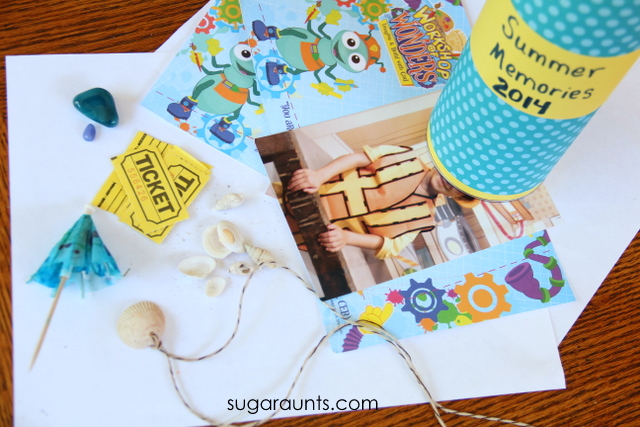
Next, is the fun part. The kids and I went on a hunt around the house to look for evidence of our summer fun. We found shells from our beach vacation, pictures, cards from vacation bible school, tickets from our birthday party movie night, and other things that meant summer fun.
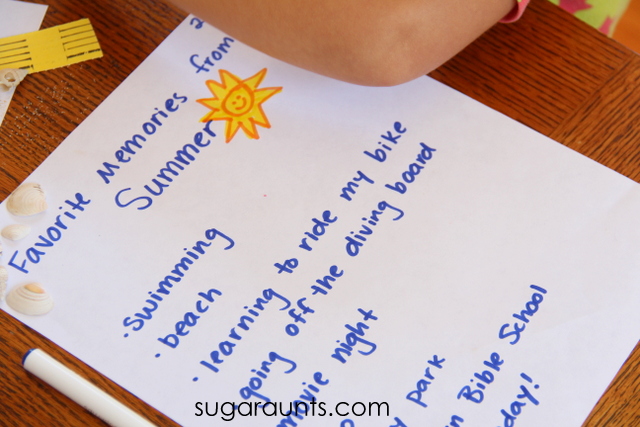
Next, I wrote out a page of summer memories as the kids told me their favorite summer memories.
We rolled up the sheet and put it into the time capsule.
Little Guy (age 5) and Baby Girl (age 2) added all of the summer memories into our time capsule. Little Guy was pretty thrilled to hear that we would open it up again next summer!
We found a home for our time capsule on a shelf… next to a frame that is waiting for pictures. Hopefully by next summer, that frame will have photos!


.jpg)