Recycled Ornament Garland Craft

We are big fans of creating crafts and activities using recycled materials and pulled out a stash of recycled lids to make this ornament garland.  The kids loved making a Christmas garland, and I loved the fine motor skills that happened!  
 
fine motor ornament garland with recycled lids.


This post contains affiliate links.  


Fine Motor Threading Activity 

The fine motor portion of this threading activity makes this garland a great way to practice many skills year-round.  The tripod grasp, bilateral hand coordination, and crossing midline during this activity make it a fun way to create and develop many important skills.
 
Use plastic lids to make a garland craft

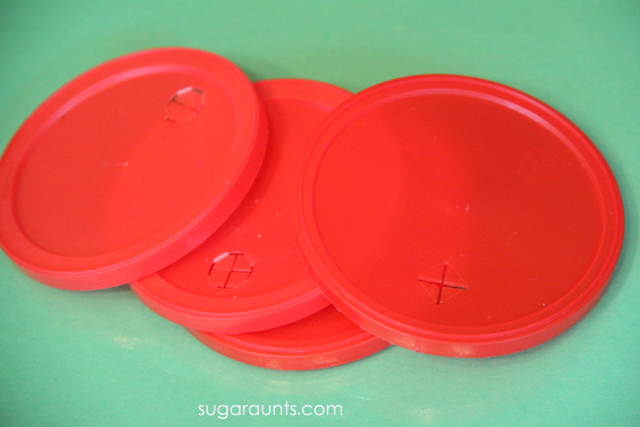
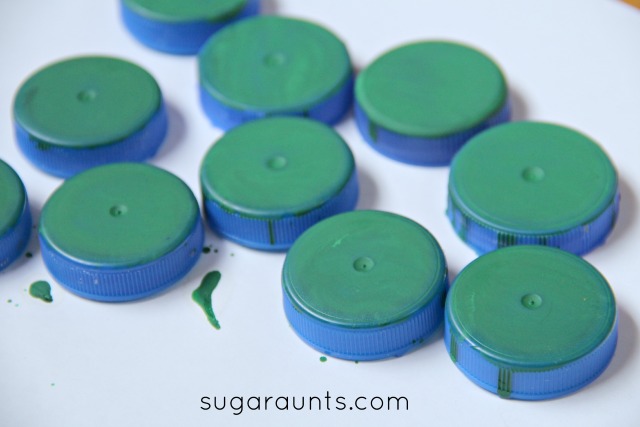
We started with a big stack of recycled lids.  These are the plastic lids that come on children’s drink cups at restaurants. When you have three kids, you end up with a lot of drink lids!

Use plastic lids and washi tape to make a fine motor garland


Fine Motor Skills with a Roll of Tape


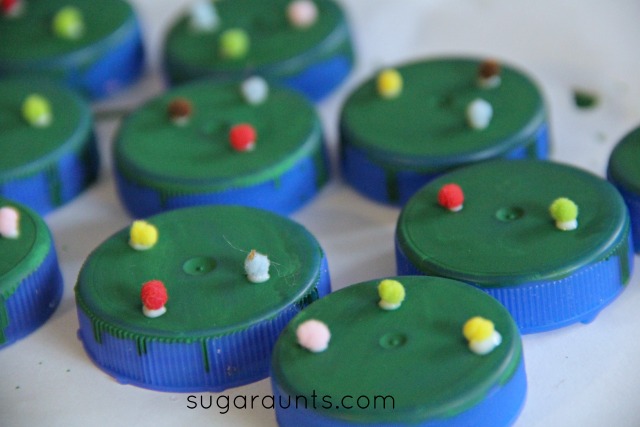
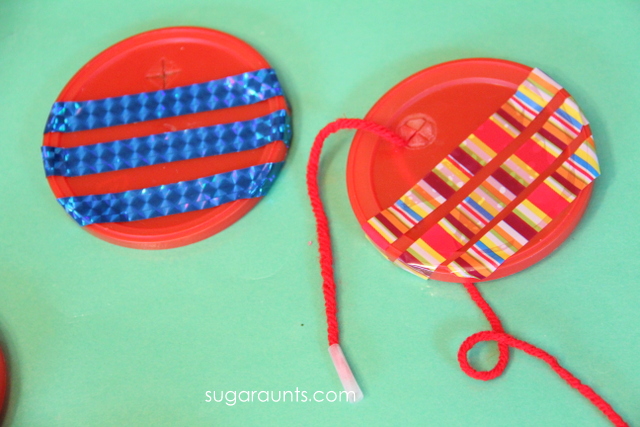
We used decorative tape that has been in our crafting bins for ages.  You can use (Amazon affiliate link) washi tape to decorate those lids.  The fine motor benefits of a child and a roll of tape are immense; There are a TON of fine motor dexterity skills that can occur by allowing a child to use tape.   A neat pincer grasp is required to pinch and grasp the sticky tape, while using the other, non-dominant hand to grasp the dispenser just right.  Pulling the tape and tearing it at the metal teeth of the tape dispenser requires controlled motor movements and eye-hand coordination.  Children will inevitably pull and pull and pull the tape when they first begin using a roll of tape, unassisted.  That’s ok!  They learn as they play and a roll of tape is a fun and creative way to practice fine motor skill.


Note:  If you give a child a roll of tape, you will end up with tape on the walls.  ((That should be the title of a children’s book! Ha!)) The urge to display artwork is just too great!


Use plastic lids to make a fine motor garland craft

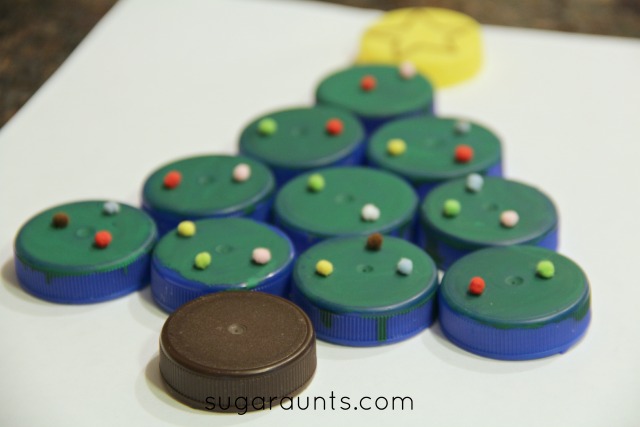
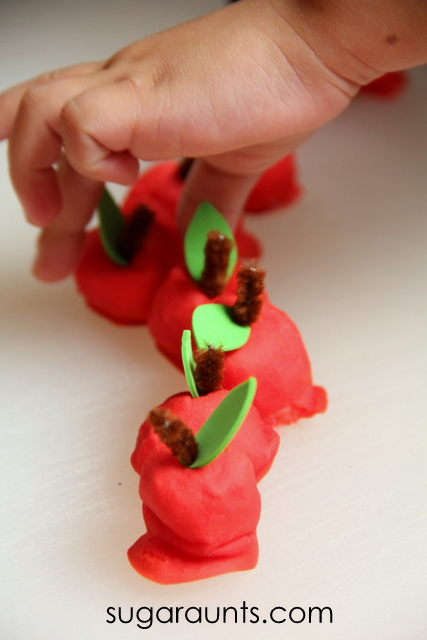
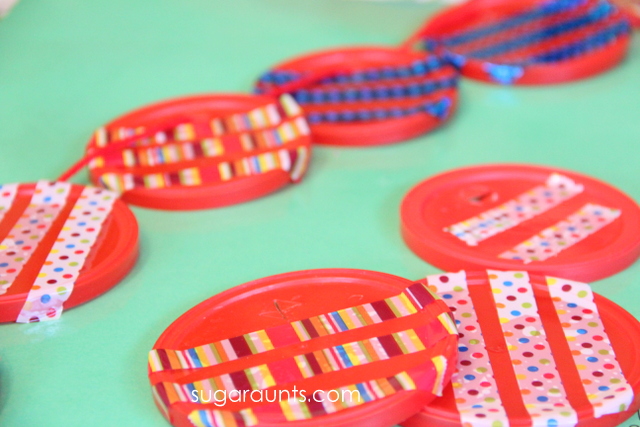
Once all of the lids are decorated with tape, grab a long piece of yarn.  We used a piece of tape at the end to make threading easier.

Thread plastic lids to make a lid garland
Thread plastic lids for a fine motor craft.


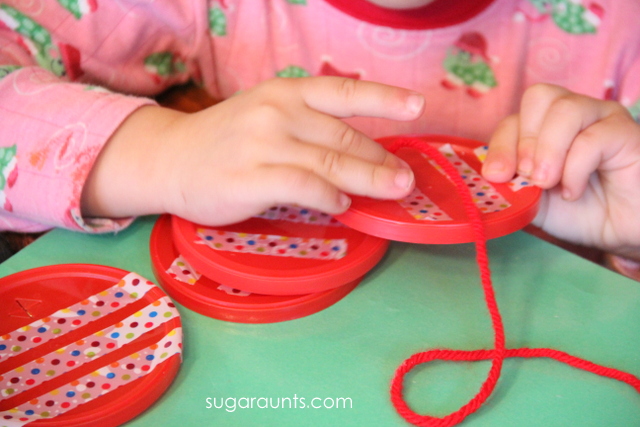
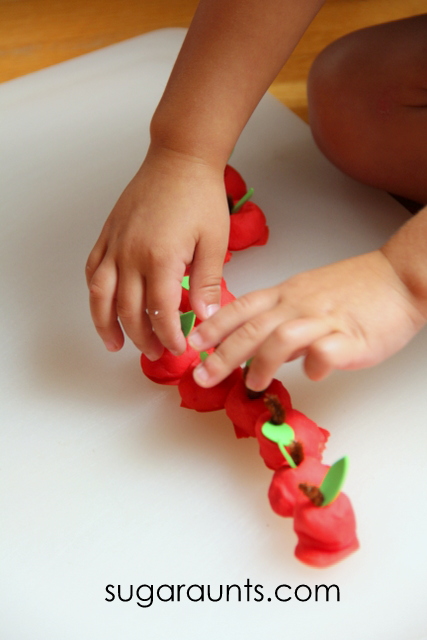
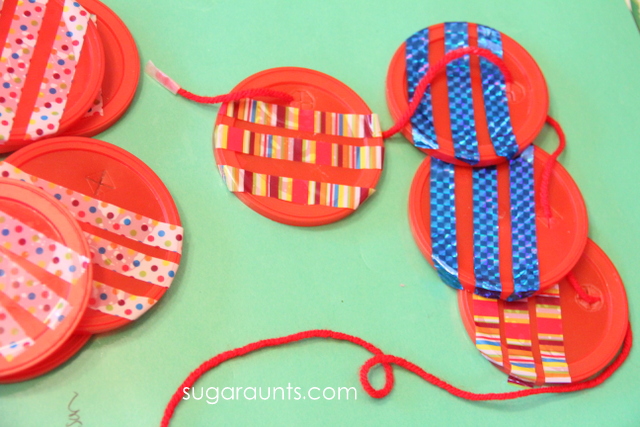
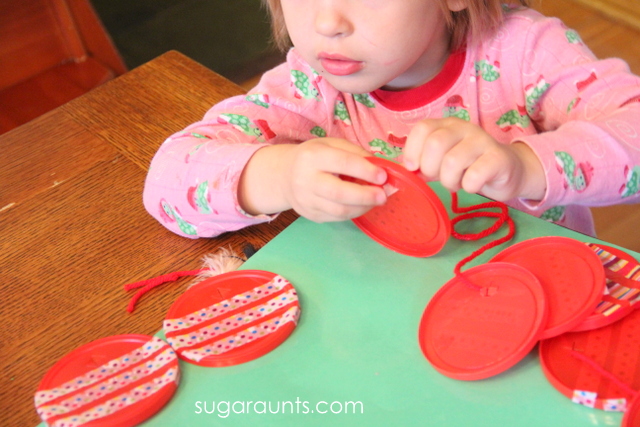
Baby Girl (age 3) loved this threading activity.  She asked to re-make this garland a few times in the week after we first made ours.  She did a great job of threading the yarn through the straw holes of the lids.  This is such a good way to work on tripod grasp and hand-eye coordination.

Thread lids for a fine motor activity with lids


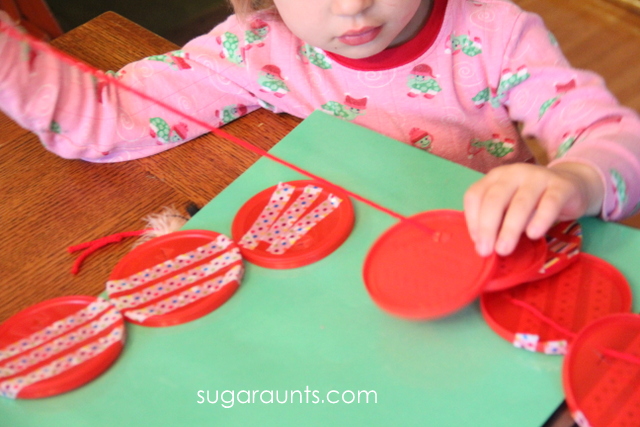
Pulling the thread all the way through the hole and pulling the lid down the yarn requires bilateral hand coordination to use the hands together in a coordinated manner.  This is an important skill for many self-care tasks like shoe tying, zippering, and buttoning.

Toddler fine motor activity with lids
Lid garland for kids

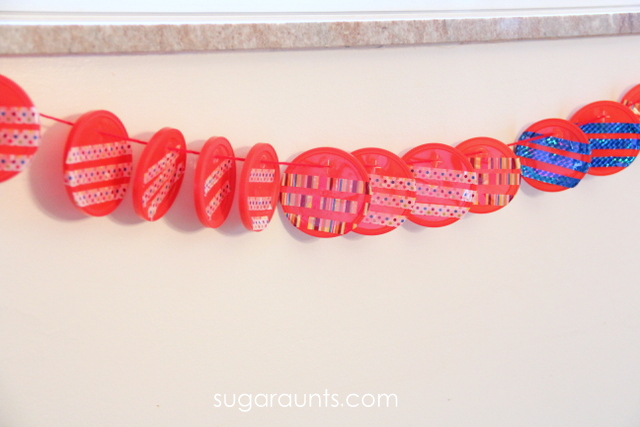
We used our garland as a Christmas decoration by hanging them from our window sill.  While this is a fun Christmas activity, I would definitely recommend doing this as a fine motor exercise year-round.

Use lids to make a garland craft with kids

Christmas Handwriting Activities

Writing out that Christmas wish list is a difficult task that brings out tears instead of holiday excitement.  I’ve got a solution for your kiddo with handwriting difficulties: a packet of modified paper for all of the Christmas handwriting tasks that come up each year.  Use this handwriting pack to help kids who struggle with handwriting to participate in holiday traditions while even working on and developing their handwriting skills!

Working on handwriting with kids this Christmas season? Grab your copy of the Christmas Modified Handwriting Packet. It’s got three types of adapted paper that kids can use to write letters to Santa, Thank You notes, holiday bucket lists and much more…all while working on handwriting skills in a motivating and fun way! Read more about the adapted Christmas Paper here


Mix It Up Fingerprint Candle Craft

Have you introduced the kids to books by Herve Tullet?  Not too long ago, we read Press Here and made a fun sensory shaving cream bin to go along with the colors and active interaction the book inspires.  When we were given the chance to review Herve Tullet’s newest book, Mix It Up!, we jumped at the chance.  Tullet’s books are colorful, bright, inspiring, and FUN!
Take a peek inside Mix It Up!  :
We loved the active learning and color mixing in Mix It Up!  The pages inspire readers to get involved with the book, mixing colors to make new colors, and then to go off and create.   We decided to make sand fingerprint art and mix up our own colors using colored sand.  We made art and a colorful candle holder craft that would make a great DIY gift.


Mix It Up!
Art and Craft

The book has colors everywhere, so when we pulled out our rainbow of sand.  We were handed down this set, but any rainbow sand set would work for this activity.

We spread out the book on the floor as inspiration and got started.  Baby Girl used a little tub of glue to make glue fingerprints on white paper.

This part of the activity alone was mesmerizing for her.  She made dots all over the page just like the dots and fingerprints in the book.

Now for the fun part!  We added color to the glue fingerprints and started with solid colors.  How beautiful is this rainbow of fingerprints?

Then things got interesting!  We added dabs of color and mixed up the different colored sands to make different colors.

We really did Mix It Up!


Baby Girl wanted to do footprints with glue, too but we decided our glue tub was too little for whole feet.  She ended up making toe prints with glue instead.

After practicing with fingerprints on paper, we moved onto our candle holder craft.


Fingerprint Candle Holder Craft


I showed Baby Girl how to make her glue fingerprints onto the side of a mason jar.  We carefully poured the colored sand onto the fingerprints, keeping the jar over white paper to catch the excess sand.

We covered all of the glue fingerprints with sand.

 
It started to look just like the colorful pages from the book.

We made a few candle holders and some ended up more mixed up than others.  I love how the colored sand mixed together.

These candle holders look great in the sunlight…

…and by candlelight!  We’ll be gifting a few of these candle holders to friends and family.  They make a great DIY gift made by kids.

 
This was one fun book and we are so happy that we got to enjoy it and create along with it.
 
 
The best news is that you can enter on each of our Preschool Book Club bloggers websites to increase your odds.  
 Frogs and Snails and Puppy Dog Tails: Fingerprint Art
Homegrown Friends: Painted Salt Dough Ornaments
Mama. Papa. Bubba. blog: Color Theory Ornaments
Buggy and Buddy: Mixing Colors

You can see all of our posts in the Preschool Book Club here:

hands-on activities to explore social emotional development through children's books.

Love exploring books with hands-on play?  

Grab our NEW book, Exploring Books Through Play: 50 Activities based on Books About Friendship, Acceptance, and Empathy, that explores friendship, acceptance, and empathy through popular (and amazing) children’s books!  It’s 50 hands-on activities that use math, fine motor skills, movement, art, crafts, and creativity to support social emotional development.

Grand Old Duke of York Craft

We love our nursery rhyme crafts!  This one is part of a Nursery Rhyme crafts and activities series we hosted with a bunch of our favorite bloggers.  One of our favorite (and it’s hard for my kids to choose favorites when it comes to nursery rhymes…) is The Grand Old Duke of York.  We made this fun craft and kept repeating the nursery rhyme for the rest of the day.  Alllllllll day 😉


The Grand Old Duke of York nursery rhyme craft

This post contains affiliate links.

To make the Grand Old Duke of York craft, you’ll need a few supplies:
red paint

beige card stock 
green card stock 
potato 
black card stock 
glue


We read a favorite from the library, Clare Beaton’s Mother Goose Remembers. This is a FUN nursery rhyme collection.  The pictures are images of embroidery and beautiful.  We check this version of a nursery rhyme collection from the library all. the.time.
I cut a cross shape into the potato to make the stamps look like a soldier’s uniform.
Pour a pile of red paint onto a plate.

Start stamping.

Little Sister (age 3) stamped like crazy.  She was a big fan of stamping that potato!


I cut little circles from the beige card stock to make the faces.  Little Sister glued hers on all over her potato stamps.  Perfect!

Cut little hats from the black card stock and glue them onto the faces.  Cut green grass/hill/field from the green card stock.  Little Sister said hers was a top of a hill and some guys were peeking their faces over the edge of the hill.  I love it!


She drew faces on the men and made a couple of sad faces.  She said they were sad from going up the hill and down the hill again.  Love it again!!

The full nursery rhyme for The Grand Old Duke of York:

Oh, The grand old Duke of York,
He had ten thousand men;
He marched them up to the top of the hill,
And he marched them down again.

And when they were up, they were up,
And when they were down, they were down,
And when they were only half-way up,
They were neither up nor down.


Stop by and see more nursery rhyme crafts and activities on our landing page: 

Bottle Cap Christmas Craft

We love our Christmas play activities.  We’ve even put together a 25 Days of Christmas play list of fun activities we’ve done in the past.  This bottle cap Christmas Tree is fun to make and a cute Christmas craft that kids will love.  And, bonus is that the recycled caps are free!


Christmas Tree craft using recycled bottle caps. This is a fun craft for kids!


Christmas Tree Craft for Kids

This post contains affiliate links.
To make the Christmas Tree craft, you’ll need a few items:
bottle caps (green, or use green acrylic paint) You will also need either brown and a yellow bottle cap, or brown and yellow acrylic paint
glue
tiny craft pom poms
marker

Arrange the lids in a tree shape to get an idea of how you want the tree to be on a page.

Use the acrylic paint to paint the tops green.  If you’re starting with green bottle caps, you can skip this part.


Dab a small amount of glue on the dried bottle caps.  The crafting poms we used were very small and great for fine motor skills.  A neat pincer grasp is needed to manipulate these itty bitty pom poms.


Glue the bottle caps into place on a piece of card stock or paper.  We drew a star on the top yellow bottle cap.  This is a fun puzzle for the kids, and a very cute craft for kids to create!

Christmas Handwriting Activities

Writing out that Christmas wish list is a difficult task that brings out tears instead of holiday excitement.  I’ve got a solution for your kiddo with handwriting difficulties: a packet of modified paper for all of the Christmas handwriting tasks that come up each year.  Use this handwriting pack to help kids who struggle with handwriting to participate in holiday traditions while even working on and developing their handwriting skills!

Working on handwriting with kids this Christmas season? Grab your copy of the Christmas Modified Handwriting Packet. It’s got three types of adapted paper that kids can use to write letters to Santa, Thank You notes, holiday bucket lists and much more…all while working on handwriting skills in a motivating and fun way! Read more about the adapted Christmas Paper here


KidKraft Train Table Review Trundle Drawers Gift for Kids

We own a KidKraft Train Table with Trundle Drawers and wanted to review it’s versatility for creative play and learning.  A train table is a key tool in therapy and learning in the home and classroom, to boost many skills.  We love to come up with frugal ways to encourage development of the child.  Using a train table is just one way to do this by using what you’ve got in the home as a multi-purpose item for therapy, play, learning, and exploration!


We’ve joined 31 other bloggers in a gift review blog hop to discover and explore more about each blogger’s must-have items.  


Sensory strategies that are motivating can be a big help for some kids. Try these train themed sensory activity ideas 

Use a train table in therapy, sensory play, fine motor development, learning, crafts at home and at school.

This post contains affiliate links.  See our full disclosure here.

We LOVE our KidKraft Train Table.  With it’s trundle drawers, we have lots of storage for trains, pretend play animals, blocks, and even sensory play items.  We use our train table almost every day in some type of play and wanted to review the KidKraft train table and share our fun ideas that make this big ticket item a great deal for versatile play for kids.


The KidKraft train table is the perfect size for play from all sides.  Many train tables are on the smaller side, but this one is huge!  It’s perfect for lots of kids to get at the pretend play fun from all sides.  The table has a small lip to the edge to prevent trains from rolling over the sides of the table top.  We’ve used this edge to contain not only trains, but marbles, water beads, art supplies, and beads.  The train table is easy to assemble and move.  We’ve moved our KidKraft Train Table around so many times and it is still very sturdy and in great shape.


Besides the trundle drawers for amazing storage (these drawers are HUGE!), our favorite feature is the reversable table surface.  One side has a great landscaped scene with road, parking lot, water, and grassy area for pretend play with trains and cars.  The other side of our surface is all white.  This is perfect for creative play at it’s finest.  Our model is older and it seems like the newer models may have a different color on the reversed side.  It would be fun to paint one side of the surface with a solid color, or chalkboard paint, or attach a Lego surface for a DIY Lego table or glue a large sheet of felt to the surface for a DIY felt table.

The height of the table is perfect for children to kneel, sit, or stand around. Adults can get right up to the table and sit on the floor with their legs under the table and stretched out, comfortable and ready for playing!


How to use a train table in therapy and at home for development.


Using a KidKraft Train Table for Creative Play

We love using our train table in creative play.  

Using a Train Table for Sensory Play:

Use the train table for sensory play with water beads, magnetic lettersplay dough activitiesbaby sensory play, or by creating a real-life “I Spy” game.  One thing to note about our train table–the surface wipes down really well.  I wouldn’t saturate it with gak or water in sensory play, but you could play with moon dough or other wipe-able sensory activities.  I use spay-able cleanser or magic erasers to clean the white surface of our train table all the time.

Using a Train Table for a Craft Center:

The size and surface of the train table is perfect for kids crafts.  The surface of this large table is perfect for spreading out supplies, craft activities, and even allowing friends to join in on crafty fun!  We’ve used our train table in so many art creation activities.

Using a Train Table for  Fine Motor Development:

We love to spread out a bunch of magazines and a few pairs of scissors to get busy on scissor skill activities.  This large area is a great way to create and play with fine motor activities while exploring many skill sets on the train table surface.  Kids can gather around the sides of the train table and play with all kinds of  fine motor activities, like in-hand manipulation play while being sure that the lip of the sides will not allow little pieces to flip over onto the floor.


Using a Train Table in Small World Imagination Play:

Oh, we definitely use our train table for trains, cars, and small world pretend play.  Free imagination play is often times the most fun!  Besides using just trains on the train table, pull in small worlds to encourage  and develop language and imagination with play dough, or with pieces like glass gems, small plastic animals, rocks, or more.  Your imagination is the limit!  We use those giant  trundle drawers for storing all of the pieces to imagination play.

The size and height of the KidKraft Train Table allows for a perfect surface for party activities like play crafts, and snacks.  


Do you have a train table? How do you use it in play? Let us know on our Facebook page or the comments below.


Stop by the other bloggers in this series to see their gift item reviews by visiting Lalymom’s Wishlist Reviewed!


                         Train Table review for gifts.  Use a train table for so much ore than just train play: fine motor station, craft table, small world surface, art area. We use our train table every day!

More gift ideas you may be interested in: 


Gratitude Craft Counting Blessings with Kids

We are so blessed.  Our family, our health, our home, everything that we do and say each day is because of the blessings that we have been given.  We are thankful all year long for all that we have been blessed with, but this time of year, it is especially appropriate to count and express gratitude for our blessings.  The kids and I create a Thanksgiving Tree or Gratitude Garland each year to display everything that we are thankful for.


This year we made our gratitude leaves into a sun catcher flower craft.  We can see our leaves an all of the blessings each day as we eat our meals together.


Gratitude Sun Catcher Craft


Gratitude Craft for Kids


This post contains affiliate links.  See our full disclosure here.


I love to do a version of this activity with the kids each November as we gear up for the holiday season.  Counting and writing out our blessings is a joyful way to head into Thanksgiving.  The display is something we love to look at our display each day and the kids will ask, “what does that leaf say?” as we read through our gratitude leaves.


This year, we made a craft to display our blessings.  I like to maintain the leaf theme each year with this activity.


I set out a basket of leaves made from construction paper.  This is super easy to throw together.  Snip up a few simple leaf shapes and a black marker, and you’re good to go.  Sit the kids down and start talking about gratitude.


These leaves crack me up!  The gratitude for “big imaginations, energy, and nice people”?? There’s a lot of thankfulness in our house for candy and cheez-its.

We glued our leaves together to form a flower.


Make the sun catcher part of the flowers by painting a thin layer of green paint onto clear cellophane wrap.  Be sure to smear the paint on nice and thin.  Fold the cellophane over.  You may need to let the sun catchers dry over night if too much paint is used.  We were able to cut the stems right away without paint dripping from the sides.


Cut strips of the green sun catchers and hang the flowers on the window with tape.


Be sure to count blessings with the kids every day!

Baked Cotton Balls Ten Apples Up On Top Activity

This Ten Apples Up on Top activity was a huge hit with my kids, because they love the book, so making baked cotton ball apples was a fun way to play through the book. And as a pediatric OT, I loved the fine motor and heavy work input that was an added benefit. You can add this to apple activities that you are doing in occupational therapy sessions or at home. These baked cotton ball apples would be a great addition to our apple pie sensory bin, and they would be fun for hands-on play with our Fine Motor Therapy Kit for visual motor, handwriting, and fine motor play.

Here’s what we did…

Ten Apples Up on Top Activity

Did you ever do an activity with the kids that was such a hit, that the kids ask to re-do the activity over and over and over again?  This one is it for us.  There is rarely a day that goes by that I don’t hear about our smashing apples activity. Especially if we happen to see a hammer.  Oh, this baked cotton ball activity was a fun one for us! 
 
We’ve never made baked cotton balls before, but have had the idea bubbling for a while.  When we heard that the Preschool Book Club‘s book for this week would be Ten Apples Up on Top, we knew it would have to be an apple themed baked cotton ball activity.  We even made these waaaay before all of the other book activities in the second series of books.  
 
Like back in June.  If you’ve never made baked cotton balls before, this is a MUST-DO activity!


This post contains affiliate links.  


How to make Baked Cotton Balls

Are you familiar with baked cotton balls? This sensory tool is a DIY sensory material that kids love, and for so many great reasons. Actually, mixing up and making the baked cotton balls is as much of a therapy task as playing with them!

 
First read Ten Apples Up On Top! by Dr. Seuss.  This is such a fun book for counting and playing along with the story.
 
 
How to make baked cotton balls:
 
  1. Begin by mixing together one cup of flour and one cup of water.  This is a great activity for the kids.  Scooping, stirring, direction following, sneak tasting (my kids aren’t the only ones who go crazy for flour, right!??).
  2. Pour in a bunch of red food coloring.  We typically go with Wilton gel colors for all of our dying activities, but I knew I wanted a really deep red color.  It seems like red coloring requires SO much dye to get a good shade of red.  I ended up using a bottle from the dollar store and used about half of the bottle of food dye.  This was maybe 20 drops?  Add enough to get a nice red color.
  3. Mix in the food coloring.
 
 
4. Now is the cotton ball part.  Grab up your stash of cotton balls.
 
 
5. Mix them around to coat all of the cotton balls.  
 
 
6. Place a layer of aluminum foil on a baking tray and place the cotton balls on the tray for baking.  I used two forks to pick up the coated cotton balls and was able to let excess flour coating drip off before placing the cotton balls onto the foil.
 
You’ll want to let as much excess drip off before putting them on the sheet to avoid the sharp edges and flat bottom once the cotton balls bake.
 
7. Pop the baking sheet into the oven for around 60 minutes at 300 degrees F.
 
 
While the cotton balls are baking, snip up the leaves and stems for the apples.  We used brown pipe cleaners and green crafting foam.
 
 
When the apples are done, pull them out of the oven and let them cool for a bit. They will be nice and hard.  You’ll need to snip the bottom edges of the apples to remove any sharp edges that dripped to the base before baking.
 
To attach the leaves and stems, lay the leaves on the apple top and poke the pipe cleaner through the foam sheet and into the cotton ball.  The kids were able to help with this part, but assisting with stem attachment did not allow this mama to take any pictures 😉
 
 
Our crop of apples were ready for playing with!
 
 
We followed along with the book as we read to stack up apples one by one.  What a great way to learn and play with math facts, counting, number order, and simple adding.  Little Guy LOVED this activity.


We got to hammering the cotton balls and this was the really fun part!  The baked cotton balls have a hard outer edge that allow for a satisfying crunch when smashed, and a squishy, cottony center.  What a fun way to explore and play.
 
We used a plastic hammer, but any hammer would do.
 
 
In fact, fists work just as well for smashing.


We had a smashing afternoon.


The remains of our cotton ball smashing reminded us of this page in the book.  Be sure to let us know if you make baked cotton balls!  We would love to hear about your experience with this sensory and fine motor activity!
 
Stop by the other Preschool Book Club bloggers to see their takes on Ten Apples Up On Top!
 
 
Sensory Bag from Frogs and Snails and Puppy Dog Tails | Relay Race from Homegrown Friends | Play Dough Activity from Buggy and Buddy


Colleen Beck, OTR/L has been an occupational therapist since 2000, working in school-based, hand therapy, outpatient peds, EI, and SNF. Colleen created The OT Toolbox to inspire therapists, teachers, and parents with easy and fun tools to help children thrive. Read her story about going from an OT making $3/hour (after paying for kids’ childcare) to a full-time OT resource creator for millions of readers. Want to collaborate? Send an email to contact@theottoolbox.com.

N is for Napkin Newt Craft

We love making cute crafts and our dining room wall can attest for that.  There’s a nice gallery of kid art going on on all four walls (and the ceiling, too!) and this cute newt craft is sure to make the wall!  


We’re joining bloggers from all over in the 31 days of ABCs series hosted by All Done Monkey.   Each day, a blogger has been publishing a blog post based on a letter.  We’re up next with N and our napkin newt.  
N is for Napkin and Newt!  Make a napkin newt with the kids.  So cute!

Newt Craft:

To make your newt, you’ll need a few supplies.  We used napkins, googly eyes, paint dab markers, glue, and red card stock.  We received the googly eyes and paint dab markers from www.craftprojectideas.com.  


Start by drawing a simple newt shape on the napkin.  I used a marker, but a pen would work, too.

If you have a bunch of newts to make for a preschool class or siblings, stack up a few sheets of napkins.  Grab your sharpest scissors and cut out the newts.  This is a job for a parent, but an older child could cut this complex shape.  Hold the napkins together tightly as you cut around the toes.
We liked how our napkin newt’s texture looked like scales.
Next, use your paint dab markers to dab on spots.  We went with different colors, and each child made their newt differently.

It was fun to see my daughter’s personalities coming out in their craftiness.  Big Sister was deliberate and colorful with her painting.  

Baby Girl painted in typical Baby Girl fashion…fast and furious and with STYLE!

Next, glue on googly eyes.
These newts are almost done.  We talked about the letter N and how Newt and Napkin both start with “N”.  We said a bunch of other words that start with “n” as we crafted.
Snip tongues from the red card stock and glue to the back of the newts.  Super cute newt!
Paint Dabber Newt Craft.


Let us know if you make this craft.  We would love to see your version!  Stop by our Facebook page and tell us all about it.

Easy Shapes Backhoe Craft

We’ve been making a few Easy Shapes crafts with vehicles recently.  A school bus or fire truck craft are fun ways to create and learn shapes with little ones.  The crafts are great teaching opportunities for vehicle lovers!  We made this Backhoe craft with simple shapes:
Easy Shapes Backhoe craft


Backhoe craft for kids:


This post contains affiliate links.
We started with yellow and black cardstock and cut some simple shapes to make the backhoe.  Rectangles, circles, squares, and semi-circles make up this backhoe.

Baby Girl (almost 3) made this like a puzzle.  I showed her how to make the backhoe and then she had to build hers.  She could copy my model or build her own.  We talked about the names of the shapes as we went.  Little Guy (age 5) enjoyed remembering how to make the backhoe and then building the construction vehicle on his own without a model.  This is a great way to practice visual memory.

Visual Memory Activity

Visual memory is the process of recalling visual information.  You depend on visual memory to copy letters in a word, recalling how a letter looks, and in reading.  Recalling how this construction vehicle was built was a fun way for Little Guy to work on these skills.

Looking for more craft ideas for the kids?  Follow along on our kids crafts Pinterest board.