Sorting Sentence Types Activity Recycled Lids

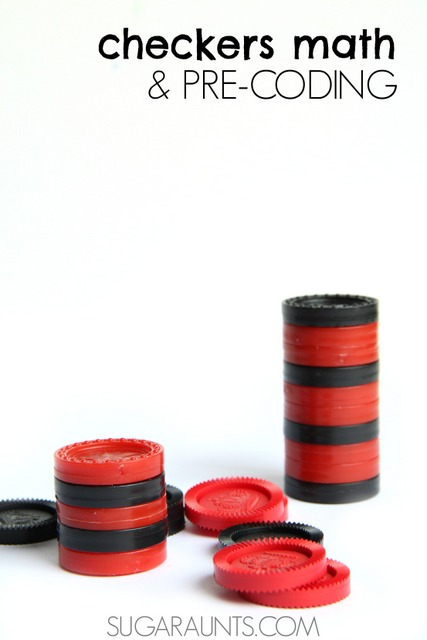
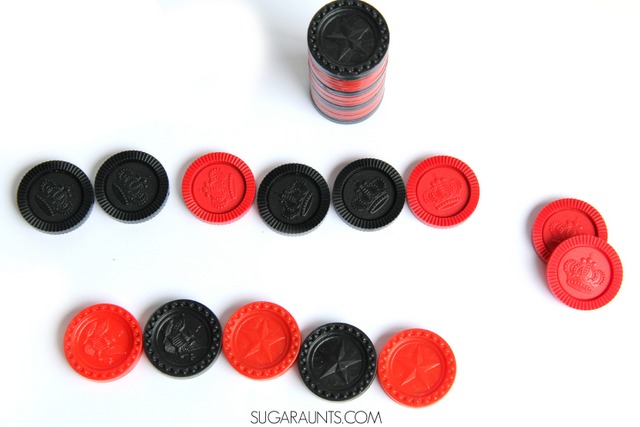
We love using recycled materials in play, crafts, and learning (notice that “Recycled Fun” tab up there at the top?) so this lid learning activity is just one way that we’ve re-used something that we had around the house in learning.  These recycled lids are just the plastic lids that your child gets at a restaurant.  My kids always want to carry their dripping, empty cup home after a dinner out, so we end up with a stack of plastic cups and lids.  They make the perfect fine motor and learning tool!


Use recycled plastic cup lids in learning with this sentence type sorting activity. This is great for first grade English Language Arts requirements.


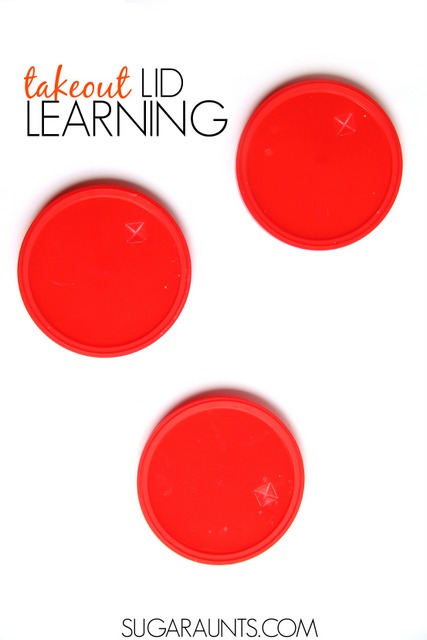
Use take out lids in learning!

This post contains affiliate links.
Use recycled plastic cup lids in learning with this sentence type sorting activity. This is great for first grade English Language Arts requirements.
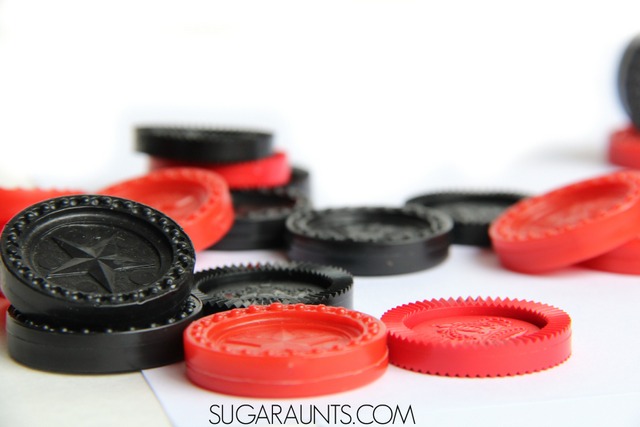
While you can use recycled lids in a ton of learning activities, like stamping sightwordsletter learning, or 10s counters, these plastic lids are a bit different.  They are a larger size and perfect for writing more information.  If you use a 

fine-tip dry erase marker
(these are my favorites!), you can use the lids again and again for so many learning activities.

Use recycled plastic cup lids in learning with this sentence type sorting activity. This is great for first grade English Language Arts requirements.

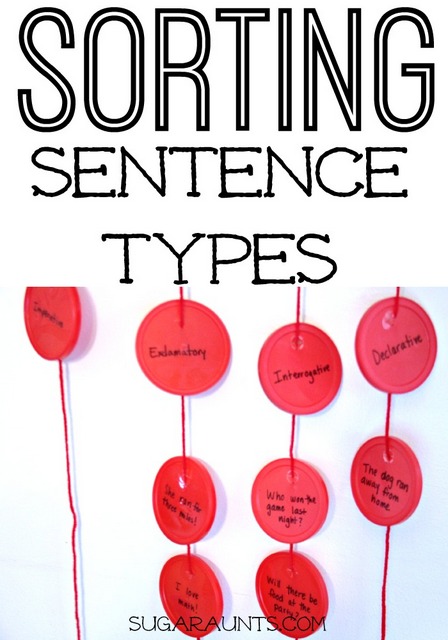
First Grade English Language Arts Sentence Types Activity:

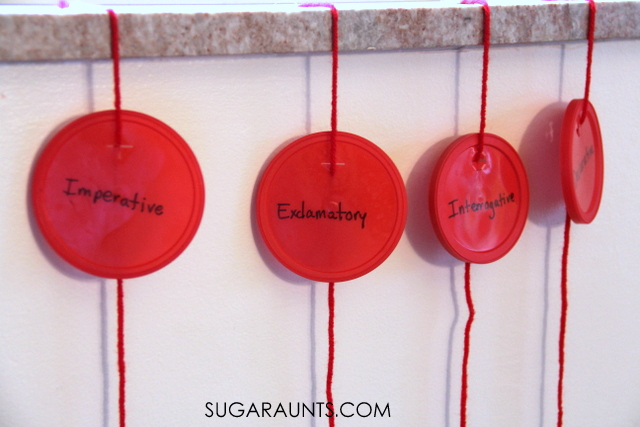
We used our lids recently to practice sorting sentence types.  I wrote out the four types of sentences: Imperative, Exclamatory, Interrogative, and Declarative. 

Use recycled plastic cup lids in learning with this sentence type sorting activity. This is great for first grade English Language Arts requirements.
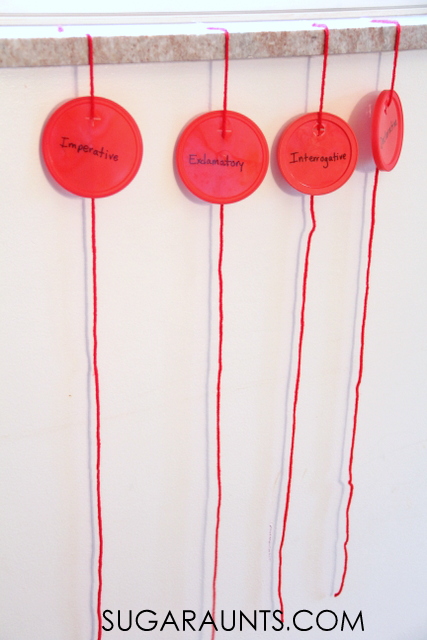
I had my daughter string them on long strands of 

bright red yarn. These were taped to the wall for overhead activity and a movement task. Adding movement to learning is a great way to get the whole brain involved in building and retaining learned information.


Use recycled plastic cup lids in learning with this sentence type sorting activity. This is great for first grade English Language Arts requirements.

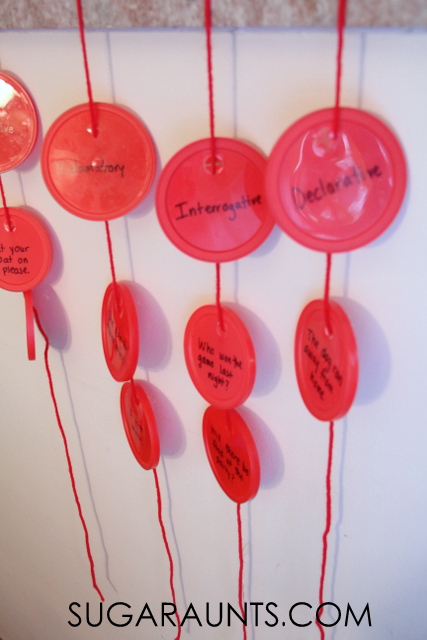
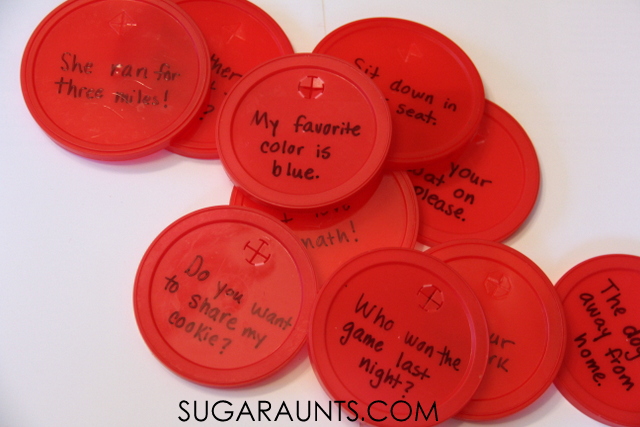
I then wrote out different sentences on other plastic lids.  My daughter sorted these by stringing them onto the appropriate string.  This is a fantastic way to practice first grade English language arts and sentence types. 

Use recycled plastic cup lids in learning with this sentence type sorting activity. This is great for first grade English Language Arts requirements.
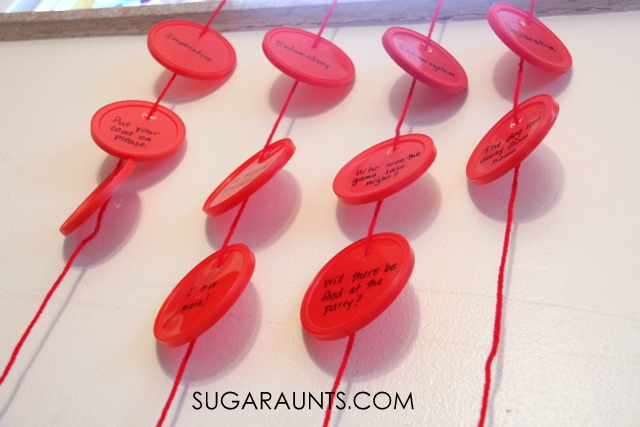
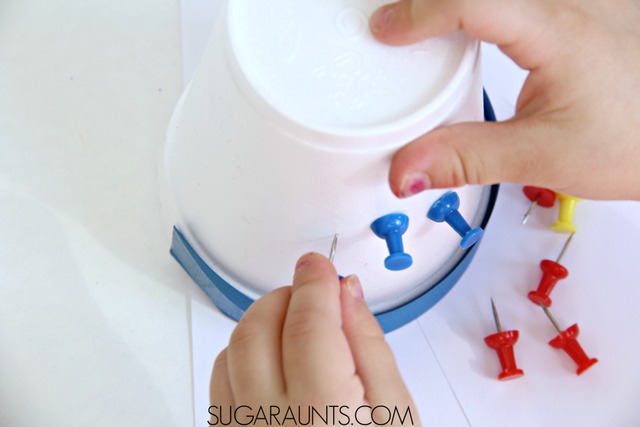
This activity was a big success and a fun way to practice sentence type identification with a fine motor component.  Stringing the lids onto the yarn requires a tripod grasp and bilateral hand coordination.   

Use recycled plastic cup lids in learning with this sentence type sorting activity. This is great for first grade English Language Arts requirements.
Love it? Pin it!

This post is part of our month-long Learning with Free Materials series, part of the 31 Days of Homeschooling Tips as we blog along with other bloggers with learning at home tips and tools.


Join our newsletter subscribers for a weekly email so you don’t miss a thing!

How to teach cursive writing with sensory textures

Cursive handwriting can be an incentive for kids to sit down and write.  Many times, kids see older children or adults writing in cursive handwriting, or see a card that comes in the mail with cursive writing.  They want to be able to read the writing and learn to write in cursive themselves.  
 
My daughter asked to learn how to write in cursive, so I was happy to get started with her.  I loved assisting my occupational therapy students in fine motor tasks like cursive handwriting and was so excited to share tips and hints with my daughter as she learned cursive letter formation.  
 
We’ve been doing a lot of practice and fun pre-cursive activities to learn the basics.  Today’s sensory cursive activity is another way to introduce cursive letter lines and beginning pencil strokes.

Practice cursive handwriting with sensory twist using grass seed!  So cool and the kids will love this!  Great tips in this post for teaching kids cursive handwriting.


How to teach cursive handwriting from the beginning:  Where to start with teaching cursive

 
This post contains affiliate links.
Practice cursive handwriting with sensory twist using grass seed!  So cool and the kids will love this!  Great tips in this post for teaching kids cursive handwriting.
When you start to teach a child how to write in cursive, do not teach letters alphabetically.  When a child learns printed letters, they do not learn how to write in alphabetical order.  Instead, you’ll teach letters based on formation.  Lower case cursive letters share similar pencil strokes and make teaching certain groupings together.  We talked about the c letter series a little bit with our fizzy dough cursive sensory activity.  Letters c, a, d, g, and q start with the cursive letter c and are typically the first letters taught. 
 
Today we practiced the l series of letters.  The lower case cursive letters l, e, b, f, h, and k begin with the letter l’s loop.  I had my daughters use 

a bottle of glue
(we go through a LOT of glue in our house!) to draw the loops of l across a page. At this point, do not worry about size. We are focusing on the formation of the “l”‘s loops and connecting the “l”‘s together. You’ll want to encourage your child to form skinny and tall “l”s and not wide loops formed haphazardly. Using the glue bottle really provides a proprioceptive feedback to your child as they squeezed the bottle and form the letter’s loops. You can read more about proprioception in handwriting here.

Practice cursive handwriting with sensory twist using grass seed!  So cool and the kids will love this!  Great tips in this post for teaching kids cursive handwriting.
Next, we used a tray of grass seed for a sensory and textured way to write our cursive letter loops.  Using grass seed over the glue is a great sensory addition to handwriting practice for it’s texture.  Little hands love to examine and explore the soft, yet pokey seed.  It’s small enough that the seeds stick well to the glue and the letters are still very legible.  A larger seed such as dyed pumpkin seeds (although equally as FUN!) makes the glue letters more difficult to distinguish, especially if a child writes the letters on the smaller side.  
 
The small size of grass seed requires a wonderful pad to pad grasp (the pads of the thumb and index finger touching together, pincer (or pad-to-pad) grasp, and neat pincer grasp where the tips of the thumb and index finger are manipulating very small items, and rotation of the grass seed between the pads of the thumb and index finger.  Rotation of items is important as a child rolls items, such as a pencil between the pads of the thumb and index finger.  Rotation of the grass seed happens as they pick up the seeds and manipulate them onto the glue letters.
Practice cursive handwriting with sensory twist using grass seed!  So cool and the kids will love this!  Great tips in this post for teaching kids cursive handwriting.
Form all of the basic beginning lines of cursive.  Practice the loops of “l”s, the curves of “c”s, and the re-tracing of “i”s.  Practice writing the glue and grass lines in connected letters and individual letters.
Practice cursive handwriting with sensory twist using grass seed!  So cool and the kids will love this!  Great tips in this post for teaching kids cursive handwriting.
Love it? Pin it!
 
More cursive handwriting activities you will Love: 
This post is part of our month-long Learning with Free Materials series, part of the 31 Days of Homeschooling Tips as we blog along with other bloggers with learning at home tips and tools.
 
Looking for more ideas to teach cursive? You’ll love our 31 day series on how to teach cursive handwriting:


Checkers Math Pre Coding without an App

Today we’re sharing how we use an every day game and household item like checkers in math for preschoolers and a pre-coding activity.  Coding for kids is a new and very important skill. You can swing by our coding for kids Pinterest board for more ideas.  Checkers are a basic manipulative that can be counted, patterned, sorted, and used in step-by-step tasks for pre-requisites to coding without a computer or app. 


This post is part of our month-long Learning with Free Materials series, part of the 31 Days of Homeschooling Tips as we blog along with other bloggers with learning at home tips and tools.
Using checkers in math and pre- coding activities for preschoolers and kids. Coding ideas without using a a computer or app


Math for Kids using checkers

This post contains affiliate links.  

We play a game of checkers
a few times a week. It’s always a hit when we need a little down time or quiet game. We’ve been using my husband’s old checkerboard from his younger days, so it’s a game that we’ve always had around the house.  Recently, we’ve been using the game pieces in math activities with my preschoolers and school-aged kids.


The bright and bold colors of the checkers pieces makes them a great patterning tool.  Preschool-aged kids can practice AB, ABA, ABB, BAA, and more complicated patterns.  Patterning is a skill needed in coding, so this is a great beginning skill to develop.


Ask your preschoolers to sort the colors into stacks and piles of red and black chips.  Manipulating the chips really can be challenging to a child’s fine motor skills.  Be sure to read up on our manipulating coins fine motor post for information on in-hand manipulation, translation, stacking with coins and chips.


Work on counting with the chips.  Count them out into columns of tens.  Practice counting by base ten and and adding ones to get double digits.  Remove single chips to practice subtraction from double digits. 


Pre-Coding Activity for Kids with Checkers

A big part of coding (at least what I understand from my husband) is the task of getting from one point to another in a problem while thinking out the process before it happens.  We love to play a game of “Shifting Pyramids” with our checkers board.  

To play Shifting Pyramids:
Use the pieces to form a pyramid with ten red chips on one side of the checkerboard and a pyramid with ten black chips on the opposite side of the checkerboard.  Only black squares are used for the game.  Players move their men forward, either by single spaces or by jumping their own or their opponents’ men in a single jump or a series of jumps.  Men that are jumped are not removed from the board.  The winner is the player who re-forms his pyramid on the opposite side of the checker board.  
Playing Shifting Pyramids requires a player to think ahead as they attempt to flip their pyramid to the other side of the checkerboard.  We typically play with only one pyramid to begin with (all red or all black pieces) to work out the steps of flipping the pyramid.  Often times, a pattern of chip movements develops. Further the activity by using the red and black chips as symbols and create a message with the “code”.

To work on more pre-coding skills, stop by and visit our coding for kids Pinterest board.  You’ll find activities related to patterns, strep-by-step thought processes, abstract thinking, using symbols, and more.

Using checkers in math and pre- coding activities for preschoolers and kids. Coding ideas without using a a computer or app

Using checkers in math and pre- coding activities for preschoolers and kids. Coding ideas without using a a computer or app
Looking for more coding games and activities?  Try some of these pre-coding games for kids:

Robot Turtles Game
Color Code
LightUp Edison Kit 
Dash & Dot Robot

Learn with Play Year Round Learning Book

We are published in a book!  I am so excited to introduce our book that we’ve had the honor to collaborate and help author.  Introducing, Learn with Play: 150- Activities for Year Round Fun and Learning!
Learn with Play: 150+ Activities for year-round fun and learning for kids.  An amazing resource for parents, teachers, grandparents, child care workers.  This would be a great gift idea for birthdays!


This book is sure to keep kids busy and free from boredom with 150+ activities for year-round learning through play.  With 94 co-authors, Learn with Play offers activities, crafts, learning for all stages of childhood from babies to kindergarten aged.  This is such an amazing resource for parents, educators, therapists, child care workers, and grandparents.  A book like this would make an amazing (and easy) gift idea for birthday presents to children of all ages.  
 
This post contains affiliate links, including Amazon affiliate links. 
Learn with Play: 150+ Activities for year-round fun and learning for kids.  An amazing resource for parents, teachers, grandparents, child care workers.  This would be a great gift idea for birthdays!


Learn With Play Book

The pages of Learn with Play is such a resource with it’s age-appropriate play and color coded activities.  Bloggers from all over the world have teamed up to bring you the best ideas for learning through play.  Each activity comes with age suggestions, abilities targeted, clear instructions, materials needed, author’s name, and blog url. 
Learn with Play: 150+ Activities for year-round fun and learning for kids.  An amazing resource for parents, teachers, grandparents, child care workers.  This would be a great gift idea for birthdays!


Included in this amazing resource:
  • Fine Motor Skills
  • Sensory
  • DIY Toys
  • Play Recipes
  • Busy Bags
  • Math
  • Literacy
  • and much more!
 

Ebook version 

Kindle version ($14.95) Click here to purchase

Paperback version ($29.99) Click here to purchase

Learn with Play: 150+ Activities for year-round fun and learning for kids.  An amazing resource for parents, teachers, grandparents, child care workers.  This would be a great gift idea for birthdays!

Teach Fractions in the Kitchen

Kids can learn fractions while cooking with kids in the kitchen using tools you already have.  We used measuring cups and measuring spoons to discuss parts, whole, and fractions while doing a little cooking with kids recently.
Teach kids fractions using kitchen utensils like measuring cups and measuring spoons.

We’ve been on a learning kick this month with our Learning with Free Materials series, part of the 31 Days of Homeschooling Tips as we blog along with other bloggers with learning at home tips and tools.


Teach fractions with measuring cups and kitchen tools:

This post contains affiliate links.  We used measuring cups and spoons that we already had, making our learning activity free.  There are many 

kid-friendly measuring cups
out there that are plastic, large handled, and no-spill. I love the bright colors of these
measuring cups and spoons, which are perfect for kids in the kitchen. While there are many kid-friendly cooking utensils out there, just grab whatever you’ve got in your kitchen for learning fractions with the kids for a free (or almost free) learning activity at home.


To practice fractions with kids, fill a large basin with water.  Using the measuring cups, show your child the one cup and half-cup measuring cup.  You can demonstrate how the half-cup utensil will fill up the one cup utensil with two scoops.  Then remove one half of the water by dumping the water back into the bin.  Ask your child how many scoops it took to remove the water from a one cup (whole) cup.  


Continue the process using the 1/3 and 1/4 measuring cups.  By adding scoops of water, kids can get a visual on how the parts make up a whole.  


Continue the fractions discussion by scooping and measuring with the tablespoon and 1/2 tablespoon measuring spoons and the teaspoon, 1/2 teaspoon, and 1/4 teaspoon measuring spoons.  


More playful math activities you will like: 

Love using regular every day items in learning and play?  Get our published book for 150+ activities for kids that can be done throughout the year:
Ebook version  Click here to purchase


Kindle version ($14.95) Click here to purchase


Paperback version ($29.99) Click here to purchase

Lemon Bars Mason Jar Cookies

Today in the Cooking with Kids A-Z series, we’re sharing L is for Lemons and our Lemon Bars made in a mason jar.  These easy bars are fresh and sweet and perfect for summer baking, and even better for gifting in a cute and fun mason jar.  Kids love to eat them up right from the mason jar.


Make lemon bar cookies in a mason jar for gifting or a sweet and tart summery treat.  Kids will love to make these in a cooking with kids activity!


This post contains affiliate links.


Mason Jar Lemon Bar Cookies

Make lemon bar cookies in a mason jar for gifting or a sweet and tart summery treat.  Kids will love to make these in a cooking with kids activity!

To make Lemon Cookies in a Mason Jar, you’ll need a few ingredients:

1 cup flour
1/2 cup butter (softened)
1/4 cup confectioners sugar
Cooking spray
2 eggs
1 cup granulated sugar
1/2 tsp. baking powder
1/4 tsp salt
2 Tbsp lemon juice 

Heat the oven to 350 degrees F.  Measure the flour by sifting.  Blend the flour, butter, confectioners sugar thoroughly.  Drop 2-3 Tablespoons into the bottom of mason jars which have been sprayed with cooking spray.  Using a Tart Tamper, press the dough until flat on the bottom of the mason jars
.  Place the jars on a cookie sheet and bake for 20 minutes.  Beat the remaining ingredients together.  Pour over the crust and bake for 20-25 minutes more.

Recipe makes 6 mason jar treats.  You can also omit the mason jars
and bake in a 8×8 inch square pan.
Make lemon bar cookies in a mason jar for gifting or a sweet and tart summery treat.  Kids will love to make these in a cooking with kids activity!
Enjoy these lemon bar mason jar treats right from the jar!

Make lemon bar cookies in a mason jar for gifting or a sweet and tart summery treat.  Kids will love to make these in a cooking with kids activity!

Make lemon bar cookies in a mason jar for gifting or a sweet and tart summery treat.  Kids will love to make these in a cooking with kids activity!

Make lemon bar cookies in a mason jar for gifting or a sweet and tart summery treat.  Kids will love to make these in a cooking with kids activity!

Read the rest of the Lemon Recipes from the Cooking with Kids A-Z team:
Lemon recipe from Rainy Day Mum
Maderia Cake from Mum in the Mad House
Lemon Ginger Ice Cubes from Still Playing School


Check out some other Cooking With Kids Recipes we’ve made: 

Want to cook healthy foods for your family?  Grab Yum! Deliciously Healthy Meals for Kids, a cookbook for busy families that want healthy meal ideas. 


Healthy recipes for kids

Letter Formation Resistive Surface

Today I am SO excited to share our new favorite way to practice letter formation, handwriting, tripod grasp, strengthening, and up-cycling.  (Yep, up-cycling at it’s finest, here!)  We have been using foam vegetable trays for handwriting and letter practice a lot.  If you purchase any fruits or vegetables in foam trays, SAVE them!  They will come in handy for a fun handwriting activity! 
 

Work on handwriting and letter formation with a tripod grasp and hand strengthening with this activity.  A foam tray and a chop stick make a great handwriting activity for kids working on writing their name and letters.


Teach letter formation and handwriting with a foam tray!

We are including affiliate links in this post, however you can find these items for free (well, after you purchase food).  We’re sharing this post as part of our 31 Days of Learning with Free (or almost Free) Materials series and joining 25 other bloggers in homeschooling and learning at home ideas and tips with the 31 Days of Homeschooling Tips series.


Work on handwriting and letter formation with a tripod grasp and hand strengthening with this activity.  A foam tray and a chop stick make a great handwriting activity for kids working on writing their name and letters.
 
Save those foam trays from fruits or vegetables.  These foam trays are primarily found holding meats, but even after a thorough washing, I would feel nervous about allowing my kiddo to write and play with a foam tray that held raw meat. You can purchase the foam trays here


if you are having trouble finding them in the produce department of your grocery store. SIDE NOTE- You can also use take-out containers. Wash and dry the lid and cut the flat part. You’re now ready to practice letter formation and handwriting. 

 
We asked for an extra set of chop sticks after a recent dinner of Chinese food take-out.  Use the chopsticks as a writing utensil on the foam tray.  
You can have the child write their name and letters for handwriting practice.  
 
Encourage appropriate letter formation by starting at the top and forming the letter appropriately.  The resistive surface of the foam tray will provide feedback through the hand as the child writes the letters. 
 
 This is a great name writing activity for young kids.  For younger kids, I would write the name or letters first lightly on the foam.  
 
Because of the surface of the foam tray, it can be easy for the chopstick to go off course when writing.  A “track” for them to trace would help with appropriate letter formation.
 

Tripod grasp and strengthening during handwriting

Using the chopsticks on the foam tray is excellent for fine motor strength and tripod grasp.  The small diameter of the chopstick requires a close and tight grip.  
 
It may be easy for a child to assume an ineffective grasp on the chopsticks, but encourage then to hold the tip of the chopstick with the thumb, pointer finger, and middle finger with an open thumb web space as they write.  
 
Maintaining this grasp while forming letters on the resistive foam will strengthen and encourage a memory of a motor plan as they form the letters.  
Work on handwriting and letter formation with a tripod grasp and hand strengthening with this activity.  A foam tray and a chop stick make a great handwriting activity for kids working on writing their name and letters.


Fun ways to work on Letter Formation:

Colleen Beck, OTR/L has been an occupational therapist since 2000, working in school-based, hand therapy, outpatient peds, EI, and SNF. Colleen created The OT Toolbox to inspire therapists, teachers, and parents with easy and fun tools to help children thrive. Read her story about going from an OT making $3/hour (after paying for kids’ childcare) to a full-time OT resource creator for millions of readers. Want to collaborate? Send an email to contact@theottoolbox.com.

Learning with Recycled Plastic Containers

Sometimes finding materials at home for learning and play is as easy as grabbing a plastic container from the recycle bin!  We put together this list of creative learning ideas using recycled plastic containers.  Who knew you could use an old plastic bottle or food container in so many ways!  This post is part of the 31 Days of Homeschooling Tips series where we are joining 25 bloggers in creative learning and ideas for homeschooling and learning at home.  We’re sharing 31 Days of learning with free (or almost free) materials so today’s plastic container learning ideas fits the bill!
Ideas for using recycled plastic containers in learning activities for kids: science, math, sensory, crafts.

Learning with Recycled Plastic Containers Ideas for Kids:


Picklebums explored colors and created print art with plastic containers.
Learn with Play at Home mixed colors in a container.
grated cheese container is great for fine motor work, sorting, math, and color identification.
For more fine motor work, use a recycled container for sorting like Mama OT.
Practice math concepts with recycled snack containers. (This Reading Mama featured on Kids Activities Blog)
Use yogurt containers for Counting Games like Teaching Mama.
For more math concepts, try this measuring activity from Learn with Play at Home.
Can Do Mama shares baby container play ideas.
Use spice containers to explore counting, observing, stacking, problem solving and more like Toddler Approved.
Or use spice containers for baby sensory play like we did.
Plastic containers are great means for conducting science experiements like this water fountain from Learn with Play at Home.
This water filter science experiment from Planet Smarty Pants uses a recycled tennis ball container.
Try this wave in a bottle from Imagination Tree.


How do you play with recycled plastic containers?  There is a lot of learning that can happen with trash!  Visit our Trash Turned Kids Crafts Pinterest board for recycled material fun and learning.

Fine Motor Color Math

You may have noticed that we like to share easy and (mostly) free activities for kids here on our blog. This Fine Motor Count and Color Match Activity is no exception.   Moms and Aunts are always looking for simple prep and low cost when it comes to learning at home.  We made this counting math activity using a few materials we had on hand.  You could cheaply re-create this activity using supplies in your home while working on preschool math and color recognition.


Fine motor color math with push pins and a foam cup. This is great and a simple activity for preschoolers to do at home! Work on counting, addition, subtraction, and color recognition with materials you already have at home (free or almost free materials for homeschool or learning extension activities at home!)

This post contains affiliate links.  

This post is part of the 31 Days of Homeschooling Tips.  You can find homeschooling and learning at home tips from 25 other bloggers this month.  We’ll be sharing 31 days of learning at home in the series. 


Math and Fine Motor Color Match with Foam Cups:

Fine motor color math with push pins and a foam cup. This is great and a simple activity for preschoolers to do at home! Work on counting, addition, subtraction, and color recognition with materials you already have at home (free or almost free materials for homeschool or learning extension activities at home!)
This is such a simple activity and one we did after having so much fun with our rainbow order color stacking cups.  We used foam cups
and plastic push pins along with the colored strips from our stacking cups post.  This is such a simple and fun activity that my 5 year old son really got into.  We worked on the tripod grasp needed for handwriting by pushing the pins into the resistive surface.

I had my preschooler work on matching the colored push pins with the colored band at the bottom of the cups.  We kept the foam cups positioned so the opening of the cup was flat on the table to avoid any pinches to hands.  We added wadded up paper towels to the inside of the cups to prevent any scratches as well.  This is an activity that will require supervision with younger kids.
Fine motor color math with push pins and a foam cup. This is great and a simple activity for preschoolers to do at home! Work on counting, addition, subtraction, and color recognition with materials you already have at home (free or almost free materials for homeschool or learning extension activities at home!)

Math with push pins:

To work on beginning math skills with my preschoolers, we counted the pins as they pushed them into the cups.  We then counted any pins that were grouped together and counted the total number of pins.  Extend this activity further by adding a dice to add and subtract push pins.  Roll the dice and push in the rolled number of push pins.  When all of the pins are added to the cup, remove pins by rolling the dice and removing the rolled number of pins.   

More Math activities you will enjoy:
Don’t miss a single post! Subscribe to our newsletter for a weekly email.